moogly

menu icon
go to homepage
  • Patterns
  • Tutorials
  • MooglyCAL
  • Giveaways
  • Lives
    • Facebook
    • Instagram
    • Pinterest
    • TikTok
    • Twitter
    • YouTube
  • search icon
    Homepage link
    • Patterns
    • Tutorials
    • MooglyCAL
    • Giveaways
    • Lives
    • Facebook
    • Instagram
    • Pinterest
    • TikTok
    • Twitter
    • YouTube
  • ×
    Home

    Crochet Project Bag and Yarn Giveaway

    January 27, 2026 by Tamara Kelly 5 Comments

    Crochet Project Bag and Yarn Giveaway

    This Crochet Project Bag and Yarn Giveaway is all about those cozy, slow-stitch moments. One lucky winner will receive an organic cotton project bag featuring the phrase “Coffee. Crochet. Sleep. Repeat.” along with two hanks of Cloudborn Highland Superwash Yarn in the beautiful Strawberry Fields colorway. It’s the perfect pairing for cozy crochet sessions, with practical storage and beautiful yarn ready for your next project!

    There’s nothing better than settling in with a comfortable crochet project and everything you need close at hand. So I'm treating you to some fun goodies, right from my own collection!

    Crochet Project Bag and Yarn Giveaway

    Coffee. Crochet. Sleep. Repeat. Project Bag

    Where did I get this? I no longer recall. My project bag collection is beyond my ability to start projects - and I've been collecting for a very long time now. But it's super cute and still has the tag on, so I'm passing it on to a good home - filled with some yarn, of course! Here's the info on the bag:

    Eco Bags - ecobags.com
    Certified Organic Cotton
    Fair Wage/Fair Labor
    Drawstring Top with Printed Front

    Crochet Project Bag and Yarn Giveaway

    Cloudborn Highland Supreme Sock Twist

    These yarns were originally sold by Craftsy... before it was Blueprint... and then Craftsy again. They have been sitting in my stash for quite some time. And while they are truly lovely, I also know that I will never get around to stitching them up. So I'm passing them on to one lucky winner! Here are the stats:

    Cloudborn Highland Supreme Superwash Sock Twist
    178 yds/50 g
    80% Superwash Highland Wool and 20% Polyamide
    Colorway: Hand Paints - Strawberry Fields

    Crochet Project Bag and Yarn Giveaway

    The Crochet Project Bag and Yarn Giveaway

    The Crochet Project Bag and Yarn Giveaway is open to US addresses only. The giveaway ends February 24, 2026, at 12:15am Central US time. To enter, use the Kingsumo form below.

    We will be giving away a Cotton Project Bag and two hanks of Cloudborn Highland Supreme Superwash Yarn, and the winner will be notified by email.

    Enter the Giveaway Here:

    Good luck all! You can follow Moogly on YouTube, Facebook, Twitter, Pinterest, TikTok, and Instagram, and don’t forget to sign up for the free newsletter at the bottom of the page! 

    Pin It For Later!

    Crochet Project Bag and Yarn Giveaway

    Bernat Future Inspire Giveaway

    January 23, 2026 by Tamara Kelly 1 Comment

    Bernat Future Inspire Giveaway

    There's a trio of new yarns from Bernat, all created with sustainability in mind! Bernat Future Inspire Yarn is a blend of recycled acrylic and recycled wool - and we're taking a closer look and giving away 8 skeins here on Moogly!

    Disclaimer: This post was sponsored by Yarnspirations and may include affiliate links; all opinions are my own.

    Bernat Future Inspire Yarn

    "Find your spark with Bernat Future Inspire! This #6 super bulky yarn blends recycled wool and acrylic for a plush, durable finish that works up quickly with excellent stitch definition. Perfect for cozy winter accessories and snuggly blankets, Future Inspire helps you make small, conscious choices while creating projects that warm both heart and home."

    Bernat Future Inspire Giveaway

    Just The Yarny Facts:

    Content: 80% recycled acrylic, 20% recycled wool

    Ball Size: 170 g/6 oz, 99 meters/108 yards

    Care: Machine wash in cool water, delicate cycle. Do not bleach. Do not dry clean. Do not iron or press. Tumble dry on low heat, delicate.

    Gauge: #6 Super Bulky

    Buy It: Available at select Walmart stores and on Yarnspirations.com

    Taking a Closer Look at Bernat Future Inspire

    Crafting and sustainability don't always walk hand in hand - but these new yarns from Bernat make it a lot easier to crochet and knit eco-consciously. Even the labels have been made with Kraft cardboard. Bernat Future Inspire currently features 6 gorgeous colorways!

    Bernat Future Inspire Giveaway

    I don't know much about the process for recycling acrylic or wool, but I do know that the skein of Bernat Future Inspire I am looking at right now is lovely. It has a fuzzy, slightly woolly look, with a small halo. The feel is soft, and not at all itchy - but not plasticy either. The color is consistent throughout, yet it has a bit of a dark and light blend happening, creating a lot of depth.

    Bernat Future Inspire Giveaway

    The recommended hook and needle size is 9mm, so this is a wonderful yarn for quick projects. I know that The Crochet Crowd used it to make a Chunky Pom Pom Cat Ears Hat, and Repeat Crafter Me used it to create her Giant Crochet Hershey Kiss! I decided to try this yarn out, and I've whipped up something new myself - look for the new pattern on January 28th! Here's a sneak peek!

    Sneak Peek Bernat Future Inspire - WIP

    I managed to make several false starts on this pattern, and that means there was a lot of frogging and pulling out stitches! Luckily, the halo of Inspire didn't cause the yarn to stick or tangle. The halo did occasionally grab the hook, but it didn't fuzz up too much with stitching and frogging. The yarn feels soft to the touch, and is squishy in the skein, but does feel more solid when stitched up. For wearables, I think I would go up from the recommended hook size a little bit, or use a more open stitch pattern as seen in the scarf below. This yarn is perfect for home decor as well - and I'll add my pattern to the list on Wednesday!

    Pattern Inspiration for Bernat Future Inspire

    Of course, Yarnspirations has created a bunch of new patterns for their new yarn! Check out the new FREE Edgepoint Knit Scarf, In A Snap Knit Mittens, Mountain Mist Crochet Throw, Cloudy Day Knit Sweater, and Roundabout Crochet Scarf patterns! What do you want to make with this new yarn?

    Pattern Inspiration for Bernat Future Inspire

    Bernat Future Inspire Yarn Giveaway Time!

    The Bernat Future Inspire Giveaway is open in the US and Canada only. The giveaway ends February 6, 2026, at 12:15am Central US time. To enter, use the Kingsumo form below. Only the email option is mandatory – all other tasks are optional, for bonus entries only.

    The winner will receive 8 skeins of Bernat Future Inspire Yarn in their choice of the available colors and will be notified by email.

    Now, don't forget to enter all the other great giveaways happening now on Moogly!

    Good luck all! Here's a Pin Image for your Giveaways or Yarn boards!

    Bernat Future Inspire Giveaway

    You can follow Moogly on Facebook, Pinterest, TikTok, Bluesky, and Instagram, and don’t forget to sign up for the free newsletter at the bottom of the page! Thank you to Yarnspirations for sponsoring this giveaway!

    MooglyCAL2026 Block 2

    January 22, 2026 by Tamara Kelly 15 Comments

    MooglyCAL2026 Block 2

    MooglyCAL2026 Block 2 is a fabulous new design by Linda Dean Crochet! The Radiate Champion Block is a center-out square that features tall stitches and unique clusters to create gorgeous texture. Get all the details for this free crochet along, and the free pattern link below!

    Disclaimer: This post includes affiliate links; materials provided by Local Crafts.

    Just getting started with the Moogly Crochet Along? CLICK HERE for the intro info!

    Want to get help with the patterns, show off, and CAL with others? CLICK HERE for the Facebook group

    Like to see all the squares visually? CLICK HERE for the Pinterest Board! (Squares will be added as they are released.)

    Introducing the MooglyCAL ONLY Newsletter! Never miss a Square Debut!

    The 2026 Moogly CAL Schedule

    As the year progresses, links will be added, and you'll be able to click on any of the past squares to go to their posts. The numbers refer to the date of the month that the square will debut.

    January Archie Argyle Crochet Square and THIS POST
    February 5 and 19
    March 5 and 19
    April 2, 16, and 30
    May 14 and 28
    June 11 and 25
    July 9 and 23
    August 6 and 20
    September 3 and 17
    October 1, 15, and 29
    November 12 and 25

    *****

    Block #2:

    Radiate Champion Block

    by Linda Dean Crochet

    MooglyCAL2026 Block 2 by Linda Dean Designs

    Above, you can see the square that Linda made in 4 colors of Madelinetosh Tosh Vintage! Below is my CAL square, in my 6 colors of Brava Worsted - Custard, Seashell, Fig, Denim, Espresso, and Cream!

    MooglyCAL2026 Block 2

    Details for MooglyCAL2026 Block 2

    My Notes: The Radiate Champion Block is textured, interesting to crochet, and a lovely addition to our CAL! Linda has put together some unique cluster stitches to create a lovely design in any set of colors. There are a few things to watch out for with this one!

    First, take note that you will turn at the end of the Rnd 2 and 3 repeats - it's easy to miss! As you make the tall stitches and cluster stitches, be sure to pull those loops up really high from the stitch below. You will want to keep a measuring tape handy as well - start checking your size around Rnd 12, and adjust as needed from there. I ended up replacing the last 3 rounds of the pattern with 1 round of single crochet. But I hadn't yet gotten my last color in there - so I added a round of surface crochet!

    I also didn't want to break the Cream yarn, so I used a trick from one of the 2025 squares and did a chain of 4 to carry it along the back between rounds. Finally, this square does need blocking - it will be a little wonky straight off the hook!

    Helpful Links and Tutorials: Crochet Abbreviations, Magic Circle, Chainless Starting Double Crochet, Standing sc, Post stitches, Tall Stitches, and seamless join.

    Sizing: My square was turning out quite large, so I skipped Rnds 14 - 16, replacing them with a round of plain sc, and a decorative rnd of surface crochet to get my last color in. But everyone's gauge is different, so be sure to measure as you go! Learn how to adjust for size HERE to ensure all your squares are the same size. Remember that the 12″ is measured across and up and down, not diagonally/corner to corner.

    Yarn Options: This year, our designers have chosen from a variety of yarns, including Brava Worsted, Swish Worsted, Jimmy Beans Wool Beanstalk, Berroco Vintage, and MadTosh Vintage. For this square, I used Brava Worsted, and Linda used Mad Tosh Vintage!

    What I Did:

    I used a US-J, 6.0 mm crochet hook, and Brava Worsted yarn, and my color scheme was as follows (see pics for more info on placement):

    Rnd 1: Cream
    Rnds 2 and 3:
    Seashell
    Rnd 4: Cream
    Rnds 5 and 6:
    Custard
    Rnd 7: Cream
    Rnds 8 and 9:
    Fig
    Rnd 10: Cream
    Rnds 11 and 12:
    Denim
    Rnd 13:
    Cream
    Rnd 14 (plain sc): Cream
    Surface Crochet Rnd: Espresso

    This square required a strong blocking so I used the wet blocking method and then steamed it as well.

    The Pattern:

    CLICK HERE FOR THE PATTERN FOR BLOCK #2

    PLEASE NOTE: The designers all hold individual copyrights for their patterns. They may choose to make videos of their patterns, and you can certainly request them from the designers. In addition, there are videos linked in the notes for specific stitches and techniques that may help you with the pattern. They may offer paid PDFs of the pattern, but have agreed to leave it up for free on their website or on Ravelry for as long as possible.

    Show Off Your Squares!

    If you share your photos on social media, be sure to use the hashtags #mooglycal2026 and tag your yarn - I'll be using #bravaworsted -  and tag me @mooglyblog so I can see them too! And don't forget to share them in the MooglyCAL Facebook Group! Thank you all for CAL-ing with me!

    And finally, here's a pin of MooglyCAL2026 - Block 2 for your own Pinterest boards!

    MooglyCAL2026 Block 2

    You can follow Moogly on YouTube, Facebook, Twitter, Pinterest, TikTok, and Instagram, and don't forget to sign up for the free newsletter at the bottom of the page! Thank you to Local Crafts for providing the materials for this crochet along.  

    Crochet and Catch Up with Moogly - January 21, 2026

    January 21, 2026 by Tamara Kelly Leave a Comment

    Crochet and Catch Up with Moogly - January 21, 2026

    The year is rolling along, routines are settling in, and it’s time for another Crochet and Catch Up here on Moogly! Let’s relax with some cozy yarn chat, check in on current WIPs, talk about new patterns, and look ahead at what’s coming up next. Grab your hook and join me for a fun and fiber-filled January hangout and a peek at what’s ahead on Moogly!

    Disclaimer: This post may contain affiliate links. Live videos are unscripted, unedited, and occasionally weird; all opinions are my own. 

    Crochet and Catch Up with Moogly

    Going LIVE on Facebook and YouTube, at 11am CT!

    Click here to Like the Moogly Facebook Page and get notified when I go live!

    Click here to Subscribe to the Moogly YouTube Page and get notified when I go live!

    Moogly Community Group on Facebook

    What I'm Wearing: Work From Home Cardigan

    MooglyCAL2026 Block 1 Courtesy of Jessie at Home

    CAL Yarns: Brava Worsted, Swish Worsted, Jimmy Beans Wool Beanstalk, Berroco Vintage, and MadTosh Vintage.

    Speckle Cloud Dishcloth Set - FREE PATTERN and Tutorial

    Universal Cotton Supreme Speckles

    Essential Crochet Dictionary Giveaway

    Furls Venture Leather Hook Roll and Tempest Blue Hooks Giveaway

    Clover Yarn Tool Set Giveaway

    Quirky Amigurumi Book Review

    GoSadi Waitlist - SIGN UP NOW!

    Twice Sheared Sheep Multi-Tool

    Sneak Peek: My current WIP, featuring Katia Symmetric Socks & More: Illusion

    Moogly Around the Web - and the World!

    January 29, 6pm-8pm CST: Join me for an online evening Crochet Guild of America Class - Mosaic Crochet Two Ways! LAST CHANCE TO SIGN UP!

    Want to see me in person in 2026?

    June 17 - 21: This summer, I'll be one of the teachers at Jimmy Beans Wool's Biggest Little Getaway 2026!

    If you have a LYS or event you'd like me to teach at this year, or if you would like me to teach an online class to your group or guild, please do reach out!

    Have a wonderful day all - see you to crochet and catch up next time! And before you go, here's a Pin for today's post, so you can add it to your favorite Pinterest boards! We appreciate (and need) your shares on all our posts.

    Crochet and Catch Up with Moogly - January 21, 2026

    Follow Moogly on YouTube, Bluesky, Facebook, Pinterest, TikTok, and Instagram! 

    Essential Crochet Dictionary by Sophie Martin Giveaway

    January 20, 2026 by Tamara Kelly 4 Comments

    Essential Crochet Dictionary by Sophie Martin Giveaway

    The Essential Crochet Dictionary by Sophie Martin is billed as "Your go-to reference guide for stitching beautiful crochet!" Take a peek inside, see what I think, and enter to win your own copy here on Moogly!

    Disclaimer: I was given a copy of this book; all opinions are my own. This post includes affiliate links. 

    The Essential Crochet Dictionary Review

    Normally, I start with a bit about the author, but this author is a mystery! I tried looking up Sophie Martin a variety of ways and found... nothing! So moving on...

    Essential Crochet Dictionary by Sophie Martin

    I was gifted a copy of this book at 2025's Crochet Guild of America Retreat - and when there were extras, they let me grab a second copy to give away! And now is the time! From the description:

    "Learn all the stitches you need to know to be a successful crocheter!

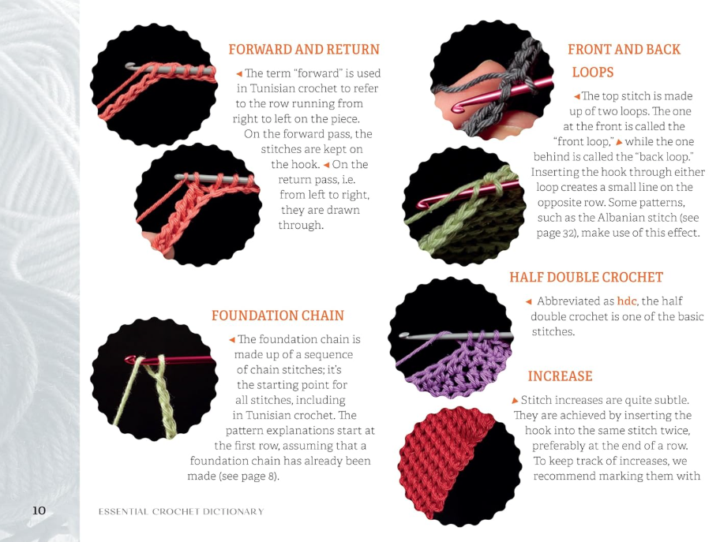
    This conveniently sized handbook covers 100 stitches, including the foundation chain, Tunisian crochet, square stitch, palm stitch, offset mesh, picot trellis, ladder stitch, iris stitch, half-daisy border, and many more!

    Essential Crochet Dictionary by Sophie Martin

    With this book in your crochet kit, you will be able to tackle any crochet project! Master the stitches with easy-to-follow step-by-step instructions and nearly 200 photos for guidance. Great for beginner, intermediate, and advanced crocheters, the stitches in this dictionary have been chosen for their diversity, rendering, modernity, and simplicity of execution, and are organized by style like full, mesh, open, relief, border, and Tunisian. The stitches have been photographed on a black background, making the details of each stitch easier to see — and learn!

    These 176 pages are jam-packed with photos and explanations of stitches and techniques to help you create beautifully stitched projects every time. You'll also find a helpful glossary of basic and advanced crochet terms and handy tips to make each stitch work wonderfully.

    Just as essential as a skein of yarn and a hook, Essential Crochet Dictionary is the practical, in-depth visual guide that is a must-have for any yarn-lover's library or project bag!"

    Essential Crochet Dictionary by Sophie Martin

    Peeking inside, I am impressed with how much they were able to pack into this book. That said, I do feel like there were some shortcuts taken. Or maybe I just disagree with their choices? The Terms Used section has some great info... mixed with some questionable statements. As an example, in talking about Decreases it states, "The most common way of doing this is to skip the stitches you'd like to reduce at the end of a row." Is it really the most common? It's one way... but that's not how I would define Decreases.

    Essential Crochet Dictionary by Sophie Martin

    Diving into the actual stitch instructions, the step-by-step photos are super helpful, although I think that some of the wording could be clearer - "threading" the yarn rather than "pulling" it through loops, for example. This might be a language issue, but as I have no info on Sophie I couldn't say. The instructions on Tunisian Crochet have the foundation row at the front, and then leave you adrift until you realize that was just the set up and the rest is at the back of the book.

    Essential Crochet Dictionary by Sophie Martin

    So would I recommend this book? Only to those who already have the basics of crochet down and are looking for a compact project-bag sized stitch dictionary. There are some fun stitch patterns in here, and the Index at the back is great for quick checks of "am I remembering that stitch correctly?" But overall, I cannot recommend this book to beginners. Also... but...? You can form your own opinion when you win the giveaway below!

    Essential Crochet Dictionary by Sophie Martin

    Get your own copy of the Essential Crochet Dictionary today!

    Purchase your own copy of this book on Amazon, or ask for it at your local bookseller!

    The Essential Crochet Dictionary Giveaway

    The Essential Crochet Dictionary Giveaway is open in the US and Canada. The giveaway ends February 24, 2026, at 12:15am Central US time. To enter, use the Kingsumo form below. Only the email option is mandatory – all other tasks are optional, for bonus entries only.

    One winner will receive a paperback copy of Essential Crochet Dictionary, courtesy of Landauer Publishing and shipped by Moogly. They will be notified by email.

    GOOD LUCK ALL!

    You can follow Moogly on YouTube, Facebook, Twitter, Pinterest, TikTok, and Instagram. Don’t forget to sign up for the free newsletter at the top of the page! And don't forget to enter all the other fab giveaways on Moogly! And if you'd like to share this post, there's a Pinterest image and sharing buttons below!

    Essential Crochet Dictionary by Sophie Martin Giveaway

    Speckle Cloud Dishcloth Set Tutorial

    January 14, 2026 by Tamara Kelly Leave a Comment

    Speckle Cloud Dishcloth Set Tutorial

    Whether you crochet right-handed or left-handed, these Speckle Cloud Dishcloth Set video tutorials make it easy to follow along and stitch up something pretty! This beginner-friendly pattern uses simple stitches to create soft scallops in two practical dishcloth sizes. Scroll down to choose the video tutorial that works best for you and start crocheting!

    Disclaimer: This post includes affiliate links.

    Be sure to scroll down past the videos to get the links to the free pattern and supplies!

    Speckle Cloud Dishcloth Set Tutorial:

    How to Crochet the Speckle Cloud Dishcloth Set - Right-Handed

    Learn to Crochet the Speckle Cloud Dishcloth Set - Left-Handed

    As Seen in This Video (click each for more info!):

    The Free Pattern: Speckle Cloud Dishcloth Set

    The Supplies:

    US - H, 5.0 mm - Furls Streamline

    140 yds Universal Cotton Supreme Speckles (100g/180 yds; 100% cotton;4 - medium)
    Colorway Shown: 1003 Popsicle (1 skein makes the set)

    Stitch Markers

    And here's a Pin for your Crochet Pinterest Board! Make sure you are following Moogly on Pinterest for all the best knit, crochet, and craft pins!

    Speckle Cloud Dishcloth Set Tutorial

    I hope you enjoy this tutorial for the Speckle Cloud Dishcloth Set! If this video doesn't answer all your questions, please ask in the comments below - I'm always happy to help.

    If you make this or any Moogly pattern, please tag me in your photos so I can see them too, @mooglyblog or #mooglyblog! Then send them to tamarakelly@mooglyblog.com to see them featured in a future Moogly email newsletter!

    Get Moogly on your favorite social media sites: YouTube, Facebook, Pinterest, Tik Tok, Bluesky, and Instagram! And sign up for the free newsletter at the bottom of the page so you don’t miss a thing! Thank you to Yarnspirations for providing the materials for this video.

    Venture & Tempest: A Furls Crochet Giveaway

    January 13, 2026 by Tamara Kelly 14 Comments

    Venture & Tempest: A Furls Crochet Giveaway: This is a promotional image showing both the hooks and the leather hook roll.

    There’s nothing better than starting a new year with tools that feel as good as they look. And today I’ve got a very special treat for you - I’m giving away a Furls Venture Leather Hook Roll in Plum, paired with three gorgeous Tempest Blue crochet hooks in some of the most-loved sizes: 4mm, 5mm, and 5.50mm! Read more about these fabulous products, and then enter to win your own below!

    Disclaimer: This post was sponsored by Furls and may include affiliate links; all opinions are my own. I was given these items for review. 

    Venture & Tempest: A Furls Crochet Giveaway! This is an image of a Plum colored leather pouch designed to hold hooks.

    All About Furls Venture Leather Hook Rolls

    Where to Buy: CLICK HERE

    What Are They Made Of: Genuine textured full-grain cow leather with coordinating interior zipper, gold anodized zipper pull, and grommets. This leather ages beautifully and develops a unique patina with time.

    Weight: Approximately 9oz (255g)

    Venture & Tempest: A Furls Crochet Giveaway! This is a picture of an unrolled Leather Hook Pouch held open by a person. There are 4 hooks sticking out of the pockets of the pouch.

    Dimensions: 

    • Empty, rolled-up: 4” W x 9” H x 1.5” D (10.1 cm x 22.9 cm x 3.8 cm)
    • Open, lying flat: 14" W x 9" H (35.5 cm x 22.9 cm)
    • Zipper length - 7.5” (19.0 cm)

    What Makes This Hook Roll Special:

    • Designed for Furls: Seven elasticized slots, designed to securely fit Streamline and Alpha hooks.
    • Artisanal Quality and Attention to Detail: Handcrafted in India by skilled artisans using time-honored techniques
    • Multi-use functionality:While designed for Furls crochet hooks, it also holds pens, markers, makeup brushes, and other creative tools!

    Venture & Tempest: A Furls Crochet Giveaway! This is a picture of two of the Leather Hook Rolls - one Plum and one a green color

    Venture & Tempest: A Furls Crochet Giveaway! This is a picture of 3 crochet hooks laying in a wooden bowl.

    All About Furls Tempest Blue Streamline Crochet Hooks

    Where to Buy: CLICK HERE

    What Are They Made Of: 100% Solid Aluminum

    Weight: Approximately 1.6-2.4 oz, depending on the size.

    Venture & Tempest: A Furls Crochet Giveaway! This is a picture of one blue crochet hook laid on it's side.

    Sizes Available: E/3.50 mm to P/10.00 mm

    What Makes This Crochet Hook Special:

    • Ergonomic design: Crafted to fit seamlessly in your hand, reducing fatigue during those marathon stitching sessions
    • Solid aluminum: A striking pop of color that marries both durability and style
    • Collector’s piece: These limited-edition hooks are as beautiful as they are functional—perfect for gifting or adding a luxe touch to your hook collection

    Venture & Tempest: A Furls Crochet Giveaway! This is a picture of 5 blue crochet hooks scattered on a tablecloth.

    Now Let's See them in Action!

    I love working with all the metal Streamlines - the shape is perfect for the way I hold and use my hook.  And the colors are gorgeous - I still haven't been able to pick a favorite! And the Venture Travel Roll in Plum is so delicious - it almost makes me want to leave my craft room!

    Stay tuned for a video unboxing - to be embedded here soon! 

    Furls Crochet Giveaway Time: Enter to win a Venture Leather Hook Roll and Three Tempest Hooks!

    The Venture & Tempest: A Furls Crochet Giveaway is open to addresses in the USA, Canada, Australia, and the UK. This giveaway ends February 17, at 12:15am Central US time. To enter, use the Kingsumo form below.

    The winner will receive a Venture Leather Hook Roll in Plum, and 3 Tempest Blue Hooks in sizes 4mm, 5mm, 5.50mm and will be notified by email!

    Now, don't forget to enter all the other great giveaways happening now on Moogly!

    Good luck all! Here's a Pin Image for your Giveaways or Yarn boards!

    Venture & Tempest: A Furls Crochet Giveaway: This is a promotional image showing both the hooks and the leather hook roll.

    You can follow Moogly on YouTube, Facebook, Pinterest, TikTok, Bluesky, and Instagram. Don’t forget to sign up for the free newsletter at the top of the page! Thank you to Furls for sponsoring this giveaway!

    Speckle Cloud Dishcloth Set

    January 11, 2026 by Tamara Kelly 1 Comment

    Speckle Cloud Dishcloth Set

    Soft, simple, and endlessly useful, the Speckle Cloud Dishcloth Set is a beginner-friendly crochet pattern designed to bring a little calm and color into your kitchen! With two great sizes and simple stitching, it's a free crochet pattern set here on Moogly!

    Disclaimer: This post includes affiliate links; material provided by Universal.

    Prefer an ad-free PDF? You've got options!

    This button leads to the pattern on Etsy

    Prefer the free blog version? Keep scrolling!

    Part of the 2026 Dishcloth of the Month CAL!

    026 Dishcloth of the Month Club CAL January Graphic

    I'm proud to be sharing this pattern as part of the 2026 Dishcloth of the Month Club, hosted by Oombawka Design Crochet and The Stitchin Mommy!

    Get this month's Free Oombawka Design Crochet pattern here: https://oombawkadesigncrochet.com/handmade-kitchen-dishcloth-a-simple-everyday-crochet-pattern/

    Get this month's Free Stitchin' Mommmy pattern here: https://www.thestitchinmommy.com/fresh-start-dishcloth-free-crochet-pattern/

    Carefree Crochet Among the Clouds

    Inspired by fluffy clouds drifting across the sky, these dishcloths feature easy stitches, gently scalloped edges, and a clean, classic shape that looks just as good hanging on display as it does at work.

    Speckle Cloud Dishcloth Set

    Made in Universal Cotton Supreme Speckle, the crisp white base is dotted with cheerful bursts of color, making each cloth feel special while staying neutral enough for any kitchen. The pattern includes two sizes, large and small, perfect for everything from everyday dishes to quick countertop wipe-downs. A built-in hanging loop adds convenience and makes these cloths ideal for gifting, craft fairs, or quick handmade additions to your home.

    Speckle Cloud Dishcloth Set

    Using just one skein of yarn for the whole Speckle Cloud Dishcloth Set makes it perfect for beginners, stash-conscious crocheters, and anyone looking for a relaxing project that works up quickly with beautiful results.

    Speckle Cloud Dishcloth Set


    Speckle Cloud Dishcloth Set

    Add this pattern to your Ravelry Queue and Favorites

    US - H, 5.0 mm - Furls Streamline

    140 yds Universal Cotton Supreme Speckles (100g/180 yds; 100% cotton; 4 - medium)
    Colorway Shown: 1003 Popsicle (1 skein makes the set)

    Stitch Markers

    Gauge: 13 hdc x 10 rows = 4" [10cm]

    Finished Size: Small - 7.5" x 7.5" excluding loop; Large - 10" x 10" excluding loop
    Written in pattern instructions as Small(Large)

    Helpful Links:

    Speckle Cloud Dishcloth Set Tutorial

    Crochet Abbreviations

    Hdc - Half Double Crochet

    Hdc2tog - Half Double Crochet Decrease

    FSC - Extending a Row with Foundation Single Crochet 

    Special Stitch:

    Hdc2tog - Half Double Crochet Decrease: Yo and insert hook in next st, yo and pull up loop through stitch, insert hook in next st, yo and pull up loop through stitch, yo and pull through all 4 loops on hook.

    Speckle Cloud Dishcloth Set INSTRUCTIONS:

    Row 1: Ch 23(31), skip the ch closest to the hook, hdc in each rem ch across; turn. (22(30) hdc)

    Row 2: Ch 1, 2 hdc in the first st, hdc across until 1 st rem, 2 hdc in last st; turn. (24(32) hdc)

    Row 3: Rep Row 2. (26(34) hdc)

    Row 4: Ch 1, hdc in each st across; turn.

    Row 5: Ch 1, hdc2tog, hdc across until 2 sts rem, hdc2tog; turn. (24(32) hdc)

    Row 6: Rep Row 5. (22(30) hdc)

    Row 7: Rep Row 4.

    Rows 8 - 19(25): Rep Rows 2 - 7.

    (Optional): At the end of Row 19(25), extend the row with 10 FSC (or more if desired for a longer loop). Break the yarn leaving a 10" tail for sewing. Use the tail to sew the last FSC to the base of the first FSC to create a hanging loop.

    Weave in all ends.

    Speckle Cloud Dishcloth Set


    The Speckle Cloud Dishcloth Set is a great, relaxing one skein make - easy to memorize for happy hands and relaxing moments. Be sure to share your photos on social media - tag @mooglyblog so I can see all your wonderful projects!

    Speckle Cloud Dishcloth Set

    The Fine Print

    Written pattern copyright Tamara Kelly 2026, all rights reserved. Please do not reprint or repost this pattern, but please do link to this page to share this pattern with others. If you wish to make items for sale from this pattern or translate it to another language, please visit the About page for details. Thank you to Universal Yarns for providing the yarn for this pattern.

    MooglyCAL2026 Block 1

    January 8, 2026 by Tamara Kelly 11 Comments

    MooglyCAL2026 1 Mine

    MooglyCAL2026 Block 1 is a lovely new design by Jessie at Home! The Archie Argyle Crochet Square is an exciting, graphic block that features tall stitches more maximum movement. Get all the details for this free crochet along, and the free pattern link below!

    Disclaimer: This post includes affiliate links; materials provided by Local Crafts.

    Just getting started with the Moogly Crochet Along? CLICK HERE for the intro info!

    Want to get help with the patterns, show off, and CAL with others? CLICK HERE for the Facebook group

    Like to see all the squares visually? CLICK HERE for the Pinterest Board! (Squares will be added as they are released.)

    Introducing the MooglyCAL ONLY Newsletter! Never miss a Square Debut!

    The 2026 Moogly CAL Schedule

    This is the first square for this year! As the year progresses, links will be added, and you'll be able to click on any of the past squares to go to their posts. The numbers refer to the date of the month that the square will debut.

    January THIS POST and 22
    February 5 and 19
    March 5 and 19
    April 2, 16, and 30
    May 14 and 28
    June 11 and 25
    July 9 and 23
    August 6 and 20
    September 3 and 17
    October 1, 15, and 29
    November 12 and 25

    *****

    Block #1:

    Archie Argyle Crochet Square

    by Jessie at Home

    MooglyCAL2026 1 by Jessie at Home

    Above, you can see the square that Jessie made in 2 colors of Brava Worsted! Below is my CAL square, in my 6 colors of Brava Worsted - Custard, Seashell, Fig, Denim, Espresso, and Cream!

    MooglyCAL2026 1 Mine

    Details for MooglyCAL2026 Block 1

    My Notes: The Archie Argyle Crochet Square is a fun combination of very simple stitches - and super tall stitches! She has included step-by-step photos and video tutorials, so this is perfect for beginners and experienced crocheters alike. I used the recommended color changes points, which were just enough to squeeze in my 6 colors - with only 13 rows, this one works up quickly. This one will also be lovely in solids, and I'm excited to see how all of you interpret this one as well!

    Helpful Links and Tutorials: Crochet Abbreviations, Chainless Starting Double Crochet, Standing dc, Standing sc, Post stitches, Tall Stitches, and seamless join.

    Sizing: I got to 12" as written. But everyone's gauge is different, so be sure to measure as you go! Learn how to adjust for size HERE to ensure all your squares are the same size. Remember that the 12″ is measured across and up and down, not diagonally/corner to corner.

    Yarn Options: This year, our designers have chosen from a variety of yarns, including Brava Worsted, Swish Worsted, Jimmy Beans Wool Beanstalk, Berroco Vintage, and MadTosh Vintage. Both of the squares shown here for Block #1 were made with Brava Worsted.

    What I Did:

    I used a US-J, 6.0 mm crochet hook, and Brava Worsted yarn, and my color scheme was as follows (see pics for more info on placement):

    Rnd 1: Custard
    Rnds 2 - 4:
    Seashell
    Rnds 5 and 6:
    Fig
    Rnds 7 - 9:
    Denim
    Rnds 10 - 12:
    Espresso
    Rnd 13:
    Cream

    This square required a mild blocking so I used the wet blocking method and used a bit of steam as well.

    The Pattern:

    CLICK HERE FOR THE PATTERN FOR BLOCK #1

    PLEASE NOTE: The designers all hold individual copyrights for their patterns. They may choose to make videos of their patterns, and you can certainly request them from the designers. In addition, there are videos linked in the notes for specific stitches and techniques that may help you with the pattern. They may offer paid PDFs of the pattern, but have agreed to leave it up for free on their website or on Ravelry for as long as possible.

    Show Off Your Squares!

    If you share your photos on social media, be sure to use the hashtags #mooglycal2026 and tag your yarn - I'll be using #bravaworsted -  and tag me @mooglyblog so I can see them too! And don't forget to share them in the MooglyCAL Facebook Group! Thank you all for CAL-ing with me!

    And finally, here's a pin of MooglyCAL2026 - Block 1 for your own Pinterest boards!

    MooglyCAL2026 Block 1

    You can follow Moogly on YouTube, Facebook, Twitter, Pinterest, TikTok, and Instagram, and don't forget to sign up for the free newsletter at the bottom of the page! Thank you to Local Crafts for providing the materials for this crochet along.  

    Crochet and Catch Up with Moogly - January 7, 2026

    January 7, 2026 by Tamara Kelly 3 Comments

    Crochet and Catch Up with Moogly - January 7, 2026

    The holidays are wrapped up, the calendar is full of possibilities, and it’s time for the first Crochet and Catch Up of the new year on Moogly! Let’s ease back in with cozy yarn chat, a little crafty reset, and a look at current WIPs, new patterns, and what’s ahead for the year. Whether you’re finishing leftovers from last year or starting something brand new, grab your hook and join me for a relaxed January hangout and a peek at what’s coming next on Moogly.

    Disclaimer: This post may contain affiliate links. Live videos are unscripted, unedited, and occasionally weird; all opinions are my own. 

    Crochet and Catch Up with Moogly

    Going LIVE on Facebook and YouTube, at 11am CT!

    Click here to Like the Moogly Facebook Page and get notified when I go live!

    Click here to Subscribe to the Moogly YouTube Page and get notified when I go live!

    Moogly Community Group on Facebook

    What I'm Wearing: Shell Stitch Crochet Duster

    MooglyCAL2026 featuring Brava Worsted

    Fa La La Towel Topper - FREE PATTERN

    Scented Orange Slice Ornaments - FREE PATTERN

    Velvet Luxe Wine Bag - FREE PATTERN

    Reginald the Reef Squid - FREE PATTERN

    Red Truck Christmas Ornament Tutorial

    Bernat Maker Minis

    Lower Linked Double Crochet Stitch Tutorial

    Bernat Blanket

    Clover Yarn Tool Set Giveaway

    Quirky Amigurumi Book Review

    Tunisian Crochet Tops Book Giveaway

    Sneak Peek: My current WIP, featuring Katia Symmetric Socks & More: Illusion

    Moogly Around the Web - and the World!

    January 29, 6pm-8pm CST: Join me for an online evening Crochet Guild of America Class - Mosaic Crochet Two Ways!

    Want to see me in person in 2026?

    March 6 - 7: This spring, you are invited to join me at Stitch Up Chicago, where I'll be one of your hosts!

    June 17 - 21: This summer, I'll be one of the teachers at Jimmy Beans Wool's Biggest Little Getaway 2026!

    If you have a LYS or event you'd like me to teach at this year, or if you would like me to teach an online class to your group or guild, please do reach out!

    Have a wonderful day all - see you to crochet and catch up next time! And before you go, here's a Pin for today's post, so you can add it to your favorite Pinterest boards! We appreciate (and need) your shares on all our posts.

    Crochet and Catch Up with Moogly - January 7, 2026

    Follow Moogly on YouTube, Bluesky, Facebook, Pinterest, TikTok, and Instagram! 

    Clover Yarn Tool Set Giveaway

    January 6, 2026 by Tamara Kelly 4 Comments

    Clover Yarn Tool Set Giveaway

    The new year is the perfect time to try something new, and Clover tools make it easy! I’m giving away a Clover Pom Pom Maker Set, Wonder Knitter, and Tassel Maker so you can add delightful texture and special details to all your yarn projects. Whether you’re topping hats, making cords, or adding tassels to bags and home decor, these handy tools open up a whole new world of yarny possibilities. Win the set here on Moogly!

    Disclaimer: This giveaway features items from Clover and shipping by Moogly. This post includes affiliate links.  

    Clover Tools for Yarny Possibilities

    This Clover giveaway is packed with clever tools that make it easy to add personality, texture, and finishing touches to your yarn projects. From playful pom poms to polished cords and tassels, each item in this set is designed to be fun, beginner-friendly, and endlessly useful. Here’s a closer look at what you can win and how each tool can level up your handmade projects.

    Clover Yarn Tool Set Giveaway

    Clover Pom-Pom Makers - 2-½" and 3-⅜"

    I've tried a wide variety of pom pom makers over the past couple of decades, and at the end of the day... these are the winners. Clover pom makers are super easy to use, with a minimal learning curve, and great results. Great for hats, blankets, bags, keychains, and all sorts of pom art, this is a set you can really get creative with! CLICK HERE to see how to use the Clover Pom Pom Maker, and CLICK HERE to purchase your own set now!

    Clover Yarn Tool Set Giveaway

    Clover Tassel Maker - Large

    Tassels can be tricky (or is it just me?!), but the Clover Tassel Maker makes them easier for sure! You can use this tool with thread, embroidery floss, and of course, all sizes of yarn. Which means you can use these tassels for everything from delicate jewelry to chunky afghans! CLICK HERE to see how to use the Clover Tassel Maker, and CLICK HERE to purchase your own set today!

    Clover Yarn Tool Set Giveaway

    Clover Wonder Knitter

    The bright colors of the Clover Wonder Knitter might make you think this one's for kids - but there are lots of elegant and practical things you can do with this tool. Tools like this are often called knitting spools, knitting nancys, or French knitters. This tiny circular knitting loom creates an icord tube which you can use for edgings, yarn art, bag handles, and even beaded jewelry! CLICK HERE to see how to use the Clover Wonder Knitter, and CLICK HERE to purchase your own (and maybe another for the kids)!

    The Clover Yarn Tool Set Giveaway

    The Clover Yarn Tool Set Giveaway is open to US addresses only. The giveaway ends February 3, 2026, at 12:15am Central US time. To enter, use the Kingsumo form below.

    We will be giving away a Clover Pom Pom Maker Set, Wonder Knitter, and Tassel Maker, and the winner will be notified by email.

    Enter the Giveaway Here:

    Good luck all! You can follow Moogly on YouTube, Facebook, Twitter, Pinterest, TikTok, and Instagram, and don’t forget to sign up for the free newsletter at the bottom of the page! 

    Pin It For Later!

    Clover Yarn Tool Set Giveaway

    MooglyCAL2025 Ends, and MooglyCAL2026 Begins Now!

    December 31, 2025 by Tamara Kelly 19 Comments

    MooglyCAL2025 Ends, and MooglyCAL2026 Begins Now!

    We’ve wrapped up another fantastic year of crocheting together, as MooglyCAL2025 ends and MooglyCAL2026 begins! This past year brought an incredible mix of beautiful squares, inspiring designs, and a community of makers who cheered each other on every step of the way.

    Now is the time to show off your 2025 creations and start planning for the year ahead. In this post, I’m sharing my completed 2025 afghan, along with the full schedule and all the details you’ll need to jump into MooglyCAL2026, featuring a new yarn and new designs!

    Disclaimer: Materials for 2026 provided by Local Crafts; this post includes affiliate links.

    Finishing MooglyCAL2025

    It's been another fabulous year, with 24 amazing designs by 24 talented designers! I love following along and learning new tips, tricks, and stitches - and sharing this crochet along with all of you!

    You can get the complete list of links to the squares on the post for Block 24. Or if you like to be able to see them all visually on one page, check out the MooglyCAL2025 Pinterest board!

    And here's my finished blanket! I did such a good job taking care of my ends this year - rather proud of myself there! So assembling, bordering, and weaving in all my ends was finished in a couple of afternoons.

    MooglyCAL2025 Finished Blanket

    For joining, I used the Tight Braid Join technique and the Black yarn. I worked the border as follows:

    Rnd 1: With Black, hdc in each st, 2 hdc in each ch-2 sp, skip the "joins" between squares, and work (hdc, ch 2, hdc) in each corner.

    Rnd 2: With Mallard, [ch 1, skip 1 st, blo sc in next st] to each corner, (hdc, ch 2, hdc) in each corner.

    Rnd 3: With Cornsilk, [ch 1, skip 1 st, hdc in ch-1 sp] to each corner, (hdc, ch 2, hdc) in each corner.

    Rnd 4: With Black, 2 hdc in each ch-1 sp to each corner, (hdc, ch 2, hdc) in each corner.

    MooglyCAL2026 Border

    On to MooglyCAL2026!

    Subscribe to the Moogly YouTube Channel to make sure you don’t miss any of our lives or videos

    I will be going LIVE on YouTube at 11am on December 31st, 2025 to share all the details outlined below - join me, won't you?

    How the MooglyCAL works

    If 2026 will be your first MooglyCAL, then welcome and we're so happy you're here! This is a year-long crochet along, featuring 24 afghan squares or blocks, designed by 24 different professional crochet designers. It started in 2014, and has been getting better every year! Is it the longest-running online crochet-along ever? I am feeling more and more confident by the year!

    The squares are released every 2 weeks with a post on Moogly, where I share my notes, my version, and helpful links and tutorials. There is a link to the new square at the bottom of my notes, where you can get it directly from the designer!

    You can make them all, or pick and choose, add extras - it's up to you! There is nowhere you need to sign up to join, but there is a fantastic Facebook group for the CAL (lots of pattern help there!) and a MooglyCAL2026 Pinterest board you can follow if desired!

    Want to Get Notifications in Your Inbox?

    You can sign up for the free Moogly weekly newsletter at the very top of this page - there's always a link to the latest MooglyCAL post included! Or if you *only* want to get an email when there's a new square, we can do that too - still free, of course, just sign up below!

    The Yarn for MooglyCAL2026

    In 2026, I'll be making my blanket in Brava Worsted, which is available at both Knit Picks and We Crochet! The designers will get to use Brava Worsted too, or they can choose to use Swish Worsted, Jimmy Beans Wool Beanstalk, Berroco Vintage, or MadTosh Vintage. All of these are amazing choices that I can personally recommend - and will make a stunning finished blanket. There's a mix of acrylics and wool blends here - something for everyone!

    MooglyCAL2026 Yarns

    And after a year of dark jewel tones, I'm ready for a change, and a move to light and bright! My colors of Brava Worsted for 2026 are Seashell, Custard, Fig, Denim, Espresso, and Cream - what do you think? They make my feel hopeful and happy - and excited to get started!

    MooglyCAL2026 Yarns Colors - Brava Worsted

    Of course, you should pick your own colors - however few or many you want! I've seen gorgeous blankets done all in one shade, and stunning kaleidoscopes of color as well! If you want 12" squares, make sure the yarn is a 4-Medium. If you prefer to use a DK or "3" weight yarn, the squares will likely be about 10" square.

    MooglyCAL2026 yarn

    On average, a 12" crochet square uses 150 yds of yarn. To make all 24 squares, plus have extra for joining and borders, I recommend purchasing at least 4420 yds of yarn total. How you distribute this is up to you! Some people use one color for the whole blanket, others a whole bunch, and some even just pull from stash making a crazy colored blanket! It's up to you!

    The Hook for MooglyCAL2026

    I will be using a US-J, 6.0 mm crochet hook for the Moogly Crochet Along, and all the designers will use the 6.0 mm hook too! You can use a smaller hook if you tend to crochet loosely, or a larger hook if you tend to crochet tightly. But I do recommend that you use the same hook throughout the CAL, as that makes final joining easier, as your loops will be closer to the same size.

    The Patterns for MooglyCAL2026

    As always, there will be 24 new patterns by 24 wonderful designers! We have a lot of names from last year, but we always add a couple new ones as others drop out! They are a surprise (to you - not me, haha!) until the square is announced. They are all hand-picked by me, and they have promised that their CAL patterns will remain forever free. If they close down their blogs, then the patterns are to be uploaded to Ravelry.

    If a pattern pops up that isn't to your liking, feel free to skip it! You can go back to the previous years' CALs and find a substitute you'd like to try or pick one of your own from the thousands of beautiful afghan squares out there. There is often a lot of inspiration for these in the Facebook Group! We are grateful to all the designers for their hard work and generosity!

    The easiest way to visually browse past year's patterns is via their Pinterest boards: MooglyCAL2025, MooglyCAL2024, MooglyCAL2023, MooglyCAL2022, MooglyCAL2021, MooglyCAL2020, MooglyCAL2019, MooglyCAL2018, MooglyCAL2017, MooglyCAL2016, and MooglyCAL2015.

    This year's squares will be on a new board: MooglyCAL2026 Pinterest Board

    MooglyCAL Pinterest Boards

    PLEASE NOTE: The designers all hold individual copyrights for their patterns. They may choose to make videos of their patterns, and you can certainly request them from the designers. In addition, there are videos linked in the notes for specific stitches and techniques to help you with the pattern.

    In other words - you don't have to already know how to read patterns to participate in this CAL, but you do need to be willing to learn how!  

    The Schedule for MooglyCAL2026

    The squares are released every two weeks throughout the year, on Thursday mornings at 10am Central US time. We begin in January, and the last square debuts one day early - the day before American Thanksgiving! Our first block is up now! CLICK HERE FOR BLOCK #1!

    This gives you a chance to grab the pattern before the holiday, and the entire month of December to join and edge your blanket.

    Here is the MooglyCAL2026 Schedule:

    January 8 and 22
    February 5 and 19
    March 5 and 19
    April 2, 16, and 30
    May 14 and 28
    June 11 and 25
    July 9 and 23
    August 6 and 20
    September 3 and 17
    October 1, 15, and 29
    November 12 and 25

    What Can You Make with the MooglyCAL2026

    What can you do with 24 afghan squares? CLICK HERE to see some fantastic possibilities! Here are the most common blanket options:

    4 blocks x 6 blocks - 4' x 6' afghan
    3 blocks x 4 blocks - Two 3' x 4' baby blankets
    add an extra square - 5' x 5' afghan

    In 2025 we had a Facebook group member turn her squares into a tree skirt! Amazing! Feel free to get creative with your project!

    Finishing Your MooglyCAL2026 Blanket or Project

    Finally, the joining and edging patterns are up to you! CLICK HERE for joining methods and then check out these great border and edging options!

    Windows Border: https://www.mooglyblog.com/windows-border/
    Border #71: https://www.mooglyblog.com/every-which-way-crochet-borders-pattern-71/
    Popcorn Border: https://www.mooglyblog.com/popcorn-border/
    Polka Dot Border: https://www.mooglyblog.com/polka-dot-border/
    Scalloped Shell Border: https://www.mooglyblog.com/scalloped-shell-stitch-border/
    Triangle Edging: https://www.mooglyblog.com/triangle-crochet-edging/
    Peppermint Border (starts around minute 24): https://www.mooglyblog.com/peppermint-swirl-pillow/
    Even more Borders: https://www.mooglyblog.com/living-edge-10-free-crochet-edging-patterns/

    How to Join the MooglyCAL2026!

    So what do you need to do next? First, be sure to join the Facebook group and follow the Pinterest board if desired! Then, sign up for the free Moogly newsletter to make sure you don't miss a square!

    After that, it's time to go get your yarn - I've linked all the ones I'm suggesting above! Most yarns you'll want to get matching dye lots for, so I recommend buying it all at once if possible.

    Finally, look for the first square to debut here on Moogly on January 8, 2026! I can't wait to share it with you! As you make your squares, feel free to share photos in the Facebook group, or on social media - and don't forget to use the tags #MooglyCAL2026 and be sure to tag the yarn you're using - #berroco, #jimmybeanswool, #madtosh, #knitpicks, or #wecrochet!

    MooglyCAL2025 Ends, and MooglyCAL2026 Begins Now!

    Thanks so much for crocheting along with me! I can’t wait to see all the beautiful blankets you crochet this year! You can follow Moogly on YouTube, Facebook, Twitter, Pinterest, Tik Tok, and Instagram, and don’t forget to sign up for the free newsletter at the top of the page - every issue includes a link to the latest CAL square! Thank you to Local Crafts for providing the materials for this crochet along.

    Velvet Luxe Wine Bag

    December 30, 2025 by Tamara Kelly 2 Comments

    Velvet Luxe Wine Bag

    Give the gift of luxury with the Velvet Luxe Wine Bag crochet pattern! This advanced beginner-friendly design features a plush velvet texture and a seamless construction. Perfect for gifting that special bottle, on that very important occasion - but quick enough to work up for last-minute invites! Get this lovely crochet wine cozy pattern here on Moogly!

    Disclaimer: This post includes affiliate links; yarn provided by Yarnspirations.

    Prefer an ad-free PDF? You've got options!

    Prefer the free blog version? Keep scrolling!

    Formerly part of Stash Busting Quickies!

    You may have spotted this pattern before - I originally designed it for one of the Stash Busting Quickies collections I did with Marly Bird! It's been a few years now, and I've decided that it's time to share this pattern here on the blog as well!

    Velvet Luxe Wine Bag

    Quick Yet Elegant Gifting

    If you shouldn't show up empty-handed, then "dress to impress" with the Velvet Luxe Wine Bag! This crochet wine cozy transforms simple moments into something special, with a soft velvet touch that feels as lovely as it looks. Worked in one seamless piece, it glides off the hook with effortless elegance, creating a gift that feels personal, thoughtful, and beautifully handcrafted. Bring a special touch to every occasion!

    Velvet Luxe Wine Bag


    Velvet Luxe Wine Bag

    Add this pattern to your Ravelry Queue and Favorites

    U.S.  J - 6.0 mm

    100 - 150 Bernat​ Velvet​ (100% polyester, 315 yds / 288 m, 10½ oz/300 g, CYCA# 5 bulky)
    Colorway Used: #​32004​ Burgundy Plum, 1 ball

    Stitch Markers

    Gauge: 12 sc and 9 rows = 4” [10 cm]; use any size hook to obtain the gauge

    Finished Measurements: 5” [13 cm] wide by 14” [35.5 cm] long when laid flat (fits standard wine bottle)

    HELPFUL LINKS AND TUTORIALS

    Crochet Abbreviations

    Magic Circle

    NOTE

    Add a ribbon or chain to tie the top, or dress it up with buttons, poms or tassels to personalize your gift!

    Velvet Luxe Wine Bag

    Velvet Luxe Wine Bag Instructions

    Round 1 (RS): Make a Magic Circle, work 6 sc in circle, join with sl st in first sc. (6 sc)

    Round 2: Ch 1, 2 sc in each sc around, join with sl st in first sc. (12 sc)

    Round 3: Ch 1, *sc in next sc, 2 sc in next sc; repeat from * around, join with sl st. (18 sc)

    Round 4: Ch 1, *sc in next 2 sts, 2 sc in next st; repeat from * around, join with sl st in first sc. (24 sc)

    Round 5: Ch 1, *sc in next 3 sts, 2 sc in next sc; repeat from * around, join with sl st in first sc. (30 sc)

    Round 6: Ch 1, sc in each sc around, join with sl st in first sc.

    Round 7 - 34: Ch 1, hdc in each sc around, join with sl st in first hdc. (30 hdc)

    FINISHING

    Fasten off and weave in ends. Fold top over and style as desired.


    Ready to Pour Up a New Pattern?

    Looking for your next project? Check out the Moogly Free Patterns Page or Ravelry!

    Velvet Luxe Wine Bag

    If this or any Moogly pattern inspires you to make your own project, and you post a photo on social media, be sure to tag me @mooglyblog or #mooglyblog so I can check it out too!

    The Fine Print

    Follow Moogly on Facebook, Pinterest, TikTok, Bluesky, YouTube, and Instagram! Thank you to Yarnspirations for providing the materials shown in this post. Thank you to Robyn Chachula for tech editing this pattern. Written pattern copyright Tamara Kelly 2025, all rights reserved. Please do not reprint or repost this pattern. Please do link to this page to share this pattern with others. If you wish to make items for sale from this pattern or translate it to another language, please visit the About page for details. 

    Reginald the Reef Squid by Alleshen Hamilton, from Quirky Amigurumi

    December 29, 2025 by Tamara Kelly Leave a Comment

    Reginald the Reef Squid

    I'm so happy to be sharing a giveaway for Quirky Amigurumi: 30 Low-Sew Crochet Patterns for Cute & Silly Creatures by Alleshen Hamilton - and I'm so honored that she has decided to share an excerpt from the book here on Moogly! Reginald the Reef Squid is a cute, fun, and perfect taste of what you'll find inside this book. Thank you so much to Alleshen and Page Street Publishing! ♥

    Disclaimer: This post includes affiliate links. Reprinted with permission from Quirky Amigurumi by Alleshen Hamilton. Page Street Publishing Co. 2025. Photo credit: Alleshen Hamilton.

    CLICK HERE to enter the giveaway to win your own copy of Quirky Amigurumi

    CLICK HERE to purchase your own copy of Quirky Amigurumi

    Please note that this pattern looks even better in the book! I've done my best to present it well here. 🙂

    Reginald the Reef Squid by Alleshen Hamilton, from Quirky Amigurumi


    Reginald the Reef Squid

    When I was little, I was terrified of squids! But the more I learned about them, I realized they are some of the most fascinating creatures in the ocean and are now one of my favorite sea critters. In comparison to their body size, squids have some of the largest eyes in the animal kingdom, which help them see in low light. Squid eyes are incredibly powerful, but they’re also incredibly cute and googly. Feel free to make your squid’s eyes as googly or goofy as you want.

    FINISHED MEASUREMENTS

    6.5 inches (16.5 cm) tall (including tentacles) and 2.25 inches (5.7 cm) wide

    YARN

    Super bulky chenille yarn (weight 6) in coral. I use Parfait Chunky by Premier Yarns (3.5 oz | 100 g | 131 yds | 120 m per skein) in Mango.

    HOOK

    5 mm (H) crochet hook

    OTHER MATERIALS AND TOOLS

    Stitch marker
    Polyester fiberfill
    Scissors
    Tapestry needle
    Pins
    White felt
    Black felt
    Hot glue gun

    ABBREVIATIONS

    st stitch
    sl st slip stitch
    ch chain
    sc single crochet
    inc increase, make two single crochet stitches in the same stitch
    dec decrease, combine two stitches into one single crochet stitch
    FLO front loops only
    BLO back loops only

    Reginald the Reef Squid Instructions

    BODY

    Round 1: Sc 6 in a magic ring. (6 sts)

    Round 2: (Sc 2, inc) x 2. (8 sts)

    Round 3: (Sc 1, inc) x 4. (12 sts)

    Round 4: Sc 1 in each st around. (12 sts)

    Round 5: (Sc 2, inc) x 4. (16 sts)

    Round 6: Sc 1 in each st around. (16 sts)

    Round 7: (Sc 3, inc) x 4. (20 sts)

    Rounds 8–12: Sc 1 in each st around for 5 rounds. (20 sts)

    Round 13: (Sc 3, dec) x 4. (16 sts)

    Round 14: In the BLO, sc 1 in each st around. (16 sts)

    Rounds 15–17: Sc 1 in each st around for 3 rounds. (16 sts)

    Stuff the body.

    Now you will work the round that contains the tentacles.

    Round 18: {Ch 8. Starting in the second ch from the hook, sl st 7. In the FLO on the body, sl st 2.} Repeat the portion between the brackets { } until you have 8 tentacles. (16 sts)

    Now you will close the body off. You’ll work the next round into the back loops created from round 18. You will need to reach over a little to make the first sc. Make sure that first sc is not loose and fold down the tentacles so they don’t get caught on the inside of your work.

    Round 19: In the back loops of round 18, sc 1 in every other st until you have about 8 to 10 sts. Exact st count isn’t crucial here, so don’t worry if you end up with fewer or a few extra stitches!

    Round 20: Dec x 2. (6 to 8 sts remain)

    Finish off and sew the hole shut.

    Squid Amigurumi

    FINS (MAKE 2)

    For the fins, I use a standard decrease instead of an invisible decrease. Doing so creates a less “squashed” looking triangle.

    Row 1: Ch 5. Starting in the second ch from the hook, sc 4. Ch 1 and turn. (4 sts)

    Row 2: Dec x 2. Ch 1 and turn. (2 sts)

    Row 3: Dec. Ch 1 and finish off, leaving a tail long enough for sewing to the body.

    ASSEMBLY

    Cut two white felt circles and two slightly smaller black felt circles. Glue the black circles to the center of the white circles and then glue each finished eye to the squid’s head between rounds 14 and 17.

    Fold your finished fins in half and use pins to place them in a tent shape, approximately between rounds 2 and 5. The top of the fin should be the point that has the yarn tail. Make
    sure the fins are centered with the eyes and sew each to the side of the head. Weave in any ends. Congrats, your reef squid is finished!

    Quirky Amigurumi


    The Fine Print

    Reprinted with permission from Quirky Amigurumi by Alleshen Hamilton, Page Street Publishing Co. 2025. Photo credit: Alleshen Hamilton. Prefer a paper copy? Get the book - linked above!

    Quirky Amigurumi by Alleshen Hamilton Review and Giveaway

    December 29, 2025 by Tamara Kelly Leave a Comment

    Quirky Amigurumi by Alleshen Hamilton Review and Giveaway

    Quirky Amigurumi: 30 Low-Sew Crochet Patterns for Cute & Silly Creatures by Alleshen Hamilton is a collection of "weird and fun-loving companions," perfect for adventurous beginners as well as experienced crocheters. As I write this review, it's the #1 New Release in Stuffed Animal Crafts on Amazon! If you'd like to create your own cuddly crew, be sure to read and enter the giveaway below. And if you'd like to get a taste of what's inside, we've got a freebie for you to make too!

    Disclaimer: I was given a copy of this book for review; all opinions are my own. This post includes affiliate links. 

    Quirky Amigurumi Excerpt and Review

    Alleshen Hamilton

    A Bit About the Author

    Author Alleshen Hamilton is the creator of GheeBeans Crafty and she has an Etsy Shop! This is her first book, and she is a bit of a mystery - no author blurb on Amazon or on her blog! One thing I do know - she loves crocheting and describers herself as "That sea critter obsessed weirdo" - so I like her so far! 😉 And she was kind enough to share an expert from her book - the pattern for the Reginald the Reef Squid!

    Reginald the Reef Squid

    This pattern was designed by Alleshen Hamilton, and can be found in Quirky Amigurumi: 30 Low-Sew Crochet Patterns for Cute & Silly Creatures, copyright 2025! And because this is a full-length amigurumi pattern, I've decided to put it on a separate page here on Moogly - CLICK HERE to go to the Reginald the Reef Squid pattern - and keep scrolling to read the rest of the review and enter the giveaway!

    Reginald the Reef Squid

    My Peek Inside Quirky Amigurumi

    "Create your very own weird and fun-loving companions with this collection of simple, no- or low-sew amigurumi patterns. Led by creative pattern designer Alleshen Hamilton of GheeBeans Crafty, you can stitch up the cuddly, strange creatures of your dreams, whether you’re an adventurous beginner or an experienced crocheter. With easy-to-follow instructions and minimal sewing, you’ll be able to bring this whole collection of wacky creatures to life, like:

    - Shoko the Shrimp
    - Baxter the Blobfish
    - Mathas the Mothman
    - Bertram the Banana Slug
    - Penelope the Pygmy Hippo
    - Shirley the Soy Sauce

    If you want to add even more character to your companions, you’re in luck! Alleshen includes five charming crochet accessories including sweater-vests, hats, and more that will make your little buddies as cute—and as stylish—as can be. Before long, you’ll have your very own group of loveable plush creatures that are filled with personality!"

    Quirky Amigurumi

    Now, I would love to add my insight here... but this book got caught up in holiday shipping, and didn't arrive in time for me to write my review! I'll be sure to make a video tour of it and insert it here when it arrives. UPDATE - It's here!


    View this post on Instagram


    A post shared by Tamara Kelly (@mooglyblog)

    Quirky Amigurumi

    That said, I was able to view the first few pages on Amazon, as well as the Reginald the Reef Squid pattern! And I like what I see!

    Quirky Amigurumi

    Judging based on what I can see, the patterns are written in "amigurumi style" - abbreviated, without extra verbiage. If you're familiar with amigurumi or an experienced crocheter, you'll be able to follow along! I do recommend always reading any tips sections in the book to make sure you understand the assumed things - like whether you're joining and chaining or working in a spiral! The photos look great, and the creatures are adorable!

    Quirky Amigurumi

    Get your own copy of Quirky Amigurumi today!

    Purchase your own copy of this book on Amazon, or ask for it at your local bookseller!

    The Quirky Amigurumi Giveaway

    The Quirky Amigurumi Giveaway is open in the US and Canada. The giveaway ends January 27, 2026, at 12:15am Central US time. To enter, use the Kingsumo form below. Only the email option is mandatory – all other tasks are optional, for bonus entries only.

    One winner will receive a paperback copy of Quirky Amigurumi, courtesy of Page Street Publishing. They will be notified by email.

    GOOD LUCK ALL!

    You can follow Moogly on YouTube, Facebook, Twitter, Pinterest, TikTok, and Instagram. Don’t forget to sign up for the free newsletter at the top of the page! And don't forget to enter all the other fab giveaways on Moogly! And if you'd like to share this post, there's a Pinterest image and sharing buttons below!

    Quirky Amigurumi by Alleshen Hamilton Review and Giveaway

    Scented Orange Slice Ornaments

    December 23, 2025 by Tamara Kelly Leave a Comment

    Scented Orange Slice Ornaments

    Create whimsical Scented Orange Slice Ornaments with this simple beginner crochet pattern! Perfect for holiday decorations or gifts, these ornaments add a festive touch to any space. The pattern includes detailed instructions for crocheting in the round and seaming the slices together. These ornaments work up quickly and are a joy to make! Get the pattern on Moogly!

    Disclaimer: This post includes affiliate links; materials provided by Yarnspirations.

    Prefer an ad-free PDF? You've got options!

    Prefer the free blog version? Keep scrolling!

    Formerly part of Stash Busting Quickies!

    Does this look familiar? You may have spotted this pattern before - I originally designed it for one of the Stash Busting Quickies collections I did with Marly Bird! It's been a few years now, and I've decided that it's time to share this pattern here on the blog as well!

    Scented Orange Slice Ornaments

    Perfect for Winter Holiday Gifts or Sachets Year Round

    Whether you're a beginner looking to expand your skills or an experienced crocheter seeking a new project, this pattern is sure to delight! And it's versatile too. Make ornaments for your holiday tree, or string these up on the mantle for a traditional farmhouse look. Pop them into drawers to make your clothes and yarn smell great. Make play food for your favorite little ones - and I'm sure you'll have even more ideas!

    Scented Orange Slice Ornaments


    Scented Orange Slice Ornaments

    Add this pattern to your Ravelry Queue and Favorites

    US - I, 5.5 mm crochet hook

    Patons Classic Wool Roving (100% wool, 120 yds / 109 m, 3.5 oz/ 100 g, CYCA #5 bulky)
    Color A: Yellow, 25 yds
    Color B: Aran, 25 yds

    Stitch Markers

    Optional: Whole Cloves or Orange Essential Oil

    Optional: Twine or Ornament Hook

    Gauge: use whatever size hook gives you a tight fabric

    HELPFUL LINKS AND TUTORIALS

    Crochet Abbreviations

    BLO - Back Loop Only

    Scented Orange Slice Ornaments Instructions

    Make 2

    Round 1: With Color A, make a magic circle, ch 1, 6 sc in the ring; close ring and join with sl st. Do not turn. (6 sc)

    Round 2: Ch 1, 2 sc in each st around; join with sl st. Do not turn. (12 sc)

    Round 3: Ch 1, *sc in next st, 2 sc in next st; repeat from * around; join with sl st. Do not turn. (18 sc)

    Round 4: Ch 1, *sc in next 2 sts, 2 sc in next st; repeat from * around; change to Color B, join with sl st. Do not turn. (24 sc)

    Round 5: Ch 1, *sc in next 3 sts, 2 sc in next st; repeat from * around; change to Color A, join with sl st and fasten off Color B. (30 sc)

    Round 6: Loosely blo sl st in each st around; join with sl st and fasten off Color A.

    Add Segment Lines

    With Color B, surface crochet 6 lines from the center of the magic circle to the increases made in Round 5.

    Assembly

    With Color A and WS of the orange slices together, whip stitch through the blo of each pair of sts around. When nearly closed, stuff with whole cloves or your chosen filling. Close and weave in ends. Add a hanging loop using Color B, twine, or an ornament hook.


    Sniffing Out a New Project?

    All done with the Scented Orange Slice Ornaments and looking for your next project? Check out the Moogly Free Patterns Page or Ravelry!

    Scented Orange Slice Ornaments

    If any Moogly pattern inspires you to make your own project, be sure to tag me @mooglyblog or #mooglyblog so I can check it out too!

    The Fine Print

    Follow Moogly on Facebook, Pinterest, TikTok, Bluesky, YouTube, and Instagram! Thank you to Yarnspirations for providing the materials shown in this post. Please do not reprint or repost this pattern. Please do link to this page to share this pattern with others. If you wish to make items for sale from this pattern or translate it to another language, please visit the About page for details. Thank you to Robyn Chachula for tech editing this pattern. 

    Fa La La Towel Topper

    December 22, 2025 by Tamara Kelly 4 Comments

    Fa La La Towel Topper

    Get into the holiday spirit with the Fa La La Towel Topper crochet pattern! This advanced beginner pattern is perfect for adding a festive touch to your kitchen decor, and works up fast for gifting and craft fairs! The pattern is written for standard-size dish towels, and is sure to impress your guests. Get the pattern here on Moogly!

    Disclaimer: This post includes affiliate links; materials provided by Yarnspirations.

    Prefer an ad-free PDF? You've got options!

    Prefer the free blog version? Keep scrolling!

    Formerly part of Stash Busting Quickies!

    You may have spotted this pattern before - I originally designed it for one of the Stash Busting Quickies collections I did with Marly Bird! It's been a few years now, and I've decided that it's time to share this pattern here on the blog as well!

    Fa La La towel toppers

    Perfect for Winter Holiday Gifts

    Kitchen items make great gifts, as well as charity donations. And the Fa La La Towel Topper is designed to be easy and quick to crochet! Worked flat, you'll whip each one up in a flash. Make this crochet classic your own today!

    Fa La La Towel Topper


    Fa La La Towel Topper

    Add this pattern to your Ravelry Queue and Favorites

    US - J, 6.0mm crochet hook

    75 yards Red Heart Super Saver Ombre (4/Worsted; 100% acrylic; 482 yds
    Color Used: Sea Coral

    Stitch Markers

    Dish Towel (approx 20" x 30")

    1 ⅝" Button

    Sharp Yarn Needle

    Gauge: 13 sts = 4" (10 cm)

    HELPFUL LINKS AND TUTORIALS

    Crochet Abbreviations

    How to Weave In Ends

    Fa La La Towel Topper  Instructions

    Prep the Towel

    Fold towel in half widthwise, and press crease with an iron.

    Use a sewing pen or pencil to mark 30 dots across, approx ½” down from the crease, and approx ½” apart.

    Cut 12’ of yarn and thread sharp needle. Tie yarn doubled at end. Use the sharp yarn needle to sew the blanket stitch across the fold, adding a stitch at each dot.

    Begin Topper

    Row 1: With yarn held doubled and RS of towel facing, join with sc in first horizontal bar of blanket stitch, ch 1, skip next bar, *sc in next bar, ch 1, skip next bar; repeat from * to last bar, ch 1, sc in last bar, turn (15 sts)

    Row 2: Ch 2, skip first 2 sts, *sc in next ch-1 sp, ch 1, skip next sc; repeat from * to last 2 sts, sc in next ch-1 sp, sc in last st; turn (14 sts)

    Rows 3–11: Ch 2, skip first 2 sts, *sc in next ch-1 sp, ch 1, skip next sc; repeat from * across to last 2 sts, sc in next ch-1 sp, sc in ch-2 sp; turn. (5 sc on Row 11)

    Row 12: Ch 2, skip first 2 sts, sc in next ch-1 sp, *ch 1, skip next st, sc in next ch-1 sp; repeat from * to last st, ch 1, skip next st, sc in ch-2 sp; turn (4 sc)

    Rows 13–28: Ch 2, sc in next ch-1 sp, *ch 1, skip next st, sc in next ch-1 sp; repeat from * to end, finishing last repeat with sc in ch-2 sp; turn

    Row 29: Ch 2, sc in next ch-1 sp, ch 3, skip next 2 sc, sc in next sc, sc in ch-2 sp; turn.

    Row 30: Ch 1, sc in first st, 7 dc in center of ch-3 space, sc in ch-2 sp. Fasten off.

    Finishing

    Sew button to the center of Row 7, or adjust placement as needed to fit your oven handle.

    Weave in all loose ends.


    Queue Dried Up?

    All done with the Fa La La Towel Topper and looking for your next project? Check out the Moogly Free Patterns Page or Ravelry!

    If any Moogly pattern inspires you to make your own project, be sure to tag me @mooglyblog or #mooglyblog so I can check it out too!

    The Fine Print

    Follow Moogly on Facebook, Pinterest, TikTok, Bluesky, YouTube, and Instagram! Thank you to Yarnspirations for providing the materials shown in this post. Please do not reprint or repost this pattern. Please do link to this page to share this pattern with others. If you wish to make items for sale from this pattern or translate it to another language, please visit the About page for details. Thank you to Robyn Chachula for tech editing this pattern. 

    Lower Linked Double Crochet

    December 19, 2025 by Tamara Kelly Leave a Comment

    Lower Linked Double Crochet

    The Lower Linked Double Crochet stitch is a variation of linked double crochet that creates a different look than the standard stitch. I used it to create the Christmas Tree Door Basket - and I think it's got a great look! Here's how it's made, in right and left-handed video tutorials!

    Disclaimer: This post includes affiliate links.

    Be sure to scroll down past the videos to get the links to the free pattern and supplies!

    Lower Linked Double Crochet:

    How to Crochet the Lower Linked Double Crochet Stitch - Right-Handed

    Learn to Crochet the Lower Linked Double Crochet Stitch - Left-Handed

    Written Instructions for the Lower Linked Double Crochet Stitch

    LLDC - Lower Linked Double Crochet: Insert hook in left front loop in bottom half of previous stitch, insert hook in next st, pull up a loop, [yo and pull through 2 loops] twice.

    To Begin a Row of LLDC, I recommend starting with either a Chainless Starting Double Crochet, or a Stacked Single Crochet.

    As Seen in This Video (click each for more info!):

    As Seen In:

    Christmas Tree Door Basket

    The Supplies Used:

    US - I, 5.5 mm crochet hook - Susan Bates

    Bernat Maker Minis (#5 Bulky; 75% Cotton 25% Nylon; 500g/17.65 oz, 560 m/612 yds)

    And here's a Pin for your Crochet Pinterest Board! Make sure you are following Moogly on Pinterest for all the best knit, crochet, and craft pins!

    Lower Linked Double Crochet

    I hope you enjoy this tutorial for the Lower Linked Double Crochet! If this video doesn't answer all your questions, please ask in the comments below - I'm always happy to help.

    If you make this or any Moogly pattern, please tag me in your photos so I can see them too, @mooglyblog or #mooglyblog! Then send them to tamarakelly@mooglyblog.com to see them featured in a future Moogly email newsletter!

    Get Moogly on your favorite social media sites: YouTube, Facebook, Pinterest, Tik Tok, Bluesky, and Instagram! And sign up for the free newsletter at the bottom of the page so you don’t miss a thing! Thank you to Yarnspirations for providing the materials for this video.

    Red Truck Christmas Ornament Tutorial

    December 18, 2025 by Tamara Kelly Leave a Comment

    Red Truck Christmas Ornament Tutorial

    The Red Truck Christmas Ornament is a cute and quick holiday decoration you can whip up using odds and ends of yarn! Here's how to crochet your own Red Truck Christmas Ornament, in right and left-handed video tutorials. Be sure to follow along with the written pattern for best results!

    Disclaimer: This post includes affiliate links.

    Be sure to scroll down past the videos to get the links to the free pattern and supplies!

    Red Truck Christmas Ornament Tutorial:

    How to Crochet the Red Truck Christmas Ornament - Right-Handed

    Learn to Crochet the Red Truck Christmas Ornament - Left-Handed

    As Seen in This Video (click each for more info!):

    The Free Pattern:

    Red Truck Christmas Ornament

    The Supplies:

    US - G, 4.0 mm crochet hook - Susan Bates

    40 yards Bernat Maker Minis (#5 Bulky; 75% Cotton 25% Nylon; 500g/17.65 oz, 560 m/612 yds)
    Colors Used: Red, White, Green, Brown (10 yds or less of each used)

    Stitch Markers

    Fiberfill (very small amount, can use scrap yarn instead)

    And here's a Pin for your Crochet Pinterest Board! Make sure you are following Moogly on Pinterest for all the best knit, crochet, and craft pins!

    Red Truck Christmas Ornament Tutorial

    I hope you enjoy this tutorial for the Red Truck Christmas Ornament! If this video doesn't answer all your questions, please ask in the comments below - I'm always happy to help.

    If you make this or any Moogly pattern, please tag me in your photos so I can see them too, @mooglyblog or #mooglyblog! Then send them to tamarakelly@mooglyblog.com to see them featured in a future Moogly email newsletter!

    Get Moogly on your favorite social media sites: YouTube, Facebook, Pinterest, Tik Tok, Bluesky, and Instagram! And sign up for the free newsletter at the bottom of the page so you don’t miss a thing! Thank you to Yarnspirations for providing the materials for this video.

    Crochet and Catch Up with Moogly - December 17, 2025

    December 17, 2025 by Tamara Kelly 4 Comments

    Crochet and Catch Up with Moogly - December 17, 2025

    The holidays are in full swing, the to-do lists are growing, and it’s the perfect moment to pause for another Crochet and Catch Up on Moogly! Let’s settle in for cozy yarn chat, a little crafty cheer, and a look at the latest projects, patterns, and handmade fun. Whether you’re taking a break from gift making or just enjoying a quiet winter moment, grab your WIP and join me for a relaxing mid-December hangout and a peek at what’s coming next on Moogly!

    Disclaimer: This post may contain affiliate links. Live videos are unscripted, unedited, and occasionally weird; all opinions are my own. 

    Crochet and Catch Up with Moogly

    Going LIVE on Facebook and YouTube, at 11am CT!

    Click here to Like the Moogly Facebook Page and get notified when I go live!

    Click here to Subscribe to the Moogly YouTube Page and get notified when I go live!

    Moogly Community Group on Facebook

    What I'm Wearing: Shell Stitch Crochet Duster

    What Yarn Will I Be Using for MooglyCAL2026? Brava Worsted! And while some designers will also use Brava Worsted, they will also be able to choose from Swish Worsted, Jimmy Beans Wool Beanstalk, Tosh Vintage, and Berroco Vintage! If you want to get shopping, I recommend purchasing at least 4420 yds of yarn total. How you distribute this is up to you! Some people use one color for the whole blanket, others a whole bunch - there's no wrong answer!

    Preppy Puppy Bandana - FREE PATTERN

    Red Truck Christmas Ornament - FREE PATTERN

    Bernat Maker Minis

    Christmas Tree Door Basket - FREE PATTERN

    Bernat Blanket

    Shell Stitch Crochet Duster Video Tutorial

    Katia Azteca

    Jimmy Beans Wool Blanket Kit Club 2025 Update

    Farm Friends Crochet Book Giveaway

    Tunisian Crochet Tops Book Giveaway

    Golden Hour Cardigan - FREE PATTERN

    Sneak Peek: You'll see my colors for MooglyCAL2026 - and to get a full sneak peek of what's in store for next year, join me at 11:30 am TODAY (AKA, right after this live is over) on the WeCrochet Official Instagram page where I'll be going live with them to chat all about it!

    Moogly Around the Web - and the World!

    Mark your calendar for a very special YouTube live kicking off the MooglyCAL2026 on December 31st at 11am Central Time!

    Want to see me in person in 2026?

    March 6 - 7: This spring, you are invited to join me at Stitch Up Chicago, where I'll be one of your hosts!

    June 17 - 21: This summer, I'll be one of the teachers at Jimmy Beans Wool's Biggest Little Getaway 2026!

    If you have a LYS or event you'd like me to teach at in 2026, or if you would like me to teach an online class to your group or guild, please do reach out!

    Have a wonderful day all - see you to crochet and catch up next time! And before you go, here's a Pin for today's post, so you can add it to your favorite Pinterest boards! We appreciate (and need) your shares on all our posts.

    Crochet and Catch Up with Moogly - December 17, 2025

    Follow Moogly on YouTube, Bluesky, Facebook, Pinterest, TikTok, and Instagram! 

    Christmas Tree Door Basket

    December 15, 2025 by Tamara Kelly Leave a Comment

    Christmas Tree Door Basket

    Celebrate the holidays and crochet something festive for your front door - or any room - with the Christmas Tree Door Basket pattern!

    Disclaimer: This post includes affiliate links; material provided by Yarnspirations.

    Prefer an ad-free PDF? You've got options!

    Prefer the free blog version? Keep scrolling!

    Part of 24 Days of Quickies with Marly Bird and Friends

    I'm proud to be sharing this pattern as part of Marly Bird's 24 Days of Quickies! CLICK HERE to see all the wonderful projects featured! "If you’re looking for Christmas gifts that knit and crochet in a hurry, this is your golden ticket. Whether you prefer to pick up your needles or hooks, I’ve got quickies lined up for you that are thoughtful, handmade, and totally doable."

    Merry and Bright!

    The Christmas Tree Door Basket is quick to stitch, and even faster to assemble! Once you've whipped up the tree, fill it with your favorite holiday bits and bobs - and if you're adventurous, add lighting!

    Christmas Tree Door Basket

    Filled with a half-foam ball stuffed with decor from the floral section, the Christmas Tree Door Basket is a fun and festive celebration of the holiday that you can whip up in an afternoon. Perfect for door decor - and those whose pets don't allow full-sized trees!

    Christmas Tree Door Basket


    Christmas Tree Door Basket

    Add this pattern to your Ravelry Queue and Favorites

    US - L, 8.0 mm

    120 yds Bernat Blanket (6-Super Bulky; 300 g/10.5 oz)
    Colorway Shown: Malachite

    Notions Shown:

    Fiberfill

    FloraCraft Half Ball 5.8"

    U Shaped Blocking Pins

    Ashland LED String Lights - 4.7 ft - purchased at Michaels, requires batteries

    All Other Floral Notions and Gifts - purchased at Michaels

    Thin plastic bag (grocery store bag)

    Tape (whatever is handy and sticky)

    Christmas Tree Door Basket

    Gauge: 8 sts = 4" in pattern

    Finished Size: 11" tall unfilled

    Helpful Links:

    Crochet Abbreviations

    Magic Circle

    CSDC - Chainless Starting Double Crochet

    LLDC - Lower Linked Double Crochet

    Twisted Single Crochet

    Special Stitch:

    LLDC - Lower Linked Double Crochet: Insert hook in left front loop in bottom half of previous stitch, insert hook in next st, pull up a loop, [yo and pull through 2 loops] twice.

    INSTRUCTIONS:

    Rnd 1: Make a magic circle, work 6 dc into the ring; join with a sl st. (6 sts)

    Rnd 2: (CSDC, LLDC) in first st, LLDC in next st, [2 LLDC in next st, LLDC in next st] twice; join. (9 sts)

    Rnd 3: CSDC in first st, LLDC in next st, 2 LLDC in next st, [LLDC in next 2 sts, 2 LLDC in next st] twice; join. (12 sts)

    Rnd 4: (CSDC, LLDC) in first st, LLDC in next 3 sts, [2 LLDC in next st, LLDC in next 3 sts] twice; join. (15 sts)

    Rnd 5: CSDC in first st, LLDC in next 3 sts, 2 LLDC in next st, [LLDC in next 4 sts, 2 LLDC in next st] twice; join. (18 sts)

    Rnd 6: (CSDC, LLDC) in first st, LLDC in next 5 sts, [2 LLDC in next st, LLDC in next 5 sts] twice; join. (21 sts)

    Rnd 7: CSDC in first st, LLDC next 5 sts, 2 LLDC in next st, [LLDC in next 6 sts, 2 LLDC in next st] twice; join and break Color A. (24 sts)

    Rnd 8: CSDC in first st, LLDC in next 2 sts, [2 LLDC in next st, LLDC in next 7 sts] twice, 2 LLDC in next st, LLDC in last 4 sts; join. (27 sts)

    Rnd 9: CSDC in first st, LLDC in the next st, [2 LLDC in next st, LLDC in next 8 sts] twice, 2 LLDC in next st, LLDC in last 6 sts; join. (30 sts)

    Rnd 10: CSDC in first st, LLDC in next 5 sts, [2 LLDC in next st, LLDC in next 9 sts] twice, 2 LLDC in next st, LLDC in last 3 sts; join. (33 sts)

    Rnd 11: (CSDC, LLDC) in first st, LLDC in the next 10 sts, [2 LLDC in next st, LLDC in next 10 sts] twice; join. (36 sts)

    Rnd 12: CSDC in first st, LLDC in next 4 sts, [2 LLDC in next st, LLDC in next 11 sts] twice, 2 LLDC in next st, LLDC in last 6 sts; join. (39 sts)

    Rnd 13 (hanging loop plus final edging): Ch 6 or to desired length for hanging loop, sl st in first st, ch 1, twisted sc in each st around, twisted sc in same st as sl st; break and join yarn to first st.

    Christmas Tree Door Basket

    Assembly:

    1: Line the Tree with the plastic bag (optional). This creates a weatherproof barrier to protect the Fiberfill from moisture and escaping through the stitches.

    Christmas Tree Door Basket

    2: Fill the bottom ⅔rds of the Tree, inside the bag, with Fiberfill.

    Christmas Tree Door Basket

    3: Insert the foam half Ball into the top of the basket, flat side up. Secure in place using U Shaped Pins, going through the Tree into the Ball. TIP: Spread the tines of the pins apart, then pinch them right before inserting them to help them stay better!

    Christmas Tree Door Basket

    Christmas Tree Door Basket

    4: Add lights (optional). Insert batteries into lights. Secure the end of the lights to the point of the tree, then wind around the Tree toward the Ball, and secure the battery pack to the ball using tape. Make sure to locate the switch near the edge so it is accessible.

    Christmas Tree Door Basket

    Christmas Tree Door Basket

    5: Add floral and decorative notions as desired! Do your best to cover both the foam Ball and the battery pack from the lights.

    Christmas Tree Door Basket

    6: Hang and enjoy!

    Christmas Tree Door Basket


    The Christmas Tree Door Basket is such a quick, fun piece - one you can pull out every year - just remember to remove the batteries before storing it! I hope you enjoy making it. Be sure to share your photos on social media - tag @mooglyblog so I can see all your wonderful projects!

    Christmas Tree Door Basket

    The Fine Print

    Written pattern copyright Tamara Kelly 2025, all rights reserved. Please do not reprint or repost this pattern, but please do link to this page to share this pattern with others. If you wish to make items for sale from this pattern or translate it to another language, please visit the About page for details. Thank you to Yarnspirations for providing the yarn for this pattern.

    Golden Hour Cardigan by Ashley Rivas, from Tunisian Crochet Tops

    December 15, 2025 by Tamara Kelly Leave a Comment

    Golden Hour Cardigan

    I'm excited to be sharing a giveaway for Tunisian Crochet Tops: 14 Beginner-Friendly Patterns for Colorful Sweaters, Tanks, and Tees by Ashley Rivas - and I'm even more excited to share an excerpt from the book here on Moogly! The Golden Hour Cardigan is a gorgeous design, the perfect basic for any wardrobe. Thank you so much to Ashley and Page Street Publishing! ♥

    Disclaimer: This post includes affiliate links. Reprinted with permission from Tunisian Crochet Tops by Ashley Rivas. Page Street Publishing Co. 2025. Photo credit: Stephanie Guerrero.

    CLICK HERE to enter the giveaway to win your own copy of Tunisian Crochet Tops

    CLICK HERE to purchase your own copy of Tunisian Crochet Tops

    Golden Hour Cardigan

    Please note that this pattern looks even better in the book! I've done my best to present it well here. 🙂


    Golden Hour Cardigan

    This textured cardigan will be one of the coziest you’ll ever make! Named after that magical time of day when the sun is setting and the light is golden, the cardigan itself is warm without sacrificing style. The design was slightly inspired by letterman’s jackets you might see at American football games, but instead of a contrast in color between the body and sleeves, this cardigan has a beautiful contrast in texture. This contrast is eye-catching yet easy to make, as the entire cardigan is created from five simple rectangular panels. It will soon be a classic for your cold-weather closet.

    CONSTRUCTION
    This cardigan is worked by crocheting five flat rectangles: two front panels, one back panel, and two sleeve panels. The panels are then sewn together, with ribbing added after assembly.

    SKILL LEVEL
    Easy

    MATERIALS

    Yarn: Worsted weight, Twill Worsted by WeCrochet (100% superwash merino wool), 149 yds (136 m) per 100-g skein

    Yardage/Meterage
    10 (10, 11, 12, 13) (14, 15, 16, 17) hanks of Twill Worsted or 1390 (1475, 1600, 1755, 1860) (2055, 2180, 2360, 2455) yds / 1275 (1350, 1465, 1605, 1700) (1870, 1995, 2160, 2245) m

    Shown In Serpent Heather colorway

    Note: Any worsted weight yarn can be used for this pattern as long as it matches gauge. For best results, wool or acrylic yarns are recommended.

    Hooks
    Note: Use hook sizes below or sizes needed to meet gauge.
    Body: US L-11 (8 mm) Tunisian crochet hook with 10" to 24" (25 cm to 61 cm) cord
    Sleeves: US L-11 (8 mm) Tunisian crochet hook with 10" to 12" (25 cm to 30 cm) cord
    Ribbing: US I-9 (5.5 mm) crochet hook

    Notions
    Stitch markers (3 minimum)
    Scissors
    Tapestry needle
    3 buttons, 1" (2.5 cm) in diameter

    SIZING

    XS (S, M, L, XL) (2XL, 3XL, 4XL, 5XL)

    Golden Hour Cardigan Sizing Chart

    Schematic

    Golden Hour Cardigan Schematic

    ABBREVIATIONS

    BLO: back loop only
    ch: chain
    LTS: last Tunisian stitch
    RetP: Return Pass
    sc: single crochet
    sk: skip
    sl st: slip stitch
    st(s): stitch(es)
    TKS: Tunisian knit stitch
    TSS: Tunisian simple stitch
    yoSS: yarn over slip stitch, see Special Techniques

    SPECIAL TECHNIQUES
    Yarn over slip stitch (yoSS) - Yarn over, insert hook into the next stitch, pull up a loop, and pull loop through both loops on hook as though making a slip stitch.

    GAUGE

    Body: 13 sts x 16 rows = 4 inches (10 cm) in Tunisian knit stitch (blocked)

    Sleeves: 16 sts x 11 rows = 4 inches (10 cm) in Tunisian alternate crossed stitch (blocked)

    Ribbing: 13 sts = 4 inches (10 cm) (stretched)

    To make gauge swatches, follow patterns below for the body and sleeves (see Abbreviations, Special Techniques, and Pattern Notes sections before continuing):

    Body: With Body Tunisian crochet hook, ch 19.

    Row 1 (starting row): working in the back bump of each ch, pull up a loop in 2nd ch from hook and each ch across, RetP. [19 sts]

    Row 2: TKS across to last st, LTS, RetP. [19 sts]

    Repeat Row 2 until you have 20 rows or can adequately measure gauge.

    Measure a 4" x 4" (10 cm x 10 cm) square in the middle of your swatch to determine gauge.

    Sleeves: With Sleeves Tunisian crochet hook, ch 23.

    Row 1 (starting row): working in the back bump of each ch, pull up a loop in 2nd ch from hook and each ch across, RetP. [23 sts]

    Work Rows 2–3 of the Sleeve Panel instructions.

    Repeat Rows 2– 3 until you have 16 rows or can adequately measure gauge.

    Measure a 4" x 4" (10 cm x 10 cm) square in the middle of your swatch to determine gauge.

    Golden Hour Cardigan

    Golden Hour Cardigan Pattern Instructions

    PATTERN NOTES
    Check stitch count by counting loops on hook before the Return Pass.

    When working the ribbing, ch 1 does not count as a st.

    FRONT PANEL (MAKE 2)

    With Body Tunisian crochet hook, ch 28 (31, 34, 37, 40) (44, 47, 50, 53).

    Row 1 (starting row): Working in the back bumps of the starting ch, pull up a loop in 2nd ch from hook and each remaining ch, RetP. [28 (31, 34, 37, 40) (44, 47, 50, 53) sts]

    Rows 2–65 (65, 65, 67, 67) (73, 73, 79, 79): TKS across to last st, LTS, RetP. [28 (31, 34, 37, 40) (44, 47, 50, 53) sts]

    Customization Note–Length: To adjust the length of your cardigan, add/subtract 4 rows for every 1" (2.5 cm) added/subtracted. Write down how many rows were added/subtracted so that you can adjust both front panels and the back panel. Keep in mind that the crochet ribbing will add 2" (5 cm) to the final length of the garment.

    Row 66 (66, 66, 68, 68) (74, 74, 80, 80): TKS bind off.

    Fasten off, leaving a long tail approximately 3x the panel width for seaming.

    BACK PANEL (MAKE 1)

    With Body Tunisian crochet hook, ch 63 (70, 76, 82, 89) (96, 102, 108, 115)

    Row 1 (starting row): working in the back bumps of the starting ch, pull up a loop in 2nd ch from hook and each remaining ch, RetP. [63 (70, 76, 82, 89) (96, 102, 108, 115) sts]

    Rows 2–65 (65, 65, 67, 67) (73, 73, 79, 79): TKS across to last st, LTS, RetP. [63 (70, 76, 82, 89) (96, 102, 108, 115) sts]

    Customization Note–Length: If you added/ subtracted rows to the front panels, add/ subtract the same number of rows to the back panel.

    Row 66 (66, 66, 68, 68) (74, 74, 80, 80): TKS bind off.

    Fasten off.

    SLEEVE PANEL (MAKE 2)

    With Sleeves Tunisian crochet hook, ch 55 (55, 59, 63, 69) (77, 83, 89, 89).

    Row 1 (starting row): working in the back bumps of the starting ch, pull up a loop in 2nd ch from hook and each remaining ch, RetP. [55 (55, 59, 63, 69) (77, 83, 89, 89) sts]

    Customization Note–Sleeve Circumference: Add or remove 4 sts for every 1" (2.5 cm) added/subtracted from the overall circumference of the sleeve. Your st count should be an odd number. Write down the st count so that you can adjust both sleeves.

    Row 2: TSS in first st, *sk next st, TSS, TSS in skipped st, (see photos on next page) repeat from * across to last st, LTS, RetP. [55 (55, 59, 63, 69) (77, 83, 89, 89) sts]

    Row 3: sk first st, TSS, TSS in skipped st, *sk next st, TSS, TSS in skipped st, repeat from * across until 2 sts remain, TSS, LTS, RetP. [55 (55, 59, 63, 69) (77, 83, 89, 89) sts]

    Rows 4–40 (40, 40, 40, 38) (38, 36, 36, 36): repeat Rows 2 and 3, ending on a Row 2 repeat. [55 (55, 59, 63, 69) (77, 83, 89, 89) sts]

    Customization Note–Sleeve Length: Add/ subtract 1 repeat of Rows 2 and 3 for every 0.7" (2 cm) added/subtracted (end on a Row 2 repeat). Write down your row count so that you can crochet the same number of rows for both sleeves. Keep in mind that the crochet ribbing will add 2" (5 cm) to the final length of the sleeve.

    Golden Hour Cardigan

    Row 41 (41, 41, 41, 39) (39, 37, 37, 37): special bind off (sk first st, work TSS bind off in next st, work TSS bind off in skipped st, *sk next st, work TSS bind off in next st, work TSS bind off in
    skipped st, repeat until 2 st remain, work TSS bind off, start a LTS in the last st and pull loop through loop on hook) ( see photo directly above).

    Fasten off, leaving a long tail approximately 3x the panel width for seaming.

    ASSEMBLY

    Wet block panels (or use blocking method best suited for your yarn of choice) to dimensions provided in size chart prior to seaming.

    Once blocked, lay the front panels over the back panel, right sides facing each other. The front panels should align with the sides of the back panel so that there are a few inches separating the front panels (see Figure 1).

    Figure 1
    Figure 1

    Using a tapestry needle and the yarn tails left over, sew the top of each front panel to the top of the back panel with the seaming method of your choice (the mattress st was used in the sample).

    Now lay the body panels flat with the right side facing up. Lay a sleeve panel down, right side up, so that the center of the top of the sleeve aligns with the shoulder seam of your panels (see Figure 2). Place st markers in your front and back panels to mark the start and end of seaming. Sew your sleeve to the front and back panels using the seaming method of your choice (the flat sl st method with the ribbing crochet hook was used in my sample). Repeat with the opposite sleeve.

    Figure 2
    Figure 2

    Now fold the cardigan in half at the shoulder seams. Using the flat sl st method or the method of your choice, sew the sides of the cardigan and the underside of the sleeve together on each side (see Figure 3).

    Figure 3
    Figure 3

    Fit Checkpoint: Try on your cardigan now to check the fit. Keep in mind the ribbing will add 2" (5 cm) to the sleeve cuffs and the bottom of cardigan, and about 1.5" (4 cm) to the cardigan circumference.

    FINISHING–SLEEVE RIBBING

    Use Ribbing crochet hook (or a hook size that meets the ribbing gauge) for all of the ribbing sections. Ribbing is added to the garment with the right side facing out.

    Setup: attach yarn at end of one sleeve near seam, ch 1, sc in first st, *sk st, sc in next st, repeat from * around cuff, sl st to first st, ch 9.

    Ribbing Row 1: yoSS in 2nd ch from hook and each ch across, sl st in next 2 sts at cuff. [8 yoSS]

    Ribbing Row 2: turn, sk the 2 sl st, yoSS BLO across to last st, yoSS in last st. [8 yoSS]

    Ribbing Row 3: ch 1 and turn, yoSS BLO across, sl st in next 2 sts at cuff. [8 yoSS]

    Repeat Ribbing Rows 2 and 3 until you reach Ribbing Row 1. Join using your method of choice (the flat sl st method was used in this sample).

    FINISHING–BOTTOM RIBBING

    Setup: attach yarn at bottom corner of one of the front panels, ch 9.

    Ribbing Row 1: yoSS in 2nd ch from hook and each ch across, sl st in next 2 sts along bottom of garment. [8 yoSS]

    Ribbing Row 2: turn, sk the 2 sl st along bottom, yoSS BLO across. [8 yoSS]

    Ribbing Row 3: ch 1 and turn, yoSSBLO across, sl st in next 2 sts along bottom of garment. [8 yoSS]

    Repeat Ribbing Rows 2 and 3 until you’ve worked around bottom of entire garment. At the end of the last row, sl st once into bottom corner of opposite front panel. Fasten off.

    FINISHING–CENTER RIBBING

    Before starting, use st markers to mark where you’d like the 3 buttons to go on the side of the right front panel (panel on the left when looking at garment). For the sample, buttons were placed at 9" (23 cm) from the top of the garment, in the center of the bottom ribbing, and then halfway between those two marks.

    Setup: attach yarn at the bottom corner of the left front panel when looking at the cardigan (right front panel when worn), or whichever side will allow you to work along the panel edge from bottom to top with the right side facing up, ch 7.

    Ribbing Row 1: yoSS in 2nd ch from hook and each ch across, sl st in next 2 row ends along the side of your work. [6 yoSS]

    Ribbing Row 2: turn, sk the 2 sl st along side of work, yoSS BLO across. [6 yoSS]

    Ribbing Row 3: ch 1 and turn, yoSS BLO across, sl st in next 2 row ends along the side of your work. [6 yoSS]

    Repeat Ribbing Rows 2 and 3 until you reach the first st marker.

    Buttonhole Row 1: sl st into the marked space, then when working back up your ribbing, yoSS
    BLO, sk 3, ch 3, yoSS BLO, yoSS in last st. [3 yoSS, 3 ch]

    Buttonhole Row 2: ch 1 and turn, yoSS BLO in each st or ch across to garment, sl st into next 2 st along the side of your work, turn. [6 yoSS]

    For the remainder of the ribbing, repeat Ribbing Rows 2 and 3 unless you are at a marked st for a buttonhole, in which you would repeat Buttonhole Rows 1 and 2 (for 3 total buttons).

    Fasten off.

    Sew buttons onto the ribbing along the right front panel (left when worn) to match buttonhole locations. Weave in all your ends.

    Golden Hour Cardigan


    The Fine Print

    Reprinted with permission from Tunisian Crochet Tops by Ashley Rivas. Page Street Publishing Co. 2025. Photo credit: Stephanie Guerrero. Prefer a paper copy? Get the book - linked above!

    Tunisian Crochet Tops by Ashley Rivas Review and Giveaway

    December 15, 2025 by Tamara Kelly 1 Comment

    Tunisian Crochet Tops by Ashley Rivas Review and Giveaway Tunisian Crochet Tops: 14 Beginner-Friendly Patterns for Colorful Sweaters, Tanks, and Tees by Ashley Rivas is a lovely new book that blends comfort and style! And not only do we have a giveaway, but I've also got an excerpt from the book to share - the Golden Hour Cardigan! If you'd like to "create timeless and gorgeous tops for everyday wear," then enter to win your own copy, right here on Moogly!

    Disclaimer: I was given a copy of this book for review; all opinions are my own. This post includes affiliate links. 

    Tunisian Crochet Tops Excerpt and Review

    Tunisian Crochet Tops by Ashley Rivas

    A Bit About the Author

    Author Ashley Rivas is the creator of Tiny Couch Crochet, and this is her debut book! Here's her author blurb:

    "Ashley is an independent crochet and Tunisian Crochet designer, and the creator of Tiny Crouch Crochet. She has always had a fondness for both math and art, and she is thrilled to have found an outlet that uses both. With a technical background in engineering and lifelong love of the arts, Ashley was able to turn her passions into designing crochet clothing that fits! She has written many beginner-friendly patterns in both traditional crochet and Tunisian crochet, which can be found on her website...

    Tunisian Crochet Tops by Ashley Rivas

    Ashley lives in California with her husband, Joe, son, Weston, and two pups, Scout and Dougie. Outside of crochet, she has a love for reading, baking, and deep diving into any and all craft and art forms. "

    And she was kind enough to share an expert from her book - the pattern for the Golden Hour Cardigan!

    Golden Hour Cardigan

    This pattern was designed by Ashley Rivas, and can be found in Tunisian Crochet Tops, copyright 2025! And because this is a full-length sweater pattern, I've decided to put it on a separate page here on Moogly - CLICK HERE to go to the Golden Hour Cardigan pattern - and keep scrolling to read the rest of the review and enter the giveaway!

    Golden Hour Cardigan

    My Peek Inside Tunisian Crochet Tops

    Ashley has put together a true beginner's book for Tunisian Crochet Tops! In the intro, she states that her goal with this book was to show that you can crochet "clothing-worthy drape with Tunisian crochet" - and I think she has succeeded!

    Tunisian Crochet Tops by Ashley Rivas

    There is a great section on Tunisian crochet basics, with super helpful pictures.

    Tunisian Crochet Tops by Ashley Rivas

    I was excited to see a page about stitch anatomy, pointing out exactly which loops are referred to in what way - I think this is where a lot of newbies get confused!

    Tunisian Crochet Tops by Ashley Rivas

    And of course, there are gorgeous patterns. Stripes, cables, cardigans, raglans, and cropped tanks - there's a lot here to explore, and a style to suit almost everyone.

    Tunisian Crochet Tops by Ashley Rivas

    With sizes ranging from XS to 5X, this is a book for nearly every crocheter who wants to make their own tops and sweaters with Tunisian  crochet!

    Tunisian Crochet Tops by Ashley Rivas

    Get your own copy of Tunisian Crochet Tops today!

    Purchase your own copy of this book on Amazon, or ask for it at your local bookseller!

    Tunisian Crochet Tops by Ashley Rivas

    The Tunisian Crochet Tops Giveaway

    The Tunisian Crochet Tops Giveaway is open in the US and Canada. The giveaway ends January 6, 2026, at 12:15am Central US time. To enter, use the Kingsumo form below. Only the email option is mandatory – all other tasks are optional, for bonus entries only.

    One winner will receive a paperback copy of Tunisian Crochet Tops, courtesy of Page Street Publishing. They will be notified by email.

    GOOD LUCK ALL!

    You can follow Moogly on YouTube, Facebook, Twitter, Pinterest, TikTok, and Instagram. Don’t forget to sign up for the free newsletter at the top of the page! And don't forget to enter all the other fab giveaways on Moogly! And if you'd like to share this post, there's a Pinterest image and sharing buttons below!

    Tunisian Crochet Tops by Ashley Rivas Review and Giveaway

    Shell Stitch Crochet Duster Tutorial

    December 12, 2025 by Tamara Kelly 2 Comments

    Shell Stitch Crochet Duster Tutorial

    The Shell Stitch Crochet Duster was designed with numerous options, from body length to sleeve style to pockets! It's practical, easy to wear, and perfect for every skill level. Follow along with the written pattern and learn how to crochet your own crochet cardigan with the video tutorials below!

    Disclaimer: This post includes affiliate links.

    Be sure to scroll down past the videos to get the links to the free pattern and supplies!

    Shell Stitch Crochet Duster Tutorial:

    How to Crochet the Shell Stitch Crochet Duster - Right-Handed

    Learn to Crochet the Shell Stitch Crochet Duster - Left-Handed

    As Seen in This Video (click each for more info!):

    The Free Pattern:

    Shell Stitch Crochet Duster

    The Supplies:

    US - L, 8.0 mm crochet hook - Lykke shown

    1340 - 2450 yards Katia Azteca (Aran; 53% wool, 47% acrylic; 3.5 oz)
    Colorway: Grey (7801) - 7(8, 10, 11, 13) balls

    Stitch Markers

    And here's a Pin for your Crochet Pinterest Board! Make sure you are following Moogly on Pinterest for all the best knit, crochet, and craft pins!

    Shell Stitch Crochet Duster Tutorial

    I hope you enjoy this tutorial for the Shell Stitch Crochet Duster! If this video doesn't answer all your questions, please ask in the comments below - I'm always happy to help.

    If you make this or any Moogly pattern, please tag me in your photos so I can see them too, @mooglyblog or #mooglyblog! Then send them to tamarakelly@mooglyblog.com to see them featured in a future Moogly email newsletter!

    Get Moogly on your favorite social media sites: YouTube, Facebook, Pinterest, Tik Tok, Bluesky, and Instagram! And sign up for the free newsletter at the bottom of the page so you don’t miss a thing! Thank you to Katia Yarns and Knitting Fever for providing the materials for this video.

    Red Truck Christmas Ornament

    December 11, 2025 by Tamara Kelly 4 Comments

    Red Truck Christmas Ornament

    If you love holiday crochet that is cute, quick, and giftable, the Red Truck Christmas Ornament Crochet Pattern checks every box. Designed to be small enough for any tree but detailed enough to stand out, this small ornament is made with Bernat Maker Minis and works up fast. It uses only a few yards of yarn, making it an excellent way to use up leftovers and turn them into something special. This red pickup truck with its festive tree adds the perfect touch of handmade nostalgia, and is a free crochet pattern on Moogly!

    Disclaimer: This post includes affiliate links; materials provided by Yarnspirations.

    Prefer an ad-free PDF? You've got options!

    Prefer the free blog version? Keep scrolling!

    Part of the 2025 Holiday Stashdown Crochet Along

    This is the 11th annual Holiday Stashdown, hosted on CAL the Central Facebook and Ravelry groups, and organized by Underground Crafter! Each of the patterns in this crochet along are made with 100 yards of yarn or less of each color used, and meant to work up quickly.

    How To Join the 2025 Holiday Stashdown CAL

    • Sign up for Crochet Along updates and the Underground Crafter newsletter to get regular updates, including links to new CAL patterns as they are released.
    • You can join in by crocheting the patterns as you have time.
    • Share your progress and post pictures of your finished projects. Tag your projects and posts #CALCentralCrochet and #HolidayStashdownCAL on all social media.
    • If you’d like to chat with other crocheters, join the CAL Central Crochet Facebook group, or visit this thread in the CAL Central Ravelry group.
    • By the end of the CAL, you’ll have up to 23 gifts and decorations for the winter holidays.

    Part of the 2025 Holiday Stashdown Crochet Along

    And I'm honored to have taken the second to last spot for the year! Be sure to head to Underground Crafter for links to all of the amazing projects  - and the past year's patterns as well!

    Red Truck Christmas Ornament

    Whether you hang it on your tree, add it to a garland, or use it as a gift topper, it adds a warm and wonderfully nostalgic touch. The bright red truck and little green tree bring instant holiday charm wherever you place it, making it a fun accent for wreaths, mantels, and special gifts. It is the kind of small, heartfelt detail that helps your seasonal decor feel personal, cozy, and full of cheer!

    Red Truck Christmas Ornament by Moogly


    Red Truck Christmas Ornament

    Add this pattern to your Ravelry Queue and Favorites

    US - G, 4.0 mm crochet hook - Susan Bates

    40 yards Bernat Maker Minis (#5 Bulky; 75% Cotton 25% Nylon; 500g/17.65 oz, 560 m/612 yds)
    Colors Used: Red, White, Green, Brown (10 yds or less of each used)

    Stitch Markers

    Fiberfill (very small amount, can use scrap yarn instead)

    Gauge: 4 sc = 1"

    Finished Size: approx 4" long x 2.5" tall excluding hanging loop

    Red Truck Christmas Ornament

    HELPFUL LINKS AND TUTORIALS

    Red Truck Christmas Ornament Tutorial

    Crochet Abbreviations

    Magic Circle

    LTR - Linked Treble Crochet

    BLO - Back Loop Only

    Whip Stitch Seaming

    NOTE

    As you assemble this piece, most of the ends will end up inside the ornament. After securing these ends, do not trim them off - stuff them into the ornament to save on stuffing!

    SPECIAL STITCH

    CSTR - Chainless Starting Treble Crochet: Pull up the loop on the hook to the height of a tr st. Secure the top of the loop with your finger on the hook, and yo with the loop itself twice. Insert the hook in the indicated st, yo and pull up a loop, [yo and pull through two loops] 3 times to finish the st. See a video tutorial for this stitch worked as a double crochet here.

    Red Truck Christmas Ornament Instructions

    Make the BODY of the truck with Red yarn 

    Row 1: Ch 5, skip the ch closest to the hook, sc in each rem ch across; turn. (4 sc)

    Rows 2 - 4: Ch 1, sc in each st across; turn.

    Rnd 5: Ch 1, sc in each st across, sc 4 along the sides of previous 4 rows, sc in each foundation chain, sc 4 along other side of previous 4 rows; join. (16 sc)

    Rnd 6: CSTR in the first st, ch 2, skip 2 sts, tr in next st, LTR in next 5 sts, ch 2, skip 2 sts, tr in next st, ch 4, skip 4 sts; join. (8 total tr and ltr)

    Rnd 7: Ch 1, sc in first tr st, sc in each of next 2 chs, sc in next tr, ch 14, skip 4 sts, sc in last ltr, sc in each of next 2 chs, sc in next tr, (sl st, CSDC) in next ch, dc in each of next 3 chs, work 2 sl st in post of last dc made; join to first sc of rnd. (8 sc, 4dc)

    Rnd 8: Ch 1, sc in 4 sc, sc in each ch, sc in next 4 sc, 2 sc in side of CSDC, sc in next 4 sts, sc in each sl st; join. (30 sc)

    Rnd 9: Ch 1, sc in each st around; join and finish off, set piece aside.

    Red Truck Christmas Ornament - BODY

    Make the BOTTOM of the truck with Red yarn

    Row 1: Ch 12, skip the ch closest to the hook, sc in each rem ch across; turn. (11 sc)

    Rows 2 - 4: Ch 1, sc in each st across; turn. After Row 4, finish off and set piece aside.

    Make the CAB insert with White yarn

    Rnd 1: Make a magic circle, working into the ring, ch 1, [sc 3, ch 2] 4 times; join. (12 sc)

    Rnd 2: Ch 1, [sc in next 3 sts, sc in ch-2 sp] 4 times; join. (16 sc)

    Rnds 3 - 7: Ch 1, sc in each st around; join. After Rnd 7, finish off and set piece aside.

    Make the TREE with Green yarn

    Rnd 1: Make a magic circle, ch 1, work 6 sc into the ring; join. (6 sts)

    Rnd 2: Working in the BLO, ch 1, [sc in the next st, 2 sc in the next st] 3 times; join. (9 sts)

    Rnd 3: Working in the BLO, ch 1, [2 sc in the next st, sc in the next 2 sts] 3 times; join. (12 sts)

    Rnd 4: Working in the BLO, ch 1, [sc in the next 3 sts, 2 sc in the next st] 3 times; join. (15 sts)

    Rnds 5 - 7: Working in the BLO, ch 1, sc in each st around; join. 

    Rnd 8: Skip the first st, sl st in the next 3 sts, BLO sc in the next 2 sts, BLO hdc in the next 3 sts, BLO sc in the next 2 sts, sl st in the rem 4 sts; join and finish off leaving a long tail for sewing, set piece aside.

    Red Truck Christmas Ornament - TREE and TIRES

    Make the TIRES with Brown yarn - Make 4

    1 Rnd: Make a magic circle, work 10 hdc into the ring; join and finish off leaving a long tail for sewing, set aside.

    Assembling the Ornament:

    Step 1: Sew the hdc sts in the last rnd of the TREE to the second row of one flat side of the CAB.

    Sew TREE to CAB

    Step 2: Insert CAB and TREE into BODY as shown below. Line up the CAB and the back of the TREE with the bottom of the BODY.

    Red Truck Christmas Ornament - assembly

    Step 3: Sew on the TIRES, going through both layers to secure the CAB and TREE in place.

    Red Truck Christmas Ornament - add tires

    Step 4 - Make Hanging Loop (optional): Cut a short length of green yarn, and fold in half. Tie a knot at the ends, and use a yarn needle to thread the loop through the top of the CAB and BODY above it.

    Step 5: Add a small amount of stuffing or scrap yarn to the inside of TREE, CAB, and between the CAB and the front hood of the BODY.

    Red Truck Christmas Ornament - stuffing

    Step 6: Sew the BOTTOM to the BODY using the whip stitch. Weave in ends.

    Red Truck Christmas Ornament - add bottom


    Need to Keep Your Fingers Moving?

    All done with the Shell Stitch Crochet Duster and looking for your next project? Check out the Moogly Free Patterns Page or Ravelry!

    Red Truck Christmas Ornament on Moogly

    If any Moogly pattern inspires you to make your own project, be sure to tag me @mooglyblog or #mooglyblog so I can check it out too!

    The Fine Print

    Follow Moogly on Facebook, Pinterest, TikTok, Bluesky, YouTube, and Instagram! Thank you to Yarnspirations for providing the materials shown in this post. Please do not reprint or repost this pattern. Please do link to this page to share this pattern with others. If you wish to make items for sale from this pattern or translate it to another language, please visit the About page for details. 

    Preppy Puppy Bandana

    December 10, 2025 by Tamara Kelly Leave a Comment

    Preppy Puppy Bandana

    Create a stylish Preppy Puppy Bandana with this easy crochet pattern. The pattern includes instructions for sizes S, M, L, and XL, and is perfect for customizing with your favorite colors! Dress your best friend for the holidays or any special occasion with this one-piece, seamless bandana. You can even make one for yourself to match!

    Disclaimer: This post includes affiliate links; this post is sponsored by Yarnspirations.

    Prefer an ad-free PDF? You've got options!

    Prefer the free blog version? Keep scrolling!

    Crochet for your pets!

    The Preppy Puppy Bandana is a beginner-friendly crochet pattern that's perfect for your puppies and your feline friends, too - well, at least those that will let you dress them! While there are 4 sizes listed, you can follow the instructions to make it fit a much wider variety of necks - just stop increasing when you have the size desired!

    Preppy Puppy Bandana

    The moss stitch is our stitch pattern of choice here, and it creates a lovely texture and movement in any number of colors. While it has great drape, it's also solid enough to add an applique if you'd like to personalize your pet's new scarf even further!

    Preppy Puppy Bandana


    Preppy Puppy Bandana

    Add this pattern to your Ravelry Queue and Favorites

    US - J, 6.0 mm crochet hook

    50-240 yds Lily Sugar’n Cream (4-worsted; 100% cotton, 120 yds/109 m, 2.5 oz/ 71 g)
    Color A: Red, 1 skein
    Color B: Overcast, 1 skein

    Stitch Markers

    Gauge: 14 sts by 14 rows (in stitch pattern)= 4” [10 cm]

    To Fit Size: S (M, L, XL) to fit neck circumference up to 9 (14, 17, 22)” [23, 35.5, 43, 56 cm], customizable

    Finished Measurements: Bandana is 9 (14, 17, 22)” [23, 35.5, 43, 56 cm] wide by 3.5 (7, 9.25, 11.5) ” [9, 18, 23.5, 29 cm] tall, not including ties

    Crochet Abbreviations

    NOTES

    Place st markers in the ch-2 or ch-3 that begins each row and in the last ch-1 sp of each row.

    Always work into the underside loop of the chain.

    Switch colors every two rows, carrying the yarn along the side.

    Preppy Puppy Bandana Instructions

    Row 1: Ch 7, skip the 2 chs closest to the hook, *sc in next st, ch 1, skip next st; repeat from * to last ch, (sc, ch 1, sc) in last ch; turn. (4 sc)

    Row 2: Ch 3, skip next sc, *sc in next ch-1 sp, ch 1, skip next sc; repeat from * across, (sc, ch 1, sc) in ch-2 sp; turn. (5 sc)

    Row 3: Ch 3, skip next sc, *sc in next ch-1 sp, ch 1, skip next sc; repeat from * across, (sc, ch 1, sc) in ch-3 sp; turn. (6 sc)

    Repeat Row 3 until the last row measures approx 9”(14”, 17”, 22”) across, ending on an even numbered row. (Approx 12 (24, 32, 40) rows)

    Finishing Rnd with Ties: *Ch 30, skip ch closest to hook, sc in next ch, hdc in next ch, dc in next ch, hdc in next ch, sc in next ch, sl st in next 24 chs;** working along the side, ^ch 1, skip side of next row, sc in next ch sp,^^ repeat from ^ to ^^to first row, [ch 1, skip next st, sc in next ch sp] twice, repeat from ^ to ^^ to last row, repeat from * to **; working along last row, ᵀsc in next ch sp, ch 1, skip next st, repeat from ᵀ across, join to last sl st of first tie and fasten off.


    Sniffing Out Your Next Project?

    All done with the Preppy Puppy Bandana and looking for your next pattern to make? Check out the Moogly Free Patterns Page or Ravelry!

    Preppy Puppy Bandana

    If any Moogly pattern inspires you to make your own project, and you post a photo on social media, be sure to tag me @mooglyblog or #mooglyblog so I can check it out too!

    The Fine Print

    Follow Moogly on Facebook, Pinterest, TikTok, Bluesky, YouTube, and Instagram! Thank you to Yarnspirations for providing the materials shown in this post. Thank you to Robyn Chaculla for tech editing this pattern. Please do not reprint or repost this pattern. Please do link to this page to share this pattern with others. If you wish to make items for sale from this pattern or translate it to another language, please visit the About page for details. 

    Farm Friends Crochet Book Review and Giveaway

    December 9, 2025 by Tamara Kelly 3 Comments

    Farm Friends Crochet Book Review and Giveaway

    Farm Friends Crochet: Supersize Amigurumi to Cuddle and Play by Kristi Simpson and Kimberly Simpson features 7 cute critters writ large! Take a peek inside below, and then enter to win your own copy, right here on Moogly!

    Disclaimer: I was given a copy of this book for review; all opinions are my own. This post includes affiliate links. 

    The Farm Friends Crochet Review

    A Bit About the Authors

    Farm Friends Crochet Book Review and Giveaway

    If you read or collect crochet books, you've probably come across Kristi Simpson before. In this book, she has enlisted the help of her daughter, Kimberly!

    "Driven by her love of yarn & crafts, Kristi's mission is to: Create Design & Inspire with a fresh and modern touch.  Kristi is a best selling Author/Designer and her work is/has been published in: Magazines (including several covers), Books, Kits, DVD's, Catalogs, Online Classes/Tutorials/Venues, and with many Yarn Companies. Kristi has hosted multiple chemo cap drives where over 2,000 hats have been donated! She is married with 4 children." And one of them is our co-author!

    Let's take a closer look at their newest book!

    Farm Friends Crochet Book Review and Giveaway

    Inside Farm Friends Crochet

    "Whether you're a beginner or an experienced crocheter, Farm Friends Crochet provides step-by-step instructions to create an adorable cast of farm friends, including Bob the Dog, Mela the Highland Cow, and Quackers the Duck. Crafted with bulky and super bulky yarn, these plush animals are designed for maximum squishiness, making them perfect for cuddling. With clear guidance on stitch techniques, gauge adjustments, and finishing touches, you'll have everything you need to bring these huggable creatures to life.

    More than just a pattern book, Farm Friends Crochet is packed with expert tips to help you master the art of amigurumi. Learn essential techniques like the magic ring, invisible joins, and strategic stuffing to create smooth, well-shaped animals with sturdy forms. The book also includes practical advice on stitch counting, placement markers, and safety precautions to ensure your creations are both beautiful and child-friendly. Each pattern is carefully designed for seamless construction, with most animals featuring a combined head and body for a more polished and professional finish.

    Get ready to stitch your way to a delightful barnyard collection!"

    Farm Friends Crochet Book Review and Giveaway

    So how big are they? As shown, the animals in Farm Friends Crochet measure 13 to 17 inches tall, with primarily 5-Bulky weight yarn. A US-J, 6mm hook keeps this fabric tight, so you can add safety eyes and stuffing. But of course, you can go even bigger by going bigger with the yarn! (Or smaller, with a DK or sport weight!)

    Farm Friends Crochet Book Review and Giveaway

    There are some great notes and tips up front, and a short but thorough section on stitches in the back - with lots of helpful pics! The patterns are written in US terms, and in standard pattern format rather than the abbreviated "amigurumi style." If you've got a little farmer in your life, this book is sure to help you put lots of smiles on their face!

    Farm Friends Crochet Book Review and Giveaway

    Get your own copy of Farm Friends Crochet today!

    Purchase your own copy of this book on Amazon, or ask for it at your local bookseller! And be sure to check out Kristi's other books too!

    Farm Friends Crochet Book Review and Giveaway Farm Friends Crochet Book Review and Giveaway Farm Friends Crochet Book Review and Giveaway

    The Farm Friends Crochet Giveaway

    The Farm Friends Crochet Giveaway is open in the US and Canada. The giveaway ends December 30, 2025, at 12:15am Central US time. To enter, use the Kingsumo form below. Only the email option is mandatory – all other tasks are optional, for bonus entries only.

    One winner will receive a paperback copy of Farm Friends Crochet, courtesy of Stackpole Books. They will be notified by email.

    GOOD LUCK ALL!

    You can follow Moogly on YouTube, Facebook, Twitter, Pinterest, TikTok, and Instagram. Don’t forget to sign up for the free newsletter at the top of the page! And don't forget to enter all the other fab giveaways on Moogly! And if you'd like to share this post, there's a Pinterest image and sharing buttons below!

    Farm Friends Crochet Book Review and Giveaway

    Speed Stripe Scarf

    December 5, 2025 by Tamara Kelly 5 Comments

    Speed Stripe Scarf

    Elevate your winter wardrobe with the Speed Stripe Scarf crochet pattern! This easy-to-follow pattern is perfect for beginners and works up fast, with a hidden keyhole for a variety of wearing options. Crafted with your favorite worsted or aran weight yarn, this scarf is cozy and soft, perfect for gifting as well as stashbusting. Get the free crochet pattern here on Moogly!

    Disclaimer: This post includes affiliate links; yarn provided by Yarnspirations.

    Prefer an ad-free PDF? You've got options!

    Prefer the free blog version? Keep scrolling!

    Formerly part of Stash Busting Quickies!

    You may have spotted this pattern before - I originally designed it for one of the Stash Busting Quickies collections I did with Marly Bird! It's been a few years now, and I've decided that it's time to share this pattern here on the blog as well!

    Speed Stripe Scarf

    Perfect for Winter Holiday Gifts

    Scarves make great gifts, as well as charity donations. And the Speed Stripe Scarf is designed to be easy to crochet, and easy to wear! Worked end to end, the rows fly by in a flash. A simple keyhole gives you even more wearable options - and the fringe means you don't even have to weave in any ends!

    Speed Stripe Scarf

    With written instructions as well as a chart, I hope you have fun making this easy crochet scarf pattern your own!

    Speed Stripe Scarf


    Speed Stripe Scarf

    Add this pattern to your Ravelry Queue and Favorites

    U.S. K - 6.5 mm

    400-500 yards Caron Big Donut O’Go (4/Worsted; 100% acrylic, 502 yds/459 m)
    Colorway Shown: Boston Cream

    Stitch Markers

    Gauge: 2 sts and 10 rows = 4" [10 cm] in main stitch pattern

    Size: 60” [152.5 cm] long x 10” [25.5] wide, excluding fringe

    HELPFUL LINKS AND TUTORIALS

    Crochet Abbreviations

    CSDC - Chainless Starting Double Crochet

    Dc2tog - Double Crochet Decrease

    NOTE

    When color changes are made, do NOT turn - be sure to read each line of instructions carefully.

    Special Stitch

    Cluster (dc2tog in same st) - yo and insert hook into indicated st, yo and pull up a loop, yo and pull through 2 loops, yo and insert hook in same st, yo and pull up a loop, yo and pull through 2 loops, yo and pull through last 3 loops to finish the stitch.

    Speed Stripe Scarf Chart Diagram

    Speed Stripe Scarf Diagram - Moogly

    Speed Stripe Scarf Instructions

    With first color, ch 181.

    Row 1 (RS): Sc in 2nd ch from hook, *ch 1, skip next ch, sc in next ch; repeat from * to last ch, sc in last ch; turn. (180 sts including chs)

    Row 2 (WS): CSDC in first sc, *cluster in next sc, ch 1, skip next ch-1 sp; repeat from * to last st, dc in last st; turn.

    Row 3 (RS): Ch 1, sc in first st, *sc in next ch-1 sp, ch 1, skip next cluster; repeat from * to last dc, sc in last dc; turn.

    Row 4 (WS): CSDC in first st, *ch 1, skip next ch-1 sp, cluster in next sc; repeat from * to last sc, dc in last sc; turn.

    Row 5 (RS): Ch 1, sc in first st, *ch 1, skip next cluster, sc in next ch-1 sp; repeat from * to last st, sc in last st. Fasten off this color, do NOT turn.

    Row 6 (RS): With right side facing, join next color with sc to first st of previous row, *sc in next ch-1 sp, ch 1, skip next sc; repeat from * to last sc, sc in last sc; turn.

    Row 7 (WS): CSDC in first st, *ch 1, skip next ch, cluster in next st; repeat from * to last st, dc in last st; turn.

    Row 8 (RS): Ch 1, sc in first st, *ch 1, skip next sc, sc in next ch-1 sp; repeat from * to last st, sc in last st; turn.

    Row 9 (WS): CSDC in first sc, *cluster in next sc, ch 1, skip next ch-1; repeat from * to last st, dc in last st; turn.

    Row 10 (RS): Ch 1, sc in first st, *sc in next ch-1 sp, ch 1, skip next sc; repeat from * to last st, sc in last st. Fasten off this color, do NOT turn.

    Row 11 (RS): With right side facing, join next color with sc to first st of previous row, [ch 1, skip next sc, sc in next ch-1 sp] 58 times, ch 17, skip 9 sc, sc in next ch-1 sp, *ch 1, skip next sc, sc in next ch-1 sp; repeat from * to last st, sc in last st; turn.

    Rows 12–15: Repeat Rows 2–5. Fasten off this color, do NOT turn.

    Row 16 (keyhole row, RS): With right side facing, join next color with sc to first st of previous row, sc in next ch-1 sp, [ch 1, skip next sc, sc in next ch-1 sp] 58 times, ch 17, skip 9 sc, *sc in next ch-1 sp, ch 1, skip next sc; repeat from * to last st, sc in last st; turn.

    Rows 17–20: Repeat Rows 7–10. Fasten off this color, do NOT turn.

    Row 21 (RS): With right side facing, join next color with sc to first st of previous row, *ch 1, skip next sc, sc in next ch-1 sp; repeat from * to last st, sc in last st; turn.

    Rows 22–25: Repeat Rows 2–5. Fasten off.

    Fringes (optional)
    Create 6 fringes at each short end of scarf as follows:

    Cut one 12 in (30.5 cm) strand of yarn in each color for each fringe.
    Fold the fringe at center. Use hook to pull folded center of fringe through edge st, then pull ends of fringe through the resulting loop, and pull until tight.
    Trim evenly after all fringes are attached.


    Racing Off to the Next Pattern?

    Looking for your next project? Check out the Moogly Free Patterns Page or Ravelry!

    Speed Stripe Scarf

    If any Moogly pattern inspires you to make your own project, and you post a photo on social media, be sure to tag me @mooglyblog or #mooglyblog so I can check it out too!

    The Fine Print

    Follow Moogly on Facebook, Pinterest, TikTok, Bluesky, YouTube, and Instagram! Thank you to Yarnspirations for providing the materials shown in this post. Thank you to Robyn Chachula for tech editing this pattern. Written pattern copyright Tamara Kelly 2025, all rights reserved. Please do not reprint or repost this pattern. Please do link to this page to share this pattern with others. If you wish to make items for sale from this pattern or translate it to another language, please visit the About page for details. 

    della Q Glow Collection Vinyl Buddy Case Giveaway

    December 4, 2025 by Tamara Kelly Leave a Comment

    della Q Glow Collection Vinyl Buddy Case Giveaway

    Premium bag and accessories maker della Q is debuting The Glow Collection - "Where function meets a flash of magic!" They have taken the most popular cases and accessories and added bright, shimmering vinyl! The whole collection is stunning, but for this giveaway, we're taking a special look at the Vinyl Buddy Case. Take a closer look and enter to win your own below!

    Disclaimer: This giveaway features items from Local Crafts. This post includes affiliate links.  

    Canvas + Vinyl = Stunning, Exciting, Practical

    The new della Q Glow Collection is a bunch of gorgeous cases and notions, in 3 stunning colorways - Starlight, Sunset, and Twilight! They combine the strong, modern canvas della Q cases are known for, with splashes of shiny iridescent vinyl.

    della Q Glow Collection Vinyl Buddy Case Giveaway

    In this collection, you'll find the Crochet Hook Stitch Case, Buddy Case, Train Case, Scissor Pocket (with scissors), and Round Mini Zip. I've gotten to see most of these in person, and I'm excited to have added the Vinyl Buddy Case in Starlight to my della Q collection!

    della Q Glow Collection Vinyl Buddy Case Giveaway

    The della Q Glow Collection Vinyl Buddy Case

    "Shine on with this compact crafting sidekick, now reimagined in sleek canvas and iridescent vinyl. Strong interior magnets keep your stitch markers, needles, and notions right where you need them, while the soft yet structured frame keeps everything safe on the go. Perfectly color-coordinated with the GLOW Train Case, this little Buddy is ready to travel, organize, and turn heads!"

    della Q Glow Collection Vinyl Buddy Case Giveaway

    When looking through all the items in the Glow Collection, it's easy to get overwhelmed - so many great options, and so many gorgeous colors! Do you mix it up or make a matching set? I don't think there are any wrong answers here.

    della Q Glow Collection Vinyl Buddy Case Giveaway

    The Buddy Case is a super handy addition to any project bag or case - and one I immediately fell in love with! It measures 5" L x 3.5" W x 2" D - compact but mighty. The magnetic walls keep all my yarn needles in place, and there's a ton of room for all the other bits and bobs.  The sturdy construction and strong snap mean it will last a long time - and I do plan to put it through its paces in 2026!

    della Q Glow Collection Vinyl Buddy Case Giveaway

    Ready to see it in action? Watch this space for a video later today! 

    Are you ready to get your own della Q The Glow Collection goodies? CLICK HERE to shop the entire collection!

    The della Q Glow Collection Vinyl Buddy Case Giveaway

    The della Q Glow Collection Vinyl Buddy Case Giveaway is open to US addresses only. The giveaway ends December 16, 2025, at 12:15am Central US time. To enter, use the Kingsumo form below.

    We will be giving away one della Q Glow Collection Vinyl Buddy Case in the winner's choice of available colors, and the winner will be notified by email!

    Enter the Giveaway Here:

    Good luck all! You can follow Moogly on YouTube, Facebook, Twitter, Pinterest, TikTok, and Instagram, and don’t forget to sign up for the free newsletter at the bottom of the page! Thank you to Local Crafts for sponsoring this giveaway!

    Pin It For Later!

    della Q Glow Collection Vinyl Buddy Case Giveaway

    Crochet and Catch Up with Moogly - December 3, 2025

    December 3, 2025 by Tamara Kelly Leave a Comment

    Crochet and Catch Up with Moogly - December 3, 2025

    The leftovers are long gone, holiday crafting is in full swing, and it’s time for another Crochet and Catch Up on Moogly! Let’s settle in for cozy yarn chat and a look at all the latest projects, patterns, and handmade happenings. Whether you’re sipping cocoa, coffee, or a warm winter brew, grab your WIP and join me for a festive early-winter hangout and a peek at what’s coming next on Moogly!

    Disclaimer: This post may contain affiliate links. Live videos are unscripted, unedited, and occasionally weird; all opinions are my own. 

    Crochet and Catch Up with Moogly

    Going LIVE on Facebook and YouTube, at 11am CT!

    Click here to Like the Moogly Facebook Page and get notified when I go live!

    Click here to Subscribe to the Moogly YouTube Page and get notified when I go live!

    Moogly Community Group on Facebook

    What I'm Wearing: Shell Stitch Crochet Duster

    MooglyCAL2025 Block 24 - Polly Plum

    Red Heart With Love

    What Yarn Will I Be Using for MooglyCAL2026? Brava Worsted!

    Corner Window Rectangle Tutorial

    Shell Stitch Crochet Duster - NEW FREE PATTERN!

    Katia Azteca

    Jimmy Beans Wool Blanket Kit Club 2025 Update

    Warm Up and Win the Holiday Crochet Hat Template Giveaway

    Darn Good Yarn DIY Watermelon Amigurumi Kit Giveaway

    della Q x TL Yarn Crafts Vivid Rose Collection Maker's Mini Messenger Giveaway

    Twice Sheared Sheep 2026 VIP Surprise Box Club Membership Giveaway

    Knit Picks and WeCrochet Yarn Ball Winder Giveaway

    Tunisian Crochet Sweater Collection Giveaway

    Sneak Peek: My new holiday ornament pattern coming next week, featuring Bernat Maker Minis!

    Moogly Around the Web - and the World!

    Mark your calendar for the next Moogly Crochet and Catch Up on December 17, 2025 at 11am CT - and a very special live announcing the MooglyCAL2026 on the 31st!

    Want to see me in person in 2026?

    Janury 29 - February 1: Up first I'll be going to Vogue Knitting Live in NYC - who's up for a meetup?

    March 6 - 7: This spring, you are invited to join me at Stitch Up Chicago, where I'll be one of your hosts!

    If you have a LYS or event you'd like me to teach at in 2026, or if you would like me to teach an online class to your group or guild, please do reach out!

    Have a wonderful day all - see you to crochet and catch up next time! And before you go, here's a Pin for today's post, so you can add it to your favorite Pinterest boards! We appreciate (and need) your shares on all our posts.

    Crochet and Catch Up with Moogly - December 3, 2025

    Follow Moogly on YouTube, Bluesky, Facebook, Pinterest, TikTok, and Instagram! 

    Warm Up and Win the Holiday Crochet Hat Template Giveaway

    December 2, 2025 by Tamara Kelly 1 Comment

    Warm Up and Win the Holiday Crochet Hat Template Giveaway

    Welcome to the Warm Up and Win the Holiday Crochet Hat Template Giveaway! This is prime hat-making season, and this versatile hat template set is just what you need for fast gifts and cozy makes that fit right the first time - every time. Enter below and get ready to stitch something warm and wonderful!

    Disclaimer: This giveaway is sponsored by babé crochet and Moogly. This post includes affiliate links.  

    If you haven't heard of these before, you're in for a treat! If you have, you can scroll to the bottom of this post to enter the giveaway - or go ahead and order your own set from Etsy!

    What Are Izzy Crochet Hat Templates?

    These Hat Templates are clever tools that make it simple to crochet hats in all sizes – no tape measure needed! Just grab the template for the size you need, check your work against the template as you go, and you’ll know exactly when to stop increasing and start working even. They’re reusable, durable, and designed to make your hat-making experience faster, easier, and way more fun.

    No more worrying if your hat will fit – with these templates, you’ll get it right the first time. Each set includes multiple sizes from newborn to adult large, so you can create hats for anyone and everyone! Whether you’re making gifts, charity donations, or stocking up for your next craft market, these are a game-changer for hat makers of every level.

    Babé Crochet Full Set of Hat Templates

    Why You’ll Love Them

    Perfect Fit Every Time – from newborn to adult, you can crochet with confidence.

    Saves Time – skip the math and focus on the fun part: the stitches!

    Reusable and Eco-Friendly – one set will last for a lifetime of hat making.

    Great for All Skill Levels – whether you’re new to crochet or a seasoned pro, templates take the guesswork out.

    Simply put, they make beanie-making fast, fun, and foolproof—so you can spend less time measuring, and more time stitching.

    How To Use the Izzy Crochet Hat Templates

    Just grab the babé crochet hat template for the size you want to make and you'll get the right fit, every time, no math needed! Work a flat circle in the stitch pattern of your choice, until the curve matches the curve at the top of the template.

    Making a Bucket Hat with babé crochet Hat Templates

    Then, work evenly until you've matched the length of the template. Prefer a slouchy beanie or folded brim? Work a little longer!

    Babé Crochet Hat Giveaway - sneak peek of Hygge Cloud Hat on Moogly

    Get Your Own Hat Templates Here!

    I like these so much I decided to become an approved reseller for the US and Canada! Head to the Moogly Etsy Shop to pick up your own set!

    🛒 Click here to shop the babé crochet Hat Templates on Etsy!

    For the rest of the world and to check out printable PDF options, visit babé crochet!

    I can’t wait to see all the amazing hats you’ll create with these templates. Whether you’re whipping up a warm beanie for yourself, a slouchy hat for a friend, or a stack of donations for charity, these tools will help you get the perfect size every single time.

    Think of them like a trusty ruler, tape measure, and fit model all in one, customized specifically for hats. No matter the season, you'll be glad to have these on hand. One set will last a lifetime - and make a lifetime supply of hats that fit!

    The December 2025 babé crochet Hat Templates Giveaway

    The December 2025 babé crochet Hat Templates Giveaway is open WORLDWIDE (void where prohibited). The giveaway ends December 9, 2025, at 12:15am Central US time. To enter, use the Kingsumo form below.

    We will be giving away THREE sets of babé crochet Hat Templates, and the winners will be notified by email. The first winner will receive a physical set, and the second and third winners will each receive a PDF set!

    Enter the Giveaway Here:

    This giveaway is now complete. Unfortunately, I messed up the giveaway form, and long story short, it will not properly display the winners. The 3 winners are: emivory, minimomginny, and donna274! Congrats to you all - check your email! 😉

    Good luck all! You can follow Moogly on YouTube, Facebook, Twitter, Pinterest, TikTok, and Instagram, and don’t forget to sign up for the free newsletter at the bottom of the page! 

    Pin It For Later!

    Warm Up and Win the Holiday Crochet Hat Template Giveaway

    Shell Stitch Crochet Duster

    November 28, 2025 by Tamara Kelly 21 Comments

    Shell Stitch Crochet Duster

    Wrap yourself in everyday warmth and ease with the Shell Stitch Crochet Duster, featuring Katia Azteca! Long lines, tapered sleeves, and handy pockets make it as practical as it is beautiful. Perfect for every skill level, it's a versatile layering piece you'll reach for again and again. Make your own with the Moogly crochet pattern below!

    Disclaimer: This post includes affiliate links; this post is sponsored by Katia Yarns.

    Prefer an ad-free PDF? You've got options!

    Prefer the free blog version? Keep scrolling!

    Ready for Winter - and Your Special Touch!

    Lightweight enough to wear indoors, warm enough to wander out into the world, and stylish enough to turn a simple outfit into something special - that's the Shell Stitch Crochet Duster! Pick your size based on the fit you desire, and make the sleeves in your favorite style and length.

    Shell Stitch Crochet Duster

    Pockets? Only if you want, and right where you want them. You'll end up with that perfect blend of comfort, flow, and polish. Cozying up at home or heading out into the world, this duster moves with you, wraps around you, and becomes an instant favorite. Katia Azteca keeps you motivated with lots of color changes and beautiful thick and thin effect.

    Shell Stitch Crochet Duster

    This pattern features a double shell stitch pattern through the body, for texture and breathability. Then, the sleeves are made in simple double crochet - for warmth and everyday ease. Whether you’re making it for yourself, gifting it to someone special, or adding a standout piece to your handmade wardrobe, the Shell Stitch Crochet Duster is a project you’ll remember - and a finished piece you’ll reach for again and again.

    Shell Stitch Crochet Duster


    Shell Stitch Crochet Duster

    Add this pattern to your Ravelry Queue and Favorites

    US - L, 8.0 mm crochet hook - Lykke shown

    1340 - 2450 yards Katia Azteca (Aran; 53% wool, 47% acrylic; 3.5 oz)
    Colorway: Grey (7801) - 7(8, 10, 11, 13) balls

    Stitch Markers

    Gauge: 12 sts (3 double V reps) = 6"; 8 rows = 7" (this is laid flat - the garment will grow longer from gravity while wearing it)

    Sizes: XS/S(M/L, XL/2X, 3X/4X, 5X/6X) - M/L shown
    Actual Bust/Hip Measurement: 44"(52", 60", 64", 72")

    Shell Stitch Crochet Duster

    HELPFUL LINKS AND TUTORIALS

    Shell Stitch Crochet Duster Tutorial

    Crochet Abbreviations

    CSDC - Chainless Starting Double Crochet

    STDC - Standing Double Crochet

    Mattress Stitch Seaming

    BLO - Back Loop Only

    NOTES

    The body of the pattern is made in one piece and then seamed along the sides. Then, we add the sleeves and some edging.

    There are many opportunities here for customization. If you'd like a vest, leave off the sleeves. Or if you'd prefer short sleeves, stop whenever you have the length desired. Instructions for both straight and tapered sleeves are included (tapered shown). If you want it longer or shorter, add or remove rows from the body - just make sure to remove or add them to each front section as well.

    The sleeves are worked in turned rounds. This keeps the seam straight under the arm. Use a stitch marker in the first and last stitch of each round for easier crocheting.

    Stitch Substitutions: Instead of CSDC, you can chain 3 or use another double crochet turning chain substitute. To avoid the STDC, join with a slip stitch and chain 3 or use your preferred double crochet turning chain substitute.

    Shell Stitch Crochet Duster

    Shell Stitch Crochet Duster Instructions

    Starting at the back bottom edge…

    Row 1: Ch 44(52, 60, 64, 72), dc in the 5th ch from the hook (skipped sts count as dc and skip 1), dc in same ch, 2 dc in next ch, skip 2 ch, *2 dc in each of the next 2 chs, skip 2 chs; rep from * across, dc in the last st; turn. (42(50, 58, 62, 70) sts)

    Row 2: CSDC in first st, skip next st, *2 dc in each of the next 2 sts, skip 2 sts; rep from * across, dc in the last st, turn.

    Rows 3 - 38(40, 41, 43, 44): Rep Row 2. Do not break the yarn.

    Split for the first front panel…be sure to follow the instructions for your size!

    Size XS/S(M/L, XL/2X) ONLY:

    Row 1: CSDC in first st, skip next st, *2 dc in each of the next 2 sts, skip 2 sts; rep from * 3(4, 5) times, 2 dc in next st, dc in next 2 sts, turn, leaving rem sts unworked. (21(25, 29) sts)

    Row 2: CSDC in first st, dc in next st, 2 dc in next st, *skip 2 sts, 2 dc in each of next 2 sts; rep from * until 2 sts rem, skip the next st, dc in last st; turn.

    Row 3: CSDC in first st, skip next st *2 dc in each of the next 2 sts, skip 2 sts; rep from until 3 sts rem, dc in next st, dc in each of last 2 sts; turn.

    Rows 4 - 38(40, 41): Repeat Rows 2 and 3, break yarn. Go to “Crochet the Other Front Panel” Instructions.

    Size 3X/4X(5X/6X) ONLY:

    Row 1: CSDC in first st, skip next st, *2 dc in each of the next 2 sts, skip 2 sts; rep from * 6(7) times, 2 dc in next st, turn, leaving rem sts unworked. (31(35) sts)

    Row 2: (CSDC, dc) in first st, *skip 2 sts, 2 dc in each of next 2 sts; rep from * until 2 sts rem, skip the next st, dc in last st; turn.

    Row 3: CSDC in first st, skip next st, *2 dc in each of the next 2 sts, skip 2 sts; rep from *until 3 sts rem, skip 2 sts, 2 dc in last st, turn.

    Rows 4 - 43 (44): Repeat Rows 2 and 3, break yarn. Go to “Crochet the Other Front Panel” Instructions. 

    Crochet the Other Front Panel

    Size XS/S(M/L, XL/2X) ONLY:

    Row 1: STDC in next unworked st of last row before the split, dc in next st, 2 dc in next st, *skip 2 sts, 2 dc in each of next 2 sts; rep from * until 2 sts rem, skip next st, dc in last st; turn. (21(25, 29) sts)

    Row 2: CSDC in first st, dc in next st, 2 dc in next st, *skip 2 sts, 2 dc in each of next 2 sts; rep from * until 2 sts rem, skip the next st, dc in last st; turn.

    Row 3: CSDC in first st, skip next st *2 dc in each of the next 2 sts, skip 2 sts; rep from until 3 sts rem, dc in next st, dc in each of last 2 sts; turn.

    Rows 4 - 38(40, 41): Repeat Rows 2 and 3. Do not break yarn. Go to “Edging” Instructions.

    Size 3X/4X(5X/6X) ONLY:

    Row 1: (STDC, dc) in next unworked st of last row before the split, *skip 2 sts, 2 dc in each of next 2 sts; rep from * until 2 sts rem, skip next st, dc in last st; turn. (31(35) sts)

    Row 2: (CSDC, dc) in first st, *skip 2 sts, 2 dc in each of next 2 sts; rep from * until 2 sts rem, skip the next st, dc in last st; turn.

    Row 3: CSDC in first st, skip next st, *2 dc in each of the next 2 sts, skip 2 sts; rep from *until 3 sts rem, skip 2 sts, 2 dc in last st, turn.

    Rows 4 - 43(44): Repeat Rows 2 and 3. Do not break yarn. Go to “Edging” Instructions.

    Edging [RS]:

    Ch 1, sc evenly around entire piece working 1 st in each st, 2 sc in the side of each row, sc2tog where front panels meet at the back of the neck, and ch 2 at each corner; join and break yarn.

    Seam the Sides to Create the Sweater Shape

    Fold the piece in half so that the two front pieces (after the split) are on top of the back (before the split).
    Use the mattress stitch, sew 24” seam on each side, starting at the ch-2 corners at the bottom. Adjust as needed for desired fit.

    Add Tapered Sleeves (Optional - Shown)

    Rnd 1 [RS]: Join with sc to first st after the seam, at the bottom of the arm opening, sc in next 9 sts, hdc in next 10 sts, dc in each st until 20 sts rem, hdc in next 10 sts, sc in last 10 sts; join and turn.

    Rnd 2: Ch 1, sc in first 5 sts, hdc in next 10 sts, dc in each st until 15 sts rem, hdc in next 10 sts, sc in last 5 sts; turn.

    Rnds 3 - 17: CSDC in first st, dc2tog, dc around until 3 sts rem, dc2tog, dc in last st; join and turn.

    Rnds 18 - 21: Ch 1, fpdc in first st, blo hdc in next st; rep from * around, join, do not turn,

    Rnd 22: Ch 1, hdc in blo of each st around; join and break yarn.

    Add Straight Sleeves (Optional - Not Shown)

    Rnd 1 [RS]: Join with sc to first st after the seam, at the bottom of the arm opening, sc in next 9 sts, hdc in next 10 sts, dc in each st until 20 sts rem, hdc in next 10 sts, sc in last 10 sts; join and turn.

    Rnd 2: Ch 1, sc in first 5 sts, hdc in next 10 sts, dc in each st until 15 sts rem, hdc in next 10 sts, sc in last 5 sts; turn.

    Rnds 3 - 17: CSDC in first st, dc in each rem st around; join and turn.

    Rnds 18 - 21: Ch 1, fpdc in first st, blo hdc in next st; rep from * around, join, do not turn,

    Rnd 22: Ch 1, hdc in blo of each st around; join and break yarn.

    Add the Front Opening Border/Hem

    Rnd 1 [RS]: Join with dc in blo of any st at bottom of sweater, dc in blo of each st around opening including the chs at the seams, working 5 dc in each ch-2 sp at the front bottom corners; join.

    Rnds 2 and 3: Ch 1, hdc in blo of first st, fpdc in next st, *hdc in blo of next st, fpdc in next st; rep from * around working 3 sts in the center st at each corner, maintaining pattern; join.

    Rnd 4: Ch 1, hdc in blo of each st around, working 3 hdc in the center st at each corner; join and break yarn.

    Shell Stitch Crochet Duster

    Make and Add the Pockets (2) (Optional)

    Row 1: Ch 20, dc in the 5th ch from the hook (skipped sts count as dc and skip 1), dc in same ch, 2 dc in next ch, skip 2 ch, *2 dc in each of the next 2 chs, skip 2 chs; rep from * until 2 chs rem, skip next ch, dc in the last ch; turn. (18 sts)

    Rows 2 – 9: CSDC in the first st, skip next st, *2 dc in each of the next 2 sts, skip 2 sts; rep from * until 2 sts rem, skip next st, dc in the last st, turn.

    Edging: Ch 1, sc evenly around entire piece, ch 2 at the corners; join to first st of edging and break yarn leaving a long tail. Use long tail to sew pockets to the sweater in the desired location - shown centered on each front panel, with bottom of pocket approximately 6 rows of shell stitch up from the hem. (Note - in retrospect, I would have located the pockets just a bit higher, about 7 rows up from the hem.)


    Need to Keep Your Fingers Moving?

    All done with the Shell Stitch Crochet Duster and looking for your next project? Check out the Moogly Free Patterns Page or Ravelry!

    Shell Stitch Crochet Duster

    If any Moogly pattern inspires you to make your own project, and you post a photo on social media, be sure to tag me @mooglyblog or #mooglyblog so I can check it out too!

    The Fine Print

    Follow Moogly on Facebook, Pinterest, TikTok, Bluesky, YouTube, and Instagram! Thank you to Katia Yarns for providing the materials shown in this post. Please do not reprint or repost this pattern. Please do link to this page to share this pattern with others. If you wish to make items for sale from this pattern or translate it to another language, please visit the About page for details. 

    MooglyCAL2025 Block 24

    November 26, 2025 by Tamara Kelly 2 Comments

    MooglyCAL2025 Block 24

    MooglyCAL2025 Block 24 is a wild and wonderful new design by Polly Plum! The Sizzle Square is an exuberant block that's sure to add life and movement to your project. Get all the details for this free crochet along, and the free pattern link below!

    Disclaimer: This post includes affiliate links; materials provided by Yarnspirations.

    Just getting started with the Moogly Crochet Along? CLICK HERE for the intro info!

    Want to get help with the patterns, show off, and CAL with others? CLICK HERE for the Facebook group

    Like to see all the squares visually, all at once? CLICK HERE for the Pinterest Board!

    Introducing the MooglyCAL ONLY Newsletter! Get it Now for MooglyCAL2026!

    The 2025 Moogly CAL Schedule

    This is the final square for this year! Click on any of the past squares to go to their posts. Now, you'll have all of December to finish it up and get ready for the holidays. ♥

    January High Tide Square and Christine Quilt Block
    February Snow Covered Garden Square and Solace Square
    March Hibiscus Afghan Square and Graduated Cables Square
    April Baby Bobbles Blanket Square and X Mix Square
    May Berries and Cream Blanket Square, Celtic Afghan Square, and Parchment Flower Crochet Square
    June Equinox Granny Square and Amalia Granny Square
    July Wild Jasmine Crochet Square and Keep It Simple Square
    August Seven Deadly Sines Square and Daylily Crochet Square
    September Geometric Eye Crochet Blanket Square and Brick Mosaic Crochet Afghan Square
    October Sweetcorn Motif Crochet Block, Ric Rac Afghan Square, and Blueberry Pie Granny Square
    November Mosaic Ziggy Zag Square and THIS POST

    *****

    Block #24:

    Sizzle Square

    by Polly Plum

    MooglyCAL2025 Block 24

    Above, you can see the square that Justina made in 5 colors! Below is my CAL square, in my 5 colors of Red Heart With Love - Merlot, Mallard, Boysenberry, Cornsilk, and Black.

    MooglyCAL2025 Block 24

    Details for MooglyCAL2025 Block 24

    My Notes: The Sizzle Square is designed for us by Justina on Polly Plum! This is a truly unique creation, a one-of-a-kind, center-out square with 3D "sizzles"! This pattern will keep you engaged and entertained, with new stitch patterns nearly every round. The final round is easy to adjust for size, and the square as a whole works up super quickly. While this one is different, it's not difficult - just take your time and you can do it!

    Helpful Links and Tutorials: Crochet Abbreviations, Magic Circle, Standing dc, Standing sc, Post stitches, Decreases, BLO, Treble, and seamless join.

    Sizing: I got to 12" as written. But everyone's gauge is different, so be sure to measure as you go! Learn how to adjust for size HERE to ensure all your squares are the same size. Remember that the 12″ is measured across and up and down, not diagonally/corner to corner.

    What I Did:

    I used a Susan Bates US-J, 6.0 mm Twist and Lock hook, and Red Heart With Love, and my color scheme was as follows (see pics for more info on placement):

    Rnds 1 and 2: Black
    Rnd 3:
    Cornsilk
    Rnd 4:
    Mallard
    Rnd 5:
    Boysenberry
    Rnds 6 - 8:
    Merlot
    Rnds 9 and 10:
    Boysenberry
    Rnd 11:
    Cornsilk
    Rnds 12 - 14:
    Black

    This square required a strong blocking so I used the wet blocking method and used a bit of steam as well.

    The Pattern:

    CLICK HERE FOR THE PATTERN FOR BLOCK #24

    PLEASE NOTE: The designers all hold individual copyrights for their patterns. They may choose to make videos of their patterns, and you can certainly request them from the designers. In addition, there are videos linked in the notes for specific stitches and techniques that may help you with the pattern. They may offer paid PDFs of the pattern, but have agreed to leave it up for free on their website or on Ravelry for as long as possible.

    Show Off Your Squares - And Finished Blankets!

    If you share your photos on social media, be sure to use the hashtags #mooglycal2025  and tag me @mooglyblog so I can see them too! And don't forget to share them in the MooglyCAL Facebook Group! Thank you all for CAL-ing with me!

    And finally, here's a pin of MooglyCAL2025 - Block 24 for your own Pinterest boards!

    MooglyCAL2025 Block 24

    You can follow Moogly on YouTube, Facebook, Twitter, Pinterest, TikTok, and Instagram, and don't forget to sign up for the free newsletter at the bottom of the page! Thank you to Yarnspirations for providing the materials for this crochet along.  

    Darn Good Yarn DIY Watermelon Amigurumi Kit Giveaway

    November 24, 2025 by Tamara Kelly Leave a Comment

    Darn Good Yarn DIY Watermelon Amigurumi Kit Giveaway

    Amigurumi kits are fun to make - and perfect for gifting! And the Darn Good Yarn DIY Watermelon Amigurumi Kits are ideal for both crocheters and knitters. I've got two of them in my stash, and I'm giving them away to two lucky winners here on Moogly - one each! Enter below!

    Disclaimer: This giveaway features items from Darn Good Yarn and shipping by Moogly. This post includes affiliate links.  

    Darn Good Yarn - and So Much More!

    Darn Good Yarn has been around since 2008, a woman-owned and family-operated business focused on fair trade and recycled materials. "Around the world, Darn Good Yarn employs people who have been marginalized or mistreated by society. With our co-ops, these artisans can find sustainable, safe, fair, and year-round employment to support themselves and their families."

    Darn Good Yarn DIY Watermelon Amigurumi Kit Giveaway

    While they do sell gorgeous Sari Skirts, clothes, and accessories, they do primarily sell yarn! And they have lots of yarns to choose from!

    Darn Good Yarn DIY Watermelon Amigurumi Kit Giveaway

    And that includes the Yarn-a-Melon – DIY Crochet or Knit Kits! I snagged two of these kits when I taught for the Crochet Guild of America at their retreat this past summer, and I've been waiting for the perfect time to share them with all of you!

    Darn Good Yarn DIY Watermelon Amigurumi Kit Giveaway

    Inside each kit you'll find:

    • Both knit and crochet patterns, all the yarn necessary to complete the project, stuffing, and a darning needle.
    • It also includes a set of 4 (3mm) double pointed knitting needles & a C/2 (3mm) crochet hook
    • Enough to make 2 delicious slices!

    Darn Good Yarn DIY Watermelon Amigurumi Kit Giveaway

    And you can follow along with the video tutorial if needed too! As I write this, it looks like they might be clearancing them out - so if you need more for stocking stuffers, I'd act fast!

    The Darn Good Yarn DIY Watermelon Amigurumi Kit Giveaway

    The Darn Good Yarn DIY Watermelon Amigurumi Kit Giveaway is open to US addresses only. The giveaway ends December 8, 2025, at 12:15am Central US time. To enter, use the Kingsumo form below.

    We will be giving away TWO Darn Good Yarn DIY Watermelon Amigurumi Kits - one per winner - and the winners will be notified by email.

    Enter the Giveaway Here:

    If the form below does not load properly, please CLICK HERE to enter the giveaway.

    Good luck all! You can follow Moogly on YouTube, Facebook, Twitter, Pinterest, TikTok, and Instagram, and don’t forget to sign up for the free newsletter at the bottom of the page! 

    Pin It For Later!

    Darn Good Yarn DIY Watermelon Amigurumi Kit Giveaway

    Corner Window Rectangle Tutorial

    November 20, 2025 by Tamara Kelly Leave a Comment

    Corner Window Rectangle Tutorial

    The Corner Window Rectangle was designed for Warm Up America! This 7” x 9” piece is perfect for their Section Drives, and part of the new Pattern Bundle available on Warm Up America! - and I'm sharing both the pattern and video tutorials here, so we can get the maximum amount of donations for this fantastic cause!

    Disclaimer: This post includes affiliate links.

    Be sure to scroll down past the videos to get the links to the free pattern and supplies!

    Corner Window Rectangle Tutorial:

    How to Crochet Corner Window Rectangle - Right-Handed

    Learn to Corner Window Rectangle - Left-Handed

    As Seen in This Video (click each for more info!):

    The Free Pattern:

    Center Window Rectangle

    The Supplies:

    US – H, 5.00mm hook - Susan Bates

    58 yds Red Heart Super Saver 
    Color Shown: Papaya Pooling

    Stitch Markers

    And here's a Pin for your Crochet Pinterest Board! Make sure you are following Moogly on Pinterest for all the best knit, crochet, and craft pins!

    Center Window Rectangle Tutorial

    I hope you enjoy this tutorial for the Corner Window Rectangle! If this video doesn't answer all your questions, please ask in the comments below - I'm always happy to help.

    If you make this or any Moogly pattern, please tag me in your photos so I can see them too, @mooglyblog or #mooglyblog! Then send them to tamarakelly@mooglyblog.com to see them featured in a future Moogly email newsletter!

    Get Moogly on your favorite social media sites: YouTube, Facebook, Pinterest, Tik Tok, Bluesky, and Instagram! And sign up for the free newsletter at the bottom of the page so you don’t miss a thing! Thank you to Yarnspirations and Furls for providing the materials for this video.

    Crochet and Catch Up with Moogly - November 19, 2025

    November 19, 2025 by Tamara Kelly Leave a Comment

    Crochet and Catch Up with Moogly - November 19, 2025

    Thanksgiving is on the horizon, the holiday lights are starting to twinkle, and it’s time for another Crochet and Catch Up on Moogly! Let’s dive into cozy yarn talk, crafty gratitude, and all the latest projects, patterns, and handmade happenings. Whether you’re sipping spiced cider, coffee, or a mug of something warm, grab your WIP and join me for a comfy late-fall hangout and a peek at what’s coming next on Moogly!

    Disclaimer: This post may contain affiliate links. Live videos are unscripted, unedited, and occasionally weird; all opinions are my own. 

    Crochet and Catch Up with Moogly

    Going LIVE on Facebook and YouTube, at 11am CT!

    Click here to Like the Moogly Facebook Page and get notified when I go live!

    Click here to Subscribe to the Moogly YouTube Page and get notified when I go live!

    Moogly Community Group on Facebook

    What I'm Wearing: Cosmos Cardigan

    MooglyCAL2025 Block 23  - Juniper & Oakes

    Red Heart With Love

    Perfect Point Cowl Tutorial

    Designer Showcase: Nicki's Homemade Crafts

    Katia Flowers Forever Blanket Crochet Along Final Update

    Jimmy Beans Wool Blanket Kit Club 2025 Update

    della Q x TL Yarn Crafts Vivid Rose Collection Maker's Mini Messenger Giveaway

    Twice Sheared Sheep 2026 VIP Surprise Box Club Membership Giveaway

    Knit Picks and WeCrochet Yarn Ball Winder Giveaway

    Tunisian Crochet Sweater Collection Giveaway

    Reversible Crochet Sweaters Giveaway

    Sneak Peek: Updating you on my current WIP! Featuring Katia Azteca!

    Moogly Around the Web - and the World!

    Finally, mark your calendar for the next Moogly Crochet and Catch Up on December 3, 2025 at 11am CT! If you have a LYS or event you'd like me to teach at in 2026, or if you would like me to teach an online class to your group or guild, please do reach out!

    Have a wonderful day all - see you to crochet and catch up next time! And before you go, here's a Pin for today's post, so you can add it to your favorite Pinterest boards! We appreciate (and need) your shares on all our posts.

    Crochet and Catch Up with Moogly - November 19, 2025

    Follow Moogly on YouTube, Bluesky, Facebook, Pinterest, TikTok, and Instagram! 

    della Q and TL Yarn Crafts Vivid Rose Maker's Mini Messenger Giveaway

    November 18, 2025 by Tamara Kelly 1 Comment

    della Q and TL Yarn Crafts Vivid Rose Maker's Mini Messenger Giveaway

    Now this is a fabulous collab! Premium bag maker della Q has partnered with Toni Lipsey and TL Yarn Crafts to create a gorgeous custom line of bags, all in bright and beautiful Vivid Rose! There is a whole variety of styles, but for this giveaway, we're taking a special look at the Maker's Mini Messenger! Take a closer look and enter to win your own below!

    Disclaimer: This giveaway features items from Local Crafts. This post includes affiliate links.  

    della Q and TL Yarn Crafts Vivid Rose Maker's Mini Messenger Giveaway

    Bright and Beautiful Vivid Rose

    Toni Lipsey is the genius behind TL Yarn Crafts, a much loved crocheter "known for bold color, modern design, and empowering creativity!" She has partnered with della Q to create a whole line of bags in gorgeous Vivid Rose, including 10 iconic della Q styles.

    della Q and TL Yarn Crafts Vivid Rose Maker's Mini Messenger Giveaway

    della Q bags are gorgeous to look at, wonderful to use, and have a whole bunch of special features!

    Hidden Yarn Cutter - Now this is sneaky! When you unsnap the zipper pull it reveals a small hidden yarn cutter. This is a new upgrade, and safer for our hands! You'll find this feature in the Backpack, Midi Backpack, Tote, Rucksack, and Mini Messenger.

    della Q and TL Yarn Crafts Vivid Rose Maker's Mini Messenger Giveaway

    Yarn Feeder - More than a bag, it's a yarn bowl on the go! Thread your yarn through the grommet for smooth, happy stitching! This feature is included in the Backpack, Midi Backpack, Tote, Rucksack, and Mini Messenger.

    della Q and TL Yarn Crafts Vivid Rose Maker's Mini Messenger Giveaway

    Stitch Marker Pin - This stylish accessory isn't just for looks! The removable pin holds your stitch markers ready to go - along with your other charms! Three stitch markers are included to get you started. This is found in the Backpack, Midi Backpack, Tote, Rucksack, and Mini Messenger.

    della Q and TL Yarn Crafts Vivid Rose Maker's Mini Messenger Giveaway

    Darning Needle - Because who doesn't need another yarn needle! Tucked into the pocket of every bag, you'll appreciate it as soon as you need it!

    Dot Journal - Oh, you think you'll remember the way you did that row when you get home? We've all made that mistake. This little notebook is perfect for jotting down your notes and tweaks  - and your yarn shopping list!

    della Q and TL Yarn Crafts Vivid Rose Maker's Mini Messenger Giveaway

    I've Got a Messenger For You!

    I got to take a closer look at the della Q and TL Yarn Crafts Vivid Rose Maker's Mini Messenger - and I'm in love! It's got all the great features listed above, and it's just a great everyday size. There are tons of pockets for all your bits and bobs, and could easily become not just a project bag, but your everyday purse!

    della Q and TL Yarn Crafts Vivid Rose Maker's Mini Messenger Giveaway

    While it's called a Mini Messenger, it's not a tiny bag - just smaller than most of their other bags! Measuring 8"(W) x 14"(H) x 4"(D), it's ideal for travel - local or far. It's lightweight and water-repellent, made of waxed canvas with full grain leather trim and antique bronze hardware. The 41.5" long strap can swap sides, so you can wear this bag in a bunch of different ways - left or right, front or back!

    della Q and TL Yarn Crafts Vivid Rose Maker's Mini Messenger Giveaway

    I have managed to collect a few della Q bags, and I'm so impressed with the quality of each and every one. This one includes a carrying handle at the top, and have I mentioned the pockets? There is the exterior front zip pocket, a hidden snap pocket on the back, and two main zip compartments with lots of interior pockets!

    della Q and TL Yarn Crafts Vivid Rose Maker's Mini Messenger Giveaway

    Ready to see it in action!


    View this post on Instagram


    A post shared by Tamara Kelly (@mooglyblog)

    Are you ready to get your own della Q and TL Yarn Crafts Vivid Rose bag? CLICK HERE to shop the entire collection!

    The della Q and TL Yarn Crafts Vivid Rose Maker's Mini Messenger Giveaway

    The della Q and TL Yarn Crafts Vivid Rose Maker's Mini Messenger Giveaway is open to US addresses only. The giveaway ends December 16, 2025, at 12:15am Central US time. To enter, use the Kingsumo form below.

    They will be giving away one della Q and TL Yarn Crafts Vivid Rose Maker's Mini Messenger Bag, and the winner will be notified by email!

    Enter the Giveaway Here:

    If the form below does not load properly, please CLICK HERE to enter the giveaway.

    Good luck all! You can follow Moogly on YouTube, Facebook, Twitter, Pinterest, TikTok, and Instagram, and don’t forget to sign up for the free newsletter at the bottom of the page! Thank you to Local Crafts for sponsoring this giveaway!

    Pin It For Later!

    della Q and TL Yarn Crafts Vivid Rose Maker's Mini Messenger Giveaway

    Twice Sheared Sheep 2026 VIP Surprise Box Club Membership Giveaway

    November 17, 2025 by Tamara Kelly Leave a Comment

    Twice Sheared Sheep 2026 VIP Surprise Box Club Membership Giveaway

    It's that time of year! We start thinking about what we'll be giving as gifts to others - and what we want to receive! The Twice Sheared Sheep 2026 VIP Surprise Box Club Membership is a premium gift for someone very special - or the most special person of all, you! ♥ See what it's all about, and then enter to win your own membership, to give or to keep, right here on Moogly!

    Disclaimer: This giveaway is sponsored by Twice Sheared Sheep. This post includes affiliate links.  

    Get The VIP Treatment All Year Long!

    You are important, and you deserve nice things. And the Surprise Boxes from Twice Sheared Sheep are VERY nice indeed! When you sign up for the VIP Surprise Box Club, you'll get three gift boxes a year. Each surprise gift box will contain items worth at least $140 and is guaranteed to include the following:

    • 8 unique full-sized presents
    • 1 skein of wool or wool blend yarn
    • 2 brand new, never-before-seen Twice Sheared Sheep goodies
    • 5 other beautiful and useful notions you'll use all year long!

    Twice Sheared Sheep 2026 VIP Surprise Box Club Membership Giveaway

    What's better than getting beautiful boxes of yarn and notions, carefully curated by experts, several times a year? I don't know if it can be outdone, but it CAN be enhanced!

    What Else Is Included In Your VIP Membership?

    As a VIP club member, you ALSO receive:

    • $766 value for only $310!
    • 3 Surprise gift boxes (one sent in each month of March, June, and September) - $420 value
    • Exclusive Q&A class with Dawn - $100 value
    • 3 Seasonal challenges with prizes for completing each one - $30 value
    • 6 Club only free patterns (1 knit and 1 crochet for each of the 3 seasons) - $36 value
    • $60 off our 2026 Advent Box (if bundled with your membership)
    • VIP early access to all collection launches
    • VIP early access and 10% off Summer Camp signups - $120 value
    • End of the year club only Zoom party and awards ceremony

    Twice Sheared Sheep 2026 VIP Surprise Box Club Membership Giveaway

    A Year-Long Adventure For Both Knitters and Crocheters

    Here's the road map - I mean Treasure Map! - for yarny fun!

    Twice Sheared Sheep 2026 VIP Surprise Box Club Membership Giveaway

    Both knitters and crocheters will love the VIP surprise boxes, and there's only one difference between the crochet and knit versions - only 1 item will be different to accommodate crochet better! So, if you do both, they recommend getting the Knit Box. They will allow you to "add on" any crochet-only items to Knit Boxes a few weeks before they ship out each gift box! That said, please note that these boxes will include wool, and there are no substitutions.

    Twice Sheared Sheep 2026 VIP Surprise Box Club Membership Giveaway

    And if you've done this club before, don't let that stop you from joining in again! While some items may be similar to last year, there promise there will be a much wider variety in the boxes than in any year they have done before! They are doing their best to "knock your socks off with the value!"

    Twice Sheared Sheep 2026 VIP Surprise Box Club Membership Giveaway

    The opportunity to join the 2026 VIP Surprise Box Club Membership ends on January 2nd, and there is no later enrollment (and they may sell out)! The first goodies go out in January, so CLICK HERE if you want to secure your spot now! 

    Want to see inside a 2025 VIP Surprise Box? Watch this!

    View this post on Instagram

    A post shared by Tamara Kelly (@mooglyblog)

    The 2026 VIP Surprise Box Club Membership Giveaway

    The Twice Sheared Sheep 2026 VIP Surprise Box Club Membership Giveaway is open Worldwide (void where prohibited). The giveaway ends December 15, 2025, at 12:15am Central US time. To enter, use the Kingsumo form below. By entering this giveaway, you are signing up for the Twice Sheared Sheep mailing list. 

    We will be giving away one Twice Sheared Sheep 2026 VIP Surprise Box Club Membership, and the winner will be notified by email.

    Enter the Giveaway Here:

    If the form below does not load properly, please CLICK HERE to enter the giveaway.

    Good luck all! You can follow Moogly on YouTube, Facebook, Twitter, Pinterest, TikTok, and Instagram, and don’t forget to sign up for the free newsletter at the bottom of the page! Thank you to babé Crochet for sponsoring this giveaway!

    Pin It For Later!

    Twice Sheared Sheep 2026 VIP Surprise Box Club Membership Giveaway

    MooglyCAL2025 Block 23

    November 13, 2025 by Tamara Kelly Leave a Comment

    MooglyCAL2025 Block 23

    MooglyCAL2025 Block 23 is an exciting new design by Erin Toews on Juniper and Oakes! The Mosaic Ziggy Zag Square is a beautiful piece of mosaic crochet that's perfect for stitchers of every skill level. Get all the details for this free crochet along, and the free pattern link below!

    Disclaimer: This post includes affiliate links; materials provided by Yarnspirations.

    Just getting started with the Moogly Crochet Along? CLICK HERE for the intro info!

    Want to get help with the patterns, show off, and CAL with others? CLICK HERE for the Facebook group

    Like to see all the squares visually, all at once? CLICK HERE for the Pinterest Board!

    Introducing the MooglyCAL ONLY Newsletter! Get it Now for MooglyCAL2026!

    The 2025 Moogly CAL Schedule

    Our last square will debut on November 26 - the day before American Thanksgiving! Then you'll have all of December to finish it up and get ready for the holidays. ♥

    January High Tide Square and Christine Quilt Block
    February Snow Covered Garden Square and Solace Square
    March Hibiscus Afghan Square and Graduated Cables Square
    April Baby Bobbles Blanket Square and X Mix Square
    May Berries and Cream Blanket Square, Celtic Afghan Square, and Parchment Flower Crochet Square
    June Equinox Granny Square and Amalia Granny Square
    July Wild Jasmine Crochet Square and Keep It Simple Square
    August Seven Deadly Sines Square and Daylily Crochet Square
    September Geometric Eye Crochet Blanket Square and Brick Mosaic Crochet Afghan Square
    October Sweetcorn Motif Crochet Block, Ric Rac Afghan Square, and Blueberry Pie Granny Square
    November THIS POST and the 26th

    *****

    Block #23:

    Mosaic Ziggy Zag Square

    by Juniper and Oakes

    MooglyCAL2025 Block 23

    Above, you can see the square that Erin made in 2 colors! Below is my CAL square, in 4 of my colors of Red Heart With Love - Mallard, Boysenberry, Cornsilk, and Black - I ran out of room for Merlot this time!

    MooglyCAL2025 Block 23

    Details for MooglyCAL2025 Block 23

    My Notes: The Mosaic Ziggy Zag Square is designed for us by Erin Toews on Juniper and Oakes! This is a beautiful mosaic crochet square worked from the center out. It's a beautiful example of the overlay mosaic technique, and a great way to try it out if you're new to mosaic! You can create this amazing design with super simple stitches - it's all chains, single crochet, and double crochet. The trick is where you work those stitches - in the front or back loop! Video tutorials are linked below - you can do this, even if you're newer to crochet! Be sure to measure as you go with this one - you may need to eliminate rows. But this is very easy to do with this pattern, at pretty much any point!

    Helpful Links and Tutorials: Crochet Abbreviations, Magic Circle, FLO and BLO, and seamless join.

    Sizing: My gauge was very different from the designer's, so I skipped Rounds 19 through 23, and finished with Round 24 as written - that got me to 12 inches. But everyone's gauge is different, so be sure to measure as you go! Learn how to adjust for size HERE to ensure all your squares are the same size. Remember that the 12″ is measured across and up and down, not diagonally/corner to corner.

    What I Did:

    I used a Susan Bates US-J, 6.0 mm Twist and Lock hook, and Red Heart With Love, and my color scheme was as follows (see pics for more info on placement):

    Color B: Black
    Rnds 1 - 5:
    Cornsilk
    Rnds 7 - 11:
    Boysenberry
    Rnds 13 - 17:
    Mallard
    Rnds 19 - 23:
    Skipped for Size
    Rnd 24: Black

    This square barely required a mild blocking, so I used the wet blocking method

    The Pattern:

    CLICK HERE FOR THE PATTERN FOR BLOCK #23

    PLEASE NOTE: The designers all hold individual copyrights for their patterns. They may choose to make videos of their patterns, and you can certainly request them from the designers. In addition, there are videos linked in the notes for specific stitches and techniques that may help you with the pattern. They may offer paid PDFs of the pattern, but have agreed to leave it up for free on their website or on Ravelry for as long as possible.

    Show Off Your Squares!

    If you share your photos on social media, be sure to use the hashtags #mooglycal2025  and tag me @mooglyblog so I can see them too! And don't forget to share them in the MooglyCAL Facebook Group! Thank you all for CAL-ing with me!

    And finally, here's a pin of MooglyCAL2025 - Block 23 for your own Pinterest boards!

    MooglyCAL2025 Block 23

    You can follow Moogly on YouTube, Facebook, Twitter, Pinterest, TikTok, and Instagram, and don't forget to sign up for the free newsletter at the bottom of the page! Thank you to Yarnspirations for providing the materials for this crochet along.  

    Nicki's Homemade Crafts: Designer Showcase

    November 12, 2025 by Tamara Kelly 1 Comment

    Nicki's Homemade Crafts: Designer Showcase

    This Designer Showcase features Nicki's Homemade Crafts! Nicole consistently shares free, high-quality crochet tutorials, patterns, and tips that empower crocheters of all skill levels. I'm excited to share more of her work with you here, including five of her free crochet patterns!

    Disclaimer: This post contains affiliate links.

    A Bit About the Designer

    Nicole's designs are colorful, fun, and full of life! Here's a bit about Nicole Riley, the designer behind Nicki's Homemade Crafts, in her own words:

    Nicki's Homemade Crafts: Designer Showcase
    "When I was a teen, my grandma taught me how to knit, which inspired me to try crocheting — but I wasn’t successful. After a few years away, focusing on other crafts, as well as track and field and volleyball in high school, I returned to yarn crafts in college. That’s when I finally learned the difference between UK and US crochet terms and realized why it didn’t work out before. My love for yarn and chatting with my grandma about it never left me; it only grew stronger.

    In 2016, I began designing and publishing my first crochet patterns as a hobby, and by 2019, I became a full-time designer. Coming from a crafty family, my creativity blossomed as I continued to design and crochet. I often find inspiration in everyday machine-made products, reimagining them through yarn.

    But my biggest inspiration comes from the crochet community — especially the members of The Crochet Club™ (TCC™), our membership of nearly 1,000 crocheters.

    I design patterns based on ideas and requests provided by TCC™ members, which I teach LIVE each week. We also meet twice a month on Zoom, chatting about crochet, bonding, and building lasting friendships. The TCC™ community also inspires many of my eBooks — over 36 self-published so far — covering everything from 900+ Crochet Tips to Mosaic Crochet, Tunisian Crochet, Moving Hats, and more.

    To connect with crocheters even more, I host various crochet-alongs throughout the year — monthly Mystery CALs, bi-monthly LIVE CALs, and our annual Mosaic Blanket CAL.

    I also love collaborating with other designers through our bi-monthly crochet pattern bundles, which usually include 30–40 designers.

    With over 800 published patterns, Nicki’s Homemade Crafts™ is a place where every crocheter can find something they’ll love to make."


    Nicki's Homemade Crafts' Most Important Links:

    • Facebook
    • Instagram
    • TikTok
    • YouTube
    • Threads
    • Ravlery
    • Pinterest
    • Etsy

    Here are 5 wonderful crochet pattern freebies from Nicki's Homemade Crafts!

    Nicki's Homemade Crafts: Designer Showcase

    5 Free Crochet Patterns on Nicki's Homemade Crafts

    Click on the names of the patterns you like to go to their pattern pages, and click on the yarn to grab the yarn!

    1. Christmas Mosaic Crochet Blanket - featuring Premier Yarns Anti-Pilling Yarn
    2. Crochet Flower Blanket Bouquet - featuring WeCrochet Brava Yarn
    3. Crochet Turtle Dove Pattern - featuring Premier Yarns Minikins Yarn
    4. No Sew Crochet Loaf Cat - featuring Ella Rae Cuddle Yarn
    5. Pop Up Moving Crochet Elf Hat - featuring Premier Pixie Dust Brights Yarn
    Thank you so much to Nicki's Homemade Crafts for being featured in the Moogly Designer Showcase! Be sure to save this pin to your crafty Pinterest board so you can find it later!

    Nicki's Homemade Crafts: Designer Showcase

    Are you a designer interested in being featured in a Moogly Designer Showcase? Send me an email at tamarakelly@mooglyblog.com ♥

    Get Moogly on your favorite social media sites: YouTube, Facebook, Twitter, Pinterest, Instagram, and TikTok so you don't miss a thing! 

    « Previous Page
    Next Page »
    Tamara Kelly of Moogly

    Moogly is world-famous for fresh. modern, and approachable crochet designs - as well as a little knitting and crafting here and there. On Moogly, you'll find several new free patterns every month, top quality video tutorials, giveaways, and more!

    More about Moogly →

    Popular

    • MooglyCAL2026 Block 21
      MooglyCAL2026 Block 21
    • Crochet and Catch Up with Moogly - October 14, 2026
      Crochet and Catch Up with Moogly - October 14, 2026
    • Seamless Crochet Sweaters Review and Giveaway
      Seamless Crochet Sweaters - Review and Giveaway
    • Ghost Treat Basket Tutorial
      Ghost Treat Basket Tutorial
    gosadi
    I'm a Craftsy Instructor. Click to see my classes.
    I Like Crochet


    Footer

    ↑ back to top

    About

    • About
    • Privacy Policy

    Newsletter

    Contact

    Email Moogly

    As an Amazon Associate I earn from qualifying purchases.
    Copyright © 2026 Mooglyblog.com