Disclaimer: This post includes affiliate links.
The Moogly Afghan Crochet-a-long has everyone working in squares! And whether you're following along or not, if you've made an afghan square, you may have been left wondering why your project doesn't look picture perfect. The answer is blocking! And here's one way to do it!
Before I tell you how to wet block a square, let me tell you why! Blocking relaxes and resets the stitches, setting them just where you want them. It gives the blocked item a more finished, professional look. And it gets the item to just the right size, stretching and relaxing the pieces to be right where you want them - important when you're making an afghan and want all the stitches the same size!
There are a couple different methods for blocking, and everyone has their favorites. You can do wet blocking, which I'll show you below, or steam blocking - there's a fantastic tutorial for that at Crochet Kitten! If you have a steamer, you can try one block with steam and one block with wet blocking, and decide which one you like best. You could even try killing the squares - but that will reduce the springiness and loft of the fabric, and it's totally permanent - I wouldn't recommend it for afghan squares.
If you don't have a steamer, or want to preserve maximum loft in your yarn, you'll want to try wet blocking!
How to Wet Block Afghan Squares
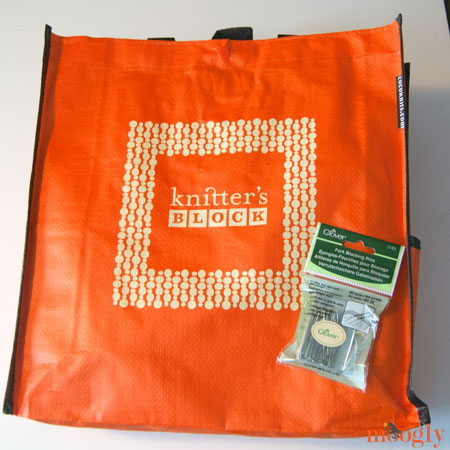
- Set up your Supplies and Work Area: You'll need rust-proof pins, a ruler or tape measure, and something to pin to. This could be a bath towel, a clean bit of carpet (in a low traffic area!), or you can use interlocking foam squares that are made for the purpose.I purchased this Knitter's Block kit from my local yarn store, Knit & Knot! If you don't have a LYS, you can find blocking mats on Amazon, where you can also pick up these Clover Fork Blocking Pins. I cannot say enough good things about these pins - they make blocking SO much easier!
 You'll need to set up an area that's at least 14" x 14" so you have room to set up your 12" block with extra left over.
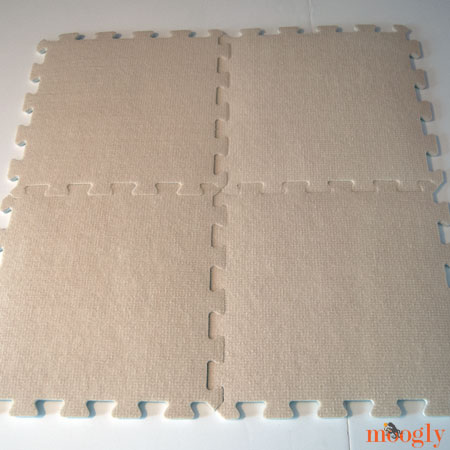
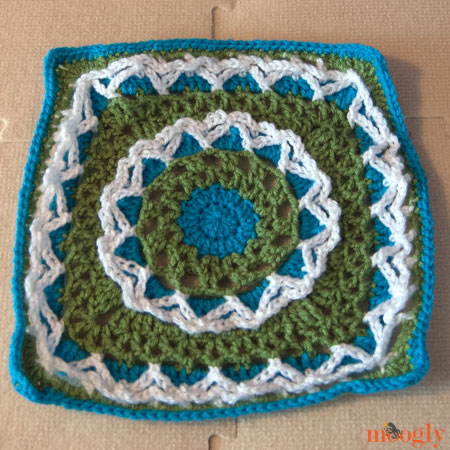
- Prep the Square: This is my Anticipation Mystery Square (Block #1 from the CAL), before I did anything to it - I didn't even try to smooth it out for this photo, just let it do it's thing. Not terrible, but it could use some work!
 So for step 2, take the square to the sink and get it really soaked with cold water. Then squeeze out as much of the water as you can, gently - no wringing or stretching! You might not be able to tell, but this this is super wet now! To speed up drying time, you can press it in a bath towel - though that can squish the details a bit, so don't overdo it.
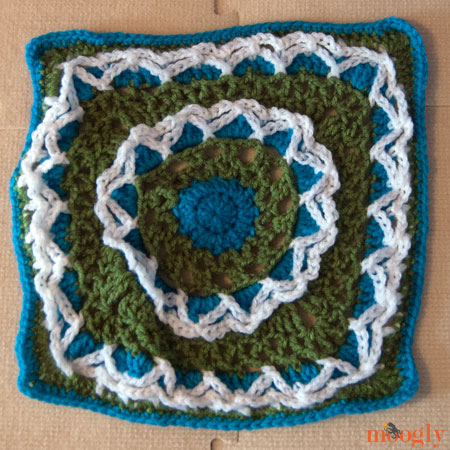
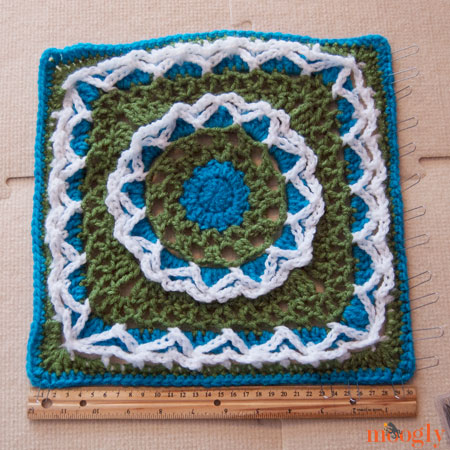
- Block the First Edge: Set the ruler along one side, and use your pins to pin it in a straight line, exactly 12" wide (or however big you want your square to be).

- Block the Second Edge: For something like a thread snowflake or doily, where you want sharp, tight edges and points, you'd move to the opposite side. For an afghan square, move to the left or right, keeping the corner at a 90 degree angle.
- Block the Rest of the Square: Keep going around the square, using the ruler and pins to create as perfect a square as you can.
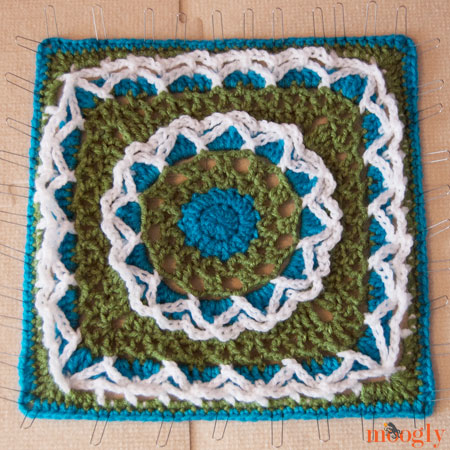
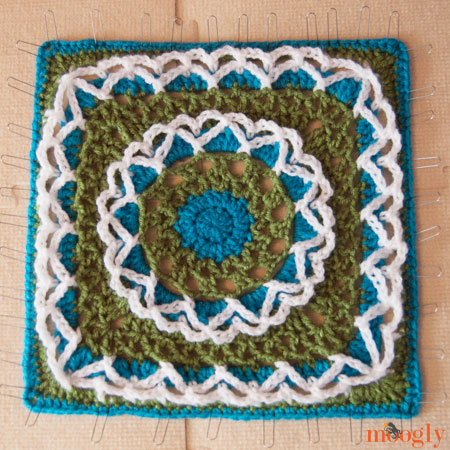
- Finger Block the Details: Not every square will have surface details, but for those that do, you can often move them into place with just your fingers, as I did below. If they are being stubborn, a few more pins to hold them in place will work. If you look closely at the photos above and below, you'll see the difference!
- Let It Dry: Walk away for about 24 hours - more or less depending on humidity. Just let it air dry!
- Unpin and Done! That's all there is to it!

And here's another idea sent in by Moogly reader Jody Wentzel - and it's a good one! Thanks Jody!
I was trying to figure out how to block, and what would work best for me. I watched a couple of videos, but didn’t want to have to go to the trouble of measuring, etc. to make everything straight.
One day right after I had wrapped a bunch of presents, it came to me. The grid that is on the back of a lot of wrapping paper would work great so people wouldn’t have to measure.
Ok, but the paper would get wet. How to solve that problem? My solution: The cheapest clear shower curtain from Walmart, about $2.
So here is what I do. I use a cheap puzzle mat (seen on youtube video, not my idea), cover it first with the wrapping paper grid, then with the shower curtain, pin those down, and then pin my project in the middle and spray them with water, blot, and then let it dry.It’s so easy to get straight lines that way! No, you can’t use steam or “kill” the acrylic, but it’s an easy method nonetheless.
Have you tried wet blocking afghan squares before? What about other items you've made? I use the same technique for baby sweaters and other items - often without the pins, just wetting and shaping them by hand. I find it makes a world of difference in how the finished item looks, and it's way easier than you might think! If I hadn't been stopping to take photos, I would've been done in under 5 minutes. I hope you can use this technique to make your own crochet and knit squares picture perfect too.

Susie says
I know this is about squares but I have another blocking question. I recently made a pair of adorable crochet cowboy boots. When I was done, they're cute, but for someone who paid for them and the just didn't look professional enough to me because some of the stitches seemed to have minds of their own. Can you "block" something like booties?
Tamara Kelly says
Absolutely Susie! Get the booties wet, squeeze out what you can by hand (gently!) and stuff them with plastic grocery bags, shaping as you go. Let them dry, et voila! 😀
Vanessa says
I wet paper towel and stuff the boots/slippers and shape them. Then let them dry until the paper towel is completely dry, about 24 hours. Works wonderfully.
RB says
What kind of yarn did you use here? I know that people tend to have Very Strong Opinions about whether or not you can block acrylic yarn, In your opinion, would this method work for acrylic too?
Thank you!
Debra bell says
The only kind of yarn I find this doesn't work well on is wool or heavy wool blends. I have always blocked this way.
Tamara Kelly says
This was Lion Brand Vanna's Choice - 100% acrylic! 😀
Patrice says
Wasn't sure you could wet block acrylic. Thought you'd need steam, i.e., heat, for the fiber to relax. I just knitted the Lichen Shawl (it's on Ravelry) with Red Heart Super Saver, put it in the washer and dried it with a fabric softener sheet. This softened and loosened the fabric very nicely, but the ends are still curly. I'd rather wet block them because I don't want to accidentally kill the fiber with a steam iron.
Tamara Kelly says
Steam might be a good choice for curly ends, but you do want to be careful. The link to Crochet Kitten really is excellent for steam blocking! 🙂
Tricia says
I use a similar method but I eyeball the measurements and rely on my seaming to get things together. Instead of running the project under water I pin it and then spray it with water from a spray bottle. It's worked really well for me. Thanks for the tips, I definitely want some blocking squares and those pins are awesome!
Tamara Kelly says
😀 Everyone who blocks has their own methods I think - as long as it works, it's all good!
Lori thompson says
Thanks so much for this help information, Tamara! I'm going to go look for one of those blocking kits rightnow! Just a quick question. When you wash the afghan, after it's all been completed, will the blocks lose their shape again, or would you have to maybe block the entire afghan?
Tamara Kelly says
The square-ishness should be held in place with the other blocks and border. The little details you might want to use a misting spray and reset once it's back on the bed. 🙂
karen says
I blocked the trim on this square and it forms perfect little hearts. I can't figure out how to post a picture to show you though.
Tamara Kelly says
I got the hearts too, though I suspect they'd have been more bouncy if I didn't chain as tightly. 🙂 It was a fun surprise though that I didn't see until I blocked it!
phyllis says
my wonderful hubby bought me this one year for Christmas and I love ithttp://www.yarn.com/index.cfm/fuseaction/product.detail/_/Blocking-Board/productID/ebf1267e-57c1-4c95-8e58-c335c570ce2c/categoryID/5f761cd5-2dae-4672-acec-d2b56a5d2d70/
It is big and a pain to store but on the other hand it has all the measurements right on it and you can block a lot at one time.
Juanita says
I originally created my blocking board for snowflakes but it is big enough for afghans squares also. I had some of those huge storage bags like the Zip Lock brand kitchen baggies. These had the zipper lock and a cutout handle above the "zipper". I cut a piece of left over foam insulation to fit tightly inside the bag. I then took freezer paper and traced the blocking designs for different sizes of snowflakes on the paper. After wrapping the piece of insulation with the freezer paper, I squeezed it into the storage bag and zipped it shut. It is easily carried and stored ( I slip it behind a never-closed door). Both sides of it can be used, I guess, by putting an item on each side and hanging it by the handle so both sides can get air. Hadn't thought of doing that but it would probably work as long as the items were pinned well enough to hold their shape in a vertical position.
Audrey Cook says
Thank you so much. I have been trying to figure out blocking!
Crafty Witch says
One could also use gridded foam board for blocking. I originally found the it at AC Moore, although IIRC, it was a different brand from what I linked.
Pat says
I've never blocked squares before joining. If you block them and then later wash the item, say an afghan, will it return to the blocked shape or revert back to the pre-blocked shape of the squares? I guess I'm asking if the blocking is permanent? I can't imagine blocking an entire afghan after every washing would be possible!
Holly says
Pat, I"m not seeing an answer to your question.
But I have the same question...
Can anyone with knowledge answer this question?
Has anyone experimented with it? I have never blocked before.
Tamara Kelly says
It depends on many many factors - like if you lay flat to dry or machine dry, what the yarn is made of, etc.
Caroline says
I hate blocking. I find it tedious. Unfortunately it's a necessary evil. I have a cork board which I block on.
Deb says
I printed a 1 inch grid from excel and slid it and some foam core into a very large zip lock. It's great and very small to store.
Kaysiebee says
Thanks for the info on blocking. I use a large sheet of insulation foam cut in half. However, I have to mark it myself. As to wetting, I spray each block before and after I pin it. It does make a difference. Love your newsletter and soon hope to catch up with the CAL blocks.
Donna Etheridge says
I find a yard of gingham is perfect for blocking. You can buy gingham with a one inch block pattern which eliminates all measuring and makes it easy to get sharp corners. Because it is cotton, you have the option to steam block or wet block.
Stacy Acevedo says
Hello. Stupid question here: can you turn on the ceiling fan to speed up the drying process? What about using an oscillating or box fan? Or the cold setting on the blow dryer? Goodness, I sound impatient, huh? :). Thanks! ~Stacy
Tamara Kelly says
I think that would work! Even hot on a consumer grade hair dryer should be fine - a lot cooler than an iron, but might help relax it just a bit. 🙂
Laurel Vee says
I have an old cardboard cutting board that I used for pinning patterns to fabric before cutting the pieces. This works great for blocking because it is ruled and all the measurements are there.
Tamara Kelly says
Nice!
kait davies says
I'm just learning to block, and have been looking at so many ways to do it. I understand the jist of it. But I was planning on making your chevron scarf into a maxie dress and it says to block it at the end. My question is how would you block it? Pin down where the points are, to make it the zigzag shape? and if possible would you be able to put up a 'second part' to blocking for chevron/zigzag patterns.
Tamara Kelly says
Blocking chevrons, or anything with a specific shape (stars, squares, circles, etc) means pinning them into the shape desired. So for chevrons, you'd pin the points up and down as the pattern goes, so that it dries with nice sharp points. Does that help?
Ellis says
I use those floor mats for kids' playrooms that also join together but are 24 inches square and bought ruler tape to stick on them for measuring. Works pretty well and the mats were less than $20 for a set of four.
Jenny Patriksson says
Thank you for yet another great tutorial 🙂
I will have to remember this one for when I jump into making those squares.
Tamara Kelly says
😀 Thank you Jenny!
Lisa says
Thank you for a great tutorial!! I have just learned the importance of blocking, and love learning all I can about it!!
Tamara Kelly says
😀 Thank you Lisa!
Jessica D says
This is a wonderful tutorial! I'm making a granny square blanket as a Christmas gift and this will most definitely be handy!
Tamara Kelly says
😀 Thank you!
Nicole says
Another great tutorial! I blocked before but not quite to this extent. Thanks for sharing!
Natasha Lindsay says
I been wanting to make something for my grandma and this is perfect.
azra says
thank you. i had no idea we could wet block before i came across this
Tamara Kelly says
😀 You're very welcome!
Iratxe says
Very interesting!!
Tabitha Rex says
I recently wet blocked my first item & loveddddd it! So much better then pinning and steaming, etc, etc.......
Tamara Kelly says
😀 So glad to hear it Tabitha!
Marcia says
Thanks so much! This sounds way easier than I thought it would be
Cori says
I love love love your blog. I have learned more in the last monthish of following you than in the 15 or so years I've been crocheting. Thank you technology, right?
So...I had never heard of blocking until this post. Should you (/can you) block anything you make: scarves, cowls, afghans, etc? And this might be a dumb question, but can you block circular items like cowls? I've recently been considering opening an Etsy shop and so obviously I want my stuff to look super professional and well made.
Tamara Kelly says
Hi Cori! Wow, thank you so much! 😀 You can block just about everything... but it's not always needed! If you've made a gauge swatch, you can block that and see if it's made a difference. To block circular things, you can put them over a balloon (like a hat), plate (beret style), or lay them flat being careful not to create creases. The only time you really "have" to block is with lace, where blocking is needed to open up the stitch pattern and get it to it's right size. 🙂 Most hats and cowls don't really need it though.
Kelly says
I've been wondering about what to block and not block - particularly hats and cowls. Thank you for your explanation!!
Crystal Wall says
I just finished a bunch of solid grannys for my dream bag and have never blocked before. I swear I was just thinking about it and clicked on here and there it was. Just when I needed it. Great site, this has happened before. You have really helped my technique. I am just learning so I try to get all the help I can. You really do that here. Thanks!
~Crystal
Tamara Kelly says
😀 Thank you so much Crystal! I'm so glad to hear it!
PatricIa says
Will this type of blocking work on an acrylic/wool blend yarn like Lion Brand's Wool-Ease? If not, what other methods do you suggest? Thanks!
Tamara Kelly says
This should work well really well, since it has real wool in it! 🙂
Patricia says
Sweet! That's the yarn I chose for this year's CAL and I've already finished the first square so it's too late to turn back now 😉
Diana says
after you have wet block and all of the Afghan is put together what stops the blocking from coming out when you wash it?
Tamara Kelly says
Being attached to the other blocks helps hold each one in shape a bit - the firmer the join, the more this is true. To make a more permanent block, you'll want to VERY lightly steam the blocks. You want to relax the fibers, not melt them!
Katie says
Hi! Thank you for the tips! I have a quick question: How do you store your blocked squares after you have blocked them? Will they lose their shape if not protected? Thanks again! 🙂
Tamara Kelly says
I just stack them up flat until I'm ready to join them! 🙂
Nina says
Can I block my squares as I go along ... maybe 9 or so at a time? If I store them flat and uncrowded, will they keep their blocked shape until the afghan is finished and I sew them together, which could take months?
Thanks.
Tamara Kelly says
Yes! I block mine as they go and then stack them neatly until joining time. 🙂
Nina says
Thank you. By the way... I LOVE the Clover Fork blocking pins. The only place I could find them was online at Amazon... over $12 for 40 pins!!! They must be made of solid gold 🙂
Tamara Kelly says
Ouch! They are pretty great... I've seen them at my local JoAnn Fabrics for less though!
Nina says
The Fork pins are sold at my local Joann's.... only online... $11.99 plus shipping ... so much for blocking 8 or 9 granny squares at a time. I bought 2 boxes of 40 each. I also checked Michaels and Beverly's.
Nina says
OOOOOps ... typo.... They AREN'T sold at my local Joanns, only online for $11.99 plus shipping. Other Joann's are an hour or more away from me, so even if they do have them, not worth the time and gas. At least I got free shipping from Amazon.
Tamara Kelly says
Ah shoot, worth a look, sorry to hear it!
Sandy says
Hi Tamara,
Thank you so much for the tutorial!
I have a question, though. If my square turned out to be 11 inches and I need it to be 12 inches and I'm using Vanna's Choice 100% acrylic, can this wet blocking method make it stretch to 12 inches? Or when I wash my future blanket, will everything shrink back and turn out wonky? I've already added an extra row around and I didn't want to add another. I guess my tension is much too tight.
Tamara Kelly says
Hi Sandy! Stretching a full inch might be a bit much, unless the inside of the square is particularly bunchy, with extra fabric. But if you can get it to stretch, you can help "set" it permanently with a steam iron. I'd wait until you have it sewn/crocheted to the other squares, then use an iron to steam block it. DON'T touch the iron to the yarn - it'll melt - and do just a few seconds at a time. You might even want to practice on a little swatch first to see how quickly it sets. 🙂
Eamionion says
I was just wondering if anyone has ever suggested using Plastic Canvas as a blocking square medium? It's obviously gridded, waterproof, can be cut to any shape (including adding larger airing holes). You wouldn't even need a drying medium, would you? It could air dry from top and bottom at the same time, though I'm sure some absorbent material would be a good idea.
I always thought you had to make perfect squares. Sigh.
Eaminion says
Spelled my own user name wrong, sigh. And would toothpicks work to pin it with? I think this is such an economical solution, that you could wet block several pieces at once. Eaminion.
Tamara Kelly says
Ah, yes! That could work - only one way to find out! 🙂
Tamara Kelly says
Interesting! It could work, though it would possibly be difficult to pin to.
Eaminion says
True. Though, I think perhaps "pin through it" is the thing. If you wouldn't mind losing the double sided effect, I would probably make a plastic canvas parfait ... a stiff layer of styrofoam (or something equally pinny) on the bottom, an absorbent material (even paper towels would work), then the plastic canvas. Fasten everything together the best way you know how, then block the crochet piece on top.
As for the toothpicks ... what about swapping them out for bamboo skewers? or cuticle push sticks? This would allow you to stack more than one block at a time. It would look like a big, layered Dagwood sandwich of crochet blocks and paper towels.
This layering would draw out the water, take the toothpicks (or whatever), and it can all be recycled when it got too worn. Except the plastic canvas ... that stuff could last for years. Hmm ... I know it comes in octagon shapes, too, which would make pinning those shaped blocks much easier. I'm thinking that would open a lot of choices.
Should I write up instructions? Would a picture help? IDK, let me know if you think others would benefit from further information.
Stephanie DesGrosielliers says
I use the interlocking blocks from when my kids were younger for my blocking. I found they work just as well as the blocking mats but were so much cheaper and for the pins I use the ones from my sewing kit. I don't sew so they were just sitting there might as well put them to good use.
Tamara Kelly says
I'm so glad they work for you! Some of those kid's mats can bleed color when wet - which is crazy for something to be used with kids, but of course bad for yarn projects too haha! So I always say to test for color-fastness on those first! 😀
RITA LAMB-MERCER says
what is sizing exactly and can it be removed before working with the yarn ?
Tamara Kelly says
If there is a "sizing chemical" added, you'd need to wash the yarn first. 🙂