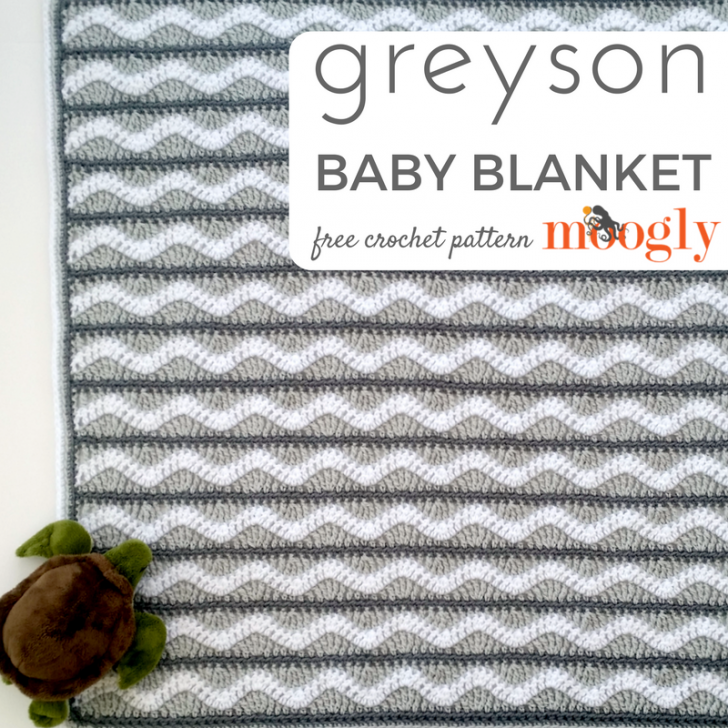
I've always loved the name Greyson - it was almost the name of our middle child! It turns out it didn't quite fit him, but it does fit this gorgeous neutral baby blanket - a free crochet baby blanket pattern here on Moogly!
Disclaimer: This post includes affiliate links.
Prefer an ad-free PDF?? You've got options!


GET THIS PATTERN AND YARN AS A LION BRAND KIT!
Prefer the free blog version? Keep scrolling!
Easy to Memorize 4 Row Repeat
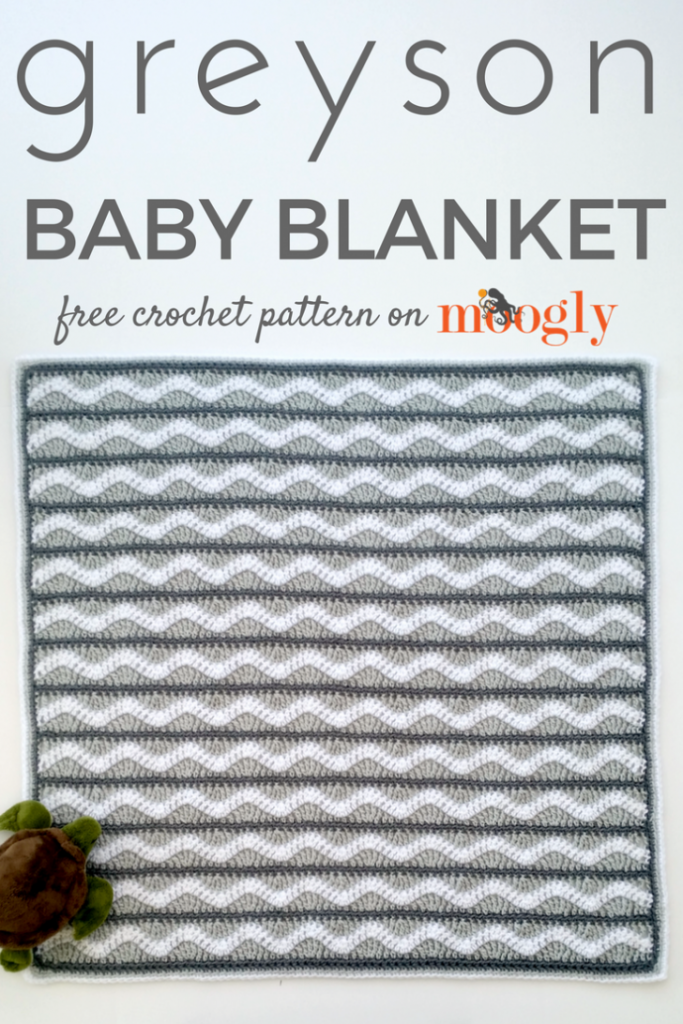
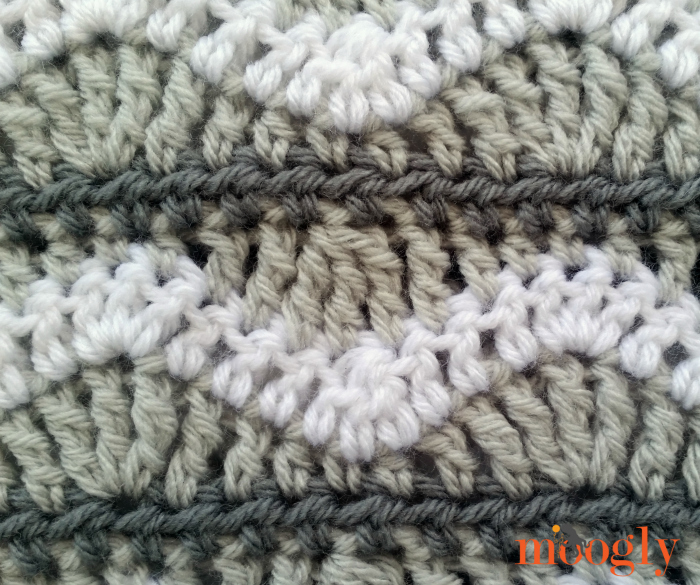
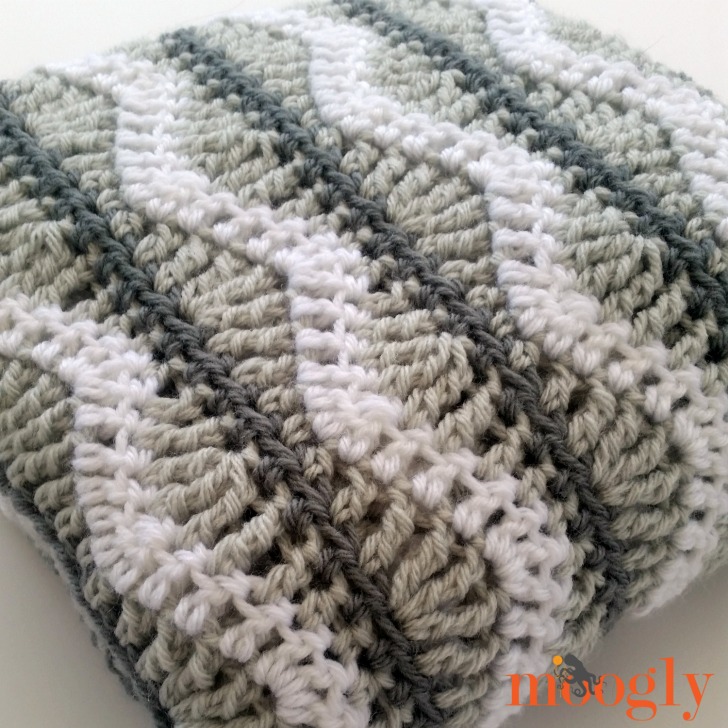
The Greyson Baby Blanket is a ripple afghan - with a twist! Every repeat you build up to the ripple row, and then even back out, creating a wave pattern within straight lines - an up to date take on a classic. Each row is unique, and the 4-row repeat is easier to memorize than you might think. It works up fast, and while it does have a lot of ends, you can weave them in in less than an evening, even if you leave them all til the end!
Greyson Baby Blanket
Add this pattern to your Ravelry Queue and Favorites
US - K, 6.5mm hook - Furls Crochet
920 yds Lion Brand Vanna’s Choice (Aran/yarn symbol “4”/UK: 10 ply; 145 yds; 3oz)
Color A: Silver Grey - 1 ball (170 yds)
Color B: Pale Grey - 3 balls (500 yds)
Color C: White - 2 balls (250 yds)
Gauge: 9 sts x 5 rows = 4" in pattern
Finished Size: 38" wide x 36" long
Stitch Multiple: mult of 8 +1, plus 1 for the tch
Helpful Links and Tutorials
Greyson Baby Blanket Tutorial Video
Fhdc - foundation half double crochet
SPECIAL STITCH: tr3tog - *yo twice and insert hook in the next st, yo and pull up a loop, (yo and pull through first 2 loops on hook) twice; repeat from * twice (4 loops on hook), yo and pull through all loops on hook.
NOTE: If preferred, substitute the following for Row 1: Ch 82, skip ch closest to hook, hdc in each remaining ch across; turn. (81 sts)
INSTRUCTIONS:
Row 1 (WS): With Color A, fhdc 81; break yarn and turn. (81 sts)
Row 2 (RS): Join Color B with sc in 1st st, *hdc in next st, dc in next st, tr in next st, 3 tr in next st, tr in next st, dc in next st, hdc in next st, sc in next st; repeat from * across; break yarn and turn. (101 sts)
Row 3: Join Color C with dc in 1st st, skip next st, dc in next 3 sts, 3 dc in the next st, dc in next 3 sts, *dc3tog, dc in next 3 sts, 3 dc in next st, dc in next 3 sts; repeat from * across until 2 sts remain, skip next st, dc in last st; break yarn and turn. (101 sts)
Row 4: Join Color B with tr in 1st st, skip next st, tr in next st, dc in next st, hdc in next st, sc in next st, hdc in next st, dc in next st, tr in next st, *tr3tog, tr in next st, dc in next st, hdc in next st, sc in next st, hdc in next st, dc in next st, tr in next st; repeat from * across until 2 sts remain, skip next st , tr in last st; break yarn and turn. (81 sts)
Row 5: Join Color A with hdc in 1st st, hdc in each remaining st across; break yarn and turn. (81 sts)
Repeat Rows 2-5 twelve times (will look like 13 stripe sections).
Border Instructions:
Round/"Rows" 1: Working from the RS, with Color A sc evenly down each side of the blanket (along the sides of the rows); join to ends of 1st and last row at corners.
Round 2: With Color B, sc in blo of each st around, working 3 sc in each corner; join and break yarn.
Round 3: With Color C, repeat Round 2.
And that's the Greyson Baby Blanket! Of course, you can use any colors you like - and I can't wait to see yours! Be sure to follow Moogly at the social media links at the top of the page for more crochet, knit and craft fun!
The Fine Print
Written pattern copyright Tamara Kelly 2017, all rights reserved. Please do not reprint or repost this pattern, but please do link to this page to share this pattern with others. If you wish to make items for sale from this pattern or translate it to another language, please visit the About page for details. Thank you to Lion Brand Yarn for providing the yarn for this pattern!


Brenda C. says
Wonderful for my next project!
Tamara Kelly says
😀 Thank you so much!
ruth shimp says
love this blanket
Tamara Kelly says
😀 Thank you Ruth!
Sarah says
Next to the Happiest Blanket, this is my favorite pattern of yours that I've seen! Can't wait to try it out!! 🙂
Tamara Kelly says
😀 Thank you so much Sarah!
Melissa Martin says
Can you carry yarn colors up sides to avoid all the end weaving?
Tamara Kelly says
Not really with this one - I understand the urge though! You could if you changed the color layout though - that might be something to play with! Otherwise, your end of Color B will always be on the wrong side.
Melissa Martin says
Thank you!
Tamara Kelly says
😀 Thank you, I'm so glad you like it!
Jackie says
Hi Tamara, thank you ....fell in love with this pattern as soon as I saw it. Colours chosen, yarn bought and on my first stripe segment. But! Before I go any further though I would ask, struggling to understand why 'turn' at the end of rows 2-5 ...so rows 3 & 5 are then worked on the WS? Or am I having a blonde moment 😉 ?
Thank you
Tamara Kelly says
Hi Jackie! Thank you! 😀 The turns serve a couple of purposes here - like you mention, I think the stitch layout just looks best that way. But also because if you work too many rows going in one direction, it can cause the blanket to take on a bit of a slant. Since stitches aren't perfectly stacked on top of each other, if they all move slightly to the side, then eventually the project will start slanting that direction too. Turning and working in both directions evens out the slant so you get 90 degree corners. 🙂 Does that make sense?
Jackie says
Thank You! Thank You! Yes, that makes perfect sense.
Tamara Kelly says
Oh good! 😀 I'm glad to hear it!
Lorraine says
Now I'm having a dense moment. You need to turn at the end of EVERY row. What' makes 2 and 5 special in that regard?
Tamara Kelly says
Hi Lorraine! I'm afraid I don't understand, there's nothing special about Rows 2 and 5.
Jinx Mcgee says
Dumb question, but what does breaking the yarn mean?
Tamara Kelly says
No dumb questions! 🙂 It just means to cut that yarn (leaving a long enough tail to weave in of course!).
Rachel says
An additional question off of your answer regarding the breaking yarn. I get the cutting part. Where I'm confused is do you fasten off first or just cut and weave in?
P.S. I love all your patterns and tutorials. They are always so helpful.
Tamara Kelly says
Thank you so much, Rachel!
There are a couple different methods for finishing off a row/color so you can use whichever method you prefer. The standard is to cut the yarn, then yarn over and pull that tail through the loop on the hook (fasten off), and weave in that end. If you prefer you can just pull the end straight up - don't yarn over and pull through, just pull straight up on the yarn after it's cut, so the tail end is sticking up out of the top of the last stitch. Then weave it in securely. Without a knot, the end has to be woven in just that much better (it's not "fastened off" as such), but it avoids knots in the work. 🙂
Either way works, as long as you do take the time to weave it in. If you prefer the crochet over the ends method, I would definitely yo and pull through for the knot.
Susan Roberts says
Hi Tamara,
Lovely pattern. I have no babies in my life currently and 10ply (worsted) is not my favourite yarn to work with, though.
Could you please tell me what the stitch multiple is, please? So I can adjust the size depending on what yarn I'm using or what I want to use the finished item for.
I really dont like sewing in ending but I'm really keen to do something with this pattern.
Thanx Muchly
Susan
Tamara Kelly says
Hello Susan! Thank you! The stitch multiple is listed above in the bullet points, below the yarn info and gauge and such. 🙂
Lisa G says
Hi Tamara! This pattern is fabulous - thank you!! I've been silently following you forever, too shy to post but I just had to tell you that your patterns and ideas are invaluable to me! Whenever I get hung up on a stitch or anything within my project I know your blog has the answer! Love it all, thank you for sharing!
Tamara Kelly says
😀 Thank you so much Lisa! I'm so honored you took the time to say so! I'm actually very shy in person too, I get it!
Ioanna Nikolaou says
Thanks so much for such a beautiful pattern ! fell in love with it when I first saw it! I'd like to make it a bit bigger though as my little boy is not a baby anymore! How could I know how many balls of each colour I will need? Thank you. Ioanna
Tamara Kelly says
Hello, and thank you Ioanna! You can take the amount of yarn used per square inch to find an estimate of the yarn needed. 🙂
Ioanna nIkolaou says
Thanks a lot Tamara for your swift reply! Much appreciated 🙂
Tamara Kelly says
🙂 I do my best! Thank you!
Nadine Zielinski says
Tamara,
Such a lovely pattern! A welcome departure from the traditional ripple! Actually, I think I'm going to make this for our king size bed. I absolutely love the design, it is so pleasing to the eye and a very calming pattern because it's very much like waves. Thanks so much for this wonderful inspiration!
Tamara Kelly says
Thank you so much Nadine! I hope I've provided all the info you need, but if you have any questions about upsizing, please let me know!
Patty riesett says
I notice that when I click on the "Print Friendly" button for this pattern it does not open a secondary window but instead prints all the pages in this post, to include the other comments.
However, when I click on the link for the "Crochet Abbreviations" it does bring up a secondary window that allows me to print just that information.
Perhaps the first "Print Friendly" button is not functioning properly???
Tamara Kelly says
Hi Patty! I tried this one and it's working for me right now, so perhaps it was a temporary glitch on their site over the weekend?
Patricia Riesett says
in followup to my above comment, I did finally succeed in getting e "Print Friendly" version to come up. I used Google Chrome as my search engine. It didn't seem to want to work properly with MSN, Yahoo or Firefox.
Tamara Kelly says
Oh, that's good to know, thank you Patricia!
Maira faizan says
Hi Tamara, i loved this pattern and im planning to make a queen size throw for my brother . was unsure how many chains do i need in my foundation chain?
thanks in advance
Tamara Kelly says
Hello Maira! Thank you! For a Queen size comforter you want at least 90 inches, so I'd start with at least fhdc 201, adding multiples of 8 as needed to overhang the sides. 🙂 (I like my blankets a little big, personally!)
Maira faizan says
thanks a lot!
Regina says
Hi Tamara,
So the number of fhdc is in multiples of 8? I would like to make one a little larger (not quite queen size lol, but maybe a half or a large twin size.
Thanks
Tamara Kelly says
Hi Regina! It's 8+1, +1 for the tch as listed above. 🙂
Debbie says
Love this pattern, and will be making more afghans using it. I did mine in red, black and white. Posted a picture on Facebook.
Tamara Kelly says
Thank you Debbie! 😀
Nicky Blyth says
I love this gorgeous pattern. But every time I do my hdc row I seem to have lost 3 stitches somewhere and I'm having to compensate on my next row by increasing again. I don't understand why and I was wondering if anyone else is having this issue.
Tamara Kelly says
Hi Nicky! Thank you! It's hard to say - have you watched the video tutorial?
Lavonne says
I agree. I lost stitches as well, tho I thought I was following the pattern carefully. Did you work it out?
SHerrt says
It would be nice if you used darker and a bit larger fonts in your patters. I can barely read them and had to copy/paste into Word so I could!. In face, I can't even read what I've written here, so I hope I don'thave too many typos!
Tamara Kelly says
Oh dear! Thank you for the feedback - we've been looking at a site design refresh and I will definitely keep this in mind!
Connie says
Hi Tamara,
Saw your pattern and fell in love with it. Started on it and got to the fourth row and I am having trouble. It says to join color b with a triple, skip next st, tr in next etc. Did you mean to actually do a triple in the first stitch or should you do a chain four? I need some help on this row. Thanks.
Tamara Kelly says
Hi Connie! There's a video tutorial that may help you: click here 🙂
Linda Biles says
what yarn or cotton would you recommend for a baby afghan for South Florida?
Tamara Kelly says
I would probably go with Lion Brand 27/4 Cotton. It's mercerized so it's cool to the touch, comes in great colors, and is machine wash and dry. 🙂
linda biles says
thanks
Becky says
Hi, I am just getting started but have found my rows are coming up one short. I am currently finishing row 4 and have a feeling it has to do with "fastening off the ends". I am digging to find the last stitch. Any thoughts on what I may be doing wrong with the end of my rows? This is my third blanket ever and my first time using that approach to color change. Thanks for your thoughts.
Tamara Kelly says
Hi Becky! It does sound like that last stitch might be getting lost - a common problem! My suggestion would be to put a stitch marker in the first and last stitch of each row, right after you make them (moving them up each row, not adding more of course, heh). Then you'll have those stitches ready for you and you won't miss them! I hope that helps!
Jill Welsch says
I have a question about the Border. For the first color, the dark grey, do you just sc down two of the sides (down the sides of the rows), and not the whole way around? I can see how this would sort of even up that color all the way around, although I think it would be better to HDC instead of sc, if that's what you're going for. Thank you for your help.
Tamara Kelly says
Yes, but if you prefer you can certainly hdc, it's up to you!
Jill Welsch says
Thank you!
Wenj says
This is so pretty! have three colors of Bernat Baby Blanket Brights that I've been looking for a pattern for. As it's so thick, do you think it will work for this afghan?
Tamara Kelly says
I think that an afghan is a very good use for that yarn - but it's pretty heavy no matter what you make with it!
Donna says
I love this blanket I'm making one for my oldest granddaughter I will post the picture on p interest. It is in turquoise color
Tamara Kelly says
Thank you so much Donna! I'm so glad to hear it! 😀
Sara Hyman says
I hope the photo shows up on the comment. I loved the pattern and made it for an ocean themed nursery with colors of sand, waves and coral. thanks so much for sharing your pattern.
Sara
Users/KJ/Pictures/Photos Library.photoslibrary/resources/proxies/derivatives/9b/00/9b5f/UNADJUSTEDNONRAW_thumb_9b5f.jpgI
Tamara Kelly says
I'm afraid the photo link didn't work, but I'm so glad you enjoyed the pattern! 😀
Marjie says
Hi Tamara, love your patterns. I finished rows 1-4 and have a slight curve. Will it straighten as I Go?
Tamara Kelly says
As long as the first row isn't tight - if you can pull it to the width of the rest of the blanket without too much trouble - it should be fine. If it's still wanting to curve when the blanket is done, I'd recommend pinning it out straight and shooting it with a little hot steam. (Don't touch the yarn with the hot iron - just shoot it with steam!) That usually relaxes things. 🙂
Amanda says
I’m not doing something right with this. I do the 82 hdc and I get the 101 stitches for row 2, but as I go to row 3 and start the dc I get 119 for some reason. I’m stopping and turning my work. Following the directions but for some reason I’m not getting it right.
Tamara Kelly says
Hi Amanda! Have you watched the linked video tutorial?
Charlene says
I did make this but with white, pink and blue. Was a really nice pattern to work with and not trouble at all. Love the way it came out. Thinking of doing another one.
Tamara Kelly says
😀 I'm so glad you enjoyed it Charlene, thank you!
Lindsey Webster says
Hi Tamara,
I just found this pattern and LOVE it. I have my blanket started and I want to double the length. I seem to be messing up stitch count some where. Please help if you can 🙂
Here is what I have:
Row 1: 162 hdc (I'm doing Ch 163 to add that extra stitch to skip the ch closest like the instruction say)
Row 2: 202 sts
Row 3: 202 sts
Row 4: 162 sts
Row:5: 162 sts
I may just be messing up at the end of the rows, but I always seem to have an extra 2-3 stitches. I have watched the videos, so I just wanted to confirm that my doubling was correct.
Thanks,
Lindsey
Tamara Kelly says
Hi Lindsey! Thank you! Looks like you're one stitch off.
The stitch multiple listed in the pattern above is "Stitch Multiple: mult of 8 +1, plus 1 for the tch"
So to make a blanket with twice as many stitches for the width, you'd start with either fhdc 161, or ch 162 and hdc 161.
Then Rows 2-3 will have 201 sts, and Rows 4-5 will have 161.
Does that make sense?
Lindsey Webster says
Yes! Thank you so much!
Cher says
Hi
Cute blanket! I’m not sure if I over looked it in my excitement. But how would I be able to make this blanket larger? I’d like to try it for a king sized bed. Thanks for your time!
Tamara Kelly says
Thank you Cher! The stitch multiple for upsizing is listed above, and the video tutorial goes over that a bit more too! 😀
CheR says
Ok I’ll look. Thank you so much for letting know. Have a great day! 🙂
Kailey says
Hi! This blanket is beautiful and I am so excited to try it!! But I have a question. I am fairly new to crocheting, so this may be a silly question, but when checking my gauge for this project am I using single crochets? I tend to crochet a little tight, so normally when I check my gauge for a project I have to go up one or two hook sizes, but for some reason I am way off with this one! I just wanted to check if I am doing something wrong?
Tamara Kelly says
Hi Kailey! Not a silly question at all! This pattern's gauge is "in pattern" which means you'll want to work up a swatch with the first 5 rows or more to measure. Alternatively, since this is a blanket and fit/exact sizing is less important, you can just make sure you have the same stitch or width gauge, and then add another repeat of the pattern to the end if it's not long enough. 🙂
Suzanne Collins says
I am going to make this just as soon as possible.
Vicky says
Hello.! Love this blanket and I am planning to start it soon. I don’t have to much experience in crochet. I’ve only done 3 protects. I have always worked with a visual pattern but never with a description by steps. Is it possible to get that?
Tamara Kelly says
There is a video tutorial linked above! 🙂
Sherrie Spangenberg says
Hi! I love the look of this blanket. Vanna's Choice is not available. Can I substitute any 4 weight yarn? Also I noticed not every 4 weight yarn uses the same suggested hook size. I noticed this pattern uses a K but on the Vanna yarn label the hook size is J. Should I choose a 4 weight and use suggested hook size on label or do a gauge swatch with whatever 4 weight I choose? Or do you have a recommendation for a yarn substitute? Thank you!
Tamara Kelly says
Hi Sherrie! Vanna's Choice can be substituted with most brands' standard worsted weight acrylic - Red Heart With Love, Caron One Pound, Hobby Lobby I Love This Yarn, etc. The hook size should be adjusted to give you gauge, unless you're changing yarn sizes completely. Changing the hook size from what's recommended is generally a choice made by the designer to create the desired fabric. I hope that helps! 🙂
Sherrie Spangenberg says
Thank you!!!
Jenny says
I found this pattern right after it was introduced and have made 15 of them in every size from crib to king size. By far my most favorite pattern to make.
I have found that on row 3 & 4 that by doing the recommended turnung chain and then putting another double or triple in the same stitch below it makes for a nicer edge when adding the border and also helps so those first & last stitches dont get lost.
Tamara Kelly says
Thank you so much Jenny, that's a great tip!
Louise Dodd says
Beautiful I can't wait to make it
stacie freeman says
Is there a way to avoid the large "holes" that are created by skipping those second stitches? I have large holes along the border. Also, a tutorial on doing the border would be helpful. When I put one stitch on the side of each row it looked too sparse so if I was on a triple stitch row I ended up putting three sc on that row, a sc on the sc rows and two sc on the dc rows. Looked better but oh the holes 🙁
Tamara Kelly says
Hi Stacie! For borders, I recommend working 1 st in the side of sc rows, 2 sts in the side of dc rows, and 3 sts in the side of tr rows. If you'd like to avoid skipping the second and penultimate sts of each row, you could work a decrease st over the first two and last two sts.