moogly

menu icon
go to homepage
  • Patterns
  • Tutorials
  • MooglyCAL
  • Giveaways
  • Lives
    • Facebook
    • Instagram
    • Pinterest
    • TikTok
    • Twitter
    • YouTube
  • search icon
    Homepage link
    • Patterns
    • Tutorials
    • MooglyCAL
    • Giveaways
    • Lives
    • Facebook
    • Instagram
    • Pinterest
    • TikTok
    • Twitter
    • YouTube
  • ×
    Home

    MooglyCAL2026 Block 8

    April 16, 2026 by Tamara Kelly 2 Comments

    MooglyCAL2026 Block 8

    MooglyCAL2026 Block 8 is a multi-colored mosaic square by Natalie Thomas of Detroit Knots! The Marvelous Mosaic Square is the perfect square to learn mosaic crochet with - and the color possibilities are huge! Get all the details for this free crochet along, and the free pattern link below!

    Disclaimer: This post includes affiliate links; materials provided by Local Crafts.

    Just getting started with the Moogly Crochet Along? CLICK HERE for the intro info!

    Want to get help with the patterns, show off, and CAL with others? CLICK HERE for the Facebook group

    Like to see all the squares visually? CLICK HERE for the Pinterest Board! (Squares will be added as they are released.)

    Introducing the MooglyCAL ONLY Newsletter! Never miss a Square Debut!

    The 2026 Moogly CAL Schedule

    As the year progresses, links will be added, and you'll be able to click on any of the past squares to go to their posts. The numbers refer to the date of the month that the square will debut.

    January Archie Argyle Crochet Square and Radiate Champion Block
    February Cozy Circles Crochet Square and Endless Griddle Stitch Square
    March Blue Cascade Afghan Square and Woven Checkerboard Square
    April Crashing Waves Blanket Square, THIS POST, and 30
    May 14 and 28
    June 11 and 25
    July 9 and 23
    August 6 and 20
    September 3 and 17
    October 1, 15, and 29
    November 12 and 25

    *****

    Block #8:

    Marvelous Mosaic Square

    by Detroit Knots

    MooglyCAL2026 Block 8

    Above, you can see the square that Natalie made in 5 colors of Brava Worsted! Below is my CAL square, in my 6 colors of Brava Worsted - Custard, Seashell, Fig, Denim, Espresso, and Cream!

    MooglyCAL2026 Block 8

    Details for MooglyCAL2026 Block 7

    My Notes: This square is crocheted using the overlay mosaic technique, utilizing the front and back loops of stitches to create an overlapping pattern. The trickiest part is the corner - please note that the dc sts "cover up" the first and last sc sts in each trio!

    If you plan on breaking the yarn after every round, I recommend joining each new yarn in a different spot around the square. This will prevent the visible seam that can be caused when all the slip stitches are lined up. If you do this, you can join with a standing sc in the back loop of any dc st, and work from there - you'll have this pattern memorized fast. I can't wait to see how you use your color changes!

    One of the many great things about this design is that it's super easy to adjust for size - just stop when you hit 12"!

    Helpful Links and Tutorials: Crochet Abbreviations, Magic Circle, Standing sc, Chainless Starting Double Crochet, BLO - Back Loop Only, and seamless join.

    Sizing: My gauge for this one just a little big - I got to 12" after 19 Rnds, so I stopped there. But everyone's gauge is different, so be sure to measure as you go! Learn how to adjust for size HERE to ensure all your squares are the same size. Remember that the 12″ is measured across and up and down, not diagonally/corner to corner.

    Yarn Options: This year, our designers have chosen from a variety of yarns, including Brava Worsted, Swish Worsted, Jimmy Beans Wool Beanstalk, Berroco Vintage, and MadTosh Vintage. For this square, both Natalie and I used Brava Worsted!

    What I Did:

    I used a US-J, 6.0 mm crochet hook, and Brava Worsted yarn, and my color scheme was as follows (see pics for more info on placement):

    Rnds 1 and 2: Seashell
    Rnd 3:
    Custard
    Rnd 4:
    Fig
    Rnd 5:
    Denim
    Rnd 6:
    Espresso
    Rnd 7:
    Cream
    Rnd 8: Seashell
    Rnd 9:
    Custard
    Rnd 10:
    Fig
    Rnd 11:
    Denim
    Rnd 12:
    Espresso
    Rnd 13:
    Cream
    Rnd 14: Seashell
    Rnd 15:
    Custard
    Rnd 16:
    Fig
    Rnd 17:
    Denim
    Rnd 18:
    Espresso
    Rnd 19:
    Cream

    This square didn't really require blocking to square, but I did use a bit of steam to help it lie flatter.

    The Pattern:

    CLICK HERE FOR THE PATTERN FOR BLOCK #8

    PLEASE NOTE: The designers all hold individual copyrights for their patterns. They may choose to make videos of their patterns, and you can certainly request them from the designers. In addition, there are videos linked in the notes for specific stitches and techniques that may help you with the pattern. They may offer paid PDFs of the pattern, but have agreed to leave it up for free on their website or on Ravelry for as long as possible.

    Show Off Your Squares!

    If you share your photos on social media, be sure to use the hashtags #mooglycal2026 and tag your yarn - I'll be using #bravaworsted -  and tag me @mooglyblog so I can see them too! And don't forget to share them in the MooglyCAL Facebook Group! Thank you all for CAL-ing with me!

    And finally, here's a pin of MooglyCAL2026 - Block 8 for your own Pinterest boards!

    MooglyCAL2026 Block 8

    You can follow Moogly on YouTube, Facebook, Twitter, Pinterest, TikTok, and Instagram, and don't forget to sign up for the free newsletter at the bottom of the page! Thank you to Local Crafts for providing the materials for this crochet along.  

    Crochet and Catch Up with Moogly - April 15, 2026

    April 15, 2026 by Tamara Kelly Leave a Comment

    Crochet and Catch Up with Moogly - April 15, 2026

    It's the Ides of April, and it’s the perfect time to pause, pick up our hooks, and enjoy some creative time together with another Crochet and Catch Up with Moogly! Join me for a relaxed break of crochet conversation, behind-the-scenes peeks, and live Q&A. Join in live, or watch the recording at your convenience - all the links are below!

    Disclaimer: This post may contain affiliate links. Live videos are unscripted, unedited, and occasionally weird; all opinions are my own. 

    Crochet and Catch Up with Moogly

    Going LIVE on Facebook and YouTube, at 11am CT!

    Click here to Like the Moogly Facebook Page and get notified when I go live!

    Click here to Subscribe to the Moogly YouTube Page and get notified when I go live!

    Moogly Community Group on Facebook

    What I'm Wearing: Artfully Simple Angled Wrap

    Hat Templates are 10% off now through April 27 (or until supplies last)

    MooglyCAL2026 Block 7 Courtesy of Michele Costa

    CAL Yarns: Brava Worsted, Swish Worsted, Jimmy Beans Wool Beanstalk, Berroco Vintage, and MadTosh Vintage.

    Warm Up America Baby Blanket Drive - LAST DAY

    WeCrochet Brava Baby DK

    Puppy Squish

    Puppy Squish Tutorial

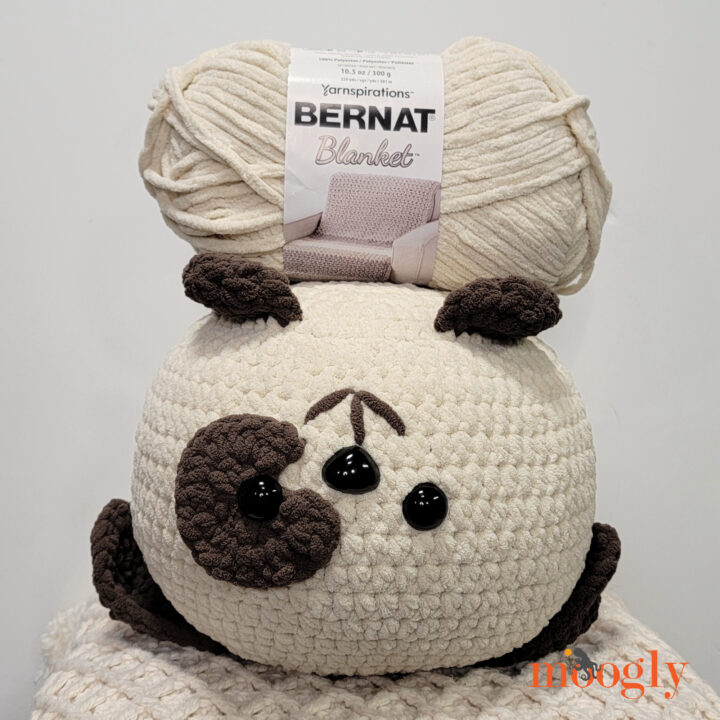
    Bernat Blanket

    GoSadi Craft Events Hub Giveaway

    Furls $100 Shopping Spree Giveaway

    Dungeons & Dragons Crochet Review and Giveaway

    Sneak Peek: New pattern coming featuring Mary Maxim Prism and Furls Odyssey II!

    Moogly Around the Web - and the World!

    Want to see me online?

    Monday, May 18, 2026 (6:00 PM - 8:00 PM) (CDT) - CGOA Class - Edinburgh Evenings Scarf - How to Crochet Linked Stitch Mesh

    Want to see me in person in 2026?

    Crochet and Catch Up with Moogly - March 18, 2026

    May 1 - 2: I will be teaching four classes at the new Fiber and Fabric Craft Festival in Chicago - one on Friday, and three on Saturday! The easiest way to find my classes is to "Filter by Speakers" and then scroll down to Tamara Kelly.  CLICK HERE to get your event ticket for FREE!

    If you have a LYS or event you'd like me to teach at this year, or if you would like me to teach an online class to your group or guild, please do reach out!

    Have a wonderful day all - see you to crochet and catch up next time! And before you go, here's a Pin for today's post, so you can add it to your favorite Pinterest boards! We appreciate (and need) your shares on all our posts.

    Crochet and Catch Up with Moogly - April 15, 2026

    Follow Moogly on YouTube, Bluesky, Facebook, Pinterest, TikTok, and Instagram! 

    Find Your People with the Craft Event Hub – GoSadi Giveaway

    April 14, 2026 by Tamara Kelly Leave a Comment

    Craft Event Hub

    The joy of crafting isn’t just in what we make - it’s the connections we build along the way. From stitching with friends to discovering new techniques at events, being part of a creative community makes our craft even more meaningful. That’s why I’m so excited to share something new with you today: Craft Event Hub by GoSadi, a place designed to help makers find events, connect, and get inspired. To celebrate its debut and help spread the word, I'm giving away a fun assortment of GoSadi goodies!

    Disclaimer: This post includes affiliate links.

    Find A New Place to Gather on the Craft Event Hub by GoSadi

    GoSadi is a wonderful online resource for crocheters and knitters! You can keep track of your patterns, WIPs, discover new projects and designers - and do it all from your phone, on the go. They are building an amazing online community. And now they want to help you take it offline too!

    Find Your People with the Craft Event Hub – GoSadi Giveaway

    When you visit the Craft Event Hub, you’ll find a searchable, easy-to-browse collection of craft events all in one place. You can look through listings by location or event type to discover fiber festivals, crochet and knitting workshops, local meetups, and more, each with helpful details like dates, locations, and what to expect.

    Find Your People with the Craft Event Hub – GoSadi Giveaway

    It’s designed to make exploring simple, so whether you’re planning ahead for a big event or just curious about what’s happening nearby, you can quickly find opportunities to learn something new, connect with other makers, and get inspired.

    Find Your People with the Craft Event Hub – GoSadi Giveaway

    One of the things I love most about the Craft Event Hub is how easy it makes it to discover what’s happening in the fiber world. From big festivals to local library meetups, every listing is welcome. Instead of searching all over the internet or relying on word of mouth, everything is gathered into one place so you can explore what’s out there and find events that truly fit your interests - and sort by location to see what's near you.

    Find Your People with the Craft Event Hub – GoSadi Giveaway

    I know I’ve definitely felt like I was missing out on events simply because I didn’t even know they existed, and browsing the hub, I found a new event just one state over! You don't have to sign up to browse the events, but once you do, you can purchase tickets, create your own dashboard of events, and submit your own.

    Find Your People with the Craft Event Hub – GoSadi Giveaway

    If you've got a yarn store, event, make-a-long, or fiber fest, this is a great way to spread the word! CLICK HERE to check it out now!

    Find Your People with the Craft Event Hub – GoSadi Giveaway

    Spreading the Word with a GoSadi Giveaway

    To celebrate the launch, I’m so excited to share a fun GoSadi giveaway with you! One lucky winner will receive a collection of GoSadi Goodies, perfect for adding a little extra crafty joy to your day.

    What's in the Giveaway? 

    • Stitch Night with GoSadi Water Bottle
    • GoSadi Nail File/Emery Board
    • GoSadi Measuring Tape
    • GoSadi Lip Gloss
    • Stitch More with GoSadi Phone Holder
    • I Feel Like Craft Exclusive Shelli Can Sticker
    • GoSadi Pen
    • Small Zipper Pouch

    GoSadi Goodies Giveaway

    If you haven’t already, take a moment to explore the Craft Event Hub and see what’s happening near you. You might be surprised by what you find! Then scroll down and enter the giveaway for your chance to win! Finally, please help spread the word about GoSadi and the Craft Event Hub - the more people that use it, the better it will be! Whether you’re looking for meetups, fiber festivals, workshops, or just a reason to get out and stitch with others, this is the kind of resource that can open up a whole new side of the crafting community.

    The GoSadi Goodies Giveaway

    The GoSadi Goodies Giveaway is open to addresses in the USA and Canada. This giveaway ends May 12, at 12:15am Central US time. To enter, use the Kingsumo form below.

    Good luck all! Now, don't forget to enter all the other great giveaways happening now on Moogly! And save this pin to help spread the word!

    Craft Event Hub by GoSadi

    Puppy Squish Tutorial

    April 9, 2026 by Tamara Kelly 2 Comments

    Puppy Squish Tutorial - Moogly

    This Puppy Squish Crochet Pattern is just begging you to pick up your hook! It is a quick, cozy project with simple stitches and an extra dose of cute. To help you with the tricky bits, I have included both right-handed and left-handed video tutorials below!

    Disclaimer: This post includes affiliate links.

    Be sure to scroll down past the videos to get the links to the free pattern and supplies!

    Puppy Squish Tutorial:

    How to Crochet the Puppy Squish - Right-Handed

    Learn to Crochet the Puppy Squish - Left-Handed

    As Seen in This Video (click each for more info!):

    The Free Pattern: Puppy Squish

    The Supplies:

    7.0 mm or 8.0 mm hook (see pillow ball info below) - Furls Odyssey II used

    280 yds Bernat Blanket (6 - Super Bulky; 100% polyester; 300g/10.5 oz; 201 m/220 yds)
    A: Birch - 200 yds
    B: Taupe - 80 yds

    10" Microbead Pillow Ball for 8mm hook or 10" Soft Round Pillow Ball for 7mm hook, OR Fiberfill

    2 Safety Eyes - 24mm

    1 Safety Nose - 24mm

    Stitch Markers

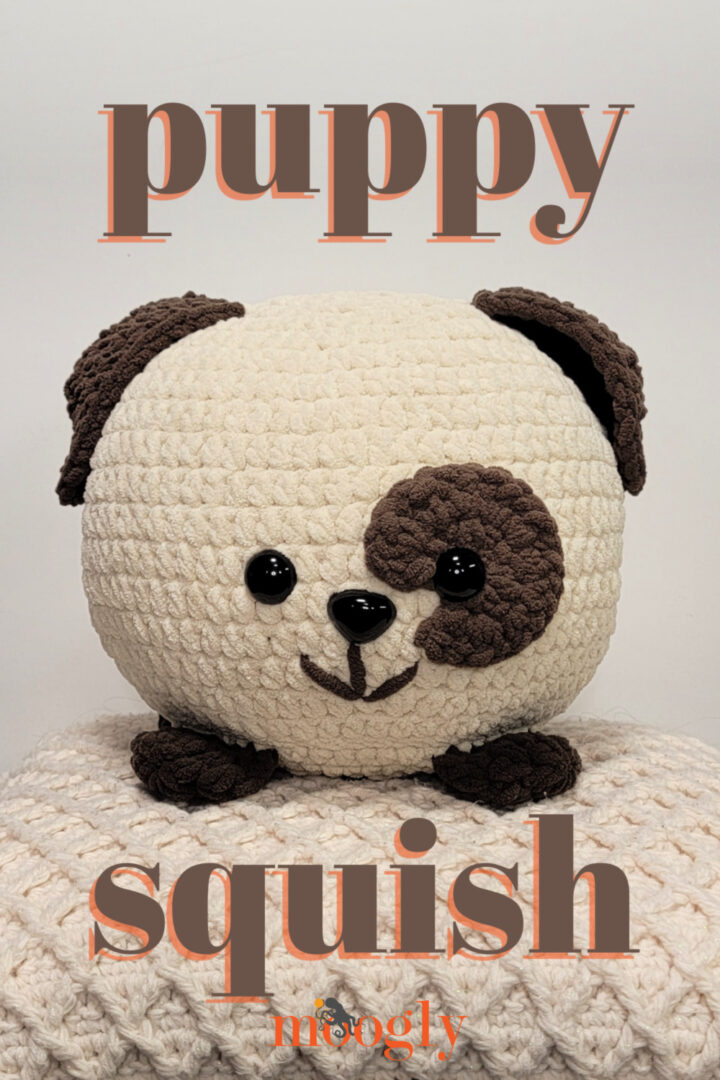
    And here's a Pin for your Crochet Pinterest Board! Make sure you are following Moogly on Pinterest for all the best knit, crochet, and craft pins!

    Puppy Squish Tutorial - Moogly

    I hope you enjoy this tutorial for the Puppy Squish! If this video doesn't answer all your questions, please ask in the comments below - I'm always happy to help.

    If you make this or any Moogly pattern, please tag me in your photos so I can see them too, @mooglyblog or #mooglyblog! Then send them to tamarakelly@mooglyblog.com to see them featured in a future Moogly email newsletter!

    Get Moogly on your favorite social media sites: YouTube, Facebook, Pinterest, Tik Tok, Bluesky, and Instagram! And sign up for the free newsletter at the bottom of the page so you don’t miss a thing! Thank you to Yarnspirations for providing the materials for this video.

    Puppy Squish

    April 8, 2026 by Tamara Kelly Leave a Comment

    Puppy Squish - Moogly

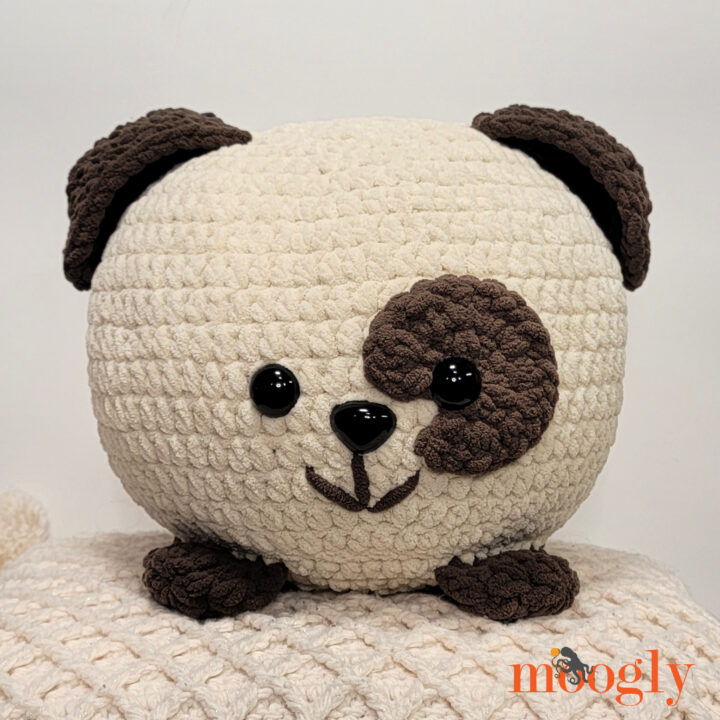
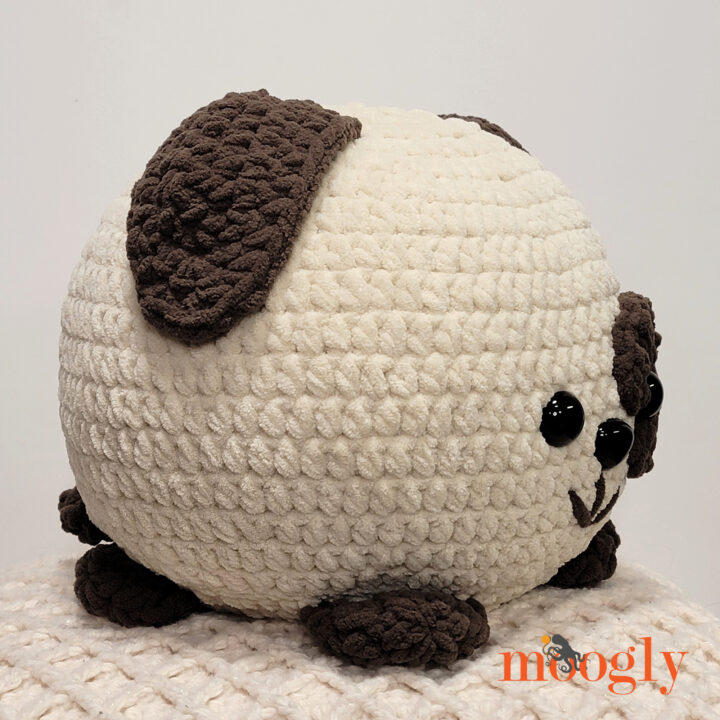
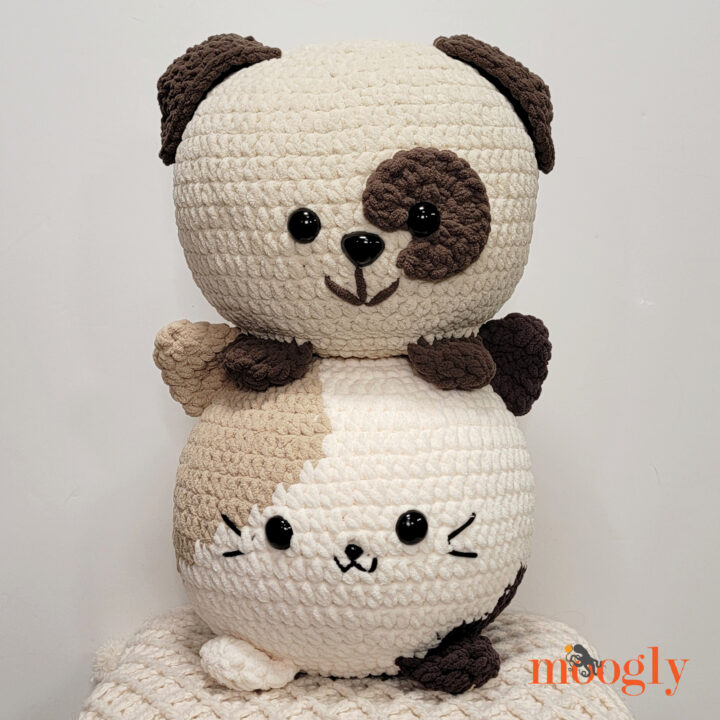
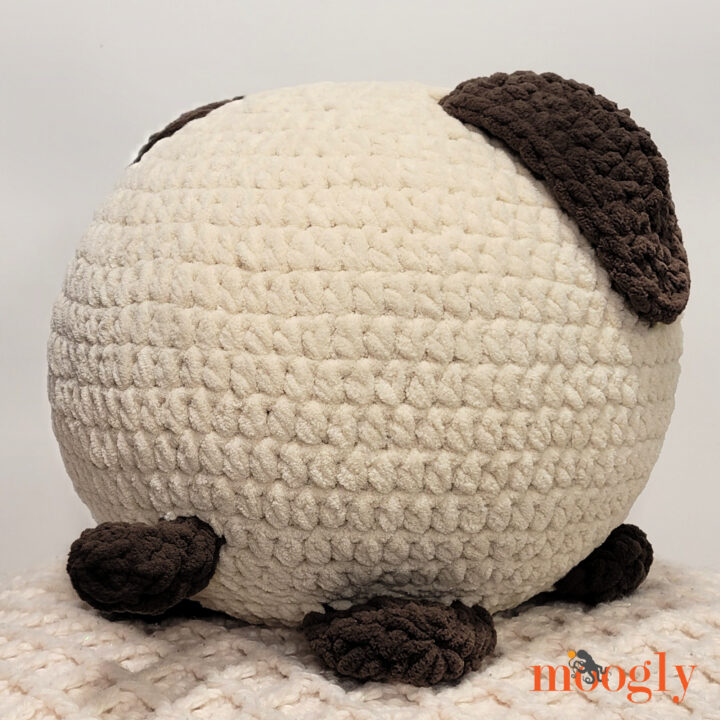
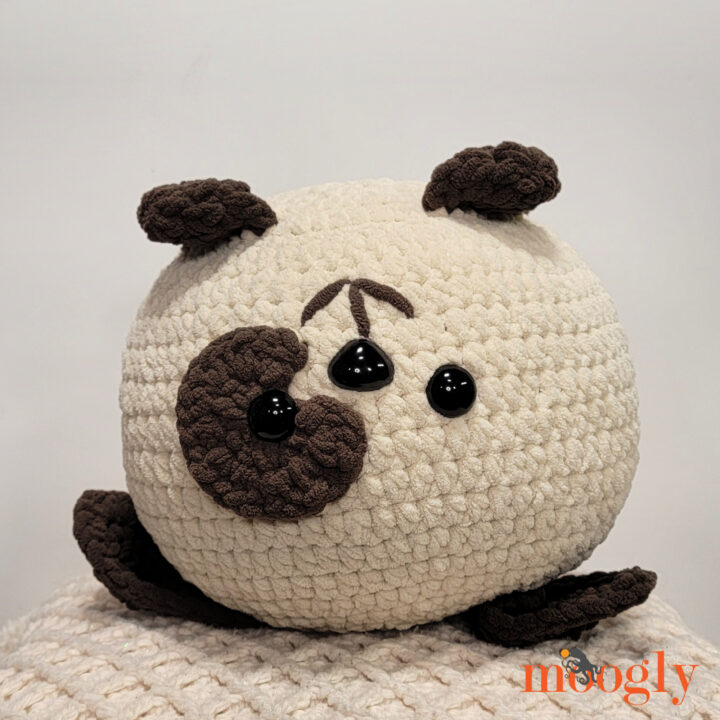
    The Puppy Squish is the most requested of our Squish series - and now you can make your own dog stuffed toy! Dogs have a wide variety of features, so you can customize the Puppy Squish with a variety of ear styles, with and without spots, eye patches, and tails. This stuffed puppy pattern is the perfect project for confident beginners and seasoned stitchers alike. Keep reading to crochet your own here on Moogly!

    Disclaimer: This post includes affiliate links; materials provided by Yarnspirations.

    Prefer an ad-free PDF? You've got options!

    This button leads to the pattern on Etsy

    Prefer the free blog version? Keep scrolling!

    A New Squish, With the Help of the Originals

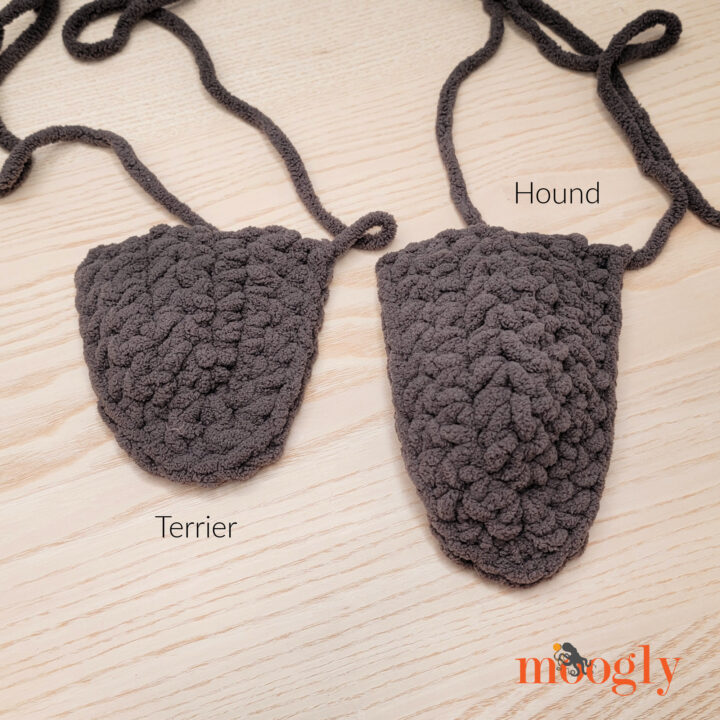
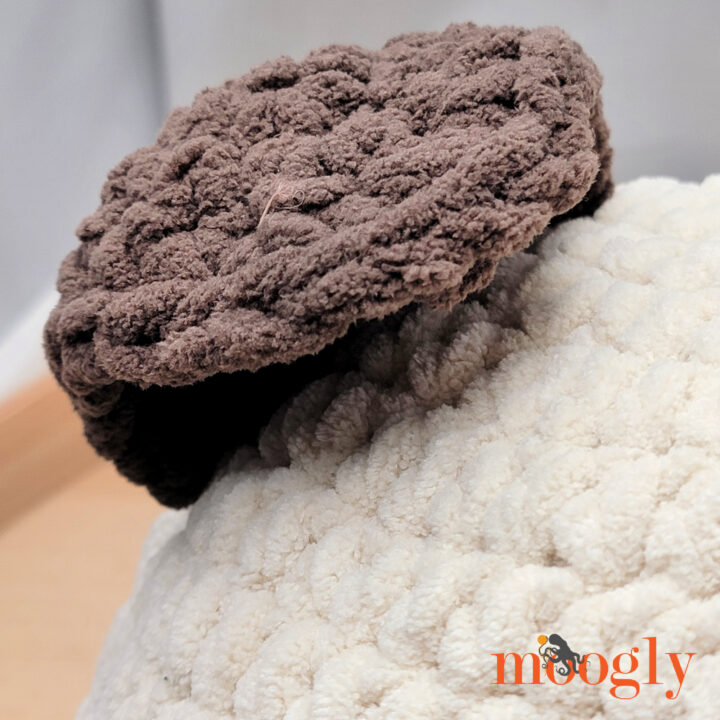
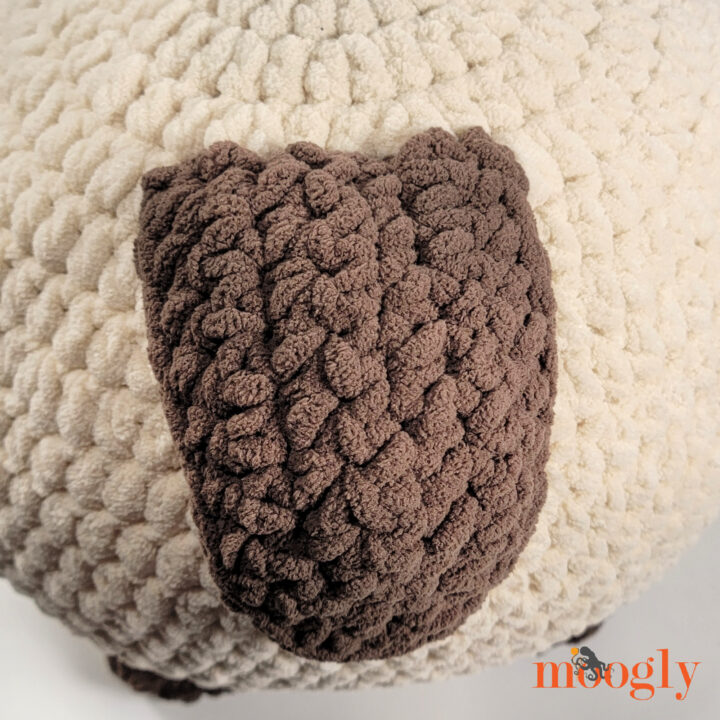
    There are now over 20 different Squish patterns on Moogly, and it's always fun to add a new one to the collection! A dog version has been requested for a while now - but with such a wide variety of breeds out there, it was hard to pick just one look. So to start, I've designed two new ear styles - a long "hound" version, and a folded-over "terrier" version. The hound version is shown, but patterns for both are included below.

    Puppy Squish - Moogly

    But before the Puppy Squish, I put out a lot of other animals first - that give us tons of options with our doggos! You can swap in the ears from the Cat Squish, Fox Squish, or Raccoon Squish - as well as their tails - to achieve the pedigree you're going for. The color split in the Fox Squish is great for Corgies and other breeds. Looking for large patches of color? Follow the Body and Belly pattern for the Cat Squish or Cow Squish! Be sure to customize all your colors - including the feet and tail.

    Puppy Squish - Moogly

    Can We Talk About Size?

    The first Squish I designed - the Octopus Squish - was made with a 7mm crochet hook, with a 10" Microbead Pillow Ball for stuffing. I loved the result, so I continued to purchase 10" microbead pillow balls from the same company for years, using them to fill each new Squish... But then suddenly, the balls were getting too big. So I went up to an 8mm crochet hook, and that seemed to work for a while, but things were getting a bit too *tight* for my taste. 

    Puppy Squish - Moogly

    Recently, I went searching again and found that the same company that makes the microbead balls has also started making a 10" Soft Round Pillow Ball - and after ordering a couple, I can say they are much closer in size to the original microbead balls and a true 10"! So for the Puppy Squish, I went back to the 7 mm crochet hook and used this new style of pillow ball. You can choose to use whichever hook and stuffing combo makes you happy! I've included info for both below.

    Made in Quick and Easy Bernat Blanket!

    As always, I chose to make the Puppy Squish with Bernat Blanket, so there are lots of colors to choose from to customize your new friend! As it's a 6-Super Bulky yarn, this pattern creates a 10" toy - a little bigger once it's stuffed! If you'd like to make it smaller - or even bigger - choose whatever yarn you like, and use whatever hook gets you a nice, tight fabric. Bernat Maker Minis are a lot of fun for amigurumi! 

    Puppy Squish - Moogly

    Cute and Cuddly for Kids and Adults

    This crochet dog pillow is fun to make - and pet and squeeze! I used safety eyes and a safety nose, but this pattern has not been "tested for safety for children under 3 years of age." If you are crocheting it for a baby or toddler, you may wish to embroider on the features and make sure that the pieces are sewn on quite securely - especially that tail! If using it as a photo prop, be sure not to leave the toy with a baby unattended.

    Puppy Squish - Moogly


    Puppy Squish

    Add this pattern to your Ravelry Queue and Favorites

    7.0 mm or 8.0 mm hook (see pillow ball info below) - Furls Odyssey II used

    280 yds Bernat Blanket (6 - Super Bulky; 100% polyester; 300g/10.5 oz; 201 m/220 yds)
    A: Birch - 200 yds
    B: Taupe - 80 yds

    10" Microbead Pillow Ball for 8mm hook or 10" Soft Round Pillow Ball for 7mm hook, OR Fiberfill

    Breaking in with a great deal on the balls I found on Etsy!

    Super Soft: https://tidd.ly/4t5LMPw
    Microbead: https://tidd.ly/4t25pb1

    2 Safety Eyes - 24mm

    1 Safety Nose - 24mm

    Stitch Markers

    Gauge: With 7mm hook: 4"/10cm across after Rnd 3; with 8mm hook: 5"/10cm across after Rnd 3

    Size: approx 10" across/tall excluding ears and tail

    HELPFUL LINKS AND TUTORIALS

    Puppy Squish Tutorial

    Body Tutorial

    Crochet Abbreviations

    Magic Circle

    Working in a Spiral

    Hdc - half double crochet

    Hdc2tog - hdc decrease

    Seamless Finishing

    Whip Stitch Seaming

    NOTES:

    Some rounds are worked in a spiral. Do not ch 1 at the beginning of a rnd or join any rnds with a sl st unless specifically directed in the pattern.

    Move a stitch marker along the first st of each rnd as you work to keep track of your progress.

    Some pieces move from Rounds to Rows.

    The stuffing used may affect which hook size you use. The microbead pillow balls run large, so I currently recommend using the larger hook size if you choose that option. In my experience, the soft stuffed pillows are more consistently sized, so I recommend using the smaller hook size. If the pillow ball is still too large, you can remove some of the stuffing through one of the seams, and then sew it closed, or use standard fiber fill.

    PUPPY SQUISH INSTRUCTIONS:

    Body - Make 1 with Color A

    Rnd 1: Make a magic circle, ch 1, sc in the ring, 9 hdc in the ring. (10 sts)

    Rnd 2: 2 hdc in each st around. (20 hdc)

    Rnd 3: *Hdc in the next st, 2 hdc in the next st; rep from * around. (30 hdc)

    Rnd 4: *2 hdc in the next st, hdc in the next 2 sts; rep from * around. (40 hdc)

    Rnd 5: *Hdc in the next 3 sts, 2 hdc in the next st; rep from * around. (50 hdc)

    Rnd 6: *Hdc in the next st, 2 hdc in the next st, hdc in the next 3 sts; rep from * around. (60 hdc)

    Rnd 7: Hdc in the next 5 sts, 2 hdc in the next st, *hdc in the next 9 sts, 2 hdc in the next st; rep from * until 4 sts rem, hdc in last 4 sts. (66 hdc)

    Rnd 8: *2 hdc in the next st, hdc in the next 10 sts; rep from * around. (72 hdc)

    Rnd 9: Hdc in the next 8 sts, 2 hdc in the next st, *hdc in the next 17 sts, 2 hdc in the next st; rep from * until 9 sts rem, hdc in last 9 sts. (76 hdc)

    Rnds 10 - 15: Hdc in each st around.

    Rnd 16: *Hdc in the next 17 sts, hdc2tog; rep from * around. (72 sts)

    Rnd 17: *Hdc in next 10 sts, hdc2tog; rep from * around. (66 sts)

    Rnd 18: Hdc in next 5 sts, hdc2tog, *hdc in next 9 sts, hdc2tog; rep from * around until 4 sts rem, hdc in last 4 sts. (60 sts) 

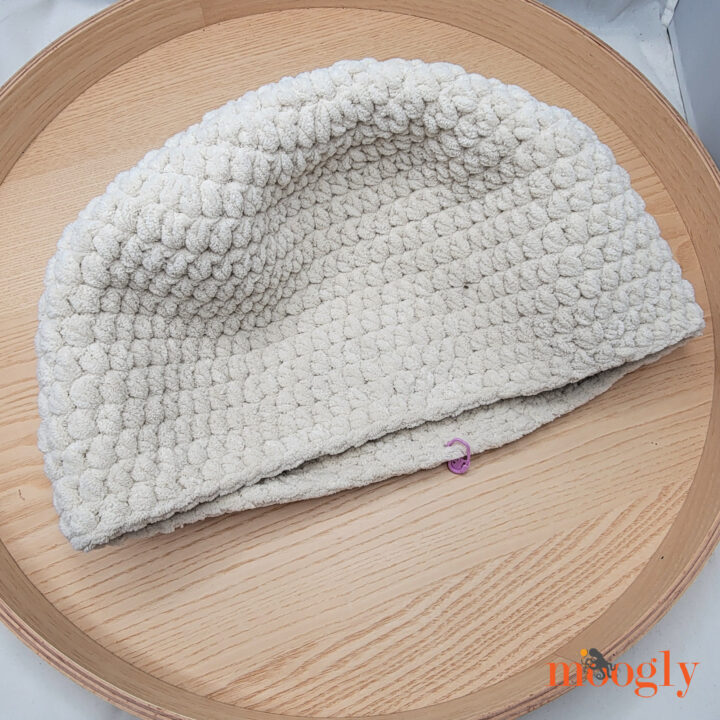
    Rnd 19: Sc in next st, sl st in next st, break yarn and seamless join. Set Body aside.

    Puppy Squish Body

    Feet - Make 4 with Color B

    Rnd 1: Make a magic circle, ch 1, sc in the ring, 6 hdc in the ring. (7 sts)

    Rnd 2: 2 hdc in each st around. (14 sts)

    Rnd 3:  Hdc in next st, sc in next 5 sts, hdc in next 2 sts, sc in the next 5 sts, hdc in next st. (14 sts) Secure active loop with a stitch marker and weave in your first end now.

    Row 4: Fold piece flat, ch 1, sc through next st and last st, sc through next 6 sets of sts; break yarn and finish off.

    Feet attached to belly

    Belly - Make 1 with Color A

    Rnd 1 - 5: Rep Rnd 1 - 5 of Body. (50 hdc)

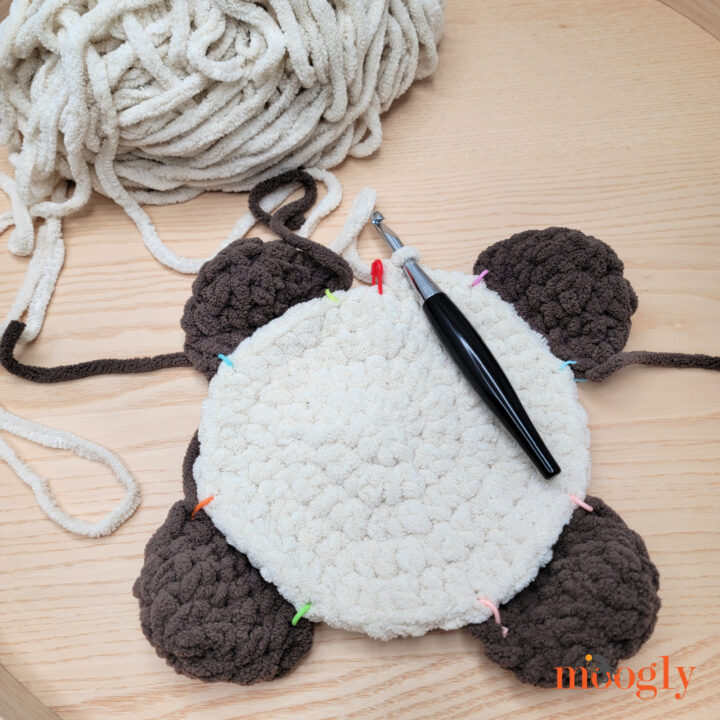
    Add Feet: Place stitch markers at st #3 and 9 (first foot), 15 and 21 (second foot), 28 and 34 (third foot), and 40 and 46 (fourth foot). Use these stitch markers to attach the last row of each foot to the RS of the belly. 

    Rnd 6: Working through both layers as needed, *hdc in the next st, 2 hdc in the next st, hdc in the next 3 sts; rep from * around. (60 hdc)

    Rnd 7: Sc in next st, sl st in next st, break yarn and seamless join, leaving a long tail for sewing.

    Puppy Squish Feet and Belly

    Ears - Make 2 with Color B in desired style

    FOLD OVER VERSION (Terrier):

    Row 1 (RS): Ch 6, skip the ch closest to the hook and pm in skipped ch, sc in each rem ch; turn. (5 sc)

    Row 2 (WS): Ch 1, sc in first 5 sts, 3 sc in marked ch, pm in center of 3 sts just made, sc in base of each st; turn. (13 sts)

    Row 3: Ch 1, sc in first 6 sts, 3 sc in marked st, pm in center of 3 sts just made, sc in each rem st across; turn. (15 sts)

    Row 4: Ch 1, sc in first 6 sts, 2 sc in next st, 3 sc in marked st, 2 sc in next st, sc in each rem st across; turnbreak yarn, leaving a long tail for sewing. (19 sts)

    LONG FLOPPY VERSION (Hound) - SHOWN:

    Row 1 (WS): Ch 9, skip the ch closest to the hook and pm in skipped ch, sc in each rem ch; turn. (8 sc)

    Row 2 (RS): Ch 1, sc in first 8 sts, 3 sc in marked ch, pm in center of 3 sts just made, sc in base of each st; turn. (19 sts)

    Row 3: Ch 1, sc in first 9 sts, 3 sc in marked st, pm in center of 3 sts just made, sc in each rem st across; turn. (21 sts)

    Row 4: Ch 1, sc in first 9 sts, 2 sc in next st, 3 sc in marked st, 2 sc in next st, sc in each rem st across; turn break yarn, leaving a long tail for sewing. (25 sts)

    Puppy Squish

    Tail - Make 1 with Color B

    Rnd 1: Ch 2, skip the ch closest to the hook, 6 dc in the last ch; join with sl st in the first dc. (6 dc)

    Rnds 2 - 3: Ch 1, sc in first 3 sts, dc in last 3 sts; join and break yarn, leaving a long tail for sewing. (14 dc) Use the first end to stuff the tail.

    Puppy Squish

    Eye Patch - Make 1 with Color B

    Row 1 (RS): Make a magic circle, ch 1, sc in the ring, 9 hdc in the ring; turn, do NOT join. (10 sts)

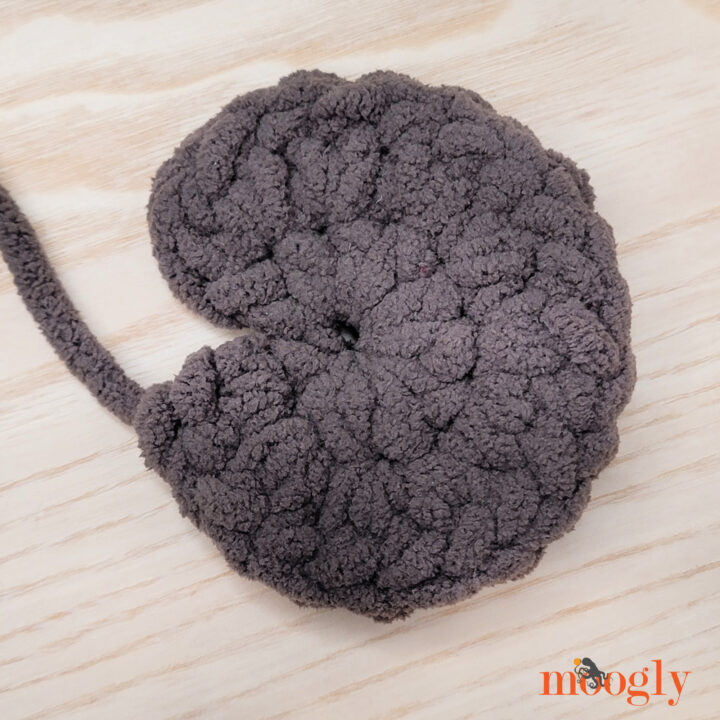
    Row 2 (WS): Ch 1, 2 hdc in each st across, break yarn leaving a long tail for sewing. (20 hdc)

    Puppy Squish

    Puppy Squish Assembly

    The marked sts of the Body and Belly (sc at beg of last rnd) mark the center back of the Puppy. Use these markers to orient the other pieces. Be sure to check placement before adding safety eye backs or weaving in ends. Feel free to adjust the placement of pieces to get the look desired.

    Step 1: Add Ears

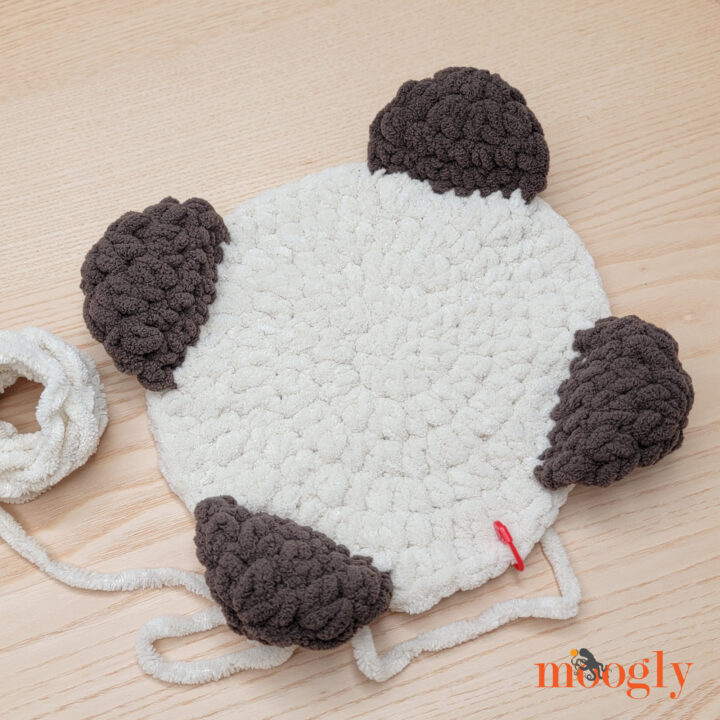
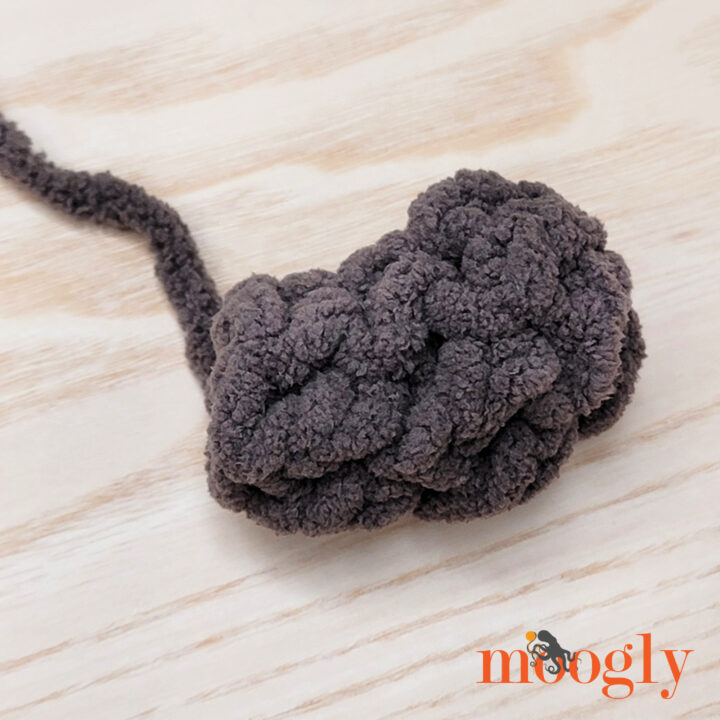
    Fold Over/Terrier Version: Use the tails to sew the ears to the top of the head, from Rnds 4 - 8 of the Body. Sew along the straight edge (ends of rows). Keep this line straight to cause the ear to fold over towards the front of the Body.

    Folded Ear of Puppy Squish

    Long/Hound Version: Use the tails to sew the ears to the top of the head, working along Rnd ⅘, on the sides of the head. Sew along the straight edge (ends of rows). Angle the ears toward the opening at the bottom of the Body.

    Puppy Squish - Moogly

    Step 2: Add the Face

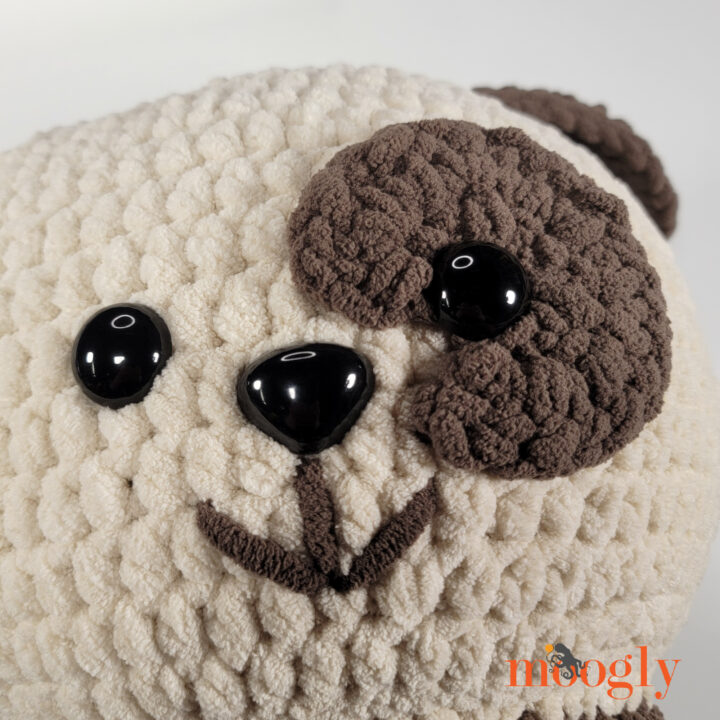
    Create the face between the ears, on the front of the body. Play with the placement of the eyes, nose, and eye patch to create the look desired, and secure in place. As shown, the Nose is between Rnds 14 and 15, and the Eyes are centered between Rnds 13 and 14. Depending on the length of the shaft of your Safety Eyes, you may need to secure one Eye to the Eye Patch only, rather than going through both layers of fabric with the Safety Eye. Use an additional length of Color B to add a smile and nose line if desired.

    Puppy Squish - Moogly

    Step 3: Add the Tail

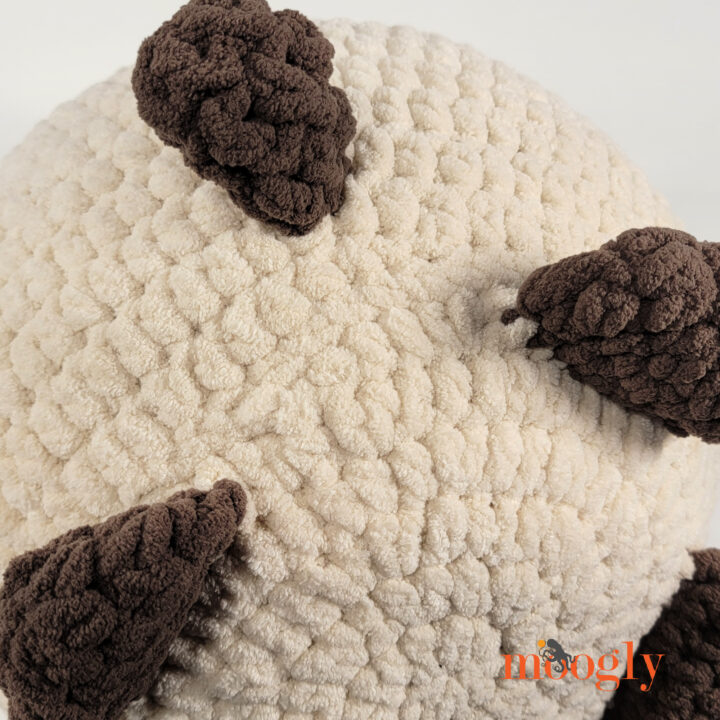
    Sew the Tail between the ears, opposite the face, above the back stitch marker, or as desired. As shown, the tail is located on Rnds 17/18.

    Puppy Squish - Moogly

    Step 4: Stuff and Sew on the Belly

    Insert your pillow ball or add stuffing to the Body so that a smooth round shape is achieved. Match the Belly stitches to the last rnd of the Body, putting back (last rnd sc) sts together. Use stitch markers to connect every few stitches around. Use the long tail of the Belly to whip stitch through each pair of Body and Belly stitches. Weave in final end.


    Need More Squish in your Life?

    Ready for your next project? Get all the Squishes Here! Check out the Moogly Free Patterns Page or Ravelry!

    Puppy Squish - Moogly

    If any of the Squish patterns inspire you to make your own project, and you post a photo on social media, be sure to tag me @mooglyblog or #mooglyblog so I can check it out too!

    The Fine Print

    Follow Moogly on YouTube, Facebook, Twitter, Pinterest, TikTok, and Instagram! Thank you to Yarnspirations for providing the materials shown in this post. Written pattern copyright Tamara Kelly 2026, all rights reserved. Please do not reprint or repost this pattern. Please do link to this page to share this pattern with others. If you wish to make items for sale from this pattern or translate it to another language, please visit the About page for details. 

    $100 Furls Shopping Spree Giveaway

    April 7, 2026 by Tamara Kelly 6 Comments

    $100 Furls Shopping Spree Giveaway

    There’s something extra special about treating yourself to beautiful tools, and this giveaway is all about that joy! I am thrilled to team up with Furls Fiberarts to offer one lucky winner a $100 gift certificate to spend on their stunning hooks and accessories. If you’ve been dreaming of upgrading your crochet toolkit, this is your chance!

    Disclaimer: This post includes affiliate links; prize provided by Furls Fiberarts; all opinions are my own.

    What's New at Furls

    Furls is always debuting amazing new hooks and storage solutions! This spring, they have released a fresh lineup of gorgeous new hooks that blend eye-catching design with the thoughtful craftsmanship they’re known for. These additions are as functional as they are inspiring. Here are a few of the latest to get your wishlist started!

    Streamline® Fusion Crochet Hook in Mango + White

    Streamline® Fusion Crochet Hook in Mango + White

    I love the Streamline shape, and this new Fusion style? Stunning. Combining warm mango wood with cool swirly white resin, this hook is gorgeous to look at and a joy to use. I have two in my collection, and they are super light at just 0.5 oz and very smooth - and every time I pick them up, they just make me smile. They are available in 10 sizes, G/4.00 mm to P/10.00 mm. This is the first of these Fusion hooks - I can't wait to see what comes next!  CLICK HERE to check out the Streamline® Fusion Crochet Hook in Mango + White!

    Odyssey® II Crochet Hook

    Odyssey® II Crochet Hook

    Fans of the original Odyssey - as well as its detractors - are going to love this new version! The Odyssey® II has been redesigned with new materials and construction for a stronger hook that won't tarnish. They've added a chrome finish to the aluminum tip and engraved the size - nice and big and easy to read! They started with Noir (a sparkly black) and Quartz (a stunning white), and recently added the Aubergine (a bright purple) and Riviera (a cool aqua). These hooks are available in sizes E/3.50 mm to P/10.0 mm. What colors do you think they'll add next? CLICK HERE to check out the Odyssey® II Crochet Hook!

    Tunisian Crochet Hooks in Laurel

    Tunisian Crochet Hooks in Laurel

    Pretty enough to put on display anywhere in the home, these Tunisian hooks feel like magic wands! I've only spent a few minutes with mine, but the glide was amazing, and the feel is just gorgeous. These hooks feature a two-piece construction - the body of the hook is one long super smooth piece, and then the finial is added right at the end to dress it all up. These hooks are handmade from sustainably-certified laurel hardwood, and include sizes from H/5.00 mm to L/7.00 mm. CLICK HERE to check out the Tunisian Crochet Hooks in Laurel!

    My Personal Favorites

    When it comes to my favorite tools, I’m always drawn to pieces that feel as good in my hands as they look in social media photos. These are the tools that turn everyday stitching into something a little more special, and once you try them, I think you will see why they’ve earned a permanent spot in my crochet rotation. (Though the ones above are quickly becoming regular go-tos too!)

    Streamline® Metal Matte Crochet Hooks

    Streamline® Metal Matte Crochet Hooks

    When I crochet, I often tailor my hook choice to my yarn. If it's a super slippery yarn, I go for a Streamline Metal in Matte. All the colors are lovely, and I've collected a wide variety. I don't think I could pick a favorite color... unless it's whatever matches the project color at the time! The Matte finish is smooth without being slick, giving me just the right amount of "grip" for my stitches! The ergonomic shape feels great, and they come in sizes from E/3.50 mm to P/10.00 mm. CLICK HERE to check out the Streamline® Metal Crochet Hooks!

    Streamline® Wood Crochet Hooks

    Streamline® Wood Crochet Hooks

    What about when the yarn has a bit of texture? That's when I turn to my Streamline® Wood Crochet Hooks! I don't have quite as many of these, but I do love using them when I get the chance. They have that same great ergonomic shape and come in a few different colors and finishes as well. But I think the 3 most important factors are: 1 - they are super slick, 2 - they are feather light, 3 - they are "Furls' most economically priced tool!" CLICK HERE to check out the Streamline® Wood Crochet Hooks!

    Companion Crochet Hook Sleeve in Leather

    Companion Crochet Hook Sleeve in Leather

    One of the things that brings me great joy in life is finding a solution for something that has persistently irked me. Is there anything more annoying than when your hook rolls right off your desk or table... or tray table? There it goes with a giant clatter - off to parts unknown, making you put everything down to look for your missing tool, hoping it survived the journey. Okay, so this isn't going to save the world, and there are bigger issues out there in life... but the Companion Crochet Hook Sleeve makes my crochet time every day a little bit better. Actually, I've used these for a few different craft tools - it's such a handy item to keep your stuff right where you left it! CLICK HERE to check out the Companion Crochet Hook Sleeve in Leather!

    The $100 Furls Shopping Spree Giveaway

    The $100 Furls Shopping Spree Giveaway is open to addresses in the USA, Canada, Australia, and the UK. This giveaway ends May 5, at 12:15am Central US time. To enter, use the Kingsumo form below.

    The winner will receive a gift certificate for $100 of in stock Furls products as found at FurlsCrochet.com.

    Now, don't forget to enter all the other great giveaways happening now on Moogly!

    Good luck all! Here's a Pin Image for your Giveaways or Yarn boards!

    $100 Furls Shopping Spree Giveaway

    You can follow Moogly on YouTube, Facebook, Pinterest, TikTok, Bluesky, and Instagram. Don’t forget to sign up for the free newsletter at the top of the page! Thank you to Furls for sponsoring this giveaway!

    MooglyCAL2026 Block 7

    April 2, 2026 by Tamara Kelly 4 Comments

    MooglyCAL2026 Block 7 Courtesy of Stitch & Hustle

    MooglyCAL2026 Block 7 is a mesmerizing block by Michele Costa of Stitch & Hustle! The Crashing Waves Blanket Square delivers texture and lots of color possibilities for all skill levels! Get all the details for this free crochet along, and the free pattern link below!

    Disclaimer: This post includes affiliate links; materials provided by Local Crafts.

    Just getting started with the Moogly Crochet Along? CLICK HERE for the intro info!

    Want to get help with the patterns, show off, and CAL with others? CLICK HERE for the Facebook group

    Like to see all the squares visually? CLICK HERE for the Pinterest Board! (Squares will be added as they are released.)

    Introducing the MooglyCAL ONLY Newsletter! Never miss a Square Debut!

    The 2026 Moogly CAL Schedule

    As the year progresses, links will be added, and you'll be able to click on any of the past squares to go to their posts. The numbers refer to the date of the month that the square will debut.

    January Archie Argyle Crochet Square and Radiate Champion Block
    February Cozy Circles Crochet Square and Endless Griddle Stitch Square
    March Blue Cascade Afghan Square and Woven Checkerboard Square
    April THIS POST, 16, and 30
    May 14 and 28
    June 11 and 25
    July 9 and 23
    August 6 and 20
    September 3 and 17
    October 1, 15, and 29
    November 12 and 25

    *****

    Block #7:

    Crashing Waves Blanket Square

    by Stitch & Hustle

    MooglyCAL2026 Block 7 Courtesy of Stitch & Hustle

    Above, you can see the square that Michele made in 5 colors of WeCrochet Swish Worsted! Below is my CAL square, in my 6 colors of Brava Worsted - Custard, Seashell, Fig, Denim, Espresso, and Cream!

    MooglyCAL2026 Block 7

    Details for MooglyCAL2026 Block 6

    My Notes: This square has texture, color, and novelty - love it! The Crashing Waves Blanket Square is quick to learn and easy to memorize, with great results. When you're ready to start making the second row of Spike Stitches, be sure to look closely at how Michele wants us to make them - your hook will go in slightly to the side of where you might think. It takes a little time and attention to get each spike stitch into the right place, but the effect is worth it! Be sure to check out my note on sizing below to understand the changes I made in my square.

    Helpful Links and Tutorials: Crochet Abbreviations, Standing sc, Spike Stitches, Surface Crochet, and seamless join.

    Sizing: My gauge for this one was way smaller than Michele's, and rather than being 10" across, the main portion of my square worked up to be 8" wide. To keep it square, I skipped Rows 31 and 32. Then, to bring it to 12", I changed Border Rnd 2 to double crochet, and then added two more rounds of double crochet. To make this larger border more interesting, I added a couple of rounds of surface crochet.

    But everyone's gauge is different, so be sure to measure as you go! Learn how to adjust for size HERE to ensure all your squares are the same size. Remember that the 12″ is measured across and up and down, not diagonally/corner to corner.

    Yarn Options: This year, our designers have chosen from a variety of yarns, including Brava Worsted, Swish Worsted, Jimmy Beans Wool Beanstalk, Berroco Vintage, and MadTosh Vintage. For this square, I used Brava Worsted, and Michele used Swish Worsted!

    What I Did:

    I used a US-J, 6.0 mm crochet hook, and Brava Worsted yarn, and my color scheme was as follows (see pics for more info on placement):

    Interior of Square:
    Color A:
    Espresso
    Color B:
    Denim
    Color C:
    Fig
    Color D:
    Custard
    Color E:
    Seashell
    Border Rnds:
    Cream
    Surface Crochet Rnds:
    Seashell and Denim

    This square required a little bit of blocking. I used the wet blocking method to square it up!

    The Pattern:

    CLICK HERE FOR THE PATTERN FOR BLOCK #7

    PLEASE NOTE: The designers all hold individual copyrights for their patterns. They may choose to make videos of their patterns, and you can certainly request them from the designers. In addition, there are videos linked in the notes for specific stitches and techniques that may help you with the pattern. They may offer paid PDFs of the pattern, but have agreed to leave it up for free on their website or on Ravelry for as long as possible.

    Show Off Your Squares!

    If you share your photos on social media, be sure to use the hashtags #mooglycal2026 and tag your yarn - I'll be using #bravaworsted -  and tag me @mooglyblog so I can see them too! And don't forget to share them in the MooglyCAL Facebook Group! Thank you all for CAL-ing with me!

    And finally, here's a pin of MooglyCAL2026 - Block 7 for your own Pinterest boards!

    MooglyCAL2026 Block 7 Courtesy of Stitch & Hustle

    You can follow Moogly on YouTube, Facebook, Twitter, Pinterest, TikTok, and Instagram, and don't forget to sign up for the free newsletter at the bottom of the page! Thank you to Local Crafts for providing the materials for this crochet along.  

    Crochet and Catch Up with Moogly - April 1, 2026

    April 1, 2026 by Tamara Kelly Leave a Comment

    Crochet and Catch Up with Moogly - April 1, 2026

    No fooling! April is here, and that means it’s time for another Crochet and Catch Up on Moogly! Bring whatever you’re working on and settle in for a relaxed, welcoming reprieve with fellow crocheters. I’ll be sharing what’s been happening behind the scenes, chatting about current projects and what’s coming next, and answering your crochet questions along the way. It’s the perfect midweek break to slow down, get inspired, and enjoy some creative time together. I hope you’ll join me!

    Disclaimer: This post may contain affiliate links. Live videos are unscripted, unedited, and occasionally weird; all opinions are my own. 

    Crochet and Catch Up with Moogly

    Going LIVE on Facebook and YouTube, at 11am CT!

    Click here to Like the Moogly Facebook Page and get notified when I go live!

    Click here to Subscribe to the Moogly YouTube Page and get notified when I go live!

    Moogly Community Group on Facebook

    What I'm Wearing: Park Lane Shawl

    Hat Templates are 10% off now through April 27 (or until supplies last)

    MooglyCAL2026 Block 6 Courtesy of MBT Creates

    CAL Yarns: Brava Worsted, Swish Worsted, Jimmy Beans Wool Beanstalk, Berroco Vintage, and MadTosh Vintage.

    Warm Up America Baby Blanket Drive

    WeCrochet Brava Baby DK

    Sideways Sampler Shawl - Parts 3 and 4 and Tutorials

    Dungeons & Dragons Crochet Review and Giveaway

    Crochet Snow Globes Book Review and Giveaway

    Sneak Peek: Sneak peek of the next Squish - featuring a NEW PILLOW BALL and the Furls Odyssey II!

    Moogly Around the Web - and the World!

    Want to see me online?

    Monday, May 18, 2026 (6:00 PM - 8:00 PM) (CDT) - CGOA Class - Edinburgh Evenings Shawl - How to Crochet Linked Stitch Mesh

    Want to see me in person in 2026?

    Crochet and Catch Up with Moogly - March 18, 2026

    May 1 - 2: I will be teaching four classes at the new Fiber and Fabric Craft Festival in Chicago - one on Friday, and three on Saturday! The easiest way to find my classes is to "Filter by Speakers" and then scroll down to Tamara Kelly.  CLICK HERE to get your event ticket for FREE!

    If you have a LYS or event you'd like me to teach at this year, or if you would like me to teach an online class to your group or guild, please do reach out!

    Have a wonderful day all - see you to crochet and catch up next time! And before you go, here's a Pin for today's post, so you can add it to your favorite Pinterest boards! We appreciate (and need) your shares on all our posts.

    Crochet and Catch Up with Moogly - April 1, 2026

    Follow Moogly on YouTube, Bluesky, Facebook, Pinterest, TikTok, and Instagram! 

    Sideways Sampler Shawl - Part 4 Tutorial

    March 31, 2026 by Tamara Kelly Leave a Comment

    Sideways Sampler Shawl - Part 4 Tutorial

    Welcome to the Tutorial for Part 4 of the Sideways Sampler Shawl Crochet Along! We’ve made it to the final section! In this last part, we’ll finish shaping the shawl, and add a simply but lovely edging. This is where it all comes together. Let’s finish your Sideways Sampler Shawl and get it ready to wear!

    Disclaimer: This post includes affiliate links.

    Be sure to scroll down past the videos to get the links to the free pattern and supplies!

    Sideways Sampler Shawl - Part 4 Tutorial:

    How to Crochet the Sideways Sampler Shawl - Part 4 - Right-Handed

    Learn to Crochet the Sideways Sampler Shawl - Part 4 - Left-Handed

    As Seen in This Video (click each for more info!):

    The Free Pattern: Sideways Sampler Shawl Part 4

    The Supplies:

    US - H, 5.0 mm - Furls Streamline

    Shown in Pattern: Concept by Katia 4ply Symmetric Socks + More Illusion (Superwash Wool 75%, Polyamide 25%; 320m/349yd; 80g/2 ⅘oz)

    Shown in Tutorials: Universal Yarn Colorburst (65% superwash fine merino, 35% acrylic)

    Stitch Markers

    And here's a Pin for your Crochet Pinterest Board! Make sure you are following Moogly on Pinterest for all the best knit, crochet, and craft pins!

    Sideways Sampler Shawl - Part 4 Tutorial

    I hope you enjoy this tutorial for the Sideways Sampler Shawl - Part 4! If this video doesn't answer all your questions, please ask in the comments below - I'm always happy to help.

    If you make this or any Moogly pattern, please tag me in your photos so I can see them too, @mooglyblog or #mooglyblog! Then send them to tamarakelly@mooglyblog.com to see them featured in a future Moogly email newsletter!

    Get Moogly on your favorite social media sites: YouTube, Facebook, Pinterest, Tik Tok, Bluesky, and Instagram! And sign up for the free newsletter at the bottom of the page so you don’t miss a thing! Thank you to Yarnspirations for providing the materials for this video.

    Sideways Sampler Shawl - Part 4

    March 30, 2026 by Tamara Kelly 7 Comments

    Sideways Sampler Shawl - Part 4

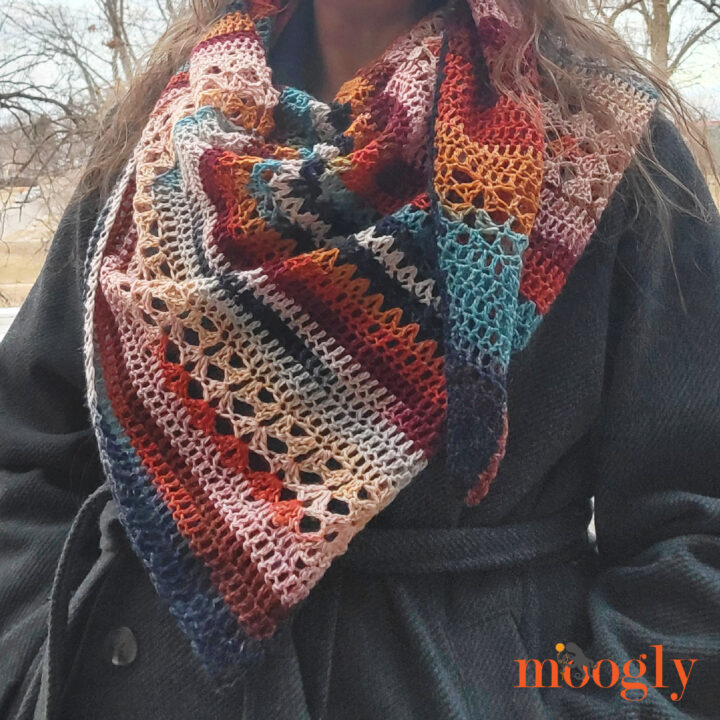
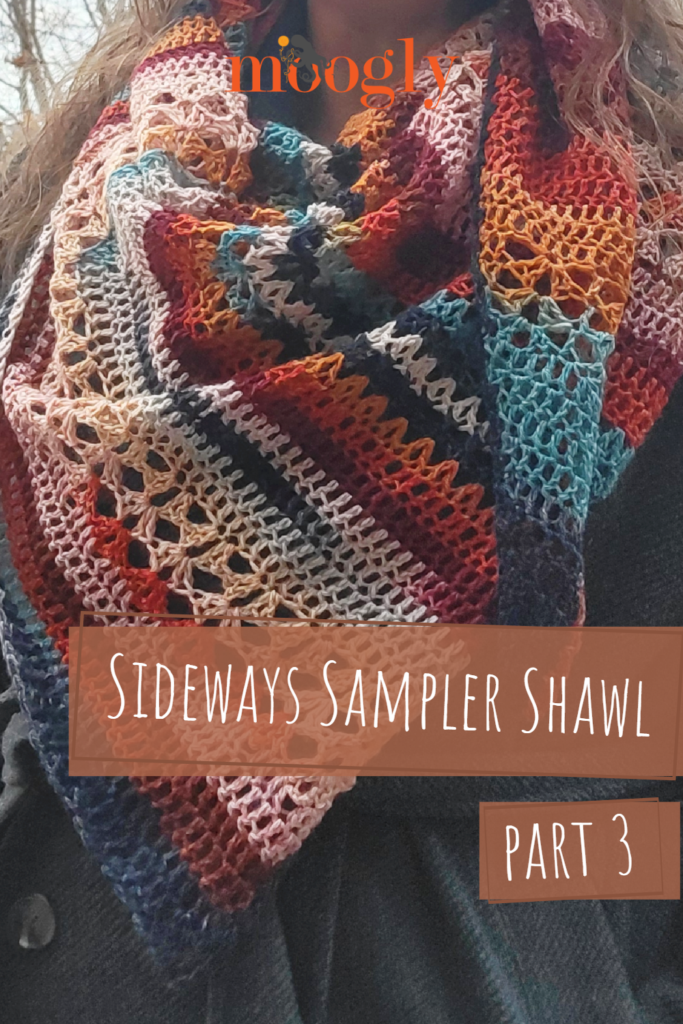
    The Sideways Sampler Shawl is all about enjoying the process. Take your time. Savor each stitch pattern. Share your progress. And by the end, you’ll have a stunning shawl that tells the story of every stitch you learned along the way! Read on for Part 4, the final part of this gorgeous pattern.

    Disclaimer: This post includes affiliate links. Materials provided by Furls and Katia. Professional photos (aka, the really good ones) courtesy of The Studio Chicago and Stitch Up Chicago.

    Prefer an all-in-one ad-free PDF? You've got options!

    This button leads to the pattern on Etsy

    Prefer the free blog version? Keep scrolling!

    The Moogly March 2026 Crochet Along

    At least once a year, I try to host a month-long crochet along - and this year it's the Sideways Sampler Shawl! I've been working on this design for several months now, and it has been so much fun.

    Worked from side to side, this asymmetrical triangular shawl keeps things interesting from the very first stitch. Instead of working from the top down or bottom up, we’ll build our shape gradually across, letting the stitches and color changes shine as the fabric flows outward. Just as the rows get long, it's time to start decreasing and race to the finish.

    And because this is a sampler, each section introduces some new stitch patterns to keep you interested and motivated. The result is a beautifully textured shawl that feels cohesive, even as the stitches change along the way.

    Sideways Sampler Shawl - Crochet Along on Moogly

    Each part builds directly on the last, so there is no sewing pieces together at the end. Just one continuous, satisfying project from start to finish.

    New instructions will be posted right here on Moogly each week, so you can crochet at your own pace. Join in on release day or catch up when it fits your schedule. This CAL is designed to be flexible and fun - for weeks, and even years to come!

    The Schedule:

    March 9 - Part 1 of the Sideways Sampler Shawl written pattern

    March 10 - Video Tutorial for Part 1 of the Sideways Sampler Shawl

    March 16 - Part 2 of the Sideways Sampler Shawl written pattern

    March 17 - Video Tutorial for Part 2 of the Sideways Sampler Shawl

    March 23 - Part 3 of the Sideways Sampler Shawl written pattern

    March 24 - Video Tutorial for Part 3 of the Sideways Sampler Shawl

    March 30 - THIS POST, Part 4 of the Sideways Sampler Shawl written pattern

    March 31 - Video Tutorial for Part 4 of the Sideways Sampler Shawl

    Sideways Sampler Shawl - Part 4

    How to Join

    Just make the pattern as we go - no need to sign up or do anything other than enjoy the CAL and stitch along with us! If you do share your projects online, I'd love it if you tag me @mooglyblog so I can see them too! ♥

    Sideways Sampler Shawl - Part 4

    Made with Concept by Katia 4ply Symmetric Socks + More Illusion - or whatever you want!

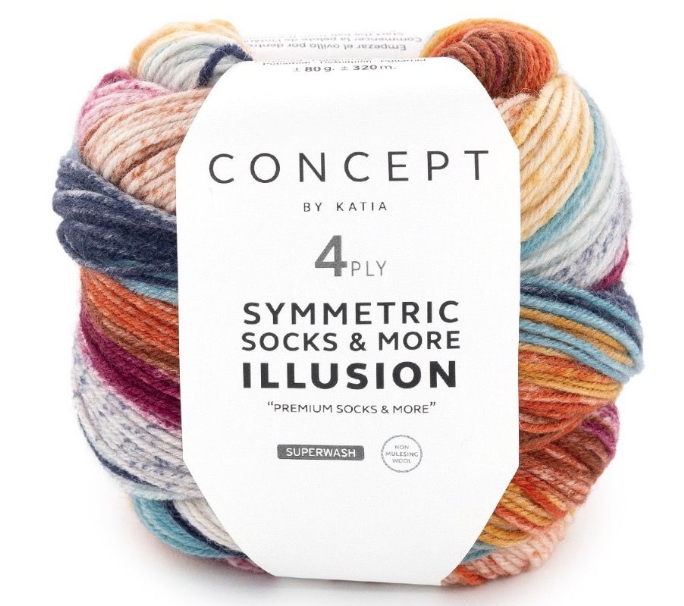
    Katia was kind enough to send me two balls of Concept by Katia 4ply Symmetric Socks + More Illusion late last year, and I fell in love. I then spent the next several months, off and on, working on this shawl. The self-striping was super motivating, and the yarn was a joy to stitch.

    Concept by Katia 4ply Symmetric Socks + More Illusion

    And then other people discovered the yarn - and they promptly sold out. I have great timing! Luckily, there are lots of gorgeous substitutes you can make. If you've got 2 hanks of fingering or sport weight yarn in your stash, this just might be the pattern they were waiting for!

    Sideways Sampler Shawl - WIP 4

    Why fingering or sport? Well, this yarn is European, and they list it as a Sport weight yarn. But then, if you look at the Ravelry listing for this yarn, it's a Fingering weight! Which is "correct"? Depends who you ask, I'm sure. The great thing is that this is a shawl, and if you hit gauge (or a bit larger) and like the fabric you're getting, it's all good!

    Sideways Sampler Shawl - Part 4


    Sideways Sampler Shawl - Part 4

    Add this pattern to your Ravelry Queue and Favorites

    US - H, 5.0 mm - Furls Streamline

    620 yds Concept by Katia 4ply Symmetric Socks + More Illusion (Superwash Wool 75%, Polyamide 25%; 320m/349yd; 80g/2 ⅘oz)
    Colorway Shown: 72 - Blue-Ochre-Red-Rust (2 balls

    Stitch Markers

    Gauge: 13 dc = 4” blocked

    Finished Size: 62" x 51" x 31" after blocking

    Helpful Links and Tutorials:

    Sideways Sampler Shawl Part 4 Tutorial - COMING TOMORROW

    Crochet Abbreviations

    Magic Circle

    CSDC - Chainless Starting Double Crochet

    Puff Stitch

    Special Stitches and Abbreviations

    Pm - place stitch marker in stitch or space just made

    Puff - [yo, insert hook in indicated stitch, yo and pull up a loop] twice, yo and pull through all 5 loops on hook

    Dpuff - [yo, insert hook in indicated stitch, yo and pull up a loop] 3 times, yo and pull through all 7 loops on hook

    Tpuff - [yo, insert hook in indicated stitch, yo and pull up a loop] 4 times, yo and pull through all 9 loops on hook

    Big V - (2 dc, ch 1, 2 dc) worked into the same st or ch sp

    V - (dc, ch 1, dc) worked into the same st or ch sp

    X - skip the next dc and ch-1, dc in the next dc, ch 1, dc in skipped dc working in front of the first dc 

    CSDC/dc2tog - Pull up a loop to the height of a dc st, secure the top of the loop to the top of the hook, yo with the loop itself, insert hook into first st of the row, yo and pull up a loop, yo and pull through the first 2 loops, yo and insert hook into next st, yo and pull up a loop, yo and pull through the first 2 loops, yo and pull through all 3 rem loops on hook. (Substitute: Ch 2, dc in the next st - ch 2 does not count as a st)

    Wide V - (dc, ch 2, dc) into the same st or ch sp

    Cluster - [yo and insert hook into indicated st or ch sp, yo and pull up a loop, yo and pull through 2 loops on hook] 3 times, yo and pull through all 4 loops on hook (aka, dc3tog with all posts worked in the same st or sp)

    Sideways Sampler Shawl - Part 4

    NOTES

    Use a stitch marker in the “corner” increase stitch or space from Row 1 through Row 61 - (pm). This marked st or space is referred to as the corner in the subsequent row. 

    Do not fully close the magic circle until the Border is finished. 

    When working “between the previous and next st,” insert the hook between the post of the stitch just worked into or skipped, and the post of the next st in the previous row.

    When making the border, not all rows end with dc stitches - in these sections, simply work evenly following the pattern to create a continuous line until you return to a dc section.

    Sideways Sampler Shawl - Part 4 Instructions

    Row 69: CSDC/dc2tog, dc in each rem st across; turn. (47 dc)

    Row 70: CSDC in first st, dc in each rem st until 2 sts rem, dc2tog; turn. (46 dc)

    Row 71: CSDC/dc2tog, dc in each rem st across; turn. (45 dc)

    Row 72: CSDC in first st, dc in each rem st until 2 sts rem, dc2tog; turn. (44 dc)

    Row 73: CSDC/dc2tog, dc in next st, skip next 2 sts, wide V in next st, [skip 2 sts, cluster in next st, skip 2 sts, wide V in next st] 6 times, skip next st, dc in last st; turn. (6 clusters)

    Row 74: CSDC in first st, ch 1, skip next dc, cluster in next ch-2 sp, skip next dc, [wide V in next cluster, skip next dc, cluster in next ch-2 sp, skip next dc] 6 times, ch 1, dc2tog; turn. (7 clusters)

    Row 75: CSDC/dc2tog in first dc and next cluster, ch 2, dc in same cluster, [skip next dc, cluster in next ch-2 sp, skip next dc, wide V in next cluster] 6 times, skip ch-1, dc in last st; turn. (6 clusters)

    Row 76: CSDC in first st, [dc in next st, 2 dc in ch-2 sp, dc in next st, 2 dc in cluster] 6 times, dc in next st, dc in next ch-2 sp, dc in last st; turn. (40 dc)

    Row 77: CSDC/dc2tog, dc in each rem st across; turn. (39 dc)

    Row 78: CSDC in first st, dc in each rem st until 2 sts rem, dc2tog; turn. (38 dc)

    Row 79: Rep Row 77. (37 dc)

    Row 80: Rep Row 78. (36 dc)

    Row 81: Rep Row 77. (35 dc)

    Row 82: CSDC in first st, [dc in next st, sc in top half of dc just made, skip next st] 16 times, dc2tog; turn. (34 sts)

    Row 83: CSDC/dc2tog, [dc in next st, sc in top half of dc just made, skip next st] 15 times, dc in last 2 sts; turn. (33 dc)

    Row 84: CSDC in first st, [dc in next st, sc in top half of dc just made, skip next st] 15 times, dc2tog; turn. (32 sts)

    Row 85: CSDC/dc2tog, dc in each rem st across; turn. (31 dc)

    Row 86: CSDC in first st, dc in each rem st until 2 sts rem, dc2tog; turn. (30 dc)

    Row 87: Rep Row 85. (29 dc)

    Row 88: Rep Row 86. (28 dc)

    Row 89: Rep Row 85. (27 dc)

    Row 90: Rep Row 86. (26 dc)

    Row 91: CSDC/dc2tog, skip the next st, [3 dc in next st, skip 2 sts] 7 times, 2 dc in the next st, dc in last st; turn. (25 dc)

    Row 92: CSDC in first st, skip the next 2 sts, [3 dc between previous and next st, skip 3 sts] 7 times, dc between previous and next st, dc2tog in same sp and last st; turn. (24 dc)

    Row 93: CSDC/dc2tog, dc between previous and next st, skip the next 3 sts, [3 dc in between previous and next st, skip 3 sts] 6 times, 2 dc in between previous and next st, dc in last st; turn. (23 dc)

    Row 94: CSDC in first st, skip next 2 sts, [3 dc in between previous and next st, skip 3 sts] 6 times, 2 dc between previous and next st, dc2tog; turn. (22 dc)

    Row 95: CSDC/dc2tog, 2 dc between previous and next st, skip the next 3 sts, [3 dc in between previous and next st, skip 3 sts] 5 times, 2 dc in between previous and next st, dc in last st; turn. (21 dc)

    Row 96: CSDC in first st, dc in each rem st until 2 sts rem, dc2tog; turn. (20 dc)

    Row 97: CSDC/dc2tog, dc in each rem st across; turn. (19 dc)

    Row 98: Rep Row 96. (18 dc)

    Row 99: Rep Row 97. (17 dc)

    Row 100: Rep Row 96. (16 dc)

    Row 101: Rep Row 97. (15 dc)

    Row 102: CSDC in first st, skip 2 sts, (2 dc, ch 2, 2 dc) in next st, skip 2 sts, dc in next st, skip 2 sts, (2 dc, ch 2, 2dc) in next st, skip 2 sts, dc in next st, dc2tog; turn. (12 dc)

    Row 103: CSDC/dc2tog, skip 2 sts, (2 dc, ch 2, 2 dc) in next ch-2 sp, skip 2 sts, dc in next st, skip 2 sts, (2 dc, ch 2, 2 dc) in ch-2 sp, skip 2 sts, dc in last st; turn. (11 sts)

    Row 104: CSDC in first st, skip 2 sts, (2 dc, ch 2, 2 dc) in next ch-2 sp, skip 2 sts, dc in next st, skip 2 sts, (2 dc, ch 2, dc) in next ch-2 sp, dc2tog in same ch sp and last st; turn. (10 dc)

    Row 105: CSDC/dc2tog, dc in next ch-2 sp, dc in next 5 sts, dc in ch-2 sp, dc in last 3 sts; turn. (11 sts)

    Row 106: CSDC in first st, dc in each rem st until 2 sts rem, dc2tog; turn. (10 dc)

    Row 107: CSDC/dc2tog, dc in each rem st across; turn. (9 dc)

    Row 108: Rep Row 106. (8 dc)

    Row 109: Rep Row 107. (7 dc)

    Row 110: Rep Row 106. (6 dc)

    Row 111: Rep Row 107. (5 dc)

    Row 112: CSDC in first st, dc in next st, dc2tog; turn. (4 dc)

    Row 113: CSDC/dc2tog, dc in last st; turn. (3 dc)

    Row 114: CSDC in first st, dc2tog; turn. (2 dc)

    Row 115: CSDC/dc2tog; turn. (1 st)

    Border: Ch 1, sc in st, working along bottom side of shawl (sc, dc) in the top half of each edge st to corner, (sc, dc) in the corner, *skip the next st, (sc, dc) in next st; rep from * until 1 st rem in Row 61, (sc, dc, sc, dc) in next st, working along shortest side of shawl, (sc, dc) in the top half of each edge st to magic circle, (sc, dc, sc, dc) in magic circle, working along longest side of shawl (sc, dc) in the top half of each edge st across; join with sl st and finish off.

    Weave in ends. Wet block to size.


    I hope you enjoy making and wearing the Sideways Sampler Shawl! If you share on socials, I would love to see it! You can always tag me @mooglyblog!

    Sideways Sampler Shawl - Part 4

    The Fine Print

    Written pattern copyright Tamara Kelly 2026, all rights reserved. Please do not reprint or repost this pattern, but please do link to this page to share this pattern with others. If you wish to make items for sale from this pattern or translate it to another language, please visit the About page for details. Thank you to Katia for providing the yarn for this pattern.

    Dungeons & Dragons Crochet by Stacy King Review and Giveaway

    March 25, 2026 by Tamara Kelly Leave a Comment

    Dungeons & Dragons Crochet by Stacy King Review and Giveaway

    Dungeons & Dragons Crochet: A Book of Many Patterns by Stacy King includes 20 unique patterns for wearables, decor, and amigurumi! If you love a good mashup of gaming fun and yarny creativity, this one is going to feel like a natural 20! Take a peek inside below, and then enter to win your own copy, right here on Moogly!

    Disclaimer: I was given a copy of this book for review; all opinions are my own. This post includes affiliate links. 

    The Dungeons & Dragons Crochet Review

    A Bit About the Author

    Stacy King

    This book was inspired by the D&D multiverse, this book invites crocheters to stitch up everything from iconic creatures like owlbears and dragons to fun, fandom-filled accessories like a Bag of Holding and magical-themed granny squares. And while Stacy King is listed as the author, the patterns are credited to Sharon Posey (Posey Handmade), Alysia Sly (Co-op Creations SD), Rebecca Stone (BextraOrdinary Creatures), and Lydia Viatoris (Earth Tricks).  And here's more about Stacy, via Amazon!

    "Hello, and welcome to my Amazon author page! I'm a Toronto-based writer who specializes in fantasy and historically-influenced work for readers both young and young-at-heart.

    Currently, I'm the co-author of the Young Adventurer's Guides for Dungeons and Dragons, introducing this classic role-playing game to a whole new audience with clear, captivating prose and fantastic new illustrations.

    I'm also a writer and editor for the Manga Classics line, which delivers faithful adaptations of Western literary classics in a graphic style inspired by Japanese manga. My work for the series includes writing adaptations of Jane Austen's "Pride and Prejudice" and "Sense and Sensibility," Bram Stoker's "Dracula" and a selection of Edgar Allen Poe works, along with adapting a number of English-language scripts from the original Cantonese versions.

    My interests include history, costuming, sci-fi, fantasy, role-playing games, travel and dancing."

    Let's take a closer look at this fab new book!

    Dungeons & Dragons Crochet by Stacy King Review and Giveaway

    Inside Dungeons & Dragons Crochet

    "Crochet your favorite creatures, wearables, and household items with twenty patterns inspired by the Dungeons & Dragons multiverse.

    Dive into a world of crochet and adventure with this delightful collection of patterns. Dungeons & Dragons Crochet gives fans and crocheters of all skill levels a chance to bring their favorite in-game elements to life. Create your own Schools of Magic’s symbols granny squares, arm yourself with the Gloves of Missile Snaring, and pack your belongings in the Bag of Holding. In addition to the lore-related items, you’ll find a beastiary of iconic creatures to make your own, including the dangerously cute Owlbear Cub, the menacing Mind Flayer, and the fiery Red Dragon.

    Filled with gorgeous photography and step-by-step instructions with pages that lay flat when open, Dungeons & Dragons Crochet will have adventurers everywhere picking up their new favorite weapon: the crochet hook."

    Dungeons & Dragons Crochet by Stacy King Review and Giveaway

    Whether you’re a longtime adventurer, a casual player, or crafting for gifts and craft fairs, this book brings a wide variety of options! With step-by-step instructions, detailed photos, and patterns designed for a range of skill levels, Dungeons & Dragons Crochet is great for everyone!

    Dungeons & Dragons Crochet by Stacy King Review and Giveaway

    The book itself is a gorgeous, high-quality hardcover - styled to be worthy of sitting on your D&D bookshelf. Each pattern's romance language is written by a true storyteller, adding an extra level of fun.

    Dungeons & Dragons Crochet by Stacy King Review and Giveaway

    The yarns used in the patterns range from DK to Super Bulky, and the vast majority of them will be familiar to you - Lion Brand Truboo, Caron Simply Soft, Lion Brand Heartland, Red Heart Super Saver, WeCrochet Brava, and Bernat Blanket, among them.

    Dungeons & Dragons Crochet by Stacy King Review and Giveaway

    Overall, Dungeons & Dragons Crochet is a must-have for any crafty adventurer or yarn-wielding mage! I've got a few players in my family, and this book caused a big buzz when it showed up on my doorstep! There's a great mix of practical and fun here, and everyone makes a great gift. And I know some of these are going to be big hits at craft fairs and cons this year, too!

    Dungeons & Dragons Crochet by Stacy King Review and Giveaway

    Get your own copy of Dungeons & Dragons Crochet today!

    Purchase your own copy of this book on Amazon, or ask for it at your local bookseller! And if you're into D&D, be sure to check out Stacy's other books too!

    Dungeons & Dragons Crochet

    The Dungeons & Dragons Crochet Giveaway

    The Dungeons & Dragons Crochet Giveaway is open to US addresses. The giveaway ends April 21, 2026, at 12:15am Central US time. To enter, use the Kingsumo form below. Only the email option is mandatory – all other tasks are optional, for bonus entries only.

    One winner will receive a paperback copy of Dungeons & Dragons Crochet, courtesy of Penguin Random House. They will be notified by email.

    GOOD LUCK ALL!

    You can follow Moogly on YouTube, Facebook, Twitter, Pinterest, TikTok, and Instagram. Don’t forget to sign up for the free newsletter at the top of the page! And don't forget to enter all the other fab giveaways on Moogly! And if you'd like to share this post, there's a Pinterest image and sharing buttons below!

    Dungeons & Dragons Crochet by Stacy King Review and Giveaway

    Sideways Sampler Shawl - Part 3 Tutorial

    March 24, 2026 by Tamara Kelly 2 Comments

    Sideways Sampler Shawl - Part 3 Tutorial

    It’s time for the Part 3 Tutorial for the Sideways Sampler Shawl Crochet Along! By now, you can really see that asymmetrical triangle taking shape, and the stitch sampler effect is starting to shine. In this section, we’ll add still more textures and move on to the decreases! You’re doing great. Let’s keep stitching!

    Disclaimer: This post includes affiliate links.

    Be sure to scroll down past the videos to get the links to the free pattern and supplies!

    Sideways Sampler Shawl - Part 3 Tutorial:

    How to Crochet the Sideways Sampler Shawl - Part 3 - Right-Handed

    Learn to Crochet the Sideways Sampler Shawl - Part 3 - Left-Handed

    As Seen in This Video (click each for more info!):

    The Free Pattern: Sideways Sampler Shawl Part 3

    The Supplies:

    US - H, 5.0 mm - Furls Streamline

    Shown in Pattern: Concept by Katia 4ply Symmetric Socks + More Illusion (Superwash Wool 75%, Polyamide 25%; 320m/349yd; 80g/2 ⅘oz)

    Shown in Tutorials: Universal Yarn Colorburst (65% superwash fine merino, 35% acrylic)

    Stitch Markers

    And here's a Pin for your Crochet Pinterest Board! Make sure you are following Moogly on Pinterest for all the best knit, crochet, and craft pins!

    Sideways Sampler Shawl - Part 3 Tutorial

    I hope you enjoy this tutorial for the Sideways Sampler Shawl - Part 3! If this video doesn't answer all your questions, please ask in the comments below - I'm always happy to help.

    If you make this or any Moogly pattern, please tag me in your photos so I can see them too, @mooglyblog or #mooglyblog! Then send them to tamarakelly@mooglyblog.com to see them featured in a future Moogly email newsletter!

    Get Moogly on your favorite social media sites: YouTube, Facebook, Pinterest, Tik Tok, Bluesky, and Instagram! And sign up for the free newsletter at the bottom of the page so you don’t miss a thing! Thank you to Yarnspirations for providing the materials for this video.

    Sideways Sampler Shawl - Part 3

    March 23, 2026 by Tamara Kelly Leave a Comment

    Sideways Sampler Shawl - Crochet Along on Moogly

    Things you'll love about the Sideways Sampler Shawl: gorgeous drape, engaging stitch patterns, and unique construction! This project lets you explore texture in manageable sections, all while creating a wearable piece you’ll reach for again and again. Keep scrolling for the instructions for Part 3!

    Disclaimer: This post includes affiliate links. Materials provided by Furls and Katia.

    Prefer an all-in-one ad-free PDF? You've got options!

    This button leads to the pattern on Etsy

    Prefer the free blog version? Keep scrolling!

    The Moogly March 2026 Crochet Along

    At least once a year, I try to host a month-long crochet along - and this year it's the Sideways Sampler Shawl! I've been working on this design for several months now, and it has been so much fun.

    Worked from side to side, this asymmetrical triangular shawl keeps things interesting from the very first stitch. Instead of working from the top down or bottom up, we’ll build our shape gradually across, letting the stitches and color changes shine as the fabric flows outward. Just as the rows get long, it's time to start decreasing and race to the finish.

    And because this is a sampler, each section introduces some new stitch patterns to keep you interested and motivated. The result is a beautifully textured shawl that feels cohesive, even as the stitches change along the way.

    Sideways Sampler Shawl - Crochet Along on Moogly

    Each part builds directly on the last, so there is no sewing pieces together at the end. Just one continuous, satisfying project from start to finish.

    New instructions will be posted right here on Moogly each week, so you can crochet at your own pace. Join in on release day or catch up when it fits your schedule. This CAL is designed to be flexible and fun - for weeks, and even years to come!

    The Schedule:

    March 9 - Part 1 of the Sideways Sampler Shawl written pattern

    March 10 - Video Tutorial for Part 1 of the Sideways Sampler Shawl

    March 16 - Part 2 of the Sideways Sampler Shawl written pattern

    March 17 - Video Tutorial for Part 2 of the Sideways Sampler Shawl

    March 23 - THIS POST, Part 3 of the Sideways Sampler Shawl written pattern

    March 24 - Video Tutorial for Part 3 of the Sideways Sampler Shawl

    March 30 - Part 4 of the Sideways Sampler Shawl written pattern

    March 31 - Video Tutorial for Part 4 of the Sideways Sampler Shawl

    How to Join

    Just make the pattern as we go - no need to sign up or do anything other than enjoy the CAL and stitch along with us! If you do share your projects online, I'd love it if you tag me @mooglyblog so I can see them too! ♥

    Sideways Sampler Shawl - Part 3

    Made with Concept by Katia 4ply Symmetric Socks + More Illusion - or whatever you want!

    Katia was kind enough to send me two balls of Concept by Katia 4ply Symmetric Socks + More Illusion late last year, and I fell in love. I then spent the next several months, off and on, working on this shawl. The self-striping was super motivating, and the yarn was a joy to stitch.

    Concept by Katia 4ply Symmetric Socks + More Illusion

    And then other people discovered the yarn - and they promptly sold out. Luckily, there are lots of gorgeous substitutes you can use. If you've got 2 hanks of fingering or sport weight yarn in your stash, this just might be the pattern they were waiting for!

    Sideways Sampler Shawl - WIP 3

    Why fingering or sport? Well, this yarn is European, and they list it as a Sport weight yarn. But then, if you look at the Ravelry listing for this yarn, it's a Fingering weight! Which is "correct"? Depends who you ask, I'm sure. The great thing is that this is a shawl, and if you hit gauge (or a bit larger) and like the fabric you're getting, it's all good!

    Sideways Sampler Shawl - Part 3


    Sideways Sampler Shawl - Part 3

    Add this pattern to your Ravelry Queue and Favorites

    US - H, 5.0 mm - Furls Streamline

    620 yds Concept by Katia 4ply Symmetric Socks + More Illusion (Superwash Wool 75%, Polyamide 25%; 320m/349yd; 80g/2 ⅘oz)
    Colorway Shown: 72 - Blue-Ochre-Red-Rust (2 balls

    Stitch Markers

    Gauge: 13 dc = 4” blocked

    Finished Size: 62" x 51" x 31"

    Helpful Links and Tutorials:

    Sideways Sampler Shawl Part 3 Tutorial - COMING TOMORROW

    Crochet Abbreviations

    Magic Circle

    CSDC - Chainless Starting Double Crochet

    Puff Stitch

    Special Stitches and Abbreviations

    Pm - place stitch marker in stitch or space just made

    Puff - [yo, insert hook in indicated stitch, yo and pull up a loop] twice, yo and pull through all 5 loops on hook

    Dpuff - [yo, insert hook in indicated stitch, yo and pull up a loop] 3 times, yo and pull through all 7 loops on hook

    Tpuff - [yo, insert hook in indicated stitch, yo and pull up a loop] 4 times, yo and pull through all 9 loops on hook

    Big V - (2 dc, ch 1, 2 dc) worked into the same st or ch sp

    V - (dc, ch 1, dc) worked into the same st or ch sp

    X - skip the next dc and ch-1, dc in the next dc, ch 1, dc in skipped dc working in front of the first dc 

    CSDC/dc2tog - Pull up a loop to the height of a dc st, secure the top of the loop to the top of the hook, yo with the loop itself, insert hook into first st of the row, yo and pull up a loop, yo and pull through the first 2 loops, yo and insert hook into next st, yo and pull up a loop, yo and pull through the first 2 loops, yo and pull through all 3 rem loops on hook. (Substitute: Ch 2, dc in the next st - ch 2 does not count as a st)

    Wide V - (dc, ch 2, dc) into the same st or ch sp

    Cluster - [yo and insert hook into indicated st or ch sp, yo and pull up a loop, yo and pull through 2 loops on hook] 3 times, yo and pull through all 4 loops on hook (aka, dc3tog with all posts worked in the same st or sp)

    NOTES

    Use a stitch marker in the “corner” increase stitch or space from Row 1 through Row 61 - (pm). This marked st or space is referred to as the corner in the subsequent row. 

    Do not fully close the magic circle until the Border is finished. 

    When working “between the previous and next st,” insert the hook between the post of the stitch just worked into or skipped, and the post of the next st in the previous row.

    When making the border, not all rows end with dc stitches - in these sections, simply work evenly following the pattern to create a continuous line until you return to a dc section.

    Sideways Sampler Shawl - Part 3 Instructions

    Row 53: CSDC in first st, skip next st, [2 dc in next st, ch 2, 2 dc in next st, skip 2 sts] 11 times, (2 dc, ch 1 (pm), 2 dc) in corner, [skip 2 sts, 2 dc in next st, ch 2, 2 dc in next st] 11 times, skip next st, dc in last st; turn. (94 dc)

    Row 54: CSDC in first st, [(2 dc, ch 2, 2 dc) in next ch-2 sp] 11 times, (3 dc, ch 1 (pm), 3 dc) in corner, [(2 dc, ch 2, 2 dc) in next ch-2 sp] 11 times, dc in last st; turn. (96 dc)

    Row 55: CSDC in first st, [(2 dc, ch 2, 2 dc) in next ch-2 sp] 11 times, skip 4 sts, 2 dc in next st, (2 dc, ch 1 (pm), 2 dc) in corner, 2 dc in next st, [(2 dc, ch 2, 2 dc) in next ch-2 sp] 11 times, dc in last st; turn. (98 dc)

    Rows 56 - 61: CSDC in first st, dc in each dc to corner, (dc, ch 1 (pm), dc) in corner, dc in each rem dc across; turn. (110 dc in Row 61)

    Increases Finished - Begin Decreases (no more corners)

    Row 62: CSDC in first st, [skip next st, dc in next 3 sts, dc in skipped st enclosing 3 dc just made] 13 times, skip next st, dc2tog in next st and corner; turn. (54 dc)

    Row 63: CSDC/dc2tog, dc in next 3 sts, [skip next st, dc in next 3 sts, dc in skipped st enclosing 3 dc just made] 12 times, dc in last st; turn. (53 dc)

    Row 64: CSDC in first st, [skip next st, dc in next 3 sts, dc in skipped st enclosing 3 dc just made] 12 times, dc in next 2 sts, dc2tog; turn. (52 dc)

    Row 65: CSDC/dc2tog, dc in next st, [skip next st, dc in next 3 sts, dc in skipped st enclosing 3 dc just made] 12 times, dc in last st; turn. (51 dc)

    Row 66: CSDC in first st, [skip next st, dc in next 3 sts, dc in skipped st enclosing 3 dc just made] 12 times, dc2tog; turn. (50 dc)

    Row 67: CSDC/dc2tog, dc in each rem st across; turn. (49 dc)

    Row 68: CSDC in first st, dc in each rem st until 2 sts rem, dc2tog; turn. (48 dc) Do not break yarn, just go to Part 4 (as soon as it's up)!


    I hope you enjoy making Part 3 of the Sideways Sampler Shawl and are excited for Part 4! If you share on socials, I would love to see it, so be sure to share your photos and let me know how yours is coming along! You can always tag me @mooglyblog!

    Sideways Sampler Shawl - Part 3

    The Fine Print

    Written pattern copyright Tamara Kelly 2026, all rights reserved. Please do not reprint or repost this pattern, but please do link to this page to share this pattern with others. If you wish to make items for sale from this pattern or translate it to another language, please visit the About page for details. Thank you to Katia for providing the yarn for this pattern.

    Crochet and Catch Up with Moogly - March 20, 2026

    March 20, 2026 by Tamara Kelly Leave a Comment

    March 20 2026 Moogly Crochet and Catch Up

    The hooks are ready, the yarn is waiting, and it’s time for another Crochet and Chat on Moogly! Whether you’re working on a current WIP, planning your next project, or just stopping by to say hello, let's take a moment to relax and stitch along together. I’ll be sharing what’s new behind the scenes at Moogly, chatting about recent and upcoming patterns, answering your crochet questions, and of course - talking yarn!

    Disclaimer: This post may contain affiliate links. Live videos are unscripted, unedited, and occasionally weird; all opinions are my own. 

    Crochet and Catch Up with Moogly

    Going LIVE on Facebook and YouTube, at 11am CT!

    Click here to Like the Moogly Facebook Page and get notified when I go live!

    Click here to Subscribe to the Moogly YouTube Page and get notified when I go live!

    Moogly Community Group on Facebook

    What I'm Wearing: Paloma Cardigan

    MooglyCAL2026 Block 5 Courtesy of Julie Yeager Designs

    MooglyCAL2026 Block 6 Courtesy of MBT Creates

    CAL Yarns: Brava Worsted, Swish Worsted, Jimmy Beans Wool Beanstalk, Berroco Vintage, and MadTosh Vintage.

    Warm Up America Baby Blanket Drive

    WeCrochet Brava Baby DK

    Sideways Sampler Shawl - Parts 1 and 2 and Tutorials

    Crochet Layers to Love Book Review and Giveaway

    Crochet Snow Globes Book Review and Giveaway

    Sneak Peek: Something new in filet crochet - featuring Movers & Makers Wicker Park Sock!

    Moogly Around the Web - and the World!

    Crochet and Catch Up with Moogly - March 18, 2026

    Friday, March 27, 12:00 PM - 1:00 PM CDT:  I'll be teaching an online class for GoSadi - Jumbo Yarn Blankets: Knit Without Needles! Learn how to work with super jumbo yarn to create gorgeous blanket-sized projects using your hands instead of knitting needles.
    Crochet and Catch Up with Moogly - March 18, 2026
    Saturday, March 28, 12:00 PM - 1:00 PM CDT: I'll be teaching an online class for GoSadi - Jumbo Yarn Blankets: Crochet Without a Hook! Learn how to work with super jumbo yarn to create gorgeous blanket-sized projects using your hands instead of hooks.

    Want to see me in person in 2026?

    Crochet and Catch Up with Moogly - March 18, 2026

    May 1 - 2: I will be teaching four classes at the new Fiber and Fabric Craft Festival in Chicago - one on Friday, and three on Saturday! The easiest way to find my classes is to "Filter by Speakers" and then scroll down to Tamara Kelly.  CLICK HERE to get your event ticket for FREE!

    If you have a LYS or event you'd like me to teach at this year, or if you would like me to teach an online class to your group or guild, please do reach out!

    Have a wonderful day all - see you to crochet and catch up next time! And before you go, here's a Pin for today's post, so you can add it to your favorite Pinterest boards! We appreciate (and need) your shares on all our posts.

    March 20 2026 Moogly Crochet and Catch Up

    Follow Moogly on YouTube, Bluesky, Facebook, Pinterest, TikTok, and Instagram! 

    MooglyCAL2026 Block 6

    March 19, 2026 by Tamara Kelly 2 Comments

    MooglyCAL2026 Block 6

    MooglyCAL2026 Block 6 is a unique, double-thick block by Mary Beth Temple of MBT Creates! The Woven Checkerboard Square is perfect for crocheters of all skill levels, and ready for all sorts of color play! Get all the details for this free crochet along, and the free pattern link below!

    Disclaimer: This post includes affiliate links; materials provided by Local Crafts.

    Just getting started with the Moogly Crochet Along? CLICK HERE for the intro info!

    Want to get help with the patterns, show off, and CAL with others? CLICK HERE for the Facebook group

    Like to see all the squares visually? CLICK HERE for the Pinterest Board! (Squares will be added as they are released.)

    Introducing the MooglyCAL ONLY Newsletter! Never miss a Square Debut!

    The 2026 Moogly CAL Schedule

    As the year progresses, links will be added, and you'll be able to click on any of the past squares to go to their posts. The numbers refer to the date of the month that the square will debut.

    January Archie Argyle Crochet Square and Radiate Champion Block
    February Cozy Circles Crochet Square and Endless Griddle Stitch Square
    March Blue Cascade Afghan Square and THIS POST
    April 2, 16, and 30
    May 14 and 28
    June 11 and 25
    July 9 and 23
    August 6 and 20
    September 3 and 17
    October 1, 15, and 29
    November 12 and 25

    *****

    Block #6:

    Woven Checkerboard Square

    by MBT Creates

    MooglyCAL2026 Block 6

    Above, you can see the square that Mary Beth made in 2 colors of Berroco Vintage! Below is my CAL square, in my 6 colors of Brava Worsted - Custard, Seashell, Fig, Denim, Espresso, and Cream!

    MooglyCAL2026 Block 6

    Details for MooglyCAL2026 Block 6

    My Notes: The Woven Checkerboard Square is made with simple stitches - and big impact! Mary Beth has brought weaving to the CAL, and I'm not mad about it! I jumped right in, but I do recommend that those who prefer to plan their color layout sit down with some graph paper. There are so many color possibilities here! This square is easy enough for beginners, but the colors add interest and a challenge for more experienced stitchers!

    Helpful Links and Tutorials: Crochet Abbreviations, Chainless Starting Double Crochet, Standing sc, and seamless join.

    Sizing: Do not panic! When you make these two halves, before you weave them together, they're going to seem too big! When I made my first row, it was about 12.75" wide - it all looked crazy. But then, I did the weaving and crocheted the border, and it came right to 12"! But everyone's gauge is different, so be sure to measure as you go! Learn how to adjust for size HERE to ensure all your squares are the same size. Remember that the 12″ is measured across and up and down, not diagonally/corner to corner.

    Yarn Options: This year, our designers have chosen from a variety of yarns, including Brava Worsted, Swish Worsted, Jimmy Beans Wool Beanstalk, Berroco Vintage, and MadTosh Vintage. For this square, I used Brava Worsted, and Mary Beth used Berroco Vintage!

    What I Did:

    I used a US-J, 6.0 mm crochet hook, and Brava Worsted yarn, and my color scheme was as follows (see pics for more info on placement):

    Row 1 and First Strip: Seashell
    Second Strip:
    Custard
    Third Strip:
    Fig
    Fourth Strip:
    Denim
    Fifth Strip and Final Row:
    Espresso
    (Both Halves are the Same)
    Border:
    Cream

    This square didn't really require much blocking, but I used the wet blocking method to make it perfect!

    The Pattern:

    CLICK HERE FOR THE PATTERN FOR BLOCK #6

    PLEASE NOTE: The designers all hold individual copyrights for their patterns. They may choose to make videos of their patterns, and you can certainly request them from the designers. In addition, there are videos linked in the notes for specific stitches and techniques that may help you with the pattern. They may offer paid PDFs of the pattern, but have agreed to leave it up for free on their website or on Ravelry for as long as possible.

    Show Off Your Squares!

    If you share your photos on social media, be sure to use the hashtags #mooglycal2026 and tag your yarn - I'll be using #bravaworsted -  and tag me @mooglyblog so I can see them too! And don't forget to share them in the MooglyCAL Facebook Group! Thank you all for CAL-ing with me!

    And finally, here's a pin of MooglyCAL2026 - Block 6 for your own Pinterest boards!

    MooglyCAL2026 Block 6

    You can follow Moogly on YouTube, Facebook, Twitter, Pinterest, TikTok, and Instagram, and don't forget to sign up for the free newsletter at the bottom of the page! Thank you to Local Crafts for providing the materials for this crochet along.  

    Sideways Sampler Shawl - Part 2 Tutorial

    March 17, 2026 by Tamara Kelly Leave a Comment

    Sideways Sampler Shawl - Part 2 Tutorial

    Welcome back for the Sideways Sampler Shawl Part 2 Tutorial! This section brings fresh texture and keeps things interesting as our shawls continue to grow. I’ll show you exactly how the stitches work and how to keep your edges looking neat and consistent. Let’s jump in and keep your shawl growing!

    Disclaimer: This post includes affiliate links.

    Be sure to scroll down past the videos to get the links to the free pattern and supplies!

    Sideways Sampler Shawl - Part 2 Tutorial:

    How to Crochet the Sideways Sampler Shawl - Part 2 - Right-Handed

    Learn to Crochet the Sideways Sampler Shawl - Part 2 - Left-Handed

    As Seen in This Video (click each for more info!):

    The Free Pattern: Sideways Sampler Shawl Part 2

    The Supplies:

    US - H, 5.0 mm - Furls Streamline

    Shown in Pattern: Concept by Katia 4ply Symmetric Socks + More Illusion (Superwash Wool 75%, Polyamide 25%; 320m/349yd; 80g/2 ⅘oz)

    Shown in Tutorials: Universal Yarn Colorburst (65% superwash fine merino, 35% acrylic)

    Stitch Markers

    And here's a Pin for your Crochet Pinterest Board! Make sure you are following Moogly on Pinterest for all the best knit, crochet, and craft pins!

    Sideways Sampler Shawl - Part 2 Tutorial

    I hope you enjoy this tutorial for the Sideways Sampler Shawl - Part 2! If this video doesn't answer all your questions, please ask in the comments below - I'm always happy to help.

    If you make this or any Moogly pattern, please tag me in your photos so I can see them too, @mooglyblog or #mooglyblog! Then send them to tamarakelly@mooglyblog.com to see them featured in a future Moogly email newsletter!

    Get Moogly on your favorite social media sites: YouTube, Facebook, Pinterest, Tik Tok, Bluesky, and Instagram! And sign up for the free newsletter at the bottom of the page so you don’t miss a thing! Thank you to Yarnspirations for providing the materials for this video.

    Sideways Sampler Shawl - Part 2

    March 16, 2026 by Tamara Kelly 2 Comments

    Sideways Sampler Shawl - Crochet Along on Moogly

    If you’ve ever wanted to try new stitches without committing to multiple small projects, this is your chance! The Sideways Sampler Shawl is here to keep your hooks happy in a 4-week-long Crochet Along. So grab your favorite yarn, pick up your hook, and get ready to crochet Part 2!

    Disclaimer: This post includes affiliate links. Materials provided by Furls and Katia.

    Prefer an all-in-one ad-free PDF? You've got options!

    This button leads to the pattern on Etsy

    Prefer the free blog version? Keep scrolling!

    The Moogly March 2026 Crochet Along

    At least once a year, I try to host a month-long crochet along - and this year it's the Sideways Sampler Shawl! I've been working on this design for several months now, and it has been so much fun.

    Worked from side to side, this asymmetrical triangular shawl keeps things interesting from the very first stitch. Instead of working from the top down or bottom up, we’ll build our shape gradually across, letting the stitches and color changes shine as the fabric flows outward. Just as the rows get long, it's time to start decreasing and race to the finish.

    And because this is a sampler, each section introduces some new stitch patterns to keep you interested and motivated. The result is a beautifully textured shawl that feels cohesive, even as the stitches change along the way.

    Sideways Sampler Shawl - Crochet Along on Moogly

    Each part builds directly on the last, so there is no sewing pieces together at the end. Just one continuous, satisfying project from start to finish.

    New instructions will be posted right here on Moogly each week, so you can crochet at your own pace. Join in on release day or catch up when it fits your schedule. This CAL is designed to be flexible and fun - for weeks, and even years to come!

    The Schedule:

    March 9 - Part 1 of the Sideways Sampler Shawl written pattern

    March 10 - Video Tutorial for Part 1 of the Sideways Sampler Shawl

    March 16 - THIS POST, Part 2 of the Sideways Sampler Shawl written pattern

    March 17 - Video Tutorial for Part 2 of the Sideways Sampler Shawl

    March 23 - Part 3 of the Sideways Sampler Shawl written pattern

    March 24 - Video Tutorial for Part 3 of the Sideways Sampler Shawl

    March 30 - Part 4 of the Sideways Sampler Shawl written pattern

    March 31 - Video Tutorial for Part 4 of the Sideways Sampler Shawl

    How to Join

    Just make the pattern as we go - no need to sign up or do anything other than enjoy the CAL and stitch along with us! If you do share your projects online, I'd love it if you tag me @mooglyblog so I can see them too! ♥

    Sideways Sampler Shawl Pt 2

    Made with Concept by Katia 4ply Symmetric Socks + More Illusion - or whatever you want!

    Katia was kind enough to send me two balls of Concept by Katia 4ply Symmetric Socks + More Illusion late last year, and I fell in love. I then spent the next several months, off and on, working on this shawl. The self-striping was super motivating, and the yarn was a joy to stitch.

    Concept by Katia 4ply Symmetric Socks + More Illusion

    And then other people discovered the yarn - and they promptly sold out of all but one color. Once this goes live, it might be sold out too. Luckily, there are lots of gorgeous substitutes you can make. If you've got 2 hanks of fingering or sport weight yarn in your stash, this just might be the pattern they were waiting for!

    Sideways Sampler Shawl - WIP 2

    Why fingering or sport? Well, this yarn is European, and they list it as a Sport weight yarn. But then, if you look at the Ravelry listing for this yarn, it's a Fingering weight! Which is "correct"? Fingering has a WPI (wraps per inch) of 14, and Sport's WPI is 12. Maybe this one is a 13? The great thing is that this is a shawl, and if you hit gauge (or a bit larger) and like the fabric you're getting, it's all good!

    Sideways Sampler Shawl - Part 2


    Sideways Sampler Shawl - Part 2

    Add this pattern to your Ravelry Queue and Favorites

    US - H, 5.0 mm - Furls Streamline

    620 yds Concept by Katia 4ply Symmetric Socks + More Illusion (Superwash Wool 75%, Polyamide 25%; 320m/349yd; 80g/2 ⅘oz)
    Colorway Shown: 72 - Blue-Ochre-Red-Rust (2 balls

    Stitch Markers

    Gauge: 13 dc = 4” blocked

    Finished Size: 62" x 51" x 31"

    Helpful Links and Tutorials:

    Sideways Sampler Shawl Part 2 Tutorial 

    Crochet Abbreviations

    Magic Circle

    CSDC - Chainless Starting Double Crochet

    Puff Stitch

    Special Stitches and Abbreviations

    Pm - place stitch marker in stitch or space just made

    Puff - [yo, insert hook in indicated stitch, yo and pull up a loop] twice, yo and pull through all 5 loops on hook

    Dpuff - [yo, insert hook in indicated stitch, yo and pull up a loop] 3 times, yo and pull through all 7 loops on hook

    Tpuff - [yo, insert hook in indicated stitch, yo and pull up a loop] 4 times, yo and pull through all 9 loops on hook

    Big V - (2 dc, ch 1, 2 dc) worked into the same st or ch sp

    V - (dc, ch 1, dc) worked into the same st or ch sp

    X - skip the next dc and ch-1, dc in the next dc, ch 1, dc in skipped dc, working in front of the first dc 

    CSDC/dc2tog - Pull up a loop to the height of a dc st, secure the top of the loop to the top of the hook, yo with the loop itself, insert hook into first st of the row, yo and pull up a loop, yo and pull through the first 2 loops, yo and insert hook into next st, yo and pull up a loop, yo and pull through the first 2 loops, yo and pull through all 3 rem loops on hook. (Substitute: Ch 2, dc in the next st - ch 2 does not count as a st)

    Wide V - (dc, ch 2, dc) into the same st or ch sp

    Cluster - [yo and insert hook into indicated st or ch sp, yo and pull up a loop, yo and pull through 2 loops on hook] 3 times, yo and pull through all 4 loops on hook (aka, dc3tog with all posts worked in the same st or sp)

    NOTES

    Use a stitch marker in the “corner” increase stitch or space from Row 1 through Row 61 - (pm). This marked st or space is referred to as the corner in the subsequent row. 

    Do not fully close the magic circle until the Border is finished. 

    When working “between the previous and next st,” insert the hook between the post of the stitch just worked into or skipped, and the post of the next st in the previous row.

    When making the border, not all rows end with dc stitches - in these sections, simply work evenly following the pattern to create a continuous line until you return to a dc section.

    Sideways Sampler Shawl - Part 2 Instructions

    Row 36: Ch 1, sc in first st, [ch 2, skip 2 sts, sc in next ch-1 sp, ch 2, skip 2 sts, sc between big V sts] 7 times, ch 2, skip 2 sts, (sc, ch 1 (pm), sc) in corner, ch 2, skip 2 sts, sc between big V sts, [ch 2, skip 2 sts, sc in next ch-1 sp, ch 2, skip 2 sts, sc between big V sts] 6 times, ch 2, skip 2 sts, sc in next ch-1 sp, ch 2, skip 2, sc in last st; turn. (32 sc)

    Row 37: CSDC in first st, [dc in next ch sp, dc in next sc] 15 times, (dc, ch 2 (pm), dc) in corner, dc in next sc, [dc in next ch sp, dc in next sc] 14 times, dc in next ch sp, dc in last st; turn. (64 dc)

    Rows 38 - 41: CSDC in first st, dc in each st to corner, (dc, ch 2 (pm), dc) in corner, dc in each rem st across; turn. (72 dc in Row 41)

    Row 42: CSDC in first st, [skip next st, V in next st] 17 times, skip next st, (dc, ch 1 (pm), dc) in corner, [skip next st, V in next st] 17 times, skip next st, dc in last st; turn. (72 dc)

    Row 43: CSDC in first st, X in next 17 V sts, (2 dc, ch 2 (pm), 2 dc) in corner, X in next 17 V sts, dc in last st; turn. (74 dc)

    Row 44: CSDC in first st, V in ch-1 sp of next 17 X sts, V st between next 2 dc sts, (dc, ch 2 (pm), dc) in corner, V st between next 2 dc sts, V st in ch-1 sp of next 17 X sts, dc in last st; turn. (76 dc)

    Row 45: CSDC in first st, X in next 18 V sts, (2 dc, ch 2 (pm), 2 dc) in corner, X in next 18 V sts, dc in last st; turn. (78 dc)

    Row 46: CSDC in first st, V in ch-1 sp of next 18 X sts, V st between next 2 dc sts, (dc, ch 2 (pm), dc) in corner, V st between next 2 dc sts, V st in ch-1 sp of next 18 X sts, dc in last st; turn. (80 dc)

    Rows 47 - 52: CSDC in first st, dc in each dc to corner, (dc, ch 1 (pm), dc) in corner, dc in each rem dc across; turn. (92 dc in Row 52) Do not break yarn, just go to Part 3 (as soon as it's up)!


    I hope you enjoy making Part 2 of the Sideways Sampler Shawl and are excited for Part 3! If you share on socials, I would love to see it, so be sure to share your photos and let me know how yours is coming along! You can always tag me @mooglyblog!

    Sideways Sampler Shawl Pt 2

    The Fine Print

    Written pattern copyright Tamara Kelly 2026, all rights reserved. Please do not reprint or repost this pattern, but please do link to this page to share this pattern with others. If you wish to make items for sale from this pattern or translate it to another language, please visit the About page for details. Thank you to Katia for providing the yarn for this pattern.

    Crochet Snow Globes by Olena Jones Review and Giveaway

    March 11, 2026 by Tamara Kelly Leave a Comment

    Crochet Snow Globes by Olena Jones Review and Giveaway

    Crochet Snow Globes by Olena Jones features "13 Patterns for Year-Round Magic"! These patterns take the classic snow globe shape and create year-round, adorable decor! Take a peek inside below, and then enter to win your own copy, right here on Moogly!

    Disclaimer: I was given a copy of this book for review; all opinions are my own. This post includes affiliate links. 

    The Crochet Snow Globes Review

    A Bit About the Author

    Olena Jones

    I "met" Olena on Instagram, where her adorable patterns caught my eye! So I'm super excited to share her first book with all of you today! Here's her author blurb:

    "Olena is a crochet designer and the founder of her blog, GoldenLucyCrafts. She discovered her passion for handmade items at a young age while growing up in Ukraine. Inspired by the beautiful creations made by her mother, who taught her how to crochet, Olena developed a deep love for the craft.

    In 2012, Olena designed her very first crochet pattern and has been creating unique pieces ever since.

    The name GoldenLucyCrafts is a loving tribute to her early years of designing, during which her loyal Golden Retriever, Lucy, was often by her side.

    Today, Olena lives in the beautiful Pacific Northwest with her husband, their son, and their current Golden Retriever, Hazel.

    Her first book, “Crochet Snow Globes”, invites readers to create a variety of snow globes for celebration across every season - ranging from the classic Christmas design to a cheerful pumpkin globe for Halloween and a romantic heart globe for Valentine’s Day."

    Let's take a closer look at her new book!

    Crochet Snow Globes by Olena Jones

    Inside Crochet Snow Globes

    "Bring the enchanting world of snow globes to life with your crochet hook!

    Snow globes are traditionally cherished Christmas keepsakes, but why limit the magic to one season? This book expands the concept and invites you to crochet a variety of unique snow globes for holidays and occasions throughout the entire year!

    Inside, you will find 13 crochet snow globe patterns, featuring designs for major holidays like Christmas, Valentine’s Day, Easter, and Halloween. Plus, you'll find globes for graduation and other special themes.

    These snow globe projects are perfect for adding charm to your home décor or for creating memorable handmade gifts that will be treasured for years to come."

    Crochet Snow Globes

    Crochet Snow Globes is Olena's self-published book of her popular globes - it's so fun to see what she comes up with next! It's about 80 pages long, and includes a section on materials as well as the stitches featured in this book.

    Crochet Snow Globes

    The patterns are all made with easy-to-find yarns, all #4 worsted acrylics. The patterns themselves are well written and easy to follow, and the large full color photos are super helpful.

    Crochet Snow Globes

    One thing I really like about Olena's book is how she formatted the pages. The letters are big and easy to read - no tiny cramped fonts here! She has also included colorwork charts where appropriate!

    Crochet Snow Globes

    Overall, Crochet Snow Globes is a wonderful way to collect 13 super fun patterns to make and display year-round! Olena's work is so fun and festive - great for home and gifting, and even craft fairs!

    Crochet Snow Globes by Olena Jones Review and Giveaway

    Get your own copy of Crochet Snow Globes today!

    Purchase your own copy of this book on Amazon, or ask for it at your local bookseller!

    Crochet Snow Globes by Olena Jones Review and Giveaway

    The Crochet Snow Globes Giveaway

    The Crochet Snow Globes Giveaway is open in the US and Canada. The giveaway ends April 8, 2026, at 12:15am Central US time. To enter, use the Kingsumo form below. Only the email option is mandatory – all other tasks are optional, for bonus entries only.

    One winner will receive a paperback copy of Crochet Snow Globes, courtesy of Olena Jones. They will be notified by email.

    GOOD LUCK ALL!

    You can follow Moogly on YouTube, Facebook, Twitter, Pinterest, TikTok, and Instagram. Don’t forget to sign up for the free newsletter at the top of the page! And don't forget to enter all the other fab giveaways on Moogly! And if you'd like to share this post, there's a Pinterest image and sharing buttons below!

    Crochet Snow Globes by Olena Jones Review and Giveaway

    Sideways Sampler Shawl - Part 1 Tutorial

    March 10, 2026 by Tamara Kelly 2 Comments

    Sideways Sampler Shawl - Part 1 Tutorial

    Welcome to the Sideways Sampler Shawl Part 1 Tutorial! I’m so excited you’re here to kick off this 4-week-long project with me. In this first section, we’ll get started with the unique side-to-side construction and the stitch patterns found in rows 1 through 35! Grab your yarn, your hook, and let’s start building your shawl!

    Disclaimer: This post includes affiliate links.

    Be sure to scroll down past the videos to get the links to the free pattern and supplies!

    Sideways Sampler Shawl - Part 1 Tutorial:

    How to Crochet the Sideways Sampler Shawl - Part 1 - Right-Handed

    Learn to Crochet the Sideways Sampler Shawl - Part 1 - Left-Handed

    As Seen in This Video (click each for more info!):

    The Free Pattern: Sideways Sampler Shawl Part 1

    The Supplies:

    US - H, 5.0 mm - Furls Streamline

    Shown in Pattern: Concept by Katia 4ply Symmetric Socks + More Illusion (Superwash Wool 75%, Polyamide 25%; 320m/349yd; 80g/5oz)

    Shown in Tutorials: Universal Yarn Colorburst (65% superwash fine merino, 35% acrylic)

    Stitch Markers

    And here's a Pin for your Crochet Pinterest Board! Make sure you are following Moogly on Pinterest for all the best knit, crochet, and craft pins!

    Sideways Sampler Shawl - Part 1 Tutorial

    I hope you enjoy this tutorial for the Sideways Sampler Shawl - Part 1! If this video doesn't answer all your questions, please ask in the comments below - I'm always happy to help.

    If you make this or any Moogly pattern, please tag me in your photos so I can see them too, @mooglyblog or #mooglyblog! Then send them to tamarakelly@mooglyblog.com to see them featured in a future Moogly email newsletter!

    Get Moogly on your favorite social media sites: YouTube, Facebook, Pinterest, Tik Tok, Bluesky, and Instagram! And sign up for the free newsletter at the bottom of the page so you don’t miss a thing! Thank you to Yarnspirations for providing the materials for this video.

    Sideways Sampler Shawl - Part 1

    March 9, 2026 by Tamara Kelly 6 Comments

    Sideways Sampler Shawl - Crochet Along on Moogly

    March is the perfect month for a fresh start, and the Sideways Sampler Shawl is here to keep your hooks moving all month long! This 4-week-long Crochet Along is designed to be relaxing, inspiring, and just a little bit different from your usual shawl project. The result is a beautifully textured shawl that feels cohesive, even as the stitches change along the way. It is the perfect project for self-striping or tonal yarns, and it looks just as lovely in a carefully curated color palette. In this post, you'll find Part 1!

    Disclaimer: This post includes affiliate links. Materials provided by Furls and Katia.

    Prefer an all-in-one ad-free PDF? You've got options!

    This button leads to the pattern on Etsy

    Prefer the free blog version? Keep scrolling!

    The Moogly March 2026 Crochet Along

    At least once a year, I try to host a month-long crochet along - and this year it's the Sideways Sampler Shawl! I've been working on this design for several months now, and it has been so much fun.

    Worked from side to side, this asymmetrical triangular shawl keeps things interesting from the very first stitch. Instead of working from the top down or bottom up, we’ll build our shape gradually across, letting the stitches and color changes shine as the fabric flows outward. Just as the rows get long, it's time to start decreasing and race to the finish.

    And because this is a sampler, each section introduces some new stitch patterns to keep you interested and motivated. The result is a beautifully textured shawl that feels cohesive, even as the stitches change along the way.

    Sideways Sampler Shawl - Crochet Along on Moogly

    Each part builds directly on the last, so there is no sewing pieces together at the end. Just one continuous, satisfying project from start to finish.

    New instructions will be posted right here on Moogly each week, so you can crochet at your own pace. Join in on release day or catch up when it fits your schedule. This CAL is designed to be flexible and fun - for weeks, and even years to come!

    The Schedule:

    March 9 - THIS POST, Part 1 of the Sideways Sampler Shawl written pattern

    March 10 - Video Tutorial for Part 1 of the Sideways Sampler Shawl

    March 16 - Part 2 of the Sideways Sampler Shawl written pattern

    March 17 - Video Tutorial for Part 2 of the Sideways Sampler Shawl

    March 23 - Part 3 of the Sideways Sampler Shawl written pattern

    March 24 - Video Tutorial for Part 3 of the Sideways Sampler Shawl

    March 30 - Part 4 of the Sideways Sampler Shawl written pattern

    March 31 - Video Tutorial for Part 4 of the Sideways Sampler Shawl

    How to Join

    Just make the pattern as we go - no need to sign up or do anything other than enjoy the CAL and stitch along with us! If you do share your projects online, I'd love it if you tag me @mooglyblog so I can see them too! ♥

    Sideways Sampler Shawl - Part 1

    Made with Concept by Katia 4ply Symmetric Socks + More Illusion - or whatever you want!

    Katia was kind enough to send me two balls of Concept by Katia 4ply Symmetric Socks + More Illusion late last year, and I fell in love. I then spent the next several months, off and on, working on this shawl. The self-striping was super motivating, and the yarn was a joy to stitch.

    Concept by Katia 4ply Symmetric Socks + More Illusion

    And then other people discovered the yarn - and they promptly sold out of all but one color. Once this goes live, it might be sold out too. Luckily, there are lots of gorgeous substitutes you can make. If you've got 2 hanks of fingering or sport weight yarn in your stash, this just might be the pattern they were waiting for!

    Sideways Sampler Shawl - WIP 1

    Why fingering or sport? Well, this yarn is European, and they list it as a Sport weight yarn. But then, if you look at the Ravelry listing for this yarn, it's a Fingering weight! Which is "correct"? Fingering has a WPI (wraps per inch) of 14, and Sport's WPI is 12. Maybe this one is a 13? The great thing is that this is a shawl, and if you hit gauge (or a bit larger) and like the fabric you're getting, it's all good!

    Sideways Sampler Shawl - Part 1


    Sideways Sampler Shawl - Part 1

    Add this pattern to your Ravelry Queue and Favorites

    US - H, 5.0 mm - Furls Streamline

    620 yds Concept by Katia Symmetric Socks + More Illusion (Fingering, Superwash Wool 75%, Polyamide 25%; 320m/349yd; 80g/2 ⅘oz)
    Colorway Shown: 72 - Blue-Ochre-Red-Rust (2 balls

    This yarn has sold out on the Katia website, but I have found it in two Etsy Shops:

      • Moadeplus - https://tidd.ly/4sAOb47
      • ColourPopCraftsStore - https://tidd.ly/47unNAz

    Stitch Markers

    Gauge: 13 dc = 4” blocked

    Finished Size: 62" x 51" x 31"

    Helpful Links and Tutorials:

    Sideways Sampler Shawl Part 1 Tutorial 

    Crochet Abbreviations

    Magic Circle

    CSDC - Chainless Starting Double Crochet

    Puff Stitch

    Special Stitches and Abbreviations

    Pm - place stitch marker in stitch or space just made

    Puff - [yo, insert hook in indicated stitch, yo and pull up a loop] twice, yo and pull through all 5 loops on hook

    Dpuff - [yo, insert hook in indicated stitch, yo and pull up a loop] 3 times, yo and pull through all 7 loops on hook

    Tpuff - [yo, insert hook in indicated stitch, yo and pull up a loop] 4 times, yo and pull through all 9 loops on hook

    Big V - (2 dc, ch 1, 2 dc) worked into the same st or ch sp

    V - (dc, ch 1, dc) worked into the same st or ch sp

    X - skip the next dc and ch-1, dc in the next dc, ch 1, dc in skipped dc working in front of the first dc 

    CSDC/dc2tog - Pull up a loop to the height of a dc st, secure the top of the loop to the top of the hook, yo with the loop itself, insert hook into first st of the row, yo and pull up a loop, yo and pull through the first 2 loops, yo and insert hook into next st, yo and pull up a loop, yo and pull through the first 2 loops, yo and pull through all 3 rem loops on hook. (Substitute: Ch 2, dc in the next st - ch 2 does not count as a st)

    Wide V - (dc, ch 2, dc) into the same st or ch sp

    Cluster - [yo and insert hook into indicated st or ch sp, yo and pull up a loop, yo and pull through 2 loops on hook] 3 times, yo and pull through all 4 loops on hook (aka, dc3tog with all posts worked in the same st or sp)

    NOTES

    Use a stitch marker in the “corner” increase stitch or space from Row 1 through Row 61 - (pm). This marked st or space is referred to as the corner in the subsequent row. 

    Do not fully close the magic circle until the Border is finished. 

    When working “between the previous and next st,” insert the hook between the post of the stitch just worked into or skipped, and the post of the next st in the previous row.

    When making the border, not all rows end with dc stitches - in these sections, simply work evenly following the pattern to create a continuous line until you return to a dc section.

    Sideways Sampler Shawl - Part 1 Instructions

    Row 1: Make a magic circle, CSDC, dc, ch 2 (pm), 2 dc in the ring; turn. (4 dc)

    Row 2: CSDC in first st, dc in next st, (dc, ch 2 (pm), dc) in corner, dc in last 2 sts; turn. (6 dc)

    Rows 3 - 11: CSDC in first st, dc in each st to corner, (dc, ch 2 (pm), dc) in corner, dc in each rem st across; turn. (24 dc in Row 11)

    Row 12: Ch 1, sc in first st, ch 1, skip the next st, [sc in the next st, ch 1, skip the next st] 5 times, (sc, ch 1 (pm), sc) in corner, [ch 1, skip next st, sc in next st] 6 times; turn. (14 sc)

    Row 13: Ch 1, hdc in first st, [puff in next ch-1 sp, ch 1, skip next sc] 6 times, (puff, ch 2 (pm), puff) in corner, [ch 1, skip next st, puff in next ch-1 sp] 6 times, hdc in last st; turn. (14 puffs)

    Row 14: Ch 1, sc in first st, ch 1, skip next st, [sc in next ch-1 sp, ch 1, skip next st] 6 times, (sc, ch 1 (pm), sc) in corner, [ch 1, skip next st, sc in next ch-1 sp] 6 times, ch 1, skip next st, sc in last st; turn. (16 sc)

    Row 15: Ch 1, hdc in first st, [dpuff in next ch-1 sp, ch 1, skip next sc] 7 times, (dpuff, ch 2 (pm), dpuff) in corner, [ch 1, skip next st, dpuff in next ch-1 sp] 7 times, hdc in last st; turn. (16 dpuffs)

    Row 16: Ch 1, sc in first st, [ch 1, skip next st, sc in next ch-1 sp] 7 times, ch 1, skip next st, (sc, ch 1 (pm), sc) in corner, [ch 1, skip next st, sc in next ch-1 sp] 7 times, ch 1, skip next st, sc in last st; turn. (18 sc)

    Row 17: Ch 1, hdc in first st, [tpuff in next ch-1 sp, ch 1, skip next sc] 8 times, (tpuff, ch 2 (pm), tpuff) in corner, [ch 1, skip next st, tpuff in next ch-1 sp] 8 times, hdc in last st; turn. (18 tpuffs)

    Row 18: Ch 1, sc in first st, [ch 1, skip next st, sc in next ch-1 sp] 8 times, ch 1, skip next st, (sc, ch 1 (pm), sc) in corner, [ch 1, skip next st, sc in next ch-1 sp] 8 times, ch 1, skip next st, sc in last st; turn. (20 sc)

    Row 19: CSDC in first st, dc in each st and ch-1 sp to corner, (dc, ch 2 (pm), dc) in corner, dc in each rem st and ch-1 sp across; turn. (40 dc)

    Rows 20 and 21: CSDC in first st, dc in each st to corner, (dc, ch 2 (pm), dc) in corner, dc in each rem st across; turn. (44 dc in Row 21)

    Row 22: CSDC in first st, [skip next st, dc in next 2 sts, hdc around posts of 2 dc just made] 7 times, (dc, ch 2 (pm), dc) in corner, [dc in next 2 sts, hdc around posts of 2 dc just made, skip next st] 7 times, dc in last st; turn. (46 sts)

    Row 23: Ch 1, sc in each st to corner, ch 2 (pm), skip the corner ch-2 sp, sc in each rem st to end; turn. (46 sc)

    Row 24: CSDC in first st, [skip next st, dc in next 2 sts, hdc around 2 dc just made] 7 times, skip next st, (2 dc, ch 2 (pm), 2 dc) in corner, skip next st, [dc in next 2 sts, hdc around 2 dc just made, skip next st] 7 times, dc in last st; turn. (48 sts)

    Row 25: Ch 1, sc in each st to corner, ch 2 (pm), skip the corner ch-2 sp, sc in each rem st to end; turn. (48 sc)

    Row 26: CSDC in first st, [skip next st, dc in next 2 sts, hdc around 2 dc just made] 7 times, skip next st, dc in next st, dc in corner, hdc around 2 dc just made, ch 1 (pm), dc in corner, dc in next st, hdc around 2 dc just made, skip next st, [dc in next 2 sts, hdc around 2 dc just made, skip next st] 7 times, dc in last st, turn. (50 sts)

    Row 27: Ch 1, sc in each st to corner, ch 2 (pm), skip the corner ch-1 sp, sc in each rem st to end; turn. (50 sc)

    Rows 28 - 30: CSDC in first st, dc in each st to corner, (dc, ch 2 (pm), dc) in corner, dc in each rem st across; turn. (56 dc in Row 30)

    Row 31: CSDC in first st, skip 2 sts, big V in next st, [skip 3 sts, big V in next st] 6 times, ch 1 (pm), skip corner ch- 2 sp, [big V in next st, skip 3 sts] 6 times, big V in next st, skip next 2 sts, dc in last st; turn. (58 dc)

    Row 32: Ch 1, sc in first st, ch 2, skip 2 sts, sc in next ch-1 sp, [ch 2, skip 2 sts, sc between big V sts, ch 2, skip 2 sts, sc in next ch-1 sp] 6 times, ch 2, skip 2 sts, (sc, ch 1 (pm), sc) in corner, [ch 2, skip 2 sts, sc in next ch-1 sp, ch 2, skip 2 sts, sc between big V sts] 6 times, ch 2, skip 2 sts, sc in next ch-1 sp, ch 2, skip 2 sts, sc in last st; turn. (30 sc)

    Row 33: CSDC in first st, [big V in next sc, skip next sc] 7 times, (dc, ch 2 (pm), dc) in corner, [skip next sc, big V in next sc, skip next sc] 7 times, dc in last st; turn. (60 dc)

    Row 34: Ch 1, sc in first st, ch 2, skip 2 sts, sc in next ch-1 sp, [ch 2, skip 2 sts, sc between big V sts, ch 2, skip 2 sts, sc in next ch-1 sp] 6 times, ch 2, skip 2 sts, sc between previous and next st, ch 1, skip next st, (sc, ch 1(pm), sc) in corner, ch 1, skip next st, sc between previous and next st, ch 2, skip 2 sts, sc in next ch-1 sp, ch 2, skip 2 sts, [sc between big V sts, ch 2, skip 2 sts, sc in next ch-1 sp, ch 2, skip 2 sts] 6 times, sc in last st; turn. (32 sc)

    Row 35: CSDC in first st, [big V in next sc, skip next sc] 7 times, skip 2 sts, big V (pm in ch-1 sp) in corner, skip 2 sts, [big V in next sc, skip next sc] 6 times, big V in next sc, dc in last st; turn. (62 dc) Do not break yarn, just go to Part 2 (as soon as it's up)!


    I hope you enjoy making Part 1 of the Sideways Sampler Shawl and are excited for Part 2! If you share on socials, I would love to see it, so be sure to share your photos and let me know how yours is coming along! You can always tag me @mooglyblog!

    Sideways Sampler Shawl - Part 1

    The Fine Print

    Written pattern copyright Tamara Kelly 2026, all rights reserved. Please do not reprint or repost this pattern, but please do link to this page to share this pattern with others. If you wish to make items for sale from this pattern or translate it to another language, please visit the About page for details. Thank you to Katia for providing the yarn for this pattern.

    MooglyCAL2026 Block 5

    March 5, 2026 by Tamara Kelly 2 Comments

    MooglyCAL2026 Block 5

    MooglyCAL2026 Block 5 is a gorgeous, center-out design by Julie Yeager Designs! The Blue Cascade Afghan Square includes a wide variety of stitches for a fabulous result! Get all the details for this free crochet along, and the free pattern link below!

    Disclaimer: This post includes affiliate links; materials provided by Local Crafts.

    Just getting started with the Moogly Crochet Along? CLICK HERE for the intro info!

    Want to get help with the patterns, show off, and CAL with others? CLICK HERE for the Facebook group

    Like to see all the squares visually? CLICK HERE for the Pinterest Board! (Squares will be added as they are released.)

    Introducing the MooglyCAL ONLY Newsletter! Never miss a Square Debut!

    The 2026 Moogly CAL Schedule

    As the year progresses, links will be added, and you'll be able to click on any of the past squares to go to their posts. The numbers refer to the date of the month that the square will debut.

    January Archie Argyle Crochet Square and Radiate Champion Block
    February Cozy Circles Crochet Square and Endless Griddle Stitch Square
    March THIS POST and 19
    April 2, 16, and 30
    May 14 and 28
    June 11 and 25
    July 9 and 23
    August 6 and 20
    September 3 and 17
    October 1, 15, and 29
    November 12 and 25

    *****

    Block #5:

    Blue Cascade Afghan Square

    by Julie Yeager Designs

    MooglyCAL2026 Block 5

    Above, you can see the square that Julie made in 8 colors of Berroco Vintage! Below is my CAL square, in my 6 colors of Brava Worsted - Custard, Seashell, Fig, Denim, Espresso, and Cream!

    MooglyCAL2026 Block 5

    Details for MooglyCAL2026 Block 5

    My Notes: The Blue Cascade Afghan Square is gorgeous, interesting to crochet, and wonderful to make, thanks to the skill of Julie Yeager! Julie is a fabulous block designer and her squares are always a treat. There is a lot of room here to play with colors, but I didn't really take any notes - it's so well written you can jump right in! There are lots of stitches, so be sure to check the special stitches section and the helpful links below.

    Helpful Links and Tutorials: Crochet Abbreviations, Chainless Starting Double Crochet, Standing sc, Standing dc, Third Loop Crochet, Post Stitches, Puff Stitches, and seamless join.

    Sizing: My square was running a little big, so I worked the last rnd in hdc instead of dc - and that worked great! But everyone's gauge is different, so be sure to measure as you go! Learn how to adjust for size HERE to ensure all your squares are the same size. Remember that the 12″ is measured across and up and down, not diagonally/corner to corner.

    Yarn Options: This year, our designers have chosen from a variety of yarns, including Brava Worsted, Swish Worsted, Jimmy Beans Wool Beanstalk, Berroco Vintage, and MadTosh Vintage. For this square, I used Brava Worsted, and Julie used Berroco Vintage!

    What I Did:

    I used a US-J, 6.0 mm crochet hook, and Brava Worsted yarn, and my color scheme was as follows (see pics for more info on placement):

    Rnd 1: Fig
    Rnds 2 and 3:
    Espresso
    Rnds 4 and 5:
    Seashell
    Rnd 6:
    Espresso
    Rnd 7:
    Custard
    Rnd 8:
    Denim
    Rnd 9:
    Fig
    Rnd 10:
    Denim
    Rnd 11:
    Custard
    Rnd 12:
    Seashell
    Rnd 13:
    Espresso
    Rnd 14:
    Cream

    This square didn't really require much blocking, but I used the wet blocking method to make it perfect!

    The Pattern:

    CLICK HERE FOR THE PATTERN FOR BLOCK #5

    PLEASE NOTE: The designers all hold individual copyrights for their patterns. They may choose to make videos of their patterns, and you can certainly request them from the designers. In addition, there are videos linked in the notes for specific stitches and techniques that may help you with the pattern. They may offer paid PDFs of the pattern, but have agreed to leave it up for free on their website or on Ravelry for as long as possible.

    Show Off Your Squares!

    If you share your photos on social media, be sure to use the hashtags #mooglycal2026 and tag your yarn - I'll be using #bravaworsted -  and tag me @mooglyblog so I can see them too! And don't forget to share them in the MooglyCAL Facebook Group! Thank you all for CAL-ing with me!

    And finally, here's a pin of MooglyCAL2026 - Block 5 for your own Pinterest boards!

    MooglyCAL2026 Block 5

    You can follow Moogly on YouTube, Facebook, Twitter, Pinterest, TikTok, and Instagram, and don't forget to sign up for the free newsletter at the bottom of the page! Thank you to Local Crafts for providing the materials for this crochet along.  

    Crochet and Catch Up with Moogly - March 4, 2026

    March 4, 2026 by Tamara Kelly Leave a Comment

    Crochet and Catch Up with Moogly - March 4, 2026

    March is here, with a hint of spring and fresh creative energy - must be time for another Crochet and Catch Up on Moogly! Let’s settle in for some cozy yarn chat as we check in on current WIPs, share new patterns, and talk about what’s coming up next. Grab your hook and join me for a relaxed, fiber-filled hangout and chat!

    Disclaimer: This post may contain affiliate links. Live videos are unscripted, unedited, and occasionally weird; all opinions are my own. 

    Crochet and Catch Up with Moogly

    Going LIVE on Facebook and YouTube, at 11am CT!

    Click here to Like the Moogly Facebook Page and get notified when I go live!

    Click here to Subscribe to the Moogly YouTube Page and get notified when I go live!

    Moogly Community Group on Facebook

    What I'm Wearing: Brown Butter Shawl

    MooglyCAL2026 Block 4 Courtesy of Oombawka Design

    CAL Yarns: Brava Worsted, Swish Worsted, Jimmy Beans Wool Beanstalk, Berroco Vintage, and MadTosh Vintage.

    Warm Up America Baby Blanket Drive

    Baby's Biggest Fan Blanket Pattern

    Baby's Biggest Fan Blanket Tutorial

    WeCrochet Brava Baby DK

    Blanket Crochet Pattern Bundle Hosted by Nicki's Homemade Crafts - ends March 6, 2026, at midnight PT!

    Split Cuff Slippers Free Crochet Pattern

    Split Cuff Slippers Tutorial

    Fab Flower Basket Tutorial

    Crochet Layers to Love Book Review and Giveaway

    Fantasy Crochet Book Review and Giveaway

    Furls Odyssey II - it's back and better than ever!

    Sneak Peek: The March Month-Long CAL!

    We're kicking off a new month-long crochet along here on Moogly starting March 9th! We'll be making an asymmetrical shawl, in one piece, with no seaming.

    What I Used: I made this shawl using a US-H, 5.0 mm crochet hook by Furls, and 2 balls of Concept by Katia 4-ply Symetric Socks + More Illusion yarn, and some stitch markers

    What You'll Need: Your favorite US-H, 5.0 mm crochet hook, and 620 yards of Fingering or Sport weight yarn just waiting to be stitched! Note that Katia lists the yarn I used as a Sport, but Ravelry lists it as a Fingering weight. The great thing about this shawl is that either weight of yarn should work, so find your favorite in either 1 or 2 weight. Self-striping is particularly fun!

    Important Dates: The pattern will be released over 4 Mondays - March 9, 16, 23, and 30. The video tutorials for each section go live the next day (Tuesdays: March 10, 17, 24, 31).

    How to Join: Just follow Moogly here on the blog or on your favorite social media, or sign up for the free weekly email newsletter! There is nowhere to sign up specifically for the CAL, and there are no deadlines - just fun!

    Moogly Around the Web - and the World!

    March 11 - 13: I’m excited to share that I’ll be speaking at the Crochet Business Summit: Online Profits Edition! This free, 3-day online event is designed specifically for crochet business owners who want to build a profitable, sustainable business without burnout, hustle culture, or tech overwhelm.

    Friday, March 27, 12:00 PM - 1:00 PM CDT:  I'll be teaching an online class for GoSadi - Jumbo Yarn Blankets: Knit Without Needles! Learn how to work with super jumbo yarn to create gorgeous blanket-sized projects using your hands instead of knitting needles.
    Saturday, March 28, 12:00 PM - 1:00 PM CDT: I'll be teaching an online class for GoSadi - Jumbo Yarn Blankets: Crochet Without a Hook! Learn how to work with super jumbo yarn to create gorgeous blanket-sized projects using your hands instead of hooks.

    Want to see me in person in 2026?

    May 1 - 2: I will be teaching four classes at the new Fiber and Fabric Craft Festival in Chicago - one on Friday, and three on Saturday!

    If you have a LYS or event you'd like me to teach at this year, or if you would like me to teach an online class to your group or guild, please do reach out!

    Have a wonderful day all - see you to crochet and catch up next time! And before you go, here's a Pin for today's post, so you can add it to your favorite Pinterest boards! We appreciate (and need) your shares on all our posts.

    Crochet and Catch Up with Moogly - March 4, 2026

    Follow Moogly on YouTube, Bluesky, Facebook, Pinterest, TikTok, and Instagram! 

    Baby's Biggest Fan Blanket Tutorial

    March 3, 2026 by Tamara Kelly 2 Comments

    Baby's Biggest Fan Blanket Tutorial

    Ready to see the Baby’s Biggest Fan Blanket come to life? In this step-by-step tutorial video, I’ll show you exactly how to create the signature fan stitch pattern, right and left-handed!

    Disclaimer: This post includes affiliate links.

    Be sure to scroll down past the videos to get the links to the free pattern and supplies!

    Baby's Biggest Fan Blanket Tutorial:

    How to Crochet the Baby's Biggest Fan Blanket - Right-Handed

    Learn to Crochet the Baby's Biggest Fan Blanket - Left-Handed

    As Seen in This Video (click each for more info!):

    The Free Pattern: Baby's Biggest Fan Blanket

    The Supplies:

    US - I, 5.5 mm - Furls Streamline

    290 - 475 yds Patons Classic Wool Worsted (4 - Worsted; 100 g/3.5 oz, 177 m/194 yds)

    Stitch Markers

    And here's a Pin for your Crochet Pinterest Board! Make sure you are following Moogly on Pinterest for all the best knit, crochet, and craft pins!

    Baby's Biggest Fan Blanket Tutorial

    I hope you enjoy this tutorial for the Baby's Biggest Fan Blanket ! If this video doesn't answer all your questions, please ask in the comments below - I'm always happy to help.

    If you make this or any Moogly pattern, please tag me in your photos so I can see them too, @mooglyblog or #mooglyblog! Then send them to tamarakelly@mooglyblog.com to see them featured in a future Moogly email newsletter!

    Get Moogly on your favorite social media sites: YouTube, Facebook, Pinterest, Tik Tok, Bluesky, and Instagram! And sign up for the free newsletter at the bottom of the page so you don’t miss a thing! Thank you to Yarnspirations for providing the materials for this video.

    Baby's Biggest Fan Blanket

    March 2, 2026 by Tamara Kelly 2 Comments

    Baby's Biggest Fan Blanket

    I'm excited and honored to share that I get to share the Warm Up America! Spring 2026 Baby Blanket Drive here on Moogly! And to support this drive, I've designed a new pattern - the Baby's Biggest Fan Blanket!

    If you love classic textures that look impressive but are wonderfully relaxing to crochet, you’re going to adore the Baby’s Biggest Fan Blanket. This sweet design uses a timeless fan stitch pattern to create soft, textural waves that feel just as cozy as they look. Designed with Brava Baby DK for Warm Up America!, this blanket is fun to stitch and wonderful to give.

    Disclaimer: This post includes affiliate links; material provided by WeCrochet and Furls.

    Prefer an ad-free PDF? You've got options!

    This button leads to the pattern on Etsy

    Prefer the free blog version? Keep scrolling!

    Baby's Biggest Fan Blanket

    The Warm Up America Spring 2026 Baby Blanket Drive

    Warm Up America! is an amazing nonprofit, most known for its afghan drives. And every spring, they have a Baby Blanket Drive! This year, I was honored to be asked to help support this effort, in partnership with WeCrochet! Read on to see how you can help spread the warmth this year!

    Warm Up America! 2026 Baby Blanket Drive

    How Can You Help and Join this Campaign?

    The Warm Up America! Spring 2026 Blanket Drive will run from March 2nd to April 15th - please ensure all your items are in the office by the end of mid-April!
    (But if you're late, do still send them in, they always need more!)

    • Make one or more baby blankets (Any pattern, crochet or knit!)
    • Use medium weight #4 OR dk weight #3, acrylic yarn
    • The minimum size is 36"x36", but go bigger if you'd like!
    • Be sure to weave in all your ends!
    • Help spread the word! Share your projects on social media with the #moogly and tag Warm Up America
    • Please include a donation form with "Moogly" on the campaign line! CLICK HERE for the donation form
    • Mail your items to:
    Warm Up America!
    ATT: Moogly Campaign
    3740 N. Josey Lane Suite 126
    Carrollton, TX 75007
    Baby's Biggest Fan Blanket

    An Soft Ombre Rainbow... or Maybe a Tea Party?

    WeCrochet donated the yarn for this design, and we went with their Pastel Rainbow Value Pack in Brava Baby DK! It was super easy to have a color selection pre-picked for me, and I decided to create an overlapping color-changing scheme - in rainbow order!

    Baby's Biggest Fan Blanket

    Brava Baby DK is soft and cozy, and machine washable - and they've got some other gorgeous color schemes you can pick up for this blanket as well! CLICK HERE to see all the beautiful sets - I think Tea Party might be my favorite!

    Brava Baby DK Value Packs

    Of course, you can use whatever color scheme you like - pick out 7 colors of your own, switch back and forth between just 2, or keep it all solid. This pattern also makes a wonderful stash buster - I can't wait to see what you all make!

    Baby's Biggest Fan Blanket


    Baby's Biggest Fan Blanket

    Add this pattern to your Ravelry Queue and Favorites

    US - I, 5.5 mm - Furls Streamline

    1500 yds Brava Baby (3- DK weight; 100% acrylic; 273 yds/ 100g) - Pastel Rainbow Value Pack Shown
    A: Orchid (purple)
    B: Aero (blue)
    C: Sea Green (green)
    D: Pale Yellow (yellow)
    E: Peach (orange)
    F: Rose (pink)
    G: Oat (off-white)

    Stitch Markers

    Gauge:  15 sts x 10 rows = 4" [10cm]

    Finished Size: 36" x 36", blocked
    Stitch Multiple: mult of 6, plus 1 (+1 turning ch)
    To Customize the Size: Work the first row to the width desired using the stitch multiple above, work to the desired length.

    Helpful Links and Tutorials:

    Baby's Biggest Fan Blanket Tutorial 

    Crochet Abbreviations

    FSC - Foundation Single Crochet

    CSDC - Chainless Starting Double Crochet - may substitute a ch 3 or stacked single crochet if preferred

    STHDC- Standing Half Double Crochet

    Hdc in the 3rd Loop

    BLO - Back Loop Only

    Seamless join

    Special Stitches:

    V st - (dc, ch 1, dc) in the same st or space

    Shell - 5 dc worked into the same st or space

    CSX - Crossed Spike X - dc inserting hook 2 rows below, under the chains after the next sc, ch 1, dc inserting hook 2 rows below, under the chains before the same sc, enclosing the first dc of the X. Be sure to pull up the loops of the dc sts to the height of the rest of the row.

    Color Scheme Shown

    Rows 1 - 13: switch between Colors A and B (3 stripes of A, 3 stripes of B)
    Rows 14 - 23: switch between Colors C and B (3 stripes of C, 2 stripes of B)
    Rows 24 - 35: switch between Colors D and C (3 stripes of D, 3 stripes of C)
    Rows 36 - 45: switch between Colors D and E (3 stripes of D, 2 stripes of E)
    Rows 46 - 57: switch between Colors E and F (3 stripes of E, 3 stripes of F)
    Rows 58 - 67: switch between Colors G and F (3 stripes of G, 2 stripes of F)
    Rows 68 - 79: switch between Colors A and G (3 stripes of A, 3 stripes of G)
    Row 80: Color G
    Border Rnd 1: Color B
    Border Rnd 2: Color E
    Border Rnd 3: Color F

    Baby's Biggest Fan Blanket INSTRUCTIONS:

    Row 1 (RS): With first color, FSC 127; turn. (127 sts) Alternatively, you may ch 128, skip the ch closest to the hook, and sc in each rem st; turn.

    Row 2: Ch 1, sc in the first st, ch 1, skip 2 sts, V st in next st, *ch 1, skip 2 sts, sc in the next st, ch 1, skip 2 sts, V st in next st; rep from * until 3 sts rem, ch 1, skip 2 sts, sc in last st; turn. (21 V sts)

    Row 3: Ch 1, sc in the first st, skip next dc, *shell in the V st ch-1 sp,** ch 1, skip next 3 sts; rep from * finishing last rep at **, skip next dc, sc in last st changing to next color; turn. (21 shells)

    Row 4: (CSDC, dc) in the first st, ch 1, skip 2 dc, sc in the next dc, *ch 1, skip 2 dc, CSX, ch 1, skip 2 dc, sc in next dc; rep from * until 3 sts rem, ch 1, skip 2 dc, 2 dc in last st; turn. (20 CSX)

    Row 5: (CSDC, 2 dc) in the first st, ch 1, skip next 3 sts, *shell in the CSX ch- 1 sp, ch 1, skip 3 sts; rep from * across, 3 dc in last st, changing to next color; turn. (20 shells)

    Row 6: Ch 1, sc in the first st, ch 1, skip 2 dc, *CSX, ch 1, skip 2 dc, sc in next st,** ch 1, skip 2 dc; rep from * finishing last rep at **, turn. (21 CSX)

    Row 7: Ch 1, sc in the first st, skip next dc, *shell in the CSX ch-1 sp,** ch 1, skip next 3 sts; rep from * finishing last rep at **, skip next dc, sc in last st changing to next color; turn. (21 shells)

    Repeat Rows 4 - 7 through Row 79, finishing on a Row 7 rep.

    Row 80 (WS): CSDC in first st, hdc in the next st, sc in the next 3 sts, hdc in the next st, *dc in the sc from Row 78, enclosing the ch-1 above it, hdc in the next st, sc in the next 3 sts, hdc in the next st; rep from * across until 1 st rem, dc in the last st changing to first Border Rnd color, turn. (127 sts) 

    Border Rnd 1 (RS): Ch 1, hdc in each st across Row 80, ch 2, hdc evenly down the side of the blanket, ch 2, hdc in each foundation st, ch 2, hdc evenly up the last side of the blanket; join with sl st and finish off with seamless join.

    Border Rnd 2 (RS): With next color, join to any corner ch-2 sp with STHDC, (ch 2, hdc) in same ch sp, hdc in the back 3rd loop of each st around, working (hdc, ch 2, hdc) in each rem ch sp around; join with sl st and finish off with seamless join.

    Border Rnd 3 (RS): With next color, join to any corner ch-2 sp with STHDC, (ch 2, hdc) in same ch sp, sc in the back 3rd loop of each st around, working (hdc, ch 2, hdc) in each rem ch sp around; join with sl st and finish off with seamless join.

    Baby's Biggest Fan Blanket


    The Baby's Biggest Fan Blanket is a wonderful way to share the warmth! I’d love to see yours - be sure to share your photos on social media and tag @mooglyblog so I can see all your wonderful projects! And for the Warm Up America drive, please tag them too! Also, a special thank you to reader Jessica Barwa for coming up with the name for this pattern! ♥

    Baby's Biggest Fan Blanket

    The Fine Print

    Written pattern copyright Tamara Kelly 2026, all rights reserved. Please do not reprint or repost this pattern, but please do link to this page to share this pattern with others. If you wish to make items for sale from this pattern or translate it to another language, please visit the About page for details. Thank you to Yarnspirations for providing the yarn for this pattern.

    Warm Up America! 2026 Baby Blanket Drive

    March 2, 2026 by Tamara Kelly 10 Comments

    Warm Up America! 2026 Baby Blanket Drive

    I'm excited and honored to share that I get to share the Warm Up America! Spring 2026 Baby Blanket Drive here on Moogly! Let's all grab some yarn and stitch together for a good cause!

    The Warm Up America! 2026 Baby Blanket Drive

    Warm Up America! is an amazing nonprofit, most known for its afghan drives. And every spring, they have a Baby Blanket Drive! This year, I was honored to be asked to help support this effort.

    And now that this year's challenge is finished...here are the results!

    Warm Up America! Baby Blanket Spring Drive Results

    Read on to see how you can help spread the warmth this next year!

    https://tidd.ly/4ctVQwr

    What Is Warm Up America!?

    "The Warm Up America! foundation, a 501C3 nonprofit, was founded in 1991 by Evie Rosen. It is committed to motivating, training and coordinating volunteers to knit and crochet afghans and clothing for people in need. To this end, the foundation:

    1. Promotes, trains and encourages individual volunteers and groups to adopt the WUA! program as a local activity.
    2. Supports and assists these local volunteers by providing information and instructional materials through its website and newsletters.
    3. Acts as a collection point for sections, oversees assembly into completed blankets and ships items to various charitable organizations and agencies for distribution to the homeless and persons in need. "

    How Can You Help and Join This Campaign?

    The Warm Up America! Spring 2026 Blanket Drive will run from March 2nd to April 15th - please ensure all your items are in the office by the end of mid-April!
    (But if you're late, do still send them in, they always need more!)

    • Make one or more baby blankets (Any pattern, crochet or knit!)
    • Use medium weight #4 OR dk weight #3, acrylic yarn
    • The minimum size is 36"x36" but go bigger if you'd like!
    • Be sure to weave in all your ends!
    • Help spread the word! Share your projects on social media with the #moogly and tag Warm Up America
    • Please include a donation form with "Moogly Baby" on the campaign line! CLICK HERE for the donation form
    • Mail your items to:
    Warm Up America!
    ATT: Moogly Campaign
    3740 N. Josey Lane Suite 126
    Carrollton, TX 75007

    Need a Pattern?

    To support this drive, I've designed a new crochet baby blanket pattern - the Baby's Biggest Fan Blanket, featuring colorways by WeCrochet/Knit Picks, in Brava Baby DK!
    https://tidd.ly/4ctVQwr
    But of course, any pattern is good! (Even ones by other designers. 😉 ) Just remember to use acrylic yarn, even if that's not what the designer used!
    And to make it convenient for you, here are some more free crochet baby blanket patterns on Moogly!
    Bright Chevron Borderless Blanket
    Sleepy Blocks Blankie
    Bunches of Bobbles Blanket
    Little Princess Baby Blanket
    Basketweave Blocks Baby Blanket
    Modern Rose Afghan
    Cupcake Baby Blanket
    Happiest Blanket Ever
    Hard Candy Baby Blanket
    Greyson Baby Blanket
    Double the Love Baby Blanket
    Ombre Arrows Afghan
    Red White and Baby
    Magic Rainbow Baby Blanket
    Loopy Love Blanket
    Leaping Stripes and Blocks Blanket
    Sweetest Baby Blanket
    Blackberry Salad Striped Baby Blanket
    Wavy Baby Blanket
    Whatever pattern you follow, I hope you'll stitch for Warm Up America! this spring. ♥ If you make a blanket for this drive, please tag me in your photos so I can see them too, @mooglyblog or #mooglyblog, and tag Warm Up America! too!
    Get Moogly on your favorite social media sites: YouTube, Facebook, Pinterest, Tik Tok, Bluesky, and Instagram! And sign up for the free newsletter at the bottom of the page so you don’t miss a thing! Thank you to Yarnspirations for providing the materials for this video.

    Split Cuff Slippers Tutorial

    February 26, 2026 by Tamara Kelly Leave a Comment

    Split Cuff Slippers Tutorial

    If you’d like a little extra help while making your Split Cuff Slippers, this step-by-step video tutorial will walk you through the entire process! Learn how to make your own pair with the right and left-handed videos below!

    Disclaimer: This post includes affiliate links.

    Be sure to scroll down past the videos to get the links to the free pattern and supplies!

    Split Cuff Slippers Tutorial:

    How to Crochet the Split Cuff Slippers - Right-Handed

    Learn to Crochet the Split Cuff Slippers - Left-Handed

    As Seen in This Video (click each for more info!):

    The Free Pattern: Split Cuff Slippers

    The Supplies:

    US - I, 5.5 mm - Furls Streamline

    290 - 475 yds Patons Classic Wool Worsted (4 - Worsted; 100 g/3.5 oz, 177 m/194 yds)

    Stitch Markers

    And here's a Pin for your Crochet Pinterest Board! Make sure you are following Moogly on Pinterest for all the best knit, crochet, and craft pins!

    Split Cuff Slippers Tutorial

    I hope you enjoy this tutorial for the Split Cuff Slippers! If this video doesn't answer all your questions, please ask in the comments below - I'm always happy to help.

    If you make this or any Moogly pattern, please tag me in your photos so I can see them too, @mooglyblog or #mooglyblog! Then send them to tamarakelly@mooglyblog.com to see them featured in a future Moogly email newsletter!

    Get Moogly on your favorite social media sites: YouTube, Facebook, Pinterest, Tik Tok, Bluesky, and Instagram! And sign up for the free newsletter at the bottom of the page so you don’t miss a thing! Thank you to Yarnspirations for providing the materials for this video.

    Fab Flower Basket Tutorial

    February 25, 2026 by Tamara Kelly 4 Comments

    Fab Flower Basket Tutorial

    Ready to see how the Fab Flower Basket comes together? This step-by-step tutorial walks you through the key techniques that give this crochet basket its beautiful floral shape and sturdy structure. Grab your hook, your favorite Bernat Fab! colorway, and let’s build your flower basket one step at a time in right and left-handed video tutorials!

    Disclaimer: This post includes affiliate links.

    Be sure to scroll down past the videos to get the links to the free pattern and supplies!

    Fab Flower Basket Tutorial:

    How to Crochet the Fab Flower Basket - Right-Handed

    Learn to Crochet the Fab Flower Basket - Left-Handed

    As Seen in This Video (click each for more info!):

    The Free Pattern: Fab Flower Basket

    The Supplies:

    US - Q, 15.0 mm - Furls Streamline

    58 yds Bernat Fab! (7 - Jumbo; 200 g/7 oz, 33 m/37 yds)
    Color A: In the Garden (blue base) - 27 yds
    Color B: Glowing Garden (yellow base) - 31 yds

    Stitch Markers

    And here's a Pin for your Crochet Pinterest Board! Make sure you are following Moogly on Pinterest for all the best knit, crochet, and craft pins!

    Fab Flower Basket Tutorial

    I hope you enjoy this tutorial for the Fab Flower Basket! If this video doesn't answer all your questions, please ask in the comments below - I'm always happy to help.

    If you make this or any Moogly pattern, please tag me in your photos so I can see them too, @mooglyblog or #mooglyblog! Then send them to tamarakelly@mooglyblog.com to see them featured in a future Moogly email newsletter!

    Get Moogly on your favorite social media sites: YouTube, Facebook, Pinterest, Tik Tok, Bluesky, and Instagram! And sign up for the free newsletter at the bottom of the page so you don’t miss a thing! Thank you to Yarnspirations for providing the materials for this video.

    Crochet Layers to Love Book Review and Giveaway

    February 24, 2026 by Tamara Kelly 2 Comments

    Crochet Layers to Love Book Review and Giveaway

    Crochet Layers to Love by Salena Baca features "8 Versatile Tops to Level Up Your Style"! Take a peek inside below, and then enter to win your own copy, right here on Moogly!

    Disclaimer: I was given a copy of this book for review; all opinions are my own. This post includes affiliate links. 

    The Crochet Layers to Love Review

    A Bit About the Author

    Salena Baca, author of Crochet Granny Square Tops, Bags, and More: Review and Giveaway

    I first met Salena years ago - was it before her first book? I'm not sure, she's become such a prolific author and designer! Here's her author blub:

    "I learned to crochet at the age of 5 and haven't put my hook down since! I've published over 500 patterns, authored 16 crochet books, taught 2 courses with Craftsy, and launched the American Crochet Association. I currently live in Oregon with my cute family and loud dog."

    Let's take a closer look at her newest book!

    Crochet Layers to Love Book Review and Giveaway

    Inside Crochet Layers to Love

    "Crocheting your own tops is easier than you think! Whether you’re a beginner or have some experience with crochet, this collection is made for you. The patterns are approachable, quick, and adjustable for a range of sizes, allowing you to create pieces that fit your body and your style.

    Crochet Layers to Love Book Review and Giveaway

    You’ll find a variety of comfortable tank tops, a cozy cropped sweater, a breezy cotton poncho, and light, airy tops that you can easily layer over outfits you already have in your wardrobe. The best part? These pieces are versatile for year-round wear—over long sleeves in cooler months and with tank tops and dresses in warmer weather. You’ll be ready for any season. If you love crochet, these tops for layering were designed to be your new favorites. Let’s get started!

    • 8 beautiful crochet designs, including tank tops, a cropped sweater, a poncho, and three short-sleeve tops
    • Sizes S–XXL
    • Written and designed by humans, for humans"

    Crochet Layers to Love Book Review and Giveaway

    Crochet Layers to Love is a thin, quick volume of patterns that gets right to the point! After the table of contents and a quick intro, we jump right into the patterns. And it's a lovely selection! This book is perfect for spring, going into summer. There are lots of light layers and airy over pieces!

    Crochet Layers to Love Book Review and Giveaway

    Both the stitches and the construction on these are simple and beginner-friendly. Lion Brand yarns are used throughout, making these projects budget-friendly as well. There are schematics to help you assemble the pieces, and the instructions look clear and well-written in standard US terms and format.

    Crochet Layers to Love Book Review and Giveaway

    One thing I should point out is that not all the patterns in Crochet Layers to Love include the full size range - a couple stop at size Large. I'm not sure why those two patterns don't include the larger sizes, and I do think an experienced and determined maker could upsize them if desired.

    Crochet Layers to Love Book Review and Giveaway

    Otherwise, this is a great book of patterns perfect for the coming months, and approachable for all skill levels!

    Crochet Layers to Love Book Review and Giveaway

    Get your own copy of Crochet Layers to Love today!

    Purchase your own copy of this book on Amazon, or ask for it at your local bookseller! And be sure to check out Salena's other books too!

    Crochet Layers to Love Book Review and Giveaway Crochet Layers to Love Book Review and Giveaway Crochet Layers to Love Book Review and Giveaway Crochet Layers to Love Book Review and Giveaway

    The Crochet Layers to Love Giveaway

    The Crochet Layers to Love Giveaway is open in the US and Canada. The giveaway ends March 24, 2026, at 12:15am Central US time. To enter, use the Kingsumo form below. Only the email option is mandatory – all other tasks are optional, for bonus entries only.

    One winner will receive a paperback copy of Crochet Layers to Love, courtesy of Stackpole Books. They will be notified by email.

    GOOD LUCK ALL!

    You can follow Moogly on YouTube, Facebook, Twitter, Pinterest, TikTok, and Instagram. Don’t forget to sign up for the free newsletter at the top of the page! And don't forget to enter all the other fab giveaways on Moogly! And if you'd like to share this post, there's a Pinterest image and sharing buttons below!

    Crochet Layers to Love Book Review and Giveaway

    Split Cuff Slippers

    February 19, 2026 by Tamara Kelly 1 Comment

    Split Cuff Slippers

    There is nothing better than slipping into something warm and cozy at the end of a long day, and the Split Cuff Slippers are ready and waiting for you. This pattern creates simple, stylish crochet slippers in a full range of adult women’s and men’s sizes, making them perfect for gifting or keeping.

    The fold-over cuff features a split in the back ease and visual interest, while the decorative strap and button add a charming finishing touch - and help tell left from right! Get the crochet pattern below, right here on Moogly!

    Disclaimer: This post includes affiliate links; material provided by Yarnspirations and Furls.

    Prefer an ad-free PDF? You've got options!

    This button leads to the pattern on Etsy

    Prefer the free blog version? Keep scrolling!

    Warm Your Feet Crochet Blog Hop 2026

    Part of the Warm Your Feet Slippers Crochet Blog Hop on Sandra Stitches

    It's been a while since I designed a pair of slippers, so when I was invited to his blog hop, I decided it was time to jump back in (every pun intended)! As Sandra says, "Slippers are one of those quiet crochet projects we return to again and again. They’re useful, giftable, and deeply satisfying to make."

    How does the 2026 Warm Your Feet Blog Hop work?

    Starting February 15th, 2026:

    • A new crochet pattern will be linked to the designer’s blog each day.
    • All patterns will be forever free + a free PDF download valid for 24 hrs daily
    • All featured patterns will be forever free on the blog posts
    • Get all the patterns, now through February 27th - CLICK HERE

    Split Cuff Slippers Warm Your Feet Blog Hop

    A Cozy Treat for Your Feet

    There’s something extra special about making a pair of slippers with your own two hands. The Split Cuff Slippers are all about everyday comfort with a polished twist, from the soft, snug fit to the fold-over cuff and sweet strap and button detail.

    They’re the kind of project that feels relaxing to stitch and even better to wear, perfect for treating yourself or creating a heartfelt handmade gift that’s sure to be loved. Best of all, the construction is straightforward and relaxing, so you can enjoy the process and have a comfy new pair ready before you know it. Worried about slipping? CLICK HERE for a variety of solutions!

    Split Cuff Slippers


    Split Cuff Slippers

    Add this pattern to your Ravelry Queue and Favorites

    US - I, 5.5 mm - Furls Streamline

    290 - 475 yds Patons Classic Wool Worsted (4 - Worsted; 100 g/3.5 oz, 177 m/194 yds)
    Color A: Gray Mix - 2 skeins
    Color B: Meadow - 5 yds

    Stitch Markers

    Gauge: 13 dc x 8 rows = 4" [10cm]

    Helpful Links and Tutorials:

    Split Cuff Slippers Tutorial

    Crochet Abbreviations

    Magic Circle

    CSDC - Chainless Starting Double Crochet

    Fpdc/Bpdc - front and back post double crochet

    BLO - Back Loop Only

    Working in the Third Loop

    Mattress Stitch Seaming

    Split Cuff Slippers Sizing

    These unisex slippers are designed to fit both standard and wide widths. To find your size and customize your slippers, see the list below:

    Women's 4 - 6 ½, standard width - follow the size SMALL (S) instructions for both stitch count and row count.

    Women's 4 - 6 ½, wide width - follow the size MEDIUM (M) instructions for the stitch count, and the size SMALL (S) instructions for the row count.

    Women's 7 - 9 ½, standard width, and Men's 6 - 8 ½, standard width - follow the size MEDIUM (M) instructions for both stitch count and row count.

    Women's 7 - 9 ½, wide width, and Men's 6 - 8 ½, wide width - follow the size LARGE (L) instructions for the stitch count, and the size MEDIUM (M) instructions for the row count.

    Women's 10 - 12 ½, standard width, and Men's 9 - 11 ½, standard width - follow the size LARGE (L) instructions for both stitch count and row count.

    Women's 10 - 12 ½, wide width, and Men's 9 - 11 ½, wide width - follow the size EXTRA LARGE (XL) instructions for the stitch count, and the size LARGE (L) instructions for the row count.

    Men's 12 - 14, standard width - follow the size EXTRA LARGE (XL) instructions for both stitch count and row count.

    Sizing instructions are given in the pattern below as S(M, L, XL) OR split into their own rnds. When only one number is given, it applies to all sizes.

    NOTES

    The right and left slippers are the same, and can be distinguished using the decorative, optional straps with buttons.

    Some rnds are worked in turned rounds, and will be marked as "join and turn." Use a stitch marker in the first and last st of each round.

    Special Stitch

    fp/bpdc2tog - yarn over and insert hook from front to back around post of next st, yarn over and pull up a loop, yarn over and pull through 2 loops on hook (2 loops rem on hook), yarn over and insert hook from back to front around post of next st, yarn over and pull up a loop, yarn over and pull through 2 loops on hook, yarn over and pull through all 3 loops on hook.

    Split Cuff Slippers INSTRUCTIONS:

    Starting at the Toe

    Rnd 1: With Color A, make a magic circle, CSDC, dc 11 in the ring; join and turn. (12 dc)

    Rnd 2: (CSDC, dc) in the first st, 2 dc in each rem st around. (24 dc)

    Follow the Rnd 3 instructions for your size only, then go on to Rnd 4. 

    Rnd 3 - SMALL ONLY: CSDC in the first st, dc in the next 10 sts, 2 dc in the next st, dc in the next 11 sts, 2 dc in the next st; join and turn. (26 dc)

    Rnd 3 - MEDIUM ONLY: CSDC in the first st, dc in the next 4 sts, 2 dc in the next st, *dc in the next 5 sts, 2 dc in the next st; rep from * around, join and turn. (28 dc)

    Rnd 3 - LARGE ONLY: CSDC in the first st, dc in the next 2 sts, 2 dc in the next st, *dc in the next 3 sts, 2 dc in the next st; rep from * around, join and turn. (30 dc)

    Rnd 3 - EXTRA LARGE ONLY: CSDC in the first st, dc in the next st, 2 dc in the next st, *dc in the next 2 sts, 2 dc in the next st; rep from * around, join and turn. (32 dc)

    Rnds 4 - 10 (11, 12, 13): CSDC in the first st, dc in each rem st around; join and turn.

    Make the Heel of the Foot

    Row 1: CSDC in the first st, dc in the next 19 (20, 22, 23) sts, turn leaving rem sts unworked. (20 (21, 23, 24) sts)

    Rows 2 - 7 (8, 9, 10): CSDC in the first st, dc in each rem st across; turn.

    Split Cuff Slippers

    Set Up for the Cuff

    Fold the last row in half, to sl st in the first st of the last row.

    Split Cuff Slippers

    Turn work to stitch around the foot opening. The opening at the back of the heel will be sewn shut later.

    Split Cuff Slippers

    Make the Inner Cuff

    Rnd 1: (CSDC, dc) in the side of the first row, work 2 dc in the side of each row and 1 dc in each st around foot opening.
    If the st count is even, join with sl st and continue to next rnd.
    If the st count is odd, add an additional st in the side of the last row, join with a sl st and continue to next rnd.

    Rnds 2 - 4: Ch 1, fpdc around the first st, bpdc around the next st; *fpdc around next st, bpdc around next st; rep from * around, join.

    Rnd 5: Ch 1, [fpdc in next st, bpdc in next st] 3 (4, 5, 6) times, fp/bpdc2tog twice, [fpdc in next st, bpdc in next st] until 10 (12, 14, 16) sts rem, fp/bpdc2tog twice, *fpdc in next st, bpdc in next st; rep from * to end, join.

    Rnd 6: Rep Rnd 2.

    Rnd 7: Ch 1, [fpdc in next st, bpdc in next st] 2 (3, 4, 5) times, fp/bpdc2tog twice, [fpdc in next st, bpdc in next st] until 8 (10, 12, 14) sts rem, fp/bpdc2tog twice, *fpdc in next st, bpdc in next st; rep from * to end, join.

    Rnd 8: Rep Rnd 2, turn.

    Make the Outer Cuff

    Row 1: Working entire rnd in BLO, CSDC in the first st, dc in each rem st around; turn but do NOT join.

    Rows 2 - 7: CSDC in the first st, dc in each rem st across; turn.

    Row 8: Ch 1, sc in the first st, working in the front 3rd loop, hdc in each st across until 1 st rem, sc in last st; turn.

    Row 9: Ch 1, sc in the first st, working in the BLO, sc in each st across until 1 st rem, sc in last st; finish off and weave in ends.

    Sew the Back of the Heel Closed

    Cut a 12" length of yarn and mattress stitch the back of the heel closed. Weave in ends.

    Turn work to stitch around the foot opening. The opening at the back of the heel will be sewn shut later.

    Add Strap and Button (Optional)

    Make Strap with Color B: 

    Row 1: Ch 13, skip the ch closest to the hook, sc in each rem st across; turn. (12 sts)

    Row 2: Ch 1, sc in each st across, FO leaving a long tail for sewing.

    Sew to Slipper:

    Fold the Strap over the bottom of the Outer Cuff, as shown. Use the long tail to sew to the cuff, and then add a button to the top of the strap.

    Repeat for the other slipper, being sure to place the strap and button on the opposite side of the cuff.

    Turn work to stitch around the foot opening. The opening at the back of the heel will be sewn shut later.


    I hope you enjoy making and wearing your Split Cuff Slippers as much as I loved designing them. They are a wonderfully relaxing project that works up quickly, and the classic style means they are perfect for gifting, selling at craft fairs, or keeping in a cozy basket by your favorite chair. If you make a pair, I would love to see them, so be sure to share your photos and let me know how you customized yours! You can always tag me @mooglyblog on social media!

    The Fine Print

    Written pattern copyright Tamara Kelly 2026, all rights reserved. Please do not reprint or repost this pattern, but please do link to this page to share this pattern with others. If you wish to make items for sale from this pattern or translate it to another language, please visit the About page for details. Thank you to Yarnspirations for providing the yarn for this pattern.

    MooglyCAL2026 Block 4

    February 19, 2026 by Tamara Kelly 2 Comments

    MooglyCAL2026 Block 4

    MooglyCAL2026 Block 4 is an easy, textured design by Rhondda Moll of Oombawka Design! The Endless Griddle Stitch Square can be any size you like - no matter your gauge! Get all the details for this free crochet along, and the free pattern link below!

    Disclaimer: This post includes affiliate links; materials provided by Local Crafts.

    Just getting started with the Moogly Crochet Along? CLICK HERE for the intro info!

    Want to get help with the patterns, show off, and CAL with others? CLICK HERE for the Facebook group

    Like to see all the squares visually? CLICK HERE for the Pinterest Board! (Squares will be added as they are released.)

    Introducing the MooglyCAL ONLY Newsletter! Never miss a Square Debut!

    The 2026 Moogly CAL Schedule

    As the year progresses, links will be added, and you'll be able to click on any of the past squares to go to their posts. The numbers refer to the date of the month that the square will debut.

    January Archie Argyle Crochet Square and Radiate Champion Block
    February Cozy Circles Crochet Square and THIS POST
    March 5 and 19
    April 2, 16, and 30
    May 14 and 28
    June 11 and 25
    July 9 and 23
    August 6 and 20
    September 3 and 17
    October 1, 15, and 29
    November 12 and 25

    *****

    Block #4:

    Endless Griddle Stitch Square

    by Oombawka Design

    MooglyCAL2026 Block 4

    Above, you can see the square that Rhondda made in 3 colors of Brava Worsted! Below is my CAL square, in my 6 colors of Brava Worsted - Custard, Seashell, Fig, Denim, Espresso, and Cream!

    MooglyCAL2026 Block 4

    Details for MooglyCAL2026 Block 4

    My Notes: The Endless Griddle Stitch Square is a simple, beginner-friendly square, IF you use one extra tool - stitch markers! While making this square, I recommend you have a total of seven stitch markers handy. Use four of them to mark the corners, use two to mark the first and last st of each rnd, and one more to hold your active loop open if you need to put your work down. The corner style alternates and you'll need to have the corner stitches marked to help you find them.

    Additionally, you'll want to mark the first and last stitch of each round, as this square is worked in turned rounds - and this keeps you from accidentally working into the slip stitch! Once you've got all your stitch markers this square is smooth sailing, and it's super easy to adjust for size!

    Helpful Links and Tutorials: Crochet Abbreviations, Magic Circle, Chainless Starting Double Crochet, Standing sc, Standing dc, and seamless join.

    Sizing: My square was running a little small, so I worked added a Round 16 in the same griddle pattern, and then worked Rnd 17 as the Last Rnd. But everyone's gauge is different, so be sure to measure as you go! Learn how to adjust for size HERE to ensure all your squares are the same size. Remember that the 12″ is measured across and up and down, not diagonally/corner to corner.

    Yarn Options: This year, our designers have chosen from a variety of yarns, including Brava Worsted, Swish Worsted, Jimmy Beans Wool Beanstalk, Berroco Vintage, and MadTosh Vintage. For this square, I used Brava Worsted, and Rhondda did the same!

    What I Did:

    I used a US-J, 6.0 mm crochet hook, and Brava Worsted yarn, and my color scheme was as follows (see pics for more info on placement):

    Rnds 1 - 3: Espresso
    Rnds 4 - 6:
    Denim
    Rnds 7 - 9:
    Fig
    Rnds 10 - 12:
    Custard
    Rnds 13 and 14:
    Seashell
    Rnds 15 - 17:
    Cream

    This square didn't really require any blocking, but I used the wet blocking method to remove a seam I accidentally put in there when I had to stuff it in a suitcase!

    The Pattern:

    CLICK HERE FOR THE PATTERN FOR BLOCK #4 and CLICK HERE FOR THE VIDEO TUTORIAL

    PLEASE NOTE: The designers all hold individual copyrights for their patterns. They may choose to make videos of their patterns, and you can certainly request them from the designers. In addition, there are videos linked in the notes for specific stitches and techniques that may help you with the pattern. They may offer paid PDFs of the pattern, but have agreed to leave it up for free on their website or on Ravelry for as long as possible.

    Show Off Your Squares!

    If you share your photos on social media, be sure to use the hashtags #mooglycal2026 and tag your yarn - I'll be using #bravaworsted -  and tag me @mooglyblog so I can see them too! And don't forget to share them in the MooglyCAL Facebook Group! Thank you all for CAL-ing with me!

    And finally, here's a pin of MooglyCAL2026 - Block 4 for your own Pinterest boards!

    MooglyCAL2026 Block 4

    You can follow Moogly on YouTube, Facebook, Twitter, Pinterest, TikTok, and Instagram, and don't forget to sign up for the free newsletter at the bottom of the page! Thank you to Local Crafts for providing the materials for this crochet along.  

    Crochet and Catch Up with Moogly - February 18, 2026

    February 18, 2026 by Tamara Kelly Leave a Comment

    Crochet and Catch Up with Moogly - February 18, 2026

    We’re halfway through February, and it’s the perfect moment for a fresh Crochet and Catch Up here on Moogly! Let’s settle in for some cozy yarn chat, see how those WIPs are coming along, share the latest patterns, and take a look at what’s just around the corner. Grab your hook and join me for another warm, fiber-filled session packed with crochet inspiration!

    Disclaimer: This post may contain affiliate links. Live videos are unscripted, unedited, and occasionally weird; all opinions are my own. 

    Crochet and Catch Up with Moogly

    Going LIVE on Facebook and YouTube, at 11am CT!

    Click here to Like the Moogly Facebook Page and get notified when I go live!

    Click here to Subscribe to the Moogly YouTube Page and get notified when I go live!

    Moogly Community Group on Facebook

    What I'm Wearing: Shell Stitch Duster

    MooglyCAL2026 Block 3 Courtesy of Fiber Flux

    CAL Yarns: Brava Worsted, Swish Worsted, Jimmy Beans Wool Beanstalk, Berroco Vintage, and MadTosh Vintage.

    Fab Flower Basket - FREE CROCHET PATTERN

    Everyday Drop Hanging Basket Video Tutorial

    Bernat Future Hope Yarn Giveaway

    Fantasy Crochet Book Review and Giveaway

    Crochet Project Bag and Yarn Giveaway

    Essential Crochet Dictionary Giveaway

    Sneak Peek: Get a sneak peek of the new baby blanket for Warm Up America featuring Brava Baby DK! Coming in March!

    Moogly Around the Web - and the World!

    February 17 - 20: I'll be one of the presenters at the Yarn to Wardrobe Summit - LAST CHANCE!

    Want to see me in person in 2026?

    May 1 - 2: I will be teaching four classes at the new Fiber and Fabric Craft Festival in Chicago - one on Friday, and three on Saturday!

    If you have a LYS or event you'd like me to teach at this year, or if you would like me to teach an online class to your group or guild, please do reach out!

    Have a wonderful day all - see you to crochet and catch up next time! And before you go, here's a Pin for today's post, so you can add it to your favorite Pinterest boards! We appreciate (and need) your shares on all our posts.

    Crochet and Catch Up with Moogly - February 18, 2026

    Follow Moogly on YouTube, Bluesky, Facebook, Pinterest, TikTok, and Instagram! 

    Bernat Furture Hope Giveaway

    February 17, 2026 by Tamara Kelly 2 Comments

    Bernat Furture Hope Giveaway

    Sustainability equals soft with new Bernat Future Hope! This chenille yarn is made of 100% recycled polyester - and we're taking a closer look and giving away 8 skeins here on Moogly!

    Disclaimer: This post was sponsored by Yarnspirations and may include affiliate links; all opinions are my own.

    Bernat Furture Hope Giveaway

    "Stitch comfort with purpose using Bernat Future Hope! This #4 worsted weight chenille yarn combines plush softness with a versatile gauge, perfect for cozy garments, accessories, and home décor. Part of the Bernat Future line, Future Hope helps you make small, conscious choices that bring comfort, creativity, and a positive impact to the things that matter most."

    Bernat Furture Hope Giveaway

    Just The Yarny Facts:

    Content: 100% recycled polyester

    Ball Size: 170 g/6 oz, 305 meters/333 yards

    Care: Machine wash in cool water, delicate cycle. Do not bleach. Do not dry clean. Do not iron or press. Tumble dry on low heat, delicate.

    Gauge: #4 Worsted (Medium)

    Buy It: Available at select Walmart stores and on Yarnspirations.com

    Taking a Closer Look at Bernat Future Hope

    Eco-friendly options can be hard to find in the yarn world, but Bernat is making thoughtful choices easier for crocheters and knitters alike, right down to labels made from Kraft cardboard. Bernat Future Hope currently features 6 lovely, muted colorways!

    Bernat Furture Hope Giveaway

    Taking a closer look at the preview skein that Yarnspirations sent me, this yarn is super soft and luxurious to the touch - with a ton of drape, and great yardage! It's recommended for garments, accessories, and cozy home décor.

    Bernat Furture Hope Giveaway

    I haven't had a chance to try this yarn out myself yet - just pet it a lot - but I will certainly share when I do!17

    Pattern Inspiration for Bernat Future Hope

    Yarnspirations has rolled out a small but versatile collection of brand-new patterns designed specifically for this new yarn! Check out the new FREE Mini Chevron Crochet Cardigan Pattern, Scallop Edge Knit Sweater Pattern, Eyelet Stripes Crochet Pullover Pattern, Knit Brioche Blanket Pattern, Deep Ridge Crochet Blanket Pattern, and Crochet Contrast Corner Shawl Pattern! What do you want to make with this new yarn?

    Bernat Furture Hope Giveaway

    Bernat Future Hope Yarn Giveaway Time!

    The Bernat Future Hope Giveaway is open in the US and Canada only. The giveaway ends March 3, 2026, at 12:15am Central US time. To enter, use the Kingsumo form below. Only the email option is mandatory – all other tasks are optional, for bonus entries only.

    The winner will receive 8 skeins of Bernat Future Hope Yarn in their choice of the available colors and will be notified by email.

    Now, don't forget to enter all the other great giveaways happening now on Moogly!

    Good luck all! Here's a Pin Image for your Giveaways or Yarn boards!

    Bernat Future Hope Yarn Giveaway

    You can follow Moogly on Facebook, Pinterest, TikTok, Bluesky, and Instagram, and don’t forget to sign up for the free newsletter at the bottom of the page! Thank you to Yarnspirations for sponsoring this giveaway!

    Everyday Drop Hanging Basket Tutorial

    February 12, 2026 by Tamara Kelly Leave a Comment

    Everyday Drop Hanging Basket Tutorial

    If you love crochet projects that are quick to make and easy to use every day, you’re going to love the Everyday Drop Hanging Basket! And now there are step-by-step tutorial videos below, covering the key techniques used in the pattern. You can follow along at your own pace, pause or replay as needed, and choose right- or left-handed videos to suit your style. Grab your hook and yarn, and let’s get started!

    Disclaimer: This post includes affiliate links.

    Be sure to scroll down past the videos to get the links to the free pattern and supplies!

    Everyday Drop Hanging Basket Tutorial:

    How to Crochet the Everyday Drop Hanging Basket - Right-Handed

    Learn to Crochet the Everyday Drop Hanging Basket - Left-Handed

    As Seen in This Video (click each for more info!):

    The Free Pattern: Everyday Drop Hanging Basket

    The Supplies:

    US - N, 9.0 mm - Furls Streamline

    50 yds Bernat Future Inspire (170 g/6 oz, 99 m/108 yds; 6 - super bulky)
    Colorway Shown: Slated (1 skein makes two baskets)

    Stitch Markers

    And here's a Pin for your Crochet Pinterest Board! Make sure you are following Moogly on Pinterest for all the best knit, crochet, and craft pins!

    Everyday Drop Hanging Basket Tutorial

    I hope you enjoy this tutorial for the Everyday Drop Hanging Basket! If this video doesn't answer all your questions, please ask in the comments below - I'm always happy to help.

    If you make this or any Moogly pattern, please tag me in your photos so I can see them too, @mooglyblog or #mooglyblog! Then send them to tamarakelly@mooglyblog.com to see them featured in a future Moogly email newsletter!

    Get Moogly on your favorite social media sites: YouTube, Facebook, Pinterest, Tik Tok, Bluesky, and Instagram! And sign up for the free newsletter at the bottom of the page so you don’t miss a thing! Thank you to Yarnspirations for providing the materials for this video.

    Fab Flower Basket

    February 11, 2026 by Tamara Kelly Leave a Comment

    Fab Flower Basket

    Say hello to the Fab Flower Basket, a cheerful and functional crochet project that’s ready to make your cottage-core dreams come true! Featuring Bernat Fab!, it's just as fun to make as it is to use. Sturdy, pretty, and practical - make your own with the Moogly pattern below!

    Disclaimer: This post includes affiliate links; material provided by Yarnspirations and Furls.

    Prefer an ad-free PDF? You've got options!

    This button leads to the pattern on Etsy

    Prefer the free blog version? Keep scrolling!

    A Fab Basket with Fab! Yarn

    Designed specifically to show off Bernat Fab! yarn, this basket takes this unique yarn "meta!" This unique yarn is a plush core wrapped in a floral printed fabric exterior that creates great stitch definition and a sweet look. The result is a springy, Easter-y basket that feels soft and squeezable, but is more than sturdy enough to stand up on its own.

    Fab Flower Basket

    Inspired by the Simple Flower Egg Cozy, the Fab Flower Basket features a scalloped base and a tulip-style top for a playful, modern take on crochet home décor. The structure is built right into the stitches, so there’s no need for extra stiffeners or inserts, making this a satisfying project from start to finish. Whether you’re organizing small essentials, dressing up a shelf, or gifting something handmade and useful, this crochet basket pattern is designed to hold its shape and look great in any space.

    Fab Flower Basket

    If you’ve been curious about crocheting with Bernat Fab! yarn, this pattern is a perfect place to start. It works up quickly, highlights the yarn’s strengths beautifully, and creates a finished piece that’s both decorative and practical. Grab your hook, choose your favorite Fab colorway, and let’s make a flower that helps around the house!

    Fab Flower Basket


    Fab Flower Basket

    Add this pattern to your Ravelry Queue and Favorites

    US - Q, 15.0 mm - Furls Streamline

    58 yds Bernat Fab! (7 - Jumbo; 200 g/7 oz, 33 m/37 yds)
    Color A: In the Garden (blue base) - 27 yds
    Color B: Glowing Garden (yellow base) - 31 yds

    Stitch Markers

    Gauge: 5 sc = 4" [10cm]

    Finished Size: approx 6" tall x 9.5" wide at base

    Helpful Links:

    Fab Flower Basket Tutorial

    Crochet Abbreviations

    Magic Circle

    BLO - Back Loop Only

    Seamless join

    Fab Flower Basket

    NOTE

    This pattern is worked in a spiral, do not join with a slip stitch at the end of each round unless indicated, and only ch when indicated. Use a stitch marker to mark the first stitch of each rnd to help keep track.

    Pm - place marker

    Fab Flower Basket INSTRUCTIONS:

    Make the Base

    Base Rnd 1: With Color A, make a magic circle, ch 1, sc 6 in the ring. (6 sc)

    Rnd 2: 2 sc in each st around. (12 sc)

    Rnd 3: *Sc in the next st, 2 sc in the next st; rep from * around. (18 sc)

    Rnd 4: *2 sc in the next st, sc in the next 2 sts; rep from * around; turn. Remove hook from active loop, pm to secure. Move working yarn and loop to front of work. (24 sc)

    Make the Flower

    Flower Rnd 1: With Color B, working entire round in blo, join to last st of Rnd 4 with sc, sc in each rem st around. (24 sc)

    Rnd 2 - 4: Sc in each st around.

    Rnd 5: Sc in first st, *skip next st, 5 dc in next st, skip next st,** sc in next st; rep from * finishing last rep at **, break yarn and seamless join to first st of rnd.

    Go Back to the Base

    Base Rnd 5: Turn, to work from the top of the flower, and insert hook in active loop of Color A. Working entire round in unused loops of Rnd 4, *skip next st, 6 dc in next st, skip next st,** sc in next st; rep from * finishing last rep at **, break yarn and seamless join to first st of rnd. Weave in all ends.

    Fab Flower Basket


    The Fab Flower Crochet Basket is another small project with a big everyday impact! I’d love to see how you use yours - be sure to share your photos on social media and tag @mooglyblog so I can see all your wonderful projects!

    Fab Flower Basket

    The Fine Print

    Written pattern copyright Tamara Kelly 2026, all rights reserved. Please do not reprint or repost this pattern, but please do link to this page to share this pattern with others. If you wish to make items for sale from this pattern or translate it to another language, please visit the About page for details. Thank you to Yarnspirations for providing the yarn for this pattern.

    Fantasy Crochet by Jessica Bertolina Review and Giveaway

    February 10, 2026 by Tamara Kelly 2 Comments

    Fantasy Crochet by Jessica Bertolina Review and Giveaway

    Fantasy Crochet: 16 Whimsical Patterns Inspired by Faeries, Elves, Nymphs & More by Jessica Bertolina is here to help you "Stitch a Bit of Magic into Your Wardrobe!" It debuts February 17th, but I've got a sneak peek inside for you today. Check out these special creations, and enter to win your own copy below!

    Disclaimer: I was given a copy of this book for review; all opinions are my own. This post includes affiliate links. 

    Fantasy Crochet Review

    Fantasy Crochet by Jessica Bertolina Review and Giveaway

    A Bit About the Author

    Author Jessica Bertolina is the fiber artist behind Cozy Faerie Craft, and you can find her on socials @cozyfaeriecraft. She designs both crochet and knit patterns, and lives in Valtellina, Italy! Here's her author blurb:

    "Jessica Bertolina is a fiber artist with a passion for crochet, knitting, and sewing. She first picked up a crochet hook as a child and then rediscovered her love for the craft in 2020. Inspired by the worlds of fantasy books and the beauty of nature, Jess designs pieces that blend the whimsical with the practical, allowing everyday wear to feel a bit more magical. Known online as CozyFaerieCraft, she shares her creations with a growing community of fellow fiber artists and fantasy lovers."

    What is Fantasy Crochet about?

    Are you ready to have the wardrobe of your forest-fairy dreams?

    "Create a whimsical array of crochet patterns that will bring a magical sparkle to your everyday outfits. Use your hook and yarn to escape to shimmering streams, ancient forests, and enchanted landscapes that are home to folkloric creatures. With each pattern, crochet designer and fantasy-lover Jessica Bertolina of @cozyfaeriecraft invites you to add a subtle hint of whimsy to your daily wear, or you can create each chapter’s complete themed outfit. Even better, mix and match the patterns together using your favorite yarns to create a look that’s all your own!

    Sprinkle some pixie dust into your handmade wardrobe with fae-inspired looks like the Blossom Skirt or Forager’s Gloves. Dip into fabled waters with the Mistweaver Skirt, enter mythical woodlands with the Mossling Bag or Warden’s Cloak, and crochet pieces for the next full moon with the Lunar Ties Top or Eerie Lights Necklace.

    All of the garment patterns are made to measure and come with step-by-step photographs, ensuring that you can achieve the perfect fit with ease. Capture the charm of fantasy worlds with this collection of delightful wearables that are sure to enchant you again and again."

    Fantasy Crochet by Jessica Bertolina Review and Giveaway

    My Peek Inside Fantasy Crochet

    When I started paging through Fantasy Crochet, the first thing I noticed was the adorable styling you'll find throughout - not just the photos of the author in her creations, but the fonts and page decor set the scene.

    Fantasy Crochet by Jessica Bertolina Review and Giveaway

    The next thing is the "Note on Sizing." This book doesn't feature patterns written in multiple sizes - but it isn't all for a size small either! All the garments in Fantasy Crochet are "made to measure, which means there are no fixed sizes or standard numbers to follow. Instead, each pattern is designed to work with your unique measurements, allowing you to create a custom fit that works perfectly for your body."

    Fantasy Crochet by Jessica Bertolina Review and Giveaway

    So each pattern includes instructions on which measurements you'll need, and how to adjust as you go for a perfect fit. Usually only one measurement is needed, so don't let this intimidate you - rather, know that you'll be able to make something to fit your body, just the way you like.

    Fantasy Crochet by Jessica Bertolina Review and Giveaway

    While this book includes patterns from beginner to experienced, most are in the advanced beginner to intermediate range. I read through a few, and they are well-written and clear to understand. She makes the custom sizing easy to follow and not at all overwhelming.

    Fantasy Crochet by Jessica Bertolina Review and Giveaway

    One of the things I really like about this book is how Jessica shows us the versatility of these pieces. She shows off the complete fantasy outfits for each section of patterns, but then also breaks up the pieces and mixes and matches them with more "regular" clothing to show how you can integrate these items into your everyday outfits. Magical indeed!

    Fantasy Crochet by Jessica Bertolina Review and Giveaway

    Get your own copy of Fantasy Crochet today!

    Purchase your own copy of this book on Amazon, or ask for it at your local bookseller!

    Fantasy Crochet by Jessica Bertolina Review and Giveaway

    The Fantasy Crochet Giveaway

    The Fantasy Crochet Giveaway is open in the US and Canada. The giveaway ends March 10, 2026, at 12:15am Central US time. To enter, use the Kingsumo form below. Only the email option is mandatory – all other tasks are optional, for bonus entries only.

    One winner will receive a copy of Fantasy Crochet courtesy of Page Street Publishing. They will be notified by email.

    GOOD LUCK ALL!

    You can follow Moogly on YouTube, Facebook, Twitter, Pinterest, TikTok, and Instagram. Don’t forget to sign up for the free newsletter at the top of the page! And don't forget to enter all the other fab giveaways on Moogly! And if you'd like to share this post, there's a Pinterest image and sharing buttons below!

    Fantasy Crochet by Jessica Bertolina Review and Giveaway

    MooglyCAL2026 Block 3

    February 5, 2026 by Tamara Kelly 3 Comments

    MooglyCAL2026 Block 3 Courtesy of Fiber Flux

    MooglyCAL2026 Block 3 is a marvelous design by Jennifer Dickerson of Fiber Flux! The Cozy Circles Crochet Square is a beautiful little blanket of its own, made with small motifs! Get all the details for this free crochet along, and the free pattern link below!

    Disclaimer: This post includes affiliate links; materials provided by Local Crafts.

    Just getting started with the Moogly Crochet Along? CLICK HERE for the intro info!

    Want to get help with the patterns, show off, and CAL with others? CLICK HERE for the Facebook group

    Like to see all the squares visually? CLICK HERE for the Pinterest Board! (Squares will be added as they are released.)

    Introducing the MooglyCAL ONLY Newsletter! Never miss a Square Debut!

    The 2026 Moogly CAL Schedule

    As the year progresses, links will be added, and you'll be able to click on any of the past squares to go to their posts. The numbers refer to the date of the month that the square will debut.

    January Archie Argyle Crochet Square and Radiate Champion Block
    February THIS POST and 19
    March 5 and 19
    April 2, 16, and 30
    May 14 and 28
    June 11 and 25
    July 9 and 23
    August 6 and 20
    September 3 and 17
    October 1, 15, and 29
    November 12 and 25

    *****

    Block #3:

    Cozy Circles Crochet Square

    by Fiber Flux

    MooglyCAL2026 Block 3 Courtesy of Fiber Flux

    Above, you can see the square that Jennifer made in 3 colors of Brava Worsted! Below is my CAL square, in my 6 colors of Brava Worsted - Custard, Seashell, Fig, Denim, Espresso, and Cream!

    MooglyCAL2026 Block 3 Courtesy of Fiber Flux

    Details for MooglyCAL2026 Block 3

    My Notes: The Cozy Circles Crochet Square is like a tiny little blanket for our blanket! Jennifer has designed some lovely puff st motifs that are then joined-as-you-go, and finished off with a fun border. So many color possibilities here! This one does require you to keep a tape measure handy, however.

    When you are making your motifs, keep an eye on the size - each should measure about 3 inches. If your square is smaller than that, you can add more to the Border Rnds to make up for it. If it's a little bit too big, you can shrink the border rounds (that's what I did, see below). But if you're way over 3 inches, you'll want adjust the final round of the Squares down to a single crochet rnd.

    Also, good news - there's a full tutorial up on YouTube! It is embedded right in the pattern on Jennifer's site.

    Helpful Links and Tutorials: Crochet Abbreviations, Magic Circle, Chainless Starting Double Crochet, Puff Stitches, Standing sc, Standing hdc, Standing dc, and seamless join.

    Sizing: My square was running a little large, so I worked Border Rnd 2 in hdc instead of dc, and skipped the ch-1 sps - that got me right to 12". But everyone's gauge is different, so be sure to measure as you go! Learn how to adjust for size HERE to ensure all your squares are the same size. Remember that the 12″ is measured across and up and down, not diagonally/corner to corner.

    Yarn Options: This year, our designers have chosen from a variety of yarns, including Brava Worsted, Swish Worsted, Jimmy Beans Wool Beanstalk, Berroco Vintage, and MadTosh Vintage. For this square, I used Brava Worsted, and Jennifer did the same!

    What I Did:

    I used a US-J, 6.0 mm crochet hook, and Brava Worsted yarn, and my color scheme was as follows (see pics for more info on placement):

    Square 1: A) Seashell, B) Espresso
    Square 2: A)
    Denim, B) Fig
    Square 3: A)
    Custard, B) Denim
    Square 4: A)
    Espresso, B) Custard
    Square 5: A)
    Fig, B) Espresso
    Square 6:
    A) Fig, B) Seashell
    Square 7: A)
    Denim, B) Seashell
    Square 8:
     A) Seashell, B) Custard
    Square 9: A)
    Denim, B) Espresso
    All Squares Color C:
    Cream
    Border Rnd 1:
    Fig
    Border Rnd 2:
    Cream
    Border Rnd 3:
    skipped for size

    This square required a moderate blocking so I used the wet blocking method and then steamed it as well.

    The Pattern:

    CLICK HERE FOR THE PATTERN FOR BLOCK #3

    PLEASE NOTE: The designers all hold individual copyrights for their patterns. They may choose to make videos of their patterns, and you can certainly request them from the designers. In addition, there are videos linked in the notes for specific stitches and techniques that may help you with the pattern. They may offer paid PDFs of the pattern, but have agreed to leave it up for free on their website or on Ravelry for as long as possible.

    Show Off Your Squares!

    If you share your photos on social media, be sure to use the hashtags #mooglycal2026 and tag your yarn - I'll be using #bravaworsted -  and tag me @mooglyblog so I can see them too! And don't forget to share them in the MooglyCAL Facebook Group! Thank you all for CAL-ing with me!

    And finally, here's a pin of MooglyCAL2026 - Block 3 for your own Pinterest boards!

    MooglyCAL2026 Block 3 Courtesy of Fiber Flux

    You can follow Moogly on YouTube, Facebook, Twitter, Pinterest, TikTok, and Instagram, and don't forget to sign up for the free newsletter at the bottom of the page! Thank you to Local Crafts for providing the materials for this crochet along.  

    Crochet and Catch Up with Moogly - February 4, 2026

    February 4, 2026 by Tamara Kelly Leave a Comment

    Crochet and Catch Up with Moogly - February 4, 2026

    February is here, bringing all the cozy, creative vibes, and it’s time for another Crochet and Catch Up on Moogly! Let’s relax with some yarn chat, check in on current projects, share new patterns, and take a peek at what’s coming up next. Grab your hook and join me for a warm, fiber-filled hangout and a little crochet inspiration for the weeks ahead!

    Disclaimer: This post may contain affiliate links. Live videos are unscripted, unedited, and occasionally weird; all opinions are my own. 

    Crochet and Catch Up with Moogly

    Going LIVE on Facebook and YouTube, at 11am CT!

    Click here to Like the Moogly Facebook Page and get notified when I go live!

    Click here to Subscribe to the Moogly YouTube Page and get notified when I go live!

    Moogly Community Group on Facebook

    What I'm Wearing: Cosmos Cardigan

    MooglyCAL2026 Block 2 Courtesy of Linda Dean Crochet

    CAL Yarns: Brava Worsted, Swish Worsted, Jimmy Beans Wool Beanstalk, Berroco Vintage, and MadTosh Vintage.

    Everyday Drop Hanging Basket - FREE CROCHET PATTERN

    Introducing GoSadi - for Makers and Designers

    Bernat Future Impact Yarn Giveaway

    Crochet Project Bag and Yarn Giveaway

    Bernat Future Inspire Yarn Giveaway

    Essential Crochet Dictionary Giveaway

    Furls Venture Leather Hook Roll and Tempest Blue Hooks Giveaway

    Sneak Peek: Coming next week - the Fab Flower Basket featuring Bernat Fab yarn! And coming next month, a new baby blanket for Warm Up America featuring Brava Baby DK!

    Moogly Around the Web - and the World!

    February 17 - 20: I'll be one of the presenters at the Yarn to Wardrobe Summit - free tickets available!

    February 20: I'm teaching a class at Virtual Knitting Live online  - Corner to Corner Colorwork!

    Want to see me in person in 2026?

    May 1 - 2: I will be teaching four classes at the new Fiber and Fabric Craft Festival in Chicago - one on Friday, and three on Saturday!

    June 17 - 21: This summer, I'll be one of the teachers at Jimmy Beans Wool's Biggest Little Getaway 2026!

    If you have a LYS or event you'd like me to teach at this year, or if you would like me to teach an online class to your group or guild, please do reach out!

    Have a wonderful day all - see you to crochet and catch up next time! And before you go, here's a Pin for today's post, so you can add it to your favorite Pinterest boards! We appreciate (and need) your shares on all our posts.

    Crochet and Catch Up with Moogly - February 4, 2026

    Follow Moogly on YouTube, Bluesky, Facebook, Pinterest, TikTok, and Instagram! 

    Bernat Furture Impact Giveaway

    February 3, 2026 by Tamara Kelly 4 Comments

    Bernat Furture Impact Giveaway

    Joining the push toward fiber sustainability is new Bernat Future Impact! This yarn is a blend of recycled acrylic, recycled cotton, and recycled polyester - and we're taking a closer look and giving away 8 skeins here on Moogly!

    Disclaimer: This post was sponsored by Yarnspirations and may include affiliate links; all opinions are my own.

    Bernat Future Impact

    "Create with purpose using Bernat Future Impact! This recycled cotton blend helps reduce environmental impact while giving you the perfect yarn for everyday accessories and bold statement pieces. As a versatile #4 worsted weight, it’s ideal for bags, scarves, and sweaters—helping you make small, conscious choices that add up to a big impact in your wardrobe and beyond."

    Bernat Furture Impact Giveaway

    Just The Yarny Facts:

    Content: 50% recycled acrylic, 30% recycled cotton, 20% recycled polyester

    Ball Size: 170 g/6 oz, 383 meters/419 yards

    Care: Machine wash in cool water, delicate cycle. Do not bleach. Do not dry clean. Do not iron or press. Tumble dry on low heat, delicate.

    Gauge: #4 Worsted (Medium)

    Buy It: Available at select Walmart stores and on Yarnspirations.com

    Taking a Closer Look at Bernat Future Impact

    Crafting and sustainability don’t always go together — but these new yarns from Bernat make it much easier to crochet and knit with an eco-conscious mindset. Even the labels are made from Kraft cardboard. Bernat Future Impact currently features 6 gorgeous colorways!

    Bernat Furture Impact Giveaway

    Taking a closer look at the preview skein that Yarnspirations sent me, this yarn has such a unique feel. It's not plasticy like some acrylics can be, but it's softer and drapier than many cotton yarns. Such a great combo! The color blend is consistent throughout the skein, but there is variation, depth, and shading in the plies. The yardage is really high for the weight, so the yarn itself is quite light.

    Bernat Furture Impact Giveaway

    I haven't seen this yarn used too much out there in the wild yet - but I think as warm weather returns, this one will really come into its own. One pattern I have seen for it is the Natural Poncho, by Selena Baca - a lovely and light layer ready for spring! Of course, I had to take a few stitches with it myself!

    Bernat Furture Impact Giveaway

    I decided to test Bernat Future Impact out by making a Bunny Ears Soap Sack! The cotton is great for bath applications, the acrylic will help it dry faster, and the polyester should make it last. I really enjoyed working with this yarn! It's soft to the touch, and I didn't encounter any splitting. It does work up a bit smaller than Lily Sugar'n Cream, the worsted yarn I originally used for the Sack, so be sure to check the gauge for any pattern you use it in - at least if it needs to fit something or someone. But then, that's always good advice! I hope to use the rest of the skein on a future project - I'm thinking a new beanie!

    Pattern Inspiration for Bernat Future Impact

    As always, Yarnspirations has created a bunch of new patterns for their new yarn! Check out the new FREE Let’s Mesh Up This Crochet Bag, Nicole's Trellis Cables Knit Pullover, Whimsy Wrap Crochet Hooded Scarf, Eyelet Stripes Crochet Pullover, and Crochet Filet Fern Backpack! What do you want to make with this new yarn?

    Bernat Furture Impact Giveaway

    Bernat Future Impact Yarn Giveaway Time!

    The Bernat Future Impact Giveaway is open in the US and Canada only. The giveaway ends February 17, 2026, at 12:15am Central US time. To enter, use the Kingsumo form below. Only the email option is mandatory – all other tasks are optional, for bonus entries only.

    The winner will receive 8 skeins of Bernat Future Impact Yarn in their choice of the available colors and will be notified by email.

    Now, don't forget to enter all the other great giveaways happening now on Moogly!

    Good luck all! Here's a Pin Image for your Giveaways or Yarn boards!

    Bernat Furture Impact Giveaway

    You can follow Moogly on Facebook, Pinterest, TikTok, Bluesky, and Instagram, and don’t forget to sign up for the free newsletter at the bottom of the page! Thank you to Yarnspirations for sponsoring this giveaway!

    Introducing GoSadi - for Makers and Designers

    January 29, 2026 by Tamara Kelly Leave a Comment

    Introducing GoSadi - for Makers and Designers

    Have you heard about GoSadi? It's an amazing new hub for makers and designers, crocheters and knitters, and I've been alpha testing it for the past two years. And now I'm so excited to announce that it is officially open - and now you can all join me and explore all this amazingness! Learn more, and then sign up for your own account at the link below!

    Disclaimer: This post includes affiliate links.

    Introducing GoSadi - for Makers and Designers

    First Things First - What IS GoSadi?

    I want to get this right, so I'm pulling it right from the FAQ - and the answer is, it depends! There are two sides of GoSadi - one for Makers, and one for Designers.

    If you are a Maker: "GoSadi is the go-to hub for knitters and crocheters to discover, organize, and save patterns from across the web — including Ravelry, Etsy, designer websites, yarn company sites, and more.
    Think of it as your personalized pattern library and inspiration board in one place. You can:

    • Search across multiple platforms at once
    • Create “playlists” of your favorite patterns
    • Follow designers and brands you love
    • Share your WIPs and FOs
    • Showcase your creativity on your Maker’s Landing Page

    GoSadi helps you find and organize what inspires you — so you can spend less time searching and more time stitching.

    Additionally, GoSadi is built for mobile — even though it’s not an app. That’s right — take it with you. Have your project notes in your pocket. Keep updates as you go along — while on the go! Have your queued items ready with you as you visit fiber events, LYS and fairs shopping for fab fibers. GoSadi goes with you!"

    Introducing GoSadi - for Makers and Designers

    And if you are a Designer: "GoSadi is a web-based application designed to simplify and streamline the process of uploading patterns to digital selling platforms & marketplaces for designers in the knit, crochet, and fiber arts space. We also help Makers connect with the community and designers and find quality patterns to make." That sounds pretty simple - but as a designer, I can tell you it's been a game-changer for me!

    Introducing GoSadi - for Makers and Designers

    The People and Vision Behind GoSadi

    I first heard about GoSadi over two years ago, when my friend Michele Costa told me about her big idea. I thought it sounded brilliant, but complex, and eagerly waited to see what happened. And every step of the way, I was amazed by her drive, her vision, and her results. Here's how her team describes it:

    "At GoSadi, we believe creativity should flow—without getting tangled in tech.

    Built by and for fiber artists, GoSadi is your all-in-one Creative Command Center: a place to organize patterns, manage listings, and grow your business with ease. Whether you design, sell, or teach, GoSadi helps you spend less time on admin and more time doing what you love—making.

    GoSadi was founded by two longtime makers and community builders, Michele Costa (Stitch and Hustle, Stitch Up Events) and Hilary Cerbin (Nina Chicago yarn shop). After years of helping creatives grow their businesses from the ground up, they saw a clear need: a smarter, simpler way to connect all the tools makers use every day. So they teamed up to build it.

    What started as a conversation between two friends has become a platform powered by passion, purpose, and the belief that makers deserve modern tools designed for them.

    This isn’t just software—it’s a movement for makers."

    GoSadi Team

    Since GoSadi's inception, Michele has surrounded herself and partnered with some extremely talented people! The GoSadi Team includes Michele and her co-founder Hilary, plus Solomon Lasluisa, who handles the technical side of the platform, and Samantha Brunson on Marketing. She's a talented crafter too - be sure to check out Sam's site, Bobble Club House! (And Solomon has started crocheting too, but as far as I know, it's just a hobby!)

    Introducing GoSadi - for Makers and Designers

    What Sets GoSadi Apart

    GoSadi is made for makers who love discovering great patterns - and actually being able to find them again later. Whether you crochet, knit, or (one of my favorite hobbies) collect inspiration for “someday,” this is your place!

    It’s also built with designers, publishers, and yarn stores in mind. If you release or sell digital patterns, GoSadi helps put your work in front of engaged, enthusiastic makers and build genuine connections with your audience. You can "Fan" all the designers you love - and individual patterns! Create a feed filled with just the things you love - not what some algorithm thinks you're into. This is great for you - and great for the designers you love! ♥

    Introducing GoSadi - for Makers and Designers

    Search by project type, yarn weight, technique, designer, and even accessibility features. GoSadi pulls results from multiple sites, including Ravelry, Etsy, and independent designer shops, all in one spot. When you find something you love, save it to a playlist or tuck it neatly into your Maker Library for later.

    Introducing GoSadi - for Makers and Designers

    Make It Easy, and Make a Connection

    The whole point of GoSadi is that it does the organizing, so you can get back to the making! And as mentioned above - GoSadi is built for mobile! As a Maker, you can add quick pics to your WIP listings right from your phone, adding notes - public or private! - as you go. Great when you need to check that pattern or WIP from the yarn shop!

    And not to be cliché, but that's not all! There's so much more to come, including pages for local yarn stores, online events, and even in-person events! It's everything you wish the other sites could be, all in one place.

    Introducing GoSadi - for Makers and Designers

    As an alpha tester, I got to peek behind the curtain... before the curtains were hung! But right from the start, even when things were buggy and broken and mostly "in the works," I could see the vision - and every day, it got better and better. I was excited to get my Designer Page set up, and started going to events and telling other designers about this great site, which they really needed to sign up for!

    Introducing GoSadi - for Makers and Designers

    Then, late in 2025, I got to lead a small group of Makers through beta testing that side of the site. I got my own Maker Page set up as well, and we explored and poked all the dark corners together, to get it ready... for today! Because GoSadi is now officially OPEN for everyone!

    Introducing GoSadi - for Makers and Designers

    How to Sign Up for GoSadi

    That's right, GoSadi is now officially open for everyone - Makers and Designers! CLICK HERE to go to the sign-up page and pick your plan - you can try it for free! No more waitlist, no more disorganized WIPs list, no more shuffling photos between phone and computer, check it out and see what you think today!

    Introducing GoSadi - for Makers and Designers

    Get Moogly on your favorite social media sites: YouTube, Facebook, Twitter, Pinterest, Instagram, and TikTok so you don't miss a thing! 

    Everyday Drop Hanging Basket

    January 28, 2026 by Tamara Kelly Leave a Comment

    Everyday Drop Hanging Basket

    The Everyday Drop Hanging Basket is a simple, modern crochet basket designed to add flexible storage wherever you need it. It's a place to "drop" those everyday items and know right where to find them later. Make your own with just one skein of Bernat Future Inspire and the Moogly pattern below!

    Disclaimer: This post includes affiliate links; material provided by Yarnspirations and Furls.

    Prefer an ad-free PDF? You've got options!

    This button leads to the pattern on Etsy

    Prefer the free blog version? Keep scrolling!

    Make One For Every Room

    With its soft teardrop shape and clean lines, it’s perfect for organizing small essentials, from craft notions to daily necessities to everyday odds and ends. Hung on a hook, knob, or peg, it works beautifully in bathrooms, entryways, and more!

    Everyday Drop Hanging Basket

    Make it decorative with (battery-operated) candles and flowers - it's also great for potted plants, mine are just too big! I plan on using it to stop losing my gloves (which are determined to lose themselves otherwise).

    Everyday Drop Hanging Basket

    The Everyday Drop Hanging Basket is crocheted with Bernat Future Inspire Yarn, a recycled-fiber blend that offers stitch definition with just a bit of a halo. Even better, you can get two baskets out of one skein, making it a quick, budget-friendly project and a great way to try out this new yarn (available on Yarnspirations and in select Walmart stores).

    Everyday Drop Hanging Basket

    Fast to stitch and endlessly useful, it’s a satisfying project you’ll want to make again and again!

    Everyday Drop Hanging Basket


    Everyday Drop Hanging Basket

    Add this pattern to your Ravelry Queue and Favorites

    US - N, 9.0 mm - Furls Streamline

    50 yds Bernat Future Inspire (170 g/6 oz, 99 m/108 yds; 6 - super bulky)
    Colorway Shown: Slated (1 skein makes two baskets)

    Stitch Markers

    Gauge: 9 hdc x 7 rows = 4" [10cm]

    Finished Size: approx 10" tall x 7" wide

    Helpful Links:

    Everyday Drop Hanging Basket Tutorial 

    Crochet Abbreviations

    Magic Circle

    Hdc - Half Double Crochet

    Hdc2tog - Half Double Crochet Decrease

    Tr- Treble

    Seamless join

    Special Stitch:

    Hdc2tog - Half Double Crochet Decrease: Yo and insert hook in next st, yo and pull up loop through stitch, insert hook in next st, yo and pull up loop through stitch, yo and pull through all 4 loops on hook.

    NOTES:

    There is one turn in this pattern, at the end of Rnd 4.

    Use a stitch marker in the first and last st of each round.

    Joining with a sc creates a "ch-1 sp."

    Joining with a ch-3 and tr creates a "ch-6 sp."

    Everyday Drop Hanging Basket

    Everyday Drop Hanging Basket INSTRUCTIONS:

    Rnd 1: Make a magic circle and ch 1, hdc 10 in the ring; join to first st with sl st. (10 sts)

    Rnd 2: Ch 1, 2 hdc in each st around; join with sl st. (20 sts)

    Rnd 3: Ch 1, hdc in the first st, 2 hdc in the next st, *hdc in the next st, 2 hdc in the next st; rep from * around, join with sl st. (30 sts)

    Rnd 4: Ch 1, 2 hdc in the first st, hdc in the next 2 sts, *2 hdc in the next st, hdc in the next 2 sts; rep from * around, join with sl st and TURN. (40 sts)

    Rnd 5: Ch 1, hdc in the sl st, hdc in each rem st around, hdc in sl st again, join to first st with sc. (42 sts)

    Rnd 6: Ch 1, hdc in the ch-1 sp, hdc in each rem st around, hdc in ch-1 sp again, join to first st with sc. (44 sts)

    Rnd 7: Ch 1, hdc in the ch-1 sp, hdc in the next 10 sts, hdc2tog, [hdc in the next 9 sts, hdc2tog] twice, hdc in the last 10 sts, hdc in ch-1 sp again, join to first st with sc. (43 sts)

    Rnd 8: Ch 1, hdc in the ch-1 sp, [hdc in the next 9 sts, hdc2tog] three times, hdc in the last 10 sts, hdc in ch-1 sp again, ch 3, join to first st with tr. (42 sts)

    Rnd 9: Ch 1, 4 sc in the ch-6 sp, hdc in the next 10 sts, hdc2tog 11 times, hdc in the last 10 sts, 4 sc in the ch-6 sp again; break yarn and seamless join. (42 sts)

    Weave in all ends.

    Everyday Drop Hanging Basket


    The Everyday Drop Hanging Basket is a small project with a big everyday impact! I’d love to see how you use yours - be sure to share your photos on social media and tag @mooglyblog so I can see all your wonderful projects!

    Everyday Drop Hanging Basket

    The Fine Print

    Written pattern copyright Tamara Kelly 2026, all rights reserved. Please do not reprint or repost this pattern, but please do link to this page to share this pattern with others. If you wish to make items for sale from this pattern or translate it to another language, please visit the About page for details. Thank you to Yarnspirations for providing the yarn for this pattern.

    « Previous Page
    Next Page »
    Tamara Kelly of Moogly

    Moogly is world-famous for fresh. modern, and approachable crochet designs - as well as a little knitting and crafting here and there. On Moogly, you'll find several new free patterns every month, top quality video tutorials, giveaways, and more!

    More about Moogly →

    Popular

    • MooglyCAL2026 Block 21
      MooglyCAL2026 Block 21
    • Crochet and Catch Up with Moogly - October 14, 2026
      Crochet and Catch Up with Moogly - October 14, 2026
    • Seamless Crochet Sweaters Review and Giveaway
      Seamless Crochet Sweaters - Review and Giveaway
    • Ghost Treat Basket Tutorial
      Ghost Treat Basket Tutorial
    gosadi
    I'm a Craftsy Instructor. Click to see my classes.
    I Like Crochet


    Footer

    ↑ back to top

    About

    • About
    • Privacy Policy

    Newsletter

    Contact

    Email Moogly

    As an Amazon Associate I earn from qualifying purchases.
    Copyright © 2026 Mooglyblog.com