
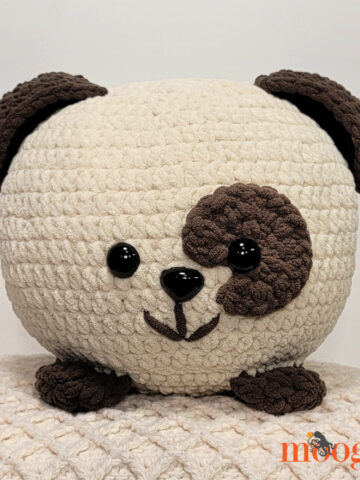
The Fox Squish is the newest member of our big amigurumi family - a clever, cunning, and free crochet pattern on Moogly! Featuring Bernat Blanket, this crafty fellow will charm his way right off your hook and into your heart.
Disclaimer: This post includes affiliate links; materials provided by Yarnspirations.
Prefer an ad-free PDF? You've got options!


Prefer the free blog version? Keep scrolling!
Part of the 2024 Softie Crochet Along on CAL Central
The Softie Crochet Along is the second crochet along of the year which is hosted in the CAL Central Facebook and Ravelry groups. 2024 marks the seventh year since this CAL started and fifteen of your favorite crochet designers will bring you free crochet patterns for adorable and cuddly softies - including the Fox Squish! Join along on this CAL to make fun crochet projects, chat with other crocheters, and enter to win one of the fabulous prizes in the giveaway!

Every Monday from March 18 to June 24, 2024, they will share a free crochet pattern for a softie from a different crocheter. You can make these softies to keep, for gifts, to sell at a craft fair, or to donate to charity while chatting with other crocheters in our groups and sharing your projects to win giveaway prizes!
We’ve partnered with GlassEyesOnline, KennyClayCo, Knitter’s Relief Balm, KnitPal, and Yazzii to bring you some great prizes in our end-of-CAL giveaway. CLICK HERE to get all the patterns for this CAL and to enter the giveaway by Sunday, June 30, 2024 at 11:59 p.m. Eastern.

How To Join the 2024 Softie CAL
- Sign up for Crochet Along updates and the Underground Crafter newsletter to get regular updates, including an update as each CAL pattern is released.
- You can join in by crocheting the patterns as you have time.
- Share your progress and post pictures of your finished projects. Tag your projects and posts #CALCentralCrochet on all social media.
- If you’d like to chat with other crocheters, join the CAL Central Facebook group or visit this thread in the CAL Central Ravelry group.
- By the end of the CAL, you’ll have up to 15 awesome softies to cuddle with!
Made in Quick and Easy Bernat Blanket!
There are lots of varieties of Bernat Blanket, and I had to poll the family to decide which orange to go with - it was a tough choice! If you can't find the exact colors I've used for the Fox Squish, there are lots of great options. Blanket comes in dozens of colors and is so easy to care for, it's perfect for these squishes. As a 6-Super Bulky yarn, this pattern creates a 10" toy - a little bigger once it's stuffed! If you'd like to make it smaller - or even bigger - choose whatever yarn you like, and use whatever hook gets you a nice tight fabric.

Cute and Cuddly for Kids and Adults
This crochet fox pillow is fun to make - and pet and squeeze! I used safety eyes and a safety nose, but this pattern has not been "tested for safety for children under 3 years of age." If you are crocheting it for a baby or toddler, you may wish to embroider on the features and make sure that the pieces are sewn on quite securely - especially that tail! If using it as a photo prop, be sure not to leave the toy with a baby unattended.

Fox Squish
Add this pattern to your Ravelry Queue and Favorites
US-L, 8.0 mm hook, Susan Bates
400 yds Bernat Blanket (6 - Super Bulky; 100% polyester; 300g/10.5 oz; 201 m/220 yds)
A: Orange Leaf (most of a ball)
B: Birch (about half a ball)
C: Coal (much less than one ball)
10" Microbead Pillow Ball or additional fiber fill
Gauge: 5"/10cm across after Rnd 3.
Size: approx 10" across/tall excluding ears, tail, and feet

HELPFUL LINKS AND TUTORIALS
NOTES:
Rounds are worked in a spiral. Do not ch 1 at the beginning of a rnd or join any rnds with a sl st unless specifically directed in the pattern.
Move a stitch marker along the first st of each rnd as you work to keep track of your progress.
Some pieces move from Rounds to Rows.
FOX SQUISH INSTRUCTIONS:
Body - uses Colors A and B
Rnd 1: With Color A, make a magic circle, ch 1, sc in the ring, 9 hdc in the ring. (10 sts)
Rnd 2: 2 hdc in each st around. (20 hdc)
Rnd 3: *Hdc in the next st, 2 hdc in the next st; rep from * around. (30 hdc)
Rnd 4: *2 hdc in the next st, hdc in the next 2 sts; rep from * around. (40 hdc)
Rnd 5: *Hdc in the next 3 sts, 2 hdc in the next st; rep from * around. (50 hdc)
Rnd 6: *Hdc in the next st, 2 hdc in the next st, hdc in the next 3 sts; rep from * around. (60 hdc)
Rnd 7: Hdc in the next 5 sts, 2 hdc in the next st, *hdc in the next 9 sts, 2 hdc in the next st; rep from * until 4 sts rem, hdc in last 4 sts. (66 hdc)
Rnd 8: *2 hdc in the next st, hdc in the next 10 sts; rep from * around. (72 hdc)
Rnd 9: Hdc in the next 8 sts, 2 hdc in the next st, *hdc in the next 17 sts, 2 hdc in the next st; rep from * until 9 sts rem, hdc in last 9 sts. (76 hdc)
Rnds 10 - 13: Hdc in each st around. Change to Color B on the last st of Rnd 13, break Color A.
Rnds 14 and 15: With Color B, hdc in each st around.
Rnd 16: *Hdc in the next 17 sts, hdc2tog; rep from * around. (72 sts)
Rnd 17: *Hdc in next 10 sts, hdc2tog; rep from * around. (66 sts)
Rnd 18: Hdc in next 5 sts, hdc2tog, *hdc in next 9 sts, hdc2tog; rep from * around until 4 sts rem, hdc in last 4 sts. (60 sts)
Rnd 19: Sc in next st, sl st in next st, break yarn and seamless join.

Snout - uses Colors A and B
Rnd 1: With Color B, make a magic circle, ch 1, sc in the ring, 9 hdc in the ring. (10 sts)
Rnd 2: 2 hdc in each of the first 5 sts, change to Color A, 2 hdc in each rem st around. Break both colors leaving a long tail of each for sewing. Use one of the tails to seamless join to the first hdc of the rnd. (20 hdc)
Feet - Make 4, uses Color C
Rnd 1: Make a magic circle, ch 1, sc in the ring, 6 hdc in the ring. (7 sts)
Rnd 2: 2 hdc in each st around. (14 sts)
Rnd 3: Hdc in next st, sc in next 5 sts, hdc in next 2 sts, sc in the next 5 sts, hdc in next st. (14 sts) Secure active loop with a stitch marker and weave in your first end now.
Row 4: Fold piece flat, ch 1, sc through next st and last st, sc through next 6 sets of sts; break yarn and finish off.

Belly - uses Color B
Rnd 1 - 5: With Color B, rep Rnd 1 - 5 of Body. (50 hdc) Use stitch markers to space Feet around RS of Rnd 5 at sts #3 and 9, 15 and 21, 28 and 34, and 40 and 46. Use these stitch markers to attach the last row of each foot to the RS of the belly.

Rnd 6: Working through both layers for those sts, *hdc in the next st, 2 hdc in the next st, hdc in the next 3 sts; rep from * around. (60 hdc)
Rnd 7: Sc in next st, sl st in next st, break yarn, and seamless join leaving a long tail for sewing.
Ears - Make 2, uses Colors A and B
Rnd 1: With Color A, make a magic circle, ch 1, sc in the ring, 5 hdc in the ring. (6 sts)
Rnd 2: *Hdc in the next st, 2 hdc in the next st; rep from * around. (9 sts)
Rnd 3: *2 hdc in next st, hdc in next 2 sts; rep from * around. (12 sts)
Rnd 4: *Hdc in the next st, 2 hdc in the next st, hdc in the next 2 sts; rep from * around. (15 sts)
Rnd 5: *Hdc in the next 4 sts, 2 hdc in next st; rep from * around. (18 sts)
Rnd 6: *Hdc in the next 2 sts, 2 hdc in next st, hdc in the next 3 sts; rep from * around. (21 sts)
Rnd 7: Sc in the next st, sl st in next st, break yarn leaving a long tail for sewing, and seamless join.
Add Surface Crochet Lines (optional): With Color B, add surface crochet lines to each ear as shown below.

Tail - uses Colors A and B
Rnd 1: With Color B, make a magic circle, ch 1, sc in the ring, 5 hdc in the ring. (6 sts)
Rnd 2: 2 hdc in each st around. (12 sts)
Rnd 3: *Hdc in the next st, 2 hdc in the next st; rep from * around. (18 sts)
Rnd 4: *2 hdc in next st, hdc in next 2 sts; rep from * around. (24 sts)
Rnd 5: *Hdc in the next st, 2 hdc in the next st, hdc in the next 2 sts; rep from * around. (30 sts)
Rnd 6: Sc in the next st, sl st in next st, break yarn and seamless join.
*switch colors*
Rnd 7: With Color A, join with sc in sc st of the previous row, hdc in each rem st around.
Rnds 8 - 12: Hdc in each st around.
Rnd 13: *Hdc in the next 13 sts, hdc2tog; rep from *. (28 sts)
Rnd 14: Hdc in each st around.
Rnd 15: Hdc in the next 6 sts, hdc2tog, hdc in the next 12 sts, hdc2tog, hdc in the next 6 sts. (26 sts)
Rnd 16: Hdc in each st around.
Rnd 17: Hdc in the next 8 sts, hdc2tog, hdc in the next 11 sts, hdc2tog, hdc in the next 3 sts. (24 sts)
Rnd 18: Hdc in each st around.
Rnd 19: *Hdc2tog, hdc in the next 10 sts; rep from *. (22 sts)
Rnd 20: Hdc in the next 5 sts, hdc2tog, hdc in the next 9 sts, hdc2tog, hdc in the next 4 sts. (20 sts)
Rnd 21: *Hdc2tog, hdc in the next 3 sts; rep from * around. Lightly stuff the tail with fiberfill. (16 sts)
Rnd 22: *Hdc in the next 2 sts, hdc2tog; rep from * around. (12 sts)
Row 23: Fold piece flat, ch 1, sc through next st and last st, sc through next 5 sets of sts; break yarn and finish off leaving a long tail for sewing. (6 sc)

Fox Squish Assembly
1 - Add Safety Nose to Snout: Be sure to center the nose at the bottom of the Color A stitches as shown below.

2 - Sew Snout to Body: Use the long tails to sew the Snout to the Body at the color change line, opposite the color shift created at Rnd 14 of the body as shown below.

3 - Add Safety Eyes to Body: Add safety eyes to Body on each side of the Snout as shown above.
4 - Add Ears to Body: Sew the Eyes to the top of the Body as shown. Be sure to face the surface crochet lines forward as shown, sewing them at Rnds 3-7 on either side of the magic circle.

3 - Add Tail to Body: Sew the final row of the tail to the back of the Body, covering up the color shift created at Rnd 14 of the Body.

4 - Final Assembly: Insert stuffing or ball into Body. Use stitch markers to attach Belly to Body, making sure that the Feet are nicely centered on either side of the face. Using long tail of Belly piece, whipstitch the Belly to the Body. Weave in end.

Need More Squish in your Life?
Ready for your next project? Get all the Squishes Here! Check out the Moogly Free Patterns Page or Ravelry!

If any of the Squish patterns inspire you to make your own project, and you post a photo on social media, be sure to tag me @mooglyblog or #mooglyblog so I can check it out too!
The Fine Print
Follow Moogly on Facebook, Twitter, Pinterest, TikTok, and Instagram! Thank you to Yarnspirations for providing the materials shown in this post. Written pattern copyright Tamara Kelly 2024, all rights reserved. Please do not reprint or repost this pattern, but please do link to this page to share this pattern with others.
If you wish to make items for sale from this pattern or translate it to another language, please visit the About page for details.


Peggy Boschee says
Where can I get a micro pillow ball to make squishies ?
Tamara Kelly says
I haven't been able to find any smaller ones, but I'm keeping an eye out! The 10" version is linked above! 🙂