Previously I demonstrated the Mattress Stitch, which is a great way to create an invisible seam when sewing two pieces of crochet (or knitting) together. Another option for seaming your yarn items is the Whip Stitch. This method isn't invisible, but it is fast as can be, and can add a decorative touch to the right project! Here's how it's done.
Whip Stitch Seaming Video Tutorial
Whip Stitch Seaming Photo Tutorial
You can use the Whip Stitch to sew together both crochet and knit pieces - or even sew crochet and knit together! When possible you want to match the stitches one-for-one, as shown in this tutorial. When sewing the ends of rows together, you'll need to eyeball the spaces and strive for consistency. If the edges you're seaming together are long, be sure to use clips or stitch markers to hold the edges together so you can keep your work even.
You can Whip Stitch over any number of stitches, and the only tool you need is a yarn or tapestry needle with an eye large enough for your yarn. This tutorial was filmed and photographed using Lion Brand LB Collection Cotton Bamboo.
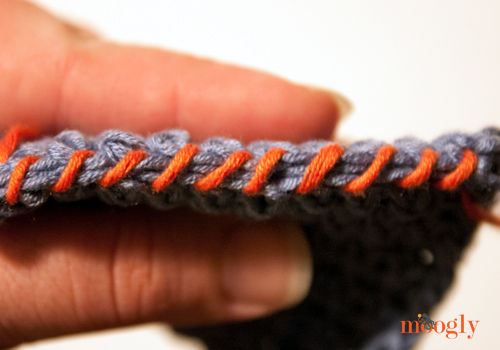
Hold the pieces to be seamed together, either WS together or RS together, depending on what the pattern calls for.

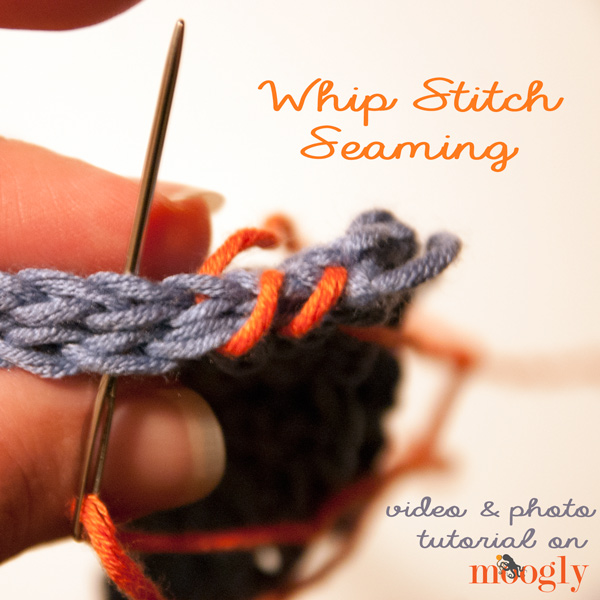
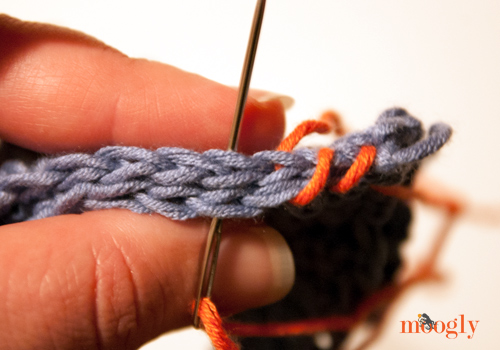
With the sewing yarn in the needle, insert the needle under both loops of the first stitch of both pieces to be seamed.
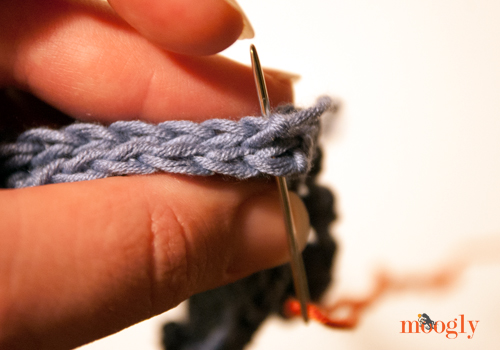
Pull the yarn on through, then insert the needle under both loops of the second stitch of each piece.

Pull the yarn on through, and move on to the third set of stitches in the same manner.
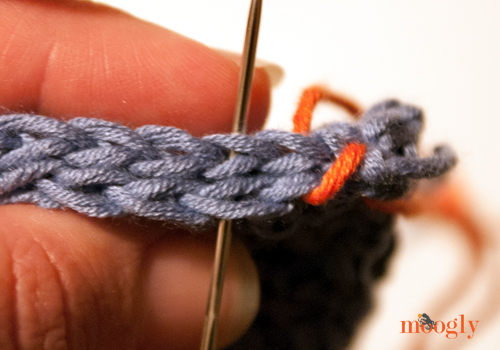
Continue to stitch through each set of stitches, going the same direction with the needle every time - whipping right through the stitches!
Ta-dah! When you get to the end, secure your yarn as you normally would.
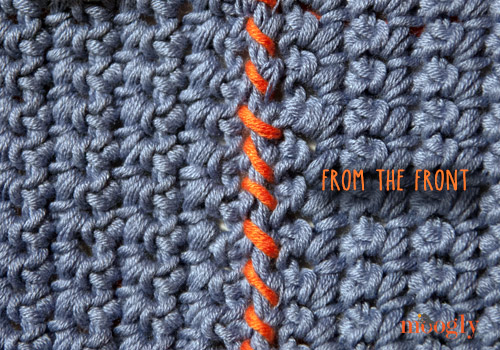
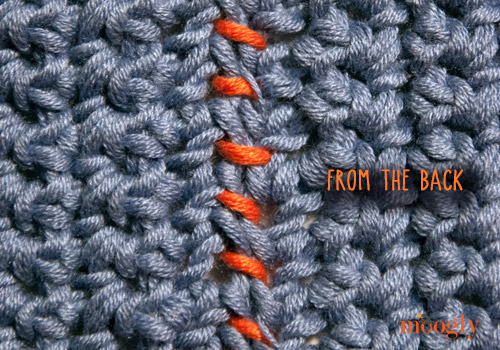
And here's how it looks when the pieces are laid flat!
And that's all there is to Whip Stitch Seaming - for both crochet and knitting! Placing your needle so that the stitches are even is important, but once you get going with this stitch you'll see just how fast it is! I hope you've enjoyed this tutorial - let me know what tutorials you'd like to see on Moogly, and share your thoughts on Whip Stitch Seaming in the comments!
Thanks for reading! Get Moogly on your favorite social media sites: Facebook, Twitter, Pinterest, and sign up for the Newsletter so you don't miss a thing!

Kristen says
Thanks for posting this. All of your video tutorials are fabulous. Can you suggest the best way to end my whip stitch? Should I weave the ends in; is that secure enough to keep the pieces tightly together? Thank you for any suggestions.
Tamara Kelly says
Thank you! Yes, weave them in. The trick to weaving in ends and getting them to stay is to go back the other direction and pierce the yarn you already wove in, while going another direction - and then do that a few times! I have a video tutorial about that here: https://www.mooglyblog.com/weaving-in-ends-crochet-video-tutorial/
Rachel Pinter says
Hi! I really like you tutorials. I have been crochet for 15 years and have always used the whip it stitch to put my blankets together. After your single stitch video to crochet square s together, I just had to try it and I love how it looks. I saw your video about the mattress stitch. I really like it because I have found that the seams in my blankets always look bulky and I find that it adds a lot of weight compared to my single piece blankets. I was wondering if the mattress stitch would come out over time?
Tamara Kelly says
Thank you so much Rachel! Great question! The key to keeping the mattress stitch in is the same as with any other joining method - weaving in your ends! You want to make sure both ends are woven in, just as if you'd crocheted the seam rather than sewn it. 🙂
Candy says
I can't seem to get any info on HOW TO have enough yarn on the needle to pull through an entire row stitch by stitch. It doesn't make any sense to me I know HOW to whip stitch. I don't know how to gauge the amount of yarn to pull through so that it's enough for an entire row of granny squares.
Tamara Kelly says
I find that 2-3 times the length of the seam usually works! But for really long rows, you may wish to do it in sections, so the sewing yarn doesn't tangle.