moogly

menu icon
go to homepage
  • Patterns
  • Tutorials
  • MooglyCAL
  • Giveaways
  • Lives
    • Facebook
    • Instagram
    • Pinterest
    • TikTok
    • Twitter
    • YouTube
  • search icon
    Homepage link
    • Patterns
    • Tutorials
    • MooglyCAL
    • Giveaways
    • Lives
    • Facebook
    • Instagram
    • Pinterest
    • TikTok
    • Twitter
    • YouTube
  • ×
    Home

    Living on the Edge with 10 Free Crochet Edging Patterns!

    November 12, 2013 by Tamara Kelly 42 Comments

    There are lots of gorgeous free crochet afghan patterns, and though the crochet edging might come last, don't think that means it isn't important! While I'm a big fan of simple sc and dc borders for letting busier afghan patterns shine, there are hundreds of beautiful and interesting border and edging patterns that are ready to take center stage and dress up and blanket you make. And of course they're not just for blankets - you can put a pretty edge on just about anything! So without further ado, here are my favorite 10 free crochet edging patterns! UPDATE - Now there are 16!

    Free #Crochet Edging Patterns - great for blankets, napkins, towels, tablecloths, dresses, you name it!

    [Read more...]

    Turkey Time: 10 Free Crochet Turkey Patterns!

    November 11, 2013 by Tamara Kelly 5 Comments

    I know this time of year every crafter is gearing up for the holidays - but don't overlook Thanksgiving! Last year I put together a Thanksgiving Roundup, but I left a few patterns out, and new patterns have debuted since then. Enough to put together an all new roundup of just turkeys! These 10 crochet turkey patterns are fun, festive and free!

    10 Free Crochet Turkey Patterns!

    [Read more...]

    Leaping Stripes and Blocks Beanies

    November 8, 2013 by Tamara Kelly 127 Comments

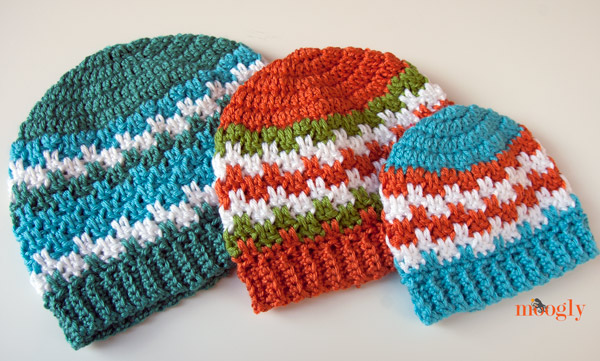
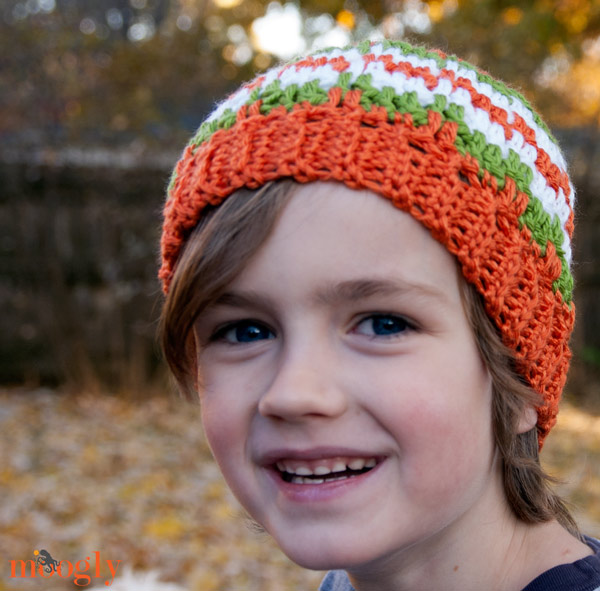
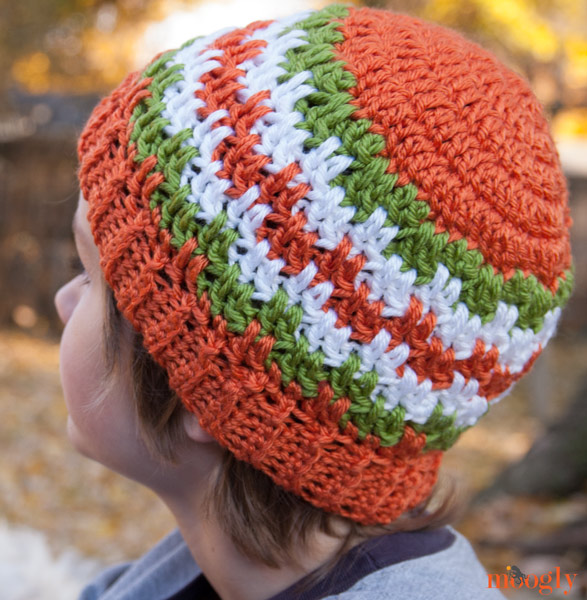
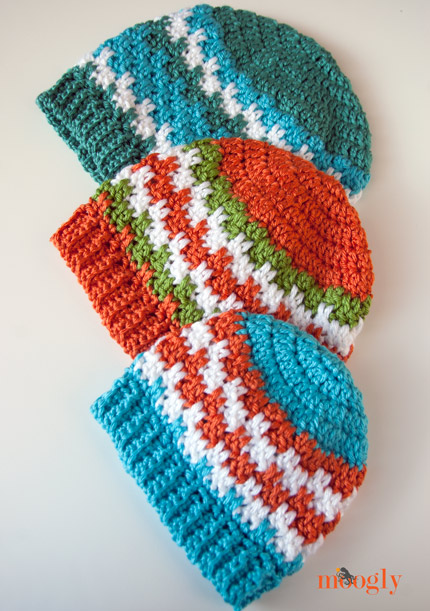
    Leaping Stripes and Blocks Beanies :: Free #Crochet Pattern in 5 sizes for the whole family!

    Recently, I had a fan request - design a hat to go with the Leaping Blocks and Stripes Blanket pattern. Well if you've been reading Moogly for a while, you know I love to take requests. So here we are - the Leaping Stripes and Blocks Beanies!

    Disclaimer: This post includes affiliate links.

    Prefer an ad-free PDF? You've got options!

    Prefer the free blog version? Keep scrolling!

    Sizes for the Whole Family

    While I'm sure she was just looking for a baby hat to make a little layette set, one of the fun things about the Leaping Blocks and Stripes Blanket pattern is that it includes instructions for several different sizes. Therefore, I just had to design hat sizes for the whole family! Pair it with the blanket for little ones, with the Mesmerizing Messenger Bag for big ones, or let it stand alone as the great beanie pattern it is!

    Leaping Stripes and Blocks Beanies :: Free #Crochet Pattern in 5 sizes for the whole family!


    Leaping Stripes and Blocks Beanies

    Add this pattern to your Ravelry Queue and Favorites

    US - J, 6.00mm hook

    75-150 total yds Red Heart Soft (100% acrylic; 4/Worsted/UK: 10-12 ply; 256yd (234m); 5oz (141g))
    Colorways Shown: White, Tangerine, Guacamole, Turquoise, and Deep Sea

    Gauge: After the first 4 rows, the circle should measure 5" across.

    Sizes: Baby (14"-16"); Toddler (16"-18"); Child (18"-20"); Teen/Small Adult (20"-22"); Large Adult (22"-24"); Be sure to scroll down to the instructions for the correct size!

    Helpful Links and Tutorials:

    Crochet Abbreviations

    Magic Circle

    CSDC - chainless starting double crochet

    STDC - standing double crochet

    Seamless Join

    BLO - Back Loop Only

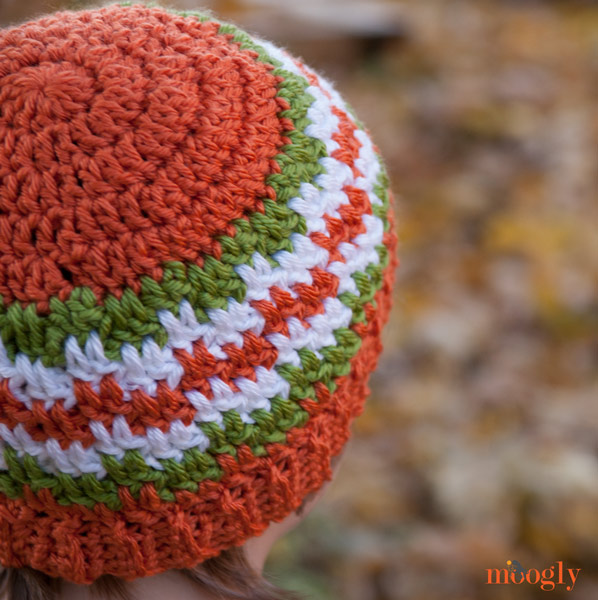
    Note: Color changes for the "stripes" of the pattern are up to you - make it your own! The hats pictured all follow different patterns, but always change color after two or four rows of "leaping stripes and blocks." Or don't, it's up to you! If you do not want to use the CSDC and STDC, you can substitute a ch 2 and dc or ch 3 as desired.

    Baby Beanie

    Round 1: With Main Color, make a magic circle, ch 2 (does not count as a stitch) and dc 12 times in the ring. Join to first dc with a sl st. (12 sts)

    Round 2: CSDC, dc in the first st, 2dc in each remaining st around. Join to CSDC with a sl st. (24 sts)

    Round 3: CSDC, dc in the first st, dc in the next st. *2 dc in the next st, dc in the next st. Repeat from * to end. Join to CSDC with a sl st. (36 sts)

    Round 4: CSDC, dc in the first st, dc in the next 2 sts. *2 dc in the next st, dc in the next 2 sts. Repeat from * to end. Break yarn and seamless join in the 2nd st of the round. (48 sts)

    Round 5: (Begin Leaping Stripes and Blocks Pattern - click here for the tutorial if you are unfamiliar with the basic stitch pattern) With Next Color, STDC in any st of Round 4. Dc in the next st, ch 2, skip 2. *Dc in the next 2 sts, ch 2, skip 2. Repeat from * to end. Join with a sl st in the STDC. (48 sts including chs)

    Round 6: Ch 4, skip 2, dc 2 in the skipped sts of Round 4, enclosing the ch 2 from Round 5. * Ch 2, skip 2, dc 2 in the skipped sts of Round 4 (enclosing the ch 2). Repeat from * to end, join with a sl st in the ch 4 sp. Break yarn and finish off. (48 sts including chs)

    Round 7: With Next Color, STDC in any skipped st of Round 5, enclosing the ch 2 sp in the st. Dc in the next st, ch 2, skip 2. *Dc in the next 2 sts, ch 2, skip 2. Repeat from * to end. Join with a sl st in the STDC. (48 sts including chs)

    Round 8: Ch 4, skip 2, dc 2 in the skipped sts of Round 6, enclosing the ch 2 from Round 7. * Ch 2, skip 2, dc 2 in the skipped sts of Round 6. Repeat from * to end, join with a sl st in the ch 4 sp. Break yarn and finish off. (48 sts including chs)

    Rounds 9 - 12: Repeat Rounds 7-8 twice, switching colors as desired and working dc sts into the skipped sts from 2 rows previous.

    Round 13: With Main Color, STDC in any skipped st of Round 12, enclosing the ch 2 sp in the st. Dc in the next st, sc in the next 2 sts. *Dc in the next 2 sts, sc in the next 2 sts. Repeat from * to end. Join with a sl st in the STDC. (48 sts including chs)

    Row 1: (Begin Ribbed Brim - click here for the brim tutorial if you are unfamiliar with this style of ribbing. Note that we'll be working around the hat, vertically, in short rows.) Ch 5. Working in BLO, sc in the 2nd ch from hook and each ch, working back toward Round 13. Sc2tog in the next 2 Round 13 sts. This is the “securing st” that attaches the vertical brim rows to the horizontal setup row. Turn. (4 sts plus securing st)

    Row 2: Skipping the securing st, sc in the BLO of each st. Turn. (4 sts)

    Row 3: Ch 1, sc in the BLO of each st. Make securing stitch. Turn. (4 sts plus securing st)

    Rows 4 - 48: Repeat Rows 2 -  3. Break yarn leaving long tail for sewing. Sew the brim together using the whip stitch, joining first and last rows. Be sure to work into the BLO of the last row to maintain the ribbed look.

    Leaping Stripes and Blocks Beanies :: Free #Crochet Pattern in 5 sizes for the whole family!

    Toddler Beanie

    Round 1: With Main Color, make a magic circle, ch 2 (does not count as a stitch) and dc 12 times in the ring. Join to first dc with a sl st. (12 sts)

    Round 2: CSDC, dc in the first st, 2dc in each remaining st around. Join to CSDC with a sl st. (24 sts)

    Round 3: CSDC, dc in the first st, dc in the next st. *2 dc in the next st, dc in the next st. Repeat from * to end. Join to CSDC with a sl st. (36 sts)

    Round 4: CSDC, dc in the first st, dc in the next 2 sts. *2 dc in the next st, dc in the next 2 sts. Repeat from * to end. Join to CSDC with a sl st. (48 sts)

    Round 5: CSDC, dc in the next 4 sts, 2 dc in the next st. *Dc in the next 5 sts, 2 dc in the next st. Repeat from * to end. Break yarn and seamless join in the 2nd st of the round. (56 sts)

    Round 6: (Begin Leaping Stripes and Blocks Pattern - click here for the tutorial if you are unfamiliar with the basic stitch pattern) With Next Color, STDC in any st of Round 5. Dc in the next st, ch 2, skip 2. *Dc in the next 2 sts, ch 2, skip 2. Repeat from * to end. Join with a sl st in the STDC. (56 sts including chs)

    Round 7: Ch 4, skip 2, dc 2 in the skipped sts of Round 5, enclosing the ch 2 from Round 6. * Ch 2, skip 2, dc 2 in the skipped sts of Round 4 (enclosing the ch 2). Repeat from * to end, join with a sl st in the ch 4 sp. Break yarn and finish off. (56 sts including chs)

    Round 8: With Next Color, STDC in any skipped st of Round 6, enclosing the ch 2 sp in the st. Dc in the next st, ch 2, skip 2. *Dc in the next 2 sts, ch 2, skip 2. Repeat from * to end. Join with a sl st in the STDC. (56 sts including chs)

    Round 9: Ch 4, skip 2, dc 2 in the skipped sts of Round 7, enclosing the ch 2 from Round 8. * Ch 2, skip 2, dc 2 in the skipped sts of Round 7. Repeat from * to end, join with a sl st in the ch 4 sp. Break yarn and finish off. (56 sts including chs)

    Rounds 10 - 15: Repeat Rounds 8-9 three times, switching colors as desired and working dc sts into the skipped sts from 2 rows previous.

    Round 16: With Main Color, STDC in any skipped st of Round 15, enclosing the ch 2 sp in the st. Dc in the next st, sc in the next 2 sts. *Dc in the next 2 sts, sc in the next 2 sts. Repeat from * to end. Join with a sl st in the STDC. (54 sts including chs)

    Row 1: (Begin Ribbed Brim - click here for the brim tutorial if you are unfamiliar with this style of ribbing. Note that we'll be working around the hat, vertically, in short rows.) Ch 6. Working in BLO, sc in the 2nd ch from hook and each ch, working back toward Round 16. Sc2tog in the next 2 Round 16 sts. This is the “securing st” that attaches the vertical brim rows to the horizontal setup row. Turn. (5 sts plus securing st)

    Row 2: Skipping the securing st, sc in the BLO of each st. Turn. (5 sts)

    Row 3: Ch 1, sc in the BLO of each st. Make securing stitch. Turn. (5 sts plus securing st)

    Rows 4 - 56: Repeat Rows 2 -  3. Break yarn leaving long tail for sewing. Sew the brim together using the whip stitch, joining first and last rows. Be sure to work into the BLO of the last row to maintain the ribbed look.

    Child Beanie

    Round 1: With Main Color, make a magic circle, ch 2 (does not count as a stitch) and dc 12 times in the ring. Join to first dc with a sl st. (12 sts)

    Round 2: CSDC, dc in the first st, 2dc in each remaining st around. Join to CSDC with a sl st. (24 sts)

    Round 3: CSDC, dc in the first st, dc in the next st. *2 dc in the next st, dc in the next st. Repeat from * to end. Join to CSDC with a sl st. (36 sts)

    Round 4: CSDC, dc in the first st, dc in the next 2 sts. *2 dc in the next st, dc in the next 2 sts. Repeat from * to end. Join to CSDC with a sl st. (48 sts)

    Round 5: CSDC, dc in the first st, dc in the next 3 sts. *2 dc in the next st, dc in the next 3 sts. Repeat from * to end. Break yarn and seamless join in the 2nd st of the round. (60 sts)

    Round 6: (Begin Leaping Stripes and Blocks Pattern - click here for the tutorial if you are unfamiliar with the basic stitch pattern) With Next Color, STDC in any st of Round 5. Dc in the next st, ch 2, skip 2. *Dc in the next 2 sts, ch 2, skip 2. Repeat from * to end. Join with a sl st in the STDC. (60 sts including chs)

    Round 7: Ch 4, skip 2, dc 2 in the skipped sts of Round 5, enclosing the ch 2 from Round 6. * Ch 2, skip 2, dc 2 in the skipped sts of Round 5 (enclosing the ch 2). Repeat from * to end, join with a sl st in the ch 4 sp. Break yarn and finish off. (60 sts including chs)

    Round 8: With Next Color, STDC in any skipped st of Round 6, enclosing the ch 2 sp in the st. Dc in the next st, ch 2, skip 2. *Dc in the next 2 sts, ch 2, skip 2. Repeat from * to end. Join with a sl st in the STDC. (60 sts including chs)

    Round 9: Ch 4, skip 2, dc 2 in the skipped sts of Round 7, enclosing the ch 2 from Round 8. * Ch 2, skip 2, dc 2 in the skipped sts of Round 6. Repeat from * to end, join with a sl st in the ch 4 sp. Break yarn and finish off. (60 sts including chs)

    Rounds 10 - 15: Repeat Rounds 8-9 three times, switching colors as desired and working dc sts into the skipped sts from 2 rows previous.

    Round 16: With Main Color, STDC in any skipped st of Round 15, enclosing the ch 2 sp in the st. Dc in the next st, sc in the next 2 sts. *Dc in the next 2 sts, sc in the next 2 sts. Repeat from * to end. Join with a sl st in the STDC. (60 sts including chs)

    Row 1: (Begin Ribbed Brim - click here for the brim tutorial if you are unfamiliar with this style of ribbing. Note that we'll be working around the hat, vertically, in short rows.) Ch 6. Working in BLO, sc in the 2nd ch from hook and each ch, working back toward Round 16. Sc2tog in the next 2 Round 16 sts. This is the “securing st” that attaches the vertical brim rows to the horizontal setup row. Turn. (5 sts plus securing st)

    Row 2: Skipping the securing st, sc in the BLO of each st. Turn. (5 sts)

    Row 3: Ch 1, sc in the BLO of each st. Make securing stitch. Turn. (5 sts plus securing st)

    Rows 4 - 60: Repeat Rows 2 -  3. Break yarn leaving long tail for sewing. Sew the brim together using the whip stitch, joining first and last rows. Be sure to work into the BLO of the last row to maintain the ribbed look.

    Leaping Stripes and Blocks Beanies :: Free #Crochet Pattern in 5 sizes for the whole family!

    Teen/Small Adult Beanie

    Round 1: With Main Color, make a magic circle, ch 2 (does not count as a stitch) and dc 12 times in the ring. Join to first dc with a sl st. (12 sts)

    Round 2: CSDC, dc in the first st, 2dc in each remaining st around. Join to CSDC with a sl st. (24 sts)

    Round 3: CSDC, dc in the first st, dc in the next st. *2 dc in the next st, dc in the next st. Repeat from * to end. Join to CSDC with a sl st. (36 sts)

    Round 4: CSDC, dc in the first st, dc in the next 2 sts. *2 dc in the next st, dc in the next 2 sts. Repeat from * to end. Join to CSDC with a sl st. (48 sts)

    Round 5: CSDC, dc in the first st, dc in the next 3 sts. *2 dc in the next st, dc in the next 3 sts. Repeat from * to end. Join to CSDC with a sl st. (60 sts)

    Round 6: CSDC, dc in the first st, dc in the next 14 sts. *2 dc in the next st, dc in the next 14 sts. Repeat from * to end. Break yarn and seamless join in the 2nd st of the round. (64 sts)

    Round 7: (Begin Leaping Stripes and Blocks Pattern - click here for the tutorial if you are unfamiliar with the basic stitch pattern) With Next Color, STDC in any st of Round 6. Dc in the next st, ch 2, skip 2. *Dc in the next 2 sts, ch 2, skip 2. Repeat from * to end. Join with a sl st in the STDC. (64 sts including chs)

    Round 8: Ch 4, skip 2, dc 2 in the skipped sts of Round 6, enclosing the ch 2 from Round 7. * Ch 2, skip 2, dc 2 in the skipped sts of Round 6 (enclosing the ch 2). Repeat from * to end, join with a sl st in the ch 4 sp. Break yarn and finish off. (64 sts including chs)

    Round 9: With Next Color, STDC in any skipped st of Round 7, enclosing the ch 2 sp in the st. Dc in the next st, ch 2, skip 2. *Dc in the next 2 sts, ch 2, skip 2. Repeat from * to end. Join with a sl st in the STDC. (64 sts including chs)

    Round 10: Ch 4, skip 2, dc 2 in the skipped sts of Round 6, enclosing the ch 2 from Round 5. * Ch 2, skip 2, dc 2 in the skipped sts of Round 6. Repeat from * to end, join with a sl st in the ch 4 sp. Break yarn and finish off. (64 sts including chs)

    Rounds 11 - 18: Repeat Rounds 9-10 four times, switching colors as desired and working dc sts into the skipped sts from 2 rows previous.

    Round 19: With Main Color, STDC in any skipped st of Round 18, enclosing the ch 2 sp in the st. Dc in the next st, sc in the next 2 sts. *Dc in the next 2 sts, sc in the next 2 sts. Repeat from * to end. Join with a sl st in the STDC. (64 sts including chs)

    Row 1: (Begin Ribbed Brim - click here for the brim tutorial if you are unfamiliar with this style of ribbing. Note that we'll be working around the hat, vertically, in short rows.) Ch 7. Working in BLO, sc in the 2nd ch from hook and each ch, working back toward Round 19. Sc2tog in the next 2 Round 19 sts. This is the “securing st” that attaches the vertical brim rows to the horizontal setup row. Turn. (6 sts plus securing st)

    Row 2: Skipping the securing st, sc in the BLO of each st. Turn. (6 sts)

    Row 3: Ch 1, sc in the BLO of each st. Make securing stitch. Turn. (6 sts plus securing st)

    Rows 4 - 64: Repeat Rows 2 -  3. Break yarn leaving long tail for sewing. Sew the brim together using the whip stitch, joining first and last rows. Be sure to work into the BLO of the last row to maintain the ribbed look.

    Leaping Stripes and Blocks Beanies :: Free #Crochet Pattern in 5 sizes for the whole family!

    Large Adult Beanie

    Round 1: With Main Color, make a magic circle, ch 2 (does not count as a stitch) and dc 12 times in the ring. Join to first dc with a sl st. (12 sts)

    Round 2: CSDC, dc in the first st, 2dc in each remaining st around. Join to CSDC with a sl st. (24 sts)

    Round 3: CSDC, dc in the first st, dc in the next st. *2 dc in the next st, dc in the next st. Repeat from * to end. Join to CSDC with a sl st. (36 sts)

    Round 4: CSDC, dc in the first st, dc in the next 2 sts. *2 dc in the next st, dc in the next 2 sts. Repeat from * to end. Join to CSDC with a sl st. (48 sts)

    Round 5: CSDC, dc in the first st, dc in the next 3 sts. *2 dc in the next st, dc in the next 3 sts. Repeat from * to end. Join to CSDC with a sl st. (60 sts)

    Round 6: CSDC, dc in next 4 sts, 2 dc in the next st, dc in the next 4 sts, 2 dc in the next st, dc in the next 4 sts. *Dc in the next 5 sts, 2 dc in the next st, dc in the next 4 sts, 2 dc in the next st, dc in the next 4 sts. Repeat from * to end. Break yarn and seamless join in the 2nd st of the round. (68 sts)

    Round 7: (Begin Leaping Stripes and Blocks Pattern - click here for the tutorial if you are unfamiliar with the basic stitch pattern) With Next Color, STDC in any st of Round 6. Dc in the next st, ch 2, skip 2. *Dc in the next 2 sts, ch 2, skip 2. Repeat from * to end. Join with a sl st in the STDC. (68 sts including chs)

    Round 8: Ch 4, skip 2, dc 2 in the skipped sts of Round 6, enclosing the ch 2 from Round 7. * Ch 2, skip 2, dc 2 in the skipped sts of Round 4 (enclosing the ch 2). Repeat from * to end, join with a sl st in the ch 4 sp. Break yarn and finish off. (68 sts including chs)

    Round 9: With Next Color, STDC in any skipped st of Round 7, enclosing the ch 2 sp in the st. Dc in the next st, ch 2, skip 2. *Dc in the next 2 sts, ch 2, skip 2. Repeat from * to end. Join with a sl st in the STDC. (68 sts including chs)

    Round 10: Ch 4, skip 2, dc 2 in the skipped sts of Round 6, enclosing the ch 2 from Round 5. * Ch 2, skip 2, dc 2 in the skipped sts of Round 6. Repeat from * to end, join with a sl st in the ch 4 sp. Break yarn and finish off. (68 sts including chs)

    Rounds 11 - 18: Repeat Rounds 9-10 four times, switching colors as desired and working dc sts into the skipped sts from 2 rows previous.

    Round 19: With Main Color, STDC in any skipped st of Round 18, enclosing the ch 2 sp in the st. Dc in the next st, sc in the next 2 sts. *Dc in the next 2 sts, sc in the next 2 sts. Repeat from * to end. Join with a sl st in the STDC. (68 sts including chs)

    Row 1: (Begin Ribbed Brim - click here for the brim tutorial if you are unfamiliar with this style of ribbing. Note that we'll be working around the hat, vertically, in short rows.) Ch 7. Working in BLO, sc in the 2nd ch from hook and each ch, working back toward Round 19. Sc2tog in the next 2 Round 19 sts. This is the “securing st” that attaches the vertical brim rows to the horizontal setup row. Turn. (6 sts plus securing st)

    Row 2: Skipping the securing st, sc in the BLO of each st. Turn. (6 sts)

    Row 3: Ch 1, sc in the BLO of each st. Make securing stitch. Turn. (6 sts plus securing st)

    Rows 4 - 68: Repeat Rows 2 -  3. Break yarn leaving long tail for sewing. Sew the brim together using the whip stitch, joining first and last rows. Be sure to work into the BLO of the last row to maintain the ribbed look.


    And that's it! With 5 sizes of the Leaping Stripes and Blocks Beanie you can make hats for the whole family. And the stripey stitch pattern makes it a fantastic stashbuster too! Add a pom pom or earflaps to personalize it even more. I can't wait to see what you do with it!

    Written pattern copyright Tamara Kelly 2013 – share this pattern via links only please! Seller’s policy is detailed on the About page. Get Moogly on your favorite social media sites:  Facebook, Twitter, Pinterest and sign up for the Newsletter so you don’t miss a thing!

    The Red Heart Yarns Holidays With Love Giveaway!

    November 7, 2013 by Tamara Kelly 125 Comments

    Congratulations to Bernice H., winner of the Red Heart Yarns Holidays With Love Giveaway! Thanks to all who entered and thanks to Red Heart Yarns for sponsoring this great giveaway. Stay tuned for more fun on Moogly!

    ~~~~~~~~~~~~~~~~~~~~~~~~~~~~~~~~~~~~~~~~~~~~~~~~~~~~~~~~~~

    No more denials - the holidays are well and truly upon us! Time to get crackin' on everyone's handmade wish list. But I'm here soften the blow and ease the holiday crazies, with this amazing giveaway:

    Red Heart Yarns Holidays With Love Giveaway!

    Enter to win yarns and notions worth $125 from Red Heart Yarns! Giveaway on Moogly ends 11/12/13

    [Read more...]

    Moroccan Tile Afghan Stitch Tutorial

    November 6, 2013 by Tamara Kelly 53 Comments

    The Moroccan Tile Afghan uses a stitch that's super easy to show... but hard to explain in words. I've heard you loud and clear - a tutorial is needed! Et voila! Here's the Moroccan Tile Afghan stitch tutorial!

    How to #Crochet the Moroccan Tile Afghan :: a photo and video tutorial for this amazing stitch!

    [Read more...]

    Hookin On Hump Day #58: Link Party for the Fiber Arts

    November 5, 2013 by Tamara Kelly 4 Comments

    We're closing in on the holidays, with just 7 more weeks to craft for Christmas, and a whole lot less for both Thanksgiving and Hanukkah! So I'm sure your hooks and needles are flying! And that means there's lots of great crafty inspiration and pattern writing happening too - and Sara from My Merry Messy Life and I love it when you share it with us here on HOHD! Remember, with the two of us as co-hosts, the featured projects get twice the publicity, with links on both our sites and all our social media outlets! And if you tweet about it using the hashtag #HOHD, we'll use these to get even MORE attention on your posts and entries. So let's get to it!

    Hookin On Hump Day #58 - Holiday patterns and Inspiration from the best fiber arts bloggers!

    FEATURED THIS WEEK ON HOOKIN ON HUMP DAY!

    #1 - Most-Clicked Link - What's New, Pussy Cat? by Jam Made - such a creative twist on a cat! I love the granny square bellies.

    #2 - Brooklyn Fingerless Mitts or Wrist Warmers, Free Crochet Pattern by Crochet Dreamz - LOVE this project! Also comes with a pattern for boot cuffs. Perfect for holiday gifts and it's a FREE pattern!

    #3 - The Larksfoot Blanket is Finished! by My World of Crochet - gorgeous use of color and comes with a link to a free crochet chart to make it!

    #4 - Autumn Cowl by There Where is Soleil - another project with bright colors using the mosaic stitch.

    #5 - Toddler Fingerless Gloves by Stitch 11 - a FREE pattern to make an adorable accessory for little ones!

    Great job everyone! Now go grab your I’ve Been Featured button and relish in the spotlight. I’ll be pinning you on my Pinterest Board and featuring you on Facebook and Google+, as will My Merry Messy Life!

    Now onto this week’s party! Here are a few simple rules:

    • Please link your post back to one of the hostesses – Moogly or My Merry Messy Life, or grab the Hookin on Hump Day party button here. Without a button on your site or link back on your post, we will not be able to feature it the following week. We have had to pass over many people before because there was no button or link!
    • I’d also really appreciate if you’d follow me on one of my social media links (see the icons at the top left of the page), and I will happily follow back (just leave me a comment that you’re following me from here, and include a link to your own page)!
    • Please visit at least one other link and leave a comment on their post so we can really support each other!
    • Please remember to link to your actual project URL and not your homepage URL, and use the name of your project or post, not your own name.
    • Please, no Etsy stores, Facebook pages, giveaways, non-fiber arts posts or other link parties. Just blog posts to your actual projects.
    I can't wait to see what you're working on now! You don’t have to be a designer or a big name blog to join this link party – all you need is to have a post about a fiber arts project you did that you’d like to show off! You don’t have to enter at both blogs either – an entry on one shows up on both, and the featured links are promoted by both My Merry Messy Life and Moogly! Twice the exposure! Remember, this party is in RANDOM order, so there’s no such thing as being late.

    New to the Hookin On Hump Day party? To receive reminder emails twice monthly about the party, enter your email here. Otherwise, I won't pester you if you'd rather not receive a reminder!


    An InLinkz Link-up


    A Trendy Classic: 10 Free Houndstooth Crochet Patterns!

    November 5, 2013 by Tamara Kelly 6 Comments

    Although it's often considered a form of plaid, houndstooth deserves a roundup of it's own! The classic houndstooth is made with woven fabric - but crochet can do a mighty fine impersonation! Heralded as a classic design that's on trend once again, here are 10 free houndstooth crochet patterns!

    Free Houndstooth Crochet Patterns!

    [Read more...]

    Santa Baby: Free Holiday Baby Crochet Patterns!

    November 4, 2013 by Tamara Kelly 12 Comments

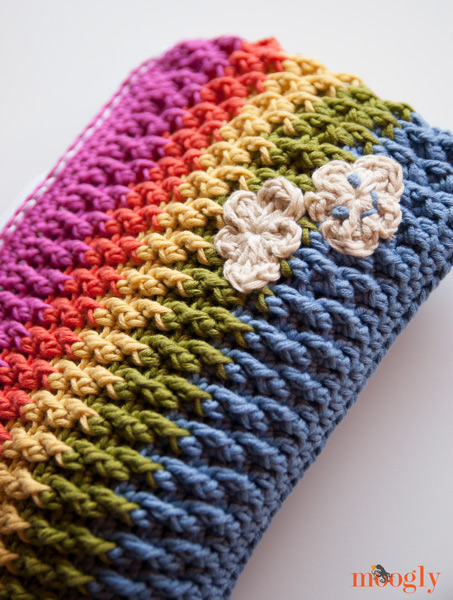
    If you haven't already, it's time to start planning your holiday crafting - including things for the littlest guests! It's also time to put together everyone's outfits for holiday photo ops and cards. So to help you craft your must make for baby list, here are 11 Free Holiday Baby Crochet Patterns!

    Free Holiday #Crochet Patterns for Babies!Disclaimer: Contains an affiliate link.
    [Read more...]

    Rainbow Happy Fun Pouch

    November 1, 2013 by Tamara Kelly 93 Comments

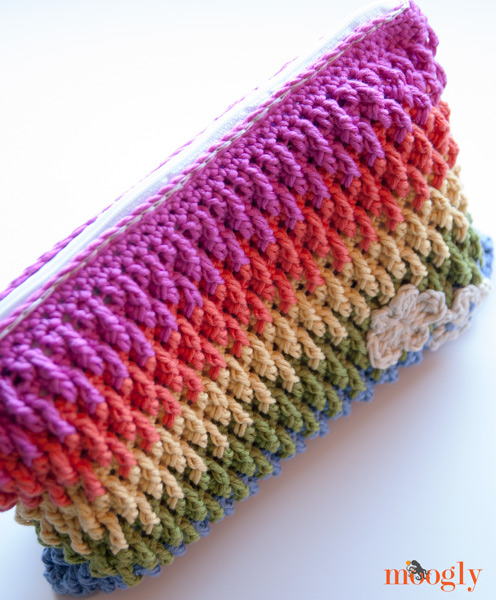
    Rainbow Happy Fun Pouch :: Free Crochet Pattern!

    Gray skies and cold wind got you down? Crochet some sunshine! The Rainbow Happy Fun Pouch will come to your rescue!

    Disclaimer: This post includes affiliate links. Yarn provided by Lion Brand.

    Prefer the ad-free PDF? You've got options!

    Prefer the free blog version? Keep scrolling!

    Cheer Up with Crochet!

    The Rainbow Happy Fun Pouch is insanely cheerful. But in a good way! It's a great stash buster, and it works up fast. I wanted a simple pattern with which to try out the Sharp Hook but that could be done without the Sharp Hook too. I utilized a stitch pattern I used before, so there's already a video tutorial for the stitches if you need help there.

    Stashbuster Time!

    I also managed to use some leftover yarn from the Moroccan Market Tote - stashbuster! You can use any weight yarn you have, just use a hook one size smaller than that recommended on the label. As written, the pouch is 6.5" tall and 9.5" wide, but the great thing about pouches is they're useful at any size!

    Rainbow Happy Fun Pouch :: Free Crochet Pattern!

    A little Cloudy...

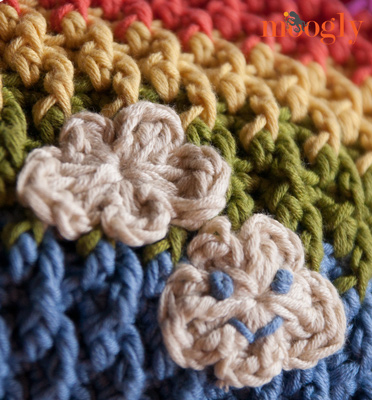
    For the appliques I used a free pattern from Fiber Flux: One Round Cloud. They took hardly any yarn at all! And I gave one a little smiley face with some scrap yarn. As you do when making a Rainbow Happy Fun Pouch.

    Rainbow Happy Fun Pouch :: Free Crochet Pattern!


    Rainbow Happy Fun Pouch

    Add this pattern to your Ravelry Queue and Favorites

    • US - G, 4.00mm hook, or hook one size smaller than recommended on label
    • 190 yds Lion Brand LB Collection Cotton Bamboo (DK/Sport weight)
    • Zipper
    • Sharp Hook or sewing needle
    • Thread to match zipper
    • Crochet thread, mercerized (if using Sharp Hook)
    • Video Tutorial for the Stitch Pattern HERE

    Instructions

    Row 1: With Color A, ch 40. Hdc in 2nd ch from hook and each ch to end. Turn. (39 sts)

    Row/Round 2: Ch 1, hdc in each st to end of row. Turning to work in the side, hdc in the side of the first st of Row 1. Turning again, hdc in the each ch of the starting ch, opposite the first row of hdc sts. With one more clockwise turn, hdc in the side of the last st of Row 1 and join to the first st of Row 2 with a sl st, to begin working in the round. Do not turn. (80 sts)

    Round 3: Ch 2 (does not count as first st), dc in each st around. Join with a sl st to first dc. (80 sts)

    Round 4: Ch 1, sc in each st around. Join with sl st to first sc. (80 sts)

    Round 5: Ch 2, fptrc around dc below the first st. Dc into the next st. *Fptrc around the st below the next st, dc in the next st. Repeat from * to end. Join with a sl st to first fptrc. (80 sts)

    Round 6: Ch 1, sc in each st around. Join with sl st to first sc. (80 sts)

    Round 7: Ch 2, dc in the 1st st, fptrc around st below next st. *Dc in the next st, fptrc around the st below the next st. Repeat from * to end. Join with a sl st to first dc. (80 sts)

    Round 8: Ch 1, sc in each st around. Join with sl st to first sc, using the Next Color. (80 sts)

    Round 9-12: With Color B, repeat Rounds 5-8.

    Round 13-16: With Color C, repeat Rounds 5-8.

    Round 17-20: With Color D, repeat Rounds 5-8.

    Round 21-24: With Color E, repeat Rounds 5-8. Add more stripes in pattern for a taller bag if desired.

    Round 25: Ch 1, sc in each st around. Join to first sc with sl st. (80 sts)

    Round 26: Sl st in each st around. Break yarn and seamless join.

    Add Zipper:

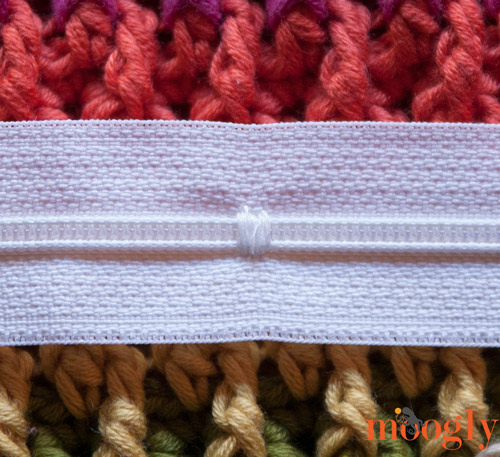
    Measure the length of zipper needed. If the zipper is too long, sew a new stopper with matching thread, by sewing around the zipper repeatedly so it cannot open.

    Rainbow Happy Fun Pouch :: Free Crochet Pattern!

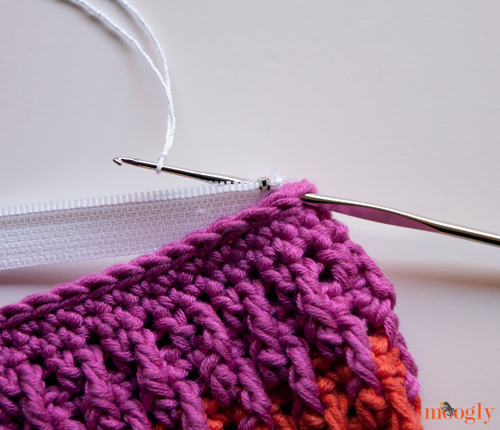
    Working into Round 26, attach the zipper. If you're using a needle and thread, sew it on with the back stitch (tutorial HERE). If you are using the Sharp Hook and crochet thread, use the Surface Crochet method (tutorial HERE).

    Rainbow Happy Fun Pouch :: Free Crochet Pattern!


    The Fine Print

    And that's all there is to it! The Rainbow Happy Fun Pouch is a quick and easy pattern that's great for using up odd balls of yarn. Make it in one color or as many as you like - and then fill it with something fun!

    Written pattern copyright Tamara Kelly 2013 – share this pattern via links only please! Get Moogly on your favorite social media sites:  Facebook, Twitter, Pinterest and Tumblr, and sign up for the Newsletter at the top of the page so you don’t miss a thing!

    Sharp Crochet Hook Review & Giveaway!

    October 31, 2013 by Tamara Kelly 305 Comments

    Congratulations to Kris R! Be sure to visit SharpCrochetHook.com to order your own Sharp Crochet Hook and Pattern Book!

    ~~~~~~~~~~~~~~~~~~~~~~~~~~~~~~~~~~~~~~~~~~~~~~~~~~~~~~~~~~~~~~

    Recently I received a Sharp Crochet Hook and Pattern book - and I was thrilled! It's a whole new way to marry fabric and yarn, and now I get to share!Sharp Crochet Hook Giveaway! Win your very own Sharp #Crochet Hook and pattern book! Giveaway ends 11/05/13 at 12am Eastern.

    [Read more...]

    Chainless Starting Double Crochet in the Round

    October 30, 2013 by Tamara Kelly 51 Comments

    The Chainless Starting Double Crochet method of starting rows is the perfect way to avoid the wimpy 3 ch turning chain. And the previous tutorial for it was a hit! But some of you had a question - how does this stitch work in the round? Well it works great! Let me show you how it's done.

    Learn how to make the Chainless Starting Double Crochet in the Round in this quick video tutorial! It'll change the way you #crochet!

    [Read more...]

    Craft Fair Checklist: Guides & Displays for Your Best Sales Ever!

    October 29, 2013 by Tamara Kelly 11 Comments

    Normally my roundups feature free crochet (or sometimes knit) patterns. But this one is a little different. It's craft selling season, and I know lots of you crocheters and knitters are getting ready to set up your tables, take your Etsy photos, and sell your handmade inventory. But you need more than great finished products - even if they're all made from Moogly designs! You also need supplies, displays, and a plan - and pre-purchased stuff can eat into your profits. I've been pinning some great DIY ideas on my Moogy's Finds Pinterest board, and now it's time to share the 10 best display ideas and resources I've collected!!

    Craft Fair Checklist: Guides & Displays for Your Best Sales Ever! #crochet #knitting #jewelry #craftfair

    [Read more...]

    We Won! Craftsy Blogger Awards 2013: Best Tutorials!

    October 29, 2013 by Tamara Kelly 32 Comments

    Moogly won! We won Knitting and Crochet: Best Tutorials in the Craftsy Blogger Awards for 2013! Thank you ALL so so much for your nominations and votes!

    Craftsy Blogger Awards 2013: Best Tutorials for Knitting & Crochet! Thank you to all who voted!

    And I definitely have to say WE here. Without all of your support, this never would have happened! Every like, share, comment, and push in the right direction has helped make the tutorials here better and better. And with any luck, they'll just keep improving!

    I also have to give a BIG thank you to my partner Geoff - not only does he take care of things when I'm too wrapped up in yarn to see past the end of my hook, but he's also the camera, lighting, and editing whiz behind the video tutorials. I haven't the foggiest idea of how to work the behind the scenes stuff, but I got lucky when I married someone in the video biz. (Of course that's not the only reason I'm lucky, but we'll stop there for now!)

    So I just wanted to say thank you - to Craftsy, to my videographer/husband, and to each and every one of you who voted! Thank you thank you thank you! I'll try to keep the good stuff coming!

    And Congratulations too, to Petals to Picots for her win for best photography! Be sure to check out her blog if you haven't already - you'll see why she won by a landslide!

    Thanks for reading! Get Moogly on your favorite social media sites:  Facebook, Twitter, G+, Pinterest and Tumblr, and sign up for the Newsletter so you don’t miss a thing! TamaraKelly@mooglyblog.com

    Mad About Plaid! 10 Free Plaid Crochet Patterns

    October 28, 2013 by Tamara Kelly 33 Comments

    Plaid is one of the big fall trends this year, and crochet is trending right there beside it. And luckily for those of us with hooks and yarn (and without a trendy budget), there are plenty of free patterns that combine the two! Vintage to brand new, I've collected 10 free plaid crochet patterns!

    10 Free Plaid #Crochet Patterns!

    [Read more...]

    Moroccan Tile Afghan

    October 25, 2013 by Tamara Kelly 197 Comments

    The Moroccan Tile Afghan :: free #crochet pattern with instructions for 6 different sizes and infinite color schemes!

    The Moroccan Tile Afghan is warm, cozy, a fast V stitch pattern to crochet, and full of color! It's the latest free crochet blanket pattern on Moogly - and I've included guidelines for 6 different sizes!

    Disclaimer: Materials for this pattern were provided by Lion Brand. This post includes affiliate links. 

    Prefer an ad-free PDF? You've got options!

    Prefer the free blog version? Keep scrolling!

    First the Tote, then the Throw!

    The stitch pattern I used in the Moroccan Market Tote lodged itself in my brain. It was so much fun to make, I had to figure out how to make it work in rows rather than rounds. I used Lion Brand Vanna's Choice, which is a great afghan yarn with lots of saturated colors to choose from - love that! And now I can tell you for sure that it makes a very very warm blanket! Working on it while the temps dropped at night, I was as cozy as could be. And it was a fantastic movie watching pattern - once the pattern is established with the first few rows, you just zip right along!

    The Moroccan Tile Afghan :: free #crochet pattern with instructions for 6 different sizes and infinite color schemes!

    The pattern here is written for a throw/afghan sized blanket, as that's the size I've made. Based on the throw, I've created the chart below with info to make 5 other sizes! (Since everyone's gauge is different, and the type of yarn used can affect the outcome as well, these are only guidelines - you'll need to make your own gauge swatch if you need it to be exact!) And of course, you can make the whole thing in only two colors if you like - it's all up to you!

    The Moroccan Tile Afghan :: free #crochet pattern with instructions for 6 different sizes and infinite color schemes!

    This blanket has now been made by so many people, in  so many color schemes, in a wide variety of yarns. And every one is gorgeous!

    The Moroccan Tile Afghan :: free #crochet pattern with instructions for 6 different sizes and infinite color schemes!


    Moroccan Tile Afghan

    Add this pattern to your Ravelry Queue and Favorites

    US - K, 6.5mm hook

    3060 yds Lion Brand Vanna's Choice (Aran/"4"/UK: 10-12 ply)
    (2 skeins of each used for the throw size, plus a little extra of Color I for the border)
    Color A: Wild Berry
    Color B: Eggplant
    Color C: Sapphire
    Color D: Aqua
    Color E: Fern
    Color F: Sweet Pea
    Color G: Duckie
    Color H: Goldfish
    Color I: Scarlet

    2 stitch markers

    Helpful Links and Tutorials

    Moroccan Tile Stitch Video Tutorial

    Crochet Abbreviations

    STDC (standing double crochet)

    CSDC (chainless starting double crochet)

    Sizing Chart

    Preemie/Lovie (20" x 20"): Ch 58, 55 rows, 372 yds
    Baby Blanket (40" x 40"): Ch 112, 111 rows, 1488 yds
    Throw/Afghan (50" x 66", shown): Ch 142, 181 rows, 3060 yds
    Twin (65" x 90"): Ch 184, 247 rows, 5441 yds
    Queen (90" x 100"): Ch 256, 275 rows, 8370 yds
    King/Cal King (110" x 100"): Ch 310, 275 rows, 10,230 yds

    Want to make your own size? Use a multiple of 3 +2, +2 for the starting chain. Always end on an odd numbered row.

    Moroccan Tile Afghan Instructions

    NOTE: You will work 2 rows, first Color A (odd rows), then Color B (even rows), going in the same direction, before turning your work and starting again with Color A and then Color B.

    Row 1: With Color A, ch 142, dc in 5th ch from the hook (counts as dc and skipped ch). Ch 1, dc in the same ch. (V stitch made) *Skip 2 ch, [dc, ch 1, dc] in next st. Repeat from * until 2 ch remain. Skip 1 ch, dc in the last ch. Remove the hook from the active loop, and pm (place marker) in loop (this is to keep the stitches from coming out). Do not turn. (140 sts, or 46 V sts)

    Row 2. With Color B, STDC in the ch sp of the 1st V of the previous row. Ch 1, dc in the same ch sp. (V st made) [Dc, ch 1, dc] in ch sp of each V st to the end. Remove the hook, pm, turn. (138 sts, or 46 V sts)

    Row 3: With Color B row held in back, replace hook in active loop of Color A. CSDC, ch 1, dc between the 1st and 2nd st of Row 1 (between the dc and the first V st). [Dc, ch 1, dc] between the V sts of Color A/Row 1 (NOT in the ch sps, enclosing Color B/Row 2 in each st) until 1 V st of Row 1 remains. Dc between the last V st and the last dc st, ch 1, dc in the last st. Remove hook, pm, do not turn. (141 sts, 47 V sts)

    Row 4: Inserting the hook into the ch sp of the 1st V st of Color A, replace hook in active loop of Color B and pull it to the front. CSDC, ch 1, dc in the same ch sp. [Dc, ch 1, dc] in ch sp of each V st to the end. Remove the hook, pm, turn. (141 sts, or 47 V sts)

    Row 5: With Color B held in back, replace hook in active loop of Color A. CSDC. [Dc, ch 1, dc] between the V sts of Color A until 1 V st remains. Dc in the last st. Remove the hook, pm, do not turn. (140 sts, or 46 V sts)

    Row 6: Inserting the hook into the ch sp of the 1st V st of Color A, replace hook in active loop of Color B and pull it to the front. CSDC, ch 1, dc in the same ch sp. [Dc, ch 1, dc] in ch sp of each V st to the end. Remove the hook, pm, turn. (138 sts, or 46 V sts)

    Row 7: With Color B row held in back, replace hook in active loop of Color A. CSDC, ch 1, dc between the 1st and 2nd st of previous Color A row (between the dc and the first V st). [Dc, ch 1, dc] between the V sts of Color A until 1 V st remains. Dc between the last V st and the last st, ch 1, dc in the last st. Remove hook, pm, do not turn. (141 sts, 47 V sts)

    Row 8: Inserting the hook into the ch sp of the 1st V st of Color A, replace hook in active loop of Color B and pull it to the front. CSDC, ch 1, dc in the same ch sp. [Dc, ch 1, dc] in ch sp of each V st to the end. Remove the hook, pm, turn. (141 sts, or 47 V sts)

    Row 9 - 181: Repeat Rows 5 - 8. (This is the Row # for the throw size, see chart above for last row number of other sizes, see below for color sheme)

    The Moroccan Tile Afghan :: free #crochet pattern with instructions for 6 different sizes and infinite color schemes!

    Want to use the same color scheme I did? Change colors after every 20 rows, so that the previous Color A is set aside, and the previous Color B becomes the new Color A. To attach the new colors, use the STDC st and work in the pattern. The very last "Color A" will be used for one extra odd numbered row to finish off the blanket. Here's the color scheme chart for how I did it.

    Color Scheme Chart

    Rows 1 - 20: Odd A, Even B
    Rows 21 - 40: Odd B, Even C
    Rows 41 - 60: Odd C, Even D
    Rows 61 - 80: Odd D, Even E
    Rows 81 - 100: Odd E, Even F
    Rows 101 - 120: Odd F, Even G
    Rows 121 - 140: Odd G, Even H
    Rows 141 - 160: Odd H, Even I
    Rows 161 - 181: Odd I, Even A

    I finished the blanket off with a simple sc border, which used up the leftover bits of yarn from when I changed colors. However, I did need a tiny bit extra of Color I/Scarlet - less than 10 yards! - to finish it off, as that last odd-numbered row left me a little short. If you plan on making a border out of one color, you may need to purchase an extra skein.

    The Moroccan Tile Afghan :: free #crochet pattern with instructions for 6 different sizes and infinite color schemes!


    Let me know if you have any questions! I know that this is a lot of information, but I want to give you all the info I have so that you can make your own custom Moroccan Tile Afghan, in the size and color scheme you desire. Just read through it all, then jump in, and I think you'll see just how easily it does come together!

    The Fine Print

    Written pattern copyright Tamara Kelly 2013 – share this pattern via links only please! Get Moogly on your favorite social media sites:  Facebook, Twitter, Pinterest and TikTok, and sign up for the newsletter at the top of the page so you don’t miss a thing!

    Shocking Mandala Rug

    October 24, 2013 by Tamara Kelly 28 Comments

    The pattern for the Shocking Mandala Rug was published during the summer of 2013 on the Stitch & Unwind blog. And while the finished rug has had a home in our playroom for a while, now I can give it the pattern a home here on Moogly! I hope you enjoy this great free crochet rug pattern!

    Shocking Mandala Rug :: Free #crochet pattern! [Read more...]

    Multicolor Granny Squares

    October 23, 2013 by Tamara Kelly 22 Comments

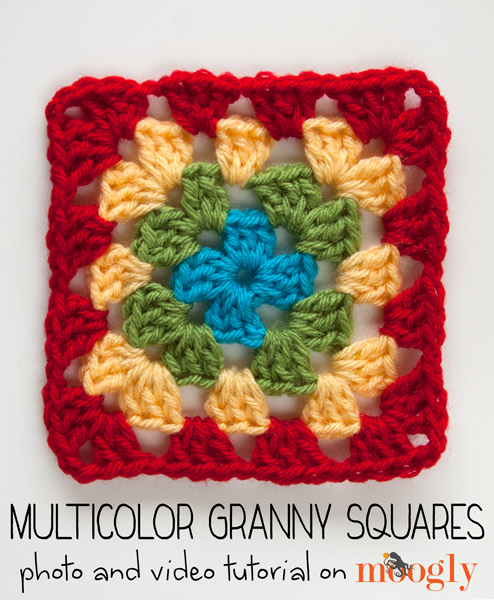
    Recently I got a request from a Moogly reader who wanted to see a video for a multicolor granny square, the kind where each row is a new color! There are a few different ways to achieve this, but I want to take it to the next level, pull out all the stops, and share the way that I think gives the most seamless, perfect looking result. Here's how I crochet a traditional (improved!), multicolor granny square.

    How to Crochet Multicolor Granny Squares that look perfect every time! Video and photo #crochet tutorial on Moogly

    [Read more...]

    3 Steps to Pricing Crochet for Profit: Guest Post by Sedruola Maruska

    October 22, 2013 by Tamara Kelly 10 Comments

    Sedruola Maruska is a speaker and personal coach, who used to design crochet for her site Yarn Obsession! Whether you have a budding Etsy business, Facebook fan page, or a part-time craft fair gig, Sedie is full of great information to help you out - and now she can teach you to "do more in less time so you enjoy your life’s journey intentionally!" With prime craft fair and holiday selling season coming up fast, Sedie has put together a fantastic post for Moogly fans to help you get the most for your yarn work!

    Pricing Crochet Fairly for Maximum Profit: get the inside scoop on how to price your crochet! Great advice!Disclaimer: This post includes affiliate links. 

    [Read more...]

    It's Boot Season: Celebrate with 10 Free Crochet Boot Cuff Patterns!

    October 21, 2013 by Tamara Kelly 42 Comments

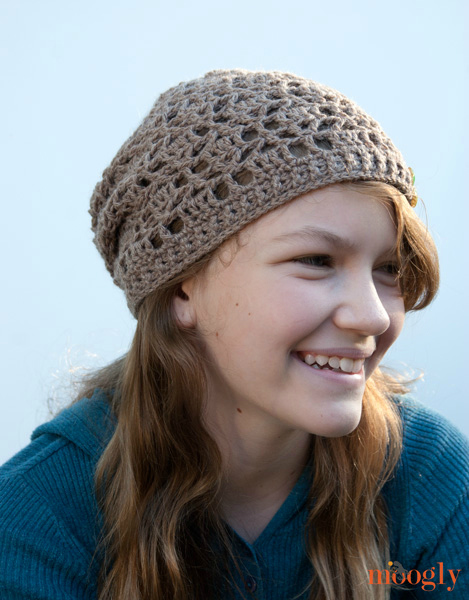
    It's boot season once again in the Northern hemisphere - and they're sure to be a wardrobe staple! Boot cuffs are a great way to set your look apart, and they're practical too - adding a great layer of warmth and keeping out drafts (and leaves... and snow!).

    Crochet boot cuff patterns are almost always super easy to adjust for size, as well as stretchy - so you don't have to worry about making a pair that fits. And since most take just a few yards of yarn and work up fast, it's a great gift or craft fair project! So for this roundup I've gathered 10 free crochet book cuff patterns - enjoy!

    10 Free #Crochet Boot Cuff Patterns - gotta make them all!Disclaimer: This post contains affiliate links.
    [Read more...]

    Fallen Leaves Slouch Hat

    October 18, 2013 by Tamara Kelly 194 Comments

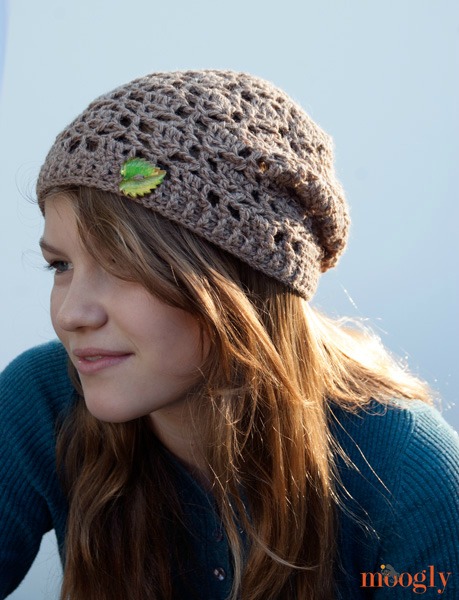
    Fallen Leaves Slouch Hat :: Free #Crochet Pattern!

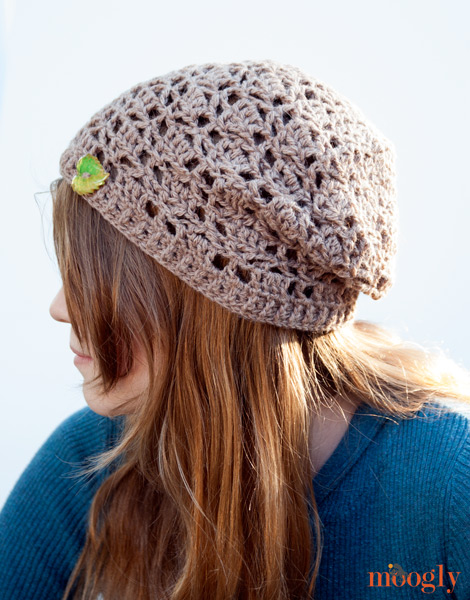
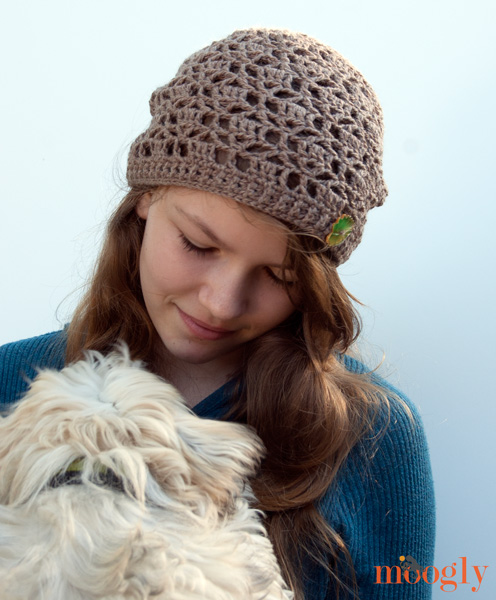
    The Fallen Leaves Slouch Hat was inspired by a gorgeous skein of LB Collection Baby Alpaca I received from Lion Brand Yarn. It was so soft and it just cried out to be made into a fall hat pattern. Paired with a stitch pattern of lacework diamonds that remind me of falling leaves, the Fallen Leaves Slouch Hat is the perfect hat for apple picking and pumpkin patches and all things Autumn.

    Disclaimer: This post includes affiliate links.

    Prefer an ad-free PDF? You've got options!

    This button leads to the pattern on Etsy

    Prefer the free blog version? Keep scrolling!

    Fallen Leaves Slouch Hat :: Free #Crochet Pattern!

    The Fallen Leaves Slouch Hat free crochet pattern is a one skein project, so you can indulge in a luxury yarn like baby alpaca, or do some stash busting with that lonely skein that's been lingering on the shelf.

    It's designed to fit pre-teens/teens/adults with 22-24" heads (it fits me and my 11 year old equally well), and the button is just for decoration - but I think it's a pretty touch. It's only slightly slouchy as written (to keep it a one skein project), but if you want it super slouchy just work more repeats of Rounds 8-11 - easy peasy!

    Fallen Leaves Slouch Hat :: Free #Crochet Pattern!


    Fallen Leaves Slouch Hat

    Add this pattern to your Ravelry Queue and Favorites

    US - H, 5.00 mm hook

    US - F, 3.75 mm hook

    145 yds DK weight yarn, yarn symbol "3" (Lion Brand LB Collection Baby Alpaca shown)

    Button (optional)

    Gauge: 14 sts x 8 rows = 4" in dc with 5mm hook

    Helpful Links and Tutorials:

    Magic Circle

    CSDC - Chainless Starting Double Crochet

    Fpdc - front post double crochet; Bpdc - back post double crochet

    Seamless join

    For the matching Alapaca Your Wrap, Click HERE!

    NOTE! This is an intermediate difficulty pattern - it is very helpful to have chart reading skills for this one!

    Fallen Leaves Slouch Hat :: Free #Crochet Pattern!

    INSTRUCTIONS

    With US - H, 5.00mm hook

    Round 1: Starting with a magic circle, ch 2 (does not count as st), dc 12 into the circle. Join to the first dc of the round with a sl st. (12 sts)

    Round 2: CSDC, dc in the 1st st, then work 2 dc in each remaining st to end. Join to CSDC with a sl st. (24 sts)

    Round 3: CSDC, ch 1, dc in the next st. *Dc in the next st, ch 1, dc in the next st. Repeat from * to end. Join to CSDC with a sl st. (36 sts, including chs)

    Round 4: CSDC, 2 dc in the ch sp, dc in the next st. *Dc in the next st, 2 dc in the ch sp, dc in the next st. Repeat from * to end. Join to CSDC with a sl st. (48 sts)

    Round 5: CSDC, ch 1, dc2tog over next 2 sts, ch 1, dc in the next st. *Dc, ch 1, dc2tog over next 2 sts, ch 1, dc in next st. Repeat from * to end. Join to CSDC with a sl st. (60 sts, including chs)

    Round 6: CSDC, ch 1, dc in the 1st st, ch 1, dc2tog over the next st and the following dc, skipping the ch in between, ch 1. *[Dc, ch 1, dc] in the next st, ch 1, dc2tog over the next st and the following dc, skipping the ch in between, ch 1. Repeat from * to end. Join to CSDC with a sl st. (72 sts, including chs)

    Round 7: CSDC, 2dc in the ch sp, dc in the next st, ch 1, dc in the next st, ch 1. *Dc in the next st, 2 dc in the ch sp, dc in the next st, ch 1, dc in the next st, ch 1. Repeat from * to end. Join to CSDC with a sl st. (84 sts, including chs) NOTE: At this point the circle should measure approximately 6 ¾" across at the widest point.

    Fallen Leaves Slouch Hat :: Free #Crochet Pattern! Round 8: CSDC and dc 2tog (CSDC as first leg of dc2tog)  over the 1st and 4th sts of the round, skipping the sts in between, ch 1, [dc, ch 3, dc] in the next st, ch 1. *Dc2tog, working the first half in the next st, then skip 2 sts, then working the second half in the next st. Ch 1, [dc, ch 3, dc] in the next st, ch 1. Repeat from * to end. Join to CSDC with a sl st. (96 sts, including chs)
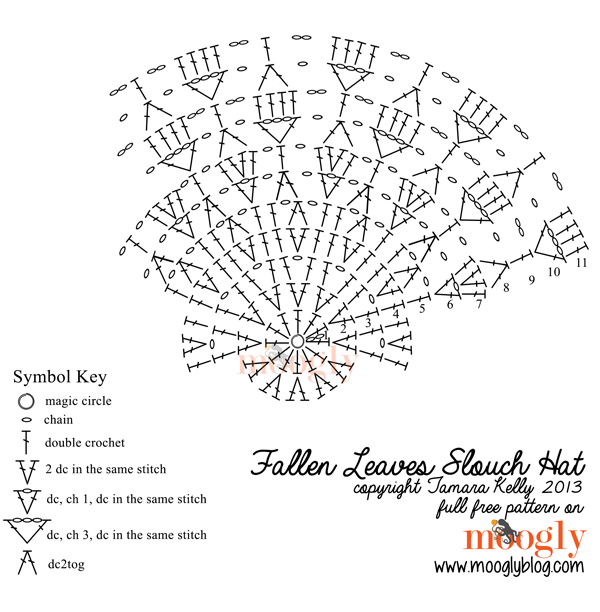
    Round 9: CSDC, ch 2, skip ch sp, dc in the next st, 2 dc in the ch sp, dc in the next st, ch 2. *Dc in the next st, ch 2, skip the ch sp, dc in the next st, 2 dc in the ch sp, dc in the next st, ch 2. Repeat from * to end. Join to CSDC with a sl st. (108 sts, including chs)

    Round 10: CSDC, ch 3, dc in the 1st st, ch 1, skip the ch sp, dc2tog, working the first half in the next st, then skip 2 sts, then working the second half in the next st, ch 1. *[Dc, ch 3, dc] in the next st, ch 1, dc2tog, working the first half in the next st, then skip 2 sts, then working the second half in the next st, ch 1. Repeat from * to end. Join to CSDC with a sl st. (96 sts, including chs)

    Round 11: CSDC, 2 dc in the ch sp, dc in the next st, ch 2, skip the ch sp, dc in the next st, ch 2, skip the ch sp. *Dc in the next st, 2 dc in the ch sp, dc in the next st, ch 2, skip the ch sp, dc in the next st, ch 2, skip the ch sp. Repeat from * to end. Join to CSDC with a sl st. (108 sts, including chs)

    Rounds 12 - 19: Repeat Rounds 8 - 11 twice.

    Round 20: Ch 1, sc in each st and 2 sc in each ch sp to end. Join to 1st sc with a sl st. (108 sts)

    Switch to US - F, 3.75mm hook

    Round 21: Ch 2, fpdc in 1st st, bpdc in next st. *Fpdc in next st, bpdc in next st. Repeat from * to end. Join to 1st fpdc with a sl st. (108 sts)

    Round 22: Repeat Round 21. Round 23: Slip stitch loosely in each st to end. Break yarn and seamless join. Weave in ends.

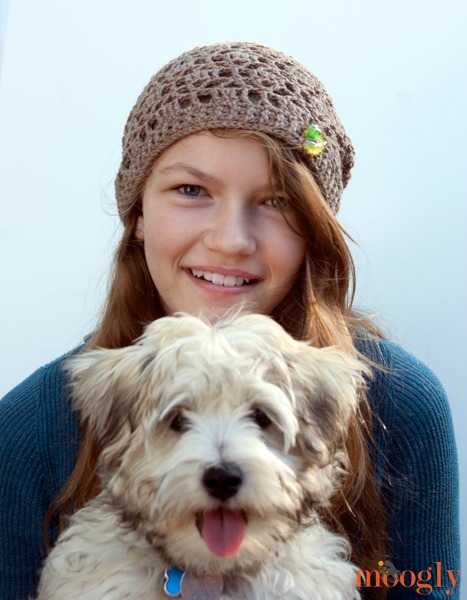
    Fallen Leaves Slouch Hat :: Free #Crochet Pattern! Fallen Leaves Slouch Hat :: free #crochet pattern on moogly! I hope you enjoy making the Fallen Leaves Slouch Hat! If you get a chance to use the LB Collection Baby Alpaca I do recommend it - so soft and a joy to crochet with! And thank you to my oldest, Riley, for modeling! (When your kid steals the hat, it's a compliment!) 

    Fallen Leaves Slouch Hat :: Free #Crochet Pattern!

    Written pattern copyright Tamara Kelly 2013 - share this pattern via links only please! Thank you to Lion Brand Yarn for sponsoring the yarn for this pattern.

    Come join the Moogly fun on your favorite social media sites:  Facebook, Twitter, Pinterest, and sign up for the Newsletter at the top of the page so you don’t miss a thing! 

    Puff Stitch (Cluster Stitch)

    October 17, 2013 by Tamara Kelly 28 Comments

    The Puff Stitch is a specific form of the Cluster Stitch - and can be referred to by both names. It's a simple stitch to make, though it can take a bit of practice to keep all the tension even. It creates a ton of texture and is similar in effect to the bobble. Here's how it's done!

    Learn the Puff Stitch! #Crochet video and photo tutorial on moogly!

    [Read more...]

    The Craftsy Blogger Awards 2013! Your Vote Needed!

    October 16, 2013 by Tamara Kelly 2 Comments

    All of you amazing, talented, lovely, beautiful (and handsome) fans have made my day - I've been nominated for the Craftsy Blogger Awards 2013, and have made it to the final four in Best Tutorials in Knitting and Crochet! And now I really REALLY need your help one. more. time. Because it's Voting time - and these votes will decide the winner!

    Vote for Moogly in the Craftsy Blogger Awards! Best #crochet tutorials in Knitting and Crochet!Voting takes less than a minute, and every vote enters you in the Craftsy giveaway to WIN a free class from Craftsy! So if you could, please vote for Moogly in the Knitting and Crochet category for Best Tutorials - and while you're there, up your chances of winning and vote for Petals to Picots for Best Photography! She's a wonderful blogger and VERY deserving of this award!

    Click Here to Vote for the Craftsy Blogger Awards!

    Thank you SO MUCH to all who nominated Moogly, and to everyone who votes! <3

    Good luck to all the voters - I hope you win the free class! Get Moogly on your favorite social media sites:  Facebook, Twitter, G+, Pinterest and Tumblr, and sign up for the Newsletter so you don’t miss a thing! TamaraKelly@mooglyblog.com

    "Sweet & Simple Baby Crochet": Review and Giveaway!

    October 16, 2013 by Tamara Kelly 9 Comments

    This giveaway is now closed! Congratulations to the winner, Vikki L-H! You can still read my review of "Sweet & Simple Baby Crochet" below, and go to Amazon US or Amazon UK (or search the Amazon service for your country) to purchase your own copy today!

    ~~~~~~~~~~~~~~~~~~~~~~~~~~~~~~~~~~~~~~~~~~~~~~~~~~~~~~~~~~~~~~

    Recently I did a Q&A with Kristi Simpson, author of "Sweet & Simple Baby Crochet. It was great learning about the process and thoughts behind her new book. And as part of her book tour, I got a free copy of the book to review - and I get to give one away too! So read on to see what I think - though I got the book for free, all opinions are my own. And then enter to win your own copy of "Sweet & Simple Baby Crochet"!

    A Moogly Review and Giveaway! Sweet & Simple Baby Crochet

    [Read more...]

    Hookin On Hump Day #57 – Link Party for the Fiber Arts

    October 15, 2013 by Tamara Kelly 12 Comments

    Thank you to everyone who's linked up their projects once again! Sara from My Merry Messy Life was kind enough to switch with me and take over this week so I can recover from surgery, and we are both pleased as can be to share the featured posts for this round! Remember, with the two of us as co-hosts, the featured projects get twice the publicity, with links on both our sites and all our social media outlets! And if you tweet about it using the hashtag #HOHD, we'll use these to get even MORE attention on your posts and entries. So let's get to it!

    Hookin On Hump Day! Get great patterns, inspiration, and add your own blog links to the party!

    FEATURED THIS WEEK ON HOOKIN ON HUMP DAY!

    #1 - MOST CLICKED LINK: Crochet Headband Pattern by Flower Girl Cottage - FREE pattern! Great project to whip up for Christmas presents and the stitch pattern is just lovely!

    #2 - Amazing Grace Headband by Beatrice of Beatrice Ryan Designs - FREE pattern! Another beautiful headband and stitch pattern and this one is for a charitable cause - breast cancer.

    #3 - Booty Booty Booties Rockin Everywhere! by Trish of Tales from Trish. These crocodile stitch booties are just too too cute!

    #4 - Artfully Simple Pattern Review by Corina of Stitch 11 - a gorgeous scarf and pattern review, designed by our very own, Tamara from Moogly!

    #5 - Fashion Accessory Organizer by Creat E Witty Unleashed - This is so neat! I love using crochet for practical things like a jewelry organizer. Great idea and comes with a free tutorial!

    Great job everyone! Now go grab your I’ve Been Featured button and relish in the spotlight. I’ll be pinning you on my Pinterest Board and featuring you on Facebook and Google+, as will My Merry Messy Life!

    Now onto this week’s party! Here are a few simple rules:

    • Please link your post back to one of the hostesses – Moogly or My Merry Messy Life, or grab the Hookin on Hump Day party button here. Without a button on your site or link back on your post, we will not be able to feature it the following week. We have had to pass over many people before because there was no button or link!
    • I’d also really appreciate if you’d follow me on one of my social media links (see the icons at the top left of the page), and I will happily follow back (just leave me a comment that you’re following me from here, and include a link to your own page)!
    • Please visit at least one other link and leave a comment on their post so we can really support each other!
    • Please remember to link to your actual project URL and not your homepage URL, and use the name of your project or post, not your own name.
    • Please, no Etsy stores, Facebook pages, giveaways, non-fiber arts posts or other link parties. Just blog posts to your actual projects.
    I can't wait to see what you're working on now! You don’t have to be a designer or a big name blog to join this link party – all you need is to have a post about a fiber arts project you did that you’d like to show off! You don’t have to enter at both blogs either – an entry on one shows up on both, and the featured links are promoted by both My Merry Messy Life and Moogly! Twice the exposure! Remember, this party is in RANDOM order, so there’s no such thing as being late.

    New to the Hookin On Hump Day party? To receive reminder emails twice monthly about the party, enter your email here. Otherwise, I won't pester you if you'd rather not receive a reminder!


    An InLinkz Link-up


    Wild, Wacky and Wonderful: 10 Free Crochet Wig Patterns!

    October 15, 2013 by Tamara Kelly 4 Comments

    I've noticed quite a few crocheted wigs lately - from the silly to the fantastical, they're a whole lot of fun. These hair-look hats crack me up! Crochet wig patterns are perfect for Halloween or fancy dress, and make the kids' dress up box so much more fun. So hat's off to the designers of these 10 free crochet wig patterns!

    Wild & Wacky Free #Crochet Wig Patterns - perfect for #Halloween, dress-up, and fancy dress!

    [Read more...]

    7 Questions with Kristi Simpson, Author of "Sweet & Simple Baby Crochet"!

    October 14, 2013 by Tamara Kelly 6 Comments

    Kristi Simpson is probably most well known for the super cute crochet designs on her website, RAKJpatterns, but she also runs Inspired Crochet Magazine. And like that wasn't impressive enough, she's also got a brand new book of patterns out: "Sweet & Simple Baby Crochet"! Moogly has joined her blog tour, and today I've got an interview with this busy, creative lady!

    Sweet & Simple Baby Crochet :: a new book by Kristi Simpson!

    [Read more...]

    Eloise Girls Sweater

    October 11, 2013 by Tamara Kelly 189 Comments

    The Eloise Baby Sweater was a big hit - and quickly became the Eloise Baby and Toddler Sweater, with sizes from 6mths to 3T. But there were requests for Girls' sizes as well - and at long last they're ready to go!

    Eloise Girls Sweater :: free crochet pattern in girls sizes S/M/L! [Read more...]

    The Super Stitch Works Software Giveaway on Moogly!

    October 10, 2013 by Tamara Kelly 41 Comments

    This giveaway has ended, thank you to all who entered! Congratulations to Barb S! If you're interested in purchasing your own copy of Stitch Works Software, please visit StitchWorksSoftware.com.

    ~~~~~~~~~~~~~~~~~~~~~~~~~~~~~~~~~~~~~~~~~~~~~~~~~~~~~~~~~~~~

    Recently I purchased my own copy of Stitch Works Software Crochet Charts for Moogly. It's a charting program that helps you make the universal crochet charts that are readable no matter what your language. And after talking to Brian Milco, the developer/software genius behind the program, he decided to giveaway a copy to one lucky Moogly reader!

    Awesome! Win your own full copy of Stitch Works Software on Moogly! Giveaway ends 10/15/2013 at 12am Eastern

    [Read more...]

    Slip Stitch and Single Crochet Seaming

    October 9, 2013 by Tamara Kelly 19 Comments

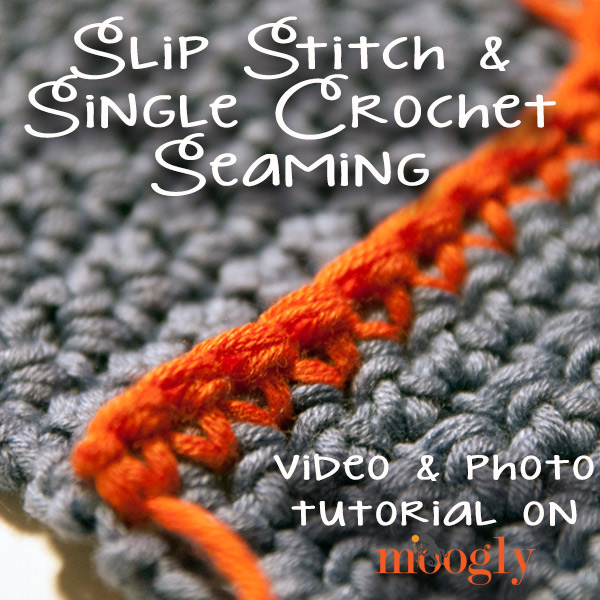
    Seaming two pieces of crochet together using slip stitches is exactly the same as seaming them together using single crochet - the only difference being, of course, the stitch used. And they're both super easy once you know how it's done! So watch and learn!

    Learn how to seam your #crochet pieces with both single crochet and the slip stitch - in just minutes! Video and photo tutorial on Moogly!

    [Read more...]

    Spooky & Sweet: Baby's First Crochet Halloween Costume! 10 Free Patterns

    October 8, 2013 by Tamara Kelly 3 Comments

    Baby might be too young to eat candy this year - but she's not too young for a costume! Crochet Halloween Costumes are lots of fun to make, and even more precious on the tiny babies! Plus you can use them after Halloween too - many of these patterns are cute all Fall! So here are 10 free crochet Halloween Costume Patterns for Babies!

    Crochet for Baby's 1st Halloween! Get links to these 10 free #crochet #Halloween costumes for babies on Moogly!

    [Read more...]

    An Apple Roundup Today Keeps Crochet Happ-ay: 10 Free Crochet Apple Patterns!

    October 7, 2013 by Tamara Kelly 6 Comments

    Fall might be best known for pumpkins, but we've gotta give some props to the apple! Crispy and crunchy, or soft and cinnamon-y, the apple is an icon: a healthy snack, a sweet dessert, a special fall treat... and today's roundup theme! To celebrate this fun fruit, here are 10 free crochet apple patterns!

    Free Crochet Apple Patterns :: Roundup on moogly!

    [Read more...]

    Special: Bonita Patterns Discount Code, Just for Moogly Fans!

    October 4, 2013 by Tamara Kelly 6 Comments

    UPDATE! This sale has been extended to October 17th! And there are two new patterns to add to your shopping list!

    Bonita Patterns sale for Moogly fans - extended to October 17th!

    Here are all the newest details:

    Bonitas Patterns Store

    Knit-Look Braid Stitch Scarf

    Knit-Look Braid Stitch Boot Toppers

    Bonita Patterns FAQ (info on how to enter the code if you get confused)

    And don't forget the Bonita Patterns Discount code: MOOGLY20

    ~~~~~~~~~~~~~~~~~~~~~~~~~~~~~~~~~~~~~~~~~~~~~~~~~~~~~~~~~~~~~~~~~~~

    Don't you love Fridays?! The whole weekend ahead to crochet - and I've got a special offer for you from Bonita Patterns to make this weekend's crocheting even better!!

    AMAZING DEAL! Get a great Bonita Patterns discount code for all Moogly Fans!

    Isn't it awesome! You were all so enthusiastic and supportive and just plain wonderful when we did the Bonita Patterns giveaway a couple of weeks ago, that she's come back to give you all this special deal! The Knit-Look Braid Stitch Booties is her latest pattern, and I think you'll all agree it's going to be a big hit. This is another great pattern for holiday gifts and craft fairs - Bonita Patterns always include permission to sell the finished projects!

    Here are all the details:

    Bonitas Patterns Store

    Bonita Patterns' Knit Look Braid Stitch Booties

    Bonita Patterns FAQ (info on how to enter the code if you get confused)

    And don't forget the Bonita Patterns Discount code: MOOGLY20

    Thanks for reading! Get Moogly on your favorite social media sites:  Facebook, Twitter, G+, Pinterest and Tumblr, and sign up for the Newsletter so you don’t miss a thing! TamaraKelly@mooglyblog.com

    Strawberry Basket Tunisian Dishcloth

    October 4, 2013 by Tamara Kelly 8 Comments

    Strawberry Basket Tunisian Dishcloth :: free #crochet pattern with tutorials on moogly!
    The Strawberry Basket Tunisian Dishcloth first appeared in Inspired Crochet Magazine - and now that they've got a new issue out, I'm free to share it here! It's a combination of all the great Tunisian techniques we've talked about here on Moogly, and a super pretty project to make for your kitchen or as a gift. Practical and decorative!
    Disclaimer: This post includes affiliate links.

    Prefer an ad-free PDF? You've got options!

    This button leads to the pattern on Etsy

    Video Tutorials Included!

    The Strawberry Basket Tunisian Dishcloth is a fun and interesting introduction to the world of Tunisian Crochet if you haven't tried it before! Just a few stitches, one hook, and a bit of cotton yarn are all you need to get started. Video tutorials for every one of the stitches are linked below. If you've already played with Tunisian stitches a bit and are ready to make something that really says WOW, then this is the pattern for you too! Dishcloths are a great way to master new techniques and stitch patterns - and this one is a standout.
    Strawberry Basket Tunisian Dishcloth :: free #crochet pattern with tutorials on moogly!

    Strawberry Basket Tunisian Dishcloth

    Add this pattern to your Ravelry Queue and Favorites

    • US - J, 6.00mm Tunisian or afghan hook
    • 60 yds total Worsted weight kitchen cotton in 3 colors
      Recommended: Lily Sugar'n Cream
      (A: brown; B: pink/red; C:green)

    Helpful Links and Tutorials:

    Tunisian Foundation Forward Pass, Return Pass, Simple Stitch (TSS) and TSS Bind Off

    Tunisian Knit Stitch (TKS)

    Tunisian Purl Stitch (TPS)

    Tunisian Strawberry Stitch (TStS)

    Instructions

    Row 1: With Color A, ch 27 and work a standard Tunisian Foundation Forward Pass. (27 sts)

    RP: Standard Tunisian Return Pass. (27 sts)

    Row 2: Skip the first st (loop on hook always counts as first st), TKS in the next 2 sts. *TPS in next 3 sts, TKS in next 3 sts. Repeat from * to end. (27 sts)

    RP: Standard Tunisian Return Pass.

    Rows 3 and 4: Repeat Row 2 twice.

    Row 5: Skip the first st, TPS in the next 2 sts. *TKS in the next 3 sts, TPS in the next 3 sts. Repeat from * to end, finishing last repeat with 2 TPS and a TKS in the last st. (27 sts)

    RP: Standard Tunisian Return Pass.

    Row 6 and 7: Repeat Row 5 twice.

    Rows 8 - 10: Repeat Row 2 three times.

    Row 11-13: Repeat Row 5 three times. Finish the last st with Color B. Do not break Color A yarn, but leave hanging to pick up later.

    Row 14: With Color B, work the first forward pass of TStS as follows. Skip the first st, and TSS in the next two sts. Then working into the next st as for a Tunisian Knit Stitch (TKS), make 5 dc as if you were making a bobble. In other words, *yo, insert the hook as for a TKS, yo, pull up a loop, pull through two loops, and leave the last loop on the hook. Repeat from * 4 more times in the same st. At this point you should have 8 loops on the hook – 3 from the first 3 TSS, then 5 from the set of dc sts.** TSS in the next 3 sts, then work the 5 dc sts in the next st as a TKS, leaving the last loop of each dc on the hook. Repeat from ** until there are 3 sts, left, work TSS in the last 3 sts. (51 sts)

    RP: Standard Tunisian Return Pass, finish last st with Color C. Do not break Color B.

    Row 15: With Color C, work the second forward pass of TStS as follows. Skip the first st, TSS in the next 2 sts. *Then working into the tops of the dc sts, TKS in each dc. Yo, and pull through the first 5 loops on the hook. TSS in the next 3 sts. Repeat from * to end. (27 sts)

    RP: Yo, pull through the first 3 loops. *Yo, pull through 2 loops. Repeat from * until 4 loops remain. With Color B, yo and pull through all 4 loops.

    Rows 16 - 23: Repeat Rows 14 and 15 four times, finishing the last stitch of Row 23 with Color C. The stitch counts will decrease as follows:

    • Row 16: 43 sts
    • Row 17: 23 sts
    • Row 18: 35 sts
    • Row 19: 19 sts
    • Row 20: 27 sts
    • Row 21: 15 sts
    • Row 22: 19 sts
    • Row 23: 11 sts

    Bind Off: With Color C, work the TSS bind off. Break Colors B and C only.

    Edging and Loop: Insert hook near where Color A ended, yo with Color A and work sc all around outside edge. At the top of the berries, make a ch 10 loop if desired. Break yarn and join to first sc of edging. Weave in ends. Wet block if desired.


    The Fine Print

    Written pattern copyright Tamara Kelly 2013. Come join the Moogly fun on your favorite social media sites:  Facebook, Twitter, Pinterest and sign up for the Newsletter so you don't miss a thing!

    Whip Stitch Seaming

    October 2, 2013 by Tamara Kelly 6 Comments

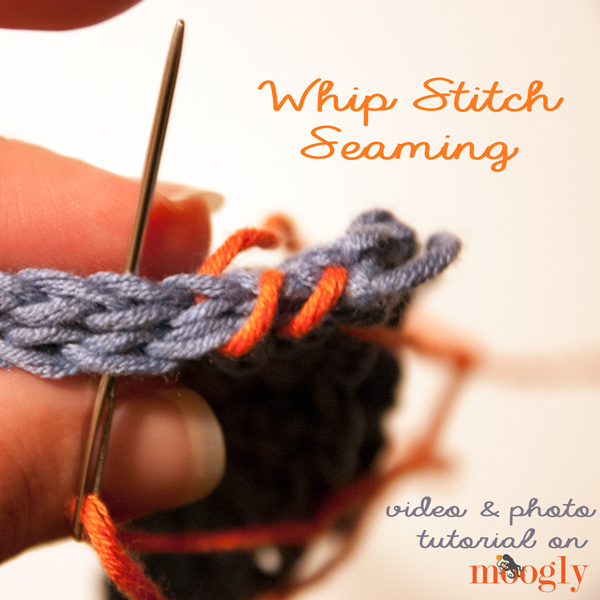
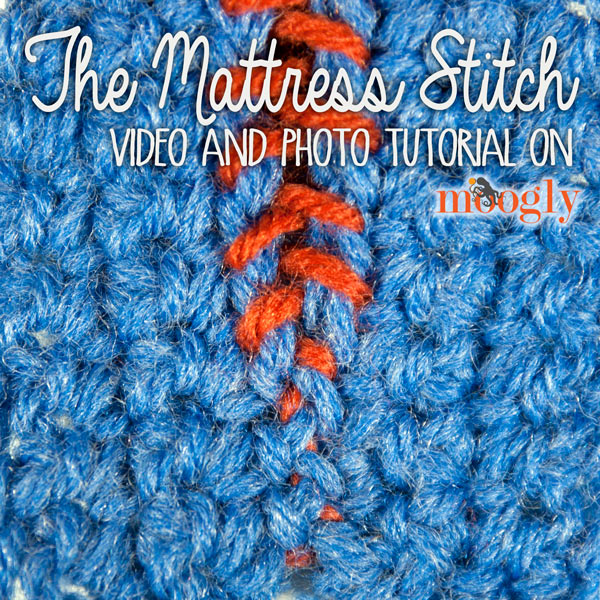
    Previously I demonstrated the Mattress Stitch, which is a great way to create an invisible seam when sewing two pieces of crochet (or knitting) together. Another option for seaming your yarn items is the Whip Stitch. This method isn't invisible, but it is fast as can be, and can add a decorative touch to the right project! Here's how it's done.

    Whip Stitch Seaming for #Crochet and #Knitting :: a video and photo tutorial!

    [Read more...]

    Hookin On Hump Day #56 – Link Party for the Fiber Arts

    October 1, 2013 by Tamara Kelly 16 Comments

    October already, and the craft world is in full swing! And Hookin On Hump Day is harvesting the rewards with the best bloggers linking up to the party - thank you to everyone who's linked up their projects once again! Sara from My Merry Messy Life and I are pleased as can be to share the featured posts every 2 weeks. Remember, with the two of us as co-hosts, the featured projects get twice the publicity, with links on both our sites and all our social media outlets! And if you tweet about it using the hashtag #HOHD, we'll use these to get even MORE attention on your posts and entries. So let's get to it!

    Join the best linky party on the web and see the best fiber arts projects - every 2 weeks on Moogly and MyMerryMessyLife!

    FEATURED THIS WEEK ON HOOKIN ON HUMP DAY!

    #1 - MOST CLICKED LINK: Sabrina Scarf Pattern by Divine Debris - A fun and fast free crochet pattern for an cowl/infinity scarf!

    #2 - Forest Girl Hood by Maz Kwok on A Crafter - Free crochet pattern, perfect for fall!

    #3 - Pumpkin Harvest From My Toy Garden by Shika on I Love Handmade: A very cute and very free seasonal crochet pattern!

    #4 - Victorian Step Cowl by Susan on Felted Button - Link to the free pattern, plus notes... and lots of eye candy!

    #5 - DIY Yarn Lights by Rajeswari on Diaper Mum - A fantastic project (and sympathetic read for all us moms!) with link to the tutorial she used!

    Great job everyone! Now go grab your I’ve Been Featured button and relish in the spotlight. I’ll be pinning you on my Pinterest Board and featuring you on Facebook and Google+, as will My Merry Messy Life!

    Now onto this week’s party! Here are a few simple rules:

    • Please link your post back to one of the hostesses – Moogly or My Merry Messy Life, or grab the Hookin on Hump Day party button here. Without a button on your site or link back on your post, we will not be able to feature it the following week. We have had to pass over many people before because there was no button or link!
    • I’d also really appreciate if you’d follow me on one of my social media links (see the icons at the top left of the page), and I will happily follow back (just leave me a comment that you’re following me from here, and include a link to your own page)!
    • Please visit at least one other link and leave a comment on their post so we can really support each other!
    • Please remember to link to your actual project URL and not your homepage URL, and use the name of your project or post, not your own name.
    • Please, no Etsy stores, Facebook pages, giveaways, non-fiber arts posts or other link parties. Just blog posts to your actual projects.
    I can't wait to see what you're working on now! You don’t have to be a designer or a big name blog to join this link party – all you need is to have a post about a fiber arts project you did that you’d like to show off! You don’t have to enter at both blogs either – an entry on one shows up on both, and the featured links are promoted by both My Merry Messy Life and Moogly! Twice the exposure! Remember, this party is in RANDOM order, so there’s no such thing as being late.


    New to the Hookin On Hump Day party? To receive reminder emails twice monthly about the party, enter your email here. Otherwise, I won't pester you if you'd rather not receive a reminder!


    An InLinkz Link-up


    Earth's Mightiest Heroes: Free Crochet Avengers Patterns!

    October 1, 2013 by Tamara Kelly 3 Comments

    The Avengers movie was a runaway hit, and with a spin off TV show and sequel in the works, this comic book turned blockbuster has inspired a devoted fandom of it's own! And if there's one thing I know, it's that fandoms and crochet go together like shawarma and awkward silences. So without further ado, here are some free crochet Avengers patterns!

    Free #Crochet Avengers Patterns!

    [Read more...]

    Moroccan Market Tote

    September 27, 2013 by Tamara Kelly 115 Comments

    Moroccan Market Tote: free #crochet pattern on Moogly!

    Totes can be utilitarian, handy, functional, and fun. And the Moroccan Market Tote is all of these - plus beautiful and luxurious! The stitch pattern reminds me of Moroccan Tile (hence the name), and is gorgeous enough to carry anywhere you go - Farmer's market to foreign shores!

    Disclaimer: This post includes affiliate links. Yarn provided by Lion Brand.

    Prefer an ad-free PDF? You've got options!

    Prefer the free blog version? Keep scrolling!

    Create Your Own Custom Color Pattern

    The Moroccan Market Tote features 7 bright colors, but could be made with just 3 skeins if you prefer to skip the stripes. As written, less than 50 yards of each "stripe" color is used, so it could also be a great stash buster. But if you get a chance, I highly recommend the LB Collection Cotton Bamboo - it's a joy to work with, and looks and feels amazing in the finished project!

    Moroccan Market Tote: free #crochet pattern on Moogly!


    Moroccan Market Tote

    Add this pattern to your Ravelry Queue and Favorites

    US - H, 5.00mm hook

    620 yds LB Collection Cotton Bamboo (DK)
    Color A: 150 yds (Chocolate Dahlia - brown)
    Color B: 245 yds (Magnolia - beige)
    Color C: 45 yds (Hyacinth - blue)
    Color D: 45 yds (Snapdragon - green)
    Color E: 45 yds (Gardenia - yellow)
    Color F: 45 yds (Persimmon - orange)
    Color G: 45 yds (Hibiscus - pink)

    4 stitch markers

    Finished size: 15-16″ wide (narrows a bit as it goes up) and 11-12″ tall not including the handles

    Helpful Links & Abbreviations

    Crochet Abbreviations

    Bag Bottoms

    Moroccan Tile Stitch in the Round

    FDC - Foundation Double Crochet;

    CSDC - Chainless Starting Double Crochet

    Seamless Join

    STDC - Standing Double Crochet

    Matching Patterns

    The Moroccan Tile Afghan

    Moroccan Midnight Slouch

    Moroccan Midnight Cowl

    Moroccan Midnight Mitts

    Moroccan Midnight Boot Cuffs

    Moroccan Handbag

    Moroccan Basket

    MOROCCAN TILE TOTE INSTRUCTIONS

    Make the Base with Color A:

    Row 1: FDC 54, turn. (54 sts)

    Row 2: CSDC, dc 53, turn. (54 sts) '

    Round 3: CSDC, dc 53. Turn the fabric clockwise to work into the ends of the rows, dc 6 evenly across the ends of the rows. Turn the fabric clockwise again to dc 54 across the bottom of Row 1. Turn clockwise again to dc 6 into the opposite ends of the rows. Break yarn and use seamless join to secure to 2nd st of the round, PM in join. (120 sts)

    Make the Body with Colors B - G:

    Round 1: With Color B, STDC in marked stitch. Ch 1, dc in same st (V st made). Skip 2 sts. *[Dc, ch 1, dc] in next st, skip 2 sts. Repeat from * to end, join with sl st to STDC. Remove hook from loop, PM in loop so it doesn't pull out. (40 V sts)

    Round 2: With Color C, STDC in ch sp of 1st V st of previous round. Ch 1, dc in the same ch sp (V st made). [Dc, ch 1, dc] in each ch sp around. Pull active loop and working yarn of Color B to front of fabric, then join with sl st to STDC. Remove hook from loop, PM in loop so it doesn't pull out. (40 V sts)

    Round 3: Replace hook in active loop of Color B, CSDC, ch 1, dc between first and last V of the row before the previous round (NOT in the ch sp, but between the Vs). [Dc, ch 1, dc] between the V sts of round before the previous round around, enclosing previous round. Leaving working yarn and active loop of Color C behind fabric, join with sl st to CSDC. Remove hook from loop, PM in loop so it doesn't pull out. (40 V sts)

    Round 4: Insert hook in the ch sp of the first V st of the previous round. Replace hook in active loop of Color C and pull it through the V to the front, leaving working yarn behind. CSDC, ch 1, dc in the ch sp of that first V. [Dc, ch 1, dc] in each ch sp around. Pull active loop and working yarn of Color B to front of fabric, then join with sl st to CSDC. Remove hook from loop, PM in loop so it doesn't pull out. (40 V sts)

    Rounds 5 - 8: Repeat Rounds 3-4 twice. At end of Round 8, break Color C and seamless join in CSDC. (40 V sts)

    Moroccan Market Tote: free #crochet pattern on Moogly!

    Round 9: Repeat Round 3.

    Round 10: With Color D, repeat Round 2.

    Round 11: Repeat Round 3.

    Round 12: With Color D, repeat Round 4.

    Rounds 13 - 16: Repeat Rounds 5-8 (using Color D).

    Rounds 17 - 24: With Color E, repeat Rounds 9-16.

    Rounds 25 - 32: With Color F, repeat Rounds 9-16.

    Rounds 33 - 40: With Color G, repeat Rounds 9-16.

    Round 41: Repeat Round 3. At end of Round, break Color B and seamless join in CSDC. PM in the first V st of the round. (40 V sts)

    Make the Top and Handles with Color A:

    Round 1: Count 9 V sts to the left of the joining seam (8 from the first V) from the previous round, and PM in that V st. (See photo below.) Join with a sl st to ch sp of the marked V st of the previous round. Ch 1 and work 3 sc in the ch sp. Work 3 sc in each ch sp around. Join with a sl st to the first sc. (120 sts)

    Moroccan Market Tote: free #crochet pattern on Moogly!

    Rounds 2 - 4: Ch 1 and sc in each st around. Join with a sl st to the first sc. (120 sts)

    Round 5: Starting with the first st of the previous round PM in sts #20, #49, #80, and #109. Lay bag flat and make sure markers line up and are where you want the handles to be (adjust if needed). Ch 1, sc to first marked st, sc in marked st, ch 100 (or to desired handle length), sc in next marked st (skip sts between 1st and 2nd markers). Sc in each st to next marked st, sc in marked st, ch 100, sc in last marked st, sc in remaining sts to end. Join with a sl st to the first sc. (64 sc and 200 ch)

    Rounds 6 - 9: Ch 1, sc in each st and ch around. Join with a sl st to the first sc. (262 sts)

    Round 10: Sl st in the next st and each st around. Break yarn and seamless join to first sl st. Use remaining yarn to sl st around handle openings in the same manor. Weave in all ends.

    Moroccan Market Tote: free #crochet pattern on Moogly!


    Splendiferous! The Moroccan Market Tote is a truly luxurious tote bag, and I can't wait to use it. Jetting off on an adventure, strolling through the local shops, or toting books to the public library, it's sure to add an extra special touch to your next outing.

    The Fine Print

    Written pattern copyright Tamara Kelly 2013. Please do not share copies of or repost this pattern, Please do link to this page to share this pattern with others. If you wish to make items for sale from this pattern, please visit the About page for details. TamaraKelly@mooglyblog.com

    Sven Sweater: Now In Four Sizes!

    September 26, 2013 by Tamara Kelly 8 Comments

    The latest two upsizes for the Sven Sweater are finally finished. They've been written, tested, verified, tried on, and now it's ready to publish! Perfect for boys AND girls, this is a great go to sweater pattern for any baby or toddler.

    Sven Sweater by Moogly!

    [Read more...]

    Mattress Stitch Seaming

    September 25, 2013 by Tamara Kelly 37 Comments

    If you crochet (or knit) for long enough, eventually you're going to want to make something with seams. And while seamless patterns are great, seams can add a lot of structure, prevent stretching in the wrong places, and are important for the majority of motif projects. There are a variety of seaming techniques out there, but this tutorial focuses on the most invisible of seams - the Mattress Stitch! Here's how it's done.

    Mattress Stitch Seaming for #Crochet Projects - video and photo tutorial on Moogly

    [Read more...]

    Make No Bones About It, It's Free Crochet Skull Patterns!

    September 24, 2013 by Tamara Kelly 11 Comments

    With Día de Muertos and Halloween coming up, it seems like the right time to share some of the amazing skull crochet patterns that are out there! Skulls don't have to be scary or creepy - after all, we all have one. And my daughter had a skulls with little pink bows theme for her 7th birthday, and that's not nearly the creepiest thing one of my kids have done! So here's a carefully curated collection of only the finest free crochet skull patterns - enjoy!

    10 Free Crochet Skull Patterns: Perfect for Halloween and the Day of the Dead!

    Disclaimer: This post includes affiliate links.
    [Read more...]

    « Previous Page
    Next Page »
    Tamara Kelly of Moogly

    Moogly is world-famous for fresh. modern, and approachable crochet designs - as well as a little knitting and crafting here and there. On Moogly, you'll find several new free patterns every month, top quality video tutorials, giveaways, and more!

    More about Moogly →

    Popular

    • MooglyCAL2026 Block 21
      MooglyCAL2026 Block 21
    • Crochet and Catch Up with Moogly - October 14, 2026
      Crochet and Catch Up with Moogly - October 14, 2026
    • Seamless Crochet Sweaters Review and Giveaway
      Seamless Crochet Sweaters - Review and Giveaway
    • Ghost Treat Basket Tutorial
      Ghost Treat Basket Tutorial
    gosadi
    I'm a Craftsy Instructor. Click to see my classes.
    I Like Crochet


    Footer

    ↑ back to top

    About

    • About
    • Privacy Policy

    Newsletter

    Contact

    Email Moogly

    As an Amazon Associate I earn from qualifying purchases.
    Copyright © 2026 Mooglyblog.com