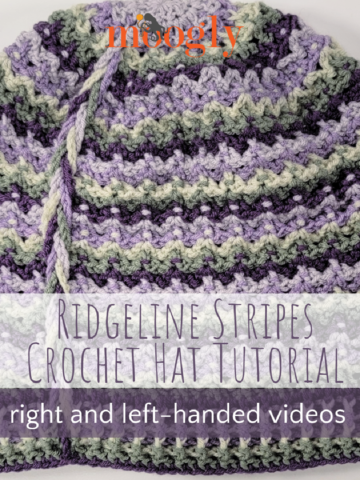
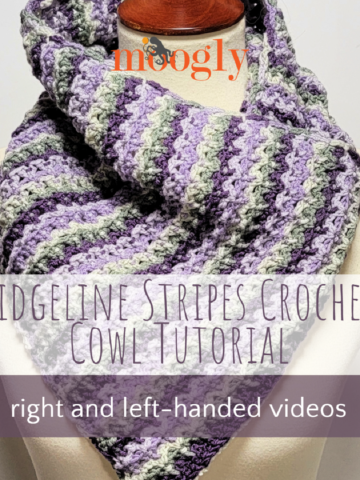
The Moroccan Tile Afghan uses a stitch that's super easy to show... but hard to explain in words. I've heard you loud and clear - a tutorial is needed! Et voila! Here's the Moroccan Tile Afghan stitch tutorial!

Moroccan Tile Afghan Video Tutorial - Right Handed
Moroccan Tile Afghan Video Tutorial - Left Handed
Moroccan Tile Afghan Photo Tutorial
The Moroccan Tile Afghan stitch is made in a multiple of 3 +2, +2 for the starting chain. The chain and row estimates for several sizes are provided on the pattern page; for this tutorial we'll be working with a starting chain of 19 - which would make a great little washcloth! A few unique stitches are used. See the original pattern, or click on the abbreviations below to go to the stitch specific tutorials.
Row 1:


Elaine says
Very helpful, thank you!
Kristin says
Is it possible for you to make a video or explain how we do color changes nice? I understand we should keep color b but use that for the stitches we first used on color a and add color c as new for color be, but how to make this change and still keep the blanket looking good? Kind of stuck here, sorry.
Dot says
Thanks for the beautiful pattern and for the tutorial. I've just found your blog, and I've subscribed via Feedly. I've been crocheting for about 70 years, and you're teaching me new things! (And thanks for using Print Friendly.)
Tamara Kelly says
😀 Thank you Dot!
Tracy says
Thanks
Angel says
Another Super Tutorial, Tamara. I haven't used the standing double crochet yet, but I will now.
This pattern is beautiful. I saw the original post and ever since I saw this pattern, I thought it would make a some great cotton dishcloths. Now I'll get started on that.
Thanks again,
Angel
stitches'n'scraps says
oooooh ok, that makes absolutely perfect sense now. Thanks for the great tutorial! 🙂
Tamara Kelly says
😀 Glad to hear it!
Meme says
Excellent tutorial Tamara. I only wonder how you end it off as this was not shown in the tutorial. Might seem like a dumb question but when I have done tutorials (not crochet) I always told my clients there were never any dumb questions, and if they were wondering about something there was probably a few others who weren't game to ask fearing they would seem silly. I can't wait to follow your tutorial and have a go at doing a multi-coloured one for an afghan. Thanks so much M
Tamara Kelly says
😀 No problem! To finish it off just end on an odd numbered row - that's all there is to it! Then I like to work an edging, in this case simple single crochet. I talk about more of the details on the original pattern page: https://www.mooglyblog.com/moroccan-tile-afghan/
Jean Cameron says
Hi
Love your tutorials!
I am wanting to use this stitch in a center out afghan. Is there a pattern for that?
Tamara Kelly says
Hi Jean! I haven't worked it center out just yet, sounds like a new challenge!
MARRIE says
I really hated this stitch but how nicely you've made, now i am in love with this stitch!..it's so colorful and clearly made!...I like this { actually i loved }..this beautiful stitch made by TAMARA KELLY..i always change my days by changing crochet websites daily..but i don't think i am ever going to search any other website!..I've already found great website in which I've found every thing i wanted!..thanks for your co-operation so far..♥
lesley says
Gorgeous pattern! I'm making this as a gift for my mom and I came across a problem. I was wondering exactly where or how I am supposed to change colors. For some reason I cannot figure this out. Any help would be appreciated
Tamara Kelly says
Hi lesley! You'll find more info on the color changes here: https://www.mooglyblog.com/moroccan-tile-afghan/
Valerie Blair says
Sorry if this is a duplicate comment, but I wrote one last night & don't see it here. First, I love, love, love this pattern!!! One of the sides appears to be coming out more diagonal than straight. Will that resolve itself as I go & do my border? I've already restarted once & am following the pattern to the letter & even watched your video tutorial several times so I know I'm doing it right. Is anyone else having this issue? The only other thing I can think of is I'm using lighter weight yarn here but I doubt that would really cause this to happen. Thanks!!!
Valerie Blair says
Omg! After pulling my work out for the second time (about 70 rows!) and watching your video for the umpteenth time I finally see where I went wrong!!!! Thank you for posting the video! I'm just mad at myself for not seeing where I went wrong sooner!
Tamara Kelly says
Oh dear! Sorry about all that frogging - always such a bummer! Glad you figured it out though!
fifar says
hi,thank you
Michele says
I have looking at your videos ..very informative! I saw that you used a stitch marker..I was taught by a friend to use tiny safety pins as stitch markers. .and less cost! I have been crocheting for 50 years . I must say you have taught me a few things. Enjoy your crocheting!
Tamara Kelly says
Thank you Michele!
Amanda says
Hi Tamara! Beautiful pattern that I am excited to be doing. Using your color scheme, I was super successful on Rows 1-20 but I am stuck on how to start Row 21. How do I end off Color A properly in order to then turn Color B into the next Color A? If you could add another short tutorial for this specific transition, it would greatly appreciated!
Tamara Kelly says
Hi Amanda! To finish off Color A, just break the yarn after you finish Row 19 and pull the loop through as if you were finished with the whole blanket. Then for Row 21, you just turn and make it with the unbroken Color B. Then join Color C as if it were Row 2. Does that help?
Amanda says
Yes, that does help! The part where I was really confused was how to "bring down" Color B to create the CSDC that starts Row 21 but I think I figured it out. I just took the active loop from Color B and pulled it through the very last stitch of Row 19. I am not sure if that is how you did it but it looks alright to me! 🙂
Tamara Kelly says
Sounds right from here! 😀 Yay!
Sharon says
Thank you for the tutorial, you do go a little fast,I had to watch a few times. I think a light background would help to see what you are doing also. I am going to attempt this pattern.
Tamara Kelly says
The photo tutorial might help with that! 🙂
Lisa Lockhart says
Tamara...as always -- THANK YOU. You share so much and I am SO happy to see crochet promoted in so many diverse, interesting and beautiful ways. I am going to make my dear spouse a lovely afghan from this. Again, thanks so much. You bring so much encouragement and common sense to this!
Tamara Kelly says
Wow, thank you so very much Lisa!
pat crowley says
Thank you so much for the video and tutorial for the Moroccan tile stitch. I love learning new stitches and this one is so cool and easy to understand.
Tamara Kelly says
😀 Thank you so much Pat!
dorit says
wonderfull!!! you teach so well!!1 I love it and going to do it, thank you so much to teach me
Tamara Kelly says
😀 Thank you so much Dorit!
Lori MacKenzie says
Tamara, Thanks for the beautiful pattern & tutorial. I'm attempting to start one, I plan on doing swatches of 12 inches across. I'm off to a rocky start. The pattern calls for the foundation chain as 3+2, (plus 2 at the end) which as written is 5, per V stitch, but the pattern only calls for 3. V stitch, skip 2, repeat. Your beginning chain was 19 st, which is not a multiple of 5 (plus 2). I'm trying to figure out how many chains I need to make mine 12 inches across but the math isn't working out. I've made it too short, pulled it out & then made it too long. Can you explain the 3 + 2 concept to me? Thanks.
Tamara Kelly says
Hi Lori! It's a multiple of 3... and then add the 2, then 2 more for the starting chain. So 3 x 5 is 15, +2 is 17, +2 more is 19. Does that made sense?
Lori MacKenzie says
Hi Tamara, thanks for the reply. I still don't understand it. You are just repeating the V stitch, which is 3 chains. Why the plus 2 for each V stitch? I get the extra 2 for the starting chain. I just kept trying trial by error & got the amount I needed for my starting row, & have about 16 inches of my first swatch started & wrote the number down for my next strip. I guess it's just not making sense to me.
Tamara Kelly says
It's not plus 2 for each, it's just plus 2 at the end, so that you have a stitch at each end of the row. Another way to put it would be a multiple of 3, plus 4. I'm not sure what size you're going for, have you checked the chain list on the pattern?
njagt says
thank you for all of your free patterns and videos. You explain everything so well. Thanks a ton.
Tamara Kelly says
🙂 Thank you so much njagt!
yolanda says
Than you for all of your free patterns and videos.
Tamara Kelly says
Thank you Yolanda!
Dawn says
This is the 5th time that I'm starting the project and I'm determined to do it. If I'm following the video, what are the rows that are repeating. Like, once I complete row 6 on the video, which would be the next row? If I can get that answered, I can get this afghan done. Thanks
Tamara Kelly says
Hi Dawn! The pattern at https://www.mooglyblog.com/moroccan-tile-afghan/ shows that the repeat is rows 5-8. 🙂
Andrea says
Tamara, I just made the market bag with this stitch and it came out well but not quite like yours. I don't know how I missed this video tutorial but now I know what I did wrong! Thanks so much for the tutorial, yours are by far the best video tutes!
Tamara Kelly says
Ah, sorry you didn't see it first, but so glad it clarified things! 😀 Thank you so much Andrea!
Marie Vallejo says
I am new to your website but can't tell you how impressed I am with all of it. Your videos and photos are outstanding. You make things very easy to follow. I am 75 years old and have been crocheting since my mother taught me at 5 yrs old. She didn't read patterns all that well but could make anything just by looking at the stitches....so I learned by watching her. But, I learned to read patterns years ago. I have 3 granddaughter and they've all learned to crochet from this Grama. I will be sure to introduce them to your website.
I just want to thank you for all that you do here and the lovely patterns.
Tamara Kelly says
Thank you so much Marie! It's so wonderful you've been able to pass it on to your granddaughters!
Kelly semlear says
Hi. I had a question about the color change at row 21. When you make Color B the new Color A, doesn't that row 21 essentially trap row 20 (color B and A) which makes the grout line and the tile the same color? Thanks for the help. I really enjoy your patterns. I made one of your shawls for my kids' teacher and she loved it.
Tamara Kelly says
When you change colors, there will be one row with the same tile and grout color. 🙂 If you look closely, you should be able to see this in a photo on the original pattern. 🙂
Megan says
Hi Tamara,
I’d like to make this with Bernat Blanket yarn(6- super bulky weight) but I can’t even begin to figure out how to alter the pattern to fit that yarn. I’d like to use that yarn as I’m making an afghan for my niece and that yarn is super soft. And I’m planning to do it in squares. So... what size hook should I use? And are there any alterations I need to make to the pattern (besides the squares), in order to make this yarn work? Please help!
Tamara Kelly says
Hi Megan! I would start with whatever hook size is recommended on that yarn, and make a swatch, and see how it looks and adjust from there. That should be it though! 🙂
Tresa Lovejoy says
Thank you so much for yourprinted and YouTube tutorials on this stitch. I have been searching for this stich for years. I saw an afghan made with this stitch but had no idea what it was called or how to work it. I thought it looked like a stain glass window pane but couldn't locate anything that really looked like what I remembered. I am very hesitant crocheted sticking to scarfs and baby blankets in easy stitches. However with your tutorials I am going to attempt this and the hat pattern.🤞
Tamara Kelly says
♥ Thank you so much!