moogly

menu icon
go to homepage
  • Patterns
  • Tutorials
  • MooglyCAL
  • Giveaways
  • Lives
    • Facebook
    • Instagram
    • Pinterest
    • TikTok
    • Twitter
    • YouTube
  • search icon
    Homepage link
    • Patterns
    • Tutorials
    • MooglyCAL
    • Giveaways
    • Lives
    • Facebook
    • Instagram
    • Pinterest
    • TikTok
    • Twitter
    • YouTube
  • ×
    Home

    MooglyCAL2019 – Afghan Block #11

    May 30, 2019 by Tamara Kelly 12 Comments

    Sit back and soak up some sun while you crochet Block 11 in the MooglyCAL2019 - courtesy of ACCROchet! This seemingly simple crochet square features a unique stitch, but once you get the hang of it, this free crochet square pattern will fly off your hook!

    MooglyCAL2019 Block 11 by ACCROchetDisclaimer: This post includes affiliate links; materials provided by Red Heart Yarns, Furls Crochet, and Chetnanigans. [Read more...]

    Facebook & YouTube Live: May 2019 - Finger Chaining and Finger Knitting

    May 29, 2019 by Tamara Kelly Leave a Comment

    May is such a busy month, with end of the school year activities, graduations, holidays, and summer planning! Grab a moment and join me for a quick look at what new patterns, tutorials, and giveaways are up now on Moogly, and get a peek at what's to come! This afternoon I'll be demonstrating a great activity to keep the kids playing with yarn this summer - finger chaining and finger knitting!

    Moogly Live May 2019Disclaimer: This post is sponsored by Red Heart Yarn, and contains affiliate links. Live videos are unscripted and all opinions are my own.

    [Read more...]

    OttLite Natural Makeup Mirror Giveaway: Pamper Yourself!

    May 28, 2019 by Tamara Kelly 5 Comments

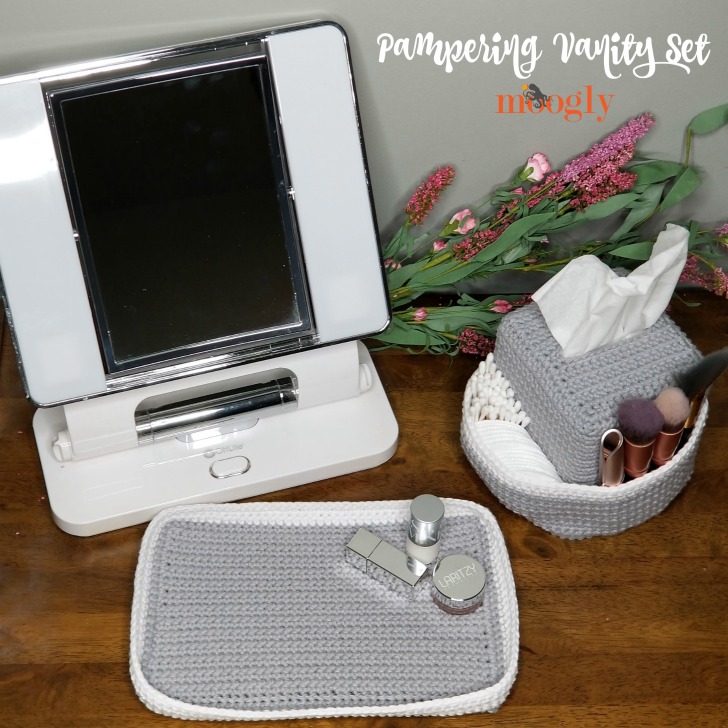
    Recently I shared my new crochet pattern for the Pampering Vanity Set. And some of you noticed the gorgeous OttLite Natural Makeup Mirror in the photos! Well, to continue that spirit of pampering - and help you model all your fabulous crochet garments, of course - OttLite is giving away one of their Natural Makeup Mirrors here on Moogly!

    OttLite Natural Makeup Mirror Giveaway on Moogly - open to US addresses, ends 6/17/19Disclaimer: This post includes affiliate links; giveaway sponsored by OttLite but all opinions are my own.

    [Read more...]

    Crochet Tissue Box Organizer and Tray: Pampering Vanity Set

    May 24, 2019 by Tamara Kelly 6 Comments

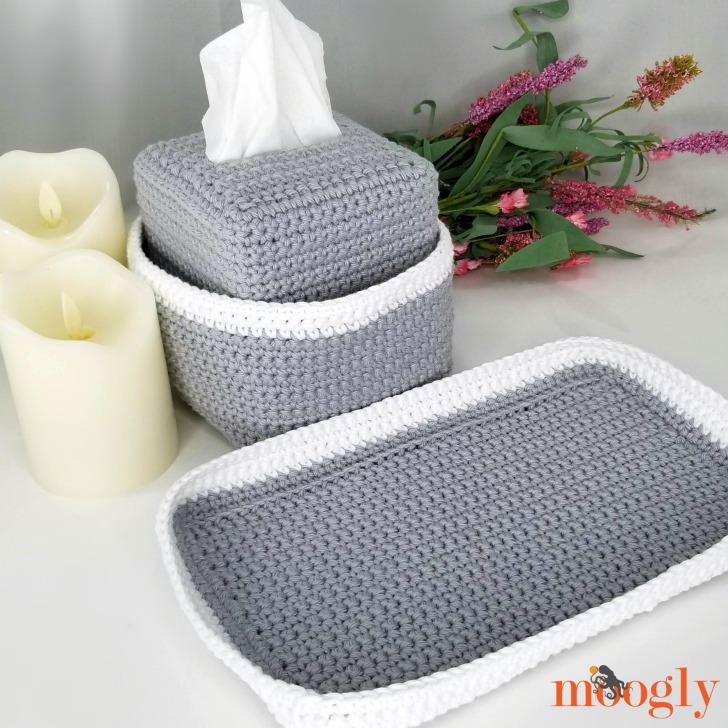
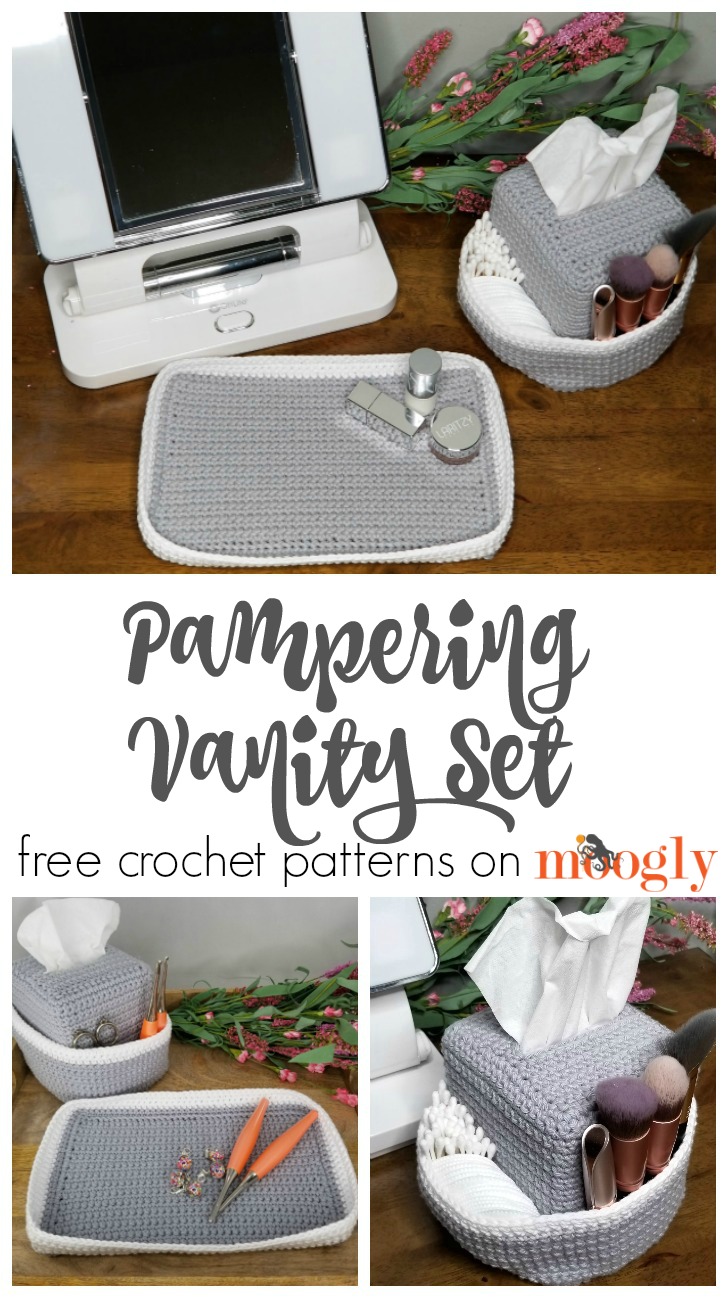
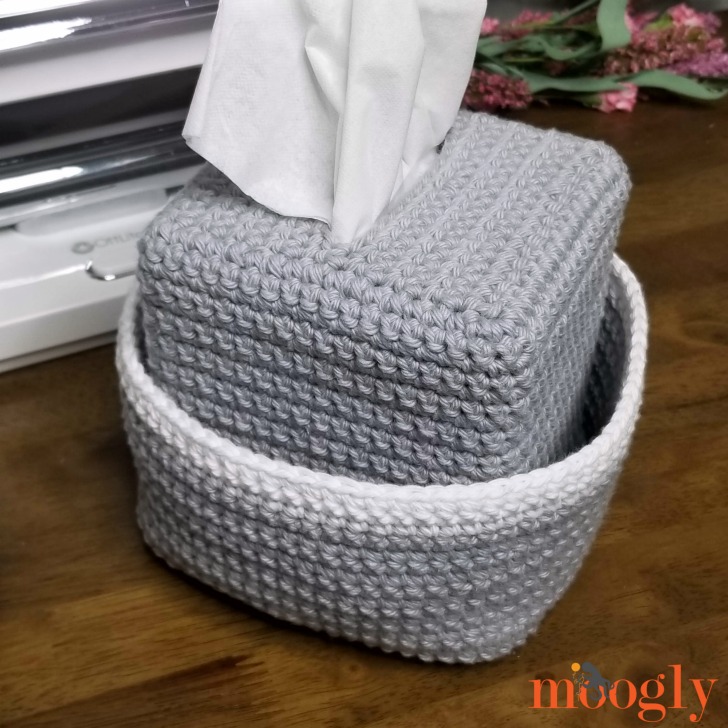
    Pampering Vanity Set: Crochet Tissue Box Organizer and Tray - free patterns on Moogly

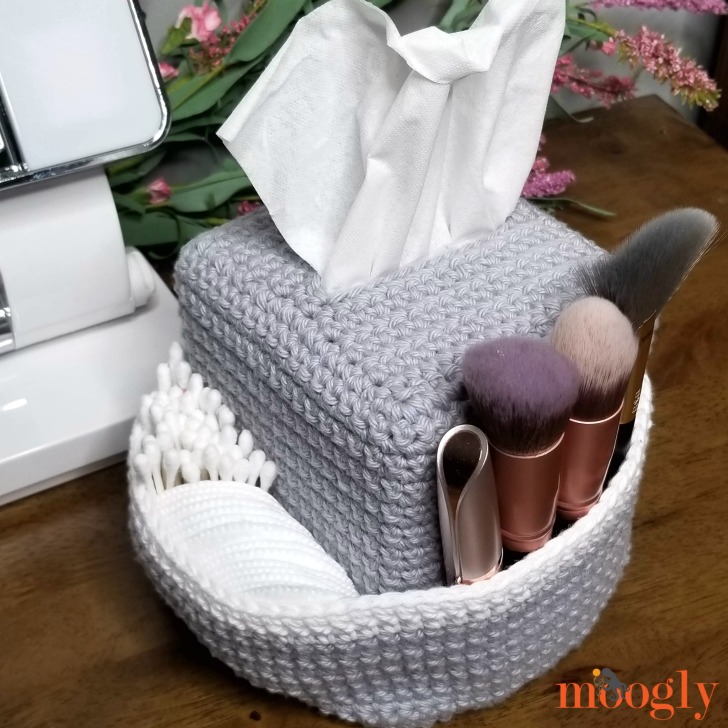
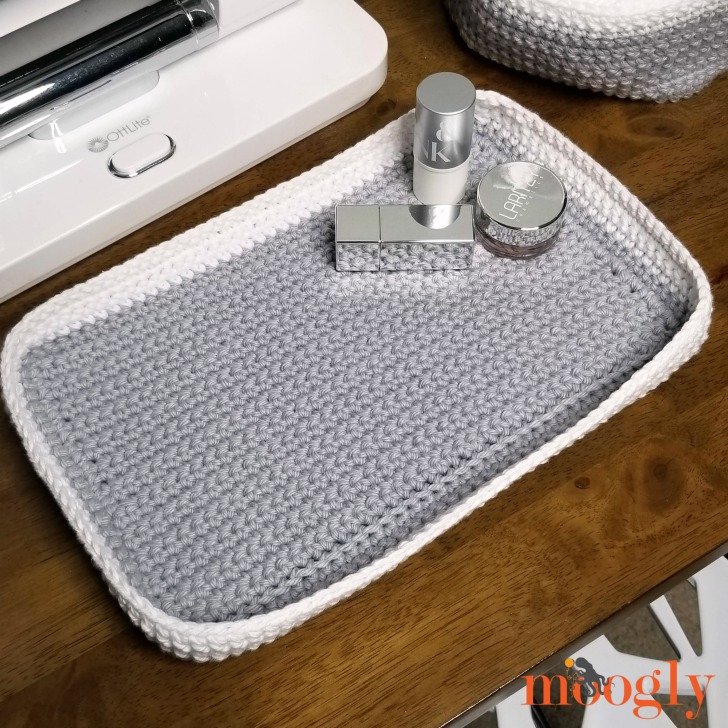
    The Pampering Vanity Set features two perfect pieces - a Crochet Tissue Box Organizer and Tray to help you pamper someone special (and that includes you)! Make this crochet vanity set with this pattern set on Moogly!

    Disclaimer: This post includes affiliate links; materials provided by Red Heart and Furls.

    Purchase the downloadable PDF of this pattern on Ravelry

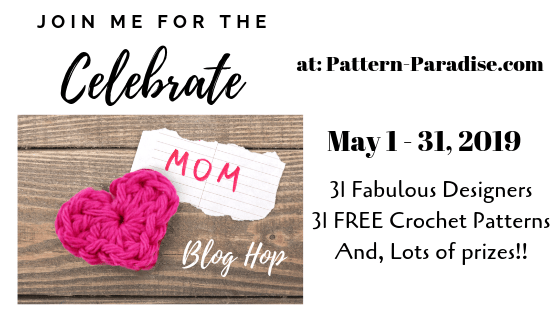
    2019 Celebrate Mom Blog Hop on Pattern Paradise

    The Pampering Vanity Set is part of the 2019 Celebrate Mom Blog Hop on Pattern Paradise! Thirty-one very talented designers have teamed up to bring you a new free pattern every day for the entire month of May! Each pattern will follow the theme of celebrating Mom, and there is a huge variety. Be sure to check out the Blog Hop for more free patterns and crochet ideas!

    Celebrate Mom Blog Hop - get 31 fantastic patterns to make for your mom or special someone, all free!

    Easy Crochet for Beginners

    The Pampering Vanity Set is very easy to make, simple enough for beginners who are ready to work in the round. In addition, while the Crochet Tissue Box Organizer pattern is written for a standard square box, I've also included instructions for adapting this pattern to fit any size - therefore, you can make a custom crochet tissue box organizer in any size!

    Pampering Vanity Set: Crochet Tissue Box Organizer and Tray

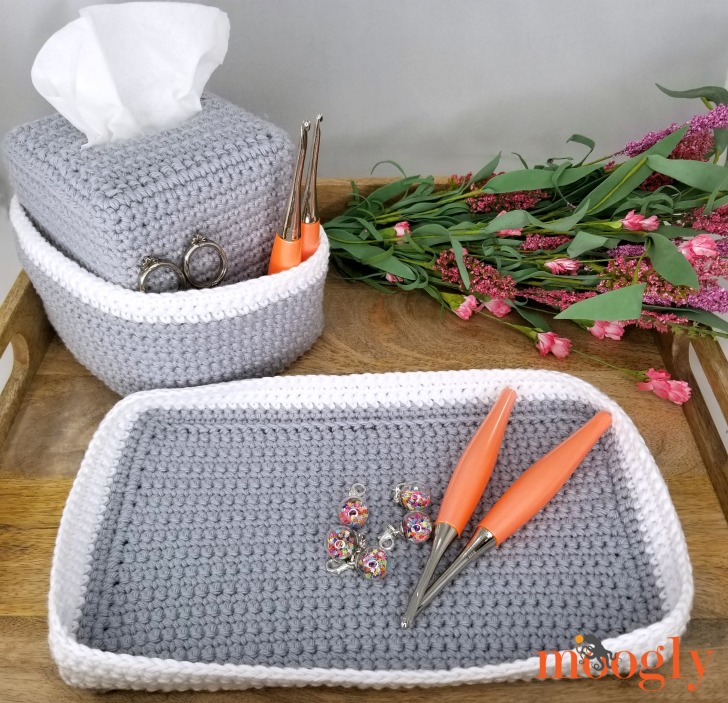
    Of course, this Crochet Vanity Set doesn't have to be relegated to the bedroom or bath - it can also come in handy in the craft room or next to your favorite chair, to keep your crochet tools close at hand. Particularly helpful during allergy season!

    Pampering Vanity Set: Crochet Tissue Box Organizer and Tray - not just for vanities, keep your craft organized and handy too!

    My Inspiration

    When I was asked to participate in this Blog Hop, I thought about what memories come to mind when I think of my mother. And one of the strongest is watching her get ready when I was a child - putting on her "face" before we'd go to town. I was so fascinated by the process, and couldn't wait to have my own vanity someday.

    It's taken a few (dozen) years, but I finally have my very own vanity table, and making things like the Pampering Vanity Set to make it pretty has made me so happy - I hope this set makes you happy too!

    Pampering Vanity Set: Crochet Tissue Box Organizer and Tray - get this free pattern set on Mooglyblog.com!


    Pampering Vanity Set: Crochet Tissue Box Organizer & Tray

    Add this pattern to your Ravelry Queue and Favorites!

    Hook: US - H, 5.0mm - Furls Odyssey

    Yarn: 290 yds Red Heart Scrubby Smoothie (100% Cotton; “4”/Medium/Worsted/UK: 10-12 ply)
    This yarn is discontinued. Recommended yarn: Lily Sugar'n Cream
    Color A: Grey - 2 balls (250 yds)
    Color B: White - 1 ball (40 yds)

    Notions: Clover Stitch Markers

    Gauge: 16 sts x 20 rows = 4"/10cm in sc

    Sizes:
    Tissue Box Organizer - fits a standard square box, approximately 4.25" square around x 5" tall
    Tray - 6" x 10" x ⅞"

    Helpful Links and Tutorials:

    Crochet Tissue Box Organizer and Tray Tutorial

    Crochet Abbreviations

    FLO - Front Loop Only

    FSC - Foundation Single Crochet

    Working into the Edge

    NOTES

    If you prefer not to use the FSC method for Row 1, then just ch 1 more than the number listed and sc in the second ch from the hook and each remaining ch across.

    The Crochet Tissue Box Organizer is written for a standard square box - see dimensions above. For all other sizes of tissue boxes, please see the Any Size Tissue Box Organizer Instructions below.

    Both patterns feature turned rounds or joined rows - this means that after joining with a sl st, you will turn your work to crochet from the other direction. Using stitch markers to mark the first and last stitch of each round is very helpful here.

    Crochet Tissue Box Organizer - free pattern on Moogly!
    What will you put in your Crochet Tissue Box Organizer?

    Crochet Tissue Box Organizer Instructions - for Square Boxes

    Row 1: With Color A, FSC 16; turn. (16 sts)

    Row 2 - 8: Ch 1, sc in each st across; turn. (16 sts)

    Row 9: Ch 1, sc in first 2 sts, ch 12, skip 12, sc in last 2 sts; turn. (4 sc, 12 ch)

    Row 10: Ch 1, sc in each st and ch across; turn. (16 sts)

    Row 11 - 17: Rep Row 2.

    Rnd 18: Ch 1, 2 sc in first st, sc in each st across until 1 st rem, 2 sc in last st of previous row, sc 16 evenly along side of rows, 2 sc in the first foundation ch, sc in each foundation ch until 1 st rem, 2 sc in last foundation ch, sc 16 evenly along remaining side of rows; join with sl st and turn. (68 sts)

    Rnd 19 - 43: Ch 1, sc in each st around; join and turn. (68 sts)

    Rnd 44: Ch 1, working entire rnd in FLO, *sc 16, 2 sc in next st; rep from * around, join and turn. (72 sts)

    Rnd 45: Ch 1, *sc 8, 2 sc in next st; rep from * around, join and turn. (80 sts)

    Rnd 46 - 58: Rep Row 19. After Row 58, break Color A. (80 sts)

    Rnd 59 - 61: With Color B, rep Row 19. After Row 61, break Color B. (80 sts)

    Fold sides up at Row 44 to create storage pocket.

    Crochet Tissue Box Organizer - free pattern on Moogly!
    Toiletries... or crochet hooks?! You might need to make two of these handy free crochet tissue box covers!

    Any Size Tissue Box Organizer Instructions

    If your tissue box is not a standard square size, you can adjust this pattern by working to the dimensions of your box as follows, referencing the pattern above:

    Row 1 is the width of the top, with the tissue opening held horizontally - FSC as many sts as needed to just cover this width.

    Repeat Row 2 until you are just under half way across the box top.

    When it's time to make Row 9 (or it's equivalent), sc until the tissue opening begins, ch the number needed to get across the opening, and then sc the same number of sts at the end as at the beginning of the row.

    Then, Repeat Row 2 again until you have covered the top of the box.

    Work evenly along the sides for Rnd 18, and then rep rows as needed for the height of the box.

    After reaching the height of the box, add 4 increases in the next round - 1 at each corner of the box.

    Then, add another round of increases with approximately 8 sts evenly spaced.

    Finally, work evenly to the desired storage pocket height, changing colors if and when desired.

    Pampering Vanity Set - make a beautiful tray for her vanity - or her craft table! Free pattern set on Moogly!
    Keep it all organized with a Crochet Vanity Tray - customize the size for your own table!

    Crochet Vanity Tray Instructions

    Row 1: With Color A, FSC 40; turn. (40 sts)

    Row 2 - 30: Ch 1, sc in each st across; turn. (40 sts)

    Rnd 31: Ch 1, 2 sc in first st, sc in each st across until 1 st rem, 2 sc in last st of previous row, sc 29 evenly along side of rows, 2 sc in the first foundation ch, sc in each foundation ch until 1 st rem, 2 sc in last foundation ch, sc 29 evenly along remaining side of rows; join with sl st and turn. (142 sts)

    Rnd 32: Ch 1, sc in each st around; join and turn, break Color A. (142 sts)

    Rnd 33 - 36: With Color B, ch 1, sc in each st around; join and turn. After Rnd 36, break Color B. (142 sts)


    And that’s how to make Pampering Vanity Set! It's ready for your own favorite colors - and I can’t wait to see your versions! So if you make this free crochet organizer pattern and you post a photo on social media, be sure to tag me @mooglyblog or #mooglyblog so I can check it out too! And if you're loving the Celebrate Mom Blog Hop, be sure to tag #CelebrateMomBlogHop too!

    Want More Free Crochet Patterns?

    Moogly Red Heart Scrubby Smoothie Free Crochet Patterns

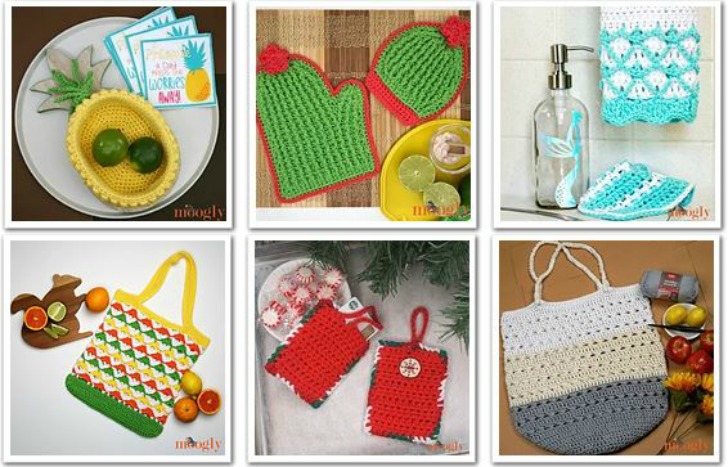
    Looking for more free Red Heart Scrubby Smoothie crochet patterns, or patterns it's perfect for? Here are some great ones!

     Citrus Twist Tote

    Hanging Gift Card Holder

    Perfect Day Market Tote

    Mermaid Bathroom Set

    Pineapple Basket

    Cactus Potholders/Trivets

    or any of these Free Patterns on Ravelry!

    The Fine Print:

    Follow Moogly on Facebook, Twitter, Pinterest, Instagram, and TikTok! Thank you to Red Heart Yarns and Furls for providing the materials shown in this post. Written pattern copyright Tamara Kelly 2019, all rights reserved. Please do not reprint or repost this pattern, however, please do link to this page to share this pattern with others. If you wish to make items for sale from this pattern or translate it to another language, please visit the About page for details.

    Red Heart It's A Wrap Rainbow: Guest Review & Round Up by Jessie At Home!

    May 22, 2019 by Tamara Kelly 5 Comments

    Jessie At Home is a fantastic crochet and knit blog written by one of my dearest friends, Jessie Rayot of Jessie At Home! Jessie and I are both Red Heart Joy Creators, and we are both in love with their It's A Wrap Rainbow yarn! Today, Jessie has put together a wonderful collection of free crochet and knit patterns made with Red Heart It's A Wrap Rainbow!

    It's a Wrap Rainbow review and round up from Jessie At Home - get all these patterns in her Moogly guest post! ♥Disclaimer: This guest post is copyright Jessie At Home, 2019. Used with permission.

    [Read more...]

    Hookin On Hump Day #191: A Yarny Link Party!

    May 21, 2019 by Tamara Kelly 1 Comment

    As we head toward summer this round, I'm noticing a trend - corner to corner crochet! It's been popular for a few years now, but this is the first time I think we've had 3 different C2C patterns to share. Get all 5 of these gorgeous patterns below - and then add your own to the HOHD link party on Moogly and Petals to Picots!

    HOHD 191 - get the links to all these free crochet patterns on Moogly! [Read more...]

    Crochet Every Way Stitch Dictionary Giveaway

    May 20, 2019 by Tamara Kelly 30 Comments

    Crochet Every Way Stitch Dictionary: 125 Essential Stitches to Crochet in Three Ways by Dora Ohrenstein is a brilliant addition to any crocheter's bookshelf and incredibly useful for designers as well! Get a peek inside, and enter to win your own copy on Moogly!

    Crochet Every Way Stitch Dictionary Giveaway on MooglyDisclaimer: This giveaway is sponsored by Abrams Books.
    This post includes affiliate links.

    [Read more...]

    Stitch Up Giveaway

    May 17, 2019 by Tamara Kelly 3 Comments

    Earlier this year I was lucky enough to attend Stitch Up Chicago, and share a crochet workshop and yarn tasting. Today, I get to share a few goodies I picked up at Stitch Up Chicago with one lucky winner - and tell you about their newest event, Stitch Up Brooklyn!

    Stitch Up 2019 Prize PkgDisclaimer: Materials provided by Stitch Up and Brooklyn Boy Knits; all opinions are my own.

    [Read more...]

    MooglyCAL2019 – Afghan Block #10

    May 16, 2019 by Tamara Kelly 12 Comments

    You will never be bored crocheting Block #10 in the MooglyCAL2019 - courtesy of The Lavender Chair! Each round brings something new, exciting, and interesting to this beautiful crochet square!

    MooglyCAL2019 Block 10 by The Lavender ChairDisclaimer: This post includes affiliate links; materials provided by Red Heart Yarns, Furls Crochet, and Chetnanigans. [Read more...]

    Cupcake Tee Tutorial

    May 15, 2019 by Tamara Kelly 9 Comments

    The Cupcake Tee Tutorial demonstrates the stitches and assembly of this simple yet flattering easy crochet top pattern - in right and left-handed video tutorials!

    Cupcake Tee Tutorial - right and left-handed videos on Mooglyblog.com to go with the free crochet pattern in sizes XS - 5X!Disclaimer: This post includes affiliate links; materials provided by Red Heart and Clover USA.

    [Read more...]

    Crochet Themed Coloring Pages Giveaway For All!

    May 13, 2019 by Tamara Kelly 2 Comments

    What's better than giving away Crochet Themed Coloring Pages to one lucky winner? Giving them away to everyone! This week I've got a gorgeous new free crochet themed coloring book by Andee Graves for each and every one of you!

    Crochet Themed Coloring Pages by Andee Graves - free on Moogly!

    [Read more...]

    Cupcake Tee

    May 10, 2019 by Tamara Kelly 53 Comments

    Cupcake Tee - modeled by the designer, free pattern on Mooglyblog.com

    The Cupcake Tee is an easy crochet top pattern featuring a cool mesh fabric and a gorgeous cowl neckline - in sizes Extra Small through 5X, all free on Moogly!

    Disclaimer: This post includes affiliate links; materials provided by Red Heart Yarn and Clover USA.

    Prefer an ad-free PDF? You've got options!

    This button leads to the pattern on Etsy

    Prefer the free blog version? Keep scrolling!

    Light and Breathable Summer Crochet

    The Cupcake Tee is made with Red Heart It's A Wrap Sprinkles, a lightweight cotton-acrylic blend that's perfect for warmer weather. The mesh stitch pattern makes it super breathable, and the cowl neck adds a flattering touch - and keeps the neck cooler too!

    Cupcake Tee - modeled, closeup, get the free pattern on moogly!

    While I made the Cupcake Tee hip length, you can easily make it longer (or shorter) by adding more rows (any multiple of 5) to the back and front waist - it's a simple repeat, and very customizable! You can even add a quick tie belt with your leftover yarn if you like - Easy as cake!

    Cupcake Tee - free pattern in XS to 5X free on Mooglyblog.com!

    I wear a Size 12 or 14, and in these photos, I am modeling the XL size, for an oversized fit. This pattern is quite drapey and flowy, so while the garment laid flat looks a bit short, it grows when you put it on! If you prefer a closer fit in your garments, you may want to go down a size. I like to wear it with a belt - how would you style the Cupcake Tee?


    Cupcake Tee

    Add this pattern to your Ravelry Queue and Favorites

    US - G, 4.0mm hook - Clover Amour

    575-1475 yds Red Heart It's A Wrap Sprinkles (50% cotton, 50% acrylic; 2 - Fine/UK: 5 ply; 5.29oz/150g; 623yds/570m)
    Colorway Shown: Cupcake (2 balls size XS - 3X; 3 balls size 4X - 5X)

    Clover Stitch Markers

    Gauge: 21 sts x 11 rows = 4"/10cm in main st pattern, measured flat and unblocked

    Sizes: XS (S, M, L, XL, 2X, 3X, 4X, 5X) Based on Craft Yarn Council Standards with 4" of positive ease in the chest
    Schematic measurements are given on unblocked gauge.

    Helpful Links & Tutorials

    Summer Sprinkles Tee Tutorial

    Crochet Abbreviations

    Whip Stitch Seaming

    Working Into the Edge

    SCHEMATIC

    Cupcake Tee Schematic - get the free pattern on Moogly!
    ERRATA: The D (Side Seams) above should read:
    D (Side Seams): 9(10.5, 10, 9.5, 9, 10.5, 10, 11.5, 11)"

    NOTES

    Start with a new cake for each half of the top. If you need a second cake to one part of the top, pull from the matching color end.

    Before beginning the Front Chest, place a stitch marker in the side of the last row of the Front Waist so that you can easily restart counting your rows.

    If desired, remove a small portion of the center color before making the Back to use for the bottom hem edge (Assembly Step 3).

    If desired, begin each row with a CSDC instead of a ch 3 for the first dc - click here for a tutorial.

    Cupcake Tee - make this free Moogly pattern with Red Heart It's A Wrap Sprinkles

    INSTRUCTIONS:

    BACK:

    Row 1: Ch 91 (101, 113, 123, 133, 143, 155, 165, 175), dc in the 4th ch from the hook (skipped 3 chs count as first dc), dc in each rem ch across; turn. (89 (99, 111, 121, 131, 141, 153, 163, 173) dc)

    Row 2: Ch 4 (counts as first dc and ch 1), skip next st, dc in next st, *ch 1, skip next st, dc in next st; rep from * to end. (45 (50, 56, 61, 66, 71, 77, 82, 87 dc)

    Row 3 - 5: Ch 4 (counts as first dc and ch 1), skip next ch sp, dc in next st, *ch 1, skip next ch sp, dc in next st; rep from * to end. (45 (50, 56, 61, 66, 71, 77, 82, 87 dc)

    Row 6: Ch 3, *dc in next ch sp, dc in next st; rep from * across; turn. (89 (99, 111, 121, 131, 141, 153, 163, 173) dc)

    Row 7 - 51 (56, 56, 56, 56, 61, 61, 66, 66): Rep Rows 2 - 6; break yarn.

    FRONT WAIST:

    Row 1: Ch 91 (101, 113, 123, 133, 143, 155, 165, 175), dc in the 4th ch from the hook (skipped 3 chs count as first dc), dc in each rem ch across; turn. (89 (99, 111, 121, 131, 141, 153, 163, 173) dc)

    Row 2: Ch 4 (counts as first dc and ch 1), skip next st, dc in next st, *ch 1, skip next st, dc in next st; rep from * to end.  (45 (50, 56, 61, 66, 71, 77, 82, 87 dc)

    Row 3 - 5: Ch 4 (counts as first dc and ch 1), skip next ch sp, dc in next st, *ch 1, skip next ch sp, dc in next st; rep from * to end. (45 (50, 56, 61, 66, 71, 77, 82, 87 dc)

    Row 6: Ch 3, *dc in next ch sp, dc in next st; rep from * across; turn. (89 (99, 111, 121, 131, 141, 153, 163, 173) dc)

    Row 7 - 15 (20, 20, 20, 20, 25, 25, 30, 30): Rep Rows 2 - 6, ending on a Row 5 rep. Do not break yarn, continue with Front Chest.

    FRONT CHEST:

    Row 1: Ch 3, dc in first st, dc in next ch sp, *dc in next st, dc in next ch sp; rep from * until 1 st rem, 2 dc in last st; turn. (91 (101, 113, 123, 133, 143, 155, 165, 175) dc)

    Row 2: Ch 4, dc in next st, *ch 1, skip next st, dc in next st; rep from * until 1 st rem, ch 1, dc in last st; turn. (93 (103, 115, 125, 135, 145, 157, 167, 177) sts including chs)

    Row 3: Ch 3, dc in first st, ch 1, skip ch sp, dc in next st; rep from * until 1 ch sp and 1 st rem, ch 1, skip last ch sp, 2 dc in last st; turn. (95 (105, 117, 127, 137, 147, 159, 169, 179) sts including chs)

    Row 4: Ch 4, dc in next st, *ch 1, skip next ch sp, dc in next st; rep from * until 1 st rem, ch 1, dc in last st; turn. (97 (107, 119, 129, 139, 149, 161, 171, 181) sts including chs)

    Row 5: Rep Row 3. (99 (109, 121, 131, 141, 151, 163, 173, 183) sts including chs)

    Row 6: Rep Row 1. (101 (111, 123, 133, 143, 153, 165, 175, 185) dc)

    Row 7: Ch 3, dc in first st, ch 1, skip next st, dc in next st; rep from * until 2 sts rem, ch 1, skip next st, 2 dc in last st; turn. (103 (113, 125, 135, 145, 155, 167, 177, 187) sts including chs)

    Row 8: Rep Row 4. (105 (115, 127, 137, 147, 157, 169, 179, 189) sts including chs)

    Row 9: Rep Row 3. (107 (117, 129, 139, 149, 159, 171, 181, 191) sts including chs)

    Row 10: Rep Row 4. (109 (119, 131, 141, 151, 161, 173, 183, 193) sts including chs)

    Row 11: Rep Row 1. (111 (121, 133, 143, 153, 163, 175, 185, 195) dc)

    Row 12 - 36: Rep Rows 2 - 11; break yarn. (161 (171, 183, 193, 203, 213, 225, 235, 245) sts in Row 36)

    ASSEMBLY

    Step 1: Seam the sides as shown in the Schematic above (measurement D), leaving the bottom 2" unsewn, and measuring up from those 2".

    Step 2: Seam the shoulders as shown in the Schematic above (measurement C), measuring in from the outer edge of both the Back and Front.

    Step 3: Work sc edgings around the bottom hem, sleeve openings, and neckline.


    And that's how to make the Cupcake Tee! There are so many wonderful colorways of It's A Wrap Sprinkles and It's a Wrap Rainbow (which is also perfect for this pattern) - I can't wait to see your versions! If this free crochet top pattern does inspire you, and you post a photo on social media, be sure to tag me @mooglyblog or #mooglyblog so I can check it out too!

    The Fine Print

    Follow Moogly on Facebook, Twitter, Pinterest, Instagram, and Tumblr! Thank you to Red Heart Yarns and Clover USA for providing the materials shown in this post. Written pattern copyright Tamara Kelly 2019, all rights reserved. Please do not reprint or repost this pattern, but please do link to this page to share this pattern with others. If you wish to make items for sale from this pattern or translate it to another language, please visit the About page for details. 

    Citrus Twist Tote Tutorial

    May 8, 2019 by Tamara Kelly 2 Comments

    The Citrus Twist Tote Tutorial demonstrates some of my favorite tote bag techniques, as well as this gorgeous stitch pattern - in right and left-handed video tutorials!

    Disclaimer: This post includes affiliate links; materials provided by Red Heart and Clover.

    [Read more...]

    Hookin On Hump Day #190: A Yarny Link Party!

    May 7, 2019 by Tamara Kelly 2 Comments

    The weather might be changing but one thing that stays steady is the stream of amazing crochet and knitting created by talented bloggers and designers! Check out all these fabulous designs and projects - all FREE this round! - and then add your own to the HOHD link party on Moogly and Petals to Picots!

    HOHD 190 Featured Patterns on Moogly and Petals to Picots [Read more...]

    Red Heart It's A Wrap Sprinkles Giveaway

    May 6, 2019 by Tamara Kelly 15 Comments

    Red Heart It's A Wrap Sprinkles is one of my favorite new warm-weather yarns - and I get to give away 3 cakes of it here on Moogly!

    Red Heart It's A Wrap Sprinkles Giveaway on MooglyDisclaimer: This post was sponsored by Red Heart Yarn, but all opinions are my own.

    [Read more...]

    Citrus Twist Tote

    May 3, 2019 by Tamara Kelly 9 Comments

    Citrus Twist Tote - free crochet pattern on Moogly

    More and more places are eliminating plastic bags - and with all the wonderful cotton yarn out there, it's so much fun to make your own shopping bags! The Citrus Twist Tote brings a fresh squeeze to the ever popular crochet cotton market bag!

    Disclaimer: This post includes affiliate links; materials provided by Red Heart and Clover.

    Prefer an ad-free PDF? You've got options!

    This button leads to the pattern on Etsy

    Prefer the free blog version? Keep scrolling!

    Fresh and Juicy!

    The Citrus Twist Tote is made with 4 bright colors of Red Heart Scrubby Smoothie that made me think of... well, citrus! But of course, there are 30 gorgeous solids and prints of Scrubby Smoothie to choose from - who want to whip up a Berry Smoothie version? Or something Beachy in cool blues?

    Citrus Twist Tote Bag

    You could even add in some Red Heart Scrubby Cotton for some fun texture! The Citrus Twist Tote features a two-row repeat that's easy to memorize and works up fast. I have included all the row instructions (rather than a general repeat) so you can cross them off as you go - time for some of that "easy summer living", or at least easy summer crocheting!

    Citrus Twist Tote - get the free crochet pattern on Mooglyblog.com!


    Citrus Twist Tote

    Add this pattern to your Ravelry Queue and Favorites

    US - I, 5.5mm - Clover Amour

    300 yds Red Heart Scrubby Smoothie (100% Cotton; “4”/Medium/Worsted/UK: 10-12 ply)
    Color A: Lime (1 ball)
    Color B: White (1 ball)
    Color C: Bright Orange (1 ball)
    Color D: Lemony (1 ball)

    This yarn has been discontinued. Recommended Substitute: Lily Sugar'n Cream

    Clover Stitch Markers

    Gauge: 13 sts x 7 rows = 4"/10cm in dc

    Finished Size: 13" wide x 13.5" tall excluding handles

    Helpful Links & Tutorials:

    Citrus Twist Tote Tutorial

    Crochet Abbreviations

    FDC - Foundation Double Crochet

    Bag Bottoms - Rows to Rounds

    Enclosing Chains - What and How To

    Bag Handles - Placement

    SPECIAL STITCH:

    cluster - tr2tog worked in just one (indicated) st

    NOTES:

    If you would prefer to avoid the FDC stitch, you can create a Row 1 made of 40 dc sts using your preferred method. (eg: ch 42, dc in the 4th ch from the hook and each rem ch across)

    Note that the pattern switches from Rows to Rounds in Rnd 5 - in this round you will crochet all around the rectangle made in Rows 1-4. Please see the Bag Bottoms tutorial linked above for more help if needed.

    To change colors, make the slip stitch to end the previous rnd with the new color.

    You can choose to break your yarn after each color change or to carry it along the inside of the bag. Shown is the latter.

    After placing the stitch markers in Rnd 29 for the handles, be sure to check their placement since everyone's gauge is a little different. Please see the Bag Handles tutorial linked above for more help if needed.

    INSTRUCTIONS:

    Row 1: With Color A, FDC 40, turn. (40 sts)

    Row 2 – 4: Ch 2 (does not count as a st), dc in each st across, turn. (40 sts)

    Rnd 5: Ch 2, dc in each st across,  dc 8 across sides of rows, dc in each st across foundation chain, dc 8 across other sides of rows; join with sl st to 1st dc to work in the round. (96 sts)

    Rnd 6: Ch 2, dc in each st around, join with a sl st to 1st dc. (96 sts)

    Rnd 7: With Color B, ch 1, sc in the first st, *ch 2, skip the next st, sc in the next st, ch 4, skip 5 sts,** sc in the next st; rep from * around, finishing last rep at **, join to first sc with sl st. (12 sc)

    Rnd 8: With Color C, sl st into next ch-2 sp, ch 1, sc in same ch-2 sp, (3 dc, ch 1, 3 dc) in next ch-4 sp, *sc in next ch-2 sp, (3 dc, ch 1, 3 dc) in next ch-4 sp; rep from * around, join. (72 dc, 12 sc)

    Rnd 9: With Color B, ch 3 (does not count as a st), tr in first st, ch 2, *(cluster, ch 4, cluster) in next sc, ch 2; rep from * around, cluster in same st as first tr, ch 4, join to top of tr. (23 clusters, 1 tr)

    Rnd 10: With Color D, sl st into next ch-2 sp, ch 1, sc in ch-1 sp below the ch-2 sp enclosing the ch-2, (3 dc, ch 1, 3 dc) in next ch-4 sp, *sc in ch-1 sp below the ch-2 sp enclosing the ch-2, (3 dc, ch 1, 3 dc) in next ch-4 sp; rep from * around, join. (72 dc, 12 sc)

    Citrus Twist Tote - closeup

    Rnd 11: With Color B, rep Rnd 9.

    Rnd 12: With Color A, rep Rnd 10.

    Rnd 13: With Color B, rep Rnd 9.

    Rnd 14: With Color C, rep Rnd 10.

    Rnd 15: With Color B, rep Rnd 9.

    Rnd 16: With Color D, rep Rnd 10.

    Rnd 17: With Color B, rep Rnd 9.

    Rnd 18: With Color A, rep Rnd 10.

    Rnd 19: With Color B, rep Rnd 9.

    Rnd 20: With Color C, rep Rnd 10.

    Rnd 21: With Color B, rep Rnd 9.

    Rnd 22: With Color D, rep Rnd 10.

    Rnd 23: With Color B, rep Rnd 9.

    Rnd 24: With Color A, rep Rnd 10, break Color A.

    Rnd 25: With Color B, rep Rnd 9.

    Rnd 26: With Color C, rep Rnd 10, break Color C.

    Rnd 27: With Color B, rep Rnd 9, break Color B.

    Rnd 28: With Color D, ch 1, sc in each cluster, enclose each ch-2 with 2 sc worked in the ch-1 sp below, 4 sc in each ch-4 sp around; join. (96 sts)

    Rnd 29: Ch 1, sc in each st around; join. (96 sts) Place stitch markers in sts # 18, 44, 66, 92, and check placement.

    Rnd 30: Ch 1, sc in each st to 1st marker, sc in marked st, ch 70, sc in 2nd marked st skipping sts in between markers, sc in each st to 3rd marker, sc in 3rd marked st, ch 70, sc in 4th marked st skipping sts in between markers, sc in each remaining st around; join. (198 sts including chs)

    Rnd 31: Ch 1, sc in each st and ch around; join. (198 sts)

    Rnd 32 and 33: Ch 1, sc in each st around, join. (198 sts) Break yarn after Rnd 33.

    Extra Bit: Join and sc around inside handle openings if desired.


    Are you ready to go green (or any other color!) with your own Citrus Twist Tote? If this free crochet market bag pattern does inspire you, and you post a photo on social media, be sure to tag me @mooglyblog or #mooglyblog so I can check it out too! I love seeing what you make!

    Citrus Twist Tote

    The Fine Print

    Follow Moogly on Facebook, Twitter, Pinterest, Instagram, and Tumblr! Thank you to Red Heart Yarns and Clover for providing the materials shown in this post. Written pattern copyright Tamara Kelly 2019, all rights reserved. Please do not reprint or repost this pattern, but please do link to this page to share this pattern with others. If you wish to make items for sale from this pattern or translate it to another language, please visit the About page for details. 

    MooglyCAL2019 – Afghan Block #9

    May 2, 2019 by Tamara Kelly 3 Comments

    Fall in love with the rhythm of block #9 in the MooglyCAL2019 - courtesy of Heart Hook Home! This block is a quick and relaxing pattern, perfect for the end of a busy day!

    MooglyCAL2019 Block 9 mainDisclaimer: This post includes affiliate links; materials provided by Red Heart Yarns, Furls Crochet, and Chetnanigans. [Read more...]

    Yarn Love: Red Heart It's A Wrap Sprinkles

    May 1, 2019 by Tamara Kelly 2 Comments

    Red Heart It's A Wrap Sprinkles is a lightweight yarn that features one of my favorite fiber blends - as well as incredible yardage! Let's take a closer look at the gorgeous new yarn in this month's Moogly Yarn Love yarn review - and get some free patterns to make with it!

    Yarn Love- Red Heart It's A Wrap SprinklesDisclaimer: This post was sponsored by Red Heart Yarn, but all opinions are my own.
    This post includes affiliate links.

    [Read more...]

    Essential Baby Sweater Tutorial

    April 30, 2019 by Tamara Kelly 5 Comments

    The Essential Baby Sweater Tutorial demonstrates just how easy it is to make this free crochet sweater - in right and left-handed video tutorials!

    Essential Baby Sweater Tutorial on MooglyDisclaimer: This post includes affiliate links; materials provided by Red Heart and Furls.

    [Read more...]

    Makerly Box Giveaway

    April 29, 2019 by Tamara Kelly 5 Comments

    Subscription boxes are so much fun - I love getting happy mail! Makerly is a fab monthly subscription box for craft lovers that I checked out recently - and they are giving away a 3 month Gift Subscription to one lucky Moogly reader!

    Makerly Giveaway on MooglyDisclaimer: This post was sponsored by Makerly but all opinions are my own.

    [Read more...]

    Essential Baby Sweater

    April 26, 2019 by Tamara Kelly 15 Comments

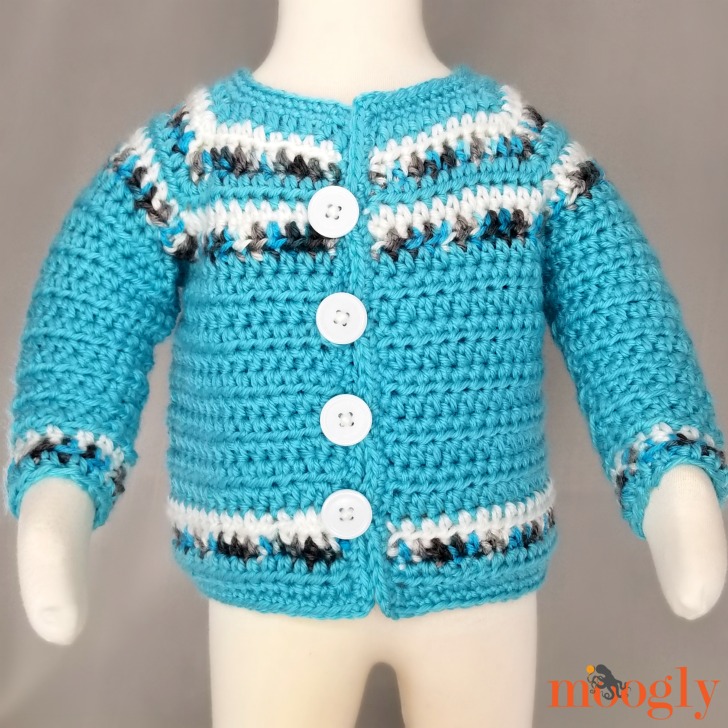
    Essential Baby Sweater - front, modeled

    The Essential Baby Sweater is that go-to, easy-peasy, every baby shower gift crochet pattern. It's simple, basic, totally unisex - and super customizable! Read on for this free Moogly baby cardigan crochet pattern!

    Disclaimer: Materials provided by Red Heart and Clover USA; this post includes affiliate links.

    Prefer an ad-free PDF? You've got options!

    This button leads to the pattern on Etsy

    Prefer the free blog version? Keep scrolling!

    A Baby Sweater for Beginner Crocheters

    To design the Essential Baby Sweater, I used Red Heart Soft Essentials Baby - a super soft yarn in fab colors perfect for babies, that you can mix and match with the other Soft Essentials options!

    Essential Baby Sweater with yarn and hook

    I tried to keep the stitching just as simple as possible - this baby cardigan pattern includes just chains, half double crochets, and single crochets. There aren't even any increase or decrease stitches! This is a great baby crochet pattern for beginners - and a super quick go-to pattern for all your baby shower invites!

    Essential Baby Sweater - three quarters shot

    Since the stitches of the Essential Baby Sweater are so simple, you can have a lot of fun with the colors! Adding a stripe of white and another of variegated yarn almost creates a faux fair isle look - but you can go solid, change colors every row, whatever you like! The possibilities are endless.

    Essential Baby Sweater - free crochet pattern on Moogly!


    Essential Baby Sweater

    Add this pattern to your Ravelry Queue and Favorites

    US-J, 6.0mm hook - Furls Streamline

    230 yds Red Heart Soft Essentials Baby (4 - Medium; 100% Acrylic)
    Color A: Aqua Sky (less than 1 ball)
    Color B: Cotton (less than 1 ball)
    Color C: Blue Horizon (less than 1 ball)

    This yarn is discontinued. Recommended substitutes: Caron Big Cakes, Red Heart Super Saver, Bernat Super Value, Red Heart Soft Baby Steps

    4 Buttons - ⅞"

    Clover Stitch Markers

    Gauge: 12 sts x 10 rows = 4"/10cm in hdc

    Size: 0-6 mths

    Helpful Links and Tutorials:

    Essentials Baby Sweater Tutorial

    Crochet Abbreviations

    Hdc – half double crochet

    Changing colors for striped patterns

    How to crochet armholes in a top-down sweater

    Working into the edge

    Slip Stitches you can crochet into

    How to sew on buttons with yarn

    SPECIAL STITCH:

    Make Corner - 3 hdc in the indicated st, place a st marker in the center of the 2nd hdc.

    NOTE:

    The sleeves on this sweater are made in turned rounds, or joined rows. This means that the even-numbered rows are worked from the inside of the sleeve.

    In Rnd 2 of the Button Holes and Final Edging, the ch-5 button loop may need to be adjusted for your button choice - be sure to check before you finish.

    Odd Rows = Right Side (RS); Even Rows = Wrong Side (WS)

    INSTRUCTIONS:

    Row 1: With Color A, ch 43, hdc in the 2nd ch from hook, hdc in the next 6 ch, make corner in the next ch, hdc in the next 6 ch, make corner in the next ch, hdc in the next 12 ch, make corner in the next ch, hdc in the next 6 ch, make corner in the next ch, hdc in the last 7 ch finishing last st with Color B; turn. (50 sts)

    Row 2: With Color B, ch 1, hdc in the first 8 sts, make corner (move st marker up from previous row), hdc in the next 8 sts, make corner, hdc in the next 14 sts, make corner, hdc in the next 8 sts, make corner, hdc in the last 8 sts finishing last st with Color C; turn. (58 sts)

    Row 3: With Color C,  ch 1, hdc in the first 9 sts, make corner, hdc in the next 10 sts, make corner, hdc in the next 16 sts, make corner, hdc in the next 10 sts, make corner, hdc in the last 9 sts finishing last st with Color A; turn. (66 sts)

    Row 4: With Color A, ch 1, hdc in the first 10 sts, make corner, hdc in the next 12 sts, make corner, hdc in the next 18 sts, make corner, hdc in the next 12 sts, make, hdc in the last 10 sts finishing last st with Color B; turn. (74 sts)

    Row 5: With Color B, ch 1, hdc in the first 11 sts, make corner, hdc in the next 14 sts, make corner, hdc in the next 20 sts, make corner, hdc in the next 14 sts, make corner, hdc in the last 11 sts finishing last st with Color C; turn. Break Color B. (82 sts)

    Row 6: With Color C, ch 1, hdc in the first 12 sts, make corner, hdc in the next 16 sts, make corner, hdc in the next 22 sts, make corner, hdc in the next 16 sts, make corner, hdc in the last 12 sts finishing last st with Color A; turn. Break Color C. (90 sts)

    Row 7: With Color A, ch 1, hdc in the first 13 sts, hdc in the marked st (remove 1st marker), ch 5, skip 18 sts, hdc in next marked st (remove 2nd marker), hdc in the next 24 sts, hdc in the next marked st (remove 3rd marker), ch 5, skip 18 sts, hdc in last marked st (remove 4th marker), hdc in the last 13 sts; turn. (54 hdc and 10 ch)

    Row 8: Ch 1, hdc in each st and ch across; turn. (64 sts)

    Row 9 - 17: Ch 1, hdc in each st across; turn. Finish last st of Row 17 with Color B. (64 sts)

    Row 18: With Color B, rep Row 9, finishing last st with Color C, break Color B. (64 sts)

    Row 19: With Color C, rep Row 9, finishing last st with Color A, break Color C. (64 sts)

    Row 20: With Color A, rep Row 9, break Color A. (64 sts)

    Add Sleeves (Repeat for both armholes):

    Rnd 1: With Color A, from RS of sweater, join to center st of the armpit (bottom of armhole), ch 1, hdc 27 sts evenly around arm opening; join and turn. (27 sts)

    Rnd 2: Ch 1, hdc in each st around until 1 st rem, skip last st; join. (26 sts)

    Rnd 3 - 14: Repeat Rnd 2. Finish last st of Row 14 with Color B.

    Rnd 15: With Color B, ch 1, hdc in each st around; join and turn finishing last st with Color C, break Color B. (14 sts)

    Rnd 16: With Color C, rep Rnd 15 finishing last st with Color A, break Color C. (14 sts)

    Rnd 17: With Color A, rep Rnd 15; break Color A. (14 sts)

    Button Holes and Final Edging:

    Before beginning the next Round, plan the placement of your button loops and mark with a stitch marker. Note that the buttons and loops as shown are the boy's version - switch the buttons and loops to the opposite edges for a girl's version. 

    Essentials Baby Sweater - button placement demo

    Rnd 1: With Color A, join to any st at back of neck, ch 1, sc in each st to front opening, ch 2, sl st along front edge, ch 2, sc in each st at bottom hem, ch 2, sl st along other side of front edge, ch 2, sc in each rem st at neck; join. Recheck placement of st markers for button loops, and move markers to sl sts.

    Rnd 2: Ch 1, sc in each st, (sc, ch 2, sc) in each ch-2 corner, and (sc, ch 5, sc) in each marked st; join and break.

    Sew on buttons opposite the button loops. See tutorial linked above, or use matching thread.


    I hope you like this free crochet baby sweater pattern! I tried to make it easy and straight-forward, but still flexible. I can't wait to see all the fun things you all do with this free baby cardi crochet pattern!

    Essential Baby Sweater - back view

    Ready to make your own Essential Baby Sweater? If this free crochet cardigan pattern does inspire you, and you post a photo on social media, be sure to tag me @mooglyblog or #mooglyblog so I can check it out too! I love seeing what you make!

    The Fine Print

    Follow Moogly on Facebook, Twitter, Pinterest, Instagram, and more! Thank you to Red Heart Yarns and Furls for providing the materials shown in this post. Written pattern copyright Tamara Kelly 2019, all rights reserved. Please do not reprint or repost this pattern, but please do link to this page to share this pattern with others. If you wish to make items for sale from this pattern or translate it to another language, please visit the About page for details. 

    Paloma Cardigan Tutorial

    April 25, 2019 by Tamara Kelly 7 Comments

    The Paloma Cardigan Tutorial shows off all the stitches, tips, and tricks that make this free crochet sweater - in right and left-handed video tutorials!

    Paloma Cardigan Tutorial - on Mooglyblog.com
    Disclaimer: This post includes affiliate links; materials provided by Red Heart and Clover USA.

    [Read more...]

    Facebook & YouTube Live: April 2019 - Crochet Hooks

    April 24, 2019 by Tamara Kelly Leave a Comment

    Time to finish out another month of Moogly madness! See what new patterns, tutorials, and giveaways are available, and get a peek at what's to come! Plus, this afternoon I'll be talking all about one of our most important tools - crochet hooks!

    Moogly Lives April 2019Disclaimer: This post is sponsored by Red Heart Yarn, and contains affiliate links. Live videos are unscripted and all opinions are my own.

    [Read more...]

    Furls Peach Odyssey Giveaway

    April 23, 2019 by Tamara Kelly 64 Comments

    Furls makes premium, luxury, ergonomic hooks - and the latest additions to the collection are the new Furls Odysseys in Peach - with both Rose Gold and Nickel tips! And I get to give one (or two!) of these gorgeous crochet hooks away on Moogly!

    Furls Odyssey Peach Giveaway - on Moogly! Open to US addresses, ends 5/13/19 at 12:15am US Central Time.Disclaimer: This post was sponsored by Furls, but all opinions are my own. This post includes affiliate links.

    [Read more...]

    Dinky Loves No More Dry Hands Giveaway

    April 22, 2019 by Tamara Kelly 7 Comments

    As wonderful as yarn is, it can be very drying! Dinky Loves creates gorgeous handmade soaps, creams, and lotions perfect for taking care of our hands (and the rest of our skin) - so let's treat our hands right with this giveaway on Moogly!

    Dinky Loves Giveaway on Moogly!Disclaimer: This post was sponsored by Dinky Loves Bath & Body LLC, but all opinions are my own; affiliate links included.

    [Read more...]

    Paloma Cardigan

    April 19, 2019 by Tamara Kelly 29 Comments

    Paloma Cardigan - modeled in size large/xl, free pattern on Mooglyblog.com

    The Paloma Cardigan is a jacket style sweater with three quarter length sleeves and mesh shoulders that stretch down the sleeves to make this free crochet cardi pattern perfect year round!

    Disclaimer: This post includes affiliate links; materials provided by Red Heart Yarns & Clover USA.

    Prefer an ad-free PDF? You've got options!

    Prefer the free blog version? Keep scrolling!

    Versatile for Every Day

    Made with Red Heart Amore Yarn (so soft!) and a Clover Amour crochet hook (so comfy!), the Paloma Cardigan is a quick and easy topper that you can throw on over jeans and a tank or a pretty dress - any time you need a little extra warmth.

    Paloma Cardigan - in sizes up to 5X on Moogly!

    This free crochet cardigan pattern features a V stitch mesh over the shoulders that is tapered in the sleeves and carried right down to the cuff. This adds a little extra breathability to the pattern - great for days that are all about layers!

    Paloma Cardigan - flatlay

    The Paloma Cardigan is made with positive ease, but it's not bulky or super oversized - great for active days, running errands, or even a night out on the town!

    Paloma Cardigan - modeled in size large/xl, free pattern on Moogly

    The Paloma Cardigan crochet pattern includes instructions for sizes Small to 5X, and can be made in a week - or a long weekend!

    Paloma Cardigan - free crochet pattern in sizes Small to 5X on Moogly!


    Paloma Cardigan

    Add this pattern to your Ravelry Queue and Favorites or purchase the Ad-Free PDF!

    US - I, 5.5mm Clover Amour Crochet Hook

    875-1675 yds Red Heart Amore (“4”/Worsted/ UK: 10-12 ply; 198 yds/181 m; 3.5 oz/100 g)
    Colorway Shown: Chamomile (5(6, 8, 9) balls)

    This yarn has been discontinued. Suggested substitutions: Bernat Bundle Up, Lion Brand Mandala Gradient

    Clover Stitch Markers

    Gauge: 14 sts x 8 rows = 4"/10cm in flo exhdc

    Sizes: Small/Medium (Large/XL; 2X/3X; 4X/5X)
    Sizing is based on the Craft Yarn Council Standards, Large/XL shown

    Paloma Cardigan - Yarn and Hook

    Helpful Links and Tutorials:

    Paloma Cardigan Tutorial

    Crochet Abbreviations

    FDC - Foundation Double Crochet

    FLO - Front Loop Only

    Exhdc - Extended Half Double Crochet

    CSDC - Chainless Starting Double Crochet

    How to Extend a Row with Foundation Sts

    How to Join with dc (Standing Double Crochet)

    Mattress Stitch Seaming

    Fpdc/Bpdc - Front Post/Back Post Double Crochet

    Special Stitch:

    V st - (dc, ch 1, dc) in the indicated stitch or ch sp

    NOTES:

    When the instructions for the sizes are different, they are listed as Small/Medium (Large/XL; 2X/3X; 4X/5X). It is recommended that you print a copy of this pattern and circle or highlight correct numbers for your size.

    For ease of use, the Row/Rnd numbers restart with each new sweater section.

    If you prefer not to use Foundation Stitches, you can begin with a chain that you dc into for the first row.

    If you prefer not to use the CSDC stitch, you can substitute a ch 3 and use that as the first dc.

    The sleeves (not including the cuffs) are worked in turned rounds, so even numbered rows will be worked from "inside" the sleeve. This is important to maintain the look of the stitches and to keep the joining seam under the arm straight.

    INSTRUCTIONS

    BACK WAIST:

    Row 1 (Wrong Side): FDC 74(89, 101, 116); turn. (74(89, 101, 116) sts)

    Rows 2 - 20(20, 22, 22): CSDC in the first st, FLO exhdc across until 1 st rem, dc in the last st; turn. (74(89, 101, 116) sts)

    BACK SHOULDERS:

    Row 1: Sl st in the first 4(4, 7, 7) sts, CSDC in the same st as the last sl st, FLO exhdc until 4(4, 7, 7) sts rem, dc in next st, rem sts left unworked; turn. (68(83, 89, 104) dc)

    Rows 2 - 7(9, 11, 13): CSDC in the first st, FLO exhdc across until 1 st rem, dc in the last st; turn. (68(83, 89, 104) dc)

    BACK MESH:

    Row 1: CSDC in the first st, skip the next st, FLO V st in next st, *skip 2 sts, FLO V st in next st; rep from * across until 2 sts rem, skip the next st, dc in the last st; turn. (22(27, 29, 34) V sts)

    Rows 2 - 10: CSDC in the first st, V st in the ch-1 sp of each V st across, dc in the last st; turn. (22(27, 29, 34) V sts) Place st marker in dc # 22(28, 30, 34) of the last row.

    LEFT FRONT MESH (will be Right Front if Left-Handed):

    Row 1: CSDC in the first st, V st in the ch-1 sp of the first 10(13, 14, 16) V sts, skip the next dc (last part of V st just crocheted into), dc in the next dc, rem sts left unworked; turn. (10(13, 14, 16) V sts)

    Rows 2 - 10: CSDC in the first st, V st in the ch-1 sp of each V st across, dc in the last st; turn. (10(13, 14, 16) V sts)

    LEFT FRONT SHOULDER:

    Row 1: CSDC in the first st, FLO exhdc in each st and ch across until 1 st rem, dc in the last st; turn. (32(41, 44, 50) sts)

    Rows 2 - 7(9, 11, 13): CSDC in the first st, FLO exhdc across until 1 st rem, dc in the last st; turn. (32(41, 44, 50) sts)

    LEFT FRONT WAIST:

    Row 1: CSDC in the first st, FLO exhdc across previous row, extend row with 3(3, 6, 6) FDC; turn. (35(44, 50, 56) sts)

    Rows 2 - 20(20, 22, 22): CSDC in the first st, FLO exhdc across until 1 st rem, dc in the last st; turn. (35(44, 50, 56) sts) Break yarn after last row.

    RIGHT FRONT MESH (will be Left Front if Left-Handed):

    Row 1: Join with dc in marked st of Back Mesh Row 10, V st in the ch-1 sp of each rem V sts across, dc in the last st; turn. (10(13, 14, 16) V sts)

    Rows 2 - 10: CSDC in the first st, V st in the ch-1 sp of each V st across, dc in the last st; turn. (10(13, 14, 16) V sts)

    RIGHT FRONT SHOULDER:

    Row 1: CSDC in the first st, FLO exhdc in each st and ch across until 1 st rem, dc in the last st; turn. (32(41, 44, 50) sts)

    Rows 2 - 7(9, 11, 13): CSDC in the first st, FLO exhdc across until 1 st rem, dc in the last st; turn. (32(41, 44, 50) sts)

    RIGHT FRONT WAIST:

    Row 1: Ch 5(5, 8, 8), dc in 3rd ch from the hook (skipped chs do not count as a st), exhdc in each rem ch, FLO exhdc across previous row until 1 st rem, dc in last st; turn. (35(44, 50, 56) sts)

    Rows 2 - 20(20, 22, 22): CSDC in the first st, FLO exhdc across until 1 st rem, dc in the last st; turn. (35(44, 50, 56) sts) Break yarn after last row.

    SEAM THE SIDES:

    Using the mattress stitch, seam the sides of the rows in the Waist sections, leaving the Shoulders and Mesh unsewn for the armholes.

    Paloma Cardigan - sleeve detail

    SLEEVES (REPEAT FOR BOTH ARMHOLES):

    Rnd 1: From Right Side of sweater, join to bottom center of armhole opening, exhdc in each st, 2 exhdc in the side of each FLO exhdc row, V st in the side of every other V st row, 2 exhdc in the side of each FLO exhdc row, exhdc in each st; join and turn. (10 V sts)

    Rnds 2 - 5: Ch 2 (does not count as a st), FLO exhdc in each exhdc st, 3 exhdc in ch-1 sp of first V st, V st in the ch-1 sp of each V st across until 1 V st rem, 3 exhdc in ch-1 sp of last V st, FLO exhdc in each rem exhdc st until 1 st rem, skip the last st; join to first exhdc and turn.

    Rnd 6: Ch 2, FLO exhdc in each exhdc st, V st in the ch-1 sp of each V st, FLO exhdc in each rem exhdc st until 1 st rem, skip the last st; join and turn.

    Rnds 7 - 24(24, 26, 26): Rep Rnd 6.

    CUFF (REPEAT FOR BOTH SLEEVES): 

    Rnd 1: Ch 1, sc in each st and ch around; join, do NOT turn.

    Rnd 2: Ch 1, *fpdc in next st, bpdc in next st; rep from * around, if 1 st rem, skip it; join.

    Rnd 3: Ch 1, *fpdc in next st, sc in next st; rep from * around and join.

    Rnd 4: Sl st in each st around; join and break yarn.

    BOTTOM HEM:

    Row 1: From Right Side of sweater, join to first st at bottom edge with dc, dc in each rem st across last row of Front Waist, foundation chain of Back Waist, and last row of Front Waist; turn.

    Row 2: Ch 1, sc in the first st, *bpdc in the next st, fpdc in the next st; rep from * across until 1-2 sts rem; if 1 st rem, sc in last st and turn; if 2 sts rem, bpdc in next st, sc in last st, and turn.

    Rows 3 and 4: Ch 1, sc in first st, maintain post st pattern to last st, sc in last st; turn.

    FINAL EDGING:

    Rnd 1: Ch 1, sc across the previous row, ch 2, sc in side of each Bottom Hem row, *ch 1, sc in the side of the next row; rep from * across entire front opening to opposite side of Bottom Hem rows, sc in side of each Bottom Hem row, ch 2, join to first sc.

    Rnd 2: Ch 1, sc each st to corner, (sc, ch 2, sc) in ch-2 sp, sc in each st and ch-1 sp across front opening to next corner, (sc, ch 2, sc) in ch-2 sp; join and break yarn.


    And that's how to crochet the Paloma Cardi! It's really pretty simple, with lots of possibilities for customization! I hope you like it!

    Paloma Cardigan - box beauty shot

    Ready to make your own Paloma Cardigan? If you post a photo on social media, be sure to tag me @mooglyblog or #mooglyblog so I can check it out too! I love seeing what you make!

    The Fine Print

    Follow Moogly on Facebook, Twitter, Pinterest, Instagram, and TikTok! Thank you to Red Heart Yarns and Clover USA for providing the materials shown in this post. Written pattern copyright Tamara Kelly 2019, all rights reserved. Please do not reprint or repost this pattern, but please do link to this page to share this pattern with others.

    If you wish to make items for sale from this pattern or translate it to another language, please visit the About page for details. 

    MooglyCAL2019 – Afghan Block #8

    April 18, 2019 by Tamara Kelly 12 Comments

    Up next at number 8 in the MooglyCAL2019 is the Strawberry Blossom Afghan Square by Julie Yeager! Julie is known for her gorgeous squares, so it's always exciting to get to make one of her designs - including this free crochet block pattern!

    MooglyCAL2019 Block #8 by Julie YeagerDisclaimer: This post includes affiliate links; materials provided by Red Heart Yarns, Furls Crochet, and Chetnanigans. [Read more...]

    Benevolent Bumble Bee Tutorial

    April 17, 2019 by Tamara Kelly 6 Comments

    The Benevolent Bumble Bee Tutorial will demonstrate all the tricky bits of this simple amigurumi style crochet bee pattern - in right and left-handed video tutorials!

    Benevolent Bumble Bee Tutorial
    Disclaimer: This post includes affiliate links; materials provided by Red Heart and Brittany.

    [Read more...]

    Hookin On Hump Day #189: A Yarny Link Party!

    April 16, 2019 by Tamara Kelly 2 Comments

    Spring has definitely sprung on Hookin On Hump Day - we've got chicks and bunnies, and a couple scarves for those lingering chilly breezes. And while I wouldn't call it an Easter miracle, it's pretty nice that all the patterns this week are free! Check out all these fabulous designs - and then add your own to the HOHD link party on Moogly and Petals to Picots!

    HOHD 189 SM [Read more...]

    OttLite Organize LED Desk Lamp Giveaway

    April 15, 2019 by Tamara Kelly 10 Comments

    The OttLite Organize LED Desk Lamp is a handy new lamp with storage space and light that's easy on the eyes - and great for crafting by! And I get to give one away here on Moogly!

    OttLite Organize LED Desk Lamp Giveaway on MooglyDisclaimer: This post was sponsored by OttLite, but all opinions are my own. This post includes affiliate links.

    [Read more...]

    A Hyperbolic Easter: Guest Pattern by Andee Graves

    April 11, 2019 by Tamara Kelly 2 Comments

    Andee Graves is a brilliant designer, with patterns in a variety of magazines and books, on yarn sites, and on her blog Mamas2Hands Designs. And today she is sharing her pattern for Hyperbolic Easter Grass in a guest post here on Moogly! Thank you so much, Andee! Be sure to also check out the linked pattern below for the basket!

    1 - Happy Spring Basket - Andee Graves M2H DesignsDisclaimer: This pattern is copyright Andee Graves, used with permission. This post may include affiliate links. 

    [Read more...]

    Clover Amour Crochet Hooks - Check This Out!

    April 9, 2019 by Tamara Kelly 15 Comments

    This week's Moogly Giveaway is special - a Clover Amour Crochet Hooks Set! But it's not here...

    Clover Amour Crochet Hook Set with Red Heart Amour Yarn and Clover Quick Lock Stitch MarkersDisclaimer: This post is sponsored by Clover USA.

    [Read more...]

    Benevolent Bumble Bee

    April 8, 2019 by Tamara Kelly 14 Comments

    Benevolent Bumble Bee - on chair

    The Benevolent Bumble Bee is big, sweet, and ready for a cuddle - no stings, I promise! Make one for someone special with this free crochet pattern on Moogly!

    Disclaimer: This post includes affiliate links; materials provided by Fairfield, Red Heart, and Brittany.

    Prefer an ad-free PDF? You've got options!

    This button leads to the pattern on Etsy

    Prefer the free blog version? Keep scrolling!

    Part of the CAL Central Softie Crochet Along

    I designed the Benevolent Bumble Bee with the design help of my daughter - even at 17, she has some firm opinions on what's cute in a softie! ♥

    This pattern is also part of the CAL Central 2019 Softie Crochet Along, hosted on Underground Crafter! To share your projects be sure to use #CALCentral and #fairfieldworld! And there are prizes too, from Fairfield, Search Press North America, Clover USA, and MorgansMane!

    Softie CAL with Underground Crafter

    The Benevolent Bumble Bee is made with Red Heart With Love and stuffed with Fairfield Poly-fil. By holding the yarn doubled, and using a small hook, the fabric is tight enough to stuff without needing any sort of fabric lining.

    Benevolent Bumble Bee - front

    This pattern is also made amigurumi style (but so big!) - the rounds are worked in spirals, with no joins. This prevents that tell-tale seem, but you'll also want to have stitch markers on hand to mark the first stitch of each round. Believe me, you don't want to skip it, especially when working with black yarn!

    Benevolent Bumble Bee - side

    The Benevolent Bumble Bee does feature appliqued on facial features and feet - so if you make it for a child under age 3, you may want to skip the feet altogether and embroider on the facial features instead. Of course, this product has not been legally or officially child safety tested, so though it won't fit through a toilet paper tube, please use all appropriate caution.

    Benevolent Bumble Bee - free crochet pattern on Moogly


    Benevolent Bumble Bee - polyfil, ready for stuffingBenevolent Bumble Bee

    Add this pattern to your Ravelry Queue and Favorites!

    US-I, 5.5mm hook – Brittany Hooks

    650 yds Red Heart With Love (100% Acrylic; “4”/Medium/Worsted/Aran/UK: 10-12 ply)
    Color A: Daffodil (1 skein)
    Color B: Black (1 skein)
    Color C: White (just a few yards)
    Color D: Holly Berry (just a few yards)

    Fairfield Poly-fil, 20oz (1 bag)

    Clover Stitch Markers

    Gauge: Rnd 7 of Body = 4"/10cm across
    Note that gauge is not important for this pattern, just make sure your stitches are very tight so stuffing won't escape.

    Finished Size: approximately 12" long x 11" wide x 12" tall including wings

    Helpful Links & Tutorials:

    Benevolent Bumble Bee Tutorial

    Crochet Abbreviations

    Magic Circle

    Seamless Join

    Invisible Decrease

    NOTES:

    For portions of this pattern, the yarn is held doubled. You can pull from both ends of a skein, or use 2 skeins at once.

    This pattern is worked in a spiral - do not join at the end of each round, and use a stitch marker to mark the first stitch of each round.

    All decreases were made using the invisible decrease - see the tutorial above.

    It's easiest to make the "add-ons" first, but if you choose not to do so, then make them after Rnd 42 of the body.

    Do not forget to start firmly stuffing the bee before the hole gets too small!

    INSTRUCTIONS:

    EYES (Make 2, use 1 strand of Color B):

    Rnd 1: Make a magic circle, ch 1, work 6 sc in the ring; pull end to close the ring. (6 sc)

    Rnd 2: 2 sc in each st around. (12 sc)

    Rnd 3: *Sc in next st, 2 sc in next st; rep from * around. (18 sc) Break yarn and seamless join to first st, leaving long tails for sewing.

    With Color C and a yarn needle, sew on white "glimmer" as shown. Set eyes aside.

    HEARTS (Make 2, use 1 strand of Color D):

    Rnd 1: Make a magic circle, work into the ring 3 dc, 4 hdc, dc, 4 hdc, 3 dc, ch 1, sl st in ring and break yarn, leaving long tails for sewing. Set hearts aside.

    WINGS (Make 2, use 2 strands of Color C):

    Rnd 1: Make a magic circle, work into the ring 3 dc, 4 hdc, dc, 4 hdc, 3 dc, ch 1, sl st in ring.

    Rnd 2: ch 1, hdc in first st, 2 hdc in each of next 3 sts, hdc 7, 2 hdc in each of next 3 sts, hdc in last st, ch 2, sl st in sl st, break yarn, leaving long tails for sewing.

    Assembly: Sew wings together at the base. Set wings aside.

    FEET (Make 4, use 2 strands of Color B):

    Rnd 1: Make a magic circle, ch 1, work 6 sc in the ring; pull end to close the ring. (6 sc)

    Rnd 2: 2 sc in each st around. (12 sc)

    Rnd 3 - 5: Sc in each st around. (12 sc) Break yarn and seamless join to first st, leaving long tails for sewing. Set feet aside.

    BODY (Begin with 2 strands of Color A):

    Rnd 1: Make a magic circle, ch 1, work 6 sc in the ring; pull end to close the ring. (6 sc)

    Rnd 2: 2 sc in each st around. (12 sc)

    Rnd 3: *Sc in next st, 2 sc in next st; rep from * around. (18 sc)

    Rnd 4: *2 sc in next st, sc in next 2 sts; rep from * around. (24 sc)

    Rnd 5: *Sc in the next 2 sts, 2 sc in the next st, sc in the next st; rep from * around. (30 sc)

    Rnd 6: *2 sc in the next st, sc in the next 5 sts; rep from * around. (35 sc)

    Rnd 7: [Sc in the next 3 sts, 2 sc in the next st, sc in the next 2 sts] 5 times, sc in the next 3 sts, 2 sc in the next st, sc in the next st. (41 sc)

    Rnd 8: Sc in the next 5 sts, 2 sc in the next st, *sc in the next 6 sts, 2 sc in the next st; rep from * around. (47 sc)

    Rnd 9: [Sc in the next 4 sts, 2 sc in the next st, sc in the next 4 sts] 5 times, sc in the next 2 sts. (52 sc)

    Rnd 10: Sc in the next st, [2 sc in the next st, sc in the next 9 sts] twice, sc in the next st, [2 sc in the next st, sc in the next 9 sts] thrice. (57 sc)

    Rnd 11: [Sc in the next 9 sts, 2 sc in the next st, sc in the next 8 sts, 2 sc in the next st] thrice. (63 sc)

    Rnd 12: Sc in the next 5 sts, [2 sc in the next st, sc in the next 11 sts] 4 times, 2 sc in the next st, sc in the next 9 sts. (68 sc)

    Rnd 13: *Sc in the next 16 sts, 2 sc in the next st; rep from * around. (72 sc)

    Rnd 14: Sc in the next 7 sts, [2 sc in the next st, sc in the next 13 sts, 2 sc in the next st, sc in the next 14 sts] twice, 2 sc in the next st, sc in the next 6 sts. (77 sc)

    Rnd 15: Sc in the next st, *2 sc in the next st, sc in the next 18 sts; rep from * around. (81 sc)

    Rnd 16: Sc in the next 10 sts, [2 sc in the next st, sc in the next 15 sts] four times, 2 sc in the next st, sc in the next 6 sts. (86 sc)

    Rnd 17: Sc in the next 17 sts, [2 sc in the next st, sc in the next 20 sts] thrice, 2 sc in the next st, sc in the next 5 sts. (90 sc)

    Rnd 18: *2 sc in the next st, sc in the next 29 sts, rep from * around, break yarn and seamless finish. (93 sc)

    Rnd 19: With Color B, join to a st near the last st of the previous rnd, *sc in the next 22 sts, 2 sc in the next st; rep from * until 1 st rem, sc in next st. (97 sc)

    Rnd 20: Sc in the next st, *sc in the next 31 sts, 2 sc in the next st; rep from * around. (100 sc)

    Rnd 21: Sc in the next 10 sts, [2 sc in the next st, sc in the next 32 sts] twice, 2 sc in the next st, sc in the next 23 sts. (103 sc)

    Rnd 22: *2 sc in the next st, sc in the next 33 sts; rep from * until 1 st rem, sc in the next st. (106 sc)

    Rnd 23 - 30: Sc in each st around; at the end of Rnd 30, break yarn and seamless join.

    Rnd 31: With Color A, join to a st near the last st of the previous rnd, ch 1, sc in each st around. (106 sc)

    Rnd 32 - 39: Rep Rnd 23, do not break yarn.

    Rnd 40: Sc in the next st, *sc in the next 33 sts, sc2tog; rep from * around. (103 sc)

    Rnd 41: Sc in the next 10 sts, [sc2tog, sc in the next 32 sts] twice, sc2tog, sc in the next 23 sts. (100 sc)

    Rnd 42: *Sc2tog, sc in the next 31 sts; rep from * until 1 st rem, sc in next st; break yarn and seamless join. (97 sc)

    SEW on the Eyes, Hearts, and Wings as shown or as desired. And don't forget to stuff!

    Rnd 43: With Color B, join to a st near the last st of the previous rnd, sc in the next st, *sc in the next 22 sts, sc2tog; rep from * around. (93 sc)

    Rnd 44: *Sc2tog, sc in the next 29 sts; rep from * around. (90 sc)

    Rnd 45: *Sc in the next 13 sts, sc2tog; rep from * around. (84 sc)

    Rnd 46: Sc in the next 6 sts, [sc2tog, sc in the next 12 sts] 5 times, sc2tog, sc in the next 6 sts. (78 sc)

    Rnd 47: Sc in the next 2 sts, [sc2tog, sc in the next 11 sts] 5 times, sc2tog, sc in the next 9 sts. (72 sc)

    Rnd 48: Sc in the next 8 sts, [sc2tog, sc in the next 10 sts] 5 times, sc2tog, sc in the next 2 sts. (66 sc)

    Rnd 49: Sc in the next 4 sts, [sc2tog, sc in the next 9 sts] 5 times, sc2tog, sc in the next 5 sts. (60 sc)

    Rnd 50: *Sc2tog, sc in the next 8 sts; rep from * around. (54 sc)

    Rnd 51: Sc in the next 6 sts, [sc2tog, sc in the next 7 sts] 5 times, sc2tog, sc in the next st. (48 sc)

    Rnd 52: *Sc in the next 10 sts, sc2tog; rep from * around. (44 sts)

    Rnd 53: Sc in the next 4 sts, [sc2tog, sc in the next 9 sts] thrice, sc2tog, sc in the next 5 sts. (40 sc)

    Rnd 54: *Sc in the next 8 sts, sc2tog; rep from * around. (36 sts)

    Rnd 55: Sc in the next 5 sts, [sc2tog, sc in the next 7 sts] thrice, sc2tog, sc in the next 2 sts. (32 sc)

    Rnd 56: *Sc2tog, sc in the next 6 sts; rep from * around. (28 sts)

    Rnd 57: Sc in the next 2 sts, [sc2tog, sc in the next 5 sts] thrice, sc2tog, sc in the next 3 sts. (24 sc)

    Rnd 58: *Sc in the next 4 sts, sc2tog; rep from * around. (20 sts)

    Rnd 59: *Sc2tog, sc in the next 3 sts; rep from * around. (16 sts)

    Rnd 60: *Sc in the next 2 sts, sc2tog; rep from * around. (12 sts)

    Rnd 58: *Sc in the next st, sc2tog; rep from * around; break yarn and gather last rnd closed. (8 sts)

    STUFF AND SEW on feet as shown or as desired.

    Benevolent Bumble Bee - rear


    And that's the Benevolent Bumble Bee! My favorite kind, as I have a mild allergy to the real thing. This one is much more cuddly!

    Benevolent Bumble Bee - sniffing the flowers

    Ready to make your own Benevolent Bumble Bee? If this free amigurumi bee pattern does inspire you, and you post a photo on social media, be sure to tag me @mooglyblog or #mooglyblog so I can check it out too! I love seeing what you make!

    Brittany Crochet Hooks - like magic wands for crochet!

    Follow Moogly on Facebook, Twitter, G+, Pinterest, Instagram, and Tumblr! Thank you to Red Heart Yarns and Brittany for providing the materials shown in this post. Written pattern copyright Tamara Kelly 2019, all rights reserved. Please do not reprint or repost this pattern, but please do link to this page to share this pattern with others.

    To print or download, use the Print Friendly button below, or go to PrintFriendly.com, or right-click to copy and paste it into a word processing document if those options do not work for you (please note that Print Friendly is a free outside website that the button links to, and you can click here for a tutorial on how to use it, but I cannot provide additional technical support for this service). If you wish to make items for sale from this pattern or translate it to another language, please visit the About page for details. 

    Tilted Heart Tote

    April 5, 2019 by Tamara Kelly 1 Comment

    The Tilted Heart Tote is blingy, fun, roomy, and a unique combination of yarn and a very special fabric - and a free crochet pattern on Moogly!

    Tilted Heart Tote - flowersDisclaimer: This post includes affiliate links; materials provided by Leisure Arts, Red Heart Yarns, and Brittany Needles.

    [Read more...]

    MooglyCAL2019 – Afghan Block #7

    April 4, 2019 by Tamara Kelly 2 Comments

    Kicking off the second quarter of the MooglyCAL2019 is the Farmhouse Square by Snappy Tots! Heidi is known for her bright, fun use of color - and you can definitely see that in this free crochet block pattern!

    MooglyCAL2019 Block 7 by Snappy TotsDisclaimer: This post includes affiliate links; materials provided by Red Heart Yarns, Furls Crochet, and Chetnanigans. [Read more...]

    Hookin On Hump Day #188: A Yarny Link Party!

    April 2, 2019 by Tamara Kelly 1 Comment

    Hookin On Hump Day is a great way to see what's hot right now in crochet and knitting - and this week, it's colorful crochet - all free! Check out all these wonderful designs - and then add your own to the HOHD link party on Moogly and Petals to Picots!

    HOHD 188 - the best crochet and knit patterns from around the web, on Moogly and Petals to Picots! [Read more...]

    Yarn Love: Red Heart Soft Essentials Baby

    April 2, 2019 by Tamara Kelly 4 Comments

    Red Heart Soft Essentials Baby is a soft and silky, easy-care yarn, available in both solids and prints! So let's take a closer look at the cozy new yarn in this month's Moogly Yarn Love yarn review - and get some free patterns to make with it!

    Yarn Love- Red Heart Soft Essentials Baby on MooglyDisclaimer: This post was sponsored by Red Heart Yarn, but all opinions are my own.
    This post includes affiliate links.

    [Read more...]

    Red Heart Soft Essentials Baby Giveaway

    April 1, 2019 by Tamara Kelly 31 Comments

    Red Heart Soft Essentials Baby is a super soft yarn with colorways that are perfect for babies, toddlers, and kids patterns - and I get to give away 10 skeins of it here on Moogly!

    Red Heart Soft Essentials Baby - Giveaway on Moogly! Open to US and Canada (excluding Quebec), ends 5/6/2019 at 12:15am US Central TimeDisclaimer: This post was sponsored by Red Heart Yarn, but all opinions are my own.

    [Read more...]

    Families Who Knit Together – Teaching Children To Knit: Guest Post by Grace Carter

    March 29, 2019 by Tamara Kelly 2 Comments

    Today I have a guest post from Grace Carter - all about teaching kids to knit! Passing on our skills and love of yarn is such a wonderful thing!

    Families Who Knit Together – Teaching Children To Knit: Guest Post by Grace Carter for Moogly!

    [Read more...]

    Cozy Couch & Bedside Organizer Caddy Tutorial

    March 28, 2019 by Tamara Kelly 11 Comments

    The Cozy Couch & Bedside Organizer Caddy Tutorial will demonstrate how to create your own handy bed pocket - in right and left-handed video tutorials!

    Cozy Couch and Bedside Organizer Caddy Tutorial SMDisclaimer: This post includes affiliate links; materials provided by Red Heart and Brittany.

    [Read more...]

    « Previous Page
    Next Page »
    Tamara Kelly of Moogly

    Moogly is world-famous for fresh. modern, and approachable crochet designs - as well as a little knitting and crafting here and there. On Moogly, you'll find several new free patterns every month, top quality video tutorials, giveaways, and more!

    More about Moogly →

    Popular

    • Seamless Crochet Sweaters Review and Giveaway
      Seamless Crochet Sweaters - Review and Giveaway
    • Ghost Treat Basket Tutorial
      Ghost Treat Basket Tutorial
    • Ghost Treat Basket
      Ghost Treat Basket
    • My First Crochet Sweater Collection - Review and Giveaway
      My First Crochet Sweater Collection - Review and Giveaway
    gosadi
    I'm a Craftsy Instructor. Click to see my classes.
    I Like Crochet


    Footer

    ↑ back to top

    About

    • About
    • Privacy Policy

    Newsletter

    Contact

    Email Moogly

    As an Amazon Associate I earn from qualifying purchases.
    Copyright © 2026 Mooglyblog.com