moogly

menu icon
go to homepage
  • Patterns
  • Tutorials
  • MooglyCAL
  • Giveaways
  • Lives
    • Facebook
    • Instagram
    • Pinterest
    • TikTok
    • Twitter
    • YouTube
  • search icon
    Homepage link
    • Patterns
    • Tutorials
    • MooglyCAL
    • Giveaways
    • Lives
    • Facebook
    • Instagram
    • Pinterest
    • TikTok
    • Twitter
    • YouTube
  • ×
    Home

    Summer Fling Throw

    June 30, 2017 by Tamara Kelly 14 Comments

    Summer Fling Throw - free crochet pattern for this light and lovely blanket in 5 sizes on Mooglyblog.com!

    Have a summer (or winter) love affair with the ripple stitch when you crochet the Summer Fling Throw! This easy to memorize blanket pattern can by made in any size - and in cool cotton, used year round!

    Disclaimer: This post includes affiliate links; Lion Brand provided the yarn for this pattern.

    Prefer an ad-free PDF? You've got options!

    Click here to purchase the yarn and pattern as a Lion Brand Kit!

    Prefer the free blog version? Keep scrolling!

    Cross Country Crochet

    The Summer Fling Throw was my road trip project when I went to visit my sister in Colorado! So this pretty crochet blanket traveled across several states, along many highways, and spent a lot of time in my lap.

    The cool yarn made it comfy no matter what weather we drove through (and there was a pretty good variety of that too) - Lion Brand 24/7 Cotton is mercerized 100% cotton so it's the perfect yarn for making blankets with fantastic stitch definition and year-round comfort.

    I made the Summer Fling Throw in a handy lap blanket/throw size, but I've included the info you'll need to make it in any size you like! And if you are looking for something warmer than cotton, Lion Brand Vanna's Choice is a good acrylic option, and Wool-Ease worsted would be a good wool blend to use for winter weather. This stitch pattern will work no matter what!

    And one quick tip to make the edging easier - keep the remainder of the ball of each color attached when you finish that stripe, and use that when crocheting that side of the edging without adding more ends to weave in. (Use a stitch marker to hold it to the side so it doesn't get tangled with the other yarns - you can see how I did this on another project here.)

    The size shown makes this extra easy - each strip uses one skein of yarn!

    Summer Fling Throw - free crochet pattern for this light and lovely blanket in 5 sizes on Mooglyblog.com!


    Summer Fling Throw

    Click here to add this pattern to your Ravelry Queue and Favorites

    US - J, 6.0mm hook - Furls Crochet

    1300-8900 yds Lion Brand 24/7 Cotton (100% cotton; Worsted/UK: 10 ply/”4″; 186 yds/170 m; 100 grams/3.53 oz)
    Color A: Grass (3 balls/558 yds for size shown, see below for other sizes)
    Color B: Rose (3 balls/558 yds for size shown, see below for other sizes)
    Color C: Ecru (3 balls/558 yds for size shown, see below for other sizes)

    Gauge: 1 pattern repeat (20 sts) = 5.5" across; 8 rows = 4" in pattern

    Size: 40" x 52" shown

    ADDITIONAL SIZES (estimates only, please check your work as you go and purchase sufficient yarn to finish your project):

    • Baby (40″ x 40″): Ch 143; 80 rows; 1300 yds/7 balls total minimum
    • Lapghan/Throw (40″ x 52"): See pattern above; 1674 yds/9 balls total minimum
    • Twin (70″ x 90″): Ch 263; 180 rows; 5100 yds/28 balls total minimum
    • Queen (90″ x 100″): Ch 328; 200 rows; 7300 yds/40 balls total minimum
    • King/Cal King (110″ x 100″): Ch 400; 200 rows; 8900 yds/48 balls total minimum

    Stitch Multiple: multiple of 20 +3

    Helpful Links:

    Summer Fling Video Tutorial and Chart

    Crochet Abbreviations

    dc2tog

    Click here to purchase the yarn and pattern as a Lion Brand Kit!

    SPECIAL STITCHES:

    dc5tog - [yo and insert hook in next st, yo and pull up a loop, yo and pull through 2 loops (remaining loops stay on hook)] 5 times, yo and pull loop through all 6 loops on hook.

    dc3tog - [yo and insert hook in next st, yo and pull up a loop, yo and pull through 2 loops (remaining loops stay on hook)] 3 times, yo and pull loop through all 4 loops on hook.

    Summer Fling Throw - free crochet pattern for this light and lovely blanket in 5 sizes on Mooglyblog.com!

    SUMMER FLING THROW INSTRUCTIONS:

    Row 1: With Color A, ch 143, skip the 3 chs closest to the hook (does not count as a st), dc2tog, *[ch 1, skip 1 ch, dc in next ch] 3 times, ch 1, skip 1 ch, 5 dc in next ch, rep [ to ] 3 times, ch 1, skip 1 ch,** dc5tog; rep from * across finishing last rep at **, dc3tog over last 3 chs, turn. (141 sts inc chs)

    Row 2: Ch 1, sc in each st and ch sp across, leaving the turning chain at the end unworked; turn. (141 sc)

    Row 3: Ch 2 (does not count as a st), skip the 1st st, dc2tog, *[ch 1, skip 1 st, dc in next st] 3 times, ch 1, skip 1 st, 5 dc in next st, rep [ to ] 3 times, ch 1, skip 1 st,** dc5tog; rep from * across finishing last rep at **, dc3tog over last 3 sts, turn. (141 sts inc chs)

    Rows 4 - 12: Repeat Rows 2 and 3, ending on a Row 2 repeat; break Color A.

    Row 13: With Color B, join to 1st st with sl st, ch 2, skip the 1st st, dc2tog, *[ch 1, skip 1 st, dc in next st] 3 times, ch 1, skip 1 st, 5 dc in next st, rep [ to ] 3 times, ch 1, skip 1 st,** dc5tog; rep from * across finishing last rep at **, dc3tog over last 3 sts, turn. (141 sts inc chs)

    Rows 14 - 24: Repeat Rows 2 and 3, ending on a Row 2 repeat; break Color B.

    Rows 25 - 36: With Color C, repeat Rows 13 - 24.

    Rows 37 - 48: With Color A, repeat Rows 13 - 24.

    Rows 49 - 60: With Color B, repeat Rows 13 - 24.

    Rows 61 - 72: With Color C, repeat Rows 13 - 24.

    Rows 73 - 108: Repeat Rows 37 - 72, do not break Color C.

    Edging:

    Continuing with Color C, ch 1, turn blanket 90 degrees to crochet along side (working into the edge), sc evenly along side of blanket using matching color in each section/stripe, ch 1, sc evenly along foundation chain (continuing with Color A in this section), ch 1, sc evenly along second side of blanket using matching colors in each section/stripe, ch 1; join to first sc of Row 72 with sl st, break yarn. (Note: This edging round is a perfect set up for adding additional decorative borders if desired, but adding a border will require additional yarn.)


    I hope you enjoy making the free Summer Fling Throw crochet pattern! It's the perfect road trip, pool-side, hammock time crochet project!

    Be sure to share your photos on social media - I love to see what you make, and I can't wait to see what colors you choose!

    Summer Fling Throw

    The Fine Print

    Written pattern copyright Tamara Kelly 2017, all rights reserved. Please do not reprint or repost this pattern, but please do link to this page to share this pattern with others. If you wish to make items for sale from this pattern or translate it to another language, please visit the About page for details. Thank you to Lion Brand Yarn for providing the yarn for this pattern.

    A Going Gnome Addiction Grows! (With a Coupon!)

    June 29, 2017 by Tamara Kelly 2 Comments

    As you may have noticed, I've been on quite the needle felting kick lately! And I love making kits - all the supplies you need, plus directions that always manage to teach me something new! So I was excited to give another Going Gnome kit a try - and share a new coupon code so you can save and try them too!

    Going Gnome: Needle Felting Kit Review (and Coupon Code!) on Moogly! Disclaimer: I was provided a kit for review but all opinions are my own. [Read more...]

    Big Sky Shawl Tutorial

    June 28, 2017 by Tamara Kelly 2 Comments

    The Big Sky Shawl is an easy to memorize pattern that can be customized in endless ways - and now there's a video tutorial!

    Big Sky Shawl: free crochet pattern with video tutorials on Mooglyblog.com! Makes the perfect prayer or comfort shawl! Disclaimer: This post includes affiliate links;
    Lion Brand provided the yarn for this video; Furls provided the hook for this video. [Read more...]

    Clover Needle Felting Bundle Giveaway!

    June 26, 2017 by Tamara Kelly 3 Comments

    Needle felting is quickly becoming one of my favorite hobbies - next to crochet and knitting of course. But anything that uses fiber makes me happy, and needle felting is uniquely wonderful. When it was time for me to upgrade to "real" supplies, I went straight to Clover! And not only did they let me try some of their best needle felting tools, but I also get to give away a set to one very lucky Moogly reader!

    Clover Needle Felting Giveaway on Moogly! Ends 7/3/17 at 12:15 am central US time.Disclaimer: This post is sponsored by Clover but all opinions are my own.
    This post includes an affiliate link.

    [Read more...]

    I'm Going to be a Knit Star - with Crochet!

    June 25, 2017 by Tamara Kelly 3 Comments

    I've been waiting for ages to be able to announce that I get to be the Knit Stars 2.0 Instructor... for crochet!

    Join my for Knit Stars 2.0 - I'm bringing the hook to the party!Disclaimer: This post includes an affiliate link. [Read more...]

    Swirling Felted Flowers

    June 23, 2017 by Tamara Kelly 4 Comments

    I've been having a lot of fun with needle felting lately - it's such a great complimentary skill to crocheting and knitting! And a great way to add an extra touch to your next project too. And after some experimentation, I came up with this free tutorial for Swirling Felted Flowers - I hope you like it!

    Swirling Felted Flowers - photo tutorial on Mooglyblog.com!Disclaimer: This post includes affiliate links.

    [Read more...]

    #MooglyCAL2017: Afghan Block #13

    June 22, 2017 by Tamara Kelly 2 Comments

    When it comes to the Moogly Afghan Crochet Along, #13 is never bad luck! In fact, we're very lucky to have a new square designed by The Lavender Chair!

    Moogly Crochet Along 2017! Get all 24 patterns FREE over the course of the year, and have a gorgeous handmade blanket by the holidays!Disclaimer: This post includes affiliate links. [Read more...]

    Hookin On Hump Day #145: A Yarny Link Party!

    June 20, 2017 by Tamara Kelly 7 Comments

    Are you all having a crochet filled summer? We've got lots of inspiration for you today - and a few projects that are now on my queue for sure! Check out the latest HOHD below - and be sure to add your own blog links too!

    Hookin On Hump Day #145 on Moogly and Petals to Picots - the best fibery blog posts from around web, collected for you twice a month! [Read more...]

    Fiber Huis Yarn Dyeing Kit: Review and Giveaway!

    June 19, 2017 by Tamara Kelly 5 Comments

    There are lots of people out there offering gorgeous hand-dyed yarns...but have you ever tried dying your own? I got to try a kit from Fiber Huis, and it was so much fun - And even better, I get to give a Fiber Huis Yarn Dyeing Kit away to one lucky winner here on Moogly!

    Fiber Huis Yarn Dyeing Kit - review and giveaway on Mooglyblog.com! (Giveaway ends 7/3/17)Disclaimer: I was given this kit for review but all opinions are my own;
    this post was sponsored by Fiber Huis.
    [Read more...]

    Bright Chevron Placemat

    June 16, 2017 by Tamara Kelly 17 Comments

    Bright Chevron Placemat - free crochet pattern on Mooglyblog.com!

    I love this stitch pattern! The Bright Chevron Placemat is summery, fun to crochet, and just plain happy. And it's a free crochet placemat pattern on Moogly!

    Disclaimer: This post includes affiliate links; Lion Brand provided the yarn for this pattern.

    Prefer an ad-free PDF? You've got options!

    This button leads to the pattern on Etsy

    Prefer the free blog version? Keep scrolling!

    An Addictive Stitch Pattern

    I've gotten one done so far, with the next one in progress. In cheerful worsted-weight cotton, you can make a matching set or let each family member pick their favorite colors! The Bright Chevron Placemat makes a nice thick cloth that will protect your table from hot dishes and stains - and look good doing it.

    Bright Chevron Placemat - free crochet pattern on Mooglyblog.com!

    This free crochet placemat pattern is second in a series now - the matching dishcloth came first, and I'm so glad to finally make some matching placemats! Now to decide what should be next... (I'm here editing from the future - now there's a matching blanket too!)

    Bright Chevron Placemat - free crochet pattern on Mooglyblog.com!


    Bright Chevron Placemat

    Click here to add this pattern to your Ravelry Queue and Favorites

    US - I, 5.5mm hook - Furls Crochet

    320 yds Lion Brand Kitchen Cotton (100% cotton; Medium/yarn symbol “4”; 99 yds/91 m; 2.01 oz)
    Color A: Cayenne and Snap Pea (2 balls per placemat, or 170 yds)
    Color B: Vanilla and Citrus (2 balls per placemat, or 150 yds)

    This yarn is discontinued. Recommended substitution: Lily Sugar'n Cream

    Stitch Markers - Clover

    Gauge: 14 sts x 12 rows = 4″ in pattern

    Finished Size: 18 " wide x 13" tall

    Helpful Links: Crochet Abbreviations; Video tutorial for this stitch

    Matching Patterns: Bright Chevron Dishcloth and Bright Chevron Borderless Blanket

    NOTES: 

    This stitch pattern uses 2 active loops, one for each color of yarn. Use a stitch marker to secure the loop you are not currently using so the previous row does not come undone - this is abbreviated as "pm" in the pattern.

    This pattern also uses some unique stitches, which are linked to their tutorials within the pattern. If preferred, substitute a ch 3 for the CSDC.

    There is a video tutorial for this stitch pattern linked above.

    INSTRUCTIONS:

    Row 1: With Color A, ch 64, skip the ch closest to the hook, sc in the next 3 chs, *ch 1, skip next ch, sc in next 3 chs; repeat from * to end, turn. (63 sts inc chs)

    Row 2: CSDC in 1st st, dc in each remaining st across; turn and remove hook from loop (pm). (63 sts)

    Row 3: With Color B, join with sc to 1st st, working in front of previous row, tr in 1st skipped ch of Row 1, skip next st, sc in next st, ch 1, skip next st, sc in next st, *tr2tog in previous skipped ch of Row 1 and next skipped ch of Row 1, skip next st, sc in next st, ch 1, skip next st, sc in next st; repeat from * until 2 sts remain, tr in last skipped ch of Row 1, sc in last st; turn. (63 sts inc chs)

    Row 4:  CSDC in 1st st, dc in each remaining st across; turn and remove hook from loop (pm). (63 sts)

    Closeup of Stitch Pattern on Mooglyblog.com

    Row 5: Insert hook in loop of Color A, ch 3, sc in 1st st of previous row, working in front of previous row, tr in 1st skipped st of the row below the previous row, skip next st, sc in next st, ch 1, skip next st, sc in next st, *tr2tog in previous skipped st of the row below and next skipped st of the row below, skip next st, sc in next st, ch 1, skip next st, sc in next st; repeat from * until 2 sts remain, tr in last skipped st of the row below, sc in last st; turn. (63 sts (does not include the first ch 3))

    Row 6: CSDC in 1st st, dc in each remaining st across; turn and remove hook from loop (pm). (63 sts)

    Row 7 – 36: Repeat Rows 5 and 6, alternating between Color A and Color B. After Row 36, break Color B.

    Row 37: Repeat Row 5 with Color A.

    Edging (optional, not shown):

    Continuing with Color A, sc evenly all around cloth; join and break Color A.

    Bright Chevron Placemat - free crochet pattern on Mooglyblog.com!


    Ready for summer entertaining! The Bright Chevron Placemat (and matching dishcloth!) is guaranteed to brighten things up and add color and fun and fun to your table. What colors will you make them in - and what other patterns in this series would you like to see?

    The Fine Print

    Written pattern copyright Tamara Kelly 2017, all rights reserved. Please do not reprint or repost this pattern, but please do link to this page to share this pattern with others. If you wish to make items for sale from this pattern or translate it to another language, please visit the About page for details. Thank you to Lion Brand Yarn for providing the yarn for this pattern.

    Deflecto is Perfecto for your Craft Stash-o!

    June 15, 2017 by Tamara Kelly 4 Comments

    When I went to the Craft and Hobby Association Trade Show earlier this year, one of the exhibitors was Deflecto. Which granted, sounds nothing like craft supplies. But when I passed by their booth I was drawn in - because they are all about amazing storage solutions, which *are* perfect for craft supplies! So when they offered me some to review, I jumped at the chance - and finally found a home for all that little stuff we need at craft time!

    Deflecto Craft Caddy Organizer System - review on Moogly!Disclaimers: I was provided these items free of charge for review, but all opinions are my own.
    This post includes an Amazon Affiliate link. [Read more...]

    Colorwork Without Tangles

    June 14, 2017 by Tamara Kelly 22 Comments

    I love colorwork! And I hate tangled yarn almost as much - it's the worst! So here is my method for keeping the yarn coming and making Colorwork Without Tangles!

    Crochet or knit patterns with multiple colors - without getting your yarn all tangled up! Get the scoop on Mooglyblog.com!Disclaimer: This post includes affiliate links;
    Lion Brand provided the yarn for this video; Furls provided the hook for this video. [Read more...]

    Lion Brand Jeans of Summer Giveaway!

    June 12, 2017 by Tamara Kelly 17 Comments

    Lion Brand Jeans® Yarn is my new favorite blue yarn -  and I get to give 5 balls of it away on Moogly!

    Lion Brand Jeans - Giveaway on Mooglyblog.com! Open to US and Canada, ends 6/19/17 at 12:15 am central US timeDisclaimer: This giveaway is sponsored by Lion Brand, but all opinions are my own. [Read more...]

    Weekend Bucket Bag

    June 8, 2017 by Tamara Kelly Leave a Comment

    Weekend Bucket Bag: free crochet pattern on Mooglyblog.com!

    Everybody loves weekends - whatever day your weekend falls on!  Picture it now... your comfiest jeans, favorite top, and heading out with a brand new bag you crocheted yourself - the Weekend Bucket Bag!

    Disclaimer: This post includes affiliate links; Lion Brand provided the yarn for this pattern.

    Prefer an ad-free PDF? You've got options!

    This button leads to the pattern on Etsy

    Prefer the free blog version? Keep scrolling!

    Helping Hold It's Shape

    The Weekend Bucket Bag was inspired by Lion Brand's Jeans yarn - check out that front pocket! It's just the right size for most phones, and we all need a big pocket for those these days!

    The base of the bag is reinforced with plastic canvas, which is a great item to use for crochet projects like this - you can cut it to any size, it's inexpensive, and it's washable! Here, it helps the Weekend Bucket Bag hold its shape, and makes the bottom of the bag that much stronger - so you can fill it up and head out for a weekend of fun!

    Weekend Bucket Bag: free crochet pattern on Mooglyblog.com!


    Weekend Bucket Bag

    Click here to add this pattern to your Ravelry Queue and Favorites

    US - I, 5.5mm hook - Furls Crochet

    700 yds Lion Brand Jeans (Worsted/yarn symbol “4”/UK: 10 ply; 246 yds/225 m; 3.53 oz)
    Color A: Classic (2 balls, or 340 yds)
    Color B: Vintage (2 balls, or 360 yds)

    Plastic Canvas

    Stitch Markers - Clover

    Button (optional) - purchased at local JoAnn, Blumenthal Style #27000OR86

    Tassel Maker (optional) - Clover

    Purse Handle - purchased at local JoAnn, Purse n-alize-it Item #009000320

    Gauge: 13 sts x 13 rows = 4"/10cm in Color B st pattern (dc, sc alternating)

    Finished Size: 10.5" wide laid flat, 10.5" tall excluding handles/tabs

    Helpful Links and Tutorials:

    Crochet Abbreviations

    Hdc in the 3rd loop

    Seamless finish

    Sc2tog

    NOTES:

    Yarn is held doubled throughout pattern unless otherwise noted- you can pull from both ends of one skein, or hold the yarn of two skeins together as you crochet.

    The main portion of this pattern is worked in turned rounds - though you join at the end as in a round, you then turn to work back in the other direction as for rows. Using stitch markers in the first and last stitch of each round will help maintain stitch count. This creates a different look in the rows as well as a straight, invisible seam running up the side of the bag.

    INSTRUCTIONS:

    Base: Make 2, with Color A

    Round 1: Ch 8, skip ch closest to hook, hdc in next 6 chs, 3 hdc in last ch working around to the opposite side of the foundation chain, hdc in bottom loop(s) of next 5 chains, 2 hdc in bottom of last ch; join with a sl st to first hdc of round, turn. (16 sts)

    Round 2: Ch 1, 2 hdc in first 2 sts, hdc in next 5 sts, 2 hdc in next 3 sts, hdc in next 5 sts, 2 hdc in last st; join and turn. (22 sts)

    Round 3: Ch 1, hdc in first st, 2 hdc in next st, hdc in next 5 sts, [hdc in next st, 2 hdc in next st] 3 times, hdc in next 5 sts, [hdc in next st, 2 hdc in next st] twice; join and turn. (28 sts)

    Round 4: Ch 1, hdc in first 2 sts, 2 hdc in next st, hdc in next 2 sts, 2 hdc in next st, hdc in next 5 sts, [hdc in next 2 sts, 2 hdc in next st] 3 times, hdc in next 7 sts, 2 hdc in last st; join and turn. (34 sts)

    Round 5: Ch 1, hdc in first 3 sts, 2 hdc in next st, hdc in next 5 sts, [hdc in next 3 sts, 2 hdc in next st] 3 times, hdc in next 5 sts, [hdc in next 3 sts, 2 hdc in next st] twice; join and turn. (40 sts)

    Round 6: Ch 1, hdc in first 4 sts, 2 hdc in next st, hdc in next 4 sts, 2 hdc in next, hdc in next 5 sts, [hdc in next 4 sts, 2 hdc in next] 3 times, hdc in next 9 sts, 2 hdc in last st; join and turn. (46 sts)

    Round 7: Ch 1, hdc in first 3 sts, 2 hdc in next st, hdc in next 7 sts, [hdc in next 3 sts, 2 hdc in next st] 4 times, hdc in next 7 sts, [hdc in next 3 sts, 2 hdc in next st] 3 times; join and turn. (54 sts)

    Round 8: Ch 1, hdc in first 4 sts, 2 hdc in next st, [hdc in next 4 sts, 2 hdc in next st] twice, hdc in next 7 sts, [hdc in next 4 sts, 2 hdc in next st] 4 times, hdc in next 11 sts, 2 hdc in last st; join and turn. (62 sts)

    Round 9: Ch 1, hdc in first 4 sts, 2 hdc in next st, hdc in next 7 sts, [hdc in next 5 sts, 2 hdc in next st] 4 times, hdc in next 7 sts, [hdc in next 5 sts, 2 hdc in next st] 3 times; join and break yarn. (70 sts)

    Assemble Base:

    Cut plastic canvas to an oval slightly smaller than crocheted base pieces (approximately 8" long x 6.5" wide).

    Layer pieces so that plastic canvas is sandwiched between the two crocheted Base pieces, with the Right Side of each Base facing out.

    Use stitch markers to secure evenly around the outside of the ovals, trapping the plastic canvas in the middle.

    Sides: Begin with Color A

    Round 1 (RS): Working through both layers of crocheted Base, join to one side of the ovals, ch 1, hdc in each set of sts around; join and turn. (70 sts)

    Round 2 - 5: Ch 1, hdc in each st around; join and turn. (70 sts) After Round 5, break yarn and do not turn.

    Round 6 (RS): With Color B, join to 1st st of previous round, hdc in 3rd loop of each st around; join and turn. (70 sts)

    Round 7 - 29: Ch 1, dc in first st, sc in next st, *dc in next st, sc in next st; rep from * around, join and turn. (70 sts) (Note: Each dc should be worked into a sc st, and each sc should be worked into a dc st.)

    Round 30: Ch 1, sc in each st around; break yarn and join with seamless finish.

    Handle Tabs: Make 2, with Color A

    Row 1: Ch 6, skip ch closest to hook, sc in remaining 5 chs; turn. (5 sts)

    Row 2 - 4: Ch 1, sc in each st across; turn. (5 sts)

    Row 5: Ch 1, sc2tog, sc in next st, sc2tog; turn. (3 sts)

    Row 6 - 9: Ch 1, sc in each st across; turn. (3 sts)

    Row 10: Ch 1, 2 sc in first st, sc in next st, 2 sc in last st; turn. (5 sts)

    Row 11 - 13: Repeat Row 2.

    Edging: Ch 1, sc evenly around tab; break yarn and join with seamless finish.

    Use tabs to attach handle as shown.

    Weekend Bucket Bag: free crochet pattern on Mooglyblog.com!

    Pocket: With Color A

    Row 1: Ch 20, skip ch closest to hook, sc in remaining 19 chs; turn. (19 sts)

    Row 2 - 20: Ch1, sc in each st across; turn. (19 sts)

    Row 21: Skip first st, sl st in next 2 sts, sc in next 13 sts, sl st in next st; turn (remaining sts unworked). (16 sts)

    Row 22: Skip first st, sl st in next 2 sts, sc in next 9 sts, sl st in next st; turn (remaining sts unworked). (12 sts)

    Row 23: Skip first st, sl st in next 2 sts, sc in next 5 sts, sl st in next st; turn (remaining sts unworked). (8 sts)

    Row 24: Skip first st, sl st in next 2 sts, sc in next st, sl st in next st; turn (remaining sts unworked). (4 sts)

    Edging: Ch 1, (sc, hdc, sc) in the st of Row 24, then sc evenly around remainder of pocket working a ch 1 at each corner; join and break leaving a long tail for sewing.

    Sew pocket to front of bag as shown.

    Optional: Add tassel (shown in Color B) and button to customize your bag.


    What do you have planned this weekend? Making a bag, or taking one out on the town? I hope you enjoy the Weekend Bucket Bag - both the making and the taking! I can't wait to see how yours turns out!

    The Fine Print

    Written pattern copyright Tamara Kelly 2017, all rights reserved. Please do not reprint or repost this pattern, but please do link to this page to share this pattern with others. If you wish to make items for sale from this pattern or translate it to another language, please visit the About page for details. Thank you to Lion Brand Yarn for providing the yarn for this pattern.

    #MooglyCAL2017: Afghan Block #12

    June 8, 2017 by Tamara Kelly 20 Comments

    Today we are officially half way through the 2017 Moogly Crochet Along - wow! And this block is a wonderful one to land on as we head into summer - courtesy of KatiDCreations!

    Moogly Crochet Along 2017! Get all 24 patterns FREE over the course of the year, and have a gorgeous handmade blanket by the holidays!Disclaimer: This post includes affiliate links. [Read more...]

    LEGO, CGOA, and Design - Oh My!

    June 7, 2017 by Tamara Kelly 6 Comments

    I am so excited for Summer 2017! I've got several great trips planned - and the one I want to tell you about today is one you can go on too: the Crochet Guild of America Chainlink Conference! And LEGO is helping me tell you about it with my other passion - LEGO Architecture!

    Having fun with LEGO and planning my trip to the CGOA Conference - Summer 2017 with Moogly!Disclaimer: LEGO provided the featured product for review but all opinions are my own.
    This post includes affiliate links.

    [Read more...]

    Hookin On Hump Day #144: A Yarny Link Party!

    June 6, 2017 by Tamara Kelly 5 Comments

    Summer is here at last, but that's no reason to put down the hooks and needles! Though you'll want to put them down for a few minutes to check out these fantastic new featured projects on Hookin On Hump Day #144 - this round they're all FREE!

    Hookin On Hump Day #144 - on Mooglyblog.com and Petals to Picots!

    [Read more...]

    OttLite Dawson LED Floor Lamp Giveaway!

    June 5, 2017 by Tamara Kelly 27 Comments

    As an OttLite Ambassador, I love sharing all the great ways OttLite helps us crochet and knit - because when you see better, you craft better! The OttLite Dawson LED Floor Lamp is the latest addition to my home, and I'm in love - so of course, I had to share the happiness with a giveaway!

    OttLite Dawson LED Floor Lamp: Giveaway on Moogly! Ope to USA and Canada addresses and ends 6/19/17 at 12:15 am Central US timeDisclaimer: This giveaway was sponsored by OttLite, but all opinions are my own.  [Read more...]

    Denim Ombre Wrap

    June 2, 2017 by Tamara Kelly 19 Comments

    Denim Ombre Wrap - free crochet pattern on Mooglyblog.com!

    The Denim Ombre Wrap is super soft, crazy cozy, and a fabulously free crochet pattern here on Moogly!

    Disclaimer: This post includes affiliate links; Lion Brand provided the yarn for this pattern.

    Prefer an ad-free PDF? You've got options!

    This button leads to the pattern on Etsy

    Click here to purchase the yarn and pattern in a Lion Brand Kit!

    Prefer the free blog version? Keep scrolling!

    Denim Ombre Wrap Inspiration

    Inspired by gorgeous Lion Brand Jeans yarn and one of my favorite vintage stitch patterns, the Denim Ombre Wrap is so wonderful to crochet! The yarn is just as soft and plush as can be, and the finished shawl fits almost any adult. And the stitch pattern has this softly scalloped edge built right in.

    Denim Ombre Wrap - free crochet pattern on Mooglyblog.com!

    A Unique Border Plan

    One of the unique features of this pattern is the way the yarn is set aside for the border - and the way you can make a multi-colored border without adding any more ends to your project! It's all due to the use of long tails and butterfly bobbins.

    There's a tutorial for how to make the bobbins below, and using them for the border like this is pretty darn smart if I do say so myself. By leaving long tails at the beginning and/or end of each color section, you can use those tails when making the border. Here's a picture of the shawl after Row 36, ready for the edging!

    Denim Ombre Wrap - free crochet pattern on Mooglyblog.com!

    Just use the butterfly bobbins to keep the ends neat and ready and waiting for you, and a stitch marker to hold the bobbin in place along the side until you're ready for it.

    Denim Ombre Wrap - free crochet pattern on Mooglyblog.com!

    Add your border with no extra ends to weave in - I call that a perfect finish!

    Denim Ombre Wrap - free crochet pattern on Mooglyblog.com!


    Denim Ombre Wrap

    Click here to add this pattern to your Ravelry Queue and Favorites

    US-K, 6.5 mm - Furls Crochet

    1080 yds Lion Brand Jeans (Worsted/yarn symbol "4"/UK: 10 ply; 246 yds/225 m; 3.53 oz)
    A - Faded (1 ball, or 240 yds)
    B - Stonewash (1 ball, or 200 yds)
    C - Classic (1 ball, or 200 yds)
    D - Brand New (1 ball, or 200 yds)
    E - Stovepipe (1 ball, or 240 yds)

    Stitch Markers – Clover

    Shawl Pin Shown: LickinFlames

    Gauge: 12 sts x 7 rows = 4"/10 cm in pattern

    Finished Size: 63" x 20"

    Stitch Multiple: 12 plus 7, plus 2 for the starting chain

    Helpful Links and Tutorials:

    Crochet Abbreviations

    Stitch Pattern Tutorial

    Dc2tog

    Chainless Starting Double Crochet

    Working into the Ch Sp

    Join with dc

    Butterfly Bobbins

    Click here to purchase the yarn and pattern in a Lion Brand Kit!

    SPECIAL STITCHES:

    v st - (dc, ch 1, dc) in indicated st

    shell - (2 dc, ch 1, 2 dc) in indicated st

    STITCH PATTERN CHART:
    Denim Ombre Wrap - free crochet pattern on Mooglyblog.com!

    INSTRUCTIONS:

    Color A:

    Row 1: With Color A, ch 213, dc in the 6th ch from the hook (skipped chs count as first dc and skip 2), [dc, ch 1, 2 dc] in the same ch, *skip 3 ch, v st in the next ch, dc2tog over the next 3 ch (skip center ch), v st in the next ch, skip 3, shell in the next ch; rep from * across, until 3 ch remain, skip 2 ch, dc in the last ch, turn. (18 shells in each row throughout pattern)

    Row 2: Ch 3 (counts as first dc, may substitute chainless starting double crochet if desired), skip 2 sts, shell in the ch sp of the first shell,  *v st in the ch sp of the next v st, dc2tog in between the posts on either side of the dc2tog of the previous round, v st in the ch sp of the next v st, shell in the ch sp of the shell; rep from * across, dc in the last st, turn.

    Rows 3 - 7: Repeat Row 2; at the end of Row 7, break yarn leaving a 30-foot tail at the end (put into a bobbin), do not turn.

    Color B:

    Row 8: With Color B, leaving a 4-foot tail at the beginning, join to first st of Row 7 with a double crochet,  skip 2 sts, shell in the ch sp of the first shell,  *v st in the ch sp of the next v st, dc2tog in between the posts on either side of the dc2tog of the previous round, v st in the ch sp of the next v st, shell in the ch sp of the next shell; rep from * across, dc in the last st, turn.

    Denim Ombre Wrap - free crochet pattern on Mooglyblog.com!

    Rows 9 - 14: Repeat Row 2; at the end of Row 14, break yarn leaving a 4-foot tail at the end, do not turn.

    Color C:

    Row 15: With Color C, repeat Row 8.

    Rows 16 - 21: Repeat Row 2; at the end of Row 21, break yarn leaving a 4-foot tail at the end, do not turn.

    Color D:

    Row 22: With Color D, repeat Row 8.

    Rows 23 - 28: Repeat Row 2; at the end of Row 28, break yarn leaving a 4-foot tail at the end, do not turn.

    Color E:

    Row 29: With Color E, repeat Row 8.

    Rows 30 - 36: Repeat Row 2.

    Edging/Border (use bobbin-ed yarn tails for Color A - D): Continuing with Color E, ch 1, sc evenly across last row, ch 1 at the corner, sc evenly along the sides of the rows switching tail ends to match each section, ch 1 at the corner, continuing with Color A sc evenly across the foundation chain, ch 1, sc evenly along the sides of the rows switching tail ends to match each section, ch 1 at the corner; join to first st of Edging with sl st, break yarn.


    Denim Ombre Wrap - free crochet pattern on Mooglyblog.com!

    And that's the Denim Ombre Wrap! It's easy to care for acrylic, and just as easy to wear. Wrap it around your shoulders to ward off a chill, or around your neck as a big bulky scarf - it's a great piece to have nearby all year round. I hope you enjoy making it!

    The Fine Print

    Written pattern copyright Tamara Kelly 2017, all rights reserved. Please do not reprint or repost this pattern, but please do link to this page to share this pattern with others.If you wish to make items for sale from this pattern or translate it to another language, please visit the About page for details. Thank you to Lion Brand Yarn for providing the yarn for this pattern.

    Father's Day Gift Ideas: 10 Free Crochet Patterns in Lion Brand Yarn!

    June 1, 2017 by Tamara Kelly Leave a Comment

    Father's Day can get lost in the end of school and beginning of summer rush - so let's take a minute for dad and look at 10 free crochet Father's Day gift ideas - all made with Lion Brand yarn!

    Father's Day Gift Ideas - Mooglyblog.comDisclaimer: This post is sponsored by Lion Brand Yarn. [Read more...]

    Ami Club by FreshStitches: Get the Scoop with the Freebies & Giveaway on Moogly!

    May 31, 2017 by Tamara Kelly 5 Comments

    I love how the crochet world continues to grow! And one of my favorite amigurumi makers, Stacey Trock from FreshStitches, has a new club to tell you about - Ami Club!

    Ami Club by FreshStitches: Get the Scoop with the Freebies & Giveaway on Moogly! Giveaway open worldwide, ends 6/7/17 at 12:15am Central US time.FreshStitches/Ami Club provided the prize for this giveaway as well as the freebies below!

    [Read more...]

    7 Reasons You Need the Weekly Stitch from Lion Brand!

    May 30, 2017 by Tamara Kelly 4 Comments

    I love crocheting and knitting with Lion Brand yarn, and today I'm working with Lion Brand to tell you all about their email newsletter, the Weekly Stitch - something your inbox needs now! In fact I found 7 reasons you need to sign up today!

    7 Reasons YOU need to sign up for The Weekly Stitch from Lion Brand! (sponsored by Lion Brand Yarn) [Read more...]

    Greyson Baby Cardigan

    May 26, 2017 by Tamara Kelly 21 Comments

     - Greyson Baby Cardigan - free crochet pattern on Mooglyblog.com!

    The Greyson Baby Cardigan is cute, unisex, and the perfect gift when paired with the Greyson Baby Blanket - or on its own! And it's a free crochet baby pattern here on Moogly!

    Disclaimer: This post includes affiliate links.

    Prefer an ad-free PDF? You've got options!

    This button leads to the pattern on Etsy

    Prefer the free blog version? Keep scrolling!

    Button Swapping for Boys and Girls

    This sweet little crochet baby cardigan comes in 3 sizes, and can be customized for both boys and girls! Just move the button band to the other front flap and sew the buttons on the other side. To be fair, I don't think most new parents pay too much attention to that sort of thing, but this crochet pattern has you covered either way.

    Greyson Baby Cardigan - free crochet pattern on Mooglyblog.com!


    Greyson Baby Cardigan

    Click here and add this pattern to your Ravelry Queue and Favorites

    US-I, 5.5 mm hook - Furls Crochet

    350-500 yds Lion Brand Modern Baby (DK/yarn symbol "3"/UK: 8 ply; 173 yds/158m; 75 g/2.65 oz)
    Color A: Grey (200-260 yds; 2 skeins)
    Color B: Yellow (100-150 yds; 1 skein)
    Color C: Turquoise (50-75 yds; 1 skein)

    This yarn has been discontinued. Recommended substitute: Bernat Softee Baby

    4 Stitch Markers - Clover

    5 Buttons - ⅝" (purchased at JoAnn Fabrics)

    Gauge: 13 sts x 10 rows = 4"/10cm in dc

    Finished Sizes: 0-3 mths; 3-6 mths (shown); 6-12 mths (sizes use Craft Yarn Council Standards)

    Helpful Links and Video Tutorials

    Crochet Abbreviations

    Top Down Yokes

    Greyson Stitch Pattern

    Chainless Starting Double Crochet

    STSC - Join with sc

    STDC - Join with dc

    STHDC - Join with hdc

    NOTES:
    If preferred, replace the ch 2 and first dc of each row (when called for) with a Chainless Starting Double Crochet (see linked tutorial above).

    Special Stitch:
    Make corner: Work 3 dc in the indicated stitch, place a stitch marker in the center stitch (move the stitch markers up each row).

    0-3 MTHS INSTRUCTIONS:

    Row 1: With Color A, ch 46, skip the 2 ch closest to the hook, dc in next 6 sts, make corner, dc in next 6 sts, make corner, dc in next 12 sts, make corner, dc in next 6 sts, make corner, dc in last 10 sts; turn. (52 sts)

    Row 2: Ch 2 (does not count as a st), dc in first 11 sts, make corner, dc in next 8 sts, make corner, dc in next 14 sts, make corner, dc in next 8 sts, make corner, dc in last 7 sts; turn. (60 sts)

    Row 3: Ch 2, dc in first 8 sts, make corner, dc in next 10 sts, make corner, dc in next 16 sts, make corner, dc in next 10 sts, make corner, dc in last 12 sts; turn. (68 sts)

    Row 4: Ch 2, dc in first 13 sts, make corner, dc in next 12 sts, make corner, dc in next 18 sts, make corner, dc in next 12 sts, make corner, dc in last 9 sts; turn. (76 sts)

    Row 5: Ch 2, dc in first 10 sts, make corner, dc in next 14 sts, make corner, dc in next 20 sts, make corner, dc in next 14 sts, make corner, dc in last 14 sts; turn. (84 sts)

    Row 6: Ch 2, dc in first 15 sts, make corner, dc in the next 16 sts, make corner, dc in the next 22 sts, make corner, dc in the next 16 sts, make corner, dc in the last 11 sts; turn. (92 sts)

    Row 7: (underarm row) Ch 2, dc in the first 13 sts, ch 8, skip the next 18 sts (between the st markers), dc in the next 13 sts, 2 dc in next st, dc in the next 13 sts, ch 8, skip 18 sts (between the st markers), dc in the last 17 sts; turn. (57 sts and 16 chs)

    Row 8: Ch 1, hdc in each st and ch to end; break yarn and turn. (73 sts)

    Row 9: With Color B, join with sc in 1st st, *hdc in next st, dc in next st, tr in next st, 3 tr in next st, tr in next st, dc in next st, hdc in next st, sc in next st; repeat from * across; break yarn and turn. (91 sts)

    Row 10: With Color C, join with dc in 1st st, skip next st, dc in next 3 sts, 3 dc in the next st, dc in next 3 sts, *dc3tog, dc in next 3 sts, 3 dc in next st, dc in next 3 sts; repeat from * across until 2 sts remain, skip next st, dc in last st; break yarn and turn. (91 sts)

    Row 11: With Color B, join with tr in 1st st, skip next st, tr in next st, dc in next st, hdc in next st, sc in next st, hdc in next st, dc in next st, tr in next st, *tr3tog, tr in next st, dc in next st, hdc in next st, sc in next st, hdc in next st, dc in next st, tr in next st; repeat from * across until 2 sts remain, skip next st , tr in last st; break yarn and turn. (73 sts)

    Row 12: With Color A, join with hdc in 1st st, hdc in each remaining st across; break yarn and turn. (73 sts)

    Row 13 - 20: Repeat Rows 9 - 12 twice, do not break yarn after Row 20.

    Edging Round: Ch 1, sc in each st across Row 20, ch 1, sc 36 evenly along front opening, ch 1, sc in each st across neckline (working in unused loops of foundation chain), ch 1, sc 36 evenly along second front opening, ch 1; join with sl st to 1st sc of rnd, turn if needed to work the Button Band up the front of the sweater. NOTE: If you prefer the button band on the other side of the sweater, break yarn and rejoin to ch-1 sp at the bottom corner of your chosen side.

    Button Band:

    Button Band Row 1: Ch 1, sc in ch-1 sp, sc 36 (rem sts left unworked); turn. (37 sts)

    Button Band Row 2: (make button holes) Ch 1, sc in first 5 sts, *ch 1, skip 2 sts, sc in next 4 sts; rep from * across until 2 sts remain, sc in last 2 sts; turn. (5 ch-1 sps)

    Button Band Row 3: Ch 1, sc in each st and 2 sc in each ch-1 sp across; turn. (37 sts)

    Button Band Row 4 (optional): Sl st in each row across; break yarn. (37 sts)

    0-3 MTHS SLEEVES (optional)

    NOTES:
    - Use a stitch marker to keep track of the last st of each row, to make it easier to find when you turn.
    - The rounds begin in the center of the underarm, or in the 5th ch of the ch-8 in the underarm row.

    Round 1: (Right Side) With Color A, join and sc in first 4 underarm sts, hdc 2 in side of Row 7, dc in next 18 sts, hdc 2 in side of Row 7, sc in remaining 4 underarm sts; join to 1st sc with sl st, turn. (30 sts)

    Round 2: (Wrong Side) Ch 1, hdc in the first 6 sts, dc in the next 18 sts, hdc in the last 6 sts; join with sl st, turn. (30 sts)

    Round 3: Ch 1, hdc in the first 4 sts, dc in the next 22 sts, hdc in the last 4 sts; join with sl st, turn. (30 sts)

    Round 4: Ch 2, dc in each st around; join with sl st, turn. (30 sts)

    Round 5 – 11: Repeat Round 4.

    Round 12: Ch 2, *dc in the next 2 sts, dc2tog; repeat from * around until 2 sts remain, dc in the last 2 sts; join with sl st, break yarn. (23 sts)

    Round 13: With Color C, join to any st of the previous row, ch 1, sc in each st around; join with sl st. (23 sts)

    Round 14: Ch 1, sc in each st around; join with sl st, break yarn. (23 sts)

    Greyson Baby Cardigan - free crochet pattern on Mooglyblog.com!

    3-6 MTHS INSTRUCTIONS:

    Row 1: With Color A, ch 47, skip the 2 ch closest to the hook, dc in next 7 sts, make corner, dc in next 6 sts, make corner, dc in next 12 sts, make corner, dc in next 6 sts, make corner, dc in last 10 sts; turn. (53 sts)

    Row 2: Ch 2 (does not count as a st), dc in first 11 sts, make corner, dc in next 8 sts, make corner, dc in next 14 sts, make corner, dc in next 8 sts, make corner, dc in last 8 sts; turn. (61 sts)

    Row 3: Ch 2, dc in first 9 sts, make corner, dc in next 10 sts, make corner, dc in next 16 sts, make corner, dc in next 10 sts, make corner, dc in last 12 sts; turn. (69 sts)

    Row 4: Ch 2, dc in first 13 sts, make corner, dc in next 12 sts, make corner, dc in next 18 sts, make corner, dc in next 12 sts, make corner, dc in last 10 sts; turn. (77 sts)

    Row 5: Ch 2, dc in first 11 sts, make corner, dc in next 14 sts, make corner, dc in next 20 sts, make corner, dc in next 14 sts, make corner, dc in last 14 sts; turn. (85 sts)

    Row 6: Ch 2, dc in first 15 sts, make corner, dc in the next 16 sts, make corner, dc in the next 22 sts, make corner, dc in the next 16 sts, make corner, dc in the last 12 sts; turn. (93 sts)

    Row 7: Ch 2, dc in the first 13 sts, make corner, dc in the next 18 sts, make corner, dc in the next 24 sts, make corner, dc in the next 18 sts, make corner, dc in the last 16 sts; turn. (101 sts)

    Row 8: (underarm row) Ch 2, dc in the first 18 sts, ch 9, skip the next 20 sts (between the st markers), 2 dc in the next st, dc in the next 26 sts, 2 dc in next st, ch 9, skip 20 sts (between the st markers), dc in the last 15 sts; turn. (63 sts and 18 chs)

    Row 9: Ch 1, hdc in each st and ch to end; break yarn and turn. (81 sts)

    Row 10: With Color B, join with sc in 1st st, *hdc in next st, dc in next st, tr in next st, 3 tr in next st, tr in next st, dc in next st, hdc in next st, sc in next st; repeat from * across; break yarn and turn. (101 sts)

    Row 11: With Color C, join with dc in 1st st, skip next st, dc in next 3 sts, 3 dc in the next st, dc in next 3 sts, *dc3tog, dc in next 3 sts, 3 dc in next st, dc in next 3 sts; repeat from * across until 2 sts remain, skip next st, dc in last st; break yarn and turn. (101 sts)

    Row 12: With Color B, join with tr in 1st st, skip next st, tr in next st, dc in next st, hdc in next st, sc in next st, hdc in next st, dc in next st, tr in next st, *tr3tog, tr in next st, dc in next st, hdc in next st, sc in next st, hdc in next st, dc in next st, tr in next st; repeat from * across until 2 sts remain, skip next st , tr in last st; break yarn and turn. (81 sts)

    Row 13: With Color A, join with hdc in 1st st, hdc in each remaining st across; break yarn and turn. (81 sts)

    Row 14 - 21: Repeat Rows 10-13 twice, do not break yarn after Row 21.

    Edging Round: Ch 1, sc in each st across Row 21, ch 1, sc 38 evenly along front opening, ch 1, sc in each st across neckline (working in unused loops of foundation chain), ch 1, sc 38 evenly along second front opening, ch 1; join with sl st to 1st sc of rnd, turn if needed to work the Button Band up the front of the sweater. NOTE: If you prefer the button band on the other side of the sweater, break yarn and rejoin to ch-1 sp at the corner of your chosen side.

    Button Band:

    Button Band Row 1: Ch 1, sc in ch-1 sp, sc 38 (rem sts left unworked); turn. (39 sts)

    Button Band Row 2: (make button holes) Ch 1, sc in first 5 sts, *ch 1, skip 2 sts, sc in next 4 sts; rep from * across until 4 sts remain, sc in last 4 sts; turn. (5 ch-1 sps)

    Button Band Row 3: Ch 1, sc in each st and 2 sc in each ch-1 sp across; turn. (39 sts)

    Button Band Row 4 (optional): Sl st in each row across; break yarn. (39 sts)

    3-6 MTHS SLEEVES (optional)

    NOTES:
    - Use a stitch marker to keep track of the last st of each row, to make it easier to find when you turn.
    - The rounds begin in the center of the underarm, or in the 5th ch (center) of the ch-9 in the underarm row.

    Round 1: (Right Side) With Color A, join with sc in center ch of underarm, sc in next 4 underarm sts, hdc 2 in side of Row 8, dc in next 20 sts, hdc 2 in side of Row 8, sc in remaining 4 underarm sts; join to 1st sc with sl st, turn. (33 sts)

    Round 2: (Wrong Side) Ch 1, hdc in the first 6 sts, dc in the next 20 sts, hdc in the last 7 sts; join with sl st, turn. (33 sts)

    Round 3: Ch 1, hdc in the first 5 sts, dc in the next 24 sts, hdc in the last 4 sts; join with sl st, turn. (33 sts)

    Round 4: Ch 2, dc in each st around; join with sl st, turn. (33 sts)

    Round 5 – 12: Repeat Round 4.

    Round 13: Ch 2, *dc in the next 2 sts, dc2tog; repeat from * around until 1 st remain, dc in the last st; join with sl st, break yarn. (25 sts)

    Round 14: With Color C, join to any st of the previous row, ch 1, sc in each st around; join with sl st. (25 sts)

    Round 15: Ch 1, sc in each st around; join with sl st, break yarn. (25 sts)

    Greyson Baby Cardigan - free crochet pattern on Mooglyblog.com!

    6-12 MTHS INSTRUCTIONS:

    Row 1: With Color A, ch 46, skip the 2 ch closest to the hook, dc in next 6 sts, make corner, dc in next 6 sts, make corner, dc in next 12 sts, make corner, dc in next 6 sts, make corner, dc in last 10 sts; turn. (52 sts)

    Row 2: Ch 2 (does not count as a st), dc in first 11 sts, make corner, dc in next 8 sts, make corner, dc in next 14 sts, make corner, dc in next 8 sts, make corner, dc in last 7 sts; turn. (60 sts)

    Row 3: Ch 2, dc in first 8 sts, make corner, dc in next 10 sts, make corner, dc in next 16 sts, make corner, dc in next 10 sts, make corner, dc in last 12 sts; turn. (68 sts)

    Row 4: Ch 2, dc in first 13 sts, make corner, dc in next 12 sts, make corner, dc in next 18 sts, make corner, dc in next 12 sts, make corner, dc in last 9 sts; turn. (76 sts)

    Row 5: Ch 2, dc in first 10 sts, make corner, dc in next 14 sts, make corner, dc in next 20 sts, make corner, dc in next 14 sts, make corner, dc in last 14 sts; turn. (84 sts)

    Row 6: Ch 2, dc in first 15 sts, make corner, dc in the next 16 sts, make corner, dc in the next 22 sts, make corner, dc in the next 16 sts, make corner, dc in the last 11 sts; turn. (92 sts)

    Row 7: Ch 2, dc in the first 12 sts, make corner, dc in the next 18 sts, make corner, dc in the next 24 sts, make corner, dc in the next 18 sts, make corner, dc in the last 16 sts; turn. (101 sts)

    Row 8: Ch 2, dc in the first 17 sts, make corner, dc in the next 20 sts, make corner, dc in the next 26 sts, make corner, dc in the next 20 sts, make corner, dc in the last 13 sts; turn. (108 sts)

    Row 9: (underarm row) Ch 2, dc in the first 15 sts, ch 8, skip the next 22 sts (between the st markers), dc in the next 14 sts, 2 dc in the next st, dc in the next 15 sts, ch 8, skip 22 sts (between the st markers), dc in the last 19 sts; turn. (65 sts and 16 chs)

    Row 10: Ch 1, hdc in each st and ch to end; break yarn and turn. (81 sts)

    Row 11: With Color B, join with sc in 1st st, *hdc in next st, dc in next st, tr in next st, 3 tr in next st, tr in next st, dc in next st, hdc in next st, sc in next st; repeat from * across; break yarn and turn. (101 sts)

    Row 12: With Color C, join with dc in 1st st, skip next st, dc in next 3 sts, 3 dc in the next st, dc in next 3 sts, *dc3tog, dc in next 3 sts, 3 dc in next st, dc in next 3 sts; repeat from * across until 2 sts remain, skip next st, dc in last st; break yarn and turn. (101 sts)

    Row 13: With Color B, join with tr in 1st st, skip next st, tr in next st, dc in next st, hdc in next st, sc in next st, hdc in next st, dc in next st, tr in next st, *tr3tog, tr in next st, dc in next st, hdc in next st, sc in next st, hdc in next st, dc in next st, tr in next st; repeat from * across until 2 sts remain, skip next st , tr in last st; break yarn and turn. (81 sts)

    Row 14: With Color A, join with hdc in 1st st, hdc in each remaining st across; break yarn and turn. (81 sts)

    Row 15 - 22: Repeat Rows 11-14 twice, do not break yarn after Row 22.

    Edging Round: Ch 1, sc in each st across Row 22, ch 1, sc 40 evenly along front opening, ch 1, sc in each st across neckline (working in unused loops of foundation chain), ch 1, sc 40 evenly along second front opening, ch 1; join with sl st to 1st sc of rnd, turn if needed to work the Button Band up the front of the sweater. NOTE: If you prefer the button band on the other side of the sweater, break yarn and rejoin to ch-1 sp at the corner of your chosen side.

    Button Band:

    Button Band Row 1: Ch 1, sc in ch-1 sp, sc 40 (rem sts left unworked); turn. (41 sts)

    Button Band Row 2: (make button holes) Ch 1, sc in first 7 sts, *ch 1, skip 2 sts, sc in next 4 sts; rep from * across until 4 sts remain, sc in last 4 sts; turn. (5 ch-1 sps)

    Button Band Row 3: Ch 1, sc in each st and 2 sc in each ch-1 sp across; turn. (41 sts)

    Button Band Row 4 (optional): Sl st in each row across; break yarn. (41 sts)

    6-12 MTHS SLEEVES (optional)

    NOTES:
    - Use a stitch marker to keep track of the last st of each row, to make it easier to find when you turn.
    - The rounds begin in the center of the underarm, or in the 5th ch of the ch-8 in the underarm row.

    Round 1: (Right Side) With Color A, join and sc in first 4 underarm sts, hdc 2 in side of Row 9, dc in next 22 sts, hdc 2 in side of Row 9, sc in remaining 4 underarm sts; join to 1st sc with sl st, turn. (34 sts)

    Round 2: (Wrong Side) Ch 1, hdc in the first 6 sts, dc in the next 22 sts, hdc in the last 6 sts; join with sl st, turn. (34 sts)

    Round 3: Ch 1, hdc in the first 4 sts, dc in the next 26 sts, hdc in the last 4 sts; join with sl st, turn. (34 sts)

    Round 4: Ch 2, dc in each st around; join with sl st, turn. (34 sts)

    Round 5 – 14: Repeat Round 4.

    Round 15: Ch 2, *dc in the next 2 sts, dc2tog; repeat from * around until 2 sts remain, dc in the last 2 sts; join with sl st, break yarn. (26 sts)

    Round 16: With Color C, join to any st of the previous row, ch 1, sc in each st around; join with sl st. (26 sts)

    Round 17: Ch 1, sc in each st around; join with sl st, break yarn. (26 sts)


    And that's the Greyson Baby Sweater! I hope you enjoy making it - I can't wait to see your version!

    The Fine Print

    Written pattern copyright Tamara Kelly 2017, all rights reserved. Please do not reprint or repost this pattern, but please do link to this page to share this pattern with others.  If you wish to make items for sale from this pattern or translate it to another language, please visit the About page for details. Thank you to Lion Brand Yarn for providing the yarn for this pattern.

    #MooglyCAL2017: Afghan Block #11

    May 25, 2017 by Tamara Kelly 11 Comments

    How are we almost half way through the 2017 CAL already? Almost, but not quite yet... Today we're enjoying the 11th block of the 2017 Moogly Crochet Along - courtesy of Amy Ramnarine of The Stitchin' Mommy!

    Moogly Crochet Along 2017! Get all 24 patterns FREE over the course of the year, and have a gorgeous handmade blanket by the holidays!Disclaimer: This post includes affiliate links. [Read more...]

    How to Make Butterfly Yarn Bobbins!

    May 24, 2017 by Tamara Kelly 14 Comments

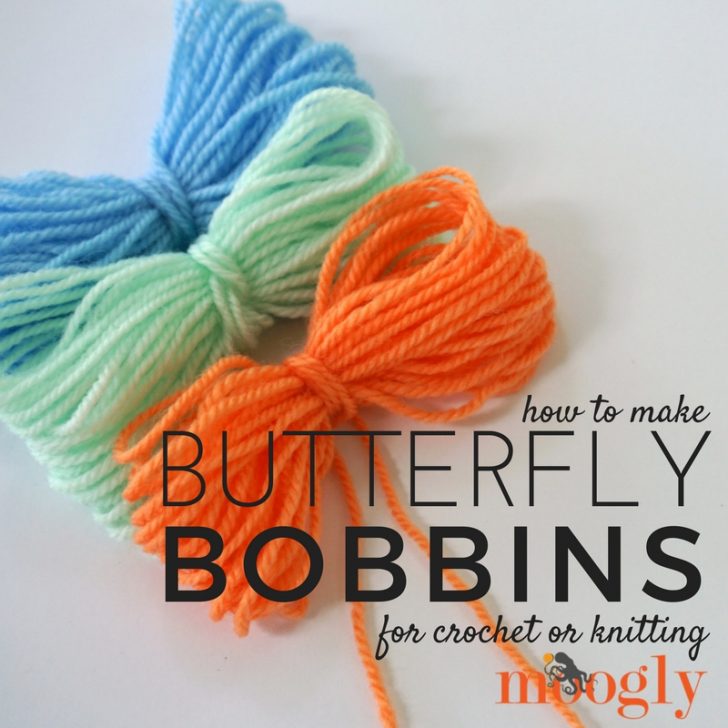
    A few years ago I did a Make and Take at a fiber event taught by Laurinda Reddig of ReCrochetions - and she taught us how to make butterfly bobbins! That wasn't the point of her demo, but it is a skill that's come in handy on a variety of projects since - both crochet and knit! So here's how to make Butterfly Yarn Bobbins!

    How to make Butterfly Yarn Bobbins - great tip for knitters and crocheters! See how on Mooglyblog.com!Disclaimer: Lion Brand Yarn provided the materials for this video.
    This post includes affiliate links.
    [Read more...]

    Weaving Summer Fun with the Wrapit Loom: Review

    May 22, 2017 by Tamara Kelly Leave a Comment

    Earlier this year I was lucky enough to be able to attend Creativation 2017, where I was able to see some of the newest craft products that creative people are bringing to market - and that included the Wrapit Loom! I had so much fun in their booth that they sent me home with their kits to try - and here's what I thought!

    Wrapit Loom - craft kit review on Moogly! Disclaimer: This post includes affiliate links; I was provided products free to review but all opinions are my own.

    [Read more...]

    Double the Love Baby Blanket

    May 19, 2017 by Tamara Kelly 26 Comments

    Double the Love Baby Blanket - free crochet pattern with photo tutorial on Mooglyblog.com!

    The Double the Love Baby Blanket is double thick, super plus, and reversible for two different looks - and it's a free crochet pattern here on Moogly!

    Disclaimer: This post includes affiliate links; Lion Brand provided the yarn for this pattern.

    Prefer an ad-free PDF? You've got options!

    This button leads to the pattern on Etsy

    Prefer the free blog version? Keep scrolling!

    Lots of color, minimal ends

    I love the stitch pattern used in the Double the Love Baby Blanket, and it's one I've been looking forward to re-visiting for a long time. And Lion Brand's Pound of Love was perfect for it, with giant skeins of bright beautiful color - making this a 3 skein baby blanket with just 8 ends to weave in when you're all done! (WOW!)

    Double the Love Baby Blanket - free crochet pattern with photo tutorial on Mooglyblog.com!

    And don't you just love the way you get two different looks?! I can't decide which side I love more! The stitch pattern used here is a little tricky, but I've included photos below to help - as well as the stitch multiple so you can make a Double the Love Afghan in any size!


    Double the Love Baby Blanket

    Click here to add this pattern to your Ravelry Queue and Favorites

    US - K, 6.5mm - Furls Crochet

    2000 yds Lion Brand Pound of Love (worsted/yarn symbol "4"/UK: 10 ply; 1020 yds/933 m; 16 oz)
    Color A - 100 White (1 ball, or 1000 yds)
    Color B - 148 Turquoise (1 ball, or 667 yds)
    Color C - 102 Bubblegum (1 ball, or 333 yds)

    Stitch markers - Clover

    Gauge: 15 sts x 15 rows = 4"/10 cm in pattern

    Finished Size: 37" x 42.5"

    Stitch Multiple: mult of 5 +1, plus 1 for the tch

    Helpful Links:

    Double the Love Stitch Video Tutorial

    Crochet Abbreviations

    Join with dc

    SPECIAL STITCH:
    V st - (2 dc, ch 1, 2 dc) in the indicated st

    INSTRUCTIONS:

    Row 1: With Color A (CA), ch 137, skip first ch, sc in next ch, *ch 5, skip 4 chs, sc in next ch; rep from *across, remove hook from loop and place marker (pm) in loop to secure, do not turn. (27 ch-5 loops)

    Row 2: (Worked into the unused loops of the foundation chain at the base of Row 1 - see images below.) With Color B (CB), join with dc in first ch, skip next ch, V st in next ch, *skip 4 ch, V st in next ch; rep from * across until 3 chs remain, skip 2 chs, dc in last ch, remove hook from loop and pm in loop to secure, turn. (27 V sts)

    Crochet the Double the Love Baby Blanket with the Moogly free pattern and photo tutorial!

    Row 3: Insert hook in CA loop, ch 3 (counts as first dc), then holding work so that CB is behind CA, V st in the next CA ch-5 loop and the ch-1 sp of the next CB V st enclosing them both in the st, V st in each loop and ch sp pair across, dc in last CA sc; remove hook from loop and pm, do not turn. (27 V sts)Crochet the Double the Love Baby Blanket with the Moogly free pattern and photo tutorial!

    Row 4: (Worked behind the previous row and only into the same color row - see images below.) Insert hook in CB loop, ch 1, sc in first st, *ch 5, sc in the space between the next two same color V sts; rep from * across finishing last rep sc in top of ch-3, turn. (27 ch-5 loops)Crochet the Double the Love Baby Blanket with the Moogly free pattern and photo tutorial!

    Row 5: Ch 3, V st in each ch-5 loop and ch sp pair across, dc in last same color sc; remove hook from loop and pm, do not turn. (27 V sts)Crochet the Double the Love Baby Blanket with the Moogly free pattern and photo tutorial!

    Row 6 and 7: With CA, repeat Rows 4 and 5.

    Row 8 and 9: With CB, repeat Rows 4 and 5.

    Row 10 - 56: Repeat Rows 6-9, ending with a Row 8 (CB) repeat; break CB.

    Row 57: With Color C(CC), join with dc to first st,  V st in each ch-5 loop and ch sp pair across, dc in last same color sc; remove hook from loop and pm, do not turn. (27 V sts)

    Row 58 - 112: Repeat Rows 6-9 with Color A and CC, ending with a Row 8 (CC) repeat; break CC.

    Row 113: With CB, repeat Row 57.

    Row 114 - 168: Repeat Rows 6-9 with CA and CB, ending with a Row 8 (CB) repeat; break CA.

    Row 169: Continuing with CB, ch 1, sc in first st and first st of CA row, ch 1, sc in next ch-5 loop and ch sp pair, ch 1, *sc between next 2 CA V sts, ch 1, sc in next ch-5 loop and ch sp pair, ch 1; rep from * across, sc in last st of CB and CA rows, turn. (55 sc)

    Row 170/End Border: Sl st in each st and ch sp across; break yarn.

    Beginning Border: With CA, join to foundation ch and sc evenly across; break yarn.

    Double the Love Baby Blanket - free crochet pattern with photo tutorial on Mooglyblog.com!


    And that's the free crochet pattern for the Double the Trouble Baby Blanket!

    I hope you enjoy making this double sided crochet blanket - with the stitch multiple given above and the long chain method, you could create one of these fun reversible crochet blankets for every room of the home.

    I can't wait to see what you all make with it, so be sure to share your photos on social media and Ravelry!

    Double the Love Baby Blanket - free crochet pattern with photo tutorial on Mooglyblog.com!

    The Fine Print

    Written pattern copyright Tamara Kelly 2017, all rights reserved. Please do not reprint or repost this pattern, but please do link to this page to share this pattern with others. If you wish to make items for sale from this pattern or translate it to another language, please visit the About page for details. Thank you to Lion Brand Yarn for providing the yarn for this pattern.

    My Favorite Crochet Magazines!

    May 18, 2017 by Tamara Kelly 25 Comments

    Just because we now have the internet, it doesn't mean we're done with crochet magazines. Whether they come to your mailbox or your inbox, crochet magazines are happy mail - and there are seven of them that I'm highlighting here on Moogly!

    Crochet Magazines = Happy Mail! Find the 7 hottest crochet magazines on Mooglyblog.com! Disclaimer: This post includes affiliate links. [Read more...]

    Hookin On Hump Day #143: A Yarny Link Party!

    May 16, 2017 by Tamara Kelly 14 Comments

    May usually signals a bit of a shift in the craft world, but this spring crochet and yarn crafts are going strong! And we've got 5 gorgeous new projects to prove it - this week on Hookin On Hump Day!

    Hookin On Hump Day 143 - the best of the best from around the web, with Moogly and Petals to Picots!

    [Read more...]

    Cozy Up to the Lion Brand Baby Soft Giveaway!

    May 15, 2017 by Tamara Kelly 16 Comments

    Lion Brand Baby Soft® is a wonderfully soft acrylic blend sportweight yarn - and I'm giving away FIVE skeins of it this week on Moogly!

    Win 5 balls of Lion Brand Baby Soft on Mooglyblog.com! Ends 5/22/17!Disclaimer: Materials and shipping for this giveaway are provided by Lion Brand Yarn. [Read more...]

    Sweetie Pouf

    May 12, 2017 by Tamara Kelly 2 Comments

    Babies are cute, poufs are cute, and this baby pouf is so cute I had to call it the Sweetie Pouf! Easy enough for beginners, it's got a few fun tricks I think you'll love - and it's a free crochet pattern here on Moogly!

    Sweetie Pouf - free pattern on Mooglyblog.com! Crafts for real life ♥

    Disclaimer: This post includes affiliate links; the yarn for this pattern was provided by Lion Brand. 

    Make It a Set!

    Designed to match the Striped Summer Baby Hoodie, the Sweetie Pouf also makes a great piece all on its own. It's a little different from your usual baby item - and that makes it stand out from the crowd! And it includes two finishing options too, for your own custom needs and wants.

    Sweetie Pouf - free pattern on Mooglyblog.com! Crafts for real life ♥

    It looks great in every room, from nursery to living room - to craft room! It's fun for toddlers to play with and lounge on, and makes a great little footstool for mom or dad too. Or how about a bit of elbow support while nursing that new baby... or for tired crochet shoulders?! The uses for this tiny pouf are endless - I hope you enjoy making it!

    Sweetie Pouf - free pattern on Mooglyblog.com! Crafts for real life ♥

    Please note that this is a crochet pattern, not a finished item that has gone through official US safety testing - be sure to monitor small children when they are using any handmade item.


    Sweetie Pouf

    Please click here to add this pattern to your Ravelry Queue and Favorites!

    US - G, 4.0mm hook - Furls Crochet

    400-520 total yards used:

    Lion Brand Baby Soft (Light/DK/yarn symbol “3”/UK: 8ply; 459 yds/420m; 5 oz)
    Color A: Apricot (1 ball, or 100-130 yds)
    Color B: Mint (1 ball, or 100-130 yds)
    Color C: Pastel Blue (1 ball, or 100-130 yds)

    Lion Brand Baby Soft Pompadour (Light/DK/yarn symbol “3”/UK: 8ply; 367 yds/335m; 4 oz)
    Color D: Baby White Pompadour (1 ball, or 100-130 yds)

    2 Pillow Forms - 16" round

    Thread (white) and sewing needle

    Optional: Dritz ⅛" Soft Stretch Elastic, 16" length

    Gauge: Rnds 1-4 = 3.5" diameter

    Finished Size: approximately 14" diameter x 9" tall

    Helpful Links: Crochet Abbreviations; magic circle tutorial; blo tutorial; CSDC - chainless starting double crochet tutorial; STDC - standing double crochet tutorial; seamless join tutorial; dc2tog tutorial

    Sweetie Pouf - free pattern on Mooglyblog.com! Crafts for real life ♥

    NOTE:

    This pattern is written using special stitches - the CSDC and STDC, both with tutorials linked above. If preferred, substitute a ch 3 for these stitches as the first dc of the round.

    INSTRUCTIONS:

    Prep the pillows:

    Using thread and sewing needle, sew seams of pillows together all the way around using the whip stitch or preferred method.

    Sweetie Pouf - free pattern on Mooglyblog.com! Crafts for real life ♥

    Prep the elastic (optional):

    Cut a 16" length of elastic, overlap ends and sew them together with thread and sewing needle, so that a ring of elastic is made.

    Sweetie Pouf - free pattern on Mooglyblog.com! Crafts for real life ♥

    Crochet Instructions

    Round 1: With Color A, make a magic circle, work 12 dc in the ring; join. (12 sts)

    Round 2: CSDC, dc in the 1st st, 2 dc in each remaining st around; break yarn and seamless join to 2nd st of rnd. (24 sts)

    Round 3: With Color B, working entire rnd in blo, STDC in any st, 2 dc in the next st, *dc in the next st, 2 dc in the next st; rep from * around, join. (36 sts)

    Round 4: CSDC, dc in next st, 2 dc in next st, *dc in next 2 sts, 2 dc in next st; rep from * around, break yarn and seamless join to 2nd st of rnd. (48 sts)

    Round 5: With Color C, working entire rnd in blo, STDC in any st, dc in next 2 sts, 2 dc in the next st, *dc in the next 3 sts, 2 dc in the next st; rep from * around, join. (60 sts)

    Round 6: CSDC, dc in next 3 sts, 2 dc in next st, *dc in next 4 sts, 2 dc in next st; rep from * around, break yarn and seamless join to 2nd st of rnd. (72 sts)

    Round 7: With Color D, working entire rnd in blo, STDC in any st, dc in next 4 sts, 2 dc in the next st, *dc in the next 5 sts, 2 dc in the next st; rep from * around, join. (84 sts)

    Round 8: CSDC, dc in next 5 sts, 2 dc in next st, *dc in next 6 sts, 2 dc in next st; rep from * around, break yarn and seamless join to 2nd st of rnd. (96 sts)

    Round 9: With Color A, working entire rnd in blo, STDC in any st, dc in next 6 sts, 2 dc in the next st, *dc in the next 7 sts, 2 dc in the next st; rep from * around, join. (108 sts)

    Round 10: CSDC, dc in next 7 sts, 2 dc in next st, *dc in next 8 sts, 2 dc in next st; rep from * around, break yarn and seamless join to 2nd st of rnd. (120 sts)

    Round 11: With Color B, working entire rnd in blo, STDC in any st, dc in next 8 sts, 2 dc in the next st, *dc in the next 9 sts, 2 dc in the next st; rep from * around, join. (132 sts)

    Round 12: CSDC, dc in next 9 sts, 2 dc in next st, *dc in next 10 sts, 2 dc in next st; rep from * around, break yarn and seamless join to 2nd st of rnd. (144 sts)

    Round 13: With Color C, working entire rnd in blo, STDC in any st, dc in next 10 sts, 2 dc in the next st, *dc in the next 11 sts, 2 dc in the next st; rep from * around, join. (156 sts)

    Round 14: CSDC, dc in next 11 sts, 2 dc in next st, *dc in next 12 sts, 2 dc in next st; rep from * around, break yarn and seamless join to 2nd st of rnd. (168 sts)

    Round 15: With Color D, working entire rnd in blo, STDC in any st, dc in each rem st around; join. (168 sts)

    Round 16: CSDC, dc in each rem st around; break yarn and seamless join to 2nd st of rnd. (168 sts)

    Round 17 and 18: With Color A, rep Round 15 and 16.

    Round 19 and 20: With Color B, rep Round 15 and 16.

    Round 21: With Color C, working entire rnd in blo, STDC in any st, dc in next 11 sts, dc2tog, *dc in the next 12 sts, dc2tog; rep from * around, join. (156 sts)

    Round 22: CSDC, dc in next 10 sts, dc2tog, *dc in next 11 sts, dc2tog; rep from * around, break yarn and seamless join to 2nd st of rnd. (144 sts)

    Round 23: With Color D, working entire rnd in blo, STDC in any st, dc in next 9 sts, dc2tog, *dc in the next 10 sts, dc2tog; rep from * around, join. (132 sts)

    Round 24: CSDC, dc in next 8 sts, dc2tog, *dc in next 9 sts, dc2tog; rep from * around, break yarn and seamless join to 2nd st of rnd. (120 sts)

    Round 25: With Color A, working entire rnd in blo, STDC in any st, dc in next 7 sts, dc2tog, *dc in the next 8 sts, dc2tog; rep from * around, join. (108 sts)

    Round 26: CSDC, dc in next 6 sts, dc2tog, *dc in next 7 sts, dc2tog; rep from * around, break yarn and seamless join to 2nd st of rnd. (96 sts)

    Round 27: With Color B, working entire rnd in blo, STDC in any st, dc in next 5 sts, dc2tog, *dc in the next 6 sts, dc2tog; rep from * around, join. (84 sts)

    Round 28: CSDC, dc in next 4 sts, dc2tog, *dc in next 5 sts, dc2tog; rep from * around, break yarn and seamless join to 2nd st of rnd. (72 sts)

    Round 29: With Color C, working entire rnd in blo, STDC in any st, dc in next 3 sts, dc2tog, *dc in the next 4 sts, dc2tog; rep from * around, join. (60 sts)

    FINISHING OPTIONS:

    To completely enclose pillows for a non-removable cover:

    Insert pillow, then continue crocheting as follows:

    Round 30: CSDC, dc in next 2 sts, dc2tog, *dc in next 3 sts, dc2tog; rep from * around; break yarn and seamless join to 2nd st of rnd. (48 sts)

    Round 31 - end: Continue decreasing in pattern until 12 sts remain, gather and close circle to finish off.

    Sweetie Pouf - free pattern on Mooglyblog.com! Crafts for real life ♥

    To create a removable cover (elastic option):

    Round 30: CSDC, dc in next 2 sts, dc2tog, *dc in next 3 sts, dc2tog; rep from * around; join, do not break yarn. (48 sts)

    Round 31: CSDC, dc in each rem st around; join. (48 sts)

    Round 32: Ch 1, sc in 1st st enclosing elastic circle, ch 1, *sc in next st enclosing elastic circle, ch 1; rep from * around, break yarn and seamless join to 1st st of rnd. (96 sts inc ch)

    Insert pillow, arranging cover so that the circles are centered with the opening at the bottom of the pouf.


    Sweetie Pouf - free pattern on Mooglyblog.com! Crafts for real life ♥

    And that's the Sweetie Pouf! I've been looking for a tiny footrest for under my desk - and this is perfect! But I have a sneaking suspicion it might walk off with one of the kids first...

    I hope you enjoy making this free crochet pouf pattern - use the Sweetie Pouf for babies, adults, kids, anywhere you need a bright pop of color and fun round cushion.

    Get the matching pattern for the Striped Summer Baby Hoodie here - and be sure to share your photos on social media and Ravelry, I love seeing what you've made!

    The Fine Print

    Written pattern copyright Tamara Kelly 2017, all rights reserved. Please do not reprint or repost this pattern, but please do link to this page to share this pattern with others. If you wish to make items for sale from this pattern or translate it to another language, please visit the About page for details. Thank you to Lion Brand Yarn for providing the yarn for this pattern!

    #MooglyCAL2017: Afghan Block #10

    May 11, 2017 by Tamara Kelly 6 Comments

    It's the 10th on the 11th! Confused? It's the 10th block of the 2017 Moogly Crochet Along - debuting on May 11th! Which tripped me up way too many times when trying to write this up - thankfully, Kathy from ELK Studio kept both the dates and the sides of this gorgeous square straight!

    Moogly Crochet Along 2017! Get all 24 patterns FREE over the course of the year, and have a gorgeous handmade blanket by the holidays!Disclaimer: This post includes affiliate links. [Read more...]

    Greyson Baby Blanket Tutorial

    May 10, 2017 by Tamara Kelly 10 Comments

    I loved crocheting the Greyson Baby Blanket, and I want you to love it too! But chevrons can be tricky - so here to help is the Greyson Baby Blanket tutorial video!

    Greyson Baby Blanket - video tutorial for this FREE crochet pattern on Mooglyblog.com!Disclaimer: This post includes affiliate links.  [Read more...]

    Supersize Crochet by Sarah Shrimpton: Review & Giveaway!

    May 8, 2017 by Tamara Kelly 2 Comments

    I got to peek inside Sarah Shrimpton's new book - and Supersize Crochet lives up to its name! Here's a peek inside - and a chance to win your own paperback copy of this fun new crochet pattern book!

    Get a peak inside Sarah Shrimpton's new book, Supersize Crochet - and enter to win your own copy on Moogly! Giveaway open worldwide, ends 5/15/17 at 12:15am central us time.Disclaimer: I received a PDF copy of this book to review but all opinions are my own. [Read more...]

    Striped Summer Baby Hoodie

    May 5, 2017 by Tamara Kelly 10 Comments

    Striped Summer Baby Hoodie - free crochet pattern in 2 sizes on Mooglyblog.com! Perfect for summer breezes and as a swimming coverup!

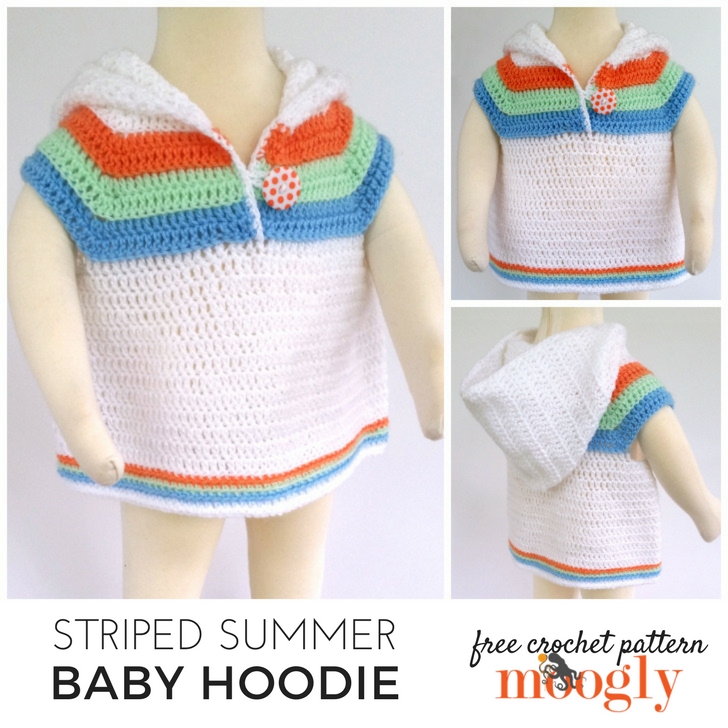
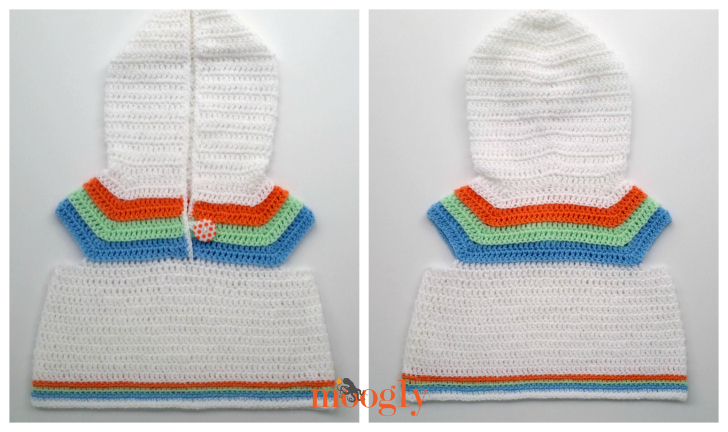
    The Striped Summer Baby Hoodie is sleeveless, hooded (of course), and ready for action! Crochet it today in 0-6 mths or 6-12 mths - both sizes are included in this free crochet baby sweater pattern!

    Disclaimer: This post contains affiliate links. Lion Brand Yarn provided the yarn for this pattern creation. 

    Prefer an ad-free PDF? You've got options!

    Prefer the free blog version? Keep scrolling!

    Light Summer Layers

    The Striped Summer Baby Hoodie features a classic summer color palette that's ready for your custom touches. It makes a fantastic little beach or pool coverup, as well as a final layer for breezy days. Alas, I no longer have a little one to model it for you - but I did use the sizing standards provided by the Craft Yarn Council, to get two sizes to carry your little one right through their first summer!

    Striped Summer Baby Hoodie - free crochet pattern in 2 sizes on Mooglyblog.com! Perfect for summer breezes and as a swimming coverup!


    Striped Summer Baby Hoodie

    Click here to add this pattern to your Ravelry Queue and Favorites

    US - G, 4.0mm hook - Furls Crochet

    415-575 yds total yarn used:

    Lion Brand Baby Soft Pompadour (Light/DK/yarn symbol "3"/UK: 8ply; 367 yds/335m; 4 oz)
    Color A: Baby White Pompadour (1 ball for smaller size, or 325 yds; 2 balls for larger size, or 425 yds)

    Lion Brand Baby Soft (Light/DK/yarn symbol "3"/UK: 8ply; 459 yds/420m; 5 oz)
    Color B: Apricot (1 ball for both sizes, or 20-40 yds)
    Color C: Mint (1 ball for both sizes, or 30-50 yds)
    Color D: Pastel Blue (1 ball for both sizes, or 40-60 yds)

    Stitch Markers - Clover

    Button (optional) - 1" (25mm) Coral Dot shown

    Gauge: 18 sts x 10 rows = 4"/10 cm in dc

    Sizes: 0-6 mths (shown); 6-12 mths

    Helpful Links: Crochet Abbreviations; Top Down Yokes; BLO (back loop only); Whip Stitch

    Special Stitches:

    MC - Make Corner:  Work 3 dc in indicated st, placing a stitch marker in the center dc - note that when the sts before and after the corner are worked in the BLO, the MC sts should also be worked in the BLO.

    Optional: Replace the ch 3 at the beginning of each round with a Chainless Starting Double Crochet or Standing Double Crochet.

    INSTRUCTIONS

    0-6 Month Size Instructions:

    Row 1 (RS): With Color A, ch 58, skip 2 chs closest to hook, dc in next 10 sts, MC in next st, dc in next 8 sts, MC in next st, dc in next 16 sts, MC in next st, dc in next 8 sts, MC in next st, dc in last 10 sts; turn. (64 dc)

    Row 2 (WS): Ch 3 (counts as 1st dc), [dc in next 10 sts, MC in next st] twice, dc in next 18 sts, [MC in next st, dc in next 10 sts] twice, dc in last st; turn and break yarn. (72 dc)

    Row 3: With Color B, join to 1st st and ch 3, blo dc in next 11 sts, MC in next st, blo dc in next 12 sts, MC in next st, blo dc in next 20 sts, MC in next st, blo dc in next 12 sts, MC in next st, blo dc in next 11 sts, dc in last st; turn. (80 dc)

    Row 4: Ch 3, dc in next 12 sts, MC in next st, dc in next 14 sts, MC in next st, dc in next 22 sts, MC in next st, dc in next 14 sts, MC in next st, dc in last 13 sts; turn and break yarn. (88 dc)

    Row 5: With Color C, join to 1st st and ch 3, blo dc in next 13 sts, MC in next st, blo dc in next 16 sts, MC in next st, blo dc in next 24 sts, MC in next st, blo dc in next 16 sts, MC in next st, blo dc in next 13 sts, dc in last st; turn. (96 dc)

    Row 6: Ch 3, dc in next 14 sts, MC in next st, dc in next 18 sts, MC in next st, dc in next 26 sts, MC in next st, dc in next 18 sts, MC in next st, dc in last 15 sts; turn and break yarn. (104 dc)

    Row 7: With Color D, join to 1st st and ch 3, blo dc in next 15 sts, MC in next st, blo dc in next 20 sts, MC in next st, blo dc in next 28 sts, MC in next st, blo dc in next 20 sts, MC in next st, blo dc in next 15 sts, dc in last st; turn. (112 dc)

    Row 8: Ch 3, dc in next 16 sts, MC in next st, dc in next 22 sts, MC in next st, dc in next 30 sts, MC in next st, dc in next 22 sts, MC in next st, dc in last 17 sts; turn and break yarn. (120 dc)

    Round 9 (underarms made and fronts joined, see yoke tutorial linked above): With Color A, join to 2nd marked st in blo, ch 3, blo dc in next 32 sts, blo dc in next (3rd marked) st, ch 8 (underarm made), skip next 24 sts, blo dc in next (4th) marked st, blo dc in next 14 sts, then overlapping the last 4 sts of this front half on top of the 4 sts at the other end of the previous row (last 4 sts on the other front half), blo dc through the next 4 sts and through both loops of each st behind them, then continuing on the other front half blo dc in the next 14 sts, blo dc in next (1st marked) st, ch 8, skip last 24 sts; join to 1st dc of this rnd with a sl st, remove all st markers. (68 dc and 16 ch)

    Round 10: Ch 3, dc in 1st st, dc in next 32 sts, 2 dc in next st, dc in next 8 chs, 2 dc in next st, dc in next 32 sts, 2 dc in next st, dc in next 8 ch; join. (88 sts)

    Round 11: Ch 3, dc in next 16 sts, 2 dc in next st, [dc in next 21 sts, 2 dc in next st] 3 times, dc in last 4 sts; join. (92 sts)

    Round 12: Ch 3, dc in next 4 sts, 2 dc in next st, [dc in next 22 sts, 2 dc in next st] 3 times, dc in last 17 sts; join. (96 sts)

    Round 13: Ch 3, dc in next 8 sts, 2 dc in next st, [dc in next 23 sts, 2 dc in next st] 3 times, dc in last 14 sts; join. (100 sts)

    Round 14: Ch 3, dc in next 12 sts, 2 dc in next st, [dc in next 24 sts, 2 dc in next st] 3 times, dc in last 11 sts; join. (104 sts)

    Round 15: Ch 3, dc in next 1 st, 2 dc in next st, [dc in next 25 sts, 2 dc in next st] 3 times, dc in last 23 sts; join. (108 sts)

    Round 16: Ch 3, dc in next 18 sts, 2 dc in next st, [dc in next 26 sts, 2 dc in next st] 3 times, dc in last 7 sts; join. (112 sts)

    Round 17: Ch 3, dc in next 10 sts, 2 dc in next st, [dc in next 27 sts, 2 dc in next st] 3 times, dc in last 16 sts; join. (116 sts)

    Round 18 - 21: Ch 3, dc in each remaining st around; join. (116 sts) After Round 21, break yarn.

    Round 22: With Color B, join to any st in blo, ch 1 and sc in same st as join, blo sc in each remaining st around; join and break yarn. (116 sts)

    Round 23: With Color C, repeat Round 22.

    Round 24: With Color D, repeat Round 22.

    Round 25: With Color A, repeat Round 22, do not break yarn.

    Round 26: Ch 1, sc in each st around; join and break yarn. (116 sts)

    0-6 Month Hood Instructions (optional, skip to Finishing Instructions below if desired):

    Row 1 (RS - worked across the unused loops at the "bottom" of Row 1, at the neckline): With Color A, join to 1st st and ch 3, dc in next 26 sts, 2 dc in next st and place marker (pm) in 2nd dc made, 2 dc in next st and pm in 1st dc made, dc in each remaining st across; turn. (58 sts)

    Row 2 (WS): Ch 3, dc in each st to marked st, 2 dc in each of next 2 sts (move markers up to corresponding sts on each row), dc in each remaining st across; turn. (60 sts)

    Row 3 - 5: Repeat Row 2. (66 sts in Row 5)

    Row 6 - 12: Ch 3, dc in each remaining st across (maintain marker placement); turn. (66)

    Row 13: Ch 3, dc in each remaining st to st before 1st marked st, [dc2tog in next 2 sts (pm)] twice, dc in each remaining st across; turn. (64 sts)

    Row 14 - 20: Repeat Row 13. (50 sts in Row 20)

    Row 21 (seam top of hood): Ch 3, dc in next 22 sts, sc2tog twice; break yarn leaving long tail (rem sts unworked). Use tail to whip stitch Row 21 sts to unworked sts of Row 20.

    0-6 Month Finishing Instructions:

    With Color A, join to front half at base of opening (bottom of Row 8), sc evenly all around front of sweater and hood and down other half of front; break yarn. Optional: Using Color A, sew button to sweater as shown, and ch a loop long enough to go around button, sew to opposite front as shown.

    Striped Summer Baby Hoodie - free crochet pattern in 2 sizes on Mooglyblog.com! Perfect for summer breezes and as a swimming coverup!

    6-12 Month Size Instructions:

    Row 1 (RS): With Color A, ch 58, skip 2 chs closest to hook, dc in next 10 sts, MC in next st, dc in next 8 sts, MC in next st, dc in next 16 sts, MC in next st, dc in next 8 sts, MC in next st, dc in last 10 sts; turn. (64 dc)

    Row 2 (WS): Ch 3 (counts as 1st dc), [dc in next 10 sts, MC in next st] twice, dc in next 18 sts, [MC in next st, dc in next 10 sts] twice, dc in last st; turn and break yarn. (72 dc)

    Row 3: With Color B, join to 1st st and ch 3, blo dc in next 11 sts, MC in next st, blo dc in next 12 sts, MC in next st, blo dc in next 20 sts, MC in next st, blo dc in next 12 sts, MC in next st, blo dc in next 11 sts, dc in last st; turn. (80 dc)

    Row 4: Ch 3, dc in next 12 sts, MC in next st, dc in next 14 sts, MC in next st, dc in next 22 sts, MC in next st, dc in next 14 sts, MC in next st, dc in last 13 sts; turn and break yarn. (88 dc)

    Row 5: With Color C, join to 1st st and ch 3, blo dc in next 13 sts, MC in next st, blo dc in next 16 sts, MC in next st, blo dc in next 24 sts, MC in next st, blo dc in next 16 sts, MC in next st, blo dc in next 13 sts, dc in last st; turn. (96 dc)

    Row 6: Ch 3, dc in next 14 sts, MC in next st, dc in next 18 sts, MC in next st, dc in next 26 sts, MC in next st, dc in next 18 sts, MC in next st, dc in last 15 sts; turn and break yarn. (104 dc)

    Row 7: With Color D, join to 1st st and ch 3, blo dc in next 15 sts, MC in next st, blo dc in next 20 sts, MC in next st, blo dc in next 28 sts, MC in next st, blo dc in next 20 sts, MC in next st, blo dc in next 15 sts, dc in last st; turn. (112 dc)

    Row 8: Ch 3, dc in next 16 sts, MC in next st, dc in next 22 sts, MC in next st, dc in next 30 sts, MC in next st, dc in next 22 sts, MC in next st, dc in last 17 sts; turn and break yarn. (120 dc)

    Row 9: With Color B, join to 1st st and ch 3, blo dc in next 17 sts, MC in next st, blo dc in next 24 sts, MC in next st, blo dc in next 32 sts, MC in next st, blo dc in next 24 sts, MC in next st, blo dc in next 17 sts, dc in last st; turn. (128 dc)

    Row 10: Ch 3, dc in next 18 sts, MC in next st, dc in next 26 sts, MC in next st, dc in next 34 sts, MC in next st, dc in next 26 sts, MC in next st, dc in last 19 sts; turn and break yarn. (136 dc)

    Round 11 (underarms made and fronts joined, see yoke tutorial linked above): With Color A, join to 2nd marked st in blo, ch 3, blo dc in next 36 sts, blo dc in next (3rd marked) st, ch 8 (underarm made), skip next 28 sts, blo dc in next (4th) marked st, blo dc in next 16 sts, then overlapping the last 4 sts of this front half on top of the 4 sts at the other end of the previous row (last 4 sts on the other front half), blo dc through the next 4 sts and through both loops of each st behind them, then continuing on the other front half blo dc in the next 16 sts, blo dc in next (1st marked) st, ch 8, skip last 28 sts; join to 1st dc of this rnd with a sl st, remove all st markers. (76 dc and 16 ch)

    Round 12: Ch 3, dc in 1st st, dc in next 36 sts, 2 dc in next st, dc in next 8 chs, 2 dc in next st, dc in next 36 sts, 2 dc in next st, dc in next 8 ch; join. (96 sts)

    Round 13: Ch 3, dc in next 16 sts, 2 dc in next st, [dc in next 23 sts, 2 dc in next st] 3 times, dc in last 6 sts; join. (100 sts)

    Round 14: Ch 3, dc in next 4 sts, 2 dc in next st, [dc in next 24 sts, 2 dc in next st] 3 times, dc in last 19 sts; join. (104 sts)

    Round 15: Ch 3, dc in next 8 sts, 2 dc in next st, [dc in next 25 sts, 2 dc in next st] 3 times, dc in last 16 sts; join. (108 sts)

    Round 16: Ch 3, dc in next 12 sts, 2 dc in next st, [dc in next 26 sts, 2 dc in next st] 3 times, dc in last 13 sts; join. (112 sts)

    Round 17: Ch 3, dc in next 1 st, 2 dc in next st, [dc in next 27 sts, 2 dc in next st] 3 times, dc in last 25 sts; join. (116 sts)

    Round 18: Ch 3, dc in next 18 sts, 2 dc in next st, [dc in next 28 sts, 2 dc in next st] 3 times, dc in last 9 sts; join. (120 sts)

    Round 19: Ch 3, dc in next 10 sts, 2 dc in next st, [dc in next 29 sts, 2 dc in next st] 3 times, dc in last 18 sts; join. (124 sts)

    Round 20: Ch 3, dc in next 24 sts, 2 dc in next st, [dc in next 30 sts, 2 dc in next st] 3 times, dc in last 5 sts; join. (128 sts)

    Round 21: Ch 3, dc in next 4 sts, 2 dc in next st, [dc in next 31 sts, 2 dc in next st] 3 times, dc in last 26 sts; join. (132 sts)

    Round 22-25: Ch 3, dc in each remaining st around; join. (132 sts) After Round 25, break yarn.

    Round 26: With Color B, join to any st in blo, ch 1 and sc in same st as join, blo sc in each remaining st around; join and break yarn. (132 sts)

    Round 27: With Color C, repeat Round 26.

    Round 28: With Color D, repeat Round 26.

    Round 29: With Color B, repeat Round 26.

    Round 30: With Color A, repeat Round 26, do not break yarn.

    Round 31: Ch 1, sc in each st around; join and break yarn. (132 sts)

    6-12 Month Hood Instructions (optional, skip to Finishing Instructions below if desired):

    Row 1 (RS - worked across the unused loops at the "bottom" of Row 1, at the neckline): With Color A, join to 1st st and ch 3, dc in next 26 sts, 2 dc in next st and place marker (pm) in 2nd dc made, 2 dc in next st and pm in 1st dc made, dc in each remaining st across; turn. (58 sts)

    Row 2 (WS): Ch 3, dc in each st to marked st, 2 dc in each of next 2 sts (move markers up to corresponding sts on each row), dc in each remaining st across; turn. (60 sts)

    Row 3 - 7: Repeat Row 2. (70 sts in Row 7)

    Row 8 - 14: Ch 3, dc in each remaining st across (maintain marker placement); turn. (70)

    Row 15: Ch 3, dc in each remaining st to st before 1st marked st, [dc2tog in next 2 sts (pm)] twice, dc in each remaining st across; turn. (68 sts)

    Row 16 - 24: Repeat Row 13. (50 sts in Row 24)

    Row 25 (seam top of hood): Ch 3, dc in next 22 sts, sc2tog twice; break yarn leaving long tail (rem sts unworked). Use tail to whip stitch Row 25 sts to unworked sts of Row 24.

    6-12 Month Finishing Instructions:

    With Color A, join to front half at base of opening (bottom of Row 10), sc evenly all around front of sweater and hood and down other half of front; break yarn. Optional: Using Color A, sew button to sweater as shown, and ch a loop long enough to go around button, sew to opposite front as shown.


    And that's the Striped Summer Baby Hoodie free crochet pattern on Moogly! I hope you enjoy making it for the little ones in your life!

    As always, getting out one free pattern a week means a quick turnaround - so YOU are the testers! Please let me know if you find any errors in the patterns above so you can help make them better for all. And if you make it and love it, please come share your photos on Ravelry or on the Moogly Facebook page!

    The Fine Print

    Written pattern copyright Tamara Kelly 2017, all rights reserved. Please do not reprint or repost this pattern, but please do link to this page to share this pattern with others. If you wish to make items for sale from this pattern or translate it to another language, please visit the About page for details. Thank you to Lion Brand Yarn for providing the yarn for this pattern!

    Shaggy Baggy Project Tote Giveaway on Moogly!

    May 4, 2017 by Tamara Kelly 7 Comments

    Disclaimer: This post is sponsored by Shaggy Baggy and I was given the product to review, but all opinions are my own.

    Today I’m working with Shaggy Baggy to show you their fantastic bags - perfect for crocheters, knitters, moms, and people who have stuff. I got to try one out and I loved it - and I get to give one away to a lucky reader here on Moogly! The giveaway is over, but see below for a COUPON CODE (as well as my review)!

    Shaggy Baggy - the perfect project tote for crochet and crafts... or whatever else you need to carry! Win one on Mooglyblog.com - open to US addresses only, ends 5/11/17 at 12:15am Central time. [Read more...]

    Hookin On Hump Day #142: A Yarny Link Party!

    May 2, 2017 by Tamara Kelly 5 Comments

    May... I show you some beautiful crochet patterns? Because we've got 5 gorgeous ones to feature this week on Hookin On Hump Day!

    Hookin On Hump Day #142 - get the latest and greatest projects from around the web, and add your own today! Hosted on Moogly and Petals to Picots!

    [Read more...]

    10 Quick Crochet Gifts for Mother's Day Using Lion Brand Yarn

    May 1, 2017 by Tamara Kelly 8 Comments

    Mother's Day is coming up fast (and the way time flies, that's true all year long)! So today I'm working with Lion Brand Yarn to bring you 10 Quick Crochet Gifts for Mother's Day - and best of all, they are all free!

    10 Quick Crochet Gift Ideas for Mother's Day - all FREE! Featuring Lion Brand Yarn, get the list on Mooglyblog.com! [Read more...]

    Garden Lace Shawl

    April 28, 2017 by Tamara Kelly 34 Comments

    Garden Lace Shawl - free crochet pattern on Mooglyblog.com! Perfect for Mother's Day, Prayer Shawl, Gifts, Weddings, and More!

    The Garden Lace Shawl blends five unique crochet lace patterns! Together, they create an ever-changing yet delightfully well-ordered free crochet wrap pattern on Moogly!

    Disclaimer: This post includes affiliate links.

    Prefer the ad-free PDF? You've got options!

    Prefer the free blog version? Keep scrolling!

    Inspired by Spring

    I was inspired by the beautiful yarn colors, spring flowers, and warming weather! Now we have all these lace panels into one fresh and breezy garment you can wear through the changing seasons.  The cotton bamboo yarn is unusually drapey and combined with these openwork patterns, it creates a light and lovely one size fits all crochet shawl!

    Garden Lace Shawl - free crochet pattern on Mooglyblog.com! Perfect for Mother's Day, Prayer Shawl, Gifts, Weddings, and More!


    Garden Lace Shawl

    Add this pattern to your Ravelry Queue and Favorites

    US - J, 6.0 mm hook – Furls Crochet

    685 yds  Lion Brand LB Collection Cotton Bamboo (DK/yarn symbol “3”/UK: 8 ply; 245 yds/224 m; 3.53 oz)
    A: Hibiscus (1 ball, or 105 yds)
    B: Snapdragon (2 balls, or 310 yds)
    C: Persimmon (1 ball, or 90 yds)
    D: Gardenia (1 ball, or 75 yds)
    E: Hyacinth (1 ball, or 105 yds)

    Gauge: 12 sts x 6.5 rows = 4"/10cm in dc

    Stitch Multiple (for the overall pattern): mult of 12, + 1, plus 1 for the tch (if not using fsc)

    Finished Size: block to 59" x 25"

    Helpful Links: Crochet Abbreviations; FSC (foundation single crochet); the Y stitch

    Klicken Sie Hier für den Garten Lace Shawl Crochet Pattern auf Deutsch - Danke Karoline!

    Special Stitches:

    2-dc cluster: [yo and insert hook in indicated st, yo and pull through 2 loops] twice (3 loops remain on hook), yo and pull through all 3 loops

    3-dc cluster: [yo and insert hook in indicated st, yo and pull through 2 loops] 3 times (4 loops remain on hook), yo and pull through all 4 loops

    Y st: tr in indicated st, ch 1, dc in center of previous tr st (see linked tutorial above)

    Garden Lace Shawl - free crochet pattern on Mooglyblog.com! Perfect for Mother's Day, Prayer Shawl, Gifts, Weddings, and More!

    Instructions:

    Section 1:

    Row 1: With Color A, FSC 181; turn. (181 sc)
    Alternative Row 1 (to avoid using FSC): Ch 182, skip the ch closest to the hook, sc in each remaining ch across; turn. (181 sc)

    Row 2: Ch 1, sc in 1st st, *ch 7, skip 5 sts, sc in next st; rep from * across; turn. (30 ch-7 loops)

    Row 3: Ch 5, sc in next ch-7 sp, *ch 2, 3-dc cluster in next sc, ch 2, sc in next ch-7 sp; rep from * across, ch 2, dc in last st; turn. (29 3-dc clusters)

    Row 4: Ch 6, sc in next sc, *ch 7, sc in next sc; rep from * across, ch 3, dc in 3rd ch of ch-5, turn. (29 ch-7 loops)

    Row 5: Ch 1, sc in 1st st, *ch 2, 3-dc cluster in next sc, ch 2, sc in next ch sp; rep from * across, finishing last rep with sc in 3rd ch of ch-6, turn. (30 3-dc clusters)

    Row 6: Ch 1, sc in 1st st, *ch 7, sc in next sc; rep from * across, turn. (30 ch-7 loops)

    Row 7: Repeat Row 3.

    Row 8: Ch 1, sc in each st and work 2 sc in each ch sp across, with last sc in 3rd ch of ch-5; turn and break yarn. (181 sc)

    Section 2:

    Row 9: With Color B, join yarn and sc in each st across; turn. (181 sts)

    Row 10: Ch 3 (counts as dc), dc in next 3 sts, *ch 1, skip 1 st, dc in next 3 sts; rep from * across, dc in last st; turn. (137 dc)

    Row 11: Ch 3 (counts as dc), dc in next st, ch 1, skip 1 st, dc in next st, dc in next ch sp, dc in next st, *ch 1, skip 1 st, dc in next st, dc in next ch sp, dc in next st; rep from * across until 3 sts remain, ch 1, skip 1 st, dc in last 2 sts, turn. (136 dc)

    Row 12 and 13: Repeat Rows 10 and 11.

    Row 14: Ch 1, sc in each st and ch sp across; turn and break yarn. (181 sc)

    Section 3:

    Row 15: With Color C, repeat Row 9.

    Row 16: Ch 1, sc in 1st st, *ch 2, skip 1 st, dc in next st, ch 2, skip 1 st, sc in next st; rep from * across, turn. (45 dc)

    Row 17: Ch 3 (counts as dc), ch 1, sc in next dc st, *ch 3, sc in next dc st; rep from * across, ch 1, dc in last sc; turn. (45 sc, 2 dc)

    Row 18: Ch 1, sc in 1st st, *ch 2, dc in next sc, ch 2,** sc in next ch-3 sp; rep from * across, finishing last rep at **, sc in last st, turn. (45 dc sts)

    Row 19 - 21: Repeat Rows 17-18, then Row 17 again.

    Row 22: Ch 1, sc in each st, sc in each ch-1 sp, and work 3 sc in each ch-3 sp across; turn and break yarn. (181 sc)

    Garden Lace Shawl - free crochet pattern on Mooglyblog.com! Perfect for Mother's Day, Prayer Shawl, Gifts, Weddings, and More!


    Section 4:

    Row 23 - 28: With Color B, repeat Rows 9-14.

    Section 5:

    Row 29: With Color D, repeat Row 9.

    Row 30: Ch 4 (counts as tr), tr in next st, skip 1 st, Y st in next st, *skip 2 sts, Y st in next st; rep from * across until 3 sts rem, skip next st, tr in last 2 sts; turn. (59 Y sts, 4 tr)

    Row 31: Ch 4 (counts as tr), tr in next st, Y st in the ch-1 sp of each Y st across, tr in last 2 sts; turn. (59 Y sts, 4 tr)

    Row 32: Ch 1, sc in each st and ch sp across; turn and break yarn. (181 sc)

    Section 6:

    Row 33 - 38: With Color B, repeat Rows 9-14.

    Section 7:

    Row 39: With Color E, repeat Row 9.

    Row 40: Ch 5 (counts as dc and ch 2), skip next 2 sts, dc in next st, *ch 2, skip 2 sts, dc in next st; rep from * across, turn. (61 dc)

    Row 41: Ch 3 (counts as dc), dc in next ch sp, *ch 1, dc in next st, dc in next ch sp; rep from * across, ch 1, dc in 3rd ch of ch-5, turn. (121 dc)

    Row 42: Ch 3 (counts as dc), dc in next ch sp, *ch 1, skip 1 st, dc in next st, dc in next ch sp; rep from * across, ch 1, skip 1 st, dc in top of ch-3, turn. (121 dc)

    Row 43: Ch 5 (counts as dc and ch 2), skip next ch sp and next st, dc in next st, *ch 2, skip next ch sp and next st, dc in next st; rep from * across, turn. (61 dc)

    Row 44: Ch 1, sc in 1st st, *5 dc in next dc, sc in next dc; rep from * across, turn. (30 5-dc shells)

    Row 45: Ch 1, skip 1st st, *sc in next 2 sts, (sc, ch 1, sc) in next st, sc in next 2 sts, sl st in next st; rep from * across, break yarn and weave in all ends. (30 ch-1 sps)


    Garden Lace Shawl - free crochet pattern on Mooglyblog.com! Perfect for Mother's Day, Prayer Shawl, Gifts, Weddings, and More!

    The Wrap Up

    And that's the Garden Lace Shawl! I hope you like it! It was a lot of fun to design and make, working out all the stitch multiples and patterns so they would all work well together.

    You'll note that I didn't add a border! You are welcome to add one if you like. I really liked the look of the clean striped color changes without it. And the Cotton Bamboo is so drapey, a border won't add much structure - so I went without! If you use a different fiber, you may wish to add a round or two of single crochet. Or add something unique to make it your own!

    I can't wait to see what you all make with this pattern!

    The Fine Print

    Written pattern copyright Tamara Kelly 2017, all rights reserved. Please do not reprint or repost this pattern. Please do link to this page to share this pattern with others. If you wish to make items for sale from this pattern or translate it to another language, please visit the About page for details. Thank you to Lion Brand Yarn for providing the yarn for this pattern!

    #MooglyCAL2017: Afghan Block #9

    April 27, 2017 by Tamara Kelly 4 Comments

    We're in the thick of things now! For block #9 I've turned to Rhelena at CrochetN'Crafts - she always creates beautiful squares for us, and I think you'll agree this one is no exception! In fact, I think it might be her best yet!

    Moogly Crochet Along 2017! Get all 24 patterns FREE over the course of the year, and have a gorgeous handmade blanket by the holidays!Disclaimer: This post includes affiliate links. [Read more...]

    « Previous Page
    Next Page »
    Tamara Kelly of Moogly

    Moogly is world-famous for fresh. modern, and approachable crochet designs - as well as a little knitting and crafting here and there. On Moogly, you'll find several new free patterns every month, top quality video tutorials, giveaways, and more!

    More about Moogly →

    Popular

    • MooglyCAL2026 Block 21
      MooglyCAL2026 Block 21
    • Crochet and Catch Up with Moogly - October 14, 2026
      Crochet and Catch Up with Moogly - October 14, 2026
    • Seamless Crochet Sweaters Review and Giveaway
      Seamless Crochet Sweaters - Review and Giveaway
    • Ghost Treat Basket Tutorial
      Ghost Treat Basket Tutorial
    gosadi
    I'm a Craftsy Instructor. Click to see my classes.
    I Like Crochet


    Footer

    ↑ back to top

    About

    • About
    • Privacy Policy

    Newsletter

    Contact

    Email Moogly

    As an Amazon Associate I earn from qualifying purchases.
    Copyright © 2026 Mooglyblog.com