moogly

menu icon
go to homepage
  • Patterns
  • Tutorials
  • MooglyCAL
  • Giveaways
  • Lives
    • Facebook
    • Instagram
    • Pinterest
    • TikTok
    • Twitter
    • YouTube
  • search icon
    Homepage link
    • Patterns
    • Tutorials
    • MooglyCAL
    • Giveaways
    • Lives
    • Facebook
    • Instagram
    • Pinterest
    • TikTok
    • Twitter
    • YouTube
  • ×
    Home

    The Y Stitch

    April 25, 2017 by Tamara Kelly 15 Comments

    When I was learning to crochet, I came across the Y stitch. It was too difficult for me at the time - you want me to put the hook where?? But a recent reader request led me to take another look at this stitch - and I realized just how easy it now is! So here's how to crochet the Y stitch!

    Learn how to crochet the Y stitch on Mooglyblog.com!Disclaimer: This post includes affiliate links.
    [Read more...]

    Babay Fay Crochet Hat Templates: Review & Giveaway!

    April 24, 2017 by Tamara Kelly 27 Comments

    Disclaimer: This post is sponsored by all opinions are my own. 
    Today I'm working with Babay Fay to show you their fantastic Crochet Hat Templates! These make crocheting a hat SO EASY! And I get to give a set away here on Moogly!
    Babay Fay Crochet Hat Templates - review and giveaway on Moogly! See image and post for details!

    [Read more...]

    Every Day Crossbody Bag

    April 21, 2017 by Tamara Kelly 16 Comments

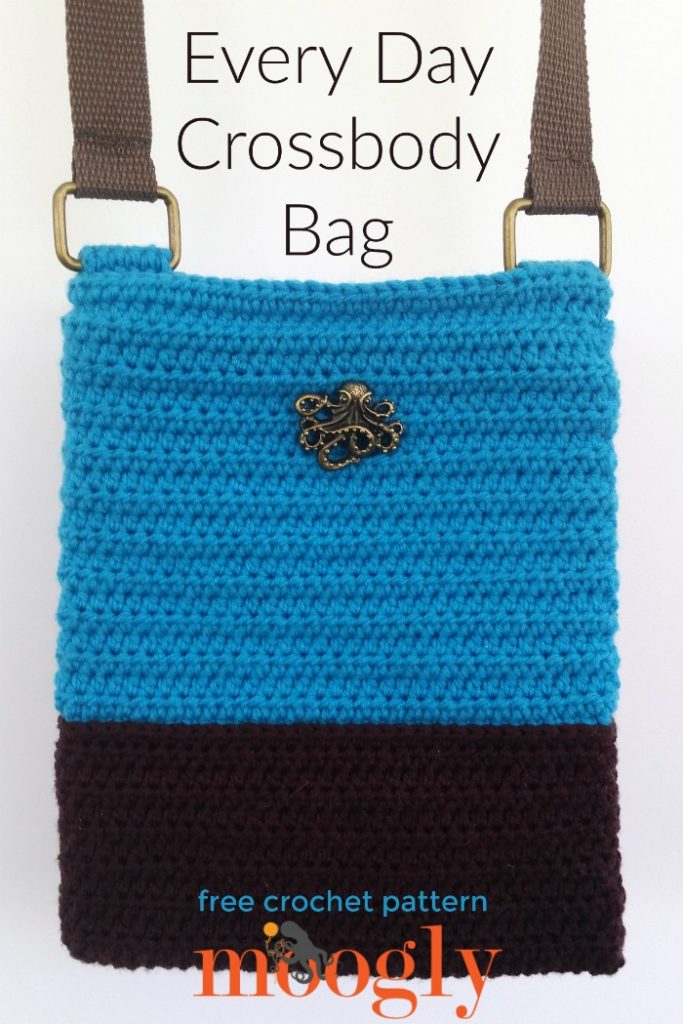
    Every Day Crossbody Bag - free crochet pattern on Mooglyblog.com

    Adulting is hard. You gotta go to the bank, the post office, the grocery store, the school, work, it never ends! But the Every Day Crossbody Bag is ready to go with you on every adventure, leaving your hands free to deal with everything else life throws at you. And it's quick enough to make one for every day! Here's the Every Day Crossbody Bag free crochet pattern!

    Disclaimer: This post includes affiliate links.

    Prefer an ad-free PDF? You've got options!

    This button leads to the pattern on Etsy

    Prefer the free blog version? Keep scrolling!

    Double the Fun

    The stitches used in the Every Day Crossbody Bag are very simple, and easy enough for Beginners. However, there are a couple of unique things to be aware of!

    First, this pattern is worked in turned rounds, or joined rows - this means that at the end of each round (unless otherwise instructed!), you join with a sl st to the first st of the round as is usual for rounds, and then turn to work the other direction, as if you are working in rows.

    Secondly, this pattern is worked with the yarn held doubled. Since it calls for less than a ball of each color, you can pull both ends of the yarn - from inside the skein as well as outside. I found that using the Yarn Valet Yarn Dispenser was a big help here - I could hold the inner end up out of the way as I pulled the other end to spin the skein! I even Instagrammed about it!

    The Yarn Valet yarnDispenser is coming in super handy tonight as I crochet from both ends of the same skein! It makes it so much easier! 😃💡🎉 @yarnvalet #crochet #mooglyblog #sneakpeek

    A post shared by Tamara Kelly (@mooglyblog) on Apr 8, 2017 at 7:40pm PDT

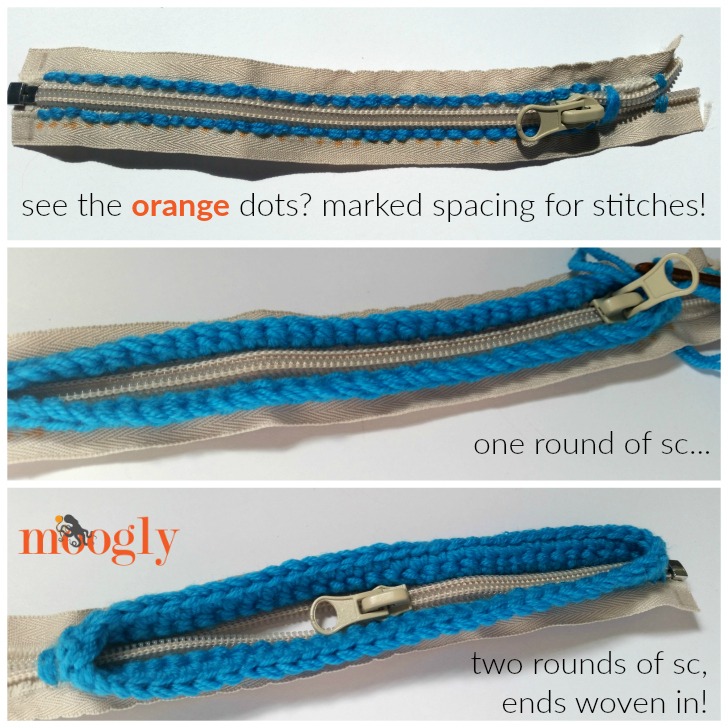
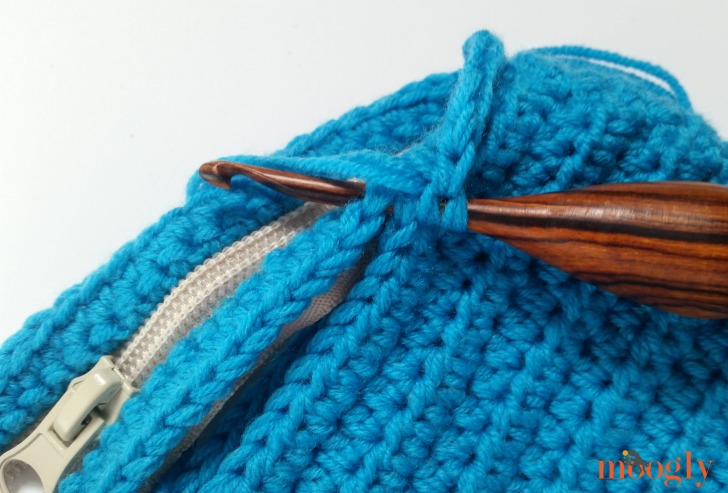
    Lastly, this bag features a fab new zipper by Dritz, which has special channels for you to crochet or knit into - right along the zipper, on each side, there's a loose weave you can stick your hook right though! I've linked it in the bullet points below. If preferred, you can first stitch around the zipper with a yarn needle and crochet into the sewn stitches. Or you can just skip the zipper part altogether and add a button or leave it open - it's up to you, and a great way to customize your own Every Day Crossbody Bag!

    Every Day Crossbody Bag - free crochet pattern on Mooglyblog.com


    Every Day Crossbody Bag

    Add this pattern to your Ravelry Queue and Favorites

    US - G, 4.0mm hook - Furls Crochet

    400 yds Lion Brand LB Collection Superwash Merino (100% merino; DK/8 ply; yarn symbol "3"; 306 yds /280 m; 3.53 oz)
    Color A: Mahogany (1 ball, or 150 yds)
    Color B: Aqua (1 ball, or 250 yds)

    Zipper - Dritz Loran Knitwear Zip Fastener 10" Oatmeal

    2 Square Rings - Everything Mary Antique Square Rings (purchased at JoAnn Fabrics)

    Thread to match Color A and Color B

    2 yds Ribbon or Strapping/Belt Trim (purchased at JoAnn Fabrics)

    Decorative Button (optional) - Steampunk Buttons (purchased at JoAnn Fabrics)

    Sewing needle, yarn needle

    Stitch Markers - Clover

    Gauge: 18 sts x 15 rows = 4"/10cm in hdc (yarn held doubled)

    Finished Size: 7.25" wide x 9.25" tall (laid flat, not including handles)

    Helpful Links and Videos:

    Crochet Abbreviations

    Blo (back loop only)

    Seamless finishing

    Working in the 3rd loop of the hdc

    NOTE: Yarn held doubled throughout pattern; use both ends of the skein held together to crochet as one.

    INSTRUCTIONS:

    Round 1: (Right Side) With Color A, ch 34, skip ch closest to hook, hdc in blo of each remaining ch across, then turn and hdc in unused loop of each st across; join to 1st hdc, turn. (66 sts)

    Round 2 - 12: Ch 1, hdc in each st around; join and turn. (66 sts)

    Round 13: Ch 1, hdc in each st around; break yarn and seamless join, do NOT turn. (66 sts)

    Stop and Prepare Zipper: Shorten zipper per package instructions to match the width of the bag at Round 13. Mark the location of the sts on each side of the zipper. Work 33 sc along one side of zipper, then turn and work 33 sc along second side of the zipper; join to work in the round. Then, ch 1 and sc in each st around, join and break yarn. Set aside until Round 33.

    Every Day Crossbody Bag - free crochet pattern on Mooglyblog.com

    Round 14: (Right Side) With Color B, join to 3rd loop of 1st st, sc in 3rd loop of each st around; join and turn. (66 sts)

    Round 15 - 33: Repeat Round 2. After Round 33, insert zipper piece inside bag so that last round of zipper piece matches up with Round 33; use stitch markers to hold in place as needed.

    Round 34: Ch 1, hdc in each st through both layers (Round 33 and zipper piece); join and turn. (66 sts)

    Every Day Crossbody Bag - free crochet pattern on Mooglyblog.com

    Round 35: (Wrong Side) Repeat Round 2.

    Row 36: (Begin tabs for Rings; Right Side) Ch 1, sc in 1st 5 sts; turn (remaining sts left unworked). (5 sts)

    Row 37 - 40: Ch 1, sc in each st across; turn. (5 sts) Break yarn after Row 40, leaving a long tail. Use stitch markers to mark the 5 sts of Round 35 that are opposite the sts used in Row 36.

    Row 41: (Right Side) With Color B, sc in 5 marked sts; turn. (5 sts)

    Row 42 - 45: Ch 1, sc in each st across; turn. (5 sts) Break yarn after Row 45, leaving a long tail.

    Assembly: 

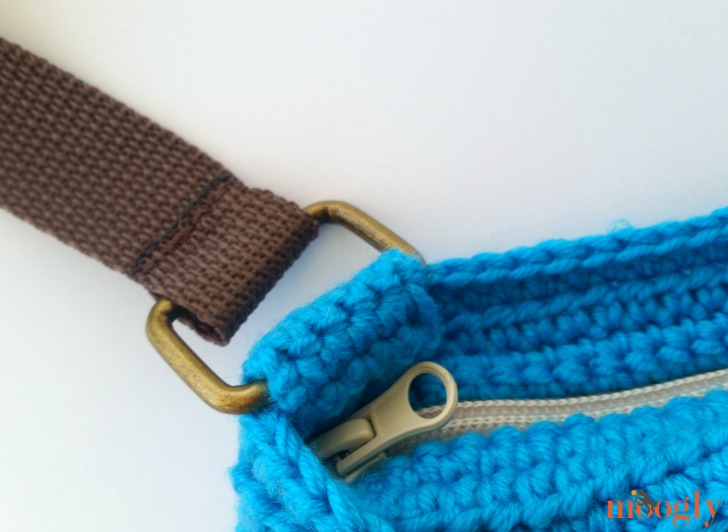
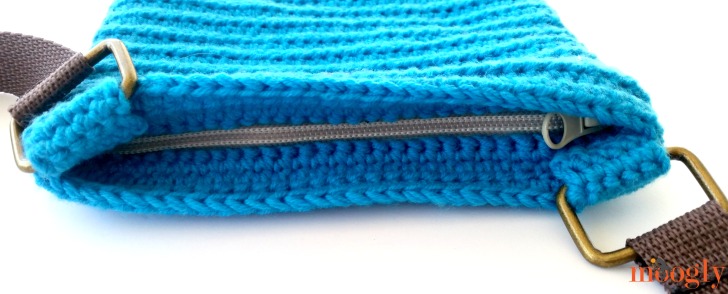
    1. Slip square ring over each tab, and sew down inside the bag, near the zipper, using the long tails left on the tabs.
    2. Cut strap/ribbon to the desired length, and sew each end to a square ring, using matching thread.
    3. Add decorative button if desired.
    4. Look amazing and get stuff done!

    Every Day Crossbody Bag - free crochet pattern on Mooglyblog.com

    Every Day Crossbody Bag - free crochet pattern on Mooglyblog.com


    And that's the free crochet pattern for the Every Day Crossbody Bag! It's super versatile, and the simple stitch pattern means it's easy to customize - start with the chain that's as wide as you want the bag to be, and work rows until it's the height desired.

    You can crochet a handle of course, but for a crossbody bag, it's good to have something sturdy that won't stretch at all. As for the bag itself, holding the yarn doubled makes a nice thick fabric that doesn't require a lining - though you can add one if desired for sure!

    I hope you enjoy this free crochet bag pattern - I can't wait to see what colors and buttons and embellishments you choose!

    The Fine Print

    Written pattern copyright Tamara Kelly 2017, all rights reserved. Please do not reprint or repost this pattern, but please do link to this page to share this pattern with others. If you wish to make items for sale from this pattern or translate it to another language, please visit the About page for details. Thank you to Lion Brand Yarn for providing the yarn for this pattern!

    Get Craft Supply Savings (and Earn Money!) with Dealspotr!

    April 20, 2017 by Tamara Kelly Leave a Comment

    Disclaimer: This is a sponsored post, but all opinions are my own.
    Have you seen the meme? The one that says something along the lines of, "Why would I buy that hat for $10 when I can spend $30 on craft supplies to make it myself?" Yeah, we all know crafting doesn't always save money. But it does save our sanity! Nonetheless, we all have a budget. And so I'm working with Dealspotr today to talk about how you can save money AND your sanity by getting great deals on crafty supplies (and everything else you order online)!
    Save money on crafts - and Earn Money! - with Dealspotr! [Read more...]

    Hookin On Hump Day #141: Link Party for the Yarny Arts!

    April 18, 2017 by Tamara Kelly 8 Comments

    Welcome back to this Spring-y edition of Hookin On Hump Day! This round, we've got 5 fab new crochet patterns to share - 4 of which are free! And they are all lovely - chosen by your clicks over the last two weeks, good job all! So let's get to these beautiful patterns already!

    Hookin On Hump Day #141 on Moogly and Petals to Picots - get all these gorgeous patterns, and add your own blog links to this amazing crochet and knitting link party!

    [Read more...]

    A Garden of Shawls by Karen Whooley: Review & Giveaway!

    April 17, 2017 by Tamara Kelly 5 Comments

    Karen Whooley is a wonderful crochet designer and teacher, and she's got a brand new book out, full of the most gorgeous shawl patterns! And I'm lucky enough to have gotten a copy of A Garden of Shawls to review, and another to give away to one lucky winner!

    A Garden of Shawls by Karen Whooley - review and giveaway on Moogly! Open to US addresses only, ends 4/24/17 at 12:15am Central US time. [Read more...]

    Pinstripe Bandana Scarf

    April 14, 2017 by Tamara Kelly 16 Comments

    Pinstripe Bandana Scarf - free crochet pattern on Mooglyblog.com!

    Get the look without the heat - the Pinstripe Bandana Scarf is made with cool cotton bamboo yarn and sized just right for wearing with every outfit. Add a little extra coverage, ward off a little chill, or just make your outfit pop with this fast and easy free crochet scarf pattern!

    Disclaimer: This post includes affiliate links.

    Prefer an ad-free PDF? You've got options!

    Prefer the free blog version? Keep scrolling!

    Pick Your Size!

    Of course, this pattern can be made as a full-size shawl too! It's infinitely adaptable, and just a matter of starting with a chain that's the width you want for the shawl. The stitch multiple is listed in the pattern below, or you can use the long chain method to create your own custom Pinstripe Bandana Shawl with this pattern!

    Pinstripe Bandana Scarf - free crochet pattern on Mooglyblog.com!


    Pinstripe Bandana Scarf

    Add this pattern to your Ravelry Queue and Favorites

    US - J, 6.0mm hook - Furls Crochet

    175 yds Lion Brand LB Collection Cotton Bamboo (DK/yarn symbol “3”/UK: 8 ply; 245 yds/224 m; 3.53 oz)
    Color A - Magnolia (1 ball, or 130 yds)
    Color B - Hibiscus (1 ball, or 45 yds)

    Stitch Markers - Clover

    Button (optional) - Favorite Findings Buttons, Meadow Flowers

    Gauge: 12 sts x 7 rows = 4"/10 cm in main st pattern

    Finished Size: see schematic below

    Stitch pattern: multiple of 4 +1

    Helpful Links and Tutorials

    Crochet Abbreviations

    How to Join with sc

    Schematic

    Pinstripe Bandana Scarf - free crochet pattern on Mooglyblog.com!

    INSTRUCTIONS:

    Row 1: With Color A, ch 85, dc in 4th ch from hook, dc in next ch, *ch 1, skip next ch, dc in next 3 chs; repeat from * across; turn. (63 dc - skipped 3 chs count as 1st dc of row)

    Row 2: Skip 1st st, sl st in next 2 sts, ch 3 (counts as 1st st), dc in next ch sp, dc in next st, *ch 1, skip next st, dc in next st, dc in next ch sp, dc in next st; repeat from * across until 2 sts remain, turn (remaining sts left unworked). (60 dc)

    Row 3: Repeat Row 2, remove hook from active loop and place stitch marker in loop to secure. (57 dc)

    Row 4: With Color B, join with sc in 3rd st of previous row, sc in each ch sp and st across until 2 sts remain; break yarn, do not turn. (71 sc)

    Row 5: Insert hook in active loop of Color A (remove st marker), skip 1st st of Row 3, sl st in next st of Row 3, sl st in 1st st of Row 4, ch 3, dc in next 2 sts, *ch 1, skip next st, dc in next 3 sts; repeat from * across Row 4, turn. (54 dc)

    Row 6 and 7: Repeat Row 2. (48 dc in Row 7)

    Row 8: Repeat Row 3. (45 dc)

    Row 9: Repeat Row 4. (55 sc)

    Row 10: Repeat Row 5. (42 dc)

    Row 11 - 23: Repeat Row 2. (3 dc in Row 23)

    Pinstripe Bandana Scarf - free crochet pattern on Mooglyblog.com!

    Border Round 1: (Continue with Color A) Ch 1, sc in next 3 sts, *ch 3, sl st in first/last st of previous row;** repeat from * to Row 1, skipping Rows 4 and 9 (Color B Rows), ch 2, 3 sc in 1st foundation ch (bottom of 1st st of Row 1), sc in each st across foundation ch to last st, 3 sc in last foundation ch, ch 2, sl st in top of same st; repeat from * to ** ending with a sc in the same st as 1st sc, sc again in same st, join to 1st sc.

    Border Round 2: Ch 1, sc in 1st st, (hdc, dc, hdc) in next st, sc in next st, then sc in each st around, working 3 sc in each ch sp; join and break yarn.

    Border Round 3: With Color B, join with sc to any st, sc in each st around, working 3 sc in the dc st; join and break yarn.

    Assembly: Add button to one top corner and a Color B chain loop (long enough to get around your chosen button) to the opposite corner if desired.


    Pinstripe Bandana Scarf - free crochet pattern on Mooglyblog.com!

    And that's it! It's a very quick project to crochet, and provides just the right bit of color and style right where you want it most! I hope you enjoy this free crochet pattern on Moogly!

    The Fine Print

    Written pattern copyright Tamara Kelly 2017, all rights reserved. Please do not reprint or repost this pattern, but please do link to this page to share this pattern with others. If you wish to make items for sale from this pattern or translate it to another language, please visit the About page for details. Thank you to Lion Brand Yarn for providing the yarn for this pattern!

    #MooglyCAL2017: Afghan Block #8

    April 13, 2017 by Tamara Kelly 2 Comments

    I'm so excited to welcome a new contributor to the Moogly Crochet Along this month, who's designed block #8 for us! She is amazing, and her squares have been dropping jaws all over Ravelry. So let's get to the latest square... courtesy of Polly Plum!

    Moogly Crochet Along 2017! Get all 24 patterns FREE over the course of the year, and have a gorgeous handmade blanket by the holidays!Disclaimer: This post includes affiliate links. [Read more...]

    Get Happy Yarn Mail with Sewrella!

    April 12, 2017 by Tamara Kelly 8 Comments

    I love connecting with other designers and bloggers, and one of my newest favorites is Sewrella. And Ashleigh at Sewrella has just launched a brand new subscription box that I think you'll love! So I'm working with her today to show you how awesome Happy Yarn Mail is - and I get to share a discount code with all of you too! (Discount code now expired)

    Happy Yarn Mail - the crochet subscription box you've been waiting for! [Read more...]

    Yarn Valet Pattern Holder Plus Storage Giveaway!

    April 10, 2017 by Tamara Kelly 10 Comments

    "You know what your paper pattern looks like at the end of your project..? It's wrinkled, folded and covered in chocolate and wine stains." How did they know?! Well, *I* know just how great their Pattern Holder Plus Storage works - so I'm working with Yarn Valet today to bring you my review and a Pattern Holder Plus Storage giveaway - with TWO winners!

    Keep paper patterns and small projects neat and together on the go with the Yarn Valet Pattern Holder Plus Storage! Read Moogly's review and enter to win one on Mooglyblog.com - open to US and Canada addresses, ends 4/17/17 at 12:15 am US central timeDisclaimer: This post includes affiliate links. [Read more...]

    Long Eared Bunny Basket

    April 7, 2017 by Tamara Kelly 5 Comments


    Long Eared Bunny Basket - free crochet pattern on Mooglyblog.com!

    Spring is in the air right now, and what's more a sign of spring than bunnies!? Whether you're celebrating Easter or just love a happy rabbit, the Long Eared Bunny Basket is perfect for your seasonal decor - and useful too!

    Disclaimer: This post includes affiliate links. Yarn provided by Lion Brand.

    Prefer an ad-free PDF? You've got options!

    Prefer the free blog version? Keep scrolling!

    Long Eared Bunny Crochet Easter Basket - or any time of year!

    Does anyone remember Longaberger Baskets? I have to admit, I wanted to call this pattern the "Long-a-Eared-a-Bunny-Basket" - but I don't know if anyone else would get it, or if it would just confirm my insanity! I mean... creativity... yeah, that's the ticket...

    Long Eared Bunny Basket - free crochet pattern on Mooglyblog.com!

    But I do love this little fella! I used Lion Brand's LB Collection Natural Wool for the main yarn, and it gave the bunny a wonderfully natural look and feel. However, this yarn is only available at LionBrand.com (see the link below!) so if you would prefer to use a yarn available in stores, you can substitute Lion Brand Wool-Ease Thick & Quick. So let's hop to it!

    Long Eared Bunny Basket - free crochet pattern on Mooglyblog.com!


    Long Eared Bunny Basket

    Add this pattern to your Ravelry Queue and Favorites - click here!

    US - K, 6.5mm - Furls Crochet

    US - I, 5.5mm - Furls Crochet

    Lion Brand LB Collection Natural Wool (Super Bulky/yarn symbol "6"/UK: 14-16 ply; 131 yds/120 m; 7 oz)
    Color A - Linen (2 hanks, or 220 yds)
    This yarn has been discontinued. For Yarnsub.com suggestions, click here!

    Lion Brand Vanna's Choice (Aran/yarn symbol “4”/UK: 10 ply; 145 yds; 3oz)
    Color B - Pink (1 skein, or 15 yds)
    Color C - Chocolate (1 skein, or 5 yds)

    Stitch Markers - Clover

    Pom Pom Maker, Large - Clover (3-⅜" used)

    Gauge: 11 sts x 8 rows = 4"/10 cm in hdc, with larger hook and Super Bulky yarn

    Finished Size: 8" tall including ears, 8" long excluding legs and tail, 5" wide

    Helpful Links and Tutorials

    Crochet Abbreviations

    Magic circle

    Making bag bottoms

    hdc2tog - half double crochet decrease

    FSC - foundation single crochet

    FHDC - foundation half double crochet

    FDC - foundation double crochet

    Special Stitch: FTR (foundation treble crochet) - Work as for foundation double crochet, but begin with a chain 3 and make 2 yarnovers to start each stitch (and then work off one more pair of loops to finish the stitch)

    NOTE: It is most helpful to make the pieces in the order presented below. You can assemble as you go, or assemble all the pieces after they are finished, EXCEPT for the legs and ears - those are added to the body as it's crocheted. Please take note of the yarn choice, hook size, and the number of pieces for each section.

    Long Eared Bunny Basket Instructions

    LEGS: Use Color A, larger hook, make 2

    Rnd 1: Make a magic circle, work 5 sc into the ring; join with a sl st in first sc to work in the round. (5 sts)

    Rnd 2: Ch 1, 2 sc in each st around; join with a sl st. (10 sts)

    Rnds 3 – 7: Ch 1, sc in each st around; join with a sl st. (10 sts)

    Row 8: Folding leg flat, ch 1, sc through both layers closing up leg; break yarn and finish off. (5 sts)

    BODY (MAIN PIECE): Use Color A, larger hook, make 1

    Row 1: Ch 19, skip the ch closest to the hook, hdc in each of the remaining chs; turn. (18 sts)

    Row 2 – 10: Ch 1, hdc in each st; turn. (18 sts)

    Rnd 11: Ch 1, hdc 18, turn work 90°, hdc 12 along sides of previous rows, turn work 90°, hdc 18 along foundation chain, turn work 90°, hdc 12 along sides of previous rows; join to first hdc of rnd with a sl st. (60 sts) Place stitch markers on sts #19, 23, 26, and 30 - these mark where the legs will be attached.

    Rnd 12: (ATTACH LEGS) Ch 1, hdc in the first 18 sts, then working through the sts of the first leg and the sts of the previous round (hold so that the hook goes through the leg before the stitch) hdc in next 5 sts, hdc in next 2 sts, then working through the sts of the second leg and the sts of the previous round hdc in next 5 sts, hdc in last 30 sts; join with a sl st. (60 sts)

    Long Eared Bunny Basket - free crochet pattern on Mooglyblog.com!

    Rnds 13 – 20: Ch 1, hdc in each st around; join with a sl st and break yarn. (60 sts) Place stitch markers on sts #7, 22, 37, and 52 – make sure these line up as they will be the handle openings.

    Row 21: (BEGIN EARS) From inside of basket (WS), ch 17, sc in 3rd marked st (#37), sc in each st to next marked st, sc in 2nd marked st (#22), ch 18; turn. (16 sc, 35 ch)

    Row 22: Skip ch closest to hook, *[2 hdc in the next ch, hdc in the next 3 chs] 4 times, 2 hdc in next ch,** sc in next 16 sts; repeat from * to **, turn. (16 sc, 44 hdc)

    Row 23: Ch 1, *[2 hdc in the next st, hdc in the next 4 sts] 4 times, hdc in the next st, 2 hdc in the next st,** sc in next 16 sts; repeat from * to **; turn. (16 sc, 54 hdc)

    Row 24: Ch 1, hdc2tog, hdc in the next 24 sts, sc2tog, sl st in the next 14 sts, sc2tog, hdc in the next 24 sts, hdc2tog; break yarn. (66 sts)

    MUZZLE: Use Color A, larger hook, make 1

    Rnd 1: Make a magic circle, work 6 sc into the ring; join with a sl st in the first sc to work in the round. (6 sc)

    Rnd 2: Ch 1, 2 sc in each st around; join with a sl st. (12 sts)

    Rnd 3: Ch 1, *sc in the next st, 2 sc in the next st; rep from *, join with a sl st. (18 sts)

    Rnd 4: Ch 1, *sc in the next 2 sts, 2 sc in the next st; rep from *, join with a sl st. (24 sts)

    Rnd 5: Ch 1, sc in each st around; join with a sl st and break yarn leaving a long tail for sewing. (24 sts) Note: Add Nose before sewing to bag!

    NOSE: Use Color B, smaller hook, make 1

    Row 1: With Color B, ch 6, skip the ch closest to the hook, sc in each remaining ch; turn. (5 sts)

    Row 2: Ch 1, sc2tog, sc in the next st, sc2tog; turn. (3 sts)

    Row 3: Ch 1, sc3tog; break yarn leaving long tail for sewing. (1 st)

    Sew nose to muzzle as shown adding mouth lines as desired, then sew muzzle to bag as shown.

    EYES: Use Color C, smaller hook, make 2

    Rnd 1: Make a magic circle, work 12 dc into the ring; join with a sl st in the first dc. (12 dc)

    Rnd 2: Sl st in each st around; join and break leaving long tail for sewing. (12 sl sts)

    Add “twinkle” with Color B and a yarn needle, then sew to bag as shown.

    Long Eared Bunny Basket - free crochet pattern on Mooglyblog.com!

    EAR LINING - RIGHT EAR: Use Color B, smaller hook, make 1

    Row 1: FSC 2, FHDC 2, FDC 6, FTR 16, FDC 2; break yarn leaving long tail for sewing.

    Sew to the outer right ear of the Body (right as from the bunny's perspective) as shown.

    EAR LINING - LEFT EAR: Use Color B, smaller hook, make 1

    Row 1: FDC 2, FTR 16, FDC 6, FHDC 2, FSC 2; break yarn leaving long tail for sewing.

    Sew to the outer left ear of the Body (left as from the bunny's perspective) as shown.

    Sew ends of ears to sides of Body right behind 1st (#7) and 4th (#52) marked sts as shown to finish handles.

    TAIL: Use Color A, pom pom maker, make 1

    Use a pom pom maker or your preferred method to make a large pom pom. Sew to the back end of the bunny, centered between the ears and down a bit.

    Long Eared Bunny Basket - free crochet pattern on Mooglyblog.com!


    And that's the Long Eared Bunny Basket! Ready for spring, holidays, rabid rabbit fans - or just for fun! I hope you enjoy this free crochet rabbit basket pattern!

    The Fine Print

    Written pattern copyright Tamara Kelly 2017, all rights reserved. Please do not reprint or repost this pattern, but please do link to this page to share this pattern with others. If you wish to make items for sale from this pattern or translate it to another language, please visit the About page for details. Thank you to Lion Brand Yarn for providing the yarn for this pattern!

    Lion Brand Vanna's Choice Rainy Day Giveaway

    April 6, 2017 by Tamara Kelly 22 Comments

    I love designing with Lion Brand Vanna's Choice - it's one of my first go-to picks! And today I get to work with them to bring you the Lion Brand Vanna's Choice Rainy Day Giveaway!

    Win 6 balls of Lion Brand Vanna's Choice on Moogly! Open to USA and Canada, ends 4/13/17 at 12:15am Central US time.Disclaimer: This post includes affiliate links. [Read more...]

    Tidal Wave Shawl Edging Tutorial

    April 5, 2017 by Tamara Kelly Leave a Comment

    The Tidal Wave Shawl already has one video tutorial showing how to make the main portion of the pattern. But what about the border? Your questions will be answered in this one - here's how to crochet the Tidal Wave Shawl Edging!

    Now you can make the entire Tidal Wave Shawl with Moogly videos - including the edging! On Mooglyblog.com!Disclaimer: This post includes affiliate links. [Read more...]
    Hookin On Hump Day #140: Link Party for the Yarny Arts!

    April 4, 2017 by Tamara Kelly 11 Comments

    You'd have to be an April fool to miss a round of Hookin On Hump Day! We've got another amazing collection to share - picked with your clicks! So let's take a look at the best crochet and knit projects from this last round - and while you're here, be sure to link up your own blog projects, and of course visit all the new entries below that catch your eye!

    Hookin On Hump Day #140: a new collection of the very best crochet and knit projects out in the last 2 weeks! Don't miss out - see what we've collected and add your own links on Moogly or Petals to Picots!

    [Read more...]

    Knotted Rainbow Tote Bag

    March 31, 2017 by Tamara Kelly 12 Comments

    Knotted Rainbow Tote Bag - free crochet pattern on Mooglyblog.com!

    I love crocheting tote bags - they are super handy, fun to crochet, and make great gifts! And I had a lot of fun playing with the colors and stitches in the Knotted Rainbow Tote Bag - a free crochet tote bag pattern here on Moogly!

    Disclaimer: This post includes affiliate links.

    Prefer an ad-free PDF?

    Prefer the free blog version? Keep scrolling!

    Knot it Up!

    The "knotted" part of this rainbow is the handles! I've never made handles like this before, but I love them! They are quick and easy to crochet (because we all know when you get to the handles, you're eager to finish the project), and because of the way they are added to the bag, they are very easy to replace if they get dirty or damaged.

    And even better, you can adjust the total strap length as needed. The folded design should keep them from stretching too much, but if you find they are too long or short for you... just move the knot! If you prefer a crossbody style, just make a longer strap... short handles, make them shorter! If you prefer it not so knotty, you can follow these bag handle instructions instead. And if your strap is unusually stretchy, insert a non-stretchy ribbon before Row 4 and tie it right along with the crocheted handles!

    Knotted Rainbow Tote Bag - free crochet pattern on Mooglyblog.com!


    Knotted Rainbow Tote Bag

    Add this pattern to your Ravelry Queue and Favorites

    • US - I, 5.5mm hook - Furls Crochet
    • 450 yds Lily Sugar'n Cream (100% cotton; Aran/yarn symbol “4”/UK 10-12 ply)
      Color A: Dazzle Blue – 1 ball
      Color B: Soft Ecru – 2 balls
      Color C: Hot Blue – 1 ball
      Color D: Mod Green – 1 ball
      Color E: Sunshine – 1 ball
      Color F: Red – 1 ball
    • Stitch Markers - Clover
    • Gauge: 13 sts x 7 rows =4" in dc
    • Finished Size: 14" wide x 15.25" tall excluding handles
    • Crochet Abbreviations
    • Helpful Links: Fdc - foundation double crochet; making bag bottoms; changing colors for striped patterns; making handles for bags

    Special Stitches:

    Beg Cluster - ch 2, [yo, insert hook in indicated stitch, yo and pull up a loop, yo and pull through first 2 loops on hook] twice, yo and pull through all 3 loops on hook.

    Cluster - [yo, insert hook in indicated stitch, yo and pull up a loop, yo and pull through first 2 loops on hook] 3 times, yo and pull through all 4 loops on hook.

    ALTERNATE ROW 1 (to avoid foundation stitch if desired): Ch 42, skip the 2 chs closest to the hook, dc in each remaining ch across; turn. (40 sts)

    Knotted Rainbow Tote Instructions:

    Row 1: With Color A, fdc 40; turn. (40 sts)

    Row 2 - 4: Ch 2 (does not count as a st), dc in each st across; turn. (40 sts)

    Round 5: (See linked "making bag bottoms" tutorial above for more info) Ch 2, dc in each st across, turn work 90 degrees to dc 8 sts across ends of rows, turn work 90 degrees to dc 40 across the foundation ch, turn work 90 degrees to dc 8 sts across ends of rows; join to 1st dc of the round with Color B. (96 sts)

    Round 6: Continuing with Color B, ch 1, sc in 1st st, ch 1, skip next st, *sc in next st, ch 1, skip next st; repeat from * around; join with Color A. (48 sc sts)

    Round 7: Continuing with Color A, sl st into next ch sp, beg cluster in same ch-1 sp, ch 1, skip next st, *cluster in next ch sp, ch 1, skip next st; repeat from * around, join with Color B. (48 clusters)

    Round 8: Continuing with Color B, ch 1, sc in 1st ch sp, skip next st, *sc in next ch sp, ch 1, skip next st; repeat from * around; join with Color A. (48 sc sts)

    Round 9: Continuing with Color A, sl st into next ch sp, ch 4 (counts as dc and ch 1), skip next st, *dc in next ch sp, ch 1, skip next st; repeat from * around, join with Color B. (48 dc sts)

    Round 10: Repeat Round 8.

    Round 11: Repeat Round 7, break Color A. (48 clusters)

    Round 12: Continuing with Color B, ch 1, sc in 1st ch sp, skip next st, *sc in next ch sp, ch 1, skip next st; repeat from * around; join with Color C. (48 sc sts)

    Round 13: Continuing with Color C, sl st into next ch sp, beg cluster in same ch-1 sp, ch 1, skip next st, *cluster in next ch sp, ch 1, skip next st; repeat from * around, join with Color B. (48 clusters)

    Round 14: Repeat Round 12.

    Round 15:  Continuing with Color C, sl st into next ch sp, ch 4 (counts as dc and ch 1), skip next st, *dc in next ch sp, ch 1, skip next st; repeat from * around, join with Color B. (48 dc sts)

    Round 16: Repeat Round 12.

    Round 17: Continuing with Color C, sl st into next ch sp, beg cluster in same ch-1 sp, ch 1, skip next st, *cluster in next ch sp, ch 1, skip next st; repeat from * around, join with Color B, break Color C. (48 clusters)

    Round 18 - 23: Repeat Round 12 - 17 replacing Color C with Color D.

    Round 24 - 29: Repeat Round 12 - 17 replacing Color C with Color E.

    Round 30 - 35: Repeat Round 12 - 17 replacing Color C with Color F.

    Round 36: Repeat Round 12; break Color B, join with Color F.

    Round 37: Continuing with Color F, ch 1, sc in each st and ch sp around; join. (96 sts)

    Round 38: Ch 1, sc in each st around; join. (96 sts)

    Round 39: (See linked "making handles for bags" tutorial above for more info on stitch marker placement) Mark 4 sts where the handles are to be attached, ch 1, sc in each unmarked stitch, at each marked st [ch 1, skip the marked st]; join. (92 sc sts, 4 chs)

    Round 40: Ch 1, sc in each st and ch sp around; join. (96 sts)

    Round 41: Ch 1, sc in each st around; join and break Color F. (96 sts)

    Handle Instructions (make 2):

    Row 1: Ch 81 (or to desired length), skip the ch closest to the hook, sc in each remaining ch across; turn. (80 sts)

    Row 2 and 3: Ch 1, sc in each st across; turn. (80 sts)

    Row 4: Fold handle lengthwise at Row 2, so that Row 1 meets Row 3; ch 1, sc through both layers across; break yarn. (80 sts)

    Assembly: Insert each end of a handle through a hole made in Round 39 above, from the inside of the bag to the outside. Tie a knot in the end of the handle to secure.

    Knotted Rainbow Tote Bag - free crochet pattern on Mooglyblog.com!


    And that's the Knotted Rainbow Tote! I hope you enjoy this free crochet bag pattern - I can't wait to see what colors you all choose!

    Written pattern copyright Tamara Kelly 2017, all rights reserved. Please do not reprint or repost this pattern, but please do link to this page to share this pattern with others. If you wish to make items for sale from this pattern or translate it to another language, please visit the About page for details. Thank you to Lion Brand Yarn for providing the yarn for this pattern!

    #MooglyCAL2017: Afghan Block #7

    March 30, 2017 by Tamara Kelly 16 Comments

    It's almost like a bonus - 3 blocks this month! And it's lucky number 7, so let's get right to it - block #7 in the MooglyCAL2017!

    Moogly Crochet Along 2017! Get all 24 patterns FREE over the course of the year, and have a gorgeous handmade blanket by the holidays!Disclaimer: This post includes affiliate links. [Read more...]
    Lion Brand Social Media: Inspiration You Need Now!

    March 29, 2017 by Tamara Kelly Leave a Comment

    I love crocheting and knitting with Lion Brand® yarn, and today I'm working with Lion Brand® to tell you all about their social media channels – inspiration you need now!

    Follow Lion Brand on Social Media for more yarny goodness in your life! [Read more...]

    Leisure Arts Ultimate Oval Loom Knitting Set: Review & Giveaway!

    March 27, 2017 by Tamara Kelly 12 Comments

    At a recent blogger event, I was gifted a Leisure Arts Ultimate Oval Loom Knitting Set to try - and today I get to tell you all about it, and even give one away to one lucky reader!

    Leisure Arts Ultimate Oval Loom Knitting Set: Review & Giveaway! Open to US addresses, ends 4/3/17 at 12:15am Central US time.Disclaimer: This post includes affiliate links. [Read more...]
    Home Clean Home Dishcloth

    March 24, 2017 by Tamara Kelly 8 Comments

    It's like a childhood tradition - pictures of the family home, drawn simply, usually with the stick figure family out front. Those homey, happy little drawings are the inspiration for the Home Clean Home Dishcloth!

    Home Clean Home - free crochet pattern on Mooglyblog.com!Disclaimer: This post includes affiliate links. [Read more...]
    How to Read Crochet Pattern Symbols

    March 23, 2017 by Tamara Kelly 47 Comments

    Part of learning to read crochet patterns is learning what all those symbols mean. Parentheses, asterisks, brackets, oh my! All of these can be used in the same pattern, and while it might seem confusing at first, they actually make the patterns much easier to read. Here's what all those crochet pattern symbols mean!

    How to Read Crochet Pattern Symbols - get the scoop on what all that punctuation means on Mooglyblog.com! [Read more...]

    Hookin On Hump Day #139: Link Party for the Yarny Arts!

    March 21, 2017 by Tamara Kelly 2 Comments

    Is it Lamb time yet? I don't know about you, but all these springy crochet projects have me thinking warm weather! What's featured this round? Well, it's your clicks on all the little squares of projects below that determine that! For this round of Hookin On Hump Day, we've got another amazing collection to share - you clicked wisely! So let's take a look at the best crochet and knit projects from this last round - and while you're here, be sure to link up your own blog projects, and of course visit all the new entries below that catch your eye!

    Hookin On Humpday is back for round #139 - full of amazing patterns and projects to inspire you! Check them out and add your own on Mooglyblog.com!

    [Read more...]

    Carrying Yarn Along the Side of a Project

    March 20, 2017 by Tamara Kelly 9 Comments

    I love stripes, you love stripes, everybody loves striped crochet projects! However, unless you're using a self-striping yarn, you're going to be working with multiple skeins at the same time. With some patterns, the only solution is to cut the yarn every time you switch to a new color. But sometimes, you can carry the yarn along the side, leaving only the ends of the skeins to weave in! Here's how to carry yarn along the side of a crochet project!

    Learn how Carrying Yarn Along the Side of a Project means less ends to weave in later! Tutorial on Mooglyblog.com!Disclaimer: This post includes affiliate links. [Read more...]
    Greyson Baby Blanket

    March 17, 2017 by Tamara Kelly 87 Comments

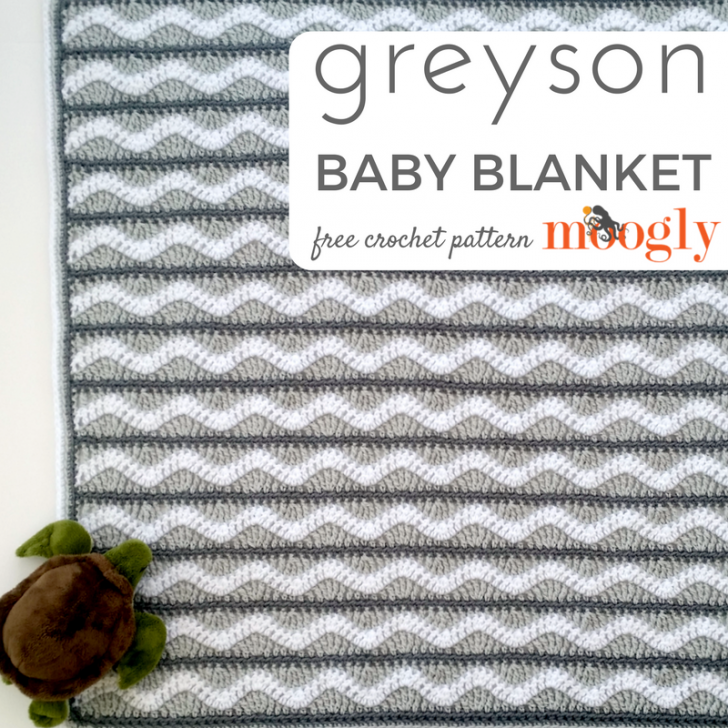
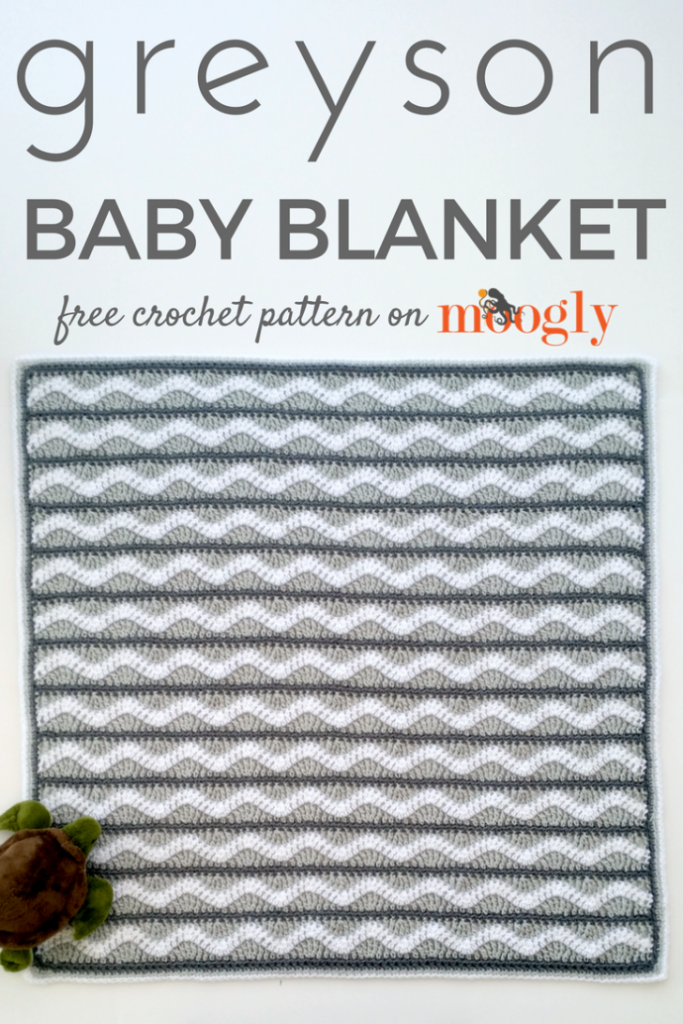
    Greyson Baby Blanket - free crochet pattern on Mooglyblog.com!

    I've always loved the name Greyson - it was almost the name of our middle child! It turns out it didn't quite fit him, but it does fit this gorgeous neutral baby blanket - a free crochet baby blanket pattern here on Moogly!

    Disclaimer: This post includes affiliate links.

    Prefer an ad-free PDF?? You've got options!

    This button leads to the pattern on Etsy

    GET THIS PATTERN AND YARN AS A LION BRAND KIT!

    Prefer the free blog version? Keep scrolling!

    Easy to Memorize 4 Row Repeat

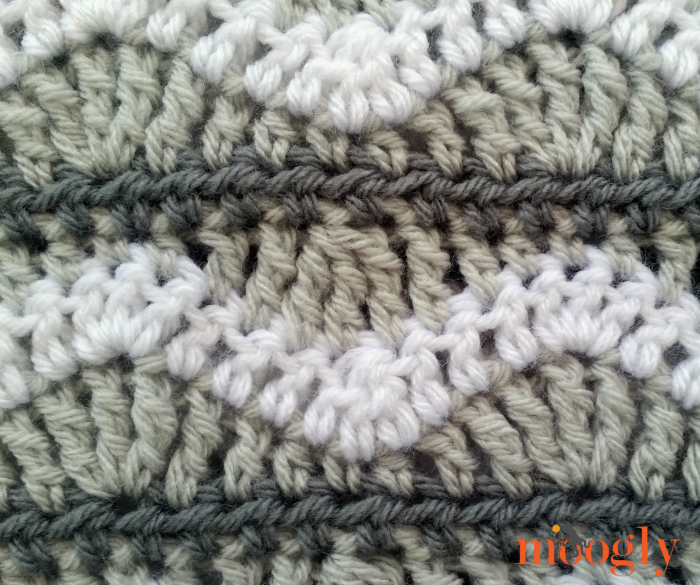
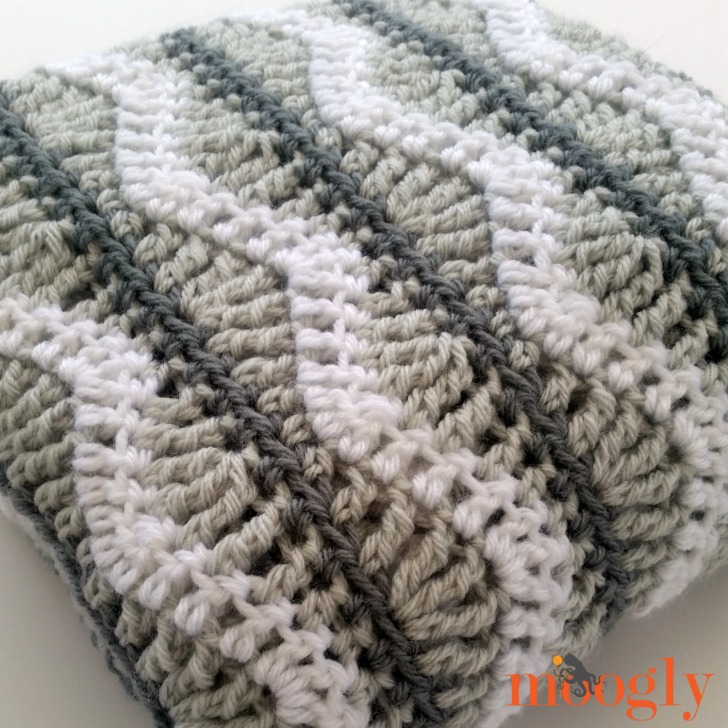
    The Greyson Baby Blanket is a ripple afghan - with a twist! Every repeat you build up to the ripple row, and then even back out, creating a wave pattern within straight lines - an up to date take on a classic. Each row is unique, and the 4-row repeat is easier to memorize than you might think. It works up fast, and while it does have a lot of ends, you can weave them in in less than an evening, even if you leave them all til the end!

    Greyson Baby Blanket - free crochet pattern on Mooglyblog.com!


    Greyson Baby Blanket

    Add this pattern to your Ravelry Queue and Favorites

    US - K, 6.5mm hook - Furls Crochet

    920 yds Lion Brand Vanna’s Choice (Aran/yarn symbol “4”/UK: 10 ply; 145 yds; 3oz)
    Color A: Silver Grey - 1 ball (170 yds)
    Color B: Pale Grey - 3 balls (500 yds)
    Color C: White - 2 balls (250 yds)

    Gauge: 9 sts x 5 rows = 4" in pattern

    Finished Size: 38" wide x 36" long

    Stitch Multiple: mult of 8 +1, plus 1 for the tch

    Helpful Links and Tutorials

    Greyson Baby Blanket Tutorial Video

    Crochet Abbreviations

    Fhdc - foundation half double crochet

    Join with Single Crochet

    Blo - back loop only

    Join with Double Crochet

    Join with Half Double Crochet

    SPECIAL STITCH: tr3tog - *yo twice and insert hook in the next st, yo and pull up a loop, (yo and pull through first 2 loops on hook) twice; repeat from * twice (4 loops on hook), yo and pull through all loops on hook.

    NOTE: If preferred, substitute the following for Row 1: Ch 82, skip ch closest to hook, hdc in each remaining ch across; turn. (81 sts)

    INSTRUCTIONS:

    Row 1 (WS): With Color A, fhdc 81; break yarn and turn. (81 sts)

    Row 2 (RS): Join Color B with sc in 1st st, *hdc in next st, dc in next st, tr in next st, 3 tr in next st, tr in next st, dc in next st, hdc in next st, sc in next st; repeat from * across; break yarn and turn. (101 sts)

    Row 3: Join Color C with dc in 1st st, skip next st, dc in next 3 sts, 3 dc in the next st, dc in next 3 sts, *dc3tog, dc in next 3 sts, 3 dc in next st, dc in next 3 sts; repeat from * across until 2 sts remain, skip next st, dc in last st; break yarn and turn. (101 sts)

    Row 4: Join Color B with tr in 1st st, skip next st, tr in next st, dc in next st, hdc in next st, sc in next st, hdc in next st, dc in next st, tr in next st, *tr3tog, tr in next st, dc in next st, hdc in next st, sc in next st, hdc in next st, dc in next st, tr in next st; repeat from * across until 2 sts remain, skip next st , tr in last st; break yarn and turn. (81 sts)

    Row 5: Join Color A with hdc in 1st st, hdc in each remaining st across; break yarn and turn. (81 sts)

    Repeat Rows 2-5 twelve times (will look like 13 stripe sections).

    Greyson Baby Blanket - free crochet pattern on Mooglyblog.com!

    Border Instructions:

    Round/"Rows" 1: Working from the RS, with Color A sc evenly down each side of the blanket (along the sides of the rows); join to ends of 1st and last row at corners.

    Round 2: With Color B, sc in blo of each st around, working 3 sc in each corner; join and break yarn.

    Round 3: With Color C, repeat Round 2.


    Greyson Baby Blanket - free crochet pattern on Mooglyblog.com!

    And that's the Greyson Baby Blanket! Of course, you can use any colors you like - and I can't wait to see yours! Be sure to follow Moogly at the social media links at the top of the page for more crochet, knit and craft fun!

    The Fine Print

    Written pattern copyright Tamara Kelly 2017, all rights reserved. Please do not reprint or repost this pattern, but please do link to this page to share this pattern with others. If you wish to make items for sale from this pattern or translate it to another language, please visit the About page for details. Thank you to Lion Brand Yarn for providing the yarn for this pattern!

    #MooglyCAL2017: Afghan Block #6

    March 16, 2017 by Tamara Kelly 11 Comments

    March is a special month in the Moogly Afghan Crochet Along - five Thursdays mean three blocks this month! That won't happen again til August, so let's get right to it - block #6 in the MooglyCAL2017!

    Moogly Crochet Along 2017! Get all 24 patterns FREE over the course of the year, and have a gorgeous handmade blanket by the holidays!Disclaimer: This post includes affiliate links. [Read more...]

    OttLite Space-Saving LED Magnifier Desk Lamp Giveaway!

    March 13, 2017 by Tamara Kelly 13 Comments

    I love being an OttLite Ambassador - my eyeballs have never been happier! And today I get to share my experience with the OttLite Space-Saving LED Magnifier Desk Lamp - and give one away here on Moogly!

    OttLite Space-Saving LED Magnifier Desk Lamp Giveaway on Mooglyblog.com! Open to the US and Canada, ends 3/20/17 at 12:15am Central US time. Disclaimer: This post includes affiliate links. [Read more...]

    There You Go Throw

    March 10, 2017 by Tamara Kelly 6 Comments

    There You Go Throw - free crochet pattern on Mooglyblog.com!

    The There You Go Throw is a two-tone join-as-you-go blanket made of 6-inch squares - graphic, eye-catching, and so much fun to crochet! And it's a free crochet pattern here on Moogly!

    Disclaimer: This post includes affiliate links.

    Prefer an ad-free PDF? You've got options!

    Prefer the free blog version? Keep scrolling!

    Fans of My Big Fat Greek Wedding might understand the inspiration for the name! When I was trying to come up with a name (always the hardest part!), I was talking to some friends about how it reminded me so much of Greek graphic patterns - especially the colors! - and the movie came up. My friend Terri loves it as much as I do, and we decided to quote the character Gus, who loves to explain how things are Greek (even things that aren't), and always ends it with "...there you go!"

    Much like some of Gus's explanations, this blanket isn't Greek, but it is join as you go (aka quick to crochet), based on the basic granny square, and ready to make in any size desired for the perfect gift or personal pick-me-up - so There You Go!

    There You Go Throw - free crochet pattern on Mooglyblog.com!


    There You Go Throw

    Add this pattern to your Ravelry Queue and Favorites

    US - K, 6.5 mm - Furls Crochet

    1480 yds Lion Brand Vanna's Choice (Aran/yarn symbol “4”/UK: 10 ply; 145 yds; 3oz)
    Color A: White - 5 balls
    Color B: Sapphire - 5 balls

    Stitch Markers - Clover

    Gauge: Each square is 6" x 6"

    Size: 36" x 48" before border (customizable, see sizing info below)

    Helpful Links and Tutorials

    Crochet Abbreviations

    Magic circle

    How to keep a magic circle closed

    blo (back loop only)

    Join with sc

    Seamless joining

    NOTES:

    • I've included 4 versions of Round 6 below - be sure to use the instructions for the correct finish for your squares!
    • To make the blanket as shown, make 24 squares as written, and then make 24 squares switching Colors A and B for the two-tone look for 48 total squares.
    • SIZING INFO: Each skein of Lion Brand Vanna's Choice has enough yarn to make 6 squares, so one skein each of Colors A and B will make 12 squares. I used 4 balls of each color for the squares, and parts of the 5th balls of each for the border.
    • To avoid chaining at the beginning of each round, you can substitute a Chainless Starting Double Crochet stitch for the chain 2 and first dc of the round.
    • When you remove the hook from the active loop at the end of Round 2, put a stitch marker in the loop to avoid it pulling out while working Round 3. It is also helpful to put stitch markers in the corner stitches while working the border.
    • Alternate squares when joining at Round 6 - see the layout below:

    There You Go Throw - free crochet pattern on Mooglyblog.com!

    SPECIAL STITCH:
    Join with a fptr: Holding the tail of the yarn in your palm, yarn over 3 times, insert hook around post of indicated stitch as for a front post stitch, yarn over and pull up loop, [yarn over and pull through two loops] 3 times.

    There You Go Throw Instructions

    ROUND 1- 5 INSTRUCTIONS:

    Round 1: With Color A, make a magic circle, ch 2 (does not count as a stitch here and throughout), [3 dc, ch 2] 4 times in the ring; join. (12 dc)

    Round 2: Ch 2, dc in the first st, ch 1, skip 1 st, dc in the next st, (2 dc, ch 2, 2 dc) in the ch sp, *dc in the next st, ch 1, skip 1 st, dc in the next st, (2 dc, ch 2, 2 dc) in the ch sp; repeat from * around, join and remove hook from loop (place marker in loop). (24 dc)

    Round 3: This round is worked into Round 1, in front of Round 2. With Color B, join with fptr in 1st st of Round 1, ch 7, skip next st, fptr around next st, ch 3, *fptr in next st, ch 7, skip next st, fptr in next st, ch 3; repeat from * around, join to top of first fptr, break Color B. (8 fptr)

    Round 4: This round is worked into Round 2, moving Round 3 back and forward as directed. Insert hook in active loop of Color A (remove st marker), then working behind the Color B ch-7 section, ch 2, dc in 1st st, ch 1, skip the ch-1 sp, dc in the next st, ch 1, skip next st, dc in next st, then working in front of the next Color B ch-3 section, (2 dc, ch 2, 2 dc) in the corner ch-2 sp, *then working behind the next Color B ch-7 section, dc in the next st, ch 1, skip the next st, dc in the next st, ch 1, skip the next ch-1 sp, dc in the next st, ch 1, skip the next st, dc in the next st, then working in front of the next Color B ch-3 section, (2 dc, ch 2, 2 dc) in the corner ch-2 sp; repeat from * around, then working behind the first Color B ch-7 section, dc in the next st, ch 1, join. (32 dc)

    Round 5: Ch 2, dc in the 1st st, *[ch 1, skip the ch sp, dc in the next st] 2 times, ch 1, skip the next st, dc in the next st, (2 dc, ch 2, 2 dc) in the corner ch-2 sp, dc in the next st, ch 1, skip the next st, dc in the next st, ch 1, skip the next ch sp; repeat from * around, join and break yarn.

    There You Go Throw - free crochet pattern on Mooglyblog.com!

    ROUND 6 INSTRUCTIONS - STAND ALONE SQUARE (TO MIX WITH OTHER SQUARES FOR A CUSTOM PROJECT)

    Round 6: With Color B, join with sc in the blo of the 1st dc after any corner ch-2 sp, sc in the blo of next 36 sts, hdc in the next Color B ch-7, skip the next st, sc in blo of next 7 sts, (sc, ch 2, sc) in corner ch-2 sp, *sc in blo of next 7 sts, hdc in the next Color B ch-7, skip the next st, sc in blo of next 7 sts, (sc, ch 2, sc) in corner ch-2 sp; repeat from * around, join and break yarn. (64 sc, 4 hdc)

    ROUND 6 INSTRUCTIONS - 1ST SQUARE OF THERE YOU GO THROW (INCLUDES JOINING SPACES TO BE USED LATER):

    Round 6: With Color B, join with a sc in the blo of the 1st dc after any corner ch-2 sp, sc in blo of next 2 sts, ch 1, skip the next ch sp, sc in blo of next 3 sts, hdc in the next Color B ch-7, skip the next st, sc in blo of next 3 sts, ch 1, skip the next ch sp, sc in blo of next 3 sts, (sc, ch 2, sc) in corner ch-2 sp, *sc in blo of next 3 sts, ch 1, skip the next ch sp, sc in blo of next 3 sts, hdc in the next Color B ch-7, skip the next st, sc in blo of next 3 sts, ch 1, skip the next ch sp, sc in blo of next 3 sts, (sc, ch 2, sc) in corner ch-2 sp; repeat from * around, join and break yarn. (56 sc, 4 hdc)

    ROUND 6 INSTRUCTIONS - JOINING TO ONE SQUARE OF THERE YOU GO THROW (1ST ROW SQUARES AND 1ST SQUARE OF EACH SUBSEQUENT ROW):

    Round 6: With Color B, join with a sc in the blo of the 1st dc after any corner ch-2 sp, sc in blo of next 2 sts, ch 1, skip the next ch sp, sc in blo of next 3 sts, hdc in the next Color B ch-7, skip the next st, sc in blo of next 3 sts, ch 1, skip the next ch sp, sc in blo of next 3 sts, sc in corner ch-2 sp, ch 1, remove hook from loop, insert hook in corner ch-2 sp of block to be joined to, reinsert hook in loop, ch 1, sc in corner ch-2 sp, sc in blo of next 3 sts, ch 1, remove hook from loop, insert hook in matching ch-1 sp of block to be joined to, reinsert hook in loop, skip the next ch sp, sc in blo of next 3 sts, hdc in the next Color B ch-7, skip the next st, sc in blo of next 3 sts, ch 1, remove hook from loop, insert hook in matching ch-1 sp of block to be joined to, reinsert hook in loop, skip the next ch sp, sc in blo of next 3 sts, sc in corner ch-2 sp, ch 1, remove hook from loop, insert hook in next corner ch-2 sp of block to be joined to, reinsert hook in loop, ch 1, sc in corner ch-2 sp, *sc in blo of next 3 sts, ch 1, skip the next ch sp, sc in blo of next 3 sts, hdc in the next Color B ch-7, skip the next st, sc in blo of next 3 sts, ch 1, skip the next ch sp, sc in blo of next 3 sts, (sc, ch 2, sc) in corner ch-2 sp; repeat from * once, join and break yarn. (56 sc, 4 hdc)

    There You Go Throw - free crochet pattern on Mooglyblog.com!

    ROUND 6 INSTRUCTIONS - JOINING TO TWO SQUARES OF THERE YOU GO THROW 

    Round 6: With Color B, join with a sc in the blo of the 1st dc after any corner ch-2 sp, sc in blo of next 2 sts, ch 1, skip the next ch sp, sc in blo of next 3 sts, hdc in the next Color B ch-7, skip the next st, sc in blo of next 3 sts, ch 1, skip the next ch sp, sc in blo of next 3 sts, sc in corner ch-2 sp, ch 1, remove hook from loop, insert hook in corner ch-2 sp of 1st block to be joined to, reinsert hook in loop, ch 1, sc in corner ch-2 sp, sc in blo of next 3 sts, ch 1, remove hook from loop, insert hook in matching ch-1 sp of block to be joined to, reinsert hook in loop, skip the next ch sp, sc in blo of next 3 sts, hdc in the next Color B ch-7, skip the next st, sc in blo of next 3 sts, ch 1, remove hook from loop, insert hook in matching ch-1 sp of block to be joined to, reinsert hook in loop, skip the next ch sp, sc in blo of next 3 sts, sc in corner ch-2 sp, remove hook from loop, insert hook in next corner ch-2 sp of 1st block to be joined to, reinsert hook in loop, ch 1, remove hook from loop, insert hook in corner ch-2 sp of 2nd block to be joined to, reinsert hook in loop, ch 1, sc in corner ch-2 sp,  sc in blo of next 3 sts, ch 1, remove hook from loop, insert hook in matching ch-1 sp of block to be joined to, reinsert hook in loop, skip the next ch sp, sc in blo of next 3 sts, hdc in the next Color B ch-7, skip the next st, sc in blo of next 3 sts, ch 1, remove hook from loop, insert hook in matching ch-1 sp of block to be joined to, reinsert hook in loop, skip the next ch sp, sc in blo of next 3 sts, sc in corner ch-2 sp, ch 1, remove hook from loop, insert hook in corner ch-2 sp of 2st block to be joined to, reinsert hook in loop, ch 1, sc in corner ch-2 sp, sc in blo of next 3 sts, ch 1, skip the next ch sp, sc in blo of next 3 sts, hdc in the next Color B ch-7, skip the next st, sc in blo of next 3 sts, ch 1, skip the next ch sp, sc in blo of next 3 sts, (sc, ch 2, sc) in corner ch-2 sp; join and break yarn. (56 sc, 4 hdc)

    That's a wall of text eh? Let's break it down for a minute before we get to the border:

    • We're working in the back loop only (blo), except for corners.
    • Each corner gets a (sc, ch 2, sc). The sides are 3 sc, ch 1, skip 1, 3 sc, hdc in the same color ch-7 loop from Round 3, skip the st behind the hdc, then 3 sc, ch 1, skip 1, 3 sc.
    • You join at the corners and at the ch-1 sps on either side of the hdc.
    • When you are joining squares, work in the same direction you crochet. So if you are joining to two squares, you'll join to the right bottom corner of the square above, then the ch-1 sps, then the left bottom corner of that square, then the top right corner of the square to the left, then those ch-1 sps, then to the bottom right corner of that square.

    BORDER INSTRUCTIONS:

    Round 1: With Color B, join to any outside st with a sc, sc in each remaining stitch around, working 19 sc into the side of each square (including the corners), and 3 sc in each blanket corner; join. (536 sts)

    Round 2: Ch 1, hdc in each st around; join and break. (544 sts)

    Round 3: With Color A, sl st in each st around; join and break. (544 sts)


    And as they say, there you go! (You had to know that was coming...) That's the There You Go Throw free crochet blanket pattern. You can make just one 6" square using the first version of Round 6, or make the full pattern by using the other 3 versions of Round 6! It can look intimidating all written out, but it's really pretty simple, and I hope you'll give it a try! I can't wait to see what colors you choose, and what projects this square sneaks into!

    The Fine Print

    Written pattern copyright Tamara Kelly 2017, all rights reserved. Please do not reprint or repost this pattern, but please do link to this page to share this pattern with others. If you wish to make items for sale from this pattern or translate it to another language, please visit the About page for details. Thank you to Lion Brand Yarn for providing the yarn for this pattern!

    Enclosing Chains & Stitches

    March 9, 2017 by Tamara Kelly 6 Comments

    So you're crocheting along with the latest and greatest crochet pattern, and you come across instructions that say, "enclosing the ch" or "enclose the st" - which means what? Well, let me tell you! Here's how to enclose chains and stitches in crochet!

    What does a crochet pattern mean when it says "enclosing?" Find out in this quick Moogly tutorial!Disclaimer: This post includes affiliate links. [Read more...]

    Lion Brand Shawl in a Ball Spring Giveaway!

    March 8, 2017 by Tamara Kelly 13 Comments

    Lion Brand Shawl in a Ball is one of my favorite yarns! And now that they've added sparkly metallics to the options, it just gets better and better - so let's celebrate the changing seasons with a Lion Brand Shawl in a Ball Spring Giveaway!

    Win Lion Brand Shawl in a Ball in the Spring Giveaway on Mooglyblog.com! Open to USA and Canada, ends 3/15/17 at 12:15am Central US time [Read more...]

    Hookin On Hump Day #138: Link Party for the Yarny Arts!

    March 7, 2017 by Tamara Kelly 1 Comment

    March is here - in like a Lion? You'll have to be the judge to see if these crafts qualify! Because it's your clicks on all the little squares of projects below that let us know who to feature each round! For this round of Hookin On Hump Day, your clicks let us know about 5 amazing FREE patterns - hooray! So let's get to it, and take a look at the best crochet and knit projects from this last round - and while you're here, be sure to link up your own blog projects, and of course visit all the new entries below that catch your eye!

    HOHD 138 is up with 5 amazing new FREE patterns for you! Add your own blog links for a chance to be featured on Moogly and Petals to Picots! [Read more...]

    Better Blocking with the Chetnanigans BlocksAll Giveaway!

    March 6, 2017 by Tamara Kelly 22 Comments

    I spent years as a crocheter not knowing about blocking. I didn't know what it was, how it was done, or why, but now I'm a big believer in it! So I jumped at the chance to try out the Chetnanigans BlocksAll - and tell you all about it!

    [Read more...]

    Lotus Blossom Shawl

    March 3, 2017 by Tamara Kelly 49 Comments

    Lotus Blossom Shawl - free crochet pattern on Mooglyblog.com! Uses just 2 skeins of Lion Brand Shawl in a Ball!

    The Lotus Blossom Shawl features a unique shape that makes it both easy to crochet, and easy to wear! This ¾ circle might remind you a bit of Pac-Man - and it's this shape that makes it stay put over the shoulders, keeping you securely wrapped in crochet love!

    Disclaimer: This post includes affiliate links, materials provided by Lion Brand.

    Prefer an ad-free PDF? You've got options!

    This button leads to the pattern on Etsy

    Prefer the free blog version? Keep scrolling!

    All About This Pattern

    It starts with a magic circle, but after working only 9 double crochets in the ring, you turn to work in rows. Most double crochet circles begin with 12 stitches, so we establish the ¾ circle right off the bat.

    As you work the Lotus Blossom Shawl pattern, you'll see that these 9 double crochets form the borders of 8 wedges of pattern, making for easy repeats across each row.

    Inset sections of mesh between the wedges create additional shaping and a light, springy feel!

    Lotus Blossom Shawl - free crochet pattern on Mooglyblog.com! Uses just 2 skeins of Lion Brand Shawl in a Ball!

    My Inspiration

    I thought about calling this the Hitchhiker shawl since it has exactly 42 rows... but of course, that name belongs to a lovely knit pattern that's been around for a while now.

    So instead, I took inspiration from the colorway itself! This shawl was made using Lion Brand Shawl in a Ball Metallic in Lotus Blossom - a gorgeous self-striping yarn of purples and greens and a bit of blue, depending on the light, with sparkly thread run throughout.

    It's stunning, but I know any Shawl in a Ball colorway will look great in this pattern! Pick up 2 balls of your favorites and you'll be ready to make this free crochet shawl pattern!

    Lotus Blossom Shawl - free crochet pattern on Mooglyblog.com! Uses just 2 skeins of Lion Brand Shawl in a Ball!


    Lotus Blossom Shawl

    Add this pattern to your Ravelry Queue and Favorites

    US-K, 6.5mm hook - Furls Crochet

    975 yds Lion Brand Shawl in a Ball (Worsted/”4″/UK: 10 ply; 518 yds/473 m; 5.3 oz)
    Colorway Shown: Lotus Blossom - 2 balls

    This yarn is discontinued. Suggested substitute: Katia Concept Cotton Merino Glam

    Gauge: 22 sts x 13 rows = 8"/20 cm in dc

    Finished size: 54" wide, 27" long at center back (all edges measure 27" from center of shawl; finished shape is a ¾ circle)

    Helpful Links and Tutorials

    Crochet Abbreviations

    Magic circle

    Keeping a magic circle closed

    Fpdc (front post double crochet) and Bpdc (back post double crochet)

    INSTRUCTIONS:

    Row 1: Make a magic circle, dc 9 in the circle; turn. (9 sts)

    Row 2: Ch 2 (does not count as a st), 2 dc in the 1st st, (fpdc, dc) in each of the next 3 sts, fpdc in the next st, (dc, fpdc) in each of the next 3 sts, 2 dc in the last st; turn. (17 sts)

    Row 3: Ch 2, dc in 1st st, [2 dc in the next st, bpdc in the next st] 7 times, 2 dc in the next st, dc in the last st; turn. (25 sts)

    Row 4: Ch 2, dc in 1st st, [2 dc in the next st, dc in the next st, fpdc in the next st] 7 times, 2 dc in the next st, dc in the last 2 sts; turn. (33 sts)

    Row 5: Ch 2, dc in 1st st, [2 dc in the next st, dc in the next 2 sts, bpdc in the next st] 7 times, 2 dc in the next st, dc in the last 3 sts; turn. (41 sts)

    Row 6: Ch 2, dc in 1st st, [2 dc in the next st, dc in the next 3 sts, fpdc in the next st] 7 times, 2 dc in the next st, dc in the last 4 sts; turn. (49 sts)

    Row 7: Ch 2, dc in 1st st, [2 dc in the next st, dc in the next 4 sts, bpdc in the next st] 7 times, 2 dc in the next st, dc in the last 5 sts; turn. (57 sts)

    Row 8: Ch 2, dc in 1st st, [2 dc in the next st, dc in the next 5 sts, fpdc in the next st] 7 times, 2 dc in the next st, dc in the last 6 sts; turn. (65 sts)

    Row 9: Ch 2, dc in 1st st, [2 dc in the next st, dc in the next 6 sts, bpdc in the next st] 7 times, 2 dc in the next st, dc in the last 7 sts; turn. (73 sts)

    Row 10: Ch 2, dc in 1st st, [2 dc in the next st, dc in the next 7 sts, fpdc in the next st] 7 times, 2 dc in the next st, dc in the last 8 sts; turn. (81 sts)

    Row 11: Ch 2, dc in 1st st, [2 dc in the next st, dc in the next 8 sts, bpdc in the next st] 7 times, 2 dc in the next st, dc in the last 9 sts; turn. (89 sts)

    Row 12: Ch 2, dc in 1st st, [2 dc in the next st, dc in the next 9 sts, fpdc in the next st] 7 times, 2 dc in the next st, dc in the last 10 sts; turn. (97 sts)

    Row 13: Ch 2, dc in 1st st, [2 dc in the next st, dc in the next 10 sts, bpdc in the next st] 7 times, 2 dc in the next st, dc in the last 11 sts; turn. (105 sts)

    Row 14: Ch 2, dc in 1st st, [2 dc in the next st, dc in the next 11 sts, fpdc in the next st] 7 times, 2 dc in the next st, dc in the last 12 sts; turn. (113 sts)

    Row 15: Ch 2, dc in 1st st, [2 dc in the next st, dc in the next 12 sts, bpdc in the next st] 7 times, 2 dc in the next st, dc in the last 13 sts; turn. (121 sts)

    Row 16: Ch 2, dc in 1st st, [2 dc in the next st, dc in the next 13 sts, fpdc in the next st] 7 times, 2 dc in the next st, dc in the last 14 sts; turn. (129 sts)

    Row 17: Ch 2, dc in 1st st, [2 dc in the next st, dc in the next 14 sts, bpdc in the next st] 7 times, 2 dc in the next st, dc in the last 15 sts; turn. (137 sts)

    Row 18: Ch 2, dc in 1st st, [2 dc in the next st, dc in the next 15 sts, fpdc in the next st] 7 times, 2 dc in the next st, dc in the last 16 sts; turn. (145 sts)

    Row 19: Ch 2, dc in 1st st, [2 dc in the next st, dc in the next 16 sts, bpdc in the next st] 7 times, 2 dc in the next st, dc in the last 17 sts; turn. (153 sts)

    Row 20: Ch 2, dc in 1st st, [2 dc in the next st, dc in the next 17 sts, fpdc in the next st] 7 times, 2 dc in the next st, dc in the last 18 sts; turn. (161 sts)

    Row 21: Ch 2, dc in 1st st, [2 dc in the next st, dc in the next 18 sts, bpdc in the next st] 7 times, 2 dc in the next st, dc in the last 19 sts; turn. (169 sts)

    Row 22: Ch 2, dc in 1st st, [2 dc in the next st, dc in the next 19 sts, fpdc in the next st] 7 times, 2 dc in the next st, dc in the last 20 sts; turn. (177 sts)

    Row 23: Ch 2, dc in 1st st, [2 dc in the next st, dc in the next 20 sts, bpdc in the next st] 7 times, 2 dc in the next st, dc in the last 21 sts; turn. (185 sts)

    Row 24: Ch 2, dc in 1st st, [2 dc in the next st, dc in the next 21 sts, fpdc in the next st] 7 times, 2 dc in the next st, dc in the last 22 sts; turn. (193 sts)

    Row 25: Ch 2, dc in 1st st, [2 dc in the next st, dc in the next 22 sts, bpdc in the next st] 7 times, 2 dc in the next st, dc in the last 23 sts; turn. (201 sts)

    Row 26: Ch 2, dc in 1st st, [dc in the next 24 sts, (fpdc, ch 1, fpdc) in the next st] 7 times, dc in the last 25 sts; turn. (215 sts including chs)

    Lotus Blossom Shawl - free crochet pattern on Mooglyblog.com! Uses just 2 skeins of Lion Brand Shawl in a Ball!

    Row 27: Ch 2, dc in 1st st, [dc in the next 24 sts, bpdc in the next st, ch 3, skip the ch -1, bpdc in the next st] 7 times, dc in the last 25 sts; turn. (229 sts including chs)

    Row 28: Ch 2, dc in the 1st st, [2 dc in the next st, dc in the next 23 sts, fpdc in the next st, ch 1, dc in the ch sp, ch 1, fpdc in the next st] 7 times, 2 dc in the next st, dc in the last 24 sts; turn. (237 sts including chs)

    Row 29: Ch 2, dc in the 1st st, [2 dc in the next st, dc in the next 24 sts, bpdc in the next st, ch 1, skip the ch sp, dc in the next st, ch 1, skip the ch sp, bpdc in the next st] 7 times, 2 dc in the next st, dc in the last 25 sts; turn. (245 sts including chs)

    Row 30: Ch 2, dc in 1st st, [dc in the next 26 sts, fpdc in the next st, ch 1, dc in the next ch sp, ch 1, skip the next st, dc in the next ch sp, ch 1, fpdc in the next st] 7 times, dc in the last 27 sts; turn. (259 sts including chs)

    Row 31: Ch 2, dc in 1st st, [dc in the next 26 sts, bpdc in the next st, ch 1, skip the next ch sp, dc in the next st, ch 2, skip the next ch sp, dc in the next st, ch 1, skip the next ch sp, bpdc in the next st] 7 times, dc in the last 27 sts; turn. (266 sts including chs)

    Row 32: Ch 2, dc in the 1st st, [2 dc in the next st, dc in the next 25 sts, fpdc in the next st, ch 1, skip the next ch sp, dc in the next st, ch 2, skip the next ch sp, dc in the next st, ch 1, skip the next ch sp,, fpdc in the next st] 7 times, 2 dc in the next st, dc in the last 26 sts; turn. (274 sts including chs)

    Row 33: Ch 2, dc in 1st st, [dc in the next 27 sts, bpdc in the next st, ch 1, dc in the next ch sp, {ch 1, skip the next st, dc in the next ch sp} 2 times, ch 1, bpdc in the next st] 7 times, dc in the last 28 sts; turn. (281 sts including chs)

    Row 34: Ch 2, dc in the 1st st, [2 dc in the next st, dc in the next 26 sts, fpdc in the next st, {ch 1, skip the ch sp, dc in the next st} 3 times, ch 1, fpdc in the next st] 7 times, 2 dc in the next st, dc in the last 27 sts; turn. (289 sts including chs)

    Row 35: Ch 2, dc in 1st st, [dc in the next 28 sts, bpdc in the next st, ch 1, skip the next ch sp, dc in the next st, {ch 2, skip the next ch sp, dc in the next st} twice, ch 1, skip the next ch sp, bpdc in the next st] 7 times, dc in the last 29 sts; turn. (303 sts including chs)

    Row 36: Ch 2, dc in the 1st st, [dc in the next 28 sts, fpdc in the next st, ch 1, {dc in the next ch sp, ch 1, skip the next st} 3 times, dc in the next ch sp, ch 1, fpdc in the next st] 7 times, dc in the last 29 sts; turn. (303 sts including chs)

    Row 37: Ch 2, dc in 1st st, [2 dc in the next st, dc in the next 27 sts, bpdc in the next st, {ch 1, skip the next ch sp, dc in the next st} 4 times, ch 1, bpdc in the next st] 7 times, 2 dc in the next st, dc in the last 28 sts; turn. (311 sts including chs)

    Row 38: Ch 2, dc in the 1st st, [2 dc in the next st, dc in the next 28 sts, fpdc in the next st, {ch 1, skip the next ch sp, dc in the next st} twice, ch 2, {skip the next ch sp, dc in the next st, ch 1} twice, fpdc in the next st] 7 times, 2 dc in the next st, dc in the last 29 sts; turn. (326 sts including chs)

    Row 39: Ch 2, dc in 1st st, [2 dc in the next st, dc in the next 29 sts, bpdc in the next st, ch 1, dc in the next ch sp, {ch 1, skip the next st, dc in the next ch sp} 4 times, ch 1, bpdc in the next st] 7 times, 2 dc in the next st, dc in the last 30 sts; turn. (341 sts including chs)

    Lotus Blossom Shawl - free crochet pattern on Mooglyblog.com! Uses just 2 skeins of Lion Brand Shawl in a Ball!

    Row 40:  Ch 2, dc in 1st st, [dc in the next 31 sts, fpdc in the next st, ch 1, dc in the next ch sp, {ch 1, skip the next st, dc in the next ch sp} 5 times, ch 1, fpdc in the next st] 7 times, dc in the last 32 sts; turn. (355 sts including chs)

    Row 41: Ch 2, dc in 1st st, [2 dc in the next st, dc in the next 30 sts, bpdc in the next st, {ch 1, skip the next ch sp, dc in the next st} 6 times, ch 1, bpdc in the next st] 7 times, 2 dc in the next st, dc in the last 31 sts; turn. (363 sts including chs)

    Row 42/Border: Ch 1, sc in each st and ch sp across Row 41, work 2 extra sc at the corner, (sc, ch 1) in the side of each row across the top 2 (straight) edges, 2 extra sc at the last corner; join and break.


    And that wraps up the pattern for this free crochet wrap pattern! It's fun to make and cozy to wear and perfect to gift - I hope you enjoy making your own Lotus Blossom Shawl!

    The Fine Print

    Written pattern copyright Tamara Kelly 2017, all rights reserved. Please do not reprint or repost this pattern, but please do link to this page to share this pattern with others. If you wish to make items for sale from this pattern or translate it to another language, please visit the About page for details. Thank you to Lion Brand Yarn for providing the yarn for this pattern!

    #MooglyCAL2017: Afghan Block #5

    March 2, 2017 by Tamara Kelly 7 Comments

    The Moogly Afghan CAL lasts for the first 11 months of the year, so that the last month can be spent joining and edging the final blanket. And believe it or not... we're on month #3 already! Time flies when you're having fun, and I know you're going to have fun making block #5!

    Moogly Crochet Along 2017! Get all 24 patterns FREE over the course of the year, and have a gorgeous handmade blanket by the holidays! [Read more...]

    Lion Brand Fast-Track Giveaway on Moogly!

    February 28, 2017 by Tamara Kelly 16 Comments

    I recently got to try out the new Lion Brand Yarn Fast-Track - and even used it to design a free crochet pattern! Well, now you can get the yarn for free to go with the pattern - in this Lion Brand Fast-Track Giveaway!

    Lion Brand Fast-Track Giveaway on Moogly! Open to US and Canada, ends 3/7/17 [Read more...]

    Annie’s Signature Designs Spring Breeze Giveaway!

    February 27, 2017 by Tamara Kelly 1 Comment

    Annie’s Signature Designs has released their new 2017 Spring Breeze Collection, with 20+ knit and crochet patterns for the modern yarn crafter - and to celebrate, they are giving one of the patterns away here on Moogly!

    Annie’s Signature Designs Spring Breeze Giveaway on Moogly - open worldwide, ends 3/6/17Disclaimer: This post includes affiliate links. [Read more...]

    Hard Candy Baby Blanket

    February 24, 2017 by Tamara Kelly 13 Comments

    Hard Candy Baby Blanket - free one skein crochet pattern on Mooglyblog.com!

    The Hard Candy Baby Blanket is fun, bright, easy to crochet, and a super soft extra cozy treat for any little girl or boy! And it's a free crochet pattern here on Moogly!

    Disclaimer: This post includes affiliate links, materials provided by Lion Brand.

    Prefer an ad-free PDF? You've got options!

    This button leads to the pattern on Etsy

    Prefer the free blog version? Keep scrolling!

    Sweet as Candy!

    The Hard Candy Baby Blanket looks like a pretty swirly wrapped candy, and I made the whole blanket with just one ball of Lion Brand's Ice Cream Big Scoop! This is a big gorgeous 10oz ball of yarn, so if you can't find the Big Scoop version then I've included the standard skein amounts below. The yarn is self-striping, and a little bit variegated, and comes in a bunch of delicious colors (or flavors!) - I can't wait to see how all of yours turn out!

    Hard Candy Baby Blanket - free one skein crochet pattern on Mooglyblog.com!


    Hard Candy Baby Blanket

    Add this pattern to your Ravelry Queue and Favorites

    US - H, 5.0mm - Furls Crochet

    1 ball Lion Brand Ice Cream Big Scoop (Sport/"3"/UK 8 ply; 1117 yds/1022 m; 10 oz )
    OR 3 balls Lion Brand Ice Cream (Sport/"3"/UK 8 ply; 394 yds/360 m; 3.53 oz)
    Colorways shown: Strawberry (finished blanket) and Blueberry (small circle below)

    Gauge: circle measures 4" after Round 4

    Finished Size: 36" diameter excluding "wrappers"

    Helpful Link and Video Tutorials

    Crochet Abbreviations

    Magic circle

    keeping a magic circle closed

    fpdc (front post double crochet)

    HARD CANDY BABY BLANKET INSTRUCTIONS:

    Round 1: Make a magic circle, ch 2 (does not count as a st here and throughout), work 12 dc in the ring; join with a sl st to first dc. (12 sts)

    Round 2: Ch 2, 2 dc in each st; join. (24 sts)

    Round 3: Ch 2, 2 dc in the 1st st, fpdc in the next st, *2 dc in the next st, fpdc in the next st; repeat from * around, join. (36 sts)

    Round 4: Ch 2, 2 dc in the 1st st, dc in the next st, fpdc in the next st, *2 dc in the next st, dc in the next st, fpdc in the next st; repeat from * around, join. (48 sts)

    Round 5: Ch 2, 2 dc in the 1st st, dc in the next 2 sts, fpdc in the next st, *2 dc in the next st, dc in the next 2 sts, fpdc in the next st; repeat from * around, join. (60 sts)

    Round 6: Ch 2, 2 dc in the 1st st, dc in the next 3 sts, fpdc in the next st, *2 dc in the next st, dc in the next 3 sts, fpdc in the next st; repeat from * around, join. (72 sts)

    Round 7: Ch 2, 2 dc in the 1st st, dc in each st to the next fpdc, fpdc in the fpdc st, *2 dc in the next st, dc in each st to the next fpdc, fpdc in the fpdc st; repeat from * around, join. (84 sts)

    Round 8 - 35: Repeat Round 7, increasing by 12 sts each round. (Round 35: 420 sts) Do not break yarn, continue to Wrapper #1 below.

    Hard Candy Baby Blanket - free one skein crochet pattern on Mooglyblog.com!

    Wrapper #1 

    Row 1: Ch 2, dc in the first 33 sts (remaining sts left unworked); turn. (33 sts)

    Row 2: Ch 2, 2 dc in the 1st st, dc in each st until 1 st remains, 2 dc in last st; turn. (35 sts)

    Rows 3 - 12: Repeat Row 2, increasing by 2 sts each row. (Row 12: 55 sts)

    Row 13: Ch 2, 3 dc in the 1st st, sc in next st, *skip the next st, 5 dc in the next st, skip the next st, sc in the next st; repeat from * until 1 st remains, 3 dc in the last st, break yarn. (13 5-dc shells, 2 half shells)

    Wrapper #2

    Row 1: Join to the st on the opposite side of the blanket from the 1st st of Wrapper #1, Row 1; ch 2, dc in the same st as join, dc in the next 32 sts (remaining sts left unworked); turn. (33 sts)

    Row 2 - 13: Repeat Wrapper #1 Rows 2 - 13, do not break yarn.

    Border: Ch 1, sc evenly around entire blanket, working as follows across the shells of the wrappers: skip the sc sts between the shells, add an extra sc in the center dc of each shell; join and break yarn.


    Yum!

    And that's that on another free Moogly crochet pattern! I hope you've enjoyed this fun crochet pattern - what flavors will you make your Hard Candy Baby Blanket?

    Written pattern copyright Tamara Kelly 2017, all rights reserved. Please do not reprint or repost this pattern, but please do link to this page to share this pattern with others. If you wish to make items for sale from this pattern or translate it to another language, please visit the About page for details. Thank you to Lion Brand Yarn for providing the yarn for this pattern!

    Love Plus Mitts & the Love + Leche Lotion Bar Giveaway!

    February 23, 2017 by Tamara Kelly 5 Comments

    I got to meet Daven, the creator of Love + Leche, a few years ago - and I immediately fell in love with her lotion bars! In fact... they've inspired a new pattern! Here are all the details on the Love Plus Mitts AND the Love + Leche Giveaway!

    So many goodies in this post on Moogly! Check out these gorgeous mitts, and get a coupon for Love + Leche with your pattern purchase! PLUS enter to win 2 Sweet Sheep Lotion Bars! Giveaway is open to US residents only, and ends 3/2/17Disclaimer: This post includes affiliate links. [Read more...]

    Adding Chains to a Too-Short Foundation

    February 22, 2017 by Tamara Kelly 23 Comments

    We've all been there. You've made your chain - 50, 100, 300 chains long. Maybe you even added a couple extra, just in case (after all, you can always take them out later). But then you get to the end of the first row... and you come up short. Oh no! But do not fret, there are ways to add more chains without pulling out your stitches or starting over! Here's how to add more chains to a too-short foundation!

    Come up short at the end of the first row? Don't worry! Get the solution on Mooglyblog.com!Disclaimer: This post includes affiliate links. [Read more...]

    Hookin On Hump Day #137: Link Party for the Yarny Arts!

    February 21, 2017 by Tamara Kelly 10 Comments

    February has had some wacky weather - but at least it means craft time! So we got to go through some amazing projects once again for this round of Hookin On Hump Day! So let's get to it, and take a look at the best crochet and knit projects from this last round - and while you're here, be sure to link up your own blog projects, and visit all the new entries below that catch your eye!

    Hookin On Hump Day #137 is up on Moogly - and all the patterns featured in this round are FREE!

    [Read more...]

    Bouncing Basket

    February 17, 2017 by Tamara Kelly 24 Comments

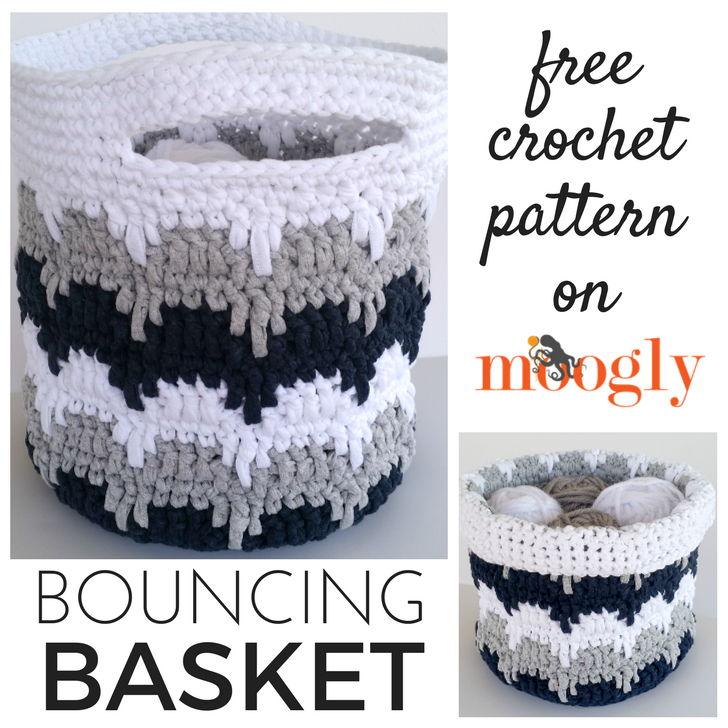
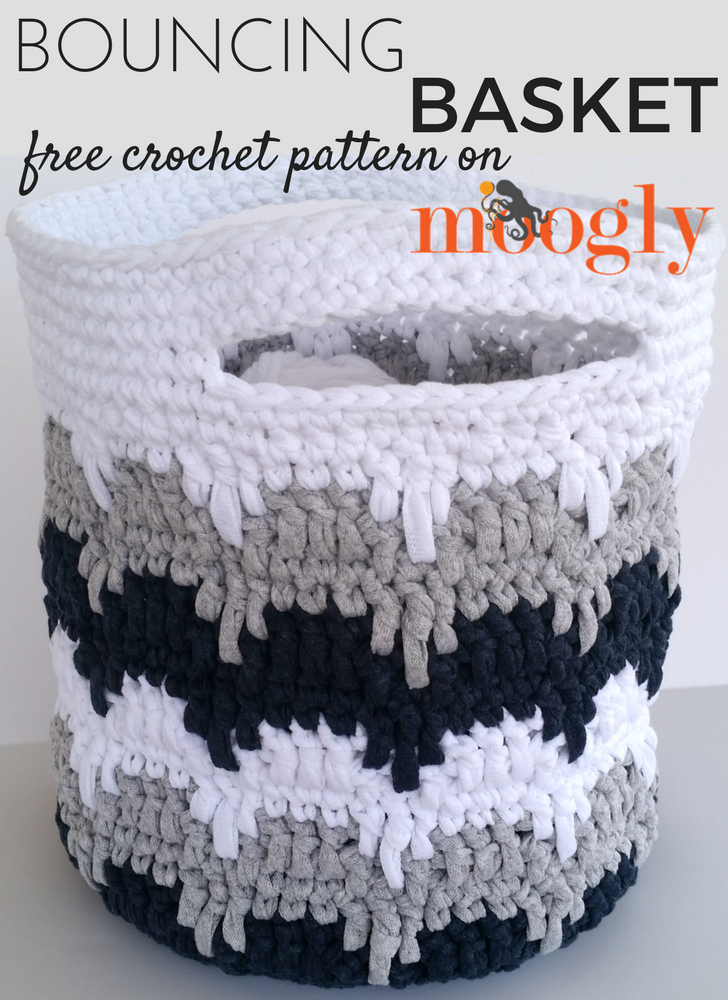
    Bouncing Basket - free crochet pattern on Mooglyblog.com!

    'Tis the season for getting organized... okay, so around here, that's every season! And one of my favorite things to make for that is crochet baskets. The Bouncing Basket is my latest, and like every new pattern, my current favorite!

    Disclaimer: This post includes affiliate links.

    Prefer an ad-free PDF? You've got options!

    This button leads to the pattern on Etsy

    Prefer the free blog version? Keep scrolling!

    Need a Yarn Sub?

    The Bouncing Basket features a stitch pattern that is fun to make as well as timeless - at home in almost any home decor! Made with Lion Brand's new Fast-Track (see the link below!), it's a quick project with big impact! It's also perfect for on the go - with generous and strong handles, you'll find yourself using it in every room of the home and out and about! Can't find Fast-Track? Try substituting Hometown USA or Heartland Thick & Quick for more great looks!

    Bouncing Basket - free crochet pattern on Mooglyblog.com!


    Bouncing Basket

    Add this pattern to your Ravelry Queue and Favorites

    US - N, 9.0mm hook - Furls Crochet

    300 yds Lion Brand Fast-Track (Super Bulky/"6"/UK 14-16 ply; 149 yds/136 m; 8.01 oz)
    Color A: Dune Buggy Denim - 1 skein/120 yds
    Color B: Chopper Grey - 1 skein/80 yds
    Color C: Airstream White - 1 skein/100 yds

    This yarn has been discontinued. Recommended substitutions: Bernat Fab, Lion Brand Cover Story Lazy Days Thick & Quick, Hoooked Ribbon XL

    Stitch Markers - Clover Lock Ring Markers

    Gauge: Round 1-5 of pattern = 4"/10cm diameter

    Size: 9" diameter, 12" tall

    Helpful Links and Tutorials

    Crochet Abbreviations

    Magic circle

    keeping a magic circle closed

    BLO (back loop only)

    joining with sc

    adding handles

    seamless finishing

    BOUNCING BASKET INSTRUCTIONS:

    Make the Bottom:

    Round 1: With Color A, make a magic circle, work 6 sc in the ring; join. (6 sts)

    Round 2: Ch 1, 2 sc in each st around; join. (12 sts)

    Round 3: Ch 1, sc in the 1st st, 2 sc in the next st, *sc in the next st, 2 sc in the next st; repeat from * around, join. (18 sts)

    Round 4: Ch 1, sc in the 1st 2 sts, 2 sc in the next st, *sc in the next 2 sts, 2 sc in the next st; repeat from * around, join. (24 sts)

    Round 5: Ch 1, sc in the 1st 3 sts, 2 sc in the next st, *sc in the next 3 sts, 2 sc in the next st; repeat from * around, join. (30 sts - check gauge here for exact sizing)

    Round 6: Ch 1, sc in the 1st 2 sts, 2 sc in the next st, *sc in the next 4 sts, 2 sc in the next st; repeat from * around until 2 sts remain, sc in the last 2 sts, join. (36 sts)

    Round 7: Ch 1, 2 sc in the 1st st, sc in the next 5 sts, *2 sc in the next st, sc in the next 5 sts; repeat from * around, join. (42 sts)

    Round 8: Ch 1, sc in the 1st 6 sts, 2 sc in the next st, *sc in the next 6 sts, 2 sc in the next st; repeat from * around, join. (48 sts)

    Round 9: Ch 1, sc in the 1st 7 sts, 2 sc in the next st, *sc in the next 7sts, 2 sc in the next st; repeat from * around, join. (54 sts)

    Round 10: Ch 1, sc in the 1st 8 sts, 2 sc in the next st, *sc in the next 8 sts, 2 sc in the next st; repeat from * around, join. (60 sts)

    Round 11: Ch 1, 2 sc in the 1st st, sc in the next 9 sts, *2 sc in the next st, sc in the next 9 sts; repeat from * around, join. (66 sts)

    Round 12: Ch 1, sc in the 1st 10 sts, 2 sc in the next st, *sc in the next 10 sts, 2 sc in the next st; repeat from * around, join. (72 sts - this is the end of the increases)

    Make the Sides:

    Round 13: Ch 1, sc in BLO of each st around; join. (72 sts)

    Round 14: Ch 1, sc in the 1st 3 sts, ch 1, skip the next st, sc in the next st, ch 1, skip the next st, *sc in the next 3 sts, ch 1, skip the next st, sc in the next st, ch 1, skip the next st; repeat from * around, join. (48 sc, 24 ch)

    Round 15: Ch 4, skip the 1st 3 sts, dc in the skipped st from the round before the previous round enclosing the ch-1 in the st, ch 1, skip the next st, dc in the next skipped st from the round before the previous round enclosing the ch-1 in the st, *ch 3, skip the next 3 sts, dc in the skipped sc from the round before the previous round enclosing the ch-1 in the st, ch 1, skip the next st, dc in the next skipped sc from the round before the previous round enclosing the ch-1 in the st; repeat from * around, join to the ch-4 sp. (24 dc, 48 ch)

    Round 16: Ch 1, dc in the 1st 3 skipped sts from the round before the previous round enclosing the ch-4 in the st, ch 3, skip the next 3 sts (this includes the dc, ch 1, dc), *dc in the next 3 skipped sts from the round before the previous round enclosing the ch-3 in the st, ch 3, skip the next 3 sts (this includes the next dc, ch 1, dc); repeat from * around, join and break Color A. (36 dc, 36 ch)

    Round 17: With Color B, join with sc to 1st dc of previous round, sc in next 2 sts, dc in skipped st from the round before the previous round enclosing the ch-3 in the st, tr in skipped st from round below enclosing the ch-3  and ch-1 in the st, dc in skipped st from the round before the previous round enclosing the ch-3 in the st, *sc in next 3 sts, dc in skipped st from the round before the previous round enclosing the ch-3 in the st, tr in skipped st from round below enclosing the ch-3  and ch-1 in the st, dc in skipped st from the round before the previous round enclosing the ch-3 in the st; repeat from * around, join. (72 sts)

    Rounds 18 - 20: Repeat Rounds 14-16; break Color B.

    Round 21: With Color C, repeat Round 17.

    Rounds 22 - 24: Repeat Rounds 14-16; break Color C.

    Rounds 25 - 28: With Color A, repeat Rounds 21-24; break Color A.

    Rnds 29 - 32: With Color B, repeat Rounds 21-24; break Color B.

    Round 33: With Color C, repeat Round 17.

    Round 34: Ch 1, hdc in the 1st 2 sts, sc in the next 3 sts, *hdc in the next 3 sts, sc in the next 3 sts; repeat from * around, join. (72 sts)

    Round 35: Ch 1, sc in each st around; join. (72 sts) Place markers in sts #11, 23, 47, and 59.

    Make the Handles:

    Round 36: Ch 1, sc in each st to 1st marker, ch 15, skip next 13 sts (1st marker to 2nd marker), sc in next 23 sts, ch 15, skip next 13 sts (3rd marker to 4th marker), sc in remaining 13 sts; join. (46 sc, 30 ch)

    Round 37: Ch 1, sc in each st and ch around; join. (76 sts)

    Round 38 and 39: Ch 1, sc in each st around; break yarn and join with seamless finish. (76 sts)


    And that's the Bouncing Basket! I gave it that name because the stitch pattern reminds me of the path of a bouncing ball - plus, it bounces back from whatever you put in it! Keep it up straight to use the handles and for more storage, or fold the handles over for easy tabletop organization - the Bouncing Basket is there for whatever you need! I hope you enjoy making this free crochet basket pattern!

    The Fine Print

    Written pattern copyright Tamara Kelly 2017, all rights reserved. Please do not reprint or repost this pattern, but please do link to this page to share this pattern with others. To print or download, use the Print Friendly button below. If you wish to make items for sale from this pattern or translate it to another language, please visit the About page for details. Thank you to Lion Brand Yarn for providing the yarn for this pattern!

    #MooglyCAL2017: Afghan Block #4

    February 16, 2017 by Tamara Kelly 10 Comments

    It's only just begun, but with Block #4 we've officially got enough squares for a whole row of the blanket for the 2017 Moogly Afghan Crochet Along! Please be sure to read the whole post before you get started with the latest square!

    Moogly Crochet Along 2017! Get all 24 patterns FREE over the course of the year, and have a gorgeous handmade blanket by the holidays! [Read more...]

    « Previous Page
    Next Page »
    Tamara Kelly of Moogly

    Moogly is world-famous for fresh. modern, and approachable crochet designs - as well as a little knitting and crafting here and there. On Moogly, you'll find several new free patterns every month, top quality video tutorials, giveaways, and more!

    More about Moogly →

    Popular

    • MooglyCAL2026 Block 21
      MooglyCAL2026 Block 21
    • Crochet and Catch Up with Moogly - October 14, 2026
      Crochet and Catch Up with Moogly - October 14, 2026
    • Seamless Crochet Sweaters Review and Giveaway
      Seamless Crochet Sweaters - Review and Giveaway
    • Ghost Treat Basket Tutorial
      Ghost Treat Basket Tutorial
    gosadi
    I'm a Craftsy Instructor. Click to see my classes.
    I Like Crochet


    Footer

    ↑ back to top

    About

    • About
    • Privacy Policy

    Newsletter

    Contact

    Email Moogly

    As an Amazon Associate I earn from qualifying purchases.
    Copyright © 2026 Mooglyblog.com