Classic Crochet Shawls is a new book from Interweave crochet - and it lives up to the name. These patterns are classics that make this book a must have!
 Disclaimer: I was given a copy of this book for review, but all opinions are my own.

Classic Crochet Shawls is a new book from Interweave crochet - and it lives up to the name. These patterns are classics that make this book a must have!
Disclaimer: I was given a copy of this book for review, but all opinions are my own.
Fall is in the air, and that means Football Season! So to celebrate, here are 10 free crochet patterns for sports fans - all made with Lion Brand Yarn!
 Disclaimer: This post was sponsored by Lion Brand.
Crochet season is coming back so strong you guys - these patterns just keep getting better and better! (And they keep giving me "why didn't I think of that??" moments too!) Thank you all so much for linking up and allowing us to highlight them here on Hookin On Hump Day! Here are the top 5 from the latest round!


Classic, versatile, easy, cozy, and fun - all words you can use to describe the Ethan Baby Blanket, a free crochet baby blanket pattern on Moogly!
Disclaimer: This post includes affiliate links; yarn provided by Lion Brand.


Prefer the free blog version? Keep scrolling!
The Ethan Baby Blanket is made with a great stitch pattern, and I've included the stitch multiple below so you can make it in any custom size. It's a quick one to make - I designed and crocheted it within a weekend!

I love the color depth that Lion Brand Wool-Ease Tonal brings to this pattern, and it comes in lots of colors to choose from - be sure to click the yarn link in the materials list below to check them out and order your own!

Add this pattern to your Ravelry Queue and Favorites
US - M/N, 9.0mm hook - Furls Crochet
740 yds Lion Brand Wool-Ease Tonal (80% acrylic/20% wool; Bulky/yarn symbol “5”/UK:12-14 ply; 124 yds/113 m; 3.99 oz)
Color A: Denim (5 balls)
Color B: Buttercup (1 ball)
This yarn has been discontinued. Recommended substitutions include Lion Brand Scarfie, Two of Wands Hue + Me, or any washable and soft Bulky yarn of your choice.
Gauge: 9 sts x 4 rows = 4"/10cm in pattern
Size: 38" x 40" including edging rounds
Stitch Multiple: Mult of 3, +4
Switching colors for striped rows

Row 1: With Color A, ch 82, dc in 4th st from hook (skipped 3-ch count as first dc of row), skip 2 chs, *3 dc in the next ch, skip 2 chs; rep from * across until 1 ch remains, 2 dc in last ch, turn. (79 sts)
Row 2: Ch 2, skip the first st, dc in the next st (ch 2 and dc count as dc2tog), ch 2, *dc3tog, ch 2; rep from * across until 2 sts remain, dc2tog, turn. (27 sts)
Row 3: Ch 3 (counts as first dc), 3 dc in each ch-2 sp across, dc in last st; turn. (80 sts)
Row 4: Ch 4 (counts as first dc and ch-1), skip the first st, dc3tog, *ch 2, dc3tog; rep from * across until 1 st remains, ch 1, dc in last st, turn. (28 sts)
Row 5: Ch 3 (counts as first dc), dc in the first st, skip next ch-1 sp, 3 dc in each ch-2 sp across, skip last ch-1 sp, 2 dc in last st; turn. (79 sts)
Rows 6-8: Repeat Rows 2-4, finish last st of Row 4 with Color B.
Row 9: Continuing with Color B, repeat Row 5.
Row 10: Repeat Row 2, finish last st with Color A, break Color B.
Rows 11-13: Continuing with Color A, repeat Rows 3-5.
Rows 14-17: Repeat Rows 2-5.
Row 18: Repeat Row 2, finish last st with Color B.
Row 19: Continuing with Color B, repeat Row 3.
Row 20: Repeat Row 4, finish last st with Color A.
Row 21: Continuing with Color A, repeat Row 5.
Row 22: Repeat Row 2, finish last st with Color B.
Row 23: Continuing with Color B, repeat Row 3.
Row 24: Repeat Row 4, finish last st with Color A, break Color B.
Row 25: Continuing with Color A, repeat Row 5.
Rows 26-29: Repeat Rows 2-5.
Rows 30-32: Repeat Rows 2-4, finish last st of Row 4 with Color B.
Row 33: Continuing with Color B, repeat Row 5.
Row 34: Repeat Row 2, finish last st with Color A, break Color B.
Rows 35-37: Repeat Rows 3-5.
Rows 38-41: Repeat Rows 2-5.
Row 42: Repeat Row 2 but do not turn at end of row.
Edging Round 1: Turning work 90 degrees to work along side of rows, sc evenly around blanket working 3 sc in each corner st; join.
Edging Round 2: Ch 1, (sc, dc) in the first st, skip the next st, *(sc, dc) in the next st, skip the next st; rep from * around, sc in last st (if 1 st extra remains), join and break yarn.

And that's how to crochet the Ethan Baby Blanket free crochet pattern! It's a great pattern for playing with color - and with the stitch multiple given above, you can make it in any custom size!
It would also make a fantastic stash buster - make every two rows in a new color, and you're sure to come up with something uniquely you.
I can't wait to see what you do with this free crochet baby blanket pattern - if you make it, please share it with me via social media @mooglyblog!
Written pattern copyright Tamara Kelly 2017, all rights reserved. Please do not reprint or repost this pattern, but please do link to this page to share this pattern with others. If you wish to make items for sale from this pattern or translate it to another language, please visit the About page for details. Thank you to Lion Brand Yarn for providing the yarn for this pattern.
One of the things each of my kids did in preschool was a field trip to the local botanical gardens. So it seems appropriate at back to school time to have #18 in the Moogly CAL for 2017, designed by Sonya Blackstone of Blackstone Designs - the Botanical Garden Square!
 Disclaimer: This post includes affiliate links. [Read more...]
How to have a summer fling? No no no, this is how to crochet the Summer Fling Throw - a free crochet pattern on Moogly!

Disclaimer: This post includes affiliate links. Materials for this video were provided by Lion Brand and Furls.
Every so often, I get the chance to highlight another fantastic crochet designer - and today, I'm excited to share Kirsten Holloway Designs in the Moogly Designer Showcase!

I got to meet Alessandra Hayden of Just Be Happy Crochet last year when she was working on this book - and I'm so excited to be able to share the finished product with you! Because Modern Tapestry Crochet is gorgeous!
 Disclaimer: I was given a copy of this book for review, but all opinions are my own.

You know when you've made something you just love, can't stop touching, and can't wait to wear? For me, that's the Quicksilver Shawlette - a free crochet shawl pattern here on Moogly!
Disclaimer: This post includes affiliate links; materials provided by Lion Brand Yarn.
Prefer an ad-free PDF? You've got options!
Prefer the free blog version? Keep scrolling!
The Quicksilver Shawlette is, to date, my favorite piece. I love the neutrals, the interplay of the stitch patterns, the edging - all of it. And it uses (less than) 2 balls of yarn - and takes only a few evenings to make!

And I'm so excited to share this finished pattern with you! It's interesting, while still being a great Netflix pattern - and I can't wait to wear it out. It is the perfect blend of feminine and graphic. Ready for date night, school runs, and coffee with friends, jeans, leggings, dresses, fall, and winter!

I used LB Collection Superwash Merino, and love the combination of Charcoal and Ivory. But this pattern would be amazing with other color combos too. Imagine a bright pink Dahlia instead of the Ivory, or go tone on tone with Eggplant and Wild Berry... So many possibilities!

Add this pattern to your Ravelry Queue and Favorites
US - K, 6.5mm hook - Furls Crochet
350 yds Lion Brand LB Collection Superwash Merino. (100% merino; DK/8 ply; yarn symbol “3”; 306 yds /280 m; 3.53 oz).
Color A: Charcoal (1 ball, or 290 yds).
Color B: Ivory (1 ball, or 60 yds).
Gauge: 17 sts x 6 rows = 4" in Repeated Rows stitch pattern (after light blocking)
Finished Size: 52" x 22.5" x 56" (after light blocking)

Quicksilver Shawlette Tutorial and Charts
CSDC (Chainless Starting Double Crochet)
Note: This pattern uses only basic stitches - chains, single crochet, and double crochet - except for the CSDC. If preferred, substitute a ch-3 for the CSDC, or a ch-2 and dc in the first st. Use whichever method you like best to begin a row of double crochet!

Row 1: With Color A, ch 2, skip the ch closest to the hook, 2 dc in the last ch; turn. (2 sts)
Row 2: CSDC in the first st, ch 1, dc in the last st; turn. (3 sts inc ch)
Row 3: CSDC in the first st, dc in the same st, ch 1, dc in the last dc st; turn. (4 sts inc ch)
Row 4: CSDC in the first st, 2 dc in the same st, ch 1, skip the next dc, dc in the last dc; turn. (5 sts inc ch)
Row 5: CSDC in the first st, dc in the same st, ch 1, skip the next dc, dc in the next dc, ch 1, dc in the last dc; turn. (6 sts inc chs)
Row 6: CSDC in the first st, ch 1, 3 dc in the next dc, ch 1, skip the next dc, dc in the last dc; turn. (7 sts inc chs)
Row 7: CSDC in the first st, dc in the same st, *ch 1, skip the next dc, dc in the next dc, ch 1, skip the next dc, 3 dc in the next dc; rep from * to end, turn. (8 sts inc ch)
Row 8: CSDC in the first st, ch 1, dc in the next st, *ch 1, skip the next dc, 3 dc in the next dc, ch 1, skip the next dc, dc in the next dc; rep from * to end, turn. (9 sts inc ch)
Row 9: CSDC in the first st, dc in the same st, *ch 1, skip the next dc, dc in the next dc, ch 1, skip the next dc, 3 dc in the next dc; rep from * across, then ch 1 and dc in the last dc, turn. (10 sts inc chs)
Row 10: CSDC in the first st, 2 dc in the same st, *ch 1, skip the next dc, dc in the next dc,** ch 1, skip the next dc, 3 dc in the next dc; rep from * across finishing last rep at **, turn. (11 sts inc chs)
Row 11: CSDC in the first st, dc in the same st, ch 1, skip the next dc, dc in the next dc, *ch 1, skip the next dc, 3 dc in the next dc, ch 1, skip the next dc, dc in the next dc; rep from * across, then ch 1 and dc in the last dc, turn. (12 sts inc chs)
Row 12: CSDC in the first st, ch 1, 3 dc in the next dc, ch 1, skip the next dc, dc in the next dc, *ch 1, skip the next dc, 3 dc in the next dc, ch 1, skip the next dc, dc in the next dc; rep from * across, turn. (13 sts inc chs)
Rows 13 - 63: Repeat Rows 7 - 12 (stitch count will increase by 1 per row), ending on a Row 9 repeat. Break Color A.
Row 64: With Color B, join with dc in first st, dc in the same st, dc in each rem st and ch sp across; turn. (65 sts)
Row 65: CSDC in the first st, *ch 1, skip the next st, dc in the next st; rep from * across, then dc in the last st, turn. (66 sts inc chs)
Row 66: CSDC in the first st, dc in the same st, dc in the next st, *skip the next dc, (3 dc, ch 2, 3 dc) in the next dc, skip the next dc, dc in the next dc; rep from * across, turn. (8 shells)
Row 67: CSDC in the first st, *ch 3, skip the next 3 dc sts, sc in the next ch-2 sp, ch 3, skip the next 3 dc sts, dc in the next dc; rep from * until 2 sts rem, then ch 1, skip the next st, 2 dc in the last st, turn. (68 sts inc chs)
Row 68: CSDC in the first st, dc in the same st, dc in the next st, ch 1, dc in the next dc, *ch 1, dc in the next ch-3 sp, ch 1, dc in the next st; rep from * across, turn. (69 sts inc chs)
Row 69: CSDC in the first st, *dc in the next ch sp, dc in the next dc; rep from * until 2 sts rem, then dc in the next st, 2 dc in the last st, turn and break Color B. (70 sts)
Row 70: With Color A, join with dc in first st, 2 dc in the same st, *ch 1, skip the next 2 dc, dc in the next dc,** ch 1, skip the next 2 dc, 3 dc in the next dc; rep from * across finishing last rep at **, turn. (71 sts inc chs)
Rows 71 -79: Repeat Rows 11 and 12, then Rows 7 - 12, then Row 7 again, break Color A.
Rows 80 - 85: Repeat Rows 64-69.
Row 86: With Color A, join with dc in first st, ch 1, dc in the next st, *ch 1, skip the next 2 dc, 3 dc in the next dc, ch 1, skip the next 2 dc, dc in the next dc; rep from * to end, turn. (87 sts inc chs)
Row 87: Repeat Row 9, but do not turn at the end of the row.
Edging Round 1: Turn shawlette 90 degrees to work along the longest edge, *ch 2, sc in top of next row; rep from * to corner; work 2 more sc in corner; rep from * across second longest edge to corner; CSDC in the first st of the previous row, 3 dc in the same st, ^skip the next dc, sc in the next dc,^^ skip the next dc, (3 dc, ch 2, 3 dc) in the next dc; rep from ^ across previous row finishing last rep at ^^; join to first ch-2 of edging and break yarn.
NOTE ON THE NEXT ROW: If you prefer to wear your shawlette with the ends on your right shoulder, then you can turn at the end of the previous round. If you prefer to wear your shawlette with the ends on your left shoulder, then do not turn. (Try it on before breaking the yarn after the next round to be sure Edging Row 2 is worked on your preferred side.)
Edging Row 2: With Color B, join with sc in top of CSDC of Edging Round 1, sc in next 3 sts, *skip the next sc, sc in the next 3 sts, (sc, ch 1, sc) in the next ch-2 sp, sc in the next 3 sts; rep from * across, sc in the last st, break yarn. Weave in all ends and block lightly to dimensions given.

The Quicksilver Shawlette is so fun to make. And you can upsize it too if you want a full-sized shawl. Just add more repeats until you have the size you want! Keep these tips in mind:
The Special Section can only begin after a row that has a stitch count that is a multiple of 8. E.g.: Row 63 (which has 64 sts - 8x8) and Row 79 (which has 80 sts - 10x8).
After a Special Section, begin again with the Repeated Row that would usually come after that last Repeated Row you made before the Special Section. For instance, Row 63 is a Row 9 repeat. So after working the Special Section, we begin again with Color A in Row 70 with a Row 10 repeat. Row 79 is a Row 7 repeat, so after that Special Section, Row 86 is a Row 8 repeat.
You may need to end the last section of Edging Round 1 in a different place. This depends on how many stitches are in the previous Row. If you don't "land" with a sc, work a half shell to match the other end - aka 4 dc sts.

And that's it! I hope you enjoy making the Quicksilver Shawlette your own. Please do share your photos on social media with me @mooglyblog. I love seeing what you've made!
Written pattern copyright Tamara Kelly 2017, all rights reserved. Please do not reprint or repost this pattern. Please do link to this page to share this pattern with others. If you wish to make items for sale from this pattern or translate it to another language, please visit the About page for details. Thank you to Lion Brand Yarn for providing the yarn for this pattern.
It's Back to School time, and that means a new Babay Fay discount code - and a giveaway to help you with all those hats you'll make this school year!

Disclaimer: This giveaway is sponsored by Babay Fay, but all opinions are my own. This post includes affiliate links. [Read more...]
Today I'm excited to bring you a guest post by Mary Walton! Mary Walton is an editor at UK Writings. She loves everything DIY and inventing new crochet patterns. And today she is sharing her thoughts on Teaching a Child to Crochet!
Crocheting is a hobby and a passion loved by many people around the world. I know a tonne of people that would spend all their time crocheting if they could as I’m sure you would! However, for those of us with children, trying to encourage your child even to try the hobby can be a daunting, if not an overwhelming, task. However, if introduced correctly, your child can enjoy the many benefits, including an increased level of patience and the ability to create some awe-inspiring creations as well as instilling a sense of achievement. In this article, we’ll explore several tips to introduce your passion in the best possible way.

Today I'm pleased to bring you a guest post by Carly Jacobs from Melbourne, Australia. She runs Crochet Coach (crochetcoach.com), an online crochet school and community. Thank you, Carly!

Disclaimer: This post includes an affiliate link. [Read more...]
The pineapple has an interesting history - and has been associated at different times with hospitality, and with good fortune. And of course, pineapples are an ever popular crochet motif. These days, we could all use a little extra hospitality and good luck, and that inspired the Lucky Pineapple Plant Hangers!
 Disclaimer: This post includes affiliate links; yarn provided by Lion Brand Yarn.
It's almost time for back to school, and that means business and schedules - and CAL squares are the perfect project for this time of year! Short, sweet, satisfying, and easy to take on the go! I thnk you'll love #17 in the Moogly CAL for 2017, designed by Alexis Middleton of Persia Lou!
Disclaimer: This post includes affiliate links. [Read more...]
I can't believe it, it isn't true... but it's time for Back to School! This summer has flown by, but here we are, just weeks from when most kids will head back to school for a new year of learning, fun, and friends. But first things first - school supplies! Here are 10 free back to school crochet patterns with Lion Brand Yarn to add to your list!
 Disclaimer: This post is sponsored by Lion Brand Yarn but all opinions are my own.
Fall schedules are firming up - I hope you are planning in some crochet and knitting time! Because there are so many fantastic new patterns coming out every single month - and we love highlighting some of the best here on Hookin On Hump Day! Thank you all so much to those who link up! Here are the top 5 from the latest round!

Lion Brand Shawl in a Ball is one of my favorite yarns - for shawls, and other projects! I've designed quite a few patterns in it, and it's quickly becoming a go-to yarn for other designers as well. So let's give some away as we enter the dog days of summer!
 Disclaimer: This giveaway was sponsored by Lion Brand.
I can't get enough of Lion Brand Shawl in a Ball! It's such a great size for one skein projects, and this colorway just spoke to me - gorgeous! I was inspired to create a filet mesh arrow pattern that is worked across the whole width of this super cozy and luxurious piece - the Opal Arrows Infinity Scarf!
 Disclaimer: This post includes affiliate links; materials provided by Lion Brand and Furls Crochet.
One of the very first edgings or borders I learned in crochet was the simple Scalloped Edging, or Shell Stitch Border. It's easy, feminine, and adds just the right touch to blankets, hats, little girl's dresses - the applications are endless!
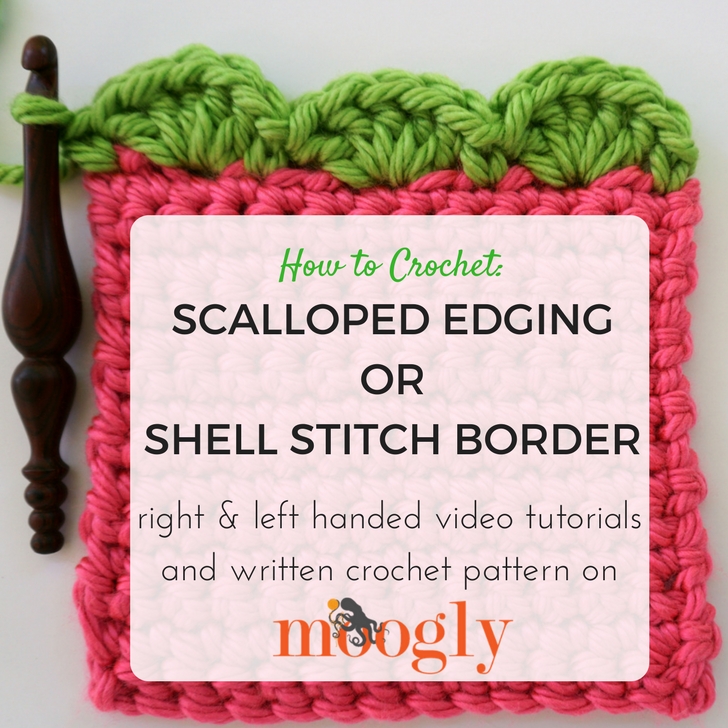 Disclaimer: This post includes affiliate links. Materials for this video were provided by Lion Brand and Furls.
I am so excited to share that Knit Stars is having a FLASH SALE! Which means you can enroll in Knit Stars 2.0 now and save money - and still get to see all the amazing teachers (plus me!) when the class debuts!
 Disclaimer: This post contains affiliate links.
This summer I got to see my friend Charles Voth and get a copy of his new book, Emoji Crochet! And of course I got a second copy to giveaway to one lucky Moogly reader!
 Disclaimer: This post includes affiliate links. Material for this giveaway provided by Spring House Press.

I designed and crocheted the Tango Shawl while at the CGOA Chainlink conference this year - surrounded by all the lovely crochet, there was so much inspiration! And I got a unique opportunity to have some special models that you just might know too!
Disclaimer: This post includes affiliate links; materials provided by Lion Brand and Furls Crochet.


Prefer the free blog version? Keep scrolling!
The Tango Shawl is made with an easy four row repeat, in an asymmetrical style - and when you're done, you're done. No borders! It's a perfect one skein project.

But as fun as asymmetrical shawls are to make - how do you wear them? It's a question I've heard several times, so I decided to ask some very special friends to show me how *they* would wear it! In fact, that's how it got the name "Tango Shawl" - it had a few of them dancing as they tried it on!
Some of the photos are a little blurry - shooting in a hotel lobby with a cell phone isn't the best - but I hope they give you some great ideas! And I've linked their blogs for you to check out too!

Pia Thadani of Stitches 'N' Scraps! Pia wins the bravery award for going first!

Linda Dean of Linda Dean Crochet! She *really* likes this shawl. 😉

Laurinda Reddig of ReCrochetions and Ficstitches Yarns! Blurry photo because we were laughing so hard!

Kathy Lashley of ELK Studio! Who thinks we need to have a meet and greet with all these amazing designers next year?

Elena Hunt of Beatrice Ryan Designs! She's decorating a new condo right now - lots of fab patterns to share!

Jennifer Pionk of A Crocheted Simplicity! I so enjoyed getting to know Jennifer better this year - and seeing her work in person!

Andee Graves of Mamas2Hands! Andee even wore a matching skirt - and shows off her summer and winter looks!

Julie Desjardins of ACCROchet! My very favorite Québécois designer!

Jessie Rayot of Jessie at Home! Jessie is one of the kindest, most generous designers I know. ♥

Shira Blumenthal from Lion Brand! Okay, so the shawl wasn't quite done, and we totally took this photo outside the elevator at about 10pm, but she was such a good sport, and how could I pass up this opportunity! Thanks Shira!
So as you can see, there are lots of ways to wear the Tango Shawl - or any asymmetrical shawl - probably more than we were even able to show here! If you have your own way, please hop over to the Moogly Facebook page and share!
But first you need something to wear in that photo - so let's get to the pattern!

Add this pattern to your Ravelry Queue and Favorites
US-J, 6.0mm hook - Furls Crochet
1 ball Lion Brand Shawl in a Ball (Worsted/”4″/UK: 10 ply; 518 yds/473 m; 5.3 oz)
Colorway Shown: Metallic - Prism
Gauge: 13 sts x 6 rows = 4"/10cm in pattern
Tango Shawl Video Tutorial and Chart
Crochet Abbreviations
Magic Circle
Wrap Stitch
Chainless Starting Double Crochet (CSDC)
Shawl pin shown in mannequin photos by Lickin Flames
Wrap St - (2 dc cluster wrapped around the last 2 sts): *Yo and placing hook in front of previous 2 sts, yo with working yarn held behind previous 2 sts, pull loop up to left of previous 2 sts, yo and pull through 2 loops on hook. (2 sts remain on hook) Repeat from *, end with 3 loops remaining on hook. Yo and pull through all 3 loops.
Place a stitch marker on the increase side of the shawl after the first few rows, and move it up every so often as you work. Then you can always tell at a glance if you're on an increase side of the row or a decrease side (even vs odd-numbered row). (And it's right there if you need to secure your working loop when you put the project down between crochet sessions!)
If you prefer a larger shawl, you will need to purchase an additional skein of Shawl in a Ball, but you can just continue with the 4-row repeats until you get the size desired.
If you do not like the Chainless Starting Double Crochet (abbreviated CSDC), you can substitute a ch 3 for the stitch.
The "Ch 2, skip the first st, dc in the next st" at the beginning of each even-numbered row act as a dc2tog - do not crochet into the top of the ch 2 on the odd-numbered rows.

Row 1: Make a magic circle, CSDC in the ring, 2 dc in the ring; close magic circle and turn. (3 sts)
Row 2: Ch 2, skip the first st, dc in the next st, 3 dc in the last st; turn. (4 sts)
Row 3: CSDC in the first st, 2 dc in the same st, dc in the next st, dc2tog; turn. (5 sts)
Row 4: Ch 2, skip the first st, dc in the next st, skip the next st, dc in the last 2 sts, wrap st, 2 dc in the last st; turn. (6 sts)
Row 5: CSDC in the first st, 2 dc in the same st, dc in the next 3 sts, dc2tog; turn. (7 sts)
Row 6: Ch 2, skip the first st, dc in the next st, *skip the next st, dc in the next 2 sts, wrap st, dc in the next st; rep from * until 1 st remains, 3 dc in the last st; turn. (8 sts)
Row 7: CSDC in the first st, 2 dc in the same st, dc in each st until 2 sts remain, dc2tog; turn. (9 sts)
Row 8: Ch 2, skip the first st, dc in the next st, *skip the next st, dc in the next 2 sts, wrap st,** dc in the next st; rep from * ending last rep at **, 2 dc in the last st (same st as last dc before wrap st); turn. (10 sts)
Row 9: Repeat Row 7.
Rows 10 - 77 (or to size desired): Repeat Rows 6 - 9, with the stitch count increasing by 1 for each row.
Row 78: Ch 1, sc in each st across; break yarn and weave in ends. Lightly block if needed.
Easy as can be! I loved seeing all these wonderful designers try on one of my designs fresh off the hook - such an honor!
And I hope you enjoy crocheting the Tango Shawl! I can't wait to see what all of you do with the pattern too!
Looking for other patterns that use Lion Brand Shawl in a Ball? Check out these freebies: Lotus Blossom Shawl, Winged Wrap, Amara Shawl, and the Amelia Shawl!
Written pattern copyright Tamara Kelly 2017, all rights reserved. Please do not reprint or repost this pattern, but please do link to this page to share this pattern with others. If you wish to make items for sale from this pattern or translate it to another language, please visit the About page for details.
Thank you to Lion Brand Yarn for providing the yarn for this pattern. And thank you to all the designers for being such great models!
August!!? It's true! Time for square #16 in the free yearly Moogly CAL for 2017, and this time it's a super fun, summery square from Laurinda Reddig at ReCrochetions!
Disclaimer: This post includes affiliate links. [Read more...]
It's the end of summer vacation, and for many thoughts are turning to back to school - and back to crochet season! There are so many great patterns that come out every month of the year, we love highlighing some of the best here on Hookin On Hump Day! Thank you all so much to those who link up! Here are the top 5 from the latest round!

Today I'm traveling from one conference... to another! I've had a blast at CGOA's Chainlink, and now I'm off to the Cricut Mountain Make-a-thon! But I wanted to take a moment to let you all know something very important... it's the last day to order the Ficstitches Yarns Fall 2017 Kit!
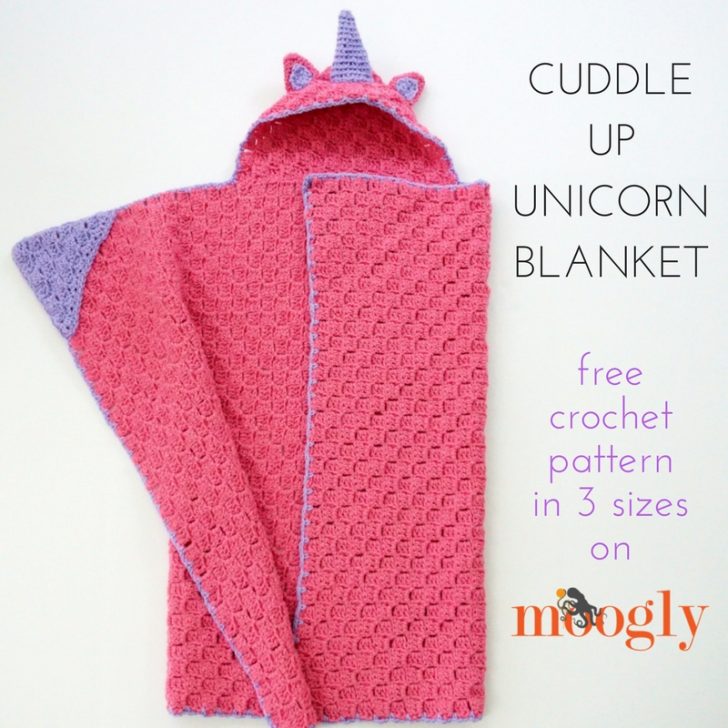
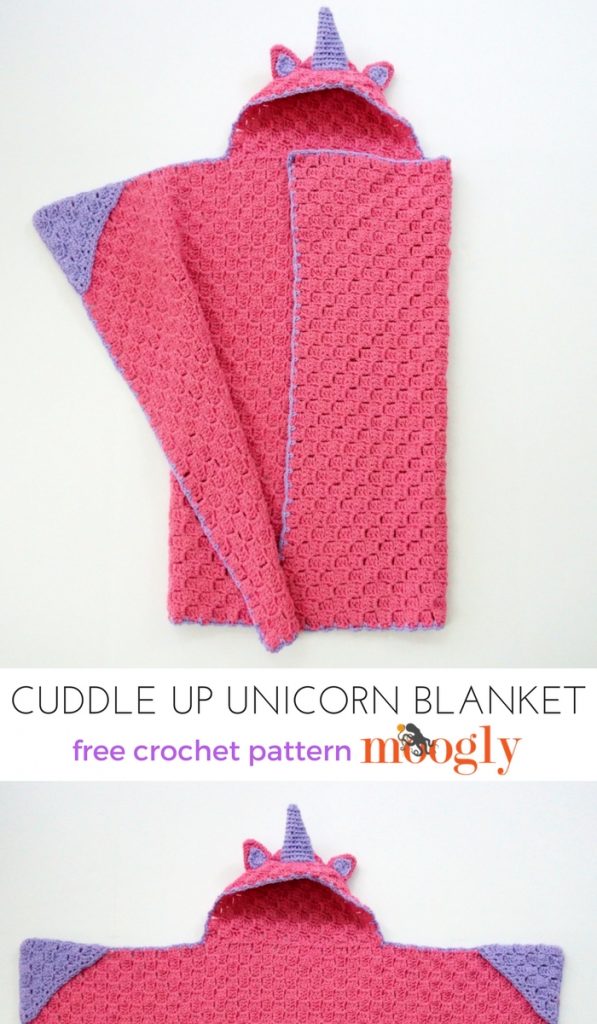
The Cuddle Up Unicorn Blanket features the corner to corner stitch, super cozy styling - and a spiral horn ready for any little one's fairy tale dreams! Enjoy the crochet pattern here on Moogly!
Disclaimer: Yarn for this pattern was provided by Lion Brand; this post includes affiliate links.
Prefer an ad-free PDF? You've got options!
Prefer the free blog version? Keep scrolling!
I had so much fun making this blanket! The corner to corner stitch (aka C2C or diagonal box stitch) is one of the most relaxing stitch patterns out there. And it makes this pattern as simple as possible - and fun for both the maker and the recipient.

I also have to show off this video Geoff helped me make - so cute!
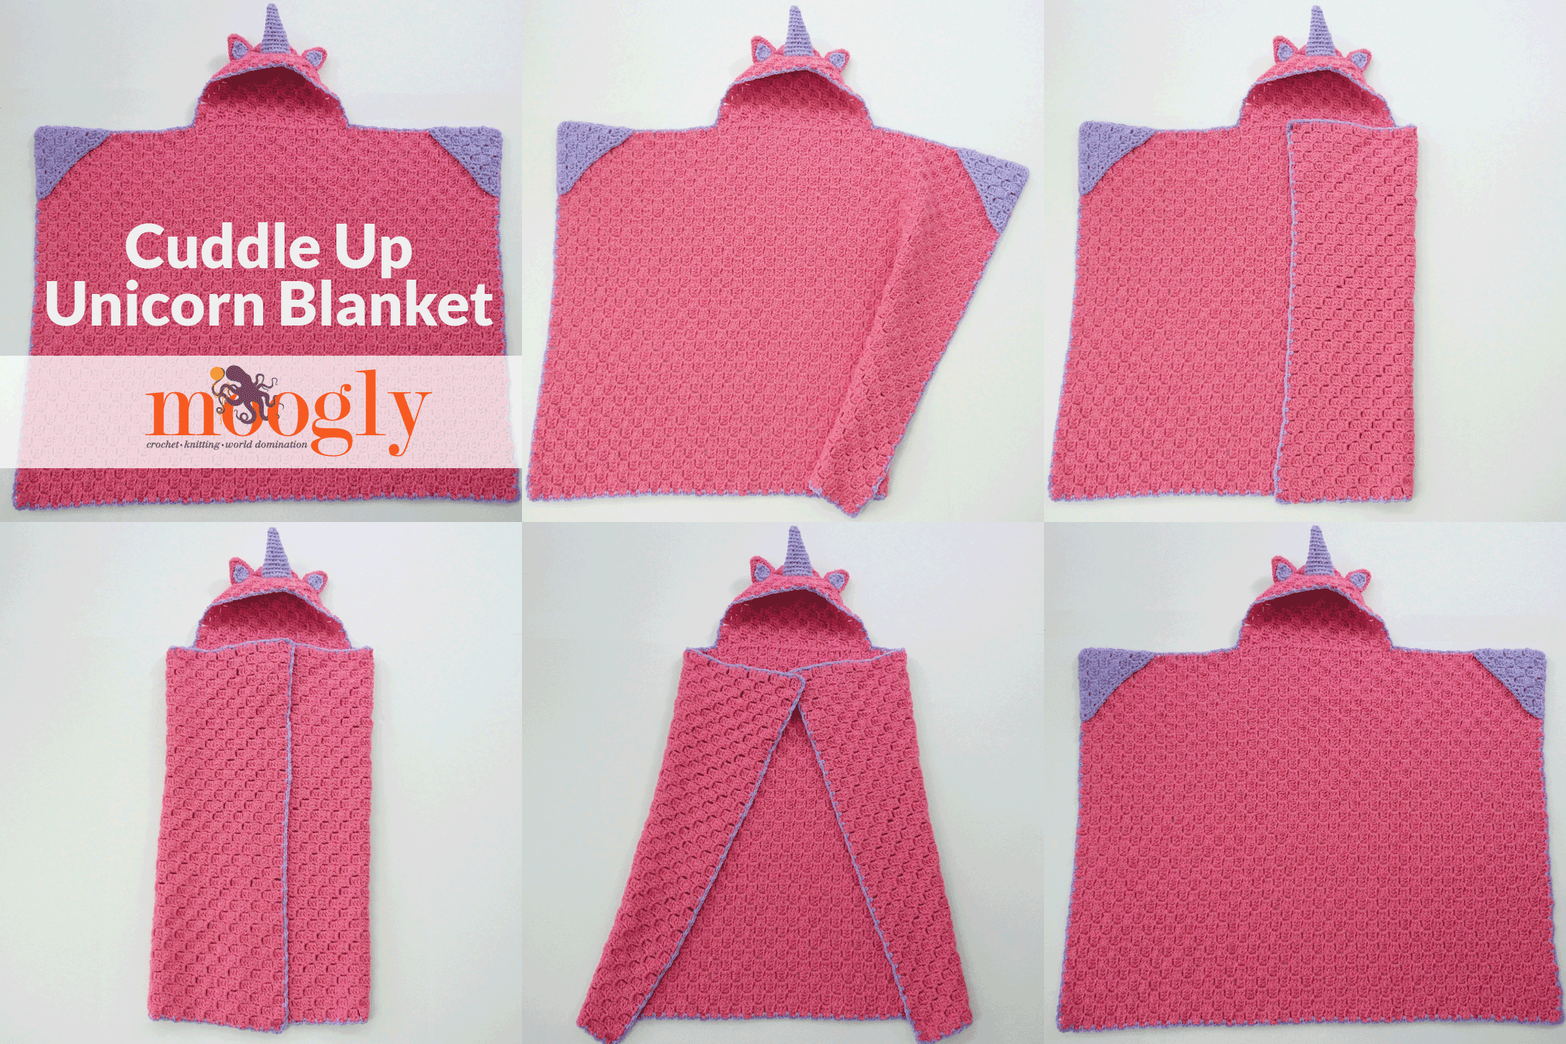
When I was designing the Cuddle Up Unicorn Blanket, I made the ¾ year old size, using two skeins of Lion Brand Pound of Love, one Bubblegum, and one Lavender. I had intended to add a mane with the Lavender color, but talking to the little girls in my life, they preferred it without! So I've got lots of leftover purple yarn... and a recommendation!
If you want to add a mane (or have a use for more yarn - and don't we all??), then I'd go with the two balls of Pound of Love. But if you prefer to leave it off, as shown here, you can substitute one ball of Lion Brand Vanna's Choice in Lilac for the Lavender - or whatever color you choose!
Add this pattern to your Ravelry Queue and Favorites
US - K, 6.5 mm hook - Furls Crochet
1100 - 2000 yds Lion Brand Pound of Love (worsted/“4”/UK: 10 ply; 1020 yds/933 m; 16 oz).
Color A: Bubblegum - 980-1778 yds (1 ball for size ¾; 2 balls for sizes ⅚ and ⅞).
Color B: Lavender - 120-222 yds (1 ball all sizes),
Stitch markers - Clover
Gauge: 5 blocks (ch-3 and dc 3 is one block) = 4" in pattern
Sizes (by age, based on average height): ¾ (shown); ⅚; ⅞
How to Corner to Corner Crochet
Crochet Abbreviations
Magic Circle
BLO - back loop only
Whip Stitch Seaming
Join with sc
NOTE: The directions for the "Blanket Pieces" and "Hands" are not written as standard crochet instructions, as they use the Corner to Corner technique. See the video tutorial linked above if needed for more info on how to work this stitch.
Size ¾: (measures approximately 28" x 36")
Rows 1 - 35: Work Corner to Corner stitch increases - start with one block, increasing on both ends on each row, to 35 blocks across.
Row 36 - 45: Work Corner to Corner stitch evenly - decrease on one side, and increase on the other, maintaining 35 blocks across for each row.
Row 46 - 79: Work Corner to Corner stitch decreases - decrease on each side of each row, until only 1 block remains. Break yarn and set aside.
Size ⅚: (measures approximately 33" x 42")
Rows 1 - 41: Work Corner to Corner stitch increases - start with one block, increasing on both ends on each row, to 41 blocks across.
Row 42 - 53: Work Corner to Corner stitch evenly - decrease on one side, and increase on the other, maintaining 41 blocks across for each row.
Row 54 - 93: Work Corner to Corner stitch decreases - decrease on each side of each row, until only 1 block remains. Break yarn and set aside.
Size ⅞: (measures approximately 38" x 48")
Rows 1 - 47: Work Corner to Corner stitch increases - start with one block, increasing on both ends on each row, to 47 blocks across.
Row 48 - 61: Work Corner to Corner stitch evenly - decrease on one side, and increase on the other, maintaining 47 blocks across for each row.
Row 62 - 107: Work Corner to Corner stitch decreases - decrease on each side of each row, until only 1 block remains. Break yarn and set aside.
Size ¾: (measures approximately 8" x 12")
Rows 1 - 10: Work Corner to Corner stitch increases - start with one block, increasing on both ends on each row, to 10 blocks across.
Row 11 - 15 Work Corner to Corner stitch evenly - decrease on one side, and increase on the other, maintaining 10 blocks across for each row.
Row 16 - 24: Work Corner to Corner stitch decreases - decrease on each side of each row, until only 1 block remains. Break yarn leaving a long tail and set aside.
Size ⅚: (measures approximately 9" x 14")
Rows 1 - 11: Work Corner to Corner stitch increases - start with one block, increasing on both ends on each row, to 11 blocks across.
Row 12 - 17: Work Corner to Corner stitch evenly - decrease on one side, and increase on the other, maintaining 11 blocks across for each row.
Row 18 - 27: Work Corner to Corner stitch decreases - decrease on each side of each row, until only 1 block remains. Break yarn leaving a long tail and set aside.
Size ⅞: (measures approximately 10" x 18")
Rows 1 - 13: Work Corner to Corner stitch increases - start with one block, increasing on both ends on each row, to 13 blocks across.
Row 14 - 23: Work Corner to Corner stitch evenly - decrease on one side, and increase on the other, maintaining 13 blocks across for each row.
Row 24 - 35: Work Corner to Corner stitch decreases - decrease on each side of each row, until only 1 block remains. Break yarn leaving a long tail and set aside.
Rows 1 - 6: Work Corner to Corner stitch increases - start with one block, increasing on both ends on each row, to 6 blocks across.
Row 7: Ch 2, dc in first st, hdc in next st, sc in next st, *(sc, hdc, dc) in next ch-3 sp,** skip next 3 sts; rep from * across ending last rep at **, turn.
Row 8: Ch 1, sc in each st across; break yarn and set aside.
Rows 1 - 7: Work Corner to Corner stitch increases - start with one block, increasing on both ends on each row, to 7 blocks across.
Row 8: Ch 2, dc in first st, hdc in next st, sc in next st, *(sc, hdc, dc) in next ch-3 sp,** skip next 3 sts; rep from * across ending last rep at **, turn.
Row 9: Ch 1, sc in each st across; break yarn and set aside.
Rows 1 - 8: Work Corner to Corner stitch increases - start with one block, increasing on both ends on each row, to 8 blocks across.
Row 9: Ch 2, dc in first st, hdc in next st, sc in next st, *(sc, hdc, dc) in next ch-3 sp,** skip next 3 sts; rep from * across ending last rep at **, turn.
Row 10: Ch 1, sc in each st across; break yarn and set aside.
Round 1: Make a magic circle, sc 6 in the ring, do not join (work as a spiral). (6 sts)
Round 2: Working in blo, *sc in the next st, 2 sc in the next st; rep from * around. (9 sts)
Round 3: Working in blo, sc in each st around. (9 sts)
Round 4: Working in blo, *sc in the next 2 sts, 2 sc in the next st; rep from * around. (12 sts)
Round 5: Rep Rnd 3. (12 sts)
Round 6: Working in blo, *sc in the next 3 sts, 2 sc in the next st; rep from * around. (15 sts)
Round 7: Rep Rnd 3. (15 sts)
Round 8: Working in blo, *sc in the next 2 sts, 2 sc in the next st, sc in the next 2 sts; rep from * around. (18 sts)
Round 9: Rep Rnd 3. (18 sts)
Round 10: Working in blo, *sc in the next 5 sts, 2 sc in the next st; rep from * around. (21 sts)
Round 11: Rep Rnd 3. (21 sts)
Round 12: Working in blo, *sc in the next 6 sts, 2 sc in the next st; rep from * around. (24 sts)
Round 13: Rep Rnd 3. (24 sts)
Round 14: Sl st in next st, break yarn and finish off leaving a long tail. Set aside.
Round 1: Make a magic circle, sc 6 in the ring; join. (6 sts)
Round 2: Ch 1, sc in the first st, 2 sc in the next st, *sc in the next st, 2 sc in the next st; rep from * around, join. (9 sts)
Round 3: Ch 1, sc in each st around; join. (9 sts)
Round 4: Ch 1, sc in the first 2 sts, 2 sc in the next st, *sc in the next 2 sts, 2 sc in the next st; rep from * around, join. (12 sts)
Round 5: Rep Rnd 3. (12 sts)
Round 6: Ch 1, sc in the first 3 sts, 2 sc in the next st, *sc in the next 3 sts, 2 sc in the next st; rep from * around, join. (15 sts)
Round 7: Rep Rnd 3. (15 sts)
Round 8: Ch 1, sc in the 1st 4 sts, 2 sc in the next st, *sc in the next 4 sts, 2 sc in the next st; rep from * around, join. (18 sts)
Round 9: Rep Rnd 3. (18 sts) Break yarn leaving a long tail, set aside.
Row 1: Ch 2, 3 dc in 2nd ch from hook; turn. (3 sts)
Row 2: Ch 2, 2 dc in the first st, dc in the next st, 2 dc in the last st; break yarn leaving a long tail. (5 sts)
1: Whip stitch Hood Blanket Piece to Body Blanket Piece so that longer sides are together, centered on the Body Blanket Piece.
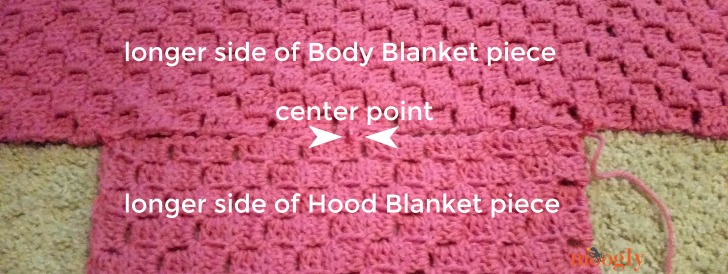
2: Whip stitch the top of the Hood Blanket Piece to form the hood (see photo below).
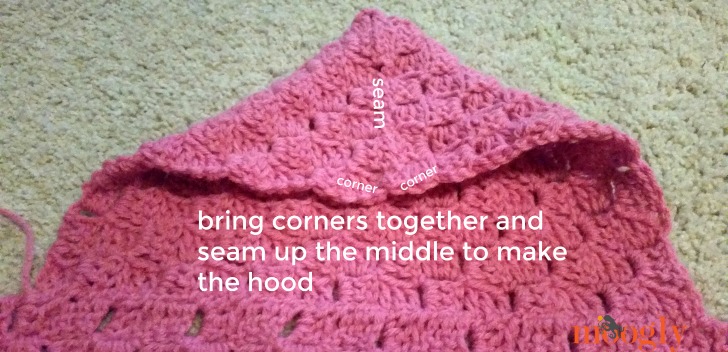
3: Flatten Ears and sew Ears and Horn to the top of hood using long tails.
4: Use stitch markers to pin hands to top two corners, matching up the blocks of the pattern. Go to Finishing.
Join with sc between any 2 blocks along bottom edge of Body Blanket Piece, ch 2, *sc between next pair of blocks, ch 2; rep from * around working 3 sc in each corner, and going through both the Body Blanket Piece and the Hands when at the corners, to secure the Hands to the blanket. Join and finish off. Weave in ends.
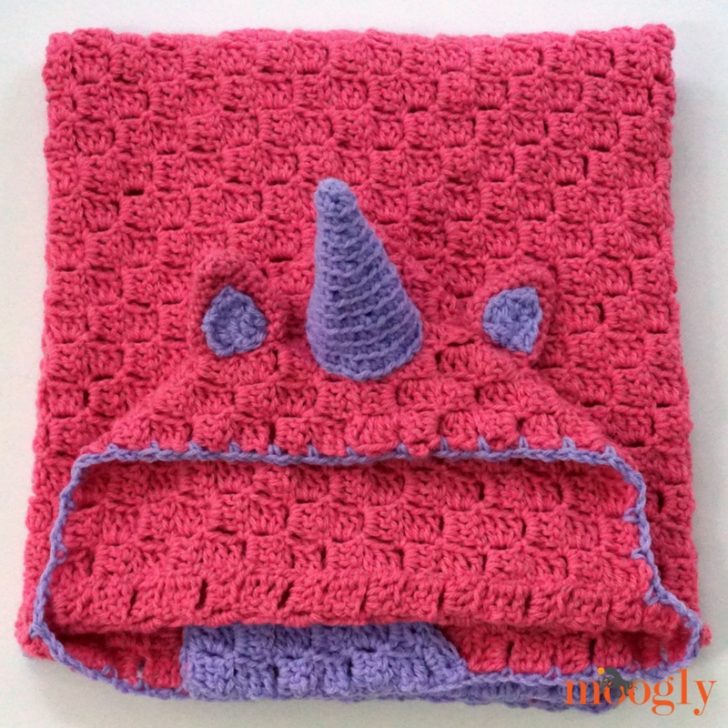
And that's the free crochet pattern for the Cuddle Up Unicorn Blanket - in 3 sizes no less! It's long on paper, but really pretty simple, particularly if you are already familiar with the c2c stitch. And if not, there's a video tutorial above.
I hope you enjoy making it - and giving it! I can't wait to see the ones you make. Be sure to tag me on social media so I can take a peek! And if you have any questions or spot any errors, please let me know!
Written pattern copyright Tamara Kelly 2017, all rights reserved. Please do not reprint or repost this pattern. Please do link to this page to share this pattern with others. For more info, please visit the About page. Thank you to Lion Brand Yarn for providing the yarn for this pattern.
The Traditional Hexagon Motif is similar to the granny square - one of those patterns for the ages! It's also similar in look to a granny square - but of course, it has 6 sides, and a few other moves that make it unique. Here's how to crochet the Traditional Hexagon Motif!
 Disclaimer: This post includes affiliate links.
Last month I debuted the Summer Fling Throw - and this month, Lion Brand is giving one lucky winner all the yarn they need to make it - 9 balls of Lion Brand 24/7 Cotton - here on Moogly!
 Disclaimer: This giveaway is sponsored by Lion Brand Yarn.
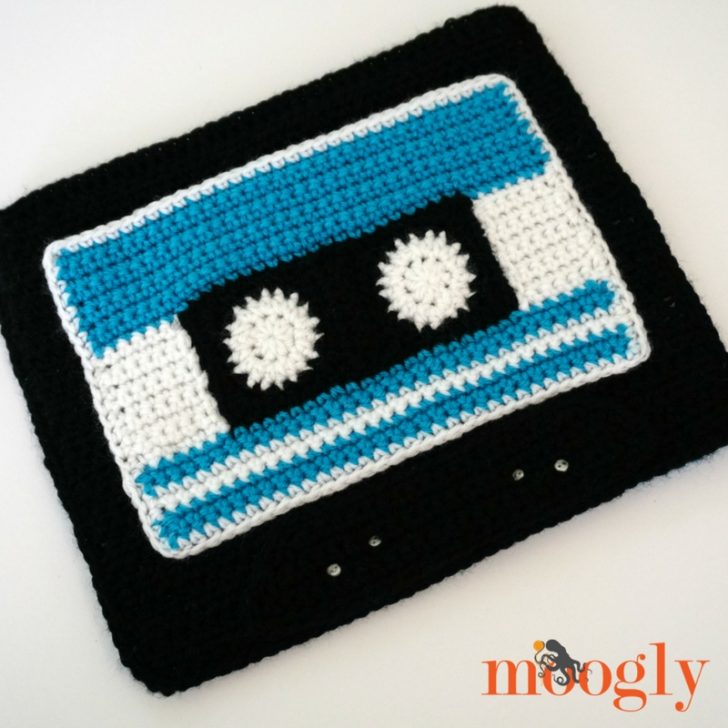
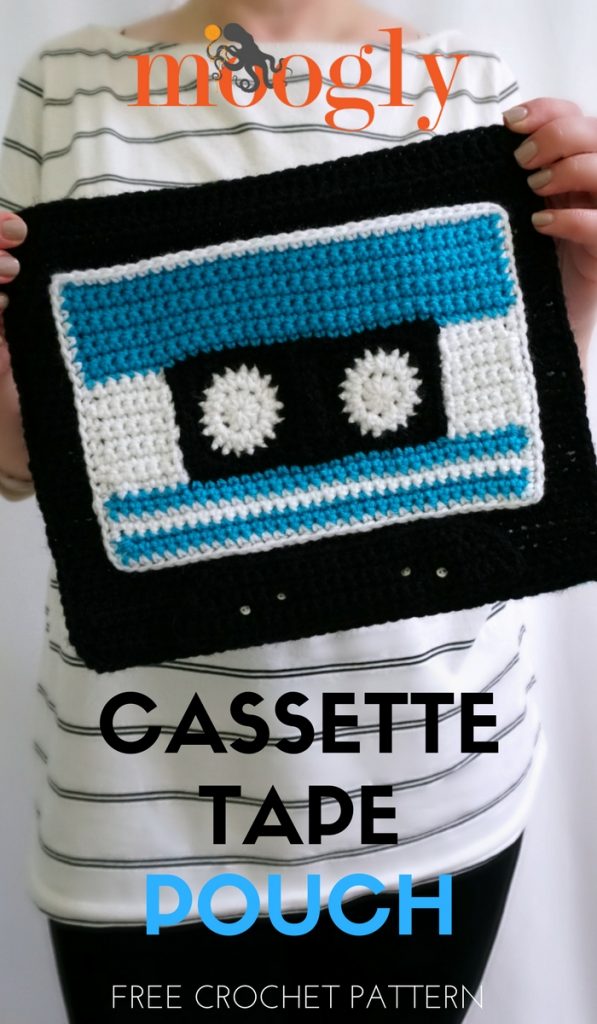
It's all about 90s retro these days, and what's more retro than the cassette tape?! The Cassette Tape Pouch is the perfect clutch to carry when you're at the party for your hot new mixtape - or to fill with pencils and supplies when the kids go back to school this fall!
Disclaimer: This post includes affiliate links; material support provided by Lion Brand Yarn and Dritz.
Prefer an ad-free PDF? You've got options!
Prefer the free blog version? Keep scrolling!
The Cassette Tape Pouch is so much fun to make! Just a few small pieces come together to give this fun retro look - all the stitches are simple, but the effect is... well, pretty effective! It's a great pattern to customize, and made with Lion Brand Vanna's Choice is great for kids, adults, and your entire gift list!
Add this pattern to your Ravelry Queue and Favorites
US-I. 5.5mm hook - Furls Crochet
310 yds Lion Brand Vanna's Choice (Aran/yarn symbol “4”/UK: 10 ply; 145 yds; 3oz)
A: White (1 ball, or 90 yds)
B: Black (1 ball, or 140 yds)
C: Aqua (1 ball, or 80 yds)
Zipper - 20" black
4 Buttons (optional)
Stitch Markers - Clover
Gauge: 14 sts x 16 rows = 4" / 10 cm in sc
Finished Size: 12" wide x 10" tall (laid flat)
NOTE: Make the pieces in the order listed.
Rnd 1: With Color A, make a magic circle, ch 1, 9 hdc in the ring; join. (9 sts)
Rnd 2: Ch 1, 2 hdc in each st around; join and break yarn. (18 sts)
Rnd 3: With Color B, join with sc in any st, 2 sc in next st, *sc in next st, 2 sc in next st; join and break yarn. (27 sts)
Row 1: With Color B, join to any st of one Reel with dc, hdc in next 2 sts, sc in next 3 sts, hdc in next 2 sts, dc in next st; turn (remaining sts left unworked). (9 sts)
Row 2: Ch 2, dc in each st across; turn. (9 sts)
Row 3: Ch 2, dc in 1st st, hdc in next 2 sts, sc in next 3 sts, hdc in next 2 sts, dc in last st; break yarn leaving long tail. (9 sts) Use the long tail to whipstitch Row 3 to any 9 sts of second Reel.
Edging: With Color B, join to 1st unworked st of any Reel with sc, *sc in next 3 sts, hdc in next st, (2 hdc, dc, 2 hdc) in next st, hdc in next st, sc in next 4 sts, hdc in next st, (2 hdc, dc, 2 hdc) in next st, hdc in next st, sc in next 4 sts, sc 6 evenly across Rows 1-3;** sc in next unworked st of second Reel; rep from * around, join and break yarn. (64 sts)
Row 1: With Color A, ch 7, sc in 2nd ch from hook and each rem ch across; turn. (6 sts)
Rows 2 - 10: Ch 1, sc in each st across; turn. (6 sts) Break yarn leaving long tail after Row 10. Use the long tail to whipstitch one Side of Label Sticker to each end of Reels, as shown below.
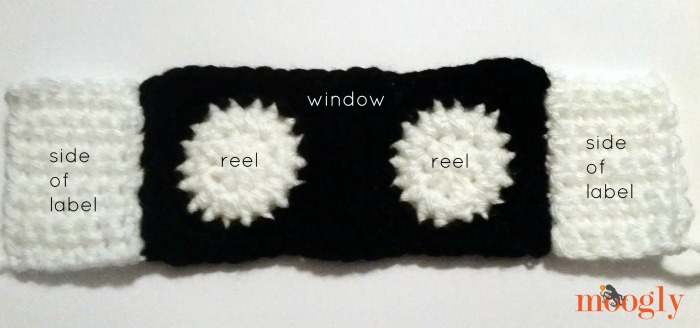
Row 1: With Color C, join to upper right corner (or upper left if crocheting left handed) with sc, sc evenly across to opposite corner; turn. (33 sts)
Rows 2 - 9: Ch 1, sc in each st across; turn. (33 sts) Break yarn after Row 9.
Row 1: With Color C, join to upper corner with sc, sc evenly across; turn. (33 sts)
Row 2: Ch 1, sc in each st across; turn. (33 sts)
Row 3: With Color A, ch 1, sc in each st across; turn. (33 sts)
Row 4: Rep Row 2.
Row 5: With Color C, rep Row 3.
Row 6: Rep Row 2, break Color C.
Edging: With Color A, ch 1, sc evenly around entire Label; join and break yarn. Personalize Label with surface crochet, appliques, buttons, etc if desired. Set Label aside.
Row 1: With Color B, ch 28, sc in 2nd ch from hook and each rem ch across; turn. (27 sts)
Row 2: Ch 1, sc2tog, sc in next 3 sts, ch 1, sk 1 st, sc in next 15 sts, ch 1, sk 1 st, sc in next 3 sts, sc2tog; turn. (23 sts, 2 chs)
Row 3: Ch 1, sc2tog, sc in next 5 sts (inc ch sp), ch 1, sk 1 st, sc in next 9 sts, ch 1, sk 1 st, sc in next 5 sts (inc ch sp), sc2tog; turn. (21 sts, 2 chs)
Row 4: Ch 1, sc2tog, sc in next 19 sts (inc ch sps), sc2tog; turn. (21 sts)
Row 5: Ch 1, sc2tog, sc in next 17 sts, sc2tog; turn. (19 sts)
Edging: Ch 1, sc evenly around entire piece; join and break. Set Thick Bottom aside.
Row 1: With Color C, ch 40, hdc in 2nd ch from hook and each rem ch across; turn. (39 sts)
Row 2: Ch 1, hdc in each st across; turn. (39 sts)
Row 3: With Color A, ch 1, hdc in each st across; turn. (33 sts)
Row 4: Rep Row 2.
Rows 5 and 6: With Color C, rep Rows 3 and 4.
Row 7 - 24: Rep Rows 3 - 6. Break both yarns after Row 24. Set Back of Pouch aside.
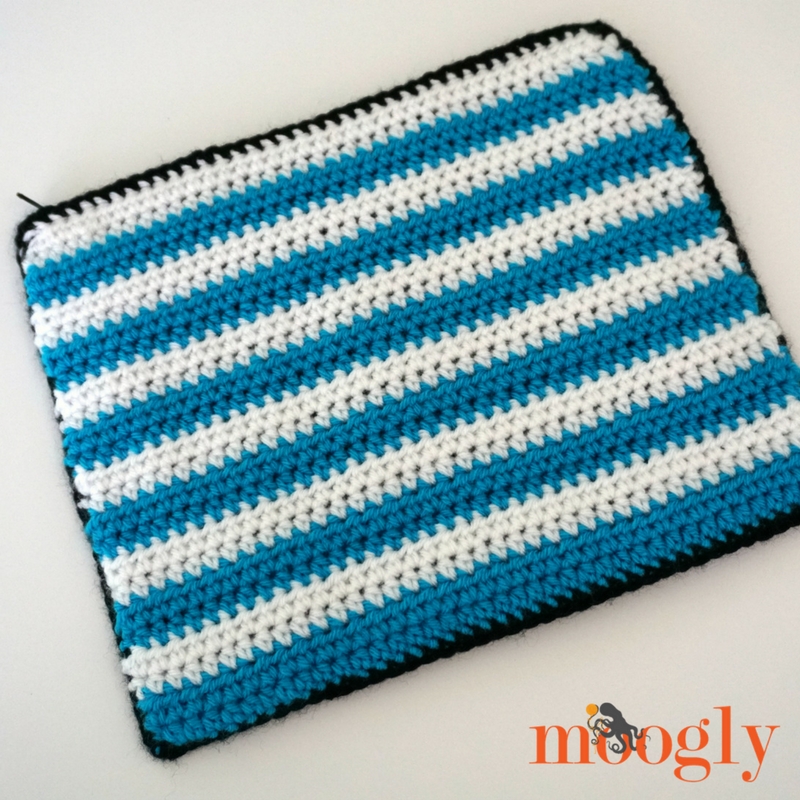
Row 1: With Color B, ch 40, hdc in 2nd ch from hook and each rem ch across; turn. (39 sts)
Row 2 - 24: Ch 1, hdc in each st across; turn. (39 sts) Break yarn after Row 24 or secure active loop of Row 24 with st marker.
1: Sew Thick Bottom to center bottom edge of Front of Pouch.
2: Sew Buttons (optional) into the ch-1 holes left in Thick Bottom, going through Front of Pouch.
3: Sew Label to Front of Pouch as shown, leaving top open to serve as a front pocket.
4: Shorten zipper as needed per package directions.
Step 5: Reinsert hook in active loop of Color B or join to first st of Front of Pouch with sc, sc evenly around pouch opening enclosing zipper in stitches (see package directions); join and break.
OR Sc evenly around without zipper; join and break, and proceed to Step 6.
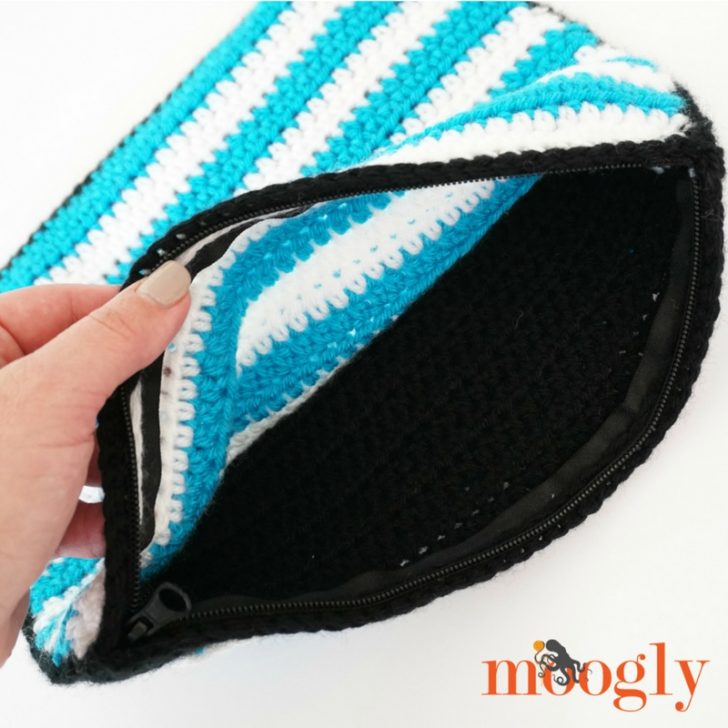
Step 6: Sew zipper to base of last round of stitching with matching yarn if not secured in previous round; weave in ends.
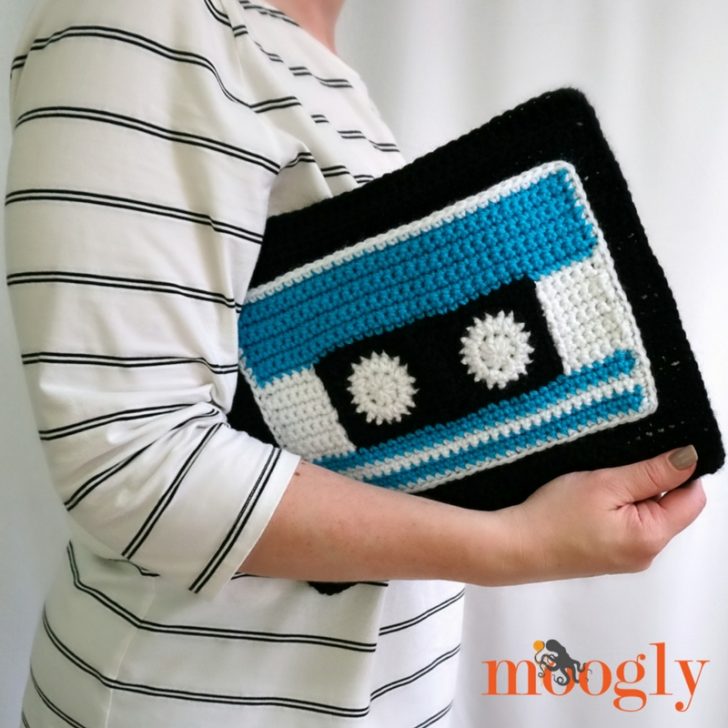
So what will you put in your Cassette Tape Pouch? Will you carry it as an awesome retro fun clutch, or fill it with stuff for the kids?
The Cassette Tape Pouch free crochet pattern makes a great sized bag, and I can't wait to see how you all personalize yours! Add a name, add musical note appliques, add more colors - make it your own hot mixtape of crochet! Be sure to share your photos with me on social media - I love to see what you make!
Written pattern copyright Tamara Kelly 2017, all rights reserved. Please do not reprint or repost this pattern, but please do link to this page to share this pattern with others. If you wish to make items for sale from this pattern or translate it to another language, please visit the About page for details. Thank you to Lion Brand Yarn for providing the yarn, and thank you to Dritz for providing the zipper for this pattern.
This month, for blocks 14 and 15, our designers co-ordinated the looks to create blocks that play off each other - so fun! This week's block is #15 in the MooglyCAL2017, courtesy of Pattern Paradise!
Disclaimer: This post includes affiliate links. [Read more...]
The Double the Love Blanket features a great intermeshing stitch worked in two colors - that can be a little confusing if you've never made it before! So I'm here to help - with right and left handed video tutorials for the Double the Love Stitch!
 Disclaimer: This post includes affiliate links. Materials for this video were provided by Lion Brand and Furls.
Hope you're all staying cool - it's hot out there, and the fiber world has been on fire with new patterns, heating it up even more! We love seeing the new projects on Hookin On Hump Day - thank you all so much for linking up! Here are the top 5 from the latest round!

Step Into Crochet: Crocheted Sock Techniques from Basic to Beyond by Rohn Strong is a new book from Interweave publishing - and today I've got a peek inside, and a giveaway too!
 Disclaimer: This giveaway was provided by Interweave, but all opinions are my own. This post includes affiliate links.

The Basketweave Blocks Baby Blanket combines the look of crochet squares with NO seaming - and takes the basketweave stitch to the extreme! It's pretty heady stuff, but the end result is a cozy, soft, and totally nursery ready! Let's rock these blocks!
Disclaimer: The yarn for this pattern was provided by Lion Brand Yarn; this post includes affiliate links.

Okay, so the key here is working with 4 skeins of yarn at once. Just like when you'd make a striped pattern and carry the yarn along the side, but we're going to be changing colors in the middle of the row (click here for a tutorial on that if needed)!
This means that you'll need to take a little time to keep your skeins from tangling. You can use the bucket method, or whatever method you prefer - just allow time for it after each turn, and it will pay off later!

There are 3 rows where you do cut one of the yarns, and then work over the yarn tapestry style - that's what moves the block colors over one space, to give them this great look! Special instructions for that are included in the notes below.
So let's get to that pattern!

Add this pattern to your Ravelry Queue and Favorites
US - J, 6.0 mm - Furls Crochet
1785 yds Lion Brand Ice Cream (Sport/”3″/UK 8 ply)
Color A: Cookies and Cream (1000 yds)
Color B: Tutti Frutti (785 yds)
Gauge: 14 sts x 10 rows = 4" (10cm) in pattern
Finished Size: 36" x 36" blocked, excluding border
Helpful Links: Crochet Abbreviations; FDC - Foundation Double Crochet; Changing colors in the middle of a row; fpdc - front post double crochet; bpdc - back post double crochet
NOTES:
The colors switch 3 times per row - leave the previous yarn hanging from the last stitch to be picked up when you return to that stitch on the next row.
There is no stitch multiple required for this pattern - simply divide the number of stitches by the number of blocks desired, and switch colors accordingly.
To work over a yarn while making post stitches (as in Rows 23, 45, and 67), insert the hook around the next st above the yarn on one side of the stitch, and below the yarn on the other side. Alternatively, you can break all 4 yarns on those rows and re-attach them in the new order.
Begin with 4 balls of yarn, 2 of each colorway. Label these balls as follows: CA1 (colorway #1, ball 1), CB1 (colorway #2, ball 1), CA2 (colorway #1, ball 2), CB2 (colorway #2, ball 2). All four balls of yarn will be used in turn, on each row of the pattern.
Row 1: With CA1, FDC 32, switch to CB1, FDC 31, switch to CA2, FDC 31, switch to CB2, FDC 32; turn. (126 sts in every row of pattern)
Rows 2 - 22: Ch 2 (counts as first st, here and throughout pattern), fpdc in next 31 sts, switch to next color, bpdc in next 31 sts, switch to next color, fpdc in next 31 sts, switch to last color, bpdc in next 31 sts, dc in last st; turn. After Row 22, break CB2.
Row 23: With CB2 and working over CA1, join to 1st st and ch 2, bpdc in next 31 sts, switch to CA1 and working over CB1, fpdc in next 31 sts, switch to CB1 and working over CA2, bpdc in next 31 sts, switch to CA2, fpdc in next 31 sts, dc in last st; turn.
Rows 24 - 44: Ch 2 (counts as first st, here and throughout pattern), bpdc in next 31 sts, switch to next color, fpdc in next 31 sts, switch to next color, bpdc in next 31 sts, switch to last color, fpdc in next 31 sts, dc in last st; turn. After Row 22, break CA2.
Row 45: With CA2 and working over CB2, join to 1st st and ch 2, fpdc in next 31 sts, switch to CB2 and working over CA1, bpdc in next 31 sts, switch to CA1 and working over CB1, fpdc in next 31 sts, switch to CB1, bpdc in next 31 sts, dc in last st; turn.
Rows 46 - 66: Rep Rows 2-22. After Row 66, break CB1.
Row 67: With CB1 and working over CA2, join to 1st st and ch 2, bpdc in next 31 sts, switch to CA2 and working over CB2, fpdc in next 31 sts, switch to CB2 and working over CA1, bpdc in next 31 sts, switch to CA1, fpdc in next 31 sts, dc in last st; turn.
Rows 68 - 88: Rep Rows 24-44. After Row 88, break 3 of the yarns, leaving a ball of CA1 or CA2 attached.
Edging: With CA ch 1, sc evenly around blanket; join and break yarn or add border if desired.
Border Shown: *Sc, ch 1, skip 1, 5 dc, ch 1, skip 1; rep from * around, adjusting number of chains skipped as needed; join and break yarn.
And that's the Basketweave Blocks Baby Blanket! I hope you enjoy making it! If you do, be sure to share your photos with me on social media - I love seeing what you make!
Written pattern copyright Tamara Kelly 2017, all rights reserved. Please do not reprint or repost this pattern, but please do link to this page to share this pattern with others. If you wish to make items for sale from this pattern or translate it to another language, please visit the About page for details. Thank you to Lion Brand Yarn for providing the yarn for this pattern.
It's Xmas in July at Babay Fay, and that means more fun for you - with discounts and a giveaway you won't want to miss!
 Disclaimer: This giveaway is sponsored by Babay Fay, but all opinions are my own. This post includes affiliate links. [Read more...]
I know, I know... it's July! And most places around here, it's HOT. But as we crafty people know - winter is indeed coming (too soon!), and with it, the need for cozy, warm, squishy projects and gifts! Lion Brand Wool-Ease Thick & Quick is one of my favorite super bulky yarns - you can't beat the speed, the look, and the variety! So even though #WinterIsComing... don't worry, #WoolIsComing too!
 Disclaimer: This post was sponsored by Lion Brand Yarn, but all opinions are my own.
This post includes affiliate links. [Read more...]
I've told you a little bit about Dealspotr before, and all the ways you can use them to save money on crafts (and everything else you buy online). Well, now they want to offer one lucky Moogly reader a $100 Amazon Gift Card - so you can save even more!
 Disclaimer: This giveaway is sponsored by Dealspotr, but all opinions are my own.
This post includes affiliate links.
[Read more...]

The Tricolor Tote has so many fun details - changing stitch patterns, fun tassels, braided handles - but its soft color palette and orderly structure bring balance to this fast and fun (and free!) crochet pattern!
Disclaimer: This post includes affiliate links; Lion Brand Yarn provided the yarn for this pattern.
Prefer the free blog version? Keep scrolling!
The Tricolor Tote was designed using Lion Brand Fast-Track, which is a really fun and unique yarn! Soft cotton/poly blend in a tape-like shape, it's like crocheting with your favorite t-shirts. And I love the look it gives projects!
This tote is also another pattern on my never-ending search for the ideal bag handles. I've tried many different methods over the years, but I think this is the first time I've tried braids! This yarn lends itself really well to these braided handles, with only a tiny bit of stretch, lots of strength, and some great color play that ends in tassels!
If this handle style isn't to your taste, you can always add pre-purchased handles, or crochet your own using this simple technique!

Add this pattern to your Ravelry Queue and Favorites
US - M/N 10.0 mm - Furls Crochet
260 yds Lion Brand Fast-Track (Super Bulky/”6″/UK 14-16 ply; 149 yds/136 m; 8.01 oz)
Color A: Purple Train (1 skein, or 90 yds)
Color B: Chopper Grey (1 skein, or 75 yds)
Color C: Airstream White (1 skein, or 95 yds)
This yarn is discontinued. Recommended substitute is any polyester or cotton yarns in Super Bulky/6. Each will add it's own look to this bag!
Stitch Markers - Clover
Gauge: 8 sts x 6 rows = 4 in/10 cm in Color A st pattern
Finished Size: 16" wide x 13" high excluding handle
CSDC - Chainless Starting Double Crochet
Instead of a ch 5 at the beginning of a round, try a CSDC and ch 2 for a less noticeable seam (see tutorial linked above).
Instead of a ch 4 at the beginning of a round, try a CSDC and ch 1.
Instead of a ch 3 at the beginning of a round, try a CSDC.
Be sure to mark the stitches before Round 23 carefully, with the bag laid flat. Everyone's gauge is a little different, and this can affect which stitch will work best for the handles.
Round 1: With Color A, ch 33, skip the ch closest to the hook, sc in blo of each ch across, then turn foundation chain and sc across the unused top loop of each ch across; join with a sl st. (64 sc)
Round 2: Ch 5 (counts as dc and ch 2), skip 2 sts, dc in next 6 sts, *ch 2, skip 2 sts, dc in next 6 sts; rep from * finishing last rep with dc in last 5 sts, join to 3rd ch. (48 dc)
Round 3: Ch 1, sc in each st and 2 sc in each ch-2 sp around; join. (64 sc)
Round 4: Ch 3 (counts as dc), dc in next 4 sts, *ch 2, skip 2 sts, dc in next 6 sts; rep from * finishing last rep with dc in last st, join. (48 dc)
Round 5: Repeat Round 3.
Round 6 and 7: Repeat Rounds 2 and 3; break Color A.
Round 8: With Color B, join with sc to first st of previous rnd, sc in each st around; join. (64 sts)
Round 9: Ch 5, skip 2 sts, dc in next 2 sts, *ch 2, skip 2 sts, dc in next 2 sts; rep from * finishing last rep with dc in last st, join. (32 dc)
Round 10: Repeat Round 3.
Round 11: Repeat Round 9.
Round 12: Repeat Round 3.
Round 13: Repeat Round 9.
Round 14: Repeat Round 3; break Color B.
Round 15: With Color C, join with sc to first st of previous rnd, sc in each st around; join. (64 sts)
Round 16: Ch 4 (counts as dc and ch 1), skip 1 st, *dc in next st, ch 1, skip 1 st; rep from * around, join. (32 dc)
Round 17: Ch 1, sc in each st and ch sp around; join. (64 sc)
Round 18 - 21: Repeat Rounds 16 and 17.
Round 22: Ch 1, sc in each st around; join. (64 sc)
Lay bag flat, and using 4 stitch markers determine where the holes for the handles should be, and mark those stitches. Count the number of stitches between the marked stitches all around to be sure of even placement. When stitches are marked, proceed with Round 23.
Round 23: Ch 1, sc in each unmarked st, ch 1 and skip each marked st; join. (60 sc, 4 chs)
Round 24: Ch 1, sc in each st and ch sp around; join and break Color A.
Handles:
Step 1: Cut six 6 foot lengths of each color of yarn, for 18 total strands. (This is enough length to make handles up to 42 inches long.)
Step 2: With 3 strands of each color, make 2 braids of the same length, tying a knot at each end with several unbraided inches left beyond the knots.

Step 3: Insert the end of a handle through one of the holes made in Round 23, from the inside of the bag to the outside.
Step 4: Tie a knot in the handle around Row 24, tightening it down to be right above the knot at that end of the braid, as shown.

Step 5: Repeat Steps 3 and 4 until all handle ends are attached to the bag, being sure to attach one handle each to the front and back of the tote.
Step 6: Trim yarn ends to create even tassels on all handle ends.
And that's the Tricolor Tote! Of course, you can make it in all sorts of colors - and as many as you like. But I do love the calm lavender feeling in this one.
I hope you enjoy making this free crochet tote bag pattern! If you do, please share your photos and tag @mooglyblog on social media - I love to see what you've made!
Looking for another fun project to make with Fast-Track? Try the Bouncing Basket - a free crochet pattern!
Written pattern copyright Tamara Kelly 2017, all rights reserved. Please do not reprint or repost this pattern, but please do link to this page to share this pattern with others. If you wish to make items for sale from this pattern or translate it to another language, please visit the About page for details. Thank you to Lion Brand Yarn for providing the yarn for this pattern.
It's summer fun time, and CAL squares make the ideal summer projects - small and perfect for your travel bag! So let's keep going with square #14, courtesy of A Crocheted Simplicity!
Disclaimer: This post includes affiliate links. [Read more...]
Happy 4th of July, Happy Canada Day, and just general happiness to all! It's been another amazing couple of weeks on Hookin On Hump Day, with so many more great projects - thank you all so much for linking up! Here are the top 5 from the latest round - this time, they're all FREE!

