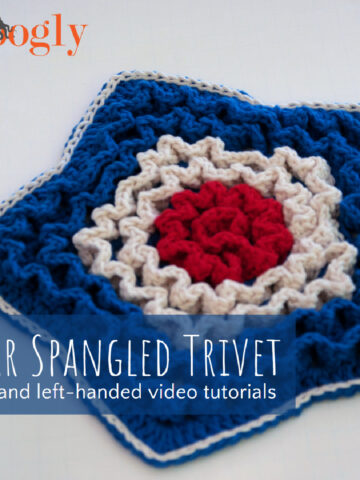
Part of learning to read crochet patterns is learning what all those symbols mean. Parentheses, asterisks, brackets, oh my! All of these can be used in the same pattern, and while it might seem confusing at first, they actually make the patterns much easier to read. Here's what all those crochet pattern symbols mean!

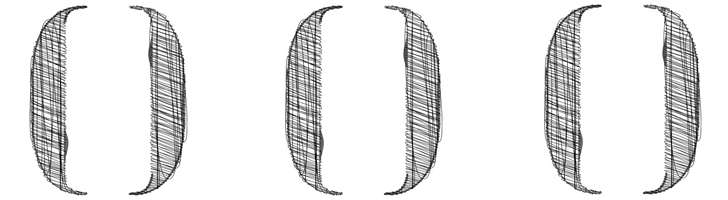
Parentheses
Parentheses can be used in a couple of different ways in crochet patterns! Let's take a look at a sample row of crochet:
Rnd 2: Ch 1, dc in next 3 sts, (dc, ch 1, dc) in next st, dc 3; join. (8 sts)
Here we see two sets of parentheses - in the middle of the instructions, and again at the end. Each of these is used differently!
Let's begin at the ending. At the end of the instructions, parentheses are usually used to show the stitch count! In the first example above, we make 8 dc stitches in that round, so that's indicated at the end of the line. Sometimes this is also italicized, but not always. And sometimes it's italicized but not in parentheses! And then sometimes there's a dash or equals sign, followed by a number. But if the instructions have ended - you've joined or turned - and you have a number after that, it's going to be the stitch count for that row or round.
Inside the instructions, parentheses can be used to:
- show that a set of stitches is all worked into one stitch,
- to indicate instructions for multiple sizes
- for additional instructions not usually included in the pattern (an aside to clarify a point to the reader, like this),
- to indicate a repeat.
In the example above, the part that reads "(dc, ch 1, dc) in next st" is telling you that everything happening inside the parentheses is happening in that next stitch. This is far and away the most common use of parentheses inside the row or round instructions.
Now, what about the second case - let's take a look at another sample row:
Row 5: Ch 1, sc 7(8, 9), sc2tog, sc 2; turn. (10 (11, 12) sts)
There are two sets of parentheses here again! The one at the end is showing the final stitch count again, but you'll notice multiple numbers inside both sets. This is because this imaginary pattern has 3 sizes! The number for the smallest size is always listed first, and they are always listed in order. So if I were making a size small, I'd work the row like this:
Row 5: Ch 1, sc 7, sc2tog, sc 2; turn. (10 sts)
If I were making the largest size, I'd work it like this:
Row 5: Ch 1, sc 9, sc2tog, sc 2; turn. (12 sts)
Quick tip: If you are making a pattern with multiple sizes, print off a copy (just one for your personal use) and circle or highlight all the numbers for your size - it'll prevent a lot of headaches later!
The third case, using them to indicate an aside, is relatively rare, but if you're making a more complicated pattern, you'll probably appreciate the additional clarification! Parentheses can also be used to indicate a repeat, but it's much more common to use asterisks or brackets for that!

Asterisks, Plus Signs and Crosses
First, let's take a look at what these symbols look like! The asterisk is the most familiar and looks like a little star: *
The plus sign is what you see on calculators and kid's homework: +
And the cross isn't actually on most keyboards but requires a special code to write. On my Windows based computer, it's Alt 0134: † And sometimes instead of this cross, you'll see this one: ‡ - but that's a little rarer.
Of all the above, the asterisk is most common by a mile, but they are all used the same way - to indicate a repeat in the row or round. Let's take a look at a sample row using this symbol:
Row 15: Ch 2, hdc in the next 3 sts, *2 hdc in the next st, hdc in the next 3 sts, hdc2tog; rep from * across, turn.
Now, what if the above were a blanket? Without using the asterisk, the pattern would have to read:
Row 15: Ch 2, hdc in the next 3 sts, 2 hdc in the next st, hdc in the next 3 sts, hdc2tog, 2 hdc in the next st, hdc in the next 3 sts, hdc2tog, 2 hdc in the next st, hdc in the next 3 sts, hdc2tog, 2 hdc in the next st, hdc in the next 3 sts, hdc2tog, 2 hdc in the next st, hdc in the next 3 sts, hdc2tog, 2 hdc in the next st, hdc in the next 3 sts, hdc2tog, 2 hdc in the next st, hdc in the next 3 sts, hdc2tog, 2 hdc in the next st, hdc in the next 3 sts, hdc2tog; turn.
Heck, that's probably not even enough repeats unless you're making something tiny! So you can see how the asterisk is a big help. We can take that section that gets repeated over and over again, and only write it once! So when you see an asterisk like above, you just keep repeating everything after the asterisk until you get to the end of the row - that's what the section after the semicolon tells you to do. Sometimes, you might see something like this:
Row 32: Ch 1, sc in the next 3 sts, *2 sc in the next st, 3 sc in the next st, sc2tog; rep from * until 3 sts remain, sc in the last 3 sts, turn.
This is just a little complicated, but still pretty easy. Repeat everything after the asterisk until you have only 3 sts left in the previous row, then finish as instructed. Let's get a little more complex.
Row 6: Ch 2, dc in the next st, *sc in the next 3 sts, (dc, ch 1, dc) in the next st, hdc in the next st,** dc in the next 2 sts; rep from * across, finishing last rep at **, turn.
What's that ** all about? Well, it lets us know that the last time we start at *, we're going to finish at **. All the other times, we work from * to ; but that last repeat will end at with an hdc in the last stitch of the row. Make sense? Let's look at one more.
Row 8: Ch 1, sc in the 1st st, hdc 3, *sc 2,† hdc 3,** sc 3, hdc 3; rep from * until 7 sts remain, then repeat from * to **, then repeat from * to †, turn.
Okay, so that's a super weird line, but you get the idea. The asterisks and cross here help the designer tell you where to go, so the lines of instructions stay clear and concise! Of course, sometimes you only repeat a set of stitches a few times, not across the whole row or round. That's where brackets come in handy!

Brackets
Brackets are the little half boxes you probably don't use a whole lot, and they always come in pairs - [ and ]
Brackets are usually used inside a line of instruction to set aside a group of stitches that will be worked multiple times. Here's a simple example:
Row 9: Ch 1, sc in the next 3 sts, [2 sc in the next st, sc in the next 3 sts] 4 times, sc in the last 3 sts; turn.
So you repeat the instructions within the brackets 4 times, and then go on to the rest of the instructions. It's useful when you want to have a repeat that's in the middle of a row or round, but doesn't necessarily go all the way to the end. Could this line have been written using asterisks instead? Sure, it would look like this:
Row 9: Ch 1, sc in the next 3 sts, *2 sc in the next st, sc in the next 3 sts; rep from * until 3 sts remain, sc in the last 3 sts; turn.
A little bit longer, and you're left watching for those last 3 sts instead of counting your 4 repeats. Either way is correct, and it's ultimately a matter of personal preference of the designer. When they come in super handy is when you need to use both!
Occasionally, brackets are also used to indicate a group of instructions worked in one stitch, like the first example for parentheses above - but it's very unusual! Context clues will give you the info needed - look for "x times" vs. "in the next st."
And if you are really getting complicated, brackets can be used when you have different sizing instructions that need to be given inside a line of instruction and within parentheses! I can't recall the last time I saw this, but it's out there somewhere...

Curlicue Brackets
Now we're really getting into it! Curlicue Brackets are usually on the same keyboard buttons as the standard brackets, but you have to hit Shift first: { and } - fancy!
These are used when you need to put a repeat inside an already-bracketed repeat! What? Okay, here's an example:
Row 10: Ch 2, hdc in the next st, 3 hdc in the next st, [dc in the next 3 sts, {ch 1, dc in the next st} 3 times, dc in the next 3 sts] 5 times, hdc in the next 3 sts, dc in the last st; turn.
So, if you're crocheting this row, you'll repeat the part within [ and ] 5 times, and each of those times, you'll repeat the part within { and } 3 times. If you were to write it out without these symbols, it would look like this:
Row 10: Ch 2, hdc in the next st, 3 hdc in the next st, dc in the next 3 sts, ch 1, dc in the next st, ch 1, dc in the next st, ch 1, dc in the next st, dc in the next 3 sts, dc in the next 3 sts, ch 1, dc in the next st, ch 1, dc in the next st, ch 1, dc in the next st, dc in the next 3 sts, dc in the next 3 sts, ch 1, dc in the next st, ch 1, dc in the next st, ch 1, dc in the next st, dc in the next 3 sts, dc in the next 3 sts, ch 1, dc in the next st, ch 1, dc in the next st, ch 1, dc in the next st, dc in the next 3 sts, dc in the next 3 sts, ch 1, dc in the next st, ch 1, dc in the next st, ch 1, dc in the next st, dc in the next 3 sts, hdc in the next 3 sts, dc in the last st; turn.
I think you can see why we use the symbols! Curlicue brackets are generally only used inside regular brackets - in combination with another symbol. And occasionally, instead of curlicue brackets, the designer will use parentheses (again, you can look at the context clues for "x times" vs "in the next st"). Indeed, ALL these symbols can be used together!

Combo Time!
What does it look like when you use asterisks and parentheses together?
Rnd 4: Ch 1, sc in the 1st st, 2 sc in the next st, *sc in the next st, 2 sc in the next st, (sc, ch 1, sc) in the next st,** sc in the next st; rep from * to end, finishing last rep at **; join.
The asterisks tell us what section of instructions to repeat as we work our round, and the part inside the parentheses is telling us that those stitches are all worked in one stitch, within that repeat. Easy enough, let's keep going!
Row 7: Ch 1, hdc in the next 2 sts, *hdc in the next st, [ch 1, skip the next st, (2 hdc, ch 1, 2 hdc) in the next st] 3 times, hdc in the next 6 sts,** 2 hdc in the next st;
rep from * across, finishing last rep at **, turn. (5000 sts)
Let's break it down. You know the asterisks give you your pattern repeat - which you only repeat until the ** when you do it for the last time. Inside that repeat, there is another repeat - each time you start again at the asterisk, you will be working the section within the brackets 3 times. Within that bracket, you've got a set of instructions in parentheses that are all worked into one stitch! The parentheses at the end tell us that when we're all done with Row 7, we'll have 5000 stitches in that row (please note these instructions are not real, and just made up for examples!).
Whew! I know that seems like a lot! But as you progress in your crochet, you'll find yourself reading crochet pattern symbols with ease - and even appreciating how much easier they make it to understand what's happening in a pattern. There are always exceptions to the above - every designer has their own writing style. But that's part of the adventure of crochet!
I hope this article helps you, and that you enjoy your crochet even more for it - and it'll stay right here so you can reference it whenever you need to! If you have any questions that you feel I haven't addressed here, please let me know in the comments, and together we can make this article as helpful as possible! Be sure to add it to your bookmarks and pin the image below!

You can follow Moogly on Facebook, Twitter, G+, Pinterest, Instagram, and Tumblr!

Adrienne McCarthy says
Oh, Tamara, I can not begin to tell you how helpful this is going to be to so many of our "newbies" on the FB group! Wonderfully done! THANK YOU!!!!
Tamara Kelly says
Oh yay! I'm so glad to hear it! 😀 It was fun and interesting putting it all together in one article!
torjie sweeten says
I cry more than I crochet. Im trying so hard to make booties (fail..cant read pattern) so I switched to amigurumi for larger projects (fail..cant read pattern) so now Im working on a SIMPLE blanket for my soon to be here FIRST grandbaby! Im 77 so it is a real event! I spend half my time squinting over the directions or frogging. I would love to have someone I can send the pattern instructions to who would write it out in PLAIN English...no brackets, no parentheses! I dont care if the instructions for one bootie are 20 pages long, at least I would know exactly what those increases and decreases & putting everything all in one stitch, etc. mean & that I was doing it correctly. Im a retired Kindergarten teacher so I like everything spelled out VERY SIMPLY. There should be a category of patterns called Beginner 101...maybe a book? of 10 or so patterns plus pictures of projects for us so we can understand these abbreviations before we get thrown in to the big pond. IS there such a thing? I live on YouTube videos for directions but Im a hard-copy gal & need written instructions so I can make nites and remember it the next day! (Im 77 years old!) Help!
Tamara Kelly says
Hello Torjie! I'm so sorry you have been having so much trouble! I have a pattern here that might help! https://www.mooglyblog.com/learn-to-crochet-mug-rug/
Jeanne Joseph says
I wish someone had told me years and years ago when I started to crochet. I basically figured it out myself. Great article!
Tamara Kelly says
Oh I'm so glad to hear it, thank you!
Sherry says
Tamara, Thanks so much for the great tutorial. I have crocheted in the past but only simple chevron patterns. I always found the other patterns too difficult to understand, especially the charts. I am an experienced knitter and I am trying to expand into crocheting. This tutorial will certainly help me to advance my skill level.
Tamara Kelly says
I hope it does help Sherry, thank you!
Donna says
Such a helpful article! Thanks so much for sharing. I wish I'd had it when I was learning to crochet!
Tamara Kelly says
😀 Thank you so very much Donna! I hadn't had any luck finding a really comprehensive discussion of the topic to point people to, so I decided to write my own! 😛
Grieta Meyer says
Good morning.
Thank you so much for the tutorial.
I have been crocheting and do knitting for at least 49 years.
I am so glad to say that everytime I start something new, I LEARN something new.
Have a good day.
Tamara Kelly says
I'm so glad to hear it Grieta! I'm always learning too, and that's what I love about it! 😀 Thank you!
Eva says
I can't get the print friendly to come up?
Tamara Kelly says
It's an external plug in that doesn't work for everyone - you can try going to PrintFriendly.com, that seems to work better for some reason!
Vicki Allgaier says
How about a 'diamond shape' after a number in a crochet pattern? What does the diamond mean.... i.e. 3 (then a diamond, which I can't find on my computer!!)
Tamara Kelly says
Hm, I haven't seen that one before! If you spot one, please send me a link!
Sharon Ledwick says
Rnd 2: ch 2, inc dc, dc, (dc skip, (dc, ch, dc) х in one stitch, dc skip, dc, inc dc, dc) х 9, dc skip, (dc, ch, dc) х in one stitch, dc skip, dc, sl st (70)
Would you kindly explain how i do this
Tamara Kelly says
Hi Sharon!
Rnd is Round.
Ch is chain - so you start with a chain 2.
Inc dc usually means to work 2 double crochets in the next st (stitch).
Dc - double crochet in the next st.
Dc skip - this isn't a formatting I've seen before, but I believe they are telling you to skip the next dc.
(dc, ch, dc) in one stitch - double crochet, chain, and double crochet again all in the next st.
x9 means you do everything between the parentheses 9 times.
sl st is slip stitch.
Does that help?
Carol Migliori says
Hello,
I am perplexed at this basket pattern I am trying to make. If I crochet it like it says I don’t end up with the correct number of stitches. Please explain what this means:
R4: ch1, (hdc 2, 2 hdc in next st) x 2, hdc 8, (hdc 2, 2 hdc in next st) x 4, hdc 8, (hdc 2, 2 hdc in next st) x 2, sl st (48)
I am going to pull my hair out. Please help me if possible.
Thank you,
Carol
Tamara Kelly says
Hi Carol!
That's a mathy one! I'll try to break it down, with my comments in italics and the pattern in bold:
R4: ch1, not a stitch
(hdc 2, 2 hdc in next st) x 2, hdc in the next 2 sts, then 2 hdc in the next stitch, then hdc in the next 2 sts, then 2 hdc in the next stitch - so you do the section within parenteses twice, hence the x2. We've now made 8 stitches.
hdc 8, hdc in the next 8 sts - we're up to 16 sts total so far.
(hdc 2, 2 hdc in next st) x 4, hdc in the next 2 sts, then 2 hdc in the next stitch, then repeat this 3 more times (4 times total). This adds another 16 sts, so we're up to 32 sts total so far.
hdc 8, hdc in the next 8 sts - we're up to 40 sts total so far.
(hdc 2, 2 hdc in next st) x 2, hdc in the next 2 sts, then 2 hdc in the next stitch, then repeat this once more (x2). This is an additional 8 sts, bringing us to...
sl st (48) Sl st to the first hdc to finish the rnd - we've got our 48 sts!
Does that help?
Carol says
Thank you so much for your help. I will try it right now. Please cross your fingers for me! LOL
Tamara Kelly says
Fingers crossed! ♥
Anne Leverich says
The pattern of a crochet shawl called Cir- Collar Vest, has
fpdc, 2dc and I can understand the rest, but do you know what
fpdc stands for? Thank you!
Tamara Kelly says
Front Post Double Crochet - here's how! https://www.mooglyblog.com/post-stitches-raisedrelief/
Kelly Metzger says
Good day!
Would you please explain this to me. I'm stuck at the point (3-2). Thanks.
Ch 2. 2 hdc in rst hdc. *1 hdc in each of next 11 (3-2) hdc. 2 hdc in next hdc. Rep from * to last 11 (3-2) hdc. 2 hdc in next hdc. 1 hdc in each of last 11 (3-1) hdc. Join with sl st to rst hdc. 52 (60-64) hdc.
Thank you so much.
Tamara Kelly says
Hi Kelly! It looks like the pattern you are making here has 3 sizes.
When you see a series of 3 numbers like this, each one is for that size. You only follow the numbers for the size you want to make.
So as you start this Round, you'd hdc in each of the next 11 hdc for a small, the next 3 for a medium, and the next 2 for a large.
It's really helpful to go through and circle or highlight the numbers for the size you're making before you begin.
Does that make sense?
Sally says
Thank you for this very helpful blog. Could you please explain these directions which includes several asterisks in a UK pattern. I know what the US stitches are for their different abbreviations.
Join B into last 3ch sp (point) before a corner, 3 ch (not counted as a st), *(3td,3ch,3tr) all into same ch sp (point), 1 tr into each of next 3tr, miss dc at corner **, 1tr into each of next 2tr, miss 3st,1tr into each of next 2tr, ***(3tr, 3ch,3tr) all into next chain sp (point), 1tr into each of next 2tr, miss 3 sets, 1tr into each of next 2tr, rep from *** to last ch sp ( point) before next corner, rep from * to ** around corner, continue in the same way around the remaining 3 sides, ending with sl st into first tr.
I so would appreciate your help. I am making a granny square blanket and am trying to crochet the border.
Tamara Kelly says
Hi Sally! That is a pretty complicated line of instructions! I hope this helps.
This section you work straight through, ignoring the asterisks - "Join B into last 3ch sp (point) before a corner, 3 ch (not counted as a st), *(3td,3ch,3tr) all into same ch sp (point), 1 tr into each of next 3tr, miss dc at corner **, 1tr into each of next 2tr, miss 3st, 1tr into each of next 2tr, ***(3tr, 3ch,3tr) all into next chain sp (point), 1tr into each of next 2tr, miss 3 sets, 1tr into each of next 2tr,"
Then, you repeat this section - "***(3tr, 3ch,3tr) all into next chain sp (point), 1tr into each of next 2tr, miss 3 sets, 1tr into each of next 2tr," until you come to the last ch sp (point) before next corner.
Then, you repeat this section - "*(3td,3ch,3tr) all into same ch sp (point), 1 tr into each of next 3tr, miss dc at corner **" around corner.
Then you continue around the other 3 sides of the blanket in the same way, ending with sl st into first tr. Does that help?
Regina says
Hello I’m new doing crochet and my daughter ask me to do this hat, but I don’t what it means with this, can you help me?
Round 3: (Sc 7, dec) around sc last two sts
Round 4: (Sc 19 , dec)X2
I need this before Halloween 👻. Can you help me ?
Tamara Kelly says
Hi Regina! Here's how to read this -
Round 3: Single crochet in the next 7 stitches, then sc2tog (decrease) over the next 2 stitches. Then start again - sc in the next 7 sts, then sc2tog. Repeat this sequence until only 2 stitches are left. Sc in each of those last 2 stitches.
Round 4: Single crochet in the next 19 stitches, then sc2tog over the next 2 stitches. Then do it again - sc in the next 19 sts, then sc2tog in the last 2 stitches.
I hope that helps!
Regina says
I forgot to mentioned that I’m new doing crochet. Thanks!
Regina says
Thank you Tamara ! This helped a lot!
Cheryl says
this is a tottally needed article. When designers write patterns, they forget a new person does not know what the * stands for or for me, how many times to the repeat. I still don't get it. I know it's a repeat but when they start putting in the parenthesis, I don't know if I'm repeating that also?
Tamara Kelly says
Hi Cheryl! Some patterns can definitely get complicated! Sometimes it's easiest to demonstrate with an example. (This is completely made up, not part of a real pattern.) So let's say the pattern reads:
Row 3: Ch 1, sc in next 2 sts, *sc 3, 2 sc in next st, (3 dc, ch 1, skip 1) twice; rep from * until 1 st remains, sc in last st.
The repeat starts at the * and ends at the ; - this means it includes the part in parentheses.
So your repeat could be written out as:
sc in the next 3 sts
2 sc in the next st
3 dc in the next st
ch 1
skip 1 st
3 dc in the next st
ch 1
skip 1 st
So you would repeat that series of sts until 1 stitch remains in the previous row. Does that make sense?
Cheryl Samms says
Yes. You made it understandable. I should stop at the semicolon but do what is included in the parenthesis also. 👍🏽
Tamara Kelly says
Great, so glad that helped! 🙂
Cheryl says
Hi Tamara. I forgot to ask. When the directions say rep from *to*2x. Is that a total counting the first time you do it or 2 more times after you e done it ? Thank you
Tamara Kelly says
Great question - and it really comes down to the exact phrasing (which does vary from designer to designer, alas).
If it says, "*sc 10, dc 10,* rep from * to * twice," then I would read that as doing the series 3 times.
If it says, "*sc 10, dc 10,* twice" then I would read it as doing the series 2 times.
However, I would say that either of these would be better written as "[sc 10, dc 10] twice" - (or 3 times) this is much clearer to me!
Kathy Bruzer says
A pattern for a cowl that I am working has this direction:
Rpt from # to # twice. Fasten off.
What does that mean? No where in the pattern are the # symbols.
Tamara Kelly says
Hm, it sounds like they made an error there! If it's a free pattern online, can you share the link? I might be able to figure it out!
Ruth Armstrong says
Help me figure out EXACTLY what to. rep from *once more, then from * to** once.
Cable panel: *1 dc in next 28 ch**
Lattice panel: 1 sc in next 24 ch. Rep from * once more, then from * to** once. 1 dc in last 5 chains.
I cannot figure out how far from the * to repeat before I repeat from * to **
Please help me. I have NEVER seen this before.
Tamara Kelly says
Hi Ruth! Some directions can get complicated, hopefully this will help! ♥
Here is another way to write that out instead:
Dc in the next 28 chs, sc in the next 24 chs, dc in the next 28 chains, sc in the next 24 chs, dc in the next 28 chs, dc in the last 5 chs.
Does that help?
Velda says
Infinite thanks for these explanations...I was almost in tears and ready to quit crochet thinking I'll never be able to read a pattern. This helped enormously. I'm still not sure of the more complex example, but hopefully with practice it will become more clear.
God bless you!
Mariann says
Whew! This article is amazing. Saved it to bite it off as I come across examples in my work that I can’t quite catch on. The brackets have always confused me. It is so generous of you to explain line by line for other perplexed crocheters. As I read through your line by line clarifications, it becomes easier to decipher. At times crochet patterns can look like hieroglyphics! Again, thank you. Great, concisive info.
Tamara Kelly says
Thank you so much Mariann! If you come across something I missed, please let me know! ♥
Jill Beck says
I have been crocheting, off an on for 50 years. My daughter bought an amigurumi kit from Target and wanted me to teach her how to crochet. I was so embarrassed because I had never seen a chart like it before. This kit came from China so that could explain some of it. There are things like:
R3 - SL,CH,(XV)8
R4 - SL,CH,X,V,X)8
R5 - Sl,CH,(3X,V)8
R32 - SL,CH,(X,A,X)6
What do all these codes mean? I found a chart of universal symbols, which I had no clue existed, but some of these are not even on that (like A and X). Can you please help me with this? The instructions are horrible! Thank you.
Tamara Kelly says
Wow, I've never seen any quite like that either! I will hazard my best guess, but you'd have to start stitching and see if this actually makes sense to make something:
SL - this is *probably* a slip stitch join at the end of the previous round.
CH - since it looks like this is worked in joined rounds, this would be the ch 1 to start the round.
X - I'm going to guess this is a single crochet (SC). This guess is based on X being a common symbol in crochet charts for the sc stitch.
V - my best guess is this is an increase - 2 sc in the same stitch. This is based on the shape of the letter V and how an increase looks in a crochet symbol chart.
A - and because I think they are using V for an increase, I suspect A would be a decrease - sc2tog.
So I would try reading it like this:
R3 - Sl st in first st of previous round, ch 1, [sc in the next st, 2 sc in the next st] 8 times.
R4 - Sl st in first st of previous round, ch 1, [sc in the next st, 2 sc in the next st, sc in the next st] 8 times.
R5 - Sl st in first st of previous round, ch 1, [sc in the next 3 sts, 2 sc in the next st] 8 times.
R32 - Sl st in first st of previous round, ch 1, [sc in the next st, sc2tog, scc in the next st] 6 times.
I hope that helps!