
I wanted to know how to knit as a kid - and how to crochet, how to macrame, how to embroider - I've been crazy for the fiber arts forever! It wasn't until I was in my 30s that I finally learned to crochet - from a video for kids! But looking at Susan B. Anderson's Kids' Knitting Workshop I think this book might have been an even better option!

Tunisian Top Stitch/Tunisian Bump Stitch
Tunisian crochet can be intimidating, but once you jump in, it's not so hard! And once you've got the basics, you might find yourself exploring new stitches - and the Tunisian Top Stitch, aka the Tunisian Bump Stitch, is a fun and easy variation to try!

Hookin On Hump Day #109: Link Party for the Yarny Arts!
It's the last round of HOHD for 2015 - thank you for joining me, and my cohost Kara from Petals to Picots this year! In 2016 we'll continue to share the best crochet and knit projects from around the web twice a month! Hookin on Hump Day is hosted here on Moogly, as well as on Petals to Picots - and the winners each round are featured on both our sites and social media shares! Here are the projects that your clicks and Kara put together this round!

Gigantic Holiday Giveaway from Lion Brand and Furls Fiberarts on Moogly!
2015 has been full of amazing giveaways here on Moogly - and I'm already lining up fantastic new ones for 2016! But first, you've got to check out this massive, humongous, gigantic holiday giveaway from Lion Brand and Furls Fiberarts!

Hurry Up Holiday Hat
The Hurry Up Holiday Hat is the second and last pattern in the 2015 Holiday Mini Crochet-Along!

"Broomstick Lace Crochet" by Donna Wolfe: Review & Giveaway!
If you love the look of broomstick lace, then you have to check out Broomstick Lace Crochet, by Donna Wolfe, out just in time for the holidays!

Artfully Simple Angled Scarf Gift Wrappers
The Artfully Simple Angled Scarf is a fantastic pattern - easily adaptable to any size or yarn! So lots of people are giving them as gift this holiday season... and since the Artfully Simple Infinity Scarf Wrappers were so popular, it was time to add the Artfully Simple Angled Scarf Wrapper!

Two Twigs Ergonomic Crochet Hook Set: Review & Coupon Code!
I recently received the brand new Two Twigs Ergonomic Crochet Hook Set so I could review it here on Moogly - and so I can pass on a coupon code to all of you!

Hurry Up Holiday Cowl
The Hurry Up Holiday Cowl is the first pattern in the 2015 Holiday Mini Crochet-Along!

Announcing the 2015 Moogly Holiday Mini CAL!
Hey hey hey! Just a quick announcement today - the last Crochet Along of the year on Moogly starts tomorrow!

Make Crafty Crochet Ornaments!
Craftwich Creations has put together the cutest idea for holiday ornaments this year!

Hookin On Hump Day #108: Link Party for the Yarny Arts!
Thank you for joining me, and my cohost Kara from Petals to Picots, for another round of HOHD, where we share the best crochet and knit projects from around the web twice a month! Hookin on Hump Day is hosted here on Moogly, as well as on Petals to Picots - and the winners each round are featured on both our sites and social media shares! Here are the projects that your clicks and Kara put together this round!

Katy Petersen of KT and the Squid: Designer Showcase!
It’s time for November’s Designer Showcase! I like to wrap up each month by having one of my favorite designers share a bit about themselves, and then I follow it up by sharing my 5 favorite free patterns that they've designed! This month I’m pleased to share some things from the talented Katy Petersen - the blogger and designer behind KT and the Squid!

Fast & Festive Crochet Christmas Ornaments
Whether it is the day after Thanskgiving or the day before Christmas, you can have these ornaments on the tree in time for present opening, because these two patterns work up fast, and look fantastic! Introducing a pair of fast and festive crochet christmas ornaments: the Peppermint Flash Ornament and Rustic Luxury Star Ornament!

The 2015 Moogly Afghan CAL: Block #24!
It's the final block for 2015 - all that's left after this is to join the blocks and finish our blankets! Thank you all so much for CAL-ing with me this year! And Happy Thanksgiving!!

GlobeIn Artisan Box Giveaway on Moogly!
It's the season for giving - and getting! And today I've got a fantastic giveaway for you, from GlobeIn!

Leisure Arts Adult Coloring Books Giveaway on Moogly!
Now that the holiday season is well and truly upon us, let's talk about one of the hottest creative gift ideas this year - outside of crochet of course.... adult coloring books! I've been enjoying these fun books from Leisure Arts, and now I'm giving away 4 of them to one lucky winner!

Ella the Elephant Lovey

Ella the Elephant Lovey is cute, cuddly, and loves spinning in circles! The perfect gift for any baby, they'll never forget how cute this free crochet pattern is!
Disclaimer: This post includes affiliate links.
Prefer an ad-free PDF? You've got options!


Prefer the free blog version? Keep scrolling!
Ella the Elephant Lovey
Add this pattern to your Ravelry Queue and Favorites
US - I, 5.5mm hook (Furls Fiberarts)
385 yds Martha Stewart Extra Soft Wool Blend (Aran/10 ply; Acrylic (65%),
Wool (35%); 165 yds/151 m; 3.53 oz)
Color A: Gray Pearl - 1 ball; 165 yds
Color B: Bakery Box White - 1 ball; 110 yds
Color C: Lemon Chiffon - 1 ball; 110 yds
Stitch Markers (Clover Lock Ring Markers)
Yarn/Tapestry needles
Fiberfill/Toy Stuffing (small amount)
Gauge: 8 rows in blanket = 4"
Finished Size: 21" diameter blanket
Helpful Links and Video Tutorials:
Crochet Abbreviations and Tutorials
NOTES:
- Make the pieces in the order listed for easiest assembly.
- Some pieces are made in a spiral, without joining, while others are made in joined rounds - this will be noted at the beginning of that section's instructions. Using a stitch marker in the first st of each round will help you keep your place
INSTRUCTIONS
EARS INSTRUCTIONS: Use Color A, make 2.
Row 1: Ch 3, skip the ch closest to the hook, sc in each remaining ch; turn. (2 sts)
Row 2: Ch 1, 2 sc in the 1st st, sc in the last st; turn. (3 sts)
Row 3: Ch 1, sc in the 1st 2 sts, 2 sc in the last st; turn. (4 sts)
Row 4: Ch 1, 2 sc in the 1st st, sc in each st to end; turn. (5 sts)
Row 5: Ch 1, sc in each st to last st, 2 sc in the last st; turn. (6 sts)
Row 6 - 11: Repeat Rows 4 - 5 until there are 12 sts in the row; break yarn leaving a long tail for sewing.
TRUNK INSTRUCTIONS: Use Color A, make 1, work in a spiral (no joining).
Round 1: Make a magic circle, hdc 9 in the ring. (9 sts)
Round 2 - 7: Sc in each st around. (9 sts) After Round 7, break yarn leaving a long tail for sewing.
HEAD INSTRUCTIONS: Use Color A, make 1, work in a spiral (no joining), use invisible decreases.
Round 1: Make a magic circle, sc 5 in the ring. (5 sts)
Round 2: 2 sc in each st to last st, 3 sc in the last st. (11 sts)
Round 3: 2 sc in the 1st st, sc in the next 2 sts, *2 sc in the next st, sc in the next st; repeat from * to end. (16 sts)
Round 4: Sc in the 1st 2 sts, 2 sc in the next st, sc in the next 3 sts, 2 sc in the next st, *sc in the next 2 sts, 2 sc in the next st; repeat from * to end. (21 sts)
Round 5: Sc in the 1st 4 sts, 2 sc in the next st, sc in the next 5 sts, 2 sc, *sc in the next 4 sts, 2 sc in the next st; repeat from * to end. (25 sts)
Round 6: Sc in the 1st st, 2 sc in the next st, sc in the next 5 sts, 2 sc in the next st, sc in the next 6 sts, 2 sc in the next st, sc in the next 5 sts, 2 sc in the next st, sc in the last 4 sts. (29 sts)
Round 7: Sc in the 1st 3 sts, 2 sc in the next st, sc in the next 8 sts, 2 sc in the next st, sc in the next 9 sts, 2 sc in the next st, sc in the last 6 sts. (32 sts)
Round 8: Sc in the 1st 4 sts, 2 sc in the next st, sc in the next 15 sts, 2 sc in the next st, sc in the last 11 sts. (34 sts)
Round 9: Sc in the 1st 12 sts, 2 sc in the next st, sc in the next 16 sts, 2 sc in the next st, sc in the last 4 sts. (36 sts)
Round 10 - 11: Sc in each st around. (36 sts)
Round 12: Sc in the 1st 3 sts, sc2tog, sc in the next 16 sts, sc2tog, sc in the last 13 sts. (34 sts)
Round 13: Sc in the 1st 11 sts, sc2tog, sc in the next 15 sts, sc2tog, sc in the last 4 sts. (32 sts)
Round 14: Sc in the 1st 7 sts, sc2tog, sc in the next 8 sts, sc2tog, sc in the next 9 sts, sc2tog, sc in the last 2 sts. (29 sts)
Round 15: Sc in the 1st st, *sc2tog, sc in the next 5 sts; repeat from * to end. (25 sts)
PAUSE FOR ASSEMBLY:
- Place a st marker in active loop, remove hook and set aside.
- Sew ears and trunk to head as shown in photos, using the long tails.
- Using Color B embroider on eyes, or use safety eyes if preferred.
- Replace hook in active loop and remove stitch marker to resume crocheting.
Round 16: Sc in the 1st st, sc2tog, sc in the next 5 sts, sc2tog, (sc in the next 4 sts, sc2tog) twice, sc in the last 3 sts. (21 sts)
Round 17: Sc in the 1st 2 sts, sc2tog, sc in the next 3 sts, sc2tog, *sc in the next 2 sts, sc2tog; repeat from * to end. (16 sts)
Round 18: (Sc2tog, sc in the next st) twice, sc2tog, sc in the next 2 sts, (sc2tog, sc in the next st) twice. (11 sts) Stuff head with small amount of fiberfill, until head is desired firmness.
Round 19: Sc2tog 4 times, sc3tog; break yarn leaving a long tail. Add more fiberfill if needed. Use tail to cinch last round closed.
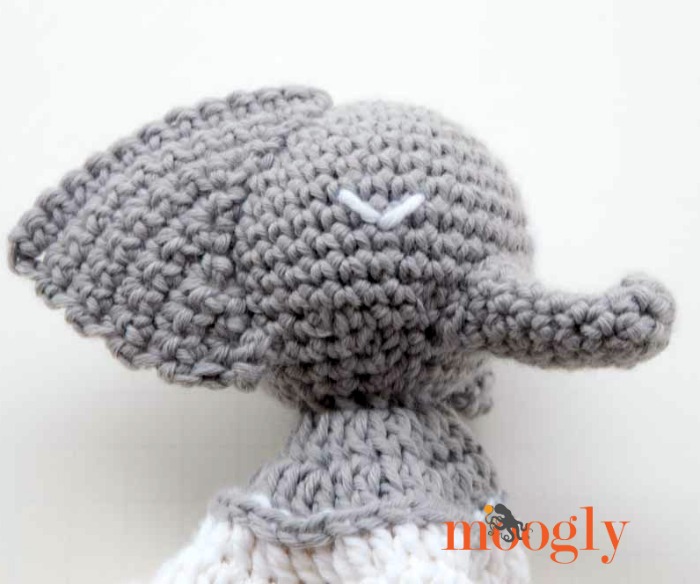
BLANKET INSTRUCTIONS: Use Colors as indicated below, make 1, work in joined rounds (not a spiral).
Round 1: With Color A, surface crochet 12 sc sts in a circle at the base of the head; join with a sl st. (12 sts)
Round 2: Ch 2 (does not count as a st here and throughout), 2 dc in each st around; join. (24 sts)
Round 3: Ch 2, *dc in the next st, 2 dc in the next st; repeat from * around, join and break yarn. (36 sts)
Round 4: With Color B, join to any st and ch 2, *shallow bpdc in the next 2 sts, 2 shallow bpdc in the next st; repeat from * around, join. (48 sts)
Round 5: Ch 2, *2 dc in the next st, dc in the next 3 sts; repeat from * around; join and break yarn. (60 sts)
Round 6: With Color C, join to any st and ch 2, *shallow bpdc in the next 4 sts, 2 shallow bpdc in the next st; repeat from * around, join. (72 sts)
Round 7: Ch 2, *2 dc in the next st, dc in the next 5 sts; repeat from * around; join and break yarn. (84 sts)
Round 8: With Color A, join to any st and ch 2, *shallow bpdc in the next 6 sts, 2 shallow bpdc in the next st; repeat from * around, join. (96 sts)
Round 9: Ch 2, *2 dc in the next st, dc in the next 7 sts; repeat from * around; join and break yarn. (108 sts)
Round 10: With Color B, join to any st and ch 2, *shallow bpdc in the next 8 sts, 2 shallow bpdc in the next st; repeat from * around, join. (120 sts)
Round 11: Ch 2, *2 dc in the next st, dc in the next 9 sts; repeat from * around; join and break yarn. (132 sts)
Round 12: With Color C, join to any st and ch 2, *shallow bpdc in the next 10 sts, 2 shallow bpdc in the next st; repeat from * around, join. (144 sts)
Round 13: Ch 2, *2 dc in the next st, dc in the next 11 sts; repeat from * around; join and break yarn. (156 sts)
Round 14: With Color A, join to any st and ch 2, *shallow bpdc in the next 12 sts, 2 shallow bpdc in the next st; repeat from * around, join. (168 sts)
Round 15: Ch 2, *2 dc in the next st, dc in the next 13 sts; repeat from * around; join and break yarn. (180 sts)
Round 16: With Color B, join to any st and ch 2, *shallow bpdc in the next 14 sts, 2 shallow bpdc in the next st; repeat from * around, join. (192 sts)
Round 17: Ch 2, *2 dc in the next st, dc in the next 15 sts; repeat from * around; join and break yarn. (204 sts)
Round 18: With Color C, join to any st and ch 2, *shallow bpdc in the next 16 sts, 2 shallow bpdc in the next st; repeat from * around, join. (216 sts)
Round 19: Ch 2, *2 dc in the next st, dc in the next 17 sts; repeat from * around; join and break yarn. (228 sts)
Round 20: With Color A, join to any st and ch 2, *shallow bpdc in the next 18 sts, 2 shallow bpdc in the next st; repeat from * around, join. (240 sts)
Round 21: Ch 1, sc in each st around; join and break yarn. (240 sts)

Weave in all your ends, and you're all set! This sleepy little elephant blanket is ready for cuddles. I hope you enjoy making Ella the Elephant Lovey!
The Fine Print
Written pattern copyright Tamara Kelly 2015, all rights reserved. Please do not reprint or repost this pattern, but please do link to this page to share this pattern with others. If you wish to make items for sale from this pattern, or translate it to another language, please visit the About page for details. Thank you to Lion Brand Yarn for providing the yarn for this pattern!
Lion Brand & Project Knitwell Giveaway on Moogly!
Have you heard of Project Knitwell? If you believe in the therapeutic benefits of knitting, or would like to discover them for yourself, then this is the post for you!

Polka Dot Border Tutorial
The Polka Dot Border was what I used to finish off my 2014 Moogly Crochet Along blanket! And whether you're finishing up a CAL or just looking to add a special touch to a project, this edging is a fun and versatile choice! So here's how to crochet the Polka Dot Border.

Hookin On Hump Day #107: Link Party for the Yarny Arts!
Thank you for joining me, and my cohost Kara from Petals to Picots, for another round of HOHD, where we share the best crochet and knit projects from around the web twice a month! Hookin on Hump Day is hosted here on Moogly, as well as on Petals to Picots - and the winners each round are featured on both our sites and social media shares! Here are the projects that your clicks and I put together this round!

Add a Special Touch with Zazzle Gift Wrap!
Are you crocheting or knitting gifts this holiday season? Or just plain giving them? Either way, Zazzle has fantastic gift wrap ideas to add a special touch - and there's even one designed by me!

Tasty Turkey Basket

Okay, so the Tasty Turkey Basket probably tastes a little... yarny. But you can fill it with tasty things for your Thanksgiving table! Or pretty things. Or whatever you like - maybe the things you're thankful for this time of year.
Disclaimer: This post includes affiliate links.
Prefer an ad-free PDF? You've got options!


Prefer the free blog version? Keep scrolling!
Tasty Turkey Basket
Add this pattern to your Ravelry Queue and Favorites
US - I, 5.5mm hook - Furls
US – K, 6.5mm hook - Clover Amour Jumbo
625 yds Bulky yarn (original yarn is discontinued)
Color A: Coffee - 450 yds
Color B: Pumpkin - 65 yds
Color C: Black - 10 yds
Color D: Honey - 65 yds
Color E: Cranberry - 5 yds
Color F: Avocado - 30 yds
Gauge: 10 sts x 8 rows = 4" in hdc with yarn held doubled and larger hook
Finished Size: Basket portion = 10" long x 6" wide x 5" high
Helpful Links and Tutorials
NOTE: Some parts are made with the yarn held doubled and the larger hook, others are made with the yarn held singly and the smaller hook - this is listed at the beginning of that part of the pattern.
Instructions
BASKET INSTRUCTIONS: Make 1, with Color A, yarn held doubled, larger hook
Row 1: Ch 24, skip the ch closest to the hook, hdc in each of the remaining chs; turn. (23 sts)
Row 2 – 12: Ch 1, hdc 23; turn. (23 sts)
Round 13: Ch 1, hdc 23, turn work 90°, hdc 14 along sides of previous rows, turn work 90°, hdc 23 along foundation chain, turn work 90°, hdc 14 along sides of previous rows; join to first hdc of round with a sl st. (74 sts)
Round 14 – 22: Ch 1, hdc in each st around; join with a sl st. (74 sts) After Round 22, break yarn and finish off.
HEAD INSTRUCTIONS: Make 1, with Color A, yarn held doubled, larger hook
Row 1: Ch 10, skip the ch closest to the hook, hdc in each of the remaining chs; turn. (9 sts)
Row 2 - 4: Ch 1, hdc 9; turn. (9 sts)
Row 5: Ch 1, hdc2tog, hdc 5, hdc2tog; turn. (7 sts)
Row 6 - 7: Ch 2, hdc 7; turn. (7 sts)
Row 8: Ch 1, hdc2tog, hdc 3, hdc2tog; turn. (5 sts)
Row 9 - 10: Ch 1, hdc 5; turn. (5 sts)
Row 11: Ch 1, 2 hdc in the 1st st, hdc 3, 2 hdc in the last st; turn. (7 sts)
Row 12 - 13: Ch 1, hdc 7; turn. (7 sts)
Row 14: Ch 1, hdc2tog, hdc 3, hdc2tog; turn. (5 sts)
Row 15: Ch 1, hdc2tog, hdc, hdc2tog; turn. (3 sts)
Edge: Ch 1, sc evenly all around head; break yarn leaving a long tail for sewing.
BEAK INSTRUCTIONS: Make 1, with Color B, yarn held singly, smaller hook
Row 1: Ch 6, skip the ch closest to the hook, sc in each remaining ch; turn. (5 sts)
Row 2: Ch 1, sc2tog, sc in the next st, sc2tog; turn. (3 sts)
Row 3: Ch 1, sc3tog; break yarn leaving long tail for sewing. (1 st)
Sew beak to head as shown.
EYES INSTRUCTIONS: Make 2, with Color C, yarn held singly, smaller hook
Round 1: Starting with a magic circle, hdc 10 in the ring; join with a sl st and break yarn, leaving long tail for sewing. (10 sts)
Add "twinkle" with yarn needle and a small amount of Color D.
Sew eyes to head as shown.
WATTLE INSTRUCTIONS: Make 1, with Color E, yarn held single, smaller hook
Row 1: Ch 9, skip the 2 chs closest to the hook, dc in next 3 chs, hdc in next 2 chs, sc in next ch, sl st in last ch; break yarn and finish off, leaving a long tail for sewing.
Sew wattle to head as shown.

TAIL FEATHER INSTRUCTIONS: All made with yarn held doubled, larger hook
- Make 1 with Color F
- Make 2 with Color B
- Make 2 with Color D
Row 1: Ch 2, skip the ch closest to the hook, 3 dc in last ch; turn. (3 sts)
Row 2: Ch 2, 2 dc in the 1st st, dc in the next st, 2 dc in the last st; turn. (5 sts)
Row 3 - 7: Ch 2, dc in each st across; turn. (5 sts)
Row 8: Ch 2, dc2tog, dc in next st, dc2tog; turn. (3 sts)
Row 9: Ch 2, dc3tog; turn. (1 st)
Edge: Ch 1, sc evenly all around feather; break yarn leaving a long tail to sew it to the basket with.
ASSEMBLY:
After sewing the beak, eyes, and wattle to the head, sew the head and tail feathers to the basket.
Happy Thanksgiving everyone! I hope you all have a wonderful holiday with people you love.
The Fine Print
Written pattern copyright Tamara Kelly 2015, all rights reserved. Please do not reprint or repost this pattern, but please do link to this page to share this pattern with others. If you wish to make items for sale from this pattern, or translate it to another language, please visit the About page for details. Thank you to Lion Brand Yarn for providing the yarn for this pattern!
The 2015 Moogly Afghan CAL: Block #23!
It's the penultimate block for 2015 - the year has flown by so fast! Please note that the last block will be shared on November 25th - a day early, due to American Thanksgiving!
Tove Fevang #Crochet Book Giveaway!
When I went to the Knit and Crochet Show this summer, I got to meet Tove Fevang, a fantastic Norweigian designer. I even won one of her books at the banquet! And now I get to do a great big giveaway to share her work with all of you!

Plum Pudding Shawl
Just in time for the winter chill and holiday gift giving... it's the Plum Pudding Shawl!

Snow Drops Reversible Cowl
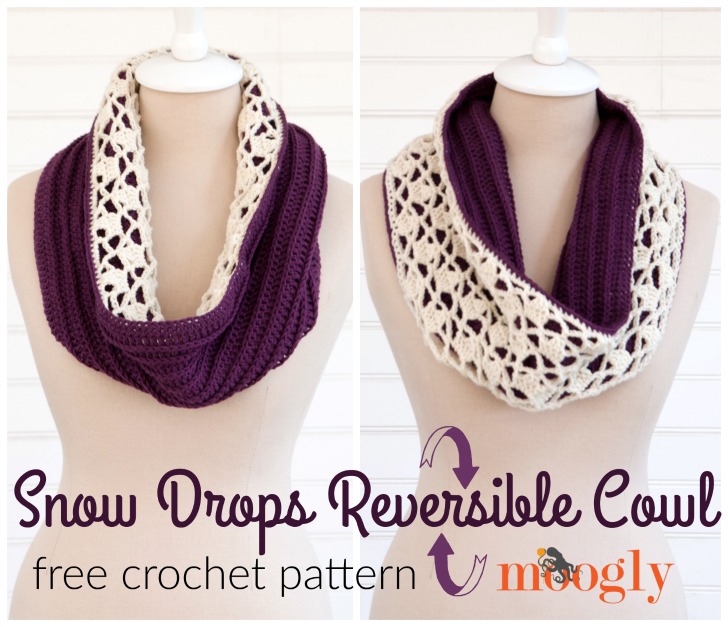
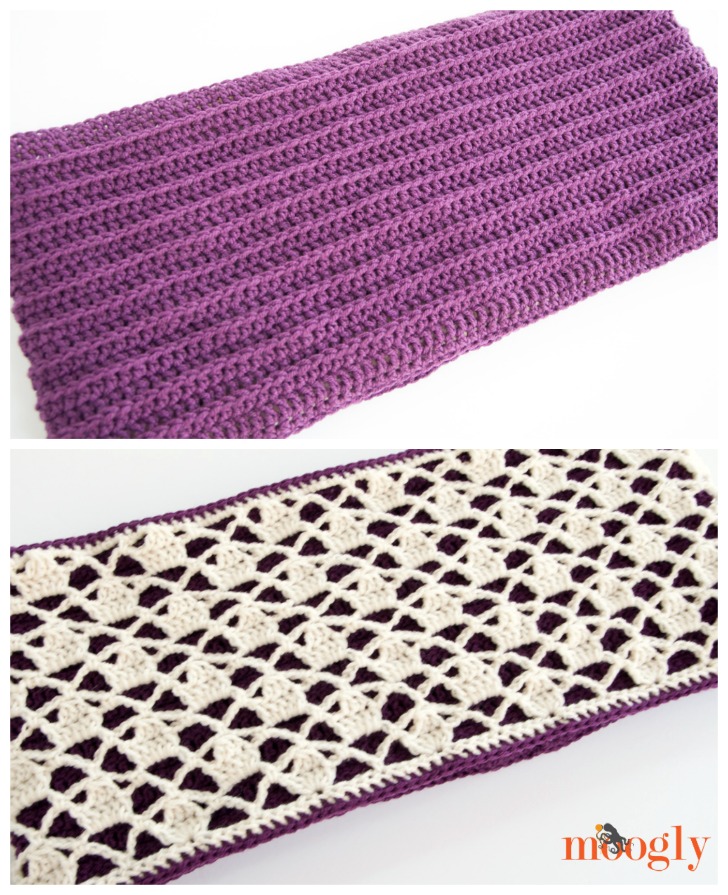
The Snow Drops Reversible Cowl is the perfect balance between modern lines and pretty crochet lace - because it features them both in one super wearable free crochet cowl pattern. Double the thickness means double the warmth - and twice the style! You can flip it over to match your outfit or your mood - or fold it to show off both sides at once.
Disclaimer: This post includes affiliate links.
Prefer an ad-free PDF? You've got options!
Prefer the free blog version? Keep scrolling!

Snow Drops Reversible Cowl
Add this pattern to your Ravelry Queue and Favorites
US-I, 5.5 mm hook - Furls
500 yds LB Collection Superwash Merino (DK/8ply weight yarn; 306 yds/280 m; 100 g/3.53 oz)
Color A - Ivory: 1 ball - 200 yds
Color B - Eggplant: 1 ball - 300 yds
Gauge: 16 sts x 12 rows = 4" in Part 2 st pattern (dc in 3rd loop row and hdc row alternating)
Finished Size: 7.5" wide x 17" wide laid flat (34" around)
To customize the size: Begin with any multiple of 10 sts.
Matching Snow Drops Hat (free crochet pattern)
NOTES:
- This cowl is made in two parts that are then crocheted together. Each part uses just one color/ball of yarn.
- If you prefer not to use foundation stitches, you can start each piece as follows, then go to Round 2 of the pattern pieces:
Round 1: Ch 141, skip the first ch, sc in remaining chs; join to work in the round. (140 sc) - Helpful tutorials: FSC (foundation single crochet); working in the "3rd loop"
PART 1 INSTRUCTIONS (the lace side) - Color A:
Round 1: FSC 140, join to work in the round. (140 sts)
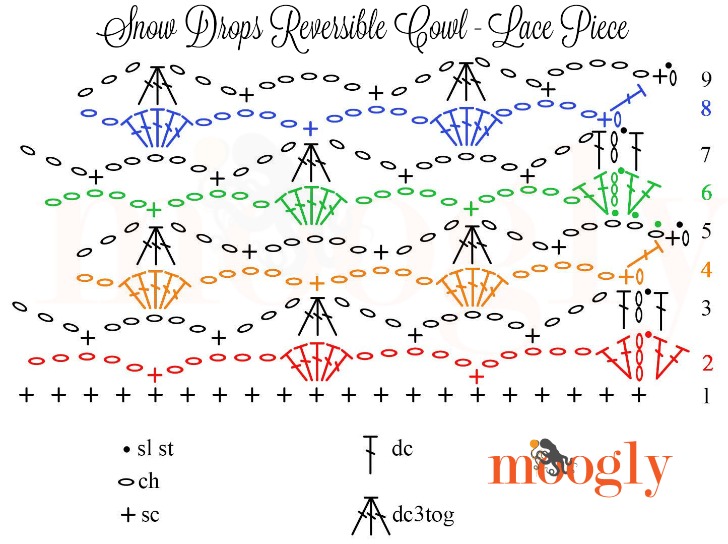
Round 2: Ch 3 (counts as 1st dc), 2 dc in 1st st, *ch 5, skip 4 sts, sc in next st, ch 5, skip 4 sts, ** 5 dc in next st; repeat from * around, finishing last repeat at **, then 2 dc in 1st st of previous round (same st as ch 3 and 2 dc); join to top of ch 3. (14 5-dc shells)
Round 3: Ch 2, skip 1st st, dc in next st, *ch 3, skip next st, sc in next ch-5 sp, ch 5, skip next st, sc in next ch-5 sp, ch 3, skip next st, ** dc3tog over next 3 sts; repeat from * around, finishing last repeat at **, dc in last st, join to 1st dc of round. (14 dc3tog sts)
Round 4: Ch 1, sc in 1st st, *ch 5, skip ch-3 sp, skip next st, 5 dc in next ch-5 sp, ** ch 5, skip next st, skip ch-3 sp, sc in next st; repeat from * around, finishing last repeat at **, ch 2, dc in 1st st of round. (14 5-dc shells)
Round 5: Ch 1, sc in 1st st, *ch 5, skip next st, sc in next ch-5 sp, ch 3, skip next st, dc3tog over next 3 sts, ch 3, skip next st, ** sc in next ch-5 sp; repeat from * finishing last repeat at **, join to 1st sc of round. (14 dc3tog sts)
Round 6: Sl st in next 3 chs, ch 3 (counts as 1st dc), 2 dc in same ch sp, *ch 5, skip next st, skip ch-3 sp, sc in next st, ch 5, skip ch-3 sp, skip next st, ** 5 dc in ch-5 sp; repeat from * finishing last repeat at **, then 2 dc in 1st ch-5 sp (working over the sl sts made at the beginning of this round); join to top of ch 3. (14 5-dc shells)
Round 7: Ch 2, skip 1st st, dc in next st, *ch 3, skip next st, sc in next ch-5 sp, ch 5, skip next st, sc in next ch-5 sp, ch 3, skip next st, ** dc3tog over next 3 sts; repeat from * around, finishing last repeat at **, dc in last st, join to 1st dc of round. (14 dc3tog sts)
Round 8: Ch 1, sc in 1st st, *ch 5, skip ch-3 sp, skip next st, 5 dc in next ch-5 sp, ** ch 5, skip next st, skip ch-3 sp, sc in next st; repeat from * around, finishing last repeat at **, ch 2, dc in 1st st of round. (14 5-dc shells)
Round 9: Ch 1, sc in 1st st, *ch 5, skip next st, sc in next ch-5 sp, ch 3, skip next st, dc3tog over next 3 sts, ch 3, skip next st, ** sc in next ch-5 sp; repeat from * finishing last repeat at **, join to 1st sc of round. (14 dc3tog sts)
Round 10 - 17: Repeat Round 6 - 9 twice.
Round 18: Ch 1, skip 1st st, *sc 5 in ch-5 sp, skip next st, sc 2 in ch-3 sp, sc in next st, sc 2 in ch-3 sp, skip next st; repeat from * around, join to 1st sc of round, break yarn and finish off. (140 sts)
PART 2 INSTRUCTIONS (the solid side) - Color B:
Round 1: FSC 140, join to work in the round. (140 sts)
Round 2: Ch 2 (does not count as a st), dc in each st around; join to 1st dc of round. (140 sts)
Round 3: Ch 1, hdc in each st around; join to 1st hdc of round. (14o sts)
Round 4: Ch 2 (does not count as a st), dc in 3rd loop of each st around; join to 1st dc of round. (140 sts)
Round 5 - 22: Repeat Rounds 3 - 4 nine times.
Round 23: Ch 1, sc in each st around; join to 1st sc of round. (140 sts) Do not break yarn, remove hook and place stitch marker in the active loop to keep it from pulling out during assembly.
ASSEMBLY INSTRUCTIONS - worked with Color B:
- Both pieces are worked in the round, so the right side is the one that was facing you as you crocheted. Turn Part 2 wrong side out, and place wrong sides together, with Part 2 on the inside of Part 1.
- Use stitch markers to attach top and bottom of both parts evenly.
- Replace hook in active loop of Part 2 and sc through both layers of top and bottom. (140 sts on each) Break yarn and weave in ends.
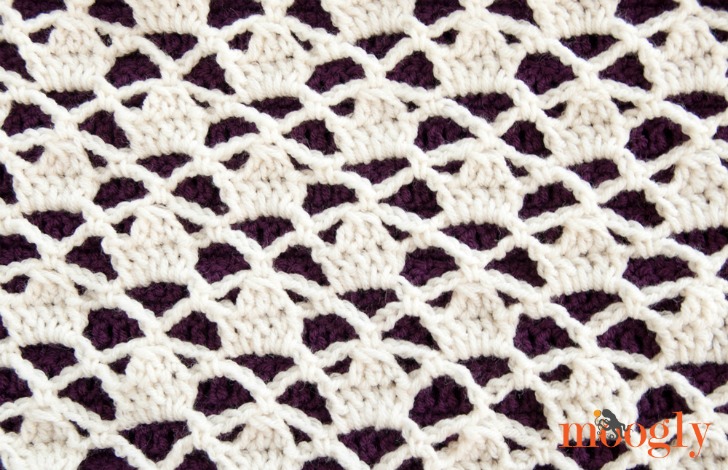
And now you have a reversible cowl! I love the way each side peeks out, however you wear it. And if you prefer long infinity scarves to cowls, just make the first round as long as you like, with any multiple of 10 sts. I hope you enjoy the Snow Drops Reversible Cowl!
The Fine Print
Written pattern copyright Tamara Kelly 2015, all rights reserved. Please do not reprint or repost this pattern, but please do link to this page to share this pattern with others. If you wish to make items for sale from this pattern, or translate it to another language, please visit the About page for details. Thank you to Lion Brand Yarn for providing the yarn for this pattern!
Perfect Fall Poncho Tutorial
The Perfect Fall Poncho has an easy construction - two rectangles seamed together with a hole left for the head in the middle. Can't get easier than that! But the stitches used to create the cable look are unique - so here's a video tutorial for the Perfect Fall Poncho!

Hookin On Hump Day #106: Link Party for the Yarny Arts!
Thank you for joining myself, and my cohost Kara from Petals to Picots, for another round of HOHD, where we share the best crochet and knit projects from around the web twice a month! Hookin on Hump Day is hosted here on Moogly, as well as on Petals to Picots - and the winners each round are featured on both our sites and social media shares! Here are the projects that your clicks and Kara put together this round!

Knitter's Pride Waves #Crochet Hook Set Giveaway
Congratulations Dixie Morrison! You aren't Dixie? You can purchase the Knitter's Pride Waves Crochet Hook Sets on Amazon - thank you to everyone who entered!
***************************************************
I think the only thing a crocheter loves more than yarn... is hooks! Okay, maybe it's a tie. And I've got some new hooks for you to love on today - the Knitter's Pride Waves Crochet Hook Set!

Perfect Fall Poncho
s
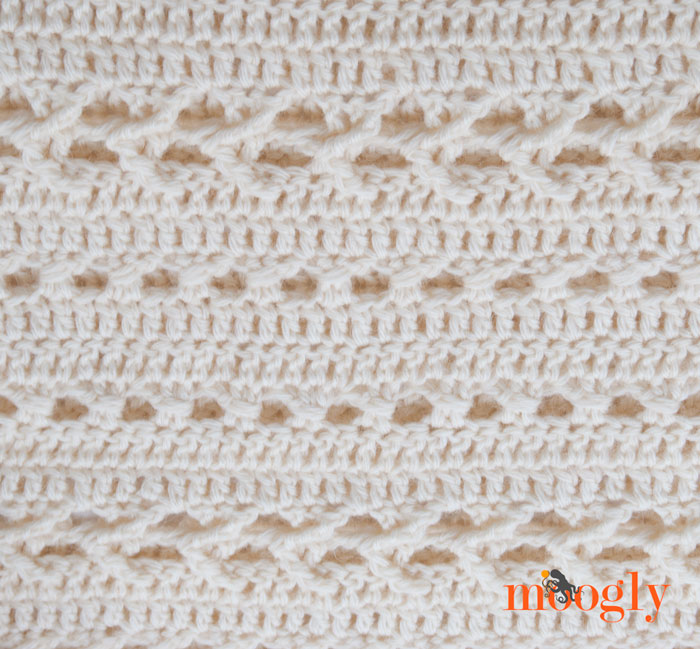
Ponchos are all the rage once again - they are the perfect autumn layer, like a cozy light blanket you can throw on over anything! The Perfect Fall Poncho features a simple cable-look pattern so it works up fast, an easy to wear shape and neutral color (in cozy Lion Brand Fishermen's Wool), and is one size fits just about all adults!
Disclaimer: This post includes affiliate links.
Prefer an ad-free PDF? You've got options!
Prefer the free blog version? Keep scrolling!
Perfect Poncho Proportions
Ponchos are a fantastic first adult garment to make. They are simple in their construction, and easy to adjust for a custom fit - if it's a little too small, make the seams a little shorter... if it's a little too big, make the seams a little longer! Easy as can be!
Perfect Fall Poncho
Add this pattern to your Ravelry Queue and Favorites
US - J, 6.0 mm hook - Furls Fiberarts
1700 yds (4 skeins) Lion Brand Fishermen's Wool (Aran/yarn symbol "4"/UK:10 ply; 465 yds/425 meters; 8.01 ounces; Colorway: Natural)
Stitch Markers - Clover Lock Ring Markers or Clover Wonder Clips
Gauge: 13 sts x 8 rows = 4" in dc
Finished Size: 50" wide x 26" high (after blocking) - fits most adults
Helpful Links and Tutorials
Chainless Starting Double Crochet
Special Stitches:
fpdtr (front post double treble) - yo 3 times, insert hook from front to back around post of indicated stitch, yo and pull up a loop, *yo and pull through 2 loops; repeat from * until 1 loop remains on hook.
bpdtr (back post double treble) - yo 3 times, insert hook from back to front around post of indicated stitch, yo and pull up a loop, *yo and pull through 2 loops; repeat from * until 1 loop remains on hook.
NOTES:
- This pattern is written with a ch-2 start to every row; this is the turning ch and does not count as a st. However, you can choose to use the Chainless Starting Double Crochet instead of the ch 2 and first dc of each row for a cleaner look.
- Odd numbered rows are the Right Side (RS), even numbered rows are the Wrong Side (WS)
Perfect Fall Poncho Instructions
Make 2 (they should each measure approximately 47" x 23" before blocking):
Row 1: Ch 174, skip the 2 chs closest to the hook, dc in each remaining ch to the end; turn. (172 sts)
Row 2: Ch 2, dc in each st across; turn. (172 sts)
Row 3: Ch 2, dc in the 1st 2 sts, ch 1, skip the next st, dc in the next 2 sts, working in front of last 2 sts made, fpdtr around skipped dc stitch, *ch 1, skip the next 2 sts, dc in the next 2 sts, working in front of last 2 sts made, fpdtr around skipped dc stitch; rep from * until 3 sts remain, skip the next st, dc in the last 2 sts, turn. (172 sts inc chs)
Row 4: Ch 2, dc in the 1st 2 sts, *ch 1, skip the next fpdtr st, dc in the next 2 sts, working behind last 2 sts made, bpdtr around skipped fpdtr st; rep from * until 2 sts remain, dc in last 2 sts, turn. (172 sts inc chs)
Row 5: Ch 2, dc in each st and ch sp across; turn. (172 sts)
Row 6: Ch 2, dc in each st across; turn.
Row 7: Ch 2, dc in the 1st 2 sts, *skip the next st, dc in the next 2 sts, dc around the posts of the previous 2 sts; rep from * until 2 sts remain, dc in the last 2 sts, turn.
Rows 8 - 9: Ch 2, dc in each st across; turn.
Row 10: Ch 2, dc in the 1st 2 sts, *skip the next st, dc in the next 2 sts, dc around the posts of the previous 2 sts; rep from * until 2 sts remain, dc in the last 2 sts, turn. (172 sts)
Row 11 and 12: Ch 2, dc in each st across; turn.
Rows 13 - 42: Repeat Rows 3 - 12.
Rows 43 - 46: Repeat Rows 3 - 6, break yarn and finish off.
Assembly:
Place 2 pieces so that RS are facing out and Row 1 of one piece is matched with Row 46 of second piece; use stitch markers to secure them together. Sew 17.5 inches from outside edge on both sides (64 sts), leaving center 12" (44 sts) unworked for neck hole. Before finishing off, try on and make neck hole smaller/larger as needed.
Final Edging: Sc evenly all around outside edge of poncho.
And with that, you have your Perfect Fall Poncho! If you're petite, you might need to close up the neck opening a little more, but this fit my size Medium 13 year old, my 3X self, and my somewhere in between sister - all with very different body shapes! I hope you enjoy it!
The Fine Print
Written pattern copyright Tamara Kelly 2015, all rights reserved. Please do not reprint or repost this pattern, but please do link to this page to share this pattern with others. If you wish to make items for sale from this pattern, or translate it to another language, please visit the About page for details. Thank you to Lion Brand Yarn for providing the yarn for this pattern!
The 2015 Moogly Afghan CAL: Block #22!
Block #22 is here, and we are in the final stages of the 2015 CAL! Please note that the last block will be shared on November 25th - a day early, due to American Thanksgiving!
If you're just now getting started, don't worry - you'll find links to all the previous posts for the CAL in the schedule below! Plus, they'll stay free forever, so you can catch up into 2016, 2017... whenever you like. If this is the first you've heard of the 2015 Moogly Afghan CAL, please CLICK HERE to read how it works! In summary, every 2 weeks I'll share a new free 12" crochet block pattern, and we'll all make them together. All the patterns will be free all year long, and we'll get to visit a variety of fantastic crochet blogs along the way!
Easy Log Cabin Afghan Tutorial
The free crochet Easy Log Cabin Afghan pattern here on Moogly comes with directions written out in two forms, as well as a graphic... and now there's a video tutorial as well!

Yarn Valet YarnballWinder and YarnBowl Giveaway on Moogly!
Yarn Valet is a new company, with a line of yarny accessories that look great, are innovative, and super budget friendly to boot! So when they asked if I'd like to do a review of a couple of their products, I jumped at the chance - and even better, I get to share!

ChiWei Ranck of One Dog Woof: Designer Showcase!
It’s time for October’s Designer Showcase! I like to wrap up each month by having one of my favorite designers share a bit about themselves, and then I follow it up by sharing my 5 favorite free patterns that they've designed! This month I’m excited to share some things from the talented ChiWei Ranck - the blogger and designer behind One Dog Woof!

Squish Slouch Crochet Hat
Squish is fun to make, fun to say, and now, at popular request, there's a fun matching hat - the Squish Slouch! It's a fab one-skein pattern to match the Squish Cowl!
 Disclaimer: Yarn was provided by Lion Brand Yarns; this post includes affiliate links.
[Read more...]
Lazadas Blocking Wire Mix Set Giveaway on Moogly!
I'm a huge fan of blocking - it can do amazing things to your finished crochet and knit projects, taking them from finished to fantastic! But I've always been a pinner - until I got my hands on Lazadas Super Flexible Blocking Wire Mix Set!

Help Support the Alzheimer's Association with "The Knitting Runner!"
Have you heard about David Babcock, also known as “The Knitting Runner”? A professor, husband and father of four, David is also the current Guinness World Record holder for knitting the longest scarf while running a marathon in October of2013 – a whopping 12 feet long! And he’s up to more greatness this year. Just last weekend, with Lion Brand® Yarn Company as his sponsor for the second year in a row, David completed the Kansas City Marathon and crocheted the world’s largest doily!

Hookin On Hump Day #105: Link Party for the Yarny Arts!
Thank you for joining myself, and my cohost Kara from Petals to Picots, for another round of HOHD, where we share the best crochet and knit projects from around the web twice a month! Hookin on Hump Day is hosted here on Moogly, as well as on Petals to Picots - and the winners each round are featured on both our sites and social media shares! Here are the projects that your clicks and I put together this round!

Give Your Handmade Goodies the Unicorn Treatment: A Moogly Giveaway!
This year I got to meet the creators of Unicorn Fibre care products, and I'm so excited to tell you about their fantastic products - and to give some away!
