Like sands through the hourglass... so are the blocks of the yearly Moogly CAL! Time for block #17!


Like sands through the hourglass... so are the blocks of the yearly Moogly CAL! Time for block #17!
Disclaimer: This is a sponsored post and contains affiliate links.
I've had to take a few extra breaks from crochet time lately - to get the kids ready for back to school! Shoes, clothes, and the dreaded school supply list. But Zazzle offers things to help whittle down the list - and my kids were more than happy to take them up on the offer!
The dog days of summer are here, but that doesn't stop the beautiful yarny projects! My fab co-host Kara from Petals to Picots and I have another round of the top crochet and knitting links and patterns here for you! We share your best projects twice a month, from the posts you submit. Hookin on Hump Day is hosted here on Moogly, as well as on Petals to Picots - here are the projects that your clicks and I put together this round!

Recently I was contacted by Sean and Holly from Chetnanigans, and they told me all about their shop - and their amazing handmade wooden goodies made with crocheters in mind! I feel in love with every thing I saw, but had to pick just one item to review for you today. I picked the Furls Organizer - something beautiful to show off my most beautiful hooks!
Earlier this year I was lucky enough to get to travel to central California, and spend some time cooling off at the beach. It was peaceful, and surprisingly chilly! And it inspired the Seaside Ruana - a free crochet wrap pattern here on Moogly!
I was lucky enough to get to know Karen Whooley earlier this year at a Craftsy instructors event, so I knew she had a new class coming out. And when I saw what it was, I had to take it! So here's my review of Mix & Match Crochet Bag Techniques, taught by Karen Whooley!
This tutorial highlights another hand sewing technique that can be very useful for crocheters (and knitters) - the Running Stitch!
Recently I was given a chance to try the Denise Double Ended Tunisian Hooks - but I didn't know how to do Double Ended Tunisian Crochet! Well, that's not a problem, that's a fine opportunity to take the plunge - which is exactly what I did!
I've been having a lot of fun playing with my Cricut when it comes to paper, but I really wanted to combine it with crochet... and teaching a class recently provided the inspiration! I wanted to share with you what I came up with - and how my Cricut and Expressions Vinyl got in the mix! [Read more...]
Have you seen eWoodStory pendants? They are THE hot ticket item for crafty jewelry, and I am so lucky to get to give away four of these pendants one very lucky Moogly reader!

I've got a special surprise for you with block #16... it's designed by me! I hope you like it!
This year I wanted to design a free 12" afghan square that was solid, pretty, and fun to make - and the result is the Joyful Afghan Square!
I got to check out Modern Baby Crochet: 18 Crocheted Baby Garments, Blankets, Accessories, and More by Sharon Zientara - and I get to give away TWO copies to Moogly readers!
The summer heat brings fabulous new projects to share! My wonderful co-host Kara from Petals to Picots and I have another round of the top crochet and knitting links and patterns here for you! We share your best projects twice a month, from the posts you submit. Hookin on Hump Day is hosted here on Moogly, as well as on Petals to Picots - here are the projects that your clicks and Kara put together this round!

Have you noticed how HOT weaving is right now? And I don't mean the temperature outside! So with a Martha Stewart Crafts® DIY Weaver™ in hand, it was time to make my first wall hanging! And I took lots of pictures so you can too!
Now that the first year of Ficstitches Yarns Kits are done, they have two fantastic books to cap it all off - The Secret Stitch, and The Secret Stitch: A Crochet Companion. And I get to give both of them away to one very lucky Moogly reader!
It is HOT out there! And the crochet itch never goes away, so when it's this steamy outside, it's time to crochet with cotton - so Lion Brand is giving away TWELVE balls of their 24/7 Cotton to one lucky winner - right here on Moogly!
The backstitch is a common stitch in embroidery and hand sewing - but it can also be a great tool to use with crochet! Here's how and why to backstitch!
As the world turns... so it’s time for July 2016's Designer Showcase! I like to wrap up each month by having one of my fellow designers share a bit about themselves, and then I follow it up by sharing my 5 favorite free patterns that they've designed! This month I get to share some of the fun and modern designs from the amazing Alexis Middleton - blogger and designer behind Persia Lou!

This free crochet area rug pattern is the bee's knees! The Bee's Knees Crochet Rug features granny hexagons all put together with a pretty edging, in super cushy yarn for that bold, boho chic look that's always hot!
Disclaimer: This post includes affiliate links.


Prefer the free blog version? Keep scrolling!
Made with Lion Brand Wool-Ease Tonal, the free pattern for the Bee's Knees Crochet Rug makes a super squishy floor covering that you can tailor to fit your space - check out all the options shown below! I went with the medium/14 hexagon option, to fit my bathroom - and compliment the Big Bold Chevron Curtain already hanging in there.
The Bee's Knees Crochet Rug works up crazy fast with a big fat hook and Bulky Yarn, and while the hexagons and colors reminded me of a honeycomb, you can mix up the colors to fit your own decor - it would look just as fabulous in bold brights, jewel tones, or understated neutrals - in any room of the home!
Add this pattern to your Ravelry Queue and Favorites
US - M, 9.0 mm hook (Clover Amour)
850 yds Lion Brand Wool-Ease Tonal (80% acrylic/20% wool; Bulky/yarn symbol "5"; 124 yds/113 m; 3.99 oz)
Color A: Buttercup - 3 balls used in rug size shown
Color B: Gray Marble - 4 balls used in rug size shown
This yarn has been discontinued. Recommended substitutions include Lion Brand Scarfie, Two of Wands Hue + Me, or any strong Bulky yarn of your choice.
Large Yarn Needle (Susan Bates Finishing Needles)
Gauge: Motif measures 3 inches across at widest point after Round 1
Finished Size: 14 hexagon layout as shown = 40 inches wide x 46 inches long, customizable
CSDC - Chainless Starting Double Crochet (optional)
Make the number of hexagons indicated for your choice of size/layout - or come up with your own! You can create all sorts of shapes and sizes for your space.

Round 1: With Color A, ch 8, join with a sl st to form a ring; ch 3 (counts as first st, may substitute CSDC if preferred), 2 dc in ring, ch 2, [3 dc in ring, ch 2] 5 times, join to top of ch 3 with sl st. (18 dc, 12 ch)
Round 2: Sl st in next 2 sts, sl st in ch sp, ch 3, (2 dc, ch 2, 3 dc) in same ch sp, *skip next 3 sts, (3 dc, ch 2, 3 dc) in next ch sp; repeat from * around, join to top of ch 3. (36 dc, 12 ch)
Round 3: Sl st in next 2 sts, sl st in ch sp, ch 3, (2 dc, ch 2, 3 dc) in same ch sp, skip next 3 sts, 3 dc in space between last st and next st, skip next 3 sts, *(3 dc, ch 2, 3 dc) in next ch sp, skip next 3 sts, 3 dc in space between last st and next st, skip next 3 sts; repeat from * around, join to top of ch 3, break yarn and finish off. (54 dc, 12 ch)
Round 4: With Color B, join with hdc in any ch-2 sp, (2 hdc, ch 2, 3 hdc) in same ch sp, [skip 3 sts, 3 dc in space between last st and next st] twice, skip 3 sts, *(3 hdc, ch 2, 3 hdc) in next ch sp, [skip 3 sts, 3 dc in space between last st and next st] twice, skip 3 sts; repeat from * around, join to top of ch 3. (72 sts, 12 chs)
Round 5: Ch 1, sc in first 3 sts, 2 sc in next ch sp, sc in next 3 sts, hdc in next 6 sts, *sc in next 3 sts, 2 sc in next ch sp, sc in next 3 sts, hdc in next 6 sts; repeat from *around, join to top of ch 3, break yarn and finish off. (84 sts)

Referencing layout of choice, use Color B to mattress stitch hexagons together, making sure they are all Right Side up.
Round 1: With C0lor B, join to any outside hdc st with a sc, sc in each st before and after each corner or join (see instructions and photos below); join and break yarn.
At Corners (2 sc worked into a ch 2 sp): Work 2 sc in the first sc, 1 sc in the next sc.

At Joins (where the hexagons are sewn together): Work hdc in st before join, dc2tog over last sts that were sewn together, hdc in next st.

Round 2: With Color A, sl st in each st of Edging Round 1; join and break yarn.

And that's the Bee's Knees Crochet Rug! You can go even bigger - or make a long skinny line of them for a hallway, or whatever you like - your imagination is the limit! It's easy to play with if you want to design your own custom rug for your space.
If you find that the edges of your rug want to curl, I recommend steaming them with a hand-head steamer or iron - just don't touch the iron to the rug, hold it an inch or so above the fabric. This will relax the fabric and let it lay flat. I hope you enjoy this free crochet rug pattern here on Moogly!
Written pattern copyright Tamara Kelly 2016, all rights reserved. Please do not reprint or repost this pattern, but please do link to this page to share this pattern with others. If you wish to make items for sale from this pattern, or translate it to another language, please visit the About page for details. Thank you to Lion Brand Yarn for providing the yarn for this pattern!
Rolling right along, it's time for block 15! This block is fun and relaxing to make, just right for kicking back with after a long hot day!
Gleener is known for their laundry helpers - lint brushes and dryer dots. But they have one more fantastic product - super cute Gleener Project Bags! And I'm giving one away today on Moogly!
Can you believe it? Time for another round of our link party, HOHD! Thank you for joining me and my fabulous co-host Kara from Petals to Picots for another round of the top crochet and knitting links and patterns. We share your best projects twice a month, from the posts you submit. Hookin on Hump Day is hosted here on Moogly, as well as on Petals to Picots - here are the projects that your clicks and I put together this round!

Sometimes lots of little things add up. And this time, they've added up to the Amara Shawl!
Disclaimer: This post includes affiliate links.
Prefer an ad-free PDF? You've got options!
Prefer the free blog version? Keep scrolling!
The Amara Shawl was inspired by both beauty, and need! I had beautiful beads from BeadBiz.org waiting for a home, one skein of Lion Brand Shawl in a Ball, and I needed a pineapple-ish something to wear on stage while co-hostessing the Knit and Crochet Fashion Show this year. And I needed it fast!

So... something sparkly and fun, but also super super lightweight - Charleston, South Carolina in July is rather warm after all. That made me think of the stitch pattern I used in the Berry Harvest Bandana Cowl! And that's how the Amara Shawl was born!

Add this pattern to your Ravelry Queue and Favorites
US - J, 6.0mm hook (Furls Fiberarts recommended)
US - 8, .90mm steel hook (Clover Amour recommended)
450 yds Lion Brand Shawl in a Ball (Worsted/”4″; 518 yds/473 m; 5.3 oz)
Colorway shown: Soothing Blue
Stitch Markers (Clover Lock Ring Markers recommended)
Optional: 462 Size 6 Beads - Bead Biz Silver-Lined Crystal shown
Finished Size: 67" wide x 46" along bottom 2 edges
Gauge: 11 sts x 7 rows = 4″ in dc
Stitch Pattern Video Tutorial and Chart
Special Stitch: Add Bead - Using smaller hook, please see the tutorial linked above.
Row 1: Using larger hook, ch 170, skip the ch closest to the hook, *[sc in the next ch, ch 3, skip 1 ch] 4 times, sc in the next ch, ch 5, skip 3 ch, sc in the next ch, ch 5, skip 3 ch; repeat from * until 9 ch remain, [sc in the next ch, ch 3, skip 1 ch] 3 times, sc in the next ch, ch 1, skip 1 ch, dc in the last ch, turn.
Row 2: Ch 1, sc in the ch-1 sp, *[ch 3, sc in the next ch-3 sp] 3 times, ch 5, skip the ch-5 sp, dc in the next sc, ch 5, skip the ch-5 sp, sc in the next ch-3 sp; repeat from * until 3 ch-3 loops remain, [ch 3, sc in the next ch-3 sp] 2 times, ch 1, dc in the last ch-3 sp, turn.
Row 3: Ch 1, sc in the ch-1 sp, *[ch 3, sc in the next ch-3 sp] 2 times, ch 5, skip the ch-5 sp, (dc, ch 1, dc) in the next dc, ch 5, skip the ch-5 sp, sc in the next ch-3 sp; repeat from * until 2 ch-3 loops remain, ch 3, sc in the next ch-3 sp, ch 1, dc in the last ch-3 sp, turn.
Row 4: Ch 1, sc in the ch-1 sp, *[add bead, ch 1] 3 times, sc in the next ch-3 sp, ch 5, skip the ch-5 sp, (dc, ch 1, dc, ch 1, dc, ch 1, dc, ch 1, dc) in the ch-1 sp, ch 5, skip the ch-5 sp, sc in the next ch-3 sp; repeat from * until 1 ch-3 loop remains, add bead, ch 1, add 2 more beads in dc in the last ch-3 sp, turn.
Row 5: Ch 1, sc in the ch-1 sp, *ch 5, skip the ch-5 sp, [sc in the next dc, ch 3, skip the ch-1 sp] 4 times, sc in the next dc, ch 5, skip the ch-5 sp,** dc in the next ch-3 sp; repeat from * ending last repeat at **, sc in the last ch-3 sp, turn.
Row 6: Ch 5, sc in the next ch-3 sp, *[ch 3, sc in the next ch-3 sp] 3 times, ch 5, skip the ch-5 sp, dc in the next dc, ch 5, skip the ch-5 sp, sc in the next ch-3 sp; repeat from * until 3 ch-3 loops remain, [ch 3, sc in the next ch-3 sp] 2 times, ch 1, dc in the last ch-3 sp, turn.
Row 7: Ch 1, sc in the ch-1 sp, *[ch 3, sc in the next ch-3 sp] 2 times, ch 5, skip the ch-5 sp, (dc, ch 1, dc) in the next dc, ch 5, skip the ch-5 sp, sc in the next ch-3 sp; repeat from * until 2 ch-3 loops remain, ch 3, sc in the next ch-3 sp, ch 1, dc in the last ch-3 sp, turn.
Row 8: Ch 1, sc in the ch-1 sp, *[add bead, ch 1] 3 times, sc in the next ch-3 sp, ch 5, skip the ch-5 sp, (dc, ch 1, dc, ch 1, dc, ch 1, dc, ch 1, dc) in the ch-1 sp, ch 5, skip the ch-5 sp, sc in the next ch-3 sp; repeat from * until 1 ch-3 loop remains, add bead, ch 1, add 2 more beads in dc in the last ch-3 sp, turn.
Rows 9 – 40: Repeat Rows 5 – 8.
Row 41: Ch 1, sc in the ch-1 sp, ch 5, skip the ch-5 sp, [sc in the next dc, ch 3, skip the ch-1 sp] 4 times, sc in the next dc, ch 5, skip the ch-5 sp, sc in the last ch-3 sp; turn.
Row 42: Ch 5, sc in the next ch-3 sp, [ch 3, sc in the next ch-3 sp] 2 times, ch 1, dc in the last ch-3 sp; turn.
Row 43: Ch 1, sc in the ch-1 sp, ch 3, sc in the next ch-3 sp, ch 1, dc in the last ch-3 sp; turn.
Row 44: Ch 1, sc in the ch-1 sp, [add bead, ch 1] 3 times (place stitch marker in loop), sc in the last ch-3 sp, do NOT turn.
Even Up the Left Edge: (NOTE: The ch 5 in the second row of each section creates a smooth looking edge on the right, but that’s not the case on the left. So this row is to even that up before we work the final edging.) Working along the left edge, *[ch 1, sl st in side of next row] 3 times, ch 5, sl st in side of next row; repeat from * until you reach the foundation chain, working a sl st and ch 1 along the side of the final triangle (Rows 1 – 4).
Along the top: Ch 1, sc evenly along the foundation chain to opposite corner, working an extra stitch in the end to turn the corner to work along the next side of the triangle,
Along the first side: sc in the 1st ch loop along the side, *dc in the next ch loop, [add bead, ch 1] 3 times, sc in same ch loop; repeat from * to marked loop,
At the point of the shawl: repeat from * once in marked loop, [add bead, ch 1] 5 times, sc in marked loop, [add bead, ch 1] 3 times, dc in marked loop,
Along the second side: ^sc in next ch loop, [add bead, ch 1] 3 times, dc in same ch loop; repeat from ^ to top of shawl, ending with sc in last ch loop; join to 1st st of edging and break yarn.
Now, let's hope the Amara Shawl brings me luck. I hope it brings good luck to all of you too! I can't wait to see your versions as well!
Written pattern copyright Tamara Kelly 2016, all rights reserved. If you wish to make items for sale from this pattern, or translate it to another language, please visit the About page for details. Thank you to Lion Brand Yarn for providing the yarn for this pattern!

You might (or might not) be familiar with Surface Crochet - it's a great way to add interest and embellishments to a project. Surface Single Crochet is similar - but it can also be the jumping off point for something more!
Earlier this year I learned how to needle felt, and it was so much fun - and a lot easier than I expected! So I was super excited when Kelly from Romney Ridge Yarns & Wool asked if I'd like to try out one of their needle felting kits and do a giveaway here on Moogly - and I promptly fell even more in love with needle felting than before!

A good friend, a cold drink, and a cozy chair - all ingredients for a good time! And if your friends are like my friends, the usual invitation includes a note to BYOB - so I created the Bring Your Own Bag so you can show up in style!
Disclaimer: This post includes affiliate links.
Prefer an ad-free PDF? You've got options!
Prefer the free blog version? Keep scrolling!
The Bring Your Own Bag fits cans and bottles of almost every shape and size - well, individual serving sizes anyway! You can fill it up with local brews or kids drinks or whatever you like... and keep everyone hydrated and happy!
There is a little bit of Tunisian in this pattern - and I've linked a tutorial for it below. But if you would prefer to skip the Tunisian crochet, use standard sc sts instead, or swap out Color B with a length of cloth ribbon!

Add this pattern to your Ravelry Queue and Favorites
NOTE: While the stitches used in this pattern are simple, the construction is unique, making this an Intermediate to Advanced pattern.
Row 1: Ch 16, skip the ch closest to the hook, sc in each remaining ch to end; turn. (15 sts)
Row 2 - 26: Ch 1, sc across; turn. (15 sts)
Edging: Ch 1, sc all the way around the rectangle, working extra sts in each corner, for 86 sts total; join and break. (86 sts) Set aside.
1. Make another Part 1 piece, then add the following:
2. Working from the RS, work a line of sc along the center lengthwise. Then work 2 rows of sc across, sectioning the piece in thirds. (See photo below.)

3. Leaving a 12" tail, join with a sc and crochet along the lines shown in the image below. Work 17 rows for each section, leaving a 12" tail at the end of each.

4. Join with a sc and crochet width wise across dividers, and lengthwise across dividers, mimicking the lines created in step 2 of this section.
Row 1: Ch 4, skip the ch closest to the hook, insert the hook and pull up a loop from each chain to the end. (4 loops on hook)
Return Pass: Yarn over and pull through the first loop, *yarn over and pull through 2 loops, repeating from * to end. (1 loop on hook)
Row 2: TSS across, and work standard return pass (as above).

Repeat Row 2 until strap measures 64" long. Finish off and sew ends of strap together without twisting. Mark the join point and the halfway point.
1. Layer the pieces from the bottom up as follows:
Part 1/Bag Bottom (WS up),
Part 3/Strap (line up the marked points in the center as shown below, and secure in place with Color A yarn),
Plastic Canvas (both pieces)
Part 2/Bottom with Dividers (RS/Dividers up)


2. Secure the edges together with stitch markers or clips, and sew Part 1 to Part 2 using Color A yarn, using backstitch and going under top loops of both layers, and going through straps as needed. Secure ends.

Round 1: With Color A, join with a sc to any st of Part 2 Edging, sc in each st around; join. (86 sts)

Round 2 - 20: Ch 1, sc in each st around; join. (86 sts) (NOTE: Keep dividers on the inside, and straps on the outside, as you create the sides of the bag! It helps to secure all the long tails out of the way while you work.) After Round 20, break yarn and finish off.
1. Using the long tails left when making the dividers, sew the dividers to the Bag Sides to create the "6 pack."
2. Using Color A, sew the straps straight up the sides of the bag using the running stitch as shown, continuing the stitch along the handle and down the other side. Repeat on other side of handle, and then on strap on other side of bag. (NOTE: This step sews the handles to the bag, and also creates more stability/less stretch in the handles themselves.)

And that's it! Don't let the construction of this pattern overwhelm you - it's almost all single crochet, and if you go step by step you can do it! Then you can fill up the Bring Your Own Bag with your beverage of choice and head out to celebrate a new crochet project! I can't wait to see how you all put your own custom spin on it!
Written pattern copyright Tamara Kelly 2016, all rights reserved. Please do not reprint or repost this pattern, but please do link to this page to share this pattern with others. If you wish to make items for sale from this pattern, or translate it to another language, please visit the About page for details. Thank you to Lion Brand Yarn for providing the yarn for this pattern!
Tada! Welcome to the post for Block #14! My daughter is 14 this summer, and this block makes me think of her - entertaining, pretty, fun, and clever!
Last year you might remember I gave away a Gleener Ultimate Fuzz Remover - a fantastic lint removal tool. Well, this year the same company has something new for you to try - Dryer Dots!
Whew, it's mid summer and muggy here in Iowa. But the bright spot of the day is HOHD! Thank you for joining me and my delightful co-hostess Kara from Petals to Picots for another round of the top crochet and knitting links and patterns. We share your best projects twice a month, from the posts you submit. Hookin on Hump Day is hosted here on Moogly, as well as on Petals to Picots - here are the projects that your clicks and I put together this round!
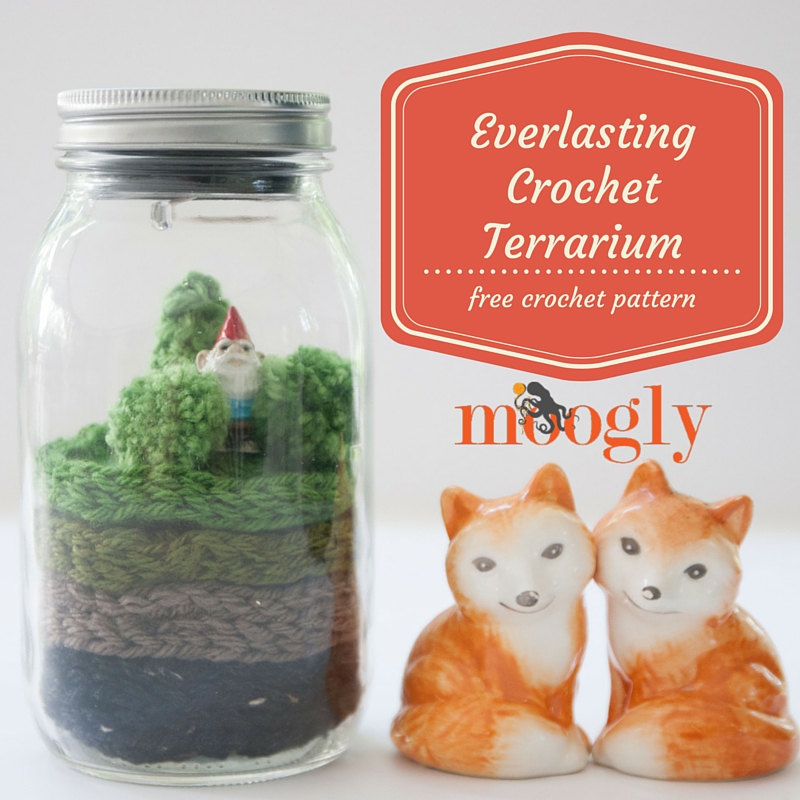
I love terrariums, and gnomes, and fairy gardens, and canning jar crafts... and I have a black thumb. I can grow a few edibles out on the deck, but keep actual house plants alive? Fuggedaboutit. And I know I'm not alone! So I've come up with a cute terrarium, right in a canning jar, no green thumb or pricey fairy "garden furniture" required - and it even lights up! Introducing the Everlasting Crochet Terrarium!
Did you know I teach classes on Craftsy? My most recent class is Crochet Crocodile Stitch, and if you haven't heard about it, well, watch this!
There are several great methods for adding beads to your crochet, and they all have their advantages and disadvantages. Here's one method many people like - adding beads with a crochet hook!
Recently I was sent the Zippy Loom to try out and see what I think - and I think it's a lot of fun! I had a grand time playing with it, and I think you will too. And I've got a discount for you to make it even better!
It’s time for June's Designer Showcase! I like to wrap up each month by having one of my fellow designers share a bit about themselves, and then I follow it up by sharing my 5 favorite free patterns that they've designed! We ended up skipping May this year - not enough days in the month! But I've brought it back for June so I can share some of the lovely designs from the talented Lauren Brown - blogger and designer behind Daisy Cottage Designs!


The Cupcake Toddler Purse pattern is the last part of the June 2016 Mini Crochet Along here on Moogly! This is a fun twist on or addition to the Cupcake Baby Blanket, making a perfect present for "big sister" when a new baby comes along! I hope you enjoy it!

Just like the Cupcake Baby Blanket, this purse has tons of great texture, with post stitches, and treble crochets. There's a handle just the right size for littles, with no long straps to put them at risk. Heck, it's so cute I'm tempted to carry it myself as a clutch! Best of all, you can make it with the yarn you'll have leftover after making the blanket - stashbuster!

US – H, 5.0mm hook - Furls Fiberarts
90 yds Lion Brand Ice Cream Big Scoop (100% acrylic; DK/yarn symbol “3”; 1117 yds/1021 m; 10.02 oz; Colorway shown: Tutti Frutti) – CA
60 yds Lion Brand Ice Cream (100% acrylic; DK/yarn symbol “3”; 394 yd/360 m; 3.50 oz); Colorway shown: Sprinkles – Rainbow) – CB
Recommended: Clover Lock Ring Markers
Gauge: 14 sts x 8 rows = 4″/10cm in dc
Finished Size: 8.75" wide x 8" tall at largest points
Row 1: Ch 23, skip the 2 chs closest to the hook, dc in each remaining ch; turn. (21 sts)
Row 2: Ch 2 (does not count as a st), dc in 1st 7 sts, hdc in next 7 sts, sc in last 7 sts; turn.
Row 3: Ch 2, dc in each st across; turn.
Row 4: Ch 2, dc in 1st st, fpdc in each remaining st across; turn.
Row 5: Ch 1, sc in 1st 7 sts, hdc in next 7 sts, dc in last 7 sts; turn.
Row 6: Ch 2, dc in each st across; turn.
Row 7: Ch 2, bpdc in each st until 1 st remaining, dc in last st; turn.
Row 8: Ch 2 (does not count as a st), dc in 1st 7 sts, hdc in next 7 sts, sc in last 7 sts; turn.
Row 9: Ch 2, dc in each st across; turn.
Rows 10 - 21: Repeat Rows 4 - 9 twice; do not turn after Row 21. Instead, turn work 90 degrees to work across the longest side of Rows 21 – 1.
Row 22: Ch 1, sc evenly across sides of rows, working 2 sc in side of each row, for 42 total sts; break yarn. (42 sts)
NOTE: Push tr sts to "back" or RS before crocheting the next st.
Row 23: Join to 1st st made in Row 22 (from RS), dc in each st across; turn. (42 sts)
Row 24: Ch 1, sc in 1st st, *skip the next st, (tr, sc) in next st; rep from * across until 1 st remains, sc in last st, turn. (42 sts)
Row 25: Ch 2, dc2tog twice (in 1st 4 sts), dc in each st across until 4 sts remain, dc2tog twice (in last 4 sts); turn. (38 sts)
Row 26: Sl st in 1st 3 sts, ch 1, sc in next st, *skip the next st, (tr, sc) in next st; rep from * across until 4 sts remains, sc in next st, last 3 sts remain unworked, turn. (32 sts)
Row 27: Ch 2, dc2tog (in 1st 2 sts), dc in each st across until 2 sts remain, dc2tog (in last 2 sts); turn. (30 sts)
Rows 28 and 29: Repeat Row 24 and 25. (26 sts)
Row 30: Sl st in 1st 3 sts, ch 1, sc in next st, [skip the next st, (tr, sc) in next st] twice, ch 10, skip 10 sts, sc in the next st, [skip the next st, (tr, sc) in next st] twice, last 3 sts remain unworked; turn. (10 sts, 10 chs)
Row 31: Ch 2, dc2tog twice (in 1st 4 sts), dc in next 5 sts, tr3tog in same st as previous st and next 2 sts, picot, dc in same st as last part of the tr3tog, dc in next 5 sts, dc2tog twice (in last 4 sts); break yarn.
With CA, sc evenly around purse, working 3 sc in the picot. (Tip: Cut out any white sections or yarn for the edging to make it "pop" more!)
Assembly: Holding wrong sides of purse pieces together, use CA to work single crochet seaming through both layers of the cupcake (straight side, across the bottom, up the other straight side) starting at Row 25 and ending at the other end of Row 25.
And that's the Cupcake Toddler Purse! I hope you've enjoyed this June Mini CAL here on Moogly! It's been fun - and made me a little hungry! Let me know what you think in the comments!

Written pattern copyright Tamara Kelly 2016, all rights reserved. Please do not reprint or repost this pattern, but please do link to this page to share this pattern with others. If you wish to make items for sale from this pattern, or translate it to another language, please visit the About page for details. Thank you to Lion Brand Yarn for providing the yarn for this pattern!
It's time for lucky 13 - the perfect square for a hot midsummer afternoon! So let's start the first block of the second of this year's CAL! Wow!! Welcome to the post for Block #13!
From big brands to boutique makers to fellow bloggers and designers, it's my privilege to be a part of The National Needlearts Association. And my most recent yarny trip was to Washington D.C., for the Summer 2016 TNNA Show! Grab a cuppa and settle in, I've got a lot of pictures to share!
Happy Hump Day! Or rather, the evening before - I don't know why link parties start the night before, but that's what I was told way back when I was a baby blogger, and well... here we are! It's HOHD again and I want to say thank you for joining me and my fantastic co-hostess Kara from Petals to Picots for another round of the mostest bestest crochet and knitting links and patterns. We share your best projects twice a month, from the posts you submit. Hookin on Hump Day is hosted here on Moogly, as well as on Petals to Picots - here are the projects that your clicks and I put together this round!