Have you seen the new autumn lookbook on Annie's? It's full of fantastic patterns, so lovely and lush! And I get to give one of them away - along with the yarn to make it - here on Moogly!
 Disclaimer: This post includes affiliate links.

Have you seen the new autumn lookbook on Annie's? It's full of fantastic patterns, so lovely and lush! And I get to give one of them away - along with the yarn to make it - here on Moogly!
Disclaimer: This post includes affiliate links.
Crocheting and knitting for children is so close to my heart - and I know that many of you like to donate your time and efforts to worthy causes as well! So I'm happy to be able to bring you this guest post from Johanna Farnham today! And if this speaks to you, please do consider helping out!

The Changing Leaves Basket turns the crocodile stitch into a cascade of falling leaves in all the beautiful colors of autumn. A celebration and decoration for all things fall!
Disclaimer: This post includes affiliate links.
Prefer an ad-free PDF? You've got options!


Prefer the free blog version? Keep scrolling!
This basket is a great stash-buster - especially after you've finished up the Happiest Blanket Ever! Or you can use all your various shades of green for something springy and summery! I think the Changing Leaves Basket perfectly captures both a modern, clean look, and a whimsical gnomes and fairies look - two of my favorites!

Add this pattern to your Ravelry Queue and Favorites
US-I, 5.5 mm hook - Furls Fiberarts
410 yds Lion Brand Vanna's Choice (Aran/yarn symbol “4”/UK: 10 ply; 145 yds; 3oz)
Color A - Chocolate (115 yds)
Color B - Fern (40 yds)
Color C - Kelly Green (40 yds)
Color D - Mustard (40 yds)
Color E - Honey (40 yds)
Color F - Rust (40 yds)
Color G - Terracotta (40 yds)
Color H - Cranberry (55 yds)
Gauge: 3.5" diameter after Round 3
Finished Size: 8" diameter x 6" tall
Helpful Video Tutorials: magic circle, crocodile stitches
Crocodile Scale Stitches (see linked tutorial above): *starting at the first dc in a pair of dc sts, work 5 fpdc sts around the first dc moving from the top of the post to the bottom, ch 1, work 5 fpdc sts around the second dc moving from the bottom of the post to the top, sl st in next single dc st; repeat from * around, join to 1st dc (starting point for the round) with a sl st.
Round 1: With Color A, make a magic circle, ch 2 (does not count as a st here and throughout), work 12 dc into the ring; join to 1st st with a sl st. (12 dc)
Round 2: Ch 2, 2 dc in each st around; join. (24 sts)
Round 3: Ch 2, *dc in the next st, 2 dc in the next st; repeat from * around, join. (36 sts)
Round 4: Ch 2, *2 dc in the next st, dc in the next 2 sts; repeat from * around, join. (48 sts)
Round 5; Ch 2, *dc in the next 3 sts, 2 dc in the next st; repeat from * around, join. (60 sts)
Round 6: Ch 2, *dc in the next 4 sts, 2 dc in the next st; repeat from * around, join. (72 sts)
Round 7: Ch 2, *2 dc in the next st, dc in the next 5 sts; repeat from * around, join. (84 sts)
Round 8: Ch 2, dc in each st around; join and break yarn. (84 sts)
Round 9: With Color B, repeat Round 8.
Rnd 10: With Color C, repeat Round 8.
Round 11: With Color D, repeat Round 8.
Rnd 12: With Color E, repeat Round 8.
Round 13: With Color F, repeat Round 8.
Rnd 14: With Color G, repeat Round 8.
Round 15: With Color H, repeat Round 8. Set liner aside.
Round 1 - 8: With Color A, repeat Rounds 1-8 of liner.
Round 9: With Color B, join to any st of Round 8, ch 4 (counts as dc and ch 1), skip 2 sts, 2 dc in next st, ch 2, skip 2 sts, *dc in next st, ch 1, skip 2 sts, 2 dc in next st, ch 2, skip 2 sts; repeat from * around, join to 3rd ch of ch-4. (42 dc)
Round 10: Work Crocodile Scale Stitches around (see special stitch and linked tutorial above); break yarn. (14 crocodile stitch scales)
Round 11: With Color C, join to center of any crocodile stitch scale, ch 4 (counts as dc and ch 1), 2 dc in next sl st (the single dc st), ch 2, *dc in center of next scale, ch 1, 2 dc in next sl st, ch 2; repeat from * around, join to 3rd ch of ch-4. (42 dc)
Round 12: Repeat Round 10.
Rounds 13 and 14: With Color D, repeat Rounds 11 and 12.
Round 15 and 16: With Color E, repeat Rounds 11 and 12.
Round 17 and 18: With Color F, repeat Rounds 11 and 12.
Rounds 19 and 20: With Color G, repeat Rounds 11 and 12.
Round 21 and 22: With Color H, repeat Rounds 11 and 12, do NOT break yarn.
Round 23: Insert liner into outer, wrong sides together. Continuing with Color H, ch 1, sc through 1st st and any inner st, 2 sc in next ch-1 sp of Round 21 (working behind the Round 22 scale) and next 2 liner sts, sc in center of next scale and next liner st, 2 sc in next ch-2 sp of Round 21 (working behind the Round 22 scale) and next 2 liner sts, *sc in next Round 21 sl st/dc and next inner st, 2 sc in next ch-1 sp of Round 21 (working behind the Round 22 scale) and next 2 liner sts, sc in center of next scale and next liner st, 2 sc in next ch-2 sp of Round 21 (working behind the Round 22 scale) and next 2 liner sts; repeat from * around, join. (84 sts)
Round 24: Ch 1, sc in 1st 7 sts, ch 10, skip 10 sts, sc in next 32 sts, ch 10, skip 10 sts, sc in last 25 sts; join. (84 sts including chs)
Round 25: Ch 1, sc in each st and ch around; join. (84 sts)
Round 26: Ch 1, sc in each st around; join. (84 sts)
Round 27: Sl st in each st around; join and break. (84 sts)

And that's the Changing Leaves Basket! So pretty filled with apples, Halloween candy, or just those odds and ends that need a home! I hope you enjoy this free crochet basket pattern, and have a wonderful autumn season!
Written pattern copyright Tamara Kelly 2016, all rights reserved. Please do not reprint or repost this pattern, but please do link to this page to share this pattern with others. If you wish to make items for sale from this pattern, or translate it to another language, please visit the About page for details. Thank you to Lion Brand Yarn for providing the yarn for this pattern!
Our CAL is old enough to drink, haha! And you can feel free to pour yourself a cup of whatever floats your boats or totes your goats as you dive into the newest square - Block #21!

The Tidal Wave Shawl is a great pattern for beginners - it's all double crochet stitches, and a great way to learn increases and decreases. And at the same time, it's a fab pattern for experienced crocheters to customize and make their own! No matter your level of experience, the Tidal Wave Shawl tutorial will show you how it's done!
It's almost time for I Love Yarn Day again! The sixth annual I Love Yarn Day will take place Saturday, October 15th and to celebrate the yarn industry will come together for another year of “stitching it forward” and spreading the love of yarn world-wide. Here's what it's all about, and how you can join in the fun!

The Oh My Cowl is so soft, so luxurious, so drapey, and so lovely, it'll make you sigh, "Oh my!" Or maybe just ooo and ahhh...
 Disclaimer: This post includes affiliate links. [Read more...]
Lion Brand has thousands and thousands of free patterns on their site... and here are some of my favorite free crochet patterns to help you celebrate and decorate for Halloween!
Are you looking for crazy cute nature themed crochet patterns for babies? Then you'll want to check out Nature's Gifts for Baby by Sara Leighton! I was lucky enough to receive a copy for review - and 3 more to give away here on Moogly!
 Disclaimer: This post includes affiliate links. [Read more...]
Welcome back to Hookin On Hump Day, hosted here on Moogly and with my fantastic co-host Kara from Petals to Picots ! HOHD is a link party where you can submit your blog posts to be featured - and/or see the best new projects available on blogs across the web! We share your most clicked projects twice a month, from the posts you submit. It's a great way to check out projects from all over the web, and to promote your own! Here are the projects that your clicks and Kara put together this round!
A couple of years ago I highlighted the Little Hearts Matter Handmade Hearts Campaign. And I'm excited to share that they have renewed their efforts for 2016!

This is the Happiest Blanket Ever! Or at least the happiest blanket I've ever made. It was fun to make, and puts a smile on my face every time I look at it - I hope it does the same for you!
Disclaimer: This post includes affiliate links.
Prefer an ad-free PDF? You've got options!


Prefer the free blog version? Keep scrolling!
The Happiest Blanket Ever is great in any size - and there's a chart with all the sizes below. You can go with just 2 colors, or the rainbow riot of colors shown here - it's a great stashbuster! And with its easy 2 row repeat can relax you as you crochet. And the border will have you on cloud nine!

Add this pattern to your Ravelry Queue and Favorites
US - K, 6.5mm hook (Furls Fiberarts used)
1240 - 8600 yds Lion Brand Vanna's Choice (yarn symbol “4”/Aran; 145 yds; 3oz)
Main Color - White
A - Eggplant
B - Purple
C - Sapphire
D - Aqua
E - Fern
F - Radiant Lime
G - Mustard
H - Honey
I - Rust
J - Terracotta
K - Scarlet
L - Cranberry
Gauge: 5 pattern repeats x 8 rows = 4" in pattern
Helpful Links and Tutorials:
Happiest Blanket Ever Tutorial
Special Stitch: V st - (dc, ch 1, dc) in indicated stitch
Row 1: With Main Color, ch for size as indicated in chart above, skip 1st 4 ch (counts as dc and skip 1 st), *V st in next ch, skip 2 chs; repeat from * to end, dc in last ch finishing st with Color A, turn.
Row 2: Ch 1, sc in 1st 2 sts, *ch 1, skip ch-1 sp, sc in next 2 sts; repeat from * to end, break yarn, do NOT turn.
Row 3: Insert hook in 1st st made in Row 2, yarn over with Main Color, ch 3 (counts as dc), V st in each ch-1 sp across, dc in last st finishing with next Color; turn.
Repeat Rows 2 and 3, cycling through Colors, ending with a Row 3 repeat (see chart above for Row count).
Rnd 1: With Main Color, sc evenly around blanket, working 3 sc in each corner. When crocheting along the side edges, ch 1 over the accent colored rows, and work 2 sc in the side of the Main Color Rows; join.
Rnd 2: Ch 2, dc in each st and ch-1 space around, working 3 dc in each corner; join.
Rnd 3: Work a repeat of [sc in next st, skip 2 sts, 5 dc in next st, skip 2 sts] around blanket, working [sc, 5 dc, sc) in the 3 sts of each corner; join and break yarn.
Rnd 4: With accent Color of choice (Aqua shown), shallow bpsc in each st around; join and break yarn. Weave in ends.

And that's the Happiest Blanket Ever! It's currently the star of my guest room, sure to make my next overnight guest feel a little cheerier and at home. I can't wait to see what colors you choose for your own Happiest Blanket Ever! I hope you enjoy this free crochet blanket pattern!
Written pattern copyright Tamara Kelly 2016, all rights reserved. Please do not reprint or repost this pattern. Please do link to this page to share this pattern with others. For more information, please visit the About page for details. Thank you to Lion Brand Yarn for providing the yarn for this pattern!
The number of blocks left for 2016 can be counted on just one hand!! Wow! And now it's time for block #20 in the Moogly Afghan Crochet Along!
Thank you so much to Jessica from Mama In A Stitch for putting together this fantastic guest post! Her patterns are absolutely gorgeous! Check out 5 of her favorites below!

Extended stitches are a fun way to get a little more drape, a little more height, and a little more interest with a simple twist on the stitches you already know! I've shared the extended single crochet tutorial here, and now it's time for the extended double crochet!
Lion Brand's Wool-Ease family of yarns is so fun and versatile, and they remind me a little bit of Goldilocks and the Three Bears. You've got Wool-Ease at Worsted weight, Wool-Ease Thick and Quick at Super Bulky, and in between, sizes juuuuust right, you've got the newest member of the family - bulky Wool-Ease Tonal!

The Tidal Wave Shawl was an experiment in shaping and color - and the result is a unique and delightful piece that looks great no matter how you wear it!
Disclaimer: This post includes affiliate links.
Prefer the free blog version? Keep scrolling!
I shared a sneak peek of this shawl on Facebook Live, and asked for a name - and several of you suggested Tidal Wave, which is just perfect! It starts small, and grows slowly, ending with bright bursts of color! Asymmetrical and slightly curved, it's actually very simple to make - I hope you enjoy it!

Add this pattern to your Ravelry Queue and Favorites
US - J, 6.0 mm hook - Furls Fiberarts
665 yds Lion Brand LB Collection Superwash Merino (100% merino; DK/yarn symbol "3"/UK - 8 ply; 306 yds/280 m; 3.53 oz)
Color A - Charcoal (2 balls, 415 yds)
Color B - Aqua (1 ball, 250 yds)
Stitch Marker - Clover Lock Ring Markers
Finished Size: 66.5" max length, 33.5" max width, 21.5" depth at point
Gauge: 13 sts x 8 rows = 4"/10cm in dc
Video tutorial for Main/Shawl portion of this pattern
Video tutorial for the Edging portion of this pattern

NOTES:
Put a stitch marker on one side of the shawl as you work, so that you always know which side is the decrease side vs the increase side (begins at Row 4). The ch 2 at the beginning of each row does not count as a stitch.
Row 1: With Color A, ch 2, skip ch closest to the hook, 3 dc in lst ch; turn. (3 sts)
Row 2: Ch 2, 2 dc in the 1st st, dc in next 2 sts; turn. (4 sts)
Row 3: Ch 2, dc2tog, 2 dc in each of last 2 sts; turn. (5 sts)
Row 4: Ch 2, 2 dc in each of 1st 2 sts, dc in the next st, dc2tog; turn. (6 sts)
Row 5: Ch 2, dc2tog, dc in each st until 2 sts remain, 2 dc in each of last 2 sts; turn. (7 sts)
Row 6: Ch 2, 2 dc in each of 1st 2 sts, dc in each st until 2 sts remain, dc2tog; turn. (8 sts)
Rows 7 - 70: Repeat Rows 5 and 6, increasing 1 st per row; break yarn after Row 70. (72 sts in Row 70)
Row 71: With Color B, join to 1st st with a sl st, repeat Row 5; turn and break yarn. (73 sts)
Rows 72 and 73: With Color A, join to 1st st with a sl st, repeat Row 6 and Row 5; turn and break yarn. (75 sts in Row 73)
Rows 74 and 75: With Color B, join to 1st st with a sl st, repeat Row 6 and Row 5; turn and break yarn. (77 sts in Row 75)
Rows 76 and 77: With Color A, join to 1st st with a sl st, repeat Row 6 and Row 5; turn and break yarn. (79 sts in Row 77)
Rows 78 - 80: With Color B, join to 1st st with a sl st, repeat Row 6, then repeat Rows 5 and 6; turn and break yarn. (82 sts in Row 80)
Rows 81 and 82: With Color A, join to 1st st with a sl st, repeat Rows 5 and 6; turn and break yarn. (84 sts in Row 82)
Rows 83 - 86: With Color B, join to 1st st with a sl st, repeat Rows 5 and 6 twice; turn and break yarn. (88 sts in Row 86)
Rows 87 and 88: With Color A, join to 1st st with a sl st, repeat Rows 5 and 6; turn and break yarn. (90 sts in Row 88)
Rows 89 - 93: With Color B, join to 1st st with a sl st, repeat Rows 5 and 6 twice, then repeat Row 5; turn and break yarn. (95 sts in Row 93)
Rows 94 and 95: With Color A, join to 1st st with a sl st, repeat Row 6 and Row 5; turn and break yarn. (97 sts in Row 95)
Rows 96 - 101: With Color B, join to 1st st with a sl st, repeat Row 6, then repeat Rows 5 and 6 twice, then repeat Row 5; turn and break yarn. (103 sts in Row 101)
Rows 102 and 103: With Color A, join to 1st st with a sl st, repeat Row 6 and Row 5; break yarn, do not turn. (105 sts in Row 103)
Edging: With Color B, join to last st made with a sl st, ch 1, 2 sc in same st, (working across top of shawl) *ch 2, sc in side of next row, repeat from * to next point, 3 sc in st at point, (working across left side of shawl) repeat from * again to next point, 3 sc in st at point, (working across right side of shawl) ^ch 2, skip 1 st, sc in next st, repeat from ^ to end of round; join and break yarn. Block if desired.

And that's the Tidal Wave Shawl! Simple stitches with color changes and shaping create a pattern that's easy to crochet, and easy to wear. I can't wait to see what colors you choose!
Written pattern copyright Tamara Kelly 2016, all rights reserved. Please do not reprint or repost this pattern, but please do link to this page to share this pattern with others. If you wish to make items for sale from this pattern, or translate it to another language, please visit the About page for details. Thank you to Lion Brand Yarn for providing the yarn for this pattern!
 Disclaimer: This post includes affiliate links.
When I filmed my video on how to gather the crowns of hats, I needed a hat to demonstrate with. So I quickly whipped up a tiny hat. And then I got requests for the hat pattern itself! So here it is - the Super Speedy Preemie Hat!
[Read more...]
Brenda and Jim from LickinFlames are two of my favorite people to see at yarny conventions! And not just because they are nice people - but they have amazing products! LickinFlames is their business, and their passion, and after trying one of their new yarn bowls, I just had to share - and host a new giveaway here on Moogly! [Read more...]
Thank you once again for joining my co-host Kara from Petals to Picots and myself for another fantastic round of Hookin On Hump Day! HOHD is a link party where you can submit your blog posts to be featured - and/or see the best new projects available on blogs across the web! We share your most clicked projects twice a month, from the posts you submit. Hookin on Hump Day is hosted here on Moogly, as well as on Petals to Picots - here are the projects that your clicks and I put together this round!

The amazing Melissa Leapman has a brand new book out - the Indispensable Stitch Collection for Crocheters! I was lucky enough to get a copy to review, and even better, I get to host a giveaway for this fantastic stitch dictionary!
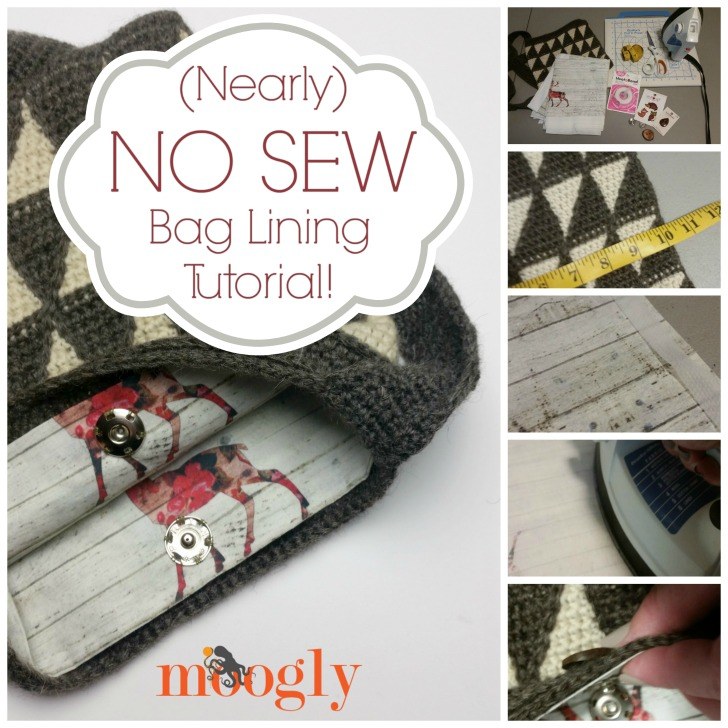
Crochet bags, purses, and totes are fun to make, and fun to use! But sometimes a bag just really needs a liner before it's ready to go out on the town. Oh, but you don't have a sewing machine, and that's too much to sew by hand? No problem! Here's my nearly no sew bag lining tutorial - for a custom bag lining you can make in just minutes!
This year is flying by, and the stack of squares ready for joining gets one taller today! Presenting the 2016 Moogly Afghan Crochet Along block #19!
What happens when you make a hat from the brim up to the crown? Well, odds are you'll decrease for a few rounds, and then you'll need to "gather to close" the last round with a yarn needle. What does that mean? How do you "gather the last round" of your project? Here are two methods for gathering hat rounds!
I do so love a good crochet hook - and a great case to keep them in! And the Knit Picks crochet hooks and case definitely qualify - so I'm giving away a set right here on Moogly!

Earlier this summer I got to spend some time in the southwest of the US, and that trip inspired the Capulin Cross Body Bag!
Disclaimer: This post includes affiliate links.
Prefer the ad-free PDF? You've got options!
Prefer the free blog version? Keep scrolling!
The Capulin Cross Body Bag is made using the tapestry technique - you crochet over the unused yarn, and then switch colors (repeatedly) over the course of each round, creating images and shapes! I've got a tutorial for the tapestry technique below. One touch I added - surface crochet along all the straight lines, to really sharpen up the triangles! I think it gives this pattern a more polished look - one you can omit if you prefer!

Add this pattern to your Ravelry Queue and Favorites
US - H, 5.0mm hook - Furls
375 yds Lion Brand Fisherman's Wool (Aran/10 ply; 465 yds/425 meters; 8.01 ounces)
Color A (CA): Brown Heather - 1 skein (265 yds)
Color B (CB): Natural - 1 skein (110 yds)
Finished Size: 10.5" x 10.5", excluding handle/strap
Gauge: 18 sts x 15 rows = 4"/10cm in hdc (in pattern)
This pattern using tapestry crochet techniques. To switch colors, finish the previous stitch (the final yo and pull through) with the new color. Crochet over the unused color. See the above linked tutorials for a demonstration of this technique, and the other techniques used in this pattern.
Round 1: With CA, ch 48, skip the ch closest to the hook, hdc in each remaining ch across, hdc again in last st, hdc across opposite side of foundation chain, hdc again in last foundation chain; join to 1st hdc with sl st. (96 sts in every round of bag before handles)
Round 2: Ch 1, *with CA hdc 7, with CB hdc 1; repeat from * around, join with CA.
Round 3: Repeat Round 2; join with CB.
Rounds 4 and 5: Ch 1, with CB hdc 1, *with CA hdc 5, with CB hdc 3; repeat from * around, finishing last repeat with CB hdc 2, join with CB.
Rounds 6 and 7: Ch 1, with CB hdc 2, *with CA hdc 3, with CB hdc 5; repeat from * around, finishing last repeat with CB hdc 3, join with CB.
Round 8: Ch 1, with CB hdc 3, *with CA hdc 1, with CB hdc 7; repeat from * around, finishing last repeat with CB hdc 4, join with CB.
Round 9: Repeat Round 8; join with CA.
Rounds 10 and 11: Ch 1, with CA hdc 3, *with CB hdc 1, with CA hdc 7; repeat from * around, finishing last repeat with CA hdc 4, join with CA.
Rounds 12 and 13: Ch 1, with CA hdc 2, *with CB hdc 3, with CA hdc 5; repeat from * around, finishing last repeat with CA hdc 3, join with CA.
Round 14: Ch 1, with CA hdc 1, *with CB hdc 5, with CA hdc 3; repeat from * around, finishing last repeat with CA hdc 2, join with CA.
Round 15: Repeat Round 14; join with CB.
Round 16: Ch 1, *with CB hdc 7, with CA hdc 1; repeat from * around, join with CB.
Round 17: Repeat Round 16; join with CA.
Rounds 18 - 33: Repeat Round 2 - 17. After Round 33, break CB and continue with CA.
Round 34: Ch 1, hdc in each st around; join.
Round 35: Ch 1, hdc in 3rd loop of each st around; join. (see linked tutorial above if needed)
Rounds 36 - 38: Ch 1, sc in each st around; join.
Round 39: Repeat Round 34.
Round 40: Ch 1, sc in 3rd loop of each st around; join and break CA.
Use CA and surface crochet to outline triangles. As shown, all vertical lines were added, then horizontal lines, then diagonal lines.


And that's the Capulin Cross Body Bag! I hope you enjoyed making it! Of course, you can line it, add snaps or a zipper, or dress it up however you like - I can't wait to see how yours turns out!
Written pattern copyright Tamara Kelly 2016, all rights reserved. Please do not reprint or repost this pattern, but please do link to this page to share this pattern with others. If you wish to make items for sale from this pattern, or translate it to another language, please visit the About page for details. Thank you to Lion Brand Yarn for providing the yarn for this pattern!
The Yarn Valet Yarn Dispenser has changed the way I crochet - and I love it! And I get to give away TWO of them right here on Moogly!
I've always loved beautiful beads, and it took me far too long to incorporate them into my crochet. One of the things that inspired my conversion is the beads from Harvey at The Big Purple Barn. And I'm thrilled to help him give some away to one lucky winner!

School is in session, and that might mean more - or less! - time to crochet and knit! But there are lots of fantastic patterns always coming out, and my co-host Kara from Petals to Picots and I have once again collected the best here for you! We share your most clicked projects twice a month, from the posts you submit. Hookin on Hump Day is hosted here on Moogly, as well as on Petals to Picots - here are the projects that your clicks and Kara put together this round!
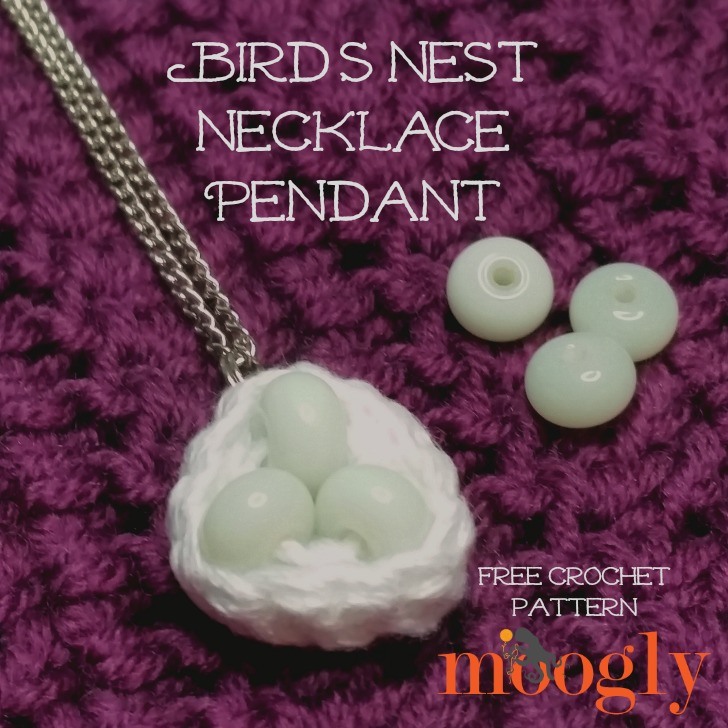
I love sentimental jewelry. And I love pretty beads, and recycling, and crochet. And this week, I had a lot of fun combining all 3 - and creating the Bird's Nest Necklace Pendant!
If you've learned to crochet, and gotten comfortable with working in rows... then the next step is learning how to work in the round! And I've got just the Craftsy Class for that - taught by Tamara Kelly (that's me)!

Do you knit or crochet while Netflix-ing? You're not alone! But finding the perfect pattern to go with your favorite shows can be tricky - so I've put together a list of 10 perfect patterns to pair with your binge-watching sessions this season!
The kids are heading back to school, the temps are (finally!) starting to drop - must be time for August 2016's Designer Showcase! I like to wrap up each month by having one of my fellow designers share a bit about themselves, and then I follow it up by sharing my 5 favorite free patterns that they've designed! This month I get to share some of the fantastic designs from the lovely Bethany Dearden - blogger and designer behind Whistle & Ivy!
Disclaimer: The Laughing Cow provided me with product and a $50 gift card for this review. However, thoughts and opinions are my own and do not necessarily reflect those of the brand.
Yesterday I released the free On the Go Snack Bag crochet pattern - but I didn't show you what we put inside! It's Laughing Cow's new Cheese Dippers!
Kids love snacks! This seems to be a universal. Whether it's elementary school snack time or at a toddler's well child checkup or while running around after school, kids need fuel! And the On the Go Snack Bag is one fun way to make sure they have the snack they need when they need it!
One of my favorite new yarns from Lion Brand is Vanna's Style - which I used to make the Seaside Ruana! And now I get to giveaway 6 balls of Vanna's Style to one lucky winner - enough to make a Seaside Ruana of your own!
The Offset Mesh, sometimes called Offset Filet Mesh, is an easy stitch pattern suitable for beginners and experienced crocheters alike - it gives great fabric! Here's how to crochet the Offset Mesh stitch pattern!
I got a chance to review a new book coming out this autumn, Crochetterie by Molla Mills - a book that promises to feature "Cool Contemporary Crochet for the Creatively Minded!" Love that! Read on to see what I think of it... and enter to win your own copy!
Does anything freshen up a room faster and easier than new throw pillows? They're certainly easier than dusting or painting! The Reversible Ruffle Pillow is fun, flirty, quick to crochet, and a great blend of graphic and feminine - the perfect thing to spice up your space right now!
 Disclaimer: This post includes affiliate links.
What makes it Reversible? Flip it to the other side and you'll see the colors reversed, for a surprisingly different look! Just by switching the colors used for each portion, you can get vastly different looks. Switch the same two colors like I did, or add two more - or make the ruffles in a rainbow and use white for the background, and then switch those. I used the twisted sc to sew the sides of the pillow together and add more interest, but you can do that your way too. The possibilities are endless!

Because the pillow form is completely sewn in, be sure to get a washable pillow form like the one I linked in the supply list below. Also, please note that the cover is smaller than the pillow - this gives you that great overstuffed look!

Add this pattern to your Ravelry Queue and Favorites
BASE:
Row 1: With Color A, FDC 49; turn. (49 sts)
Alternative Row 1 (to avoid foundation stitch): Ch 51, skip the 2 chs closest to the hook, dc in remaining 49 chs; turn. (49 sts)
Row 2: Ch 2 (does not count as a st), dc in BLO of each st across; turn. (49 sts)
Row 3: Ch 2, dc in each st across; turn. (49 sts)
Row 4 - 27: Repeat Rows 2 and 3. Break yarn and finish off.
ADDING RUFFLES - These are worked into the unworked front loops created when working the even numbered rows in the BLO above:
Row 1: With Color B, join with sc in first unworked front loop of Row 1, *skip 2 unworked loops, 7 dc in the next unworked loop, skip 2 unworked loops, sc in the next unworked loop; repeat from * to end, break yarn and finish off. (8 7-dc ruffles)
Row 2: With Color B, join with dc in first unworked front loop of Row 3, 3 dc in the same loop, *skip 2 unworked loops, sc in the next unworked loop, skip 2 unworked loops, 7 dc in the next unworked loop; repeat from * to end, finishing last repeat with 4 dc in the last unworked loop, break yarn and finish off. (7 7-dc ruffles, 2 4-dc ruffles)
Row 3 - 13: Repeat Row 1 and 2 working down the Base, ending with a Row 1 repeat.
ADDING SIDE EDGES: With Color A, sc evenly along each side of the Base, with 2 sc in the side of a row, followed by 1 sc in the side of the next row, repeating, tacking down 4-dc ruffles as you go. (41 sts on each side)
Repeat Side 1 Instructions, reversing Color A and Color B.
Using Color A and Color B held together, and holding wrong sides of both pieces together, twisted sc around 3 sides of pillow, then insert pillow form and continue along 4th side. Break yarn and finish off.

I hope you have fun making the free crochet Reversible Ruffle Pillow pattern! It's a great way to add custom color and fun to your space!
Written pattern copyright Tamara Kelly 2016, all rights reserved. Please do not reprint or repost this pattern, but please do link to this page to share this pattern with others. If you wish to make items for sale from this pattern, or translate it to another language, please visit the About page for details. Thank you to Lion Brand Yarn for providing the yarn for this pattern!