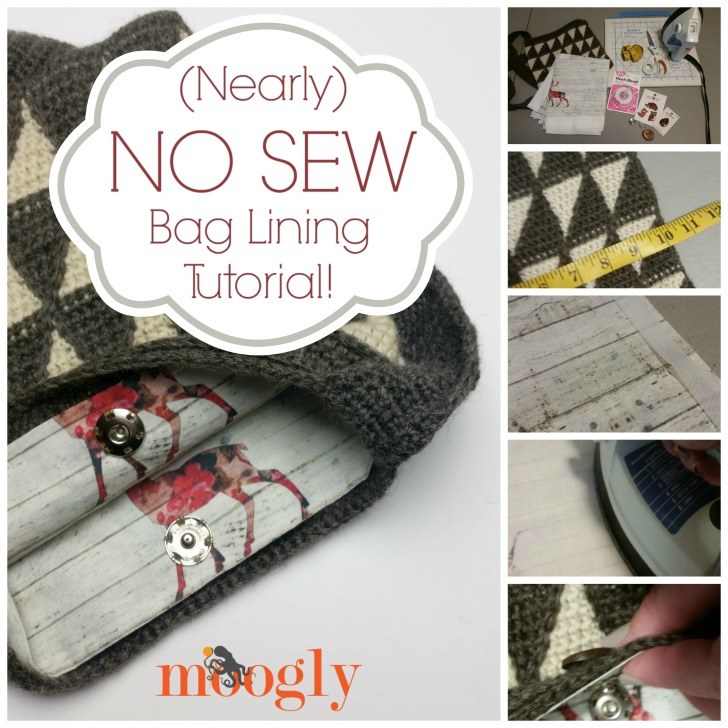
Crochet bags, purses, and totes are fun to make, and fun to use! But sometimes a bag just really needs a liner before it's ready to go out on the town. Oh, but you don't have a sewing machine, and that's too much to sew by hand? No problem! Here's my nearly no sew bag lining tutorial - for a custom bag lining you can make in just minutes!
 Disclaimer: This post includes affiliate links.
The secret to making a lining without needle and thread? Iron on adhesive! This comes in a few different brands and strengths, but they are all basically the same. You place a strip of the iron on adhesive between 2 pieces of fabric, apply a hot iron for a few seconds... et voila! A no sew seam is made!
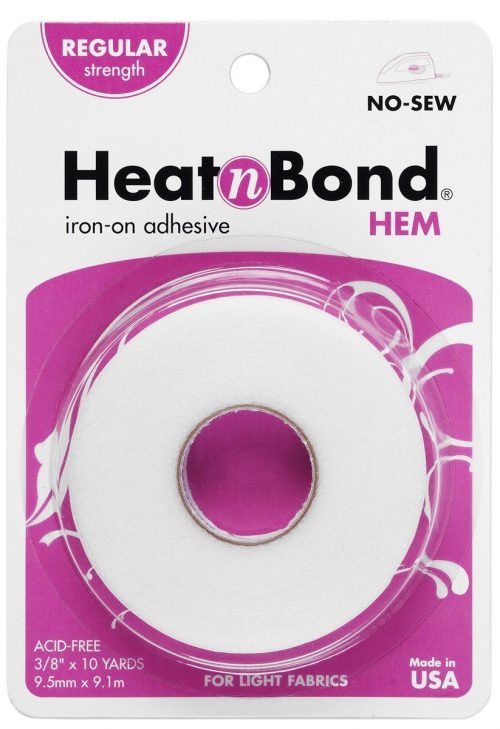
For this demo, I used Heat n Bond Hem in Regular Strength. This is a popular brand, found in most big box craft stores, and in the craft department of lots of big box department stores. Another popular brand is Dritz Stitch Witchery. Any of them should do the job, but I would recommend either Regular or Ultra strength - not Light.
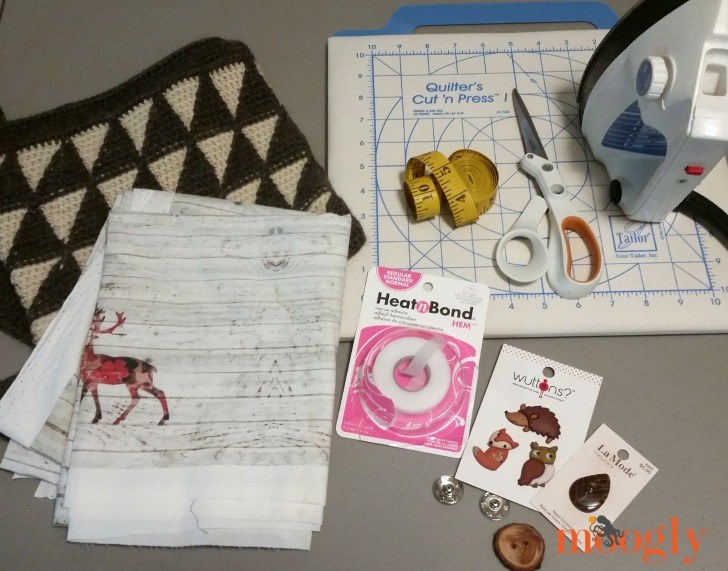
So let's gather the supplies:
- A bag to line - Capulin Cross Body Bag shown
- Measuring Tape
- Iron on adhesive (see links above)
- Fabric - Zazzle custom fabric shown
- Sew in snap and buttons, sewing needle and thread (optional)
- Iron (standard household iron)
- Ironing board/pressing board - Quilter's Cut'n Press shown
- Scissors
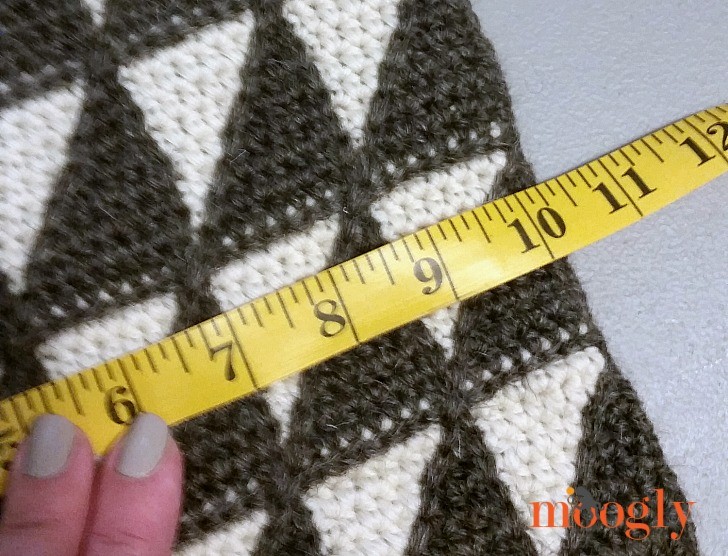
And let's make a bag lining! Step 1: Measure your bag. This one has a measurement of 10" x 10" (excluding the handle of course).
Step 2: Cut the fabric to the width of the bag, plus 1", and to the length of the bag x 2, plus 2". For this project, my fabric is 11" wide x 22" long. Fold the fabric in half (the fold becomes the bottom of the liner), right sides together.
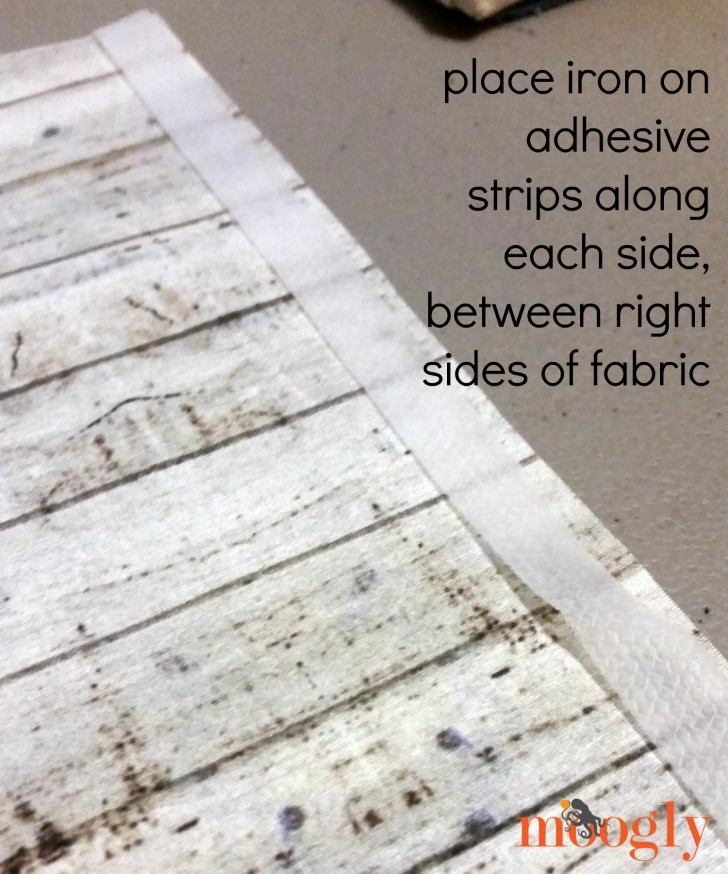
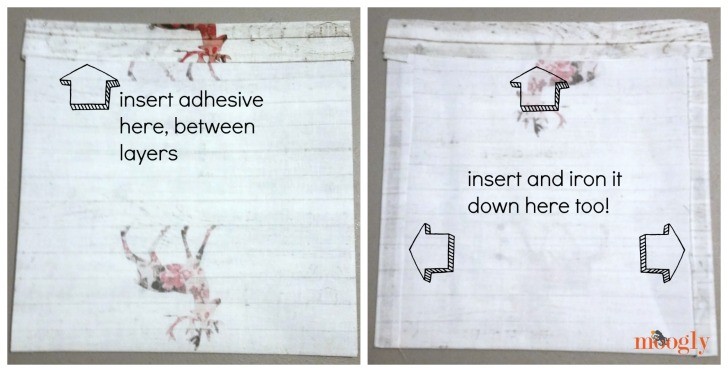
Step 3: Cut 2 strips of iron on adhesive the length of the sides of the liner. For this project, I cut 2 strips 11" long. Place the iron on adhesive between the layers of fabric, on each side.
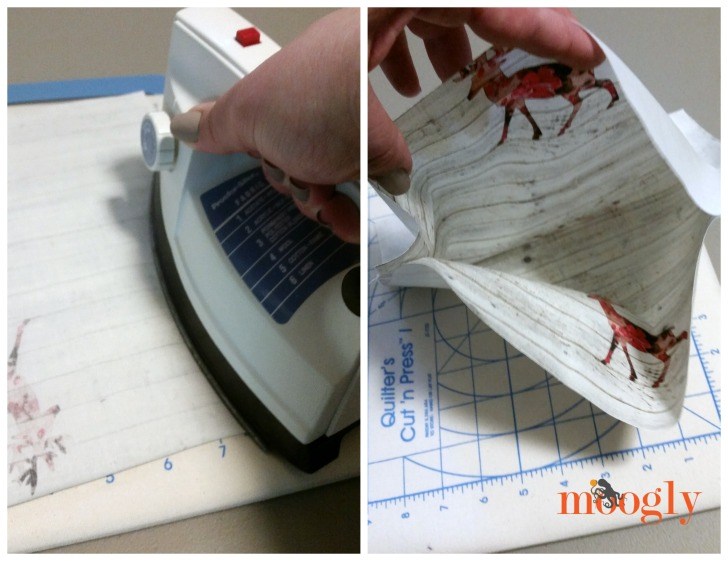
Step 4: Preheat the iron to Medium heat, or the heat directed on your package of iron on adhesive. Check this heat setting on a scrap of leftover fabric, to be sure it won't hurt the fabric you've chosen. When the iron is hot, press it on the fabric for about 3 seconds/section, or as directed on the iron on adhesive package.
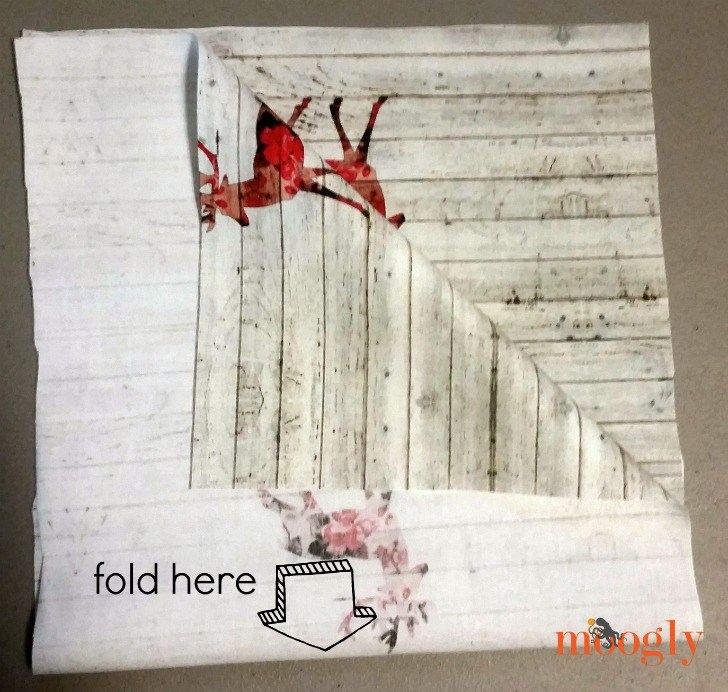
Step 5: Fold the sides with the adhesive in, and then fold over the top of the bag liner, to the outside, to create the upper lip of the liner. Check it against the bag you are lining to make sure it is the right size.
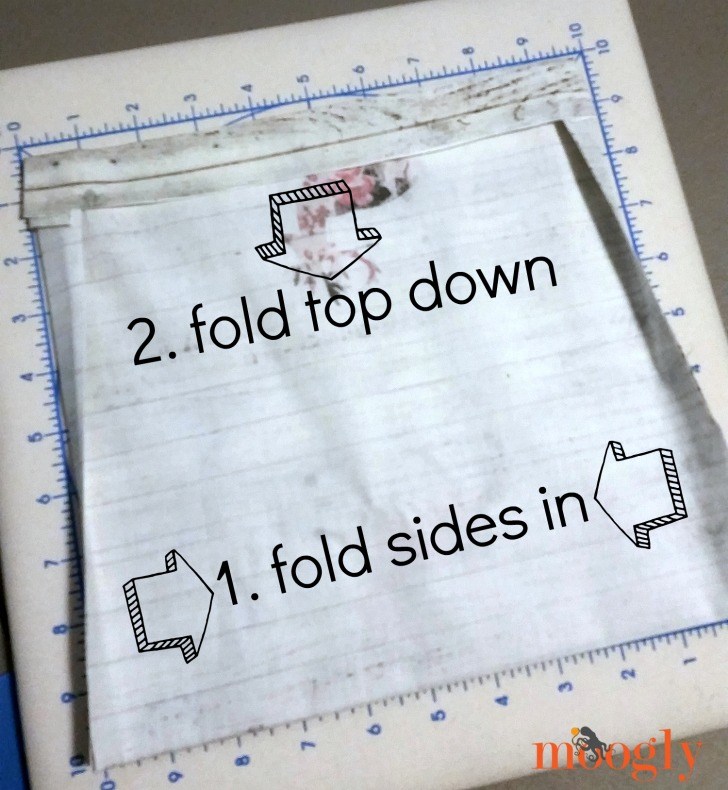
Step 6: Using more iron on adhesive, iron down the folded over sides as well as the folded over top.
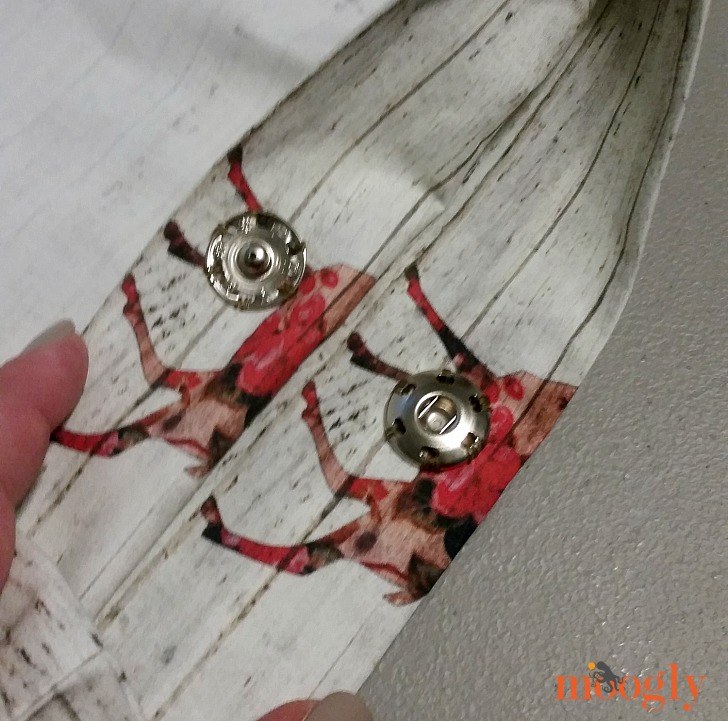
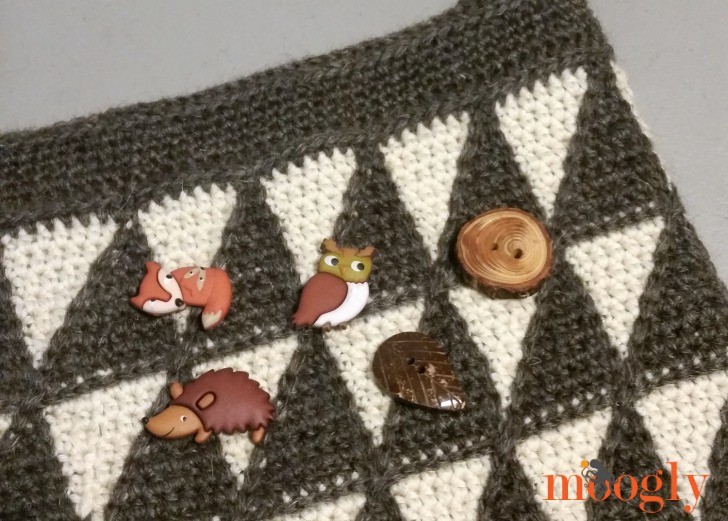
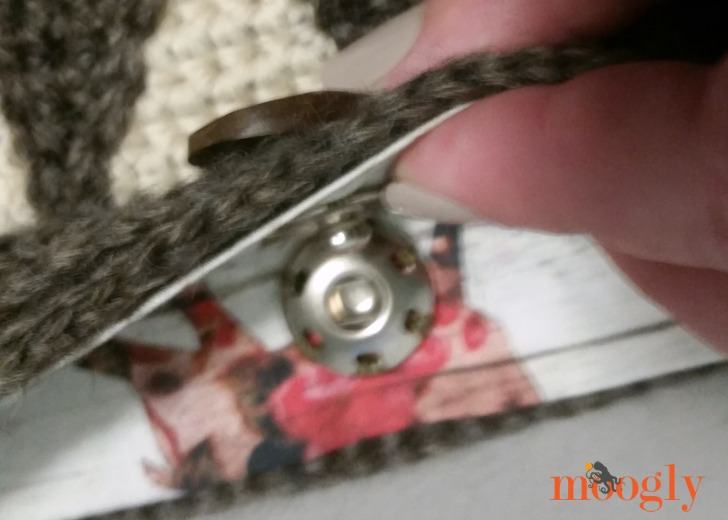
Step 7 (optional): Using sewing needle and thread, add snaps to liner if desired.
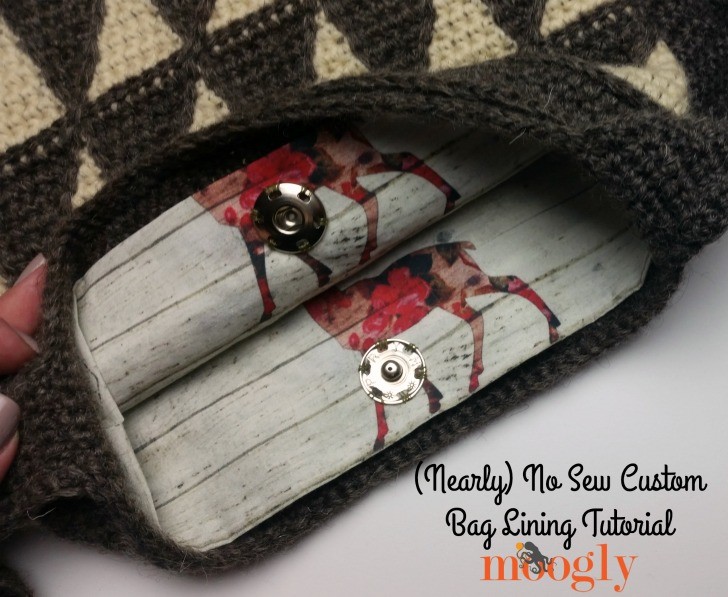
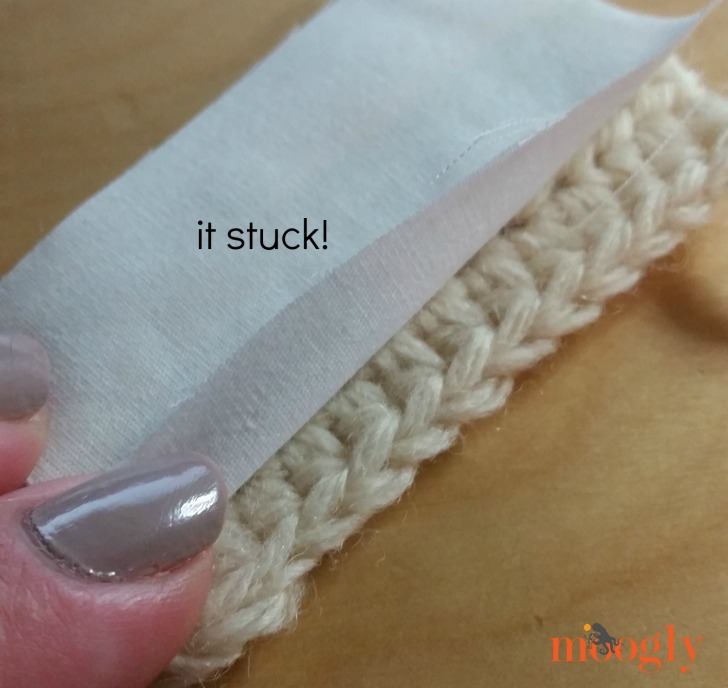
Step 8: Insert the lining into the crocheter/knitted bag. How you attach the bag and lining is up to you! This is where you may have to do some hand sewing, to sew it in securely. Another option is to make a swatch using the yarn you made the bag with, and test it with a scrap of your fabric and a couple inches of the iron on adhesive - ONLY IF you are using wool or cotton, not acrylic yarn! Acrylic will melt! But if your test is successful, you may be able to iron in the lining into the bag as well!
That last step will definitely require some testing on your part. In this tutorial I used a bag crocheted with Lion Brand Fishermen's Wool, which recommends that you do not iron it on the label - even though it is 100% wool. So I decided to do my own experiment... and it worked just fine! I ironed it on, and let it cool over night. And it was firmly stuck to the crochet, and the crochet part looked fine!
If I hadn't stopped to take photos, creating this bag lining would've taken just a few minutes! Sewing in the snap probably took the longest time, and of course that part is optional. If you do sew in a snap, it's nice to add a button on the outside of the bag, opposite the snap - it helps you find the snap easier to open and close the bag, and buttons go a long way to making a bag your own too!
I hope you've enjoyed this tutorial and share it with your friends! I can't wait to see what you are able to create with it! In the meantime, don't forget to add it to your Pinterest board:


Get Moogly on your favorite social media sites: Facebook, Twitter, G+, Pinterest, Instagram and Tumblr, and sign up for the free Newsletter so you don’t miss a thing!


Albertine says
Thanks for the tip, but I'd rather use needle and thread and/or crochet hook. I think it will be more secured that way and it will look better 😉
I really like your lining and animal buttons!
Pj says
Nice idea for the crocheter who doesn't own a sewing machine. I HATE sewing by hand.
Tamara Kelly says
I have one and I'm still excited by how FAST this is! 😀
Becky S. says
Sewing in a lining is as easy as using a needle to weave in your yarn tails, or stitching two parts of a crochet pattern together. You can use a mattress stitch, running stitch or whip stitch, and if you use a lining fabric that is close to the same color as the crocheted bag itself, you can deconstruct your yarn and only use one strand of it to sew with.
But I love this idea and will use it! Just a thought - if you are lining a 10" X 10" bag, a fat quarter of fabric is the perfect size (11" x 22"). You can buy fat quarters at all quilt shops, many fabric shops, and most craft store that sell fabric.
Tamara Kelly says
I didn't know that about fat quarters! Thank you Becky!
Carrie Pray says
Great idea!
Tamara Kelly says
Thank you! 😀
CAlenna says
That's brilliant! I have a crochet bag that's been needing a lining for about two years but I hate sewing. Even sewing buttons on makes me cringe. It never even occurred to me to use an iron on adhesive. Thanks. 🙂
Tamara Kelly says
😀 I'm glad you like it!
Jean says
Have wanted to make a "bag" but without a sewing machine to make a lining I've never tried. Thank you for this easy tutorial. Now I'm on my way...
Tamara Kelly says
😀 I'm so glad you like it, thank you!
Lizette says
I don't mind the sewing so much but this is a very well made tutorial. I might have to try it this way for no other reason than to try it. Thanks for a great website! Whenever I want to start a new project I often come here first to see if you either have a pattern or if you have a link to a good one. I realize that a lot of hard work goes into it and you should know that very many people appreciate it! So thank you!
Tamara Kelly says
😀 Thank you so much Lizette! I really appreciate you saying so!
Kathy says
HI Tamara,
I'm a huge fan of your patterns and tutorials! I saw a product at Michaels' last night that looks like it could be an alternative to fuse the fabric to acrylic yarn - no sew, no iron. It's called Peel n Stick fabric fuse. I haven't tried it yet so I don't know how well it works. I'll have to get some next time I go, I would love to try it with your easy liner tutorial. Thank you for all that you do, Moogly has always been one of my favorite sites!
http://www.michaels.com/search?q=peel%20n%20stick
Tamara Kelly says
Oh wow, I hadn't seen that, I'll have to give it a try! Thank you Kathy!! 😀
Julia says
Thanks Tamara, what a fantastic and easy way to make a lining for crochet bags. I have a few crochet bags that I want to try this eith idea!
Virginia Thompson says
I agree with others. This is a fantastic idea!
Tamara Kelly says
Thank you so much Virginia!
Patricia says
I never thought of this and I am SO glad you did! Thank you so much for this idea. I really want to make bags of all kinds and now I know that those that need a lining will not stop me.
Tamara Kelly says
😀 Thank you so much Patricia!
Kelly B. says
Hate sewing. Love it! Thanks.
Tamara Kelly says
😀 Thanks Kelly!
Betty w says
I love your newsletter & the cool patterns. When I'm crocheting, I don't like to stop crocheting to sew something together to complete the project. I like the fusion tap.
I'd love to the the happy receipent of one of your crochet hooks. They appear to be quality made hooks.
Thank you for the giveaway. Be thankful in all things!
Tamara Kelly says
Thank you so much Betty!
Tamara Aubuchon says
Great idea, iron on tape. I'll try that. I still would attach smaller pockets to lining (sewing them on) "before" attaching to bag. I like pockets.
An easy way to have inner pockets for a crocheted (knit, or hand sewn, or bought) bag & not have to sew, is to use a purse drop in bag liner that has lots of pockets. They come in small & large sizes.
Also, when I fly, I use a very small travel size shoulder bag for a tiny project bag (crochet flowers, baby hat, bootees, etc) with the tools I need, round tipped snips, & a few ptns I've printed up from pc, into 4ths to fit in front pocket, & it fits in my carry on bag.
I also use a big purse as my carry on bag, (or a medium size duffle bag that is allowed size) & pac my medium size purse, in front pocket of suitcase.
When Im picked up at airport by friends or family, I quickly grab my medium sized purse from suitcase front pocket & transfer purse contents from duffle to purse in the car as we drive. (Again, easier if you use a purse liner pouch.)
Tamara (Tammy....in WA)
Tamara Kelly says
Great ideas, thank you Tamara!
Melody Hill says
Thanks so much for such a great idea. I truly enjoy your email letters and all the great projects and tips. Keep them coming!
Tamara Kelly says
Thank you so much! 😀
Brenda Tindle says
Awesome idea! I have several crocheted totes completed except for the lining. I love to sew but I was just putting off making the linings. Now I will finish them. BTW, I introduced my Mama to your website. She is 77 and holds a crochet meet every Tuesday with her church ladies. She placed a shortcut to your site on her desktop. She'll ask me now and then, "Anything new on Moogly I need to look at?". LOL
Tamara Kelly says
😀 Aw, that's awesome Brenda! Thank you so much! And please tell your mom I said Hello!
Susie Parr says
What a total gift this tutorial has been for me! Thank you soo much for sharing this, I was panicking after sewing my first bag project for my friend's daughter (birthday in 3 days, what was I thinking? !), then realised interior was a bit... ragged. your photos are bang on clear to follow, I can only learn from photos, video and someone actually showing me - totally useless with just words.
You have saved my bacon, thankyou! x
Tamara Kelly says
Oh I'm so glad to hear it, thank you Susie!
Lisa says
I, for one, do NOT like to sew! Thank you for a no-sew option!
Maxine Jepsen says
How would you line a crocheted bag with a round bottom ? It's a drawstring bag. Thank you. Your instructions are very good.
Tamara Kelly says
Thank you Maxine!
I would cut a circle just a bit bigger than the bottom of the bag, and a rectangle long enough to go around the circle and wide enough to be as tall as the bag. 🙂
Sharon DeForest says
It looks easy enough, but I must be missing something. If you place the iron on tape between the two sides and iron, it only sticks to one side. How do you make the two sides stick together. I hope I'm not the only one who doesn't understand. I really want to try this method.
Sharon
Tamara Kelly says
Hi Sharon! The iron on tape should be sticky on both sides. 🙂 (Or I should say, stick when heated up!)
Sharon DeForest says
Thank you! Do I ever feel dumb! The cardboard piece with the label had come detached from the roll. I thought I knew what to do without the directions. I found it now and it makes more sense. Thank you for answering me so quickly.
Sharon
Tamara Kelly says
Oh good, I'm so glad you found it! 😀 Best of luck!