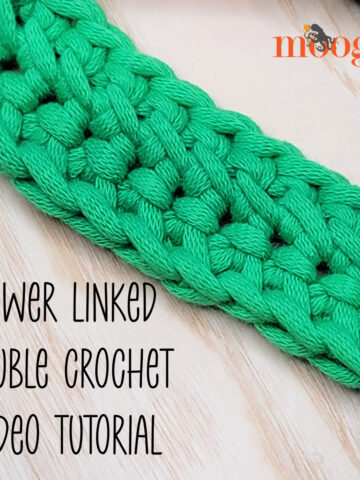
The Crocodile Stitch, aka the Scale Stitch, is the most requested video tutorial on the Moogly Facebook page - and you all know how I love to take requests! But I decided to take it one step further, and include not only a video and written instructions, but a photo tutorial as well!

There are a variety of ways to make the Crocodile Stitch, and I've attempted several of them myself. What I show here is the method that I believe is easiest. Even so, this is definitely an advanced stitch. You should be comfortable with both double crochet and post stitches before you start with the Crocodile Stitch. You might also want to grab a glass of wine! But be patient, go through the video a couple times, pausing as necessary, and give it a try - it just might be easier than you think!
Crocodile Stitch Video Tutorials
How to Crochet the Crocodile Stitch - Right Handed
How to Crochet the Crocodile Stitch - Left Handed
Written Instructions and Photo Tutorial for the Crocodile Stitch
UPDATE 12/14/15: In the video and in the photo tutorial below I chained 21. However, I've been playing with this stitch a bit more, and I would recommend starting with a chain that is a multiple of 6 plus 1, and then 3 more if you want to use that for the first dc.
Row 1: Ch to desired length (see note above). Work 2 dc in the 6th ch from the hook. *Ch 1, skip 2 chains, and dc in the next st. Ch 1, skip 2 chains, and work 2 dc in the next st. Repeat from * to end, ending with either 2 dc or 1 dc in the last st. Turn.

Row 2: Ch 1, and start working into the first pair of dc sts, skipping the single dc if that was the last st of the previous row. Going around the post of the first dc of the pair as if to work a back post stitch, make 5 dc sts around the post of the st, working down the length of the post towards the foundation chain.

Then make 5 dc around the post of the next dc st, working from the foundation chain end towards the top. (First scale made.)

*Sl st in the next single dc. Make the next scale in the next pair of dc sts. Repeat from * to end, working a sl st in the top of every single dc and a scale in each pair of dc sts. Turn. NOTE: If you ended this row with a sl st in the top of a single dc st, then continue with Row 3 instructions. If you ended with a scale, go to the Row 5 instructions.


Row 3: Ch 3, dc in the same st. *Ch 1, dc in the middle of the next scale. Ch 1, work 2 dc in the top of the next sl st. Repeat from * to end, working 2 dc sts in the top of each sl st, and 1 dc in the top of each scale. If the previous row ended with a scale, work 1 dc in the left corner of the last scale, as shown. Turn.

Row 4: Repeat Row 2, working scales in the dc pairs and sl sts in the single dc sts. NOTE: If you ended this row with a sl st in the top of the dc st, then repeat the Row 3 instructions for the next row. If you ended with a scale, continue to Row 5.


Row 5: Ch 1 and sl st in the center of the last scale made. Ch 4 (counts as first dc and ch1), then work 2 dc in the next sl st. *Ch 1, dc in the center of the next scale. Ch 1, work 2 dc in the next sl st. Repeat from * to end, working sts as appropriate. If the previous row ended with a scale, work 1 dc in the left corner of the last scale, as shown. Turn.

From here you should be able to see the pattern. Work the scaffolding and then work the scales in the dc pairs. Continue as long as desired!

Did you give it a try? If this method just isn't working for you, I recommend trying some other videos on youtube. There are several different ways to make Crocodile Stitches, and everyone has the method they prefer - and that's okay! There's rarely a right or wrong in crochet - just whatever works for the project you're working on. Good luck and let me know if this method worked for you!
Want to learn more about the Crocodile Stitch? Increasing, decreasing, in the round, and more? Check out my Crocodile Stitch Class on Bluprint/Craftsy!

Be sure to check out and like the moogly Facebook page to get the latest updates, links, and sneak peeks. Moogly is also on Pinterest, Twitter, Tumblr – come join the fun! All materials and content shown here copyright Tamara Kelly, 2013.

Shauna Mearkle says
I am loving this blog!
Beth says
Great tutorial and the best one yet. I actually did a few rows during my lunch break today. I really like how the stitches are anchored in with that slip stitch.
caitlin says
can someon eplase explain what "si st in the next single dc" stands for??? Im stuck at this part :/
Tamara Kelly says
Slip stitch in the next dc that is by itself - not a pair.
Clarita Nelson says
i'll have to watch this several times. kinda too fast for me!
Aerobuyck says
Love, Love, Love this!!!! I would have never gotten working around the post without watching it. Great video. Thank you!
Monay says
The pic tutorial made it look so easy. Going to practice a bit then attempt one of the crocodile projects.
Lisa says
This tutorial is outstanding! I tried this a couple of times but the instructions were so jacked up! Thank you, as always, Tamara!
Lisa says
I meant the "other" instructions were jacked up. Can't wait to try again now!
Tamara Kelly says
😀 Thank you Lisa! I'm so glad I was able to make it clear!
Barbara Fuller says
What does "jacked up" mean??? it must be colloquialism in the region where you live, but unknown where I live.
Tamara Kelly says
Not working properly or as intended. 🙂
Marsha Erickson says
I have watch many video's on this crocodile stitch and by far this is the best one I have found! You explain it so clearly! I tried it and I found myself doing great! I love new things! Thank you!!
Tamara Kelly says
😀 You're so welcome!
frinder says
oh!..i seriosly HATE crocodile stitch!..but after having a look of your's!..I M IT"S FAN 😛 😛 :P!♥
Tamara Kelly says
😀 Thank you!
Frinder says
you are welcome so much!..best tutorials ever! ♥
happy star says
I hate crocodile stitch,...but after taking the look on your's!..i am its fan!..i love your tutorials!..SERIOUSLY :P! love 'em ♥ 🙂
pie says
thank you so much for sharing.. you made it so easy.. made my first crocodile stitch sandals and it looks so good for my first try.. can't wait to start "scaling" more! shared your link on pinterest with my work.
Tamara Kelly says
😀 Thank you so much pie!
Clotilde/Craftybegonia says
Love to see it in video format as well as in writing. It will be much easier to understand for those who have never made the stitch.
Marrie says
Tamara?
in your old website, on its logo..i saw there was written 'm' now, it's 'g'?..what does this 'G' refers??
Tamara Kelly says
Ah the favicon! I don't actually know for sure, I suspect it's for "Genesis" - we switched to the Genesis blog framework. We'll be changing it back soon, it's just a little further down the to-do list than some of the other tweaks that need to be made.
sonu says
this is awosome .......... u r rely very nicly teach us........thanks
Joanmojo says
I was looking for a thick stitch for an afghan for a boy. I think I will do some of these into squares. Your videos are so nice and your written instructions are great. Although my first row of scales were backwards, I figured it out! Thanks
Tamara Kelly says
😀 Thank you!
Amy says
Do you have a tutorial for dragonscale fingerless gloves?!
Tamara Kelly says
I don't, but I did find a crocodile st fingerless glove pattern that does have a video tutorial! http://www.meladorascreations.com/crocodilestgloves.htm
maryama says
thanks so much
Lea Sirm says
Paluks varrastel kootavate linikute õppematerjali ja ka linikute mustreid.
liz kaufman says
I love the crocodile stitch booties but I am having trouble trying to find out how you do the cuffs on the bootie. my problem is how do you start the cuff on the bootie. hope you can help me thank you so much
Tamara Kelly says
I haven't made any crocodile stitch booties myself, but you might get an idea here: http://www.ravelry.com/patterns/library/crocodile-stitch-baby-booties 🙂
Bali says
Hi. Loooooove your tutorials. Is there any chance you could do one on increasing in the round with crocodile stitch? I cant find any tutorials on this specifically and i'm going to make a ballgown in it.
Thanks so much!!
Tamara Kelly says
Thank you so much Bali! I'll add it to the list! 🙂
Sherran says
I love the crocodile stitch but I don't know how to use it as the edging for a project I have completed except the edging. Can you help me with this? I love the blog and all of the comments.
Tamara Kelly says
Thank you Sherran! I think this might help you: http://crochetuncut.com/files/CrocodileStitchEdging.pdf 🙂
Mortuum says
This crocodile stitche is awesome. I did a "flower" to start (http://mortuum.fr/crochet-appliques-1-crocodile-fleur-et-simple-coeur/), but i already have some idea about how to integrate it on some clothes ! Thank you for the pattern/tutorial!
Caty Miller says
I've been wanting to learn how to do this, I can't wait to come back and check it out. The only thing I worry about is not understanding it correctly because I'm left handed and most right handed tutorials mess me up.
Dara says
Thanks for the clear instructions
Tracey Stewart says
Great tutorial as always.
Tamara Kelly says
Thank you Tracey!
Natasha Hudgins says
Thanks for a great tutorial and a great blog!!!
Tamara Kelly says
Thank you so much Natasha!
Linden Bird says
What a great tutorial. Thanks for sharing
Amber says
Easy to follow thank you 🙂
tanya Wallace says
Thank you so much! 🙂
lubna says
Wonder ful i m from karachi and i love to do crochet and honestly this will help me a lot thank you
JIll Marie says
Loved your video and photo instructions. I was glad I found photos and written instructions as I find them easier to follow than videos, but the video helped too.
A suggestion would be to leave notes for each row of the time mark where it can be found such as row 4 starts at minute 9 or whatever. Also in the video, your left thumb is in the way a lot of the time when inserting your hook, for beginners this may pose a problem, so sometimes perhaps move it out of the way a bit for them to see. BUT STILL A GREAT JOB! And I thank you MUCH!!!
Jill marie says
Is there a way to do this stitch but have the "front" of the double crochets showing, rather than the back?
Tamara Kelly says
Hi Jill! This method does have the front of the stitches showing. 🙂
Jill Marie says
Actually it doesnt. The double crochets in each scale have the back showing, When you do a regular double crochet, look at the front, and then the back. In the crocodile stitch, the back of each double crochet is what actually shows.
Tamara Kelly says
Ah, right you are. It had been so long since I'd done anything with crocodile stitches I'd forgotten about that little quirk! Perhaps working into the other side of the framework? I don't know any other crocodile stitch methods myself, though I'm sure they're out there.
Melissa says
Hi I love your video's they make learning crochet so much easier. I've recently started working with the crocodile stitch so this is very helpful. I'm working on a sweater with the sleeves ending in crocodile stitches and I cannot for the life of me figure out how to increase and decrease crocodile stitches while working in the round. Any way you can help me with that? Thanks soo much!
Tamara Kelly says
Thank you so much Melissa! I haven't actually designed anything will the crocodile stitch myself. This might help: https://cultofcrochet.wordpress.com/2011/07/05/crocodile-scarf-tail/ As for the in the round part, seamed sleeves might be easier...
StEphanie grant says
Thanks for the tutorial! I made my own crocodile stitch wall art and linked it back to you so that others could learn from your video tutorial!! Sometimes you've gotta see it to understand it. You're video is the easiest to understand that I've seen so far. I included my link below if you wanna see what you inspired. Thanks again!
http://www.uniqueyarndesigns.com/crocodile-stitch-diy-crochet-wall-art/
Tamara Kelly says
Very cool Stephanie! 😀 Thanks for the link back!
Jessica says
I have been amazed by all the crocodile stitch creations but never tried. Your tutorial inspires me... but I must finish the (dozen!) projects I have going first!!!
Tamara Kelly says
😀 I hear that!
Joey says
great tutorial took me time to get the hang of it but it worked up great thank you
chloe says
I love the crocodile stitch but I'm having problems figuring out how to increase in the round. Any suggestions?
Tamara Kelly says
The way the increases would be done would depend on the design - and be an integral part of it. Looking at other crocodile stitch patterns worked in the round would be the best way. 🙂
linda says
I just finish the baby blanket but is battling with baby blanket crocodile stitch finishing edge. Please could you help me. I would appreciate it. Have to finish it this week for my grand son. Its beautiful. Thank you so much.
Tamara Kelly says
Hi Linda! That blanket isn't my pattern, so I'm afraid the designer would be a better help - there are several versions of the stitch, I have no idea which one she uses.
Maila Hägglund says
Thank you for this tutorial. I was too slow most likely as I was a row behind all the time. Maybe you could slow down osme. Otherwise I learned the principle.
Tamara Kelly says
Since it's a video, I figure people will pause and rewind as needed. 🙂
Laurie says
Thank you for the tutorial on Crocodile Stitch. I have looked at several others and just couldn't grasp it. With yours I was able to figure it out! Thanks!
Tamara Kelly says
Thank you so much, I'm so glad to hear it!
Sherri says
Tamara,
I love this pattern, I thought it would be a lot harder. Its just awkward. I wanted to know if you have a video on how to continue the crocodile shells instead of going 3, 4, 3. I would like to go 3,4,5 and continue until the width is reached.
Thank you, Sherri
Tamara Kelly says
Hi Sheri! That would involve increasing the mesh! I don't have a video on it though, at this time.
Crystal says
I'm going to try this stitch with my new "temperature" blanket. Thanks for sharing! This is very helpful. (:
Tamara Kelly says
Ooo, that will look amazing! 😀 Thank you Crystal!
Ladee says
Oh my gosh, thank you, thank you! Whenever I get confused on a stitch I know I can come here and find a video tutorial and written instructions that include all the pictures I could possibly need to finally conquer the stitch giving me problems. Again, THANK YOU!
Tamara Kelly says
Wow, thank you so much Ladee!
Linda says
LOve this blanket made it for a baby shower but having trouble on the border. Do you have any tutorials for the border as I can't find one
Tamara Kelly says
Hi Linda! I'm not sure what pattern you are making?
Marny CA says
I wonder if this stitch would be appropriate for a Mermaid Tail blanket ... anyone?
Tamara Kelly says
Absolutely - it's perfect for it! 🙂
Sharon says
I would love to see this done in the round ?
Tamara Kelly says
Then you might want to check out my newest Craftsy Class! 😀 Here's my discounted instructor link: http://www.craftsy.com/ext/TamaraKelly_10211_H
Monika Klar says
I used this for some gloves. When I finished, I thought it would be perfect if the scales pointed the other way. Is there a way to have them point the other way? Or do I just have to start the gloves at the other end?
Tamara Kelly says
You can have them point either way! I have a crocodile stitch pattern at http://www.ravelry.com/patterns/library/crocodile-stitch-fingerless-mitts that uses a technique were you can put the scales on in either direction. 🙂
Monika Klar says
Thank you so much for the quick answer. I totally forgot to reply. I finished my first pair of gloves and my friend loved them very much
Tamara Kelly says
I'm so glad to hear it! 😀
Becci says
Awesome tutorial! I'm a complete newbie to crochet & was inspired to try some more complex stuff.... I'm now the proud owner of a set of crocodile scales!! Thank you 🙂
Tamara Kelly says
😀 Thank you so much Becci, I'm so glad to hear it!
Marny CA says
Becci, my take is that I do something I consider VERY difficult - and then once mastering that, everything else is easy or easier.
It took me 40 years to try entrelac and with the Internet and sites like this one, plus YouTube, I gave it a try. The first couple of rows were a mess so I frogged more than a few times.
All of a sudden, it all made sense - and Voila! I was/am shocked to see how really easy that technique is for knitting. Then I gave it a try with Tunisian Crochet - and regular crochet. Wow!
So, learn the hard stuff and all else is a pie of cake. 😉
Tamara Kelly says
😀 Love it Marny!
Marny CA says
oops ... piece of cake ... pie is good, too.
Becci says
Pie or cake - always happy with either! Good theory...
carolyn d williams says
I lovev this video, i do have one question is cotton a good yarn to use with this pattern.
Tamara Kelly says
Hi Carolyn! You can use cotton with the crocodile stitch, sure! It just depends on whether or not cotton is a good material for whatever you're making. 🙂 Thank you!
Teisha says
HI there!
I am pretty inexperienced when it comes to crochet - I learned from a friend of my mom's years and years ago but never really stuck with it. After looking at some pins on Pinterest, I noticed an abundance of these "crocodile stitch" gloves because they remind me of dragons! But I didn't know how to make the stitch. That's when I found your incredibly helpful site!
I LOVE your video. It is so well paced that I didn't have a lot of trouble keeping up. I also enjoyed the way you described the technique. Thank you for your hard work. I also subscribed to you on YouTube after finding another tutorial (how to color change). Keep up the awesome work!
- Teisha
P.S. I've now started on making gloves after practicing for two days. It is so much fun.
Tamara Kelly says
Hello Teisha! Thank you so very much! I'm so glad to hear the video was what you needed! 😀 I hope you keep enjoying learning new things in crochet - it's one of my favorite parts of the craft, finding out what else I can do!
Barb says
crocodile stitch, does the backside of scale look more like the right side than the right side does
Tamara Kelly says
Hi Barb! Yes, it's actually the backside of the dc stitches that show in the finished scales. It's a unique stitch for sure! 🙂
Tapria says
For some reason on mine the first scale of each row lays flat but the subsequent ones all tend to fold over and the bottom angles slightly to the right and they curl quite a bit. Am I using too small a hook or would this be that I'm pulling too tight?
Tamara Kelly says
Blocking will help, but a bigger hook might help too - it's easier to switch hook sizes than change your natural tension level. 🙂
Shai says
Hi Tamara,
Thank you for this tutorial! I was originally following the Red Heart "Ultimate Beginner's Guide to the Crocodile Stitch" but their method seems to result in stitches with big gaps in the middle (because their guide starts each scale on the second dc in each 2dc pair and ends it on the next single dc). I didn't like the result of that at all.
Your method of starting on the first dc of each 2dc pair makes much more sense and results in scales that are essentially solid. Wonderful! Once I have a bit more practice in I'm looking forward to making my first project using this stitch.
Thanks again!
Tamara Kelly says
I'm so glad you like it, Shai! Thank you! 😀
Michelle says
Absolutely amazing yet again. I am going over the video right now!