moogly

menu icon
go to homepage
  • Patterns
  • Tutorials
  • MooglyCAL
  • Giveaways
  • Lives
    • Facebook
    • Instagram
    • Pinterest
    • TikTok
    • Twitter
    • YouTube
  • search icon
    Homepage link
    • Patterns
    • Tutorials
    • MooglyCAL
    • Giveaways
    • Lives
    • Facebook
    • Instagram
    • Pinterest
    • TikTok
    • Twitter
    • YouTube
  • ×
    Home

    Crafty Carrying Case Tutorial

    July 11, 2018 by Tamara Kelly 8 Comments

    The Crafty Carrying Case is a handy way to keep your most-used tools close to hand. It's a simple pattern made up of single crochets, but there is a bit of assembly - so here is the Crafty Carrying Case Tutorial on Moogly!

    Crafty Carrying Case Tutorial on Moogly! Both right and left-handed videos included with this free pattern. Make it with Red Heart With Love Stripes!Disclaimer: This post includes affiliate links; materials provided Red Heart Yarns, Furls Crochet, and Clover USA.

    [Read more...]

    Yarn Love: Red Heart With Love Stripes

    July 10, 2018 by Tamara Kelly 6 Comments

    Red Heart With Love has long been a favorite of mine - and I'm so excited they have added Stripes! So this month I'm taking a closer look at With Love Stripes in the Yarn Love yarn review (and more) on Moogly!

    Yarn Love Video Yarn Review: Red Heart With Love Stripes!Disclaimer: This post was sponsored by Red Heart Yarn, but all opinions are my own.
    This post includes affiliate links.

    [Read more...]

    Babay Fay Christmas in July Giveaway

    July 9, 2018 by Tamara Kelly 12 Comments

    Babay Fay Hat Templates make crocheting top-down hats simpler than ever before! And while stocking caps might not be top of mind (haha) in July, they are a great make-ahead project during the summer heat - so we're giving away two FULL SETS of Babay Fay Hat Templates to two lucky winners here on Moogly!

    Babay Fay Christmas in July Hat Templates Giveaway on Moogly Disclaimer: This post was sponsored by Babay Fay, but all opinions are my own.
    This post includes affiliate links.

    [Read more...]

    Crafty Carrying Case

    July 6, 2018 by Tamara Kelly 22 Comments

    Crafty Carrying Case - make crafting easier by keeping all your tools handy with this free crochet pattern on Moogly!

    The Crafty Carrying Case is a great way to keep your most important tools handy and take your crochet wherever you go! It's a beginner level pattern and it's free on Moogly!

    Disclaimer: This post includes affiliate links; materials provided by Red Heart Yarn, Furls Crochet, and Clover USA.

    Prefer an ad-free PDF? You've got options!

    This button leads to the pattern on Etsy

    Prefer the free blog version? Keep scrolling!

    One of the great things about crocheting is its portability - but more often than not, you need more than just yarn and a hook. I'm always digging through my bag for my needles, tape measure, and scissors - and too often getting a sharp poke for my trouble!

    Crafty Carrying Case - free crochet pattern on Moogly! Folds up nice and compact for easy use!

    A few years ago I designed the Nifty Needle Case, and that was good for the needles (and the tiniest of scissors), but I got a lot of feedback from crocheters looking for something larger, with more storage options, such as a larger pocket for scissors. So here is the result - the Crafty Carrying Case!

    Crafty Carrying Case - make crafting easier by keeping all your tools handy with this free crochet pattern on Moogly, made with Red Heart With Love!


    Crafty Carrying Case

    Add this pattern to your Ravelry Queue and Favorites

    US - I, 5.5mm hook - Furls Crochet

    Red Heart With Love Stripes (100% Acrylic; "4"/Medium/Worsted/Aran/UK: 10-12 ply; 5 oz (141 g); 223 yards (204 m))
    Color A: Passion Stripe (1 skein - 140 yds)

    Red Heart With Love (100% Acrylic; "4"/Medium/Worsted/Aran/UK: 10-12 ply; 7oz (198 g); 70yds (338m))
    Color B: Papaya (1 skein - 10 yds)

    Clover Stitch Markers

    Sew On Snap - Large

    Gauge: 13 sts x 16 rows = 4"/10 cm in sc

    Size (open, laid flat): 6" tall x 12" wide

    Helpful Links & Tutorials

    Crafty Carrying Case Tutorial

    Crochet Abbreviations

    Single Crochet - sc

    Back Loop Only - BLO

    Working into the Edge

    Seamless Finishing

    INSTRUCTIONS:

    Outer Piece - Color A

    Row 1 (RS): Ch 20, skip the ch closest to the hook, sc in the remaining 19 chs; turn. (19 sts)

    Row 2 – 14: Ch 1, sc in each st across; turn. (19 sts)

    Row 15: Ch 12, skip all the chs just made, blo sc in each sc across; turn. (19 sts)

    Row 16 – 30: Ch 1, sc in each st across; turn. (19 sts)

    Row 31: Ch 1, blo sc in each st across; turn. (19 sts)

    Row 32 – 44: Ch 1, sc in each st across; turn. (19 sts) Set Outer Portion Aside - do not break yarn, use a stitch marker to secure the working loop

    Needle Holder - Color B

    Row 1: Ch 11, skip the ch closest to the hook, sc in the remaining 10 chs; turn. (10 sts)

    Row 2 – 19: Ch 1, sc in each st across; turn. (10 sts)

    Edging (RS): Ch 1, sc in each st across, ch 1, sc evenly down the side of the piece, ch 1, sc across the foundation chain of the piece, ch 1, sc evenly up the last side of the piece, ch 1, join to first st made. Break yarn, weave in ends, and set aside.

    Scissors Pocket - Color B

    Row 1: Ch 20, skip the ch closest to the hook, sc in the remaining 19 chs; turn. (19 sts)

    Row 2 – 12: Ch 1, sc in each st across; turn. (19 sts) After Row 12, break yarn and set aside.

    Assembly

    Step 1: Using a yarn needle and Color A, sew the "male" sides of the snaps to the RS of the Outer Piece at Rows 38-40, as shown in the photos.

    Step 2: Use the stitch markers to attach the Needle Holder to the WS of the Outer Piece in the center (between Rows 15 and 31).

    Step 3: Use the stitch markers to attach the Scissors Pocket to the WS of the Outer Piece, lining up Row 1 of the Pocket with Row 44 of the Outer Piece.

    Step 4: Insert hook in active loop of Outer Piece, and working from RS, sc around the entire case, working through both the Outer Piece and Pocket/Needle Holder where both are present. Work 3 sc in each corner, and join and break yarn at the end of the Rnd.

    Step 5: Using a yarn needle and Color A, sew the "female" sides of the snaps to the WS of the Outer Piece at Rows 2-5, or so that they match up with the male sides when the case is closed.


    Now it's time to fill up your Crafty Carrying Case with all your crochet necessities! I love attaching my tape measure to the handy little loop, and now even my largest yarn needles have a home - Jumbo yarns need big yarn needles. Plus I get to slip my prettiest (and sharpest) scissors in there and I know right where they are - no more ouchies!

    I hope you find the Crafty Carrying Case handy too - and easy to make!

    I can't wait to see what colors of Red Heart With Love and With Love Stripes you choose! So if you share it on social media, be sure to tag me @mooglyblog or #mooglyblog – and happy crocheting!

    The Fine Print

    Written pattern copyright Tamara Kelly 2018, all rights reserved. Please do not reprint or repost this pattern, but please do link to this page to share this pattern with others.  If you wish to make items for sale from this pattern or translate it to another language, please visit the About page for details. Thank you to Red Heart Yarn and Clover USA for providing the materials for this pattern.

    Moogly CAL 2018 - Afghan Block #13

    July 5, 2018 by Tamara Kelly Leave a Comment

    I love the anticipation of a new square! We're smack dab in the middle of this year's Moogly Crochet Along, and to kick off the second half, we have a fun and twisty new free crochet square pattern by Laurinda Reddig of ReCrochetions!

    MooglyCAL2018 Block 13 by ReCrochetionsDisclaimer: This post includes affiliate links; yarn provided by Red Heart. [Read more...]

    Hookin On Hump Day #170: A Yarny Link Party!

    July 3, 2018 by Tamara Kelly Leave a Comment

    It might be mid-summer, but yarn has no season! We've got another amazing round of Hookin On Hump Day for you - and this round, they're all free!

    Hookin On Hump Day 170 on Moogly and Petals to Picots [Read more...]

    Red Heart With Love Stripes Giveaway

    July 2, 2018 by Tamara Kelly 20 Comments

    I've been a big fan of Red Heart With Love for years - it's so super soft, and perfect for kid and pet-friendly home decor too! So I'm excited that they have added self-striping versions to the options - and I get to giveaway 8 skeins of Red Heart With Love Stripes here on Moogly!

    Red Heart With Love Stripes Giveaway on Moogly! Win 8 skeins of this gorgeous yarn! Sponsored by Red Heart and open to US addresses only, ends July 30, 2018Disclaimer: This giveaway was sponsored by Red Heart Yarns. [Read more...]

    Quick Cricut Craft: Whatever Sprinkles Your Donuts

    June 29, 2018 by Tamara Kelly Leave a Comment

    What to do when you get a last minute invite to a desserts-themed party? If you're like me, you break out the Cricut and make a super fast shirt to wear. And because sharing is caring - I'm sharing the Whatever Sprinkles Your Donuts project file in Design Space, in case you want to make one too!

    Make whatever sprinkles your donuts with this free Cricut project from Moogly!Disclaimer: This post includes affiliate links. Material support provided by Cricut and Happy Crafters.

    [Read more...]

    Seaglass Summer Cardi Tutorial

    June 28, 2018 by Tamara Kelly 13 Comments

    The Seaglass Summer Cardi is a simple, one size fits all pattern that is easy enough for even beginning crocheters to make! Especially now that there are right and left-handed tutorials here on Moogly!

    Seaglass Summer Cardi Tutorial - Right & Left-Handed Videos on MooglyDisclaimer: This post includes affiliate links; materials provided by Red Heart Yarn and Clover USA.

    [Read more...]

    Facebook Live and YouTube Live: June 2018

    June 27, 2018 by Tamara Kelly 2 Comments

    I can. not. believe. it's the end of June already! But I'm excited to go Live today on Facebook to share what's new - and what's coming up! And on YouTube, I'm talking about sizing tops - which means gauges and grading!

    Moogly's Facebook and YouTube Lives June 2018: Get a sneak peek at July, and learn all about sizing tops!Disclaimer: This post is sponsored by Red Heart Yarn, and may contain affiliate links. 

    [Read more...]

    Crochet! Magazine Summer 2018 Giveaway!

    June 25, 2018 by Tamara Kelly 4 Comments

    One of the most popular crochet magazines in the US is Crochet! magazine, published by Annie's. I've been a subscriber for many years now, so I'm excited to share the latest issue as a giveaway here on Moogly!

    Crochet! Magazine Summer 2018 Giveaway on Moogly
    Disclaimer: This post includes affiliate links; giveaway sponsored by Annie's.

    [Read more...]

    Seaglass Summer Cardi

    June 22, 2018 by Tamara Kelly 29 Comments

    Seaglass Summer Cardi - front view 2

    The Seaglass Summer Cardi is a simple beach or swimsuit cover-up - that is just as beautiful back on solid land! Crochet your own with this gorgeous Moogly pattern!

    Disclaimer: This post includes affiliate links; materials provided by Red Heart Yarns and Clover USA.

    Prefer an ad-free PDF? You've got options!

    Prefer the free blog version? Keep scrolling!

    For pool day - or every day!

    When I began designing the Seaglass Summer Cardi, I was thinking exclusively in terms of a swimsuit coverup. But by the time it was done, I knew I wanted to wear it everywhere! It's still great for the pool though - even after I soaked it, it dried super fast!

    Seaglass Summer Cardi - back view 1

    And truth be told... I wasn't really looking forward to putting swimsuit photos of myself on the internet. Nobody needs that! But what you *do* need is a beautiful super lightweight layering piece to throw on this summer - and I think that this is the one for me.

    The Seaglass Summer Cardi is truly one size fits all. It fits up to a 68" bust - and stretches too! Made with just 2 cakes of Red Heart It's a Wrap Rainbow, it's simple enough to be your first garment if you haven't made one before!

    Seaglass Summer Cardi Tutorial Videos on Moogly


    Seaglass Summer Cardi

    Add this pattern to your Ravelry Queue and Favorites

    US - K, 6.5mm hook - Clover Amour

    1200 yds Red Heart It's a Wrap Rainbow (55% Acrylic/45% Cotton; "2" - Fine/Sport/UK: 5 ply; 623 yds (570 m); 5.29 oz. /150g)
    Colorway Shown: Seaglass (2 cakes)

    This yarn has been discontinued. Recommended substitutions: Sheepjes Whirl, WeCrochet Comfy Fingering, WeCrochet Lindy Chain

    Gauge: 13 sts x 6 rows = 4"/10 cm in Rows 2-3 stitch pattern

    Size: One Size Fits All (up to 68" bust)

    Seaglass Summer Cardi - supplies needed include 2 cakes of Red Heart It's a Wrap Rainbow and a Clover Amour US-K hook
    Click on the image to get the yarn!

    Helpful Links, Special Stitches & Tutorials:

    Seaglass Summer Cardi Tutorial

    Crochet Abbreviations

    Foundation Double Crochet - FDC

    Chainless Starting Double Crochet - CSDC

    Standing Double Crochet - STDC

    Whip Stitch Seaming

    SCHEMATIC:

    The 4" seams on each side are approximately 13" from the shoulder fold. Exact rows are given in the pattern. Block to 34" wide x 36" long.

    Seaglass Summer Cardi Schematic - free pattern on Moogly

    NOTES:

    The yarn is cut several times when making the 2 front sections, in order to maintain the gradient of the yarn and match that of the back. If you are using a solid colored yarn, then you can finish one front side before beginning the other (simply work the same number of rows as the back).

    Try on the garment before weaving in the ends of the seams, to make sure you like where they lay - they are easily adjustable and customizable.

    If you would like the garment to be shorter or longer, simply stop after any odd-numbered row desired - just be sure to adjust the front to match. Longer rows can always be added before the edging, so that is another good time to try it on.

    If a larger/wider garment is desired, I recommend soaking the garment well before blocking and stretching the fabric slightly before pinning, as this fabric has a lot of stretch to it.

    Use one cake of Red Heart It's a Wrap Rainbow to make the back, and then use a new cake to make the front pieces. There will be a bit of yarn left over at the end of each cake, which should be set aside for seaming.

    If avoiding Foundation Stitches is preferred, substitute a chain of 111 and skip the first 3 chains, and dc in each remaining chain across (109 dc).

    If avoiding Chainless Starting Double Crochets or Standing Double Crochets is preferred, substitute a chain 3 (counts as the first dc of the row).

    INSTRUCTIONS:

    BACK OF CARDI (First Cake)

    Row 1: FDC 109; turn. (109 dc) TIP: Put a stitch marker in the base (foundation chain) of the last stitch made.

    Row 2: CSDC, ch 1, skip next st, dc in next st, *ch 1, skip next st, dc in next st; rep from * across, turn. (55 dc)

    Row 3: CSDC, dc in each st and ch-1 sp across; turn. (109 dc)

    Row 4 - 57: Repeat Rows 2 and 3; after Row 57, break yarn.

    FRONT OF CARDI (Second Cake)

    Right Front Row 1: STDC in base (foundation chain) of the last stitch of Row 1 of the Back of Cardi, dc in the next 54 sts; turn (remaining stitches left unworked). (55 dc)

    Right Front Row 2: CSDC, ch 1, skip next st, dc in next st, *ch 1, skip next st, dc in next st; rep from * across, turn. (28 dc)

    Right Front Row 3: CSDC, dc in each st and ch-1 sp across; turn. (55 dc)

    Right Front Row 4 - 6: Repeat Rows 2 and 3, ending on a Row 2 repeat; break yarn.

    Left Front Row 1: STDC in same st as the last st of Right Front Row 1, dc in each remaining st across; turn. (55 dc)

    Left Front Row 2 - 12: Repeat Right Front Rows 2 and 3, ending on a Row 2 repeat; break yarn.

    Right Front Row 7: STDC in the last stitch made in Right Front Row 6, dc in each st and ch-1 sp across; turn. (55 dc)

    Right Front Row 8 - 18: Repeat Right Front Rows 2 and 3, ending on a Row 2 repeat; break yarn.

    Left Front Row 13: STDC in the last stitch made in Left Front Row 12, dc in each st and ch-1 sp across; turn. (55 dc)

    Left Front Row 14 - 24: Repeat Right Front Rows 2 and 3, ending on a Row 2 repeat; break yarn.

    Right Front Row 19: STDC in the last stitch made in Right Front Row 18, dc in each st and ch-1 sp across; turn. (55 dc)

    Right Front Row 20 - 30: Repeat Right Front Rows 2 and 3, ending on a Row 2 repeat; break yarn.

    Left Front Row 25: STDC in the last stitch made in Left Front Row 24, dc in each st and ch-1 sp across; turn. (55 dc)

    Left Front Row 26 - 36: Repeat Right Front Rows 2 and 3, ending on a Row 2 repeat; break yarn.

    Right Front Row 31: STDC in the last stitch made in Right Front Row 30, dc in each st and ch-1 sp across; turn. (55 dc)

    Right Front Row 32 - 42: Repeat Right Front Rows 2 and 3, ending on a Row 2 repeat; break yarn.

    Left Front Row 37: STDC in the last stitch made in Left Front Row 36, dc in each st and ch-1 sp across; turn. (55 dc)

    Left Front Row 38 - 48: Repeat Right Front Rows 2 and 3, ending on a Row 2 repeat; break yarn.

    Right Front Row 43: STDC in the last stitch made in Right Front Row 42, dc in each st and ch-1 sp across; turn. (55 dc)

    Right Front Row 44 - 54: Repeat Right Front Rows 2 and 3, ending on a Row 2 repeat; break yarn.

    Left Front Row 49: STDC in the last stitch made in Left Front Row 48, dc in each st and ch-1 sp across; turn. (55 dc)

    Left Front Row 50 - 57: Repeat Right Front Rows 2 and 3; break yarn.

    Right Front Row 55: STDC in the last stitch made in Right Front Row 54, dc in each st and ch-1 sp across; turn. (55 dc)

    Right Front Row 56 and 57: Repeat Right Front Rows 2 and 3; do not turn and do not break yarn.

    FINISHING

    Edging: Ch 1, sc evenly around the entire piece, working a ch-2 at each corner; join and break yarn.

    Seaming: Lay garment flat with Row 57 of back and fronts matched. Using a whip stitch and leftover yarn, sew the sides of the front and back pieces together at Rows 20-26. This seam should be approximately 13" from the shoulder, and 4" long.


    And that's another crochet garment on the books - and in my closet! I hope you enjoy making and wearing your own Seaglass Summer Cardi. It's a stunning piece that really shows off the yarn, and I can't wait to see it in the colorways you choose!

    If you make the Seaglass Summer Cardi I’d love to see it! So if you share it on social media, be sure to tag me @mooglyblog or #mooglyblog – and happy crocheting!

    The Fine Print

    Written pattern copyright Tamara Kelly 2018, all rights reserved. Please do not reprint or repost this pattern, but please do link to this page to share this pattern with others.  If you wish to make items for sale from this pattern or translate it to another language, please visit the About page for details. Thank you to Red Heart Yarn and Clover USA for providing the materials for this pattern.

    Moogly CAL 2018 - Afghan Block #12

    June 21, 2018 by Tamara Kelly 2 Comments

    One of the things I love about this CAL is how great it is to beat the heat - a small project means a cool one! The other thing I love is getting to make patterns designed by my favorite designers - like Block #12, courtesy of ELK Studio!

    MooglyCAL2018 Block 12 by ELK StudioDisclaimer: This post includes affiliate links; yarn provided by Red Heart. [Read more...]

    Hookin On Hump Day #169: A Yarny Link Party!

    June 19, 2018 by Tamara Kelly 1 Comment

    Welcome to Hookin On Hump Day - or, thank you all for coming back for another fantastic round of this crochet and knit link party! Did you know that the featured projects every round are picked based on your clicks? Each one of your clicks on the squares down below is a "vote" you cast!

    This round was particularly close - everyone was within just a few clicks of each other! And it's easy to see why - each of these new patterns is lovely. And even better, most are free!

    Hookin On Hump Day 169 - Get each of these gorgeous crochet patterns on Moogly and Petals to Picots! And if you're a designer/blogger, be sure to add your own! [Read more...]

    Stitch & Hustle On The Go Arm Project Bag Giveaway

    June 18, 2018 by Tamara Kelly 10 Comments

    These days it seems I'm always on the go go go - and I know many of you feel the same way! It's crazy making - but one thing that keeps us all sane is crochet or knitting. So here's a fun way to take your project with you - and keep your sanity! I'm excited to share the Stitch & Hustle On The Go Arm Project Bag with all of you - so excited I'm filling it too!

    Win a Stitch & Hustle Limited Edition Project Bag, Red Heart Scrubby Cotton, and Clover Amour Hook on Moogly! Giveaway open worldwide, ends 7/9/18 at 12:15am Central US timeDisclaimer: This giveaway was sponsored by Stitch & Hustle, but all opinions are my own.
    This post includes affiliate links.

    [Read more...]

    Cactus Painted Rocks with Yarn Pots

    June 15, 2018 by Tamara Kelly 11 Comments

    Painted rocks have been everywhere lately - one of the biggest crafting trends of the past few years! I've seen so many cute ideas... but I had a few more, and I decided to try them out. Here are  some of the things I learned along the way, my failures, and my best results: Cactus Painted Rocks with Yarn Pots!

    Cactus Painted Rocks with Yarn Pots - Tutorial on Moogly!Disclaimer: This post includes affiliate links; materials provided by Red Heart Yarn.

    [Read more...]

    Adventure Travel Case Assembly Tutorial

    June 13, 2018 by Tamara Kelly Leave a Comment

    The Adventure Travel Case is very easy to crochet, made up almost exclusively of single crochet stitches! But it has lots of parts, and therefore lots of assembly steps - so I've created a video tutorial to help with that part!

    Adventure Travel Case - Assembly Tutorial VideoDisclaimer: This post includes affiliate links; materials provided by Red Heart Yarn, Furls Crochet, Clover USA, and Polaroid.

    [Read more...]

    Yarn Love: Red Heart It's A Wrap Rainbow

    June 12, 2018 by Tamara Kelly 11 Comments

    I've talked before about how much I love cotton yarns - and the only way to make them even better is to add some acrylic in there for strength and durability! Red Heart It's A Wrap Rainbow is just such a yarn - and it combines these glorious fibers into a drapey, summer yarn you won't want to even try to resist. This month I'm taking a closer look at It's a Wrap Rainbow in the Yarn Love yarn review (and more) on Moogly!

    Yarn Love: Watch a video review and get the scoop (and free pattern!) for Red Heart It's a Wrap Rainbow - on Moogly!Disclaimer: This post was sponsored by Red Heart Yarn, but all opinions are my own.
    This post includes affiliate links.

    [Read more...]

    Ashley Leither Designs Hook Giveaway

    June 11, 2018 by Tamara Kelly 15 Comments

    I was recently introduced to the lovely designer Ashley Leither - and then I found out her husband has been creating handcrafted crochet hook! So I was excited to try one out - and give another one away

    Ashley Leither Designs Handcrafted Crochet Hook Giveaway on Moogly! Open worldwide, ends 7/2/18 at 12:15am Central US timeDisclaimer: I was provided a hook for review but all opinions are my own;
    giveaway sponsored by Ashley Leither Designs. This post includes affiliate links.

    [Read more...]

    Adventure Travel Case

    June 8, 2018 by Tamara Kelly 14 Comments

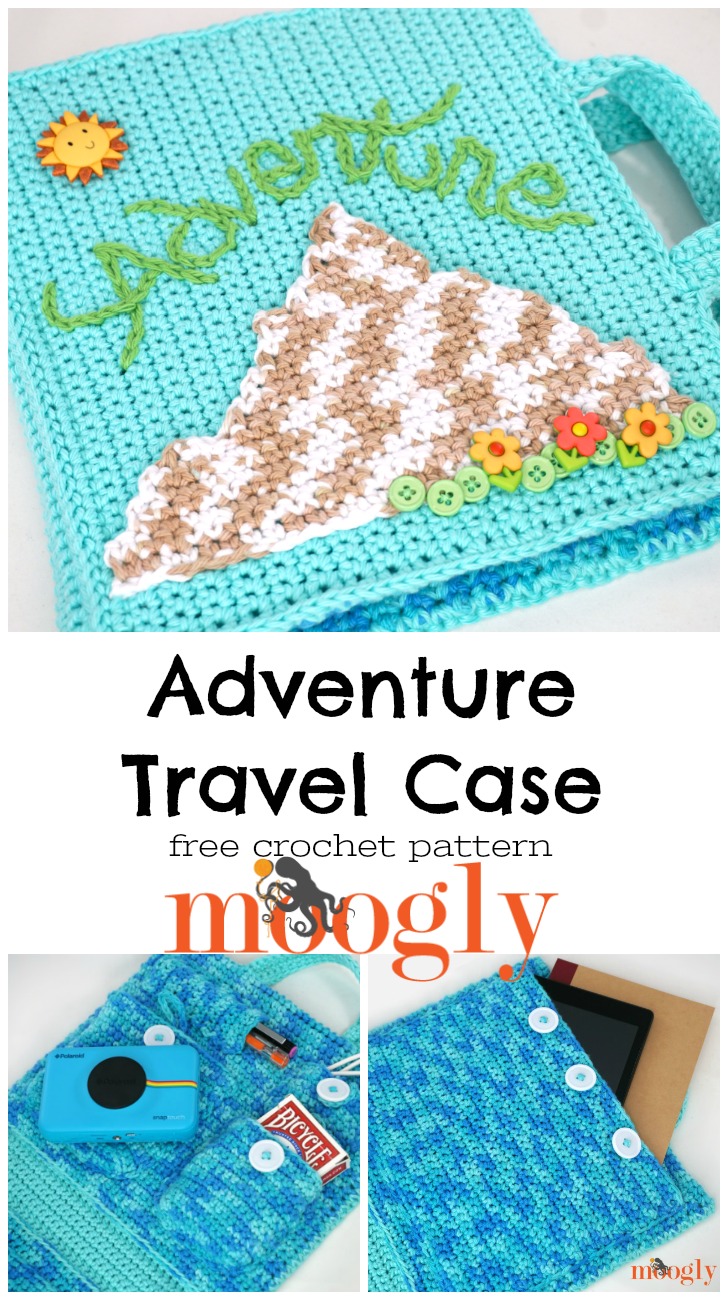
    The Adventure Travel Case is a fun pattern to make for kids - or for kids to make for themselves! (Or maybe you want one too?!) Customize one for your favorite adventurer with this free crochet pattern!

    Adventure Travel Case - get your little explorer ready for summer expeditions with this free crochet pattern on Moogly!Disclaimer: This post includes affiliate links; materials provided by Red Heart Yarn, Clover USA, Furls Crochet and Polaroid.

    [Read more...]

    Mountain Applique

    June 8, 2018 by Tamara Kelly 4 Comments

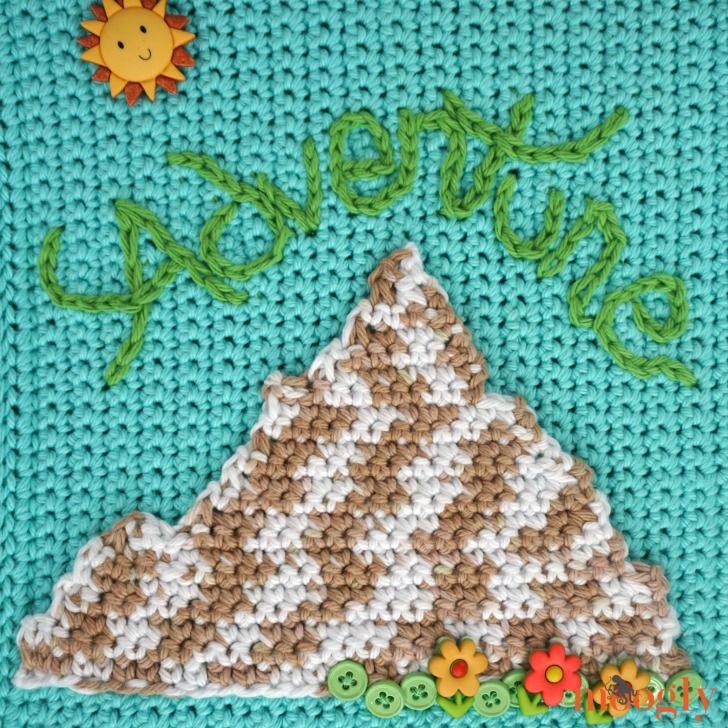
    The Mountain Applique is perfect on the cover of the Adventure Travel Case - but it's also great to add to any project you like! Made with all single crochets (and a couple slip stitches), this simple but effective pattern makes a great embellishment - or secret pocket!

    Mountain Applique by MooglyDisclaimer: This post includes affiliate links; materials provided by Red Heart Yarns and Furls Crochet.

    [Read more...]

    Moogly CAL 2018 - Afghan Block #11

    June 7, 2018 by Tamara Kelly Leave a Comment

    Crochet along squares are perfect for summer - small, quick, and fun! Block #11 fits the bill with its clever moves, and it comes to us courtesy of Stitches n Scraps!

    MooglyCAL2018: Block #11, courtesy of Stitches n ScrapsDisclaimer: This post includes affiliate links; yarn provided by Red Heart. [Read more...]

    Super Easy Non-Slip Pom Pom Rug Tutorial

    June 6, 2018 by Tamara Kelly 10 Comments

    The Super Easy Non-Slip Pom Pom Rug is... well... super easy to crochet! Only the most beginning stitches are used, making this pattern perfect for crocheters of any skill level. The yarn used does require a few tips and tricks though - so I've put together right and left-handed pom pom rug tutorials for the Super Easy Non-Slip Pom Pom Rug!

    How to Crochet a Pom Pom Rug - that's non-slip right off the hook! Try this beginner friendly pattern on Moogly!Disclaimer: This post includes affiliate links; materials provided by Red Heart Yarn and Brittany Needles.

    [Read more...]

    Hookin On Hump Day #168: A Yarny Link Party!

    June 5, 2018 by Tamara Kelly 2 Comments

    Summertime Hookin On Hump Days begin! The weather is warmer, the yarns are a little lighter, but the amazing patterns and projects just keep coming! Thank you all for coming back for another fantastic round of this crochet and knit link party! I love seeing what the designers share and the readers pick every time - this time, you picked 5 fabulous freebies!

    Hookin On Hump Day 168 - get these fantastic patterns on Moogly and Petals to Picots! [Read more...]

    Red Heart It's A Wrap Rainbow Giveaway

    June 4, 2018 by Tamara Kelly 45 Comments

    Have you ever felt like you were just waiting for a particular mystery yarn to exist? Red Heart It's A Wrap Rainbow just might be the yarn I've been waiting for! It's lightweight, my favorite fiber blend, and holy cow those colors - and I get to giveaway 4 cakes of it here on Moogly!


    Red Heart It's A Wrap Rainbow - Giveaway on Moogly!Disclaimer: This giveaway was sponsored by Red Heart Yarns. [Read more...]

    Super Easy Non-Slip Pom Pom Rug

    June 1, 2018 by Tamara Kelly 21 Comments

    Red Heart Pomp-a-doodle is just too fun - and it makes a super easy DIY pom-pom rug! But crocheted (and knitted) rugs can be so slippery on hard surface floors. The Super Easy Non-Slip Pom Pom Rug has the perfect DIY crochet rug trick to solve this problem!

    Super Easy Non-Slip Pom Pom Rug - pin this image
    Disclaimer: This post includes affiliate links. Materials provided by Red Heart Yarn and Brittany Needles.

    [Read more...]

    Ball Cactus Potholder Tutorial

    May 31, 2018 by Tamara Kelly 3 Comments

    The Crochet Cactus Potholders are perfectly cute and on trend! Though they use the same stitches, each deserves its own tutorial. So now we'll make the Ball Cactus Potholder together with the Crochet Ball Cactus Potholder Tutorial - and of course, both right and left-handed are included!

    Ball Cactus Potholder Tutorial on MooglyDisclaimer: This post includes affiliate links; materials provided by Red Heart Yarn, Furls Crochet, and Clover USA.

    [Read more...]

    Facebook Live and YouTube Live: May 2018

    May 30, 2018 by Tamara Kelly Leave a Comment

    Another month has flown by - and it's time for another Day of Our Moogly Lives!

    Moogly Facebook Live and YouTube Live: May 2018Disclaimer: This post is sponsored by Red Heart Yarn, and may contain affiliate links. 

    [Read more...]

    Babay Fay Preemie Hat Templates Giveaway

    May 29, 2018 by Tamara Kelly 4 Comments

    If you aren't familiar with Babay Fay Hat Templates yet, you're in for a treat! Crocheting and knitting hats is super easy with these templates - and I'm giving away THREE of the Preemie Sets here on Moogly!

    Babay Fay Preemie Crochet Hat Templates Giveaway on Moogly - open worldwide, ends 6/11/18 at 12am GMTDisclaimer: This post was sponsored by Babay Fay, but all opinions are my own.

    [Read more...]

    Quick Cricut Craft: No Prob-Llama Tote with Pom Poms

    May 25, 2018 by Tamara Kelly 5 Comments

    Who doesn't love a slightly sassy Llama? The No Prob-Llama Tote Bag is fun and fast to make, and perfect for summer fun. And you don't have to know how to knit or crochet to make it!

    No Prob-Llama Tote Bag - tutorial on MooglyDisclaimer: This post includes affiliate links. Material support provided by Cricut, Happy Crafters, and Red Heart Yarn.

    [Read more...]

    Moogly CAL 2018 - Afghan Block #10

    May 24, 2018 by Tamara Kelly Leave a Comment

    Block #10 in the Moogly CAL is here, and it's a fun one! Full of color and life and clever stitches, it was designed for this crochet along by Cre8tion Crochet!

    MooglyCAL2018 Block #10, courtesy of Cre8tion CrochetDisclaimer: This post includes affiliate links; yarn provided by Red Heart. [Read more...]

    Tall Cactus Potholder Tutorial

    May 23, 2018 by Tamara Kelly Leave a Comment

    The Crochet Cactus Potholders make a super cute set - and they each present their own challenges! But I'm here to help - and I've created separate video tutorials for each! Up first, we have the Crochet Tall Cactus Potholder Tutorial - in both right and left-handed!

    Tall Cactus Potholder Tutorial on MooglyDisclaimer: This post includes affiliate links; materials provided by Red Heart Yarn, Furls Crochet, and Clover USA.

    [Read more...]

    OttLite Revive LED Floor Lamp: Giveaway!

    May 21, 2018 by Tamara Kelly 36 Comments

    Last year I got to try the OttLite Revive Desk Lamp - and I quickly fell in love with the light quality as well as the great styling. When you see better, you craft better! So I was super excited to see that there's now an OttLite Revive LED Floor Lamp to match - let's take a closer look at it together, and then give one away!

    OttLite Revive LED Floor Lamp Review, Live Unboxing, and Giveaway on Moogly! The giveaway ends 6/4/2018 at 12:15 am Central US timeDisclaimer: This giveaway was sponsored by OttLite, but all opinions are my own.
    Moogly is an OttLite Ambassador.

    [Read more...]

    Crochet Cactus Potholders

    May 18, 2018 by Tamara Kelly Leave a Comment

    Crochet Cactus Potholders on a table with limes

    Cacti are happy, bright, summery, and fun - so Crochet Cactus Potholders are perfect for your kitchen! These thick squishy crocheted hot pads make great trivets too. Or you can sew a couple of tall ones together to make an oven mitt!

    Disclaimer: This post includes affiliate links; materials provided by Red Heart Yarns, Clover USA, and Furls Crochet.

    Prefer an ad-free PDF? You've got options!

    This button leads to the pattern on Etsy

    Prefer the free blog version? Keep scrolling!

    Hot as the Desert Sun... or Fresh Out of the Oven!

    The key to the Crochet Cactus Potholders is to use 100% cotton yarn! With cotton yarn, you can use these Cacti with hot dishes without worrying about melting your project on your next hot dish.

    The Crochet Cactus Potholders are a set - there's a tall cactus and a ball cactus, both kitchen ready. But they aren't limited to being just potholders! The tall cactus also would make a great oven mitt if you sew two of them together. And the Ball Cactus would be super cute under a real flower pot! However you use them, they are sure to brighten up your table.

    Crochet Cactus Potholders - on a table with some limes, and individually, this is a long Pinterest ready image


    Crochet Cactus Potholders

    Add this pattern to your Ravelry Queue and Favorites

    US - H, 5.0mm Furls Crochet hook

    150 yds Red Heart Scrubby Smoothie (100% Cotton; “4”/Medium/Worsted/UK: 10-12 ply; 3.5oz/100g; 153 yd/140 m)
    Color A: Lime (1 ball)
    Color B: Coral (1 ball)

    This yarn has been discontinued. Recommended substitution: Lily Sugar'n Cream

    Clover Stitch Markers

    Gauge: 16 sts x 12 rows = 4"/10cm in fpdc/bpdc worked even (main st pattern)

    Size:
    Tall Cactus - 10" tall (including flower) x 7 ¼" wide at the widest point
    Ball Cactus - 7 ¾" tall (including flower) x 6" wide at the widest point

    Helpful Links & Tutorials

    Crochet Cactus Potholders Tutorials: Tall Cactus Tutorial; Ball Cactus Tutorial

    Crochet Abbreviations

    FDC - Foundation Double Crochet

    Post Stitches (FP and BP)

    Increasing with Post Stitches

    Join with HDC (Standing Half Double Crochet)

    Magic Circle

    Special Stitches:

    bpslst - back post slip stitch: insert hook from back to front to back around indicated st, yo and pull up a loop, pull through to finish as a slip stitch

    bp/fpdc2tog - back post double crochet and front post double crochet two together (dec): yo and insert hook from back to front to back around next st, yo and pull up a loop, yo and pull through 2 loops (2 loops remain on hook), yo and insert hook from front to back to front around next st, yo and pull up a loop, yo and pull through 2 loops (3 loops remain on hook), yo and pull through all 3 loops to finish stitch

    fp/bpdc2tog - front post double crochet and back post double crochet two together (dec): yo and insert hook from front to back to front around next st, yo and pull up a loop, yo and pull through 2 loops (2 loops remain on hook), yo and insert hook from back to front to back around next st, yo and pull up a loop, yo and pull through 2 loops (3 loops remain on hook), yo and pull through all 3 loops to finish stitch

    Crochet Tall Cactus Potholder alone

    Tall Cactus Instructions

    Row 1 (WS): With Color A, FDC 23; turn. (23 sts)

    Row 2 (RS): Ch 1, hdc in 1st st, *fpdc in next st, bpdc in next st; rep from * across until 2 sts remain, fpdc in next st, hdc in last st, turn. (23 sts)

    Row 3: Ch 1, hdc in 1st st, *bpdc in next st, fpdc in next st; rep from * across until 2 sts remain, bpdc in next st, hdc in last st; turn. (23 sts)

    Row 4 - 9: Rep Rows 2 and 3.

    Row 10: Ch 1, hdc in 1st st, [fpdc in next st, bpdc in next st] twice, (fpdc, hdc, fpdc) in next st, *bpdc in next st, fpdc in next st; rep from * across until 1 st remains, hdc in last st, turn. (25 sts)

    Row 11: Ch 1, hdc in 1st st, *bpdc in next st, fpdc in next st; rep from * across until 8 sts remain, bpdc in next st, 2 hdc in hdc, [bpdc in next st, fpdc in next st] twice, bpdc in next st, hdc in last st, turn. (26 sts)

    Row 12: Ch 1, hdc in 1st st, [fpdc in next st, bpdc in next st] twice, fpdc in next st, sc in next 2 hdc, fpdc in next st, *bpdc in next st, fpdc in next st; rep from * across until 1 st remains, hdc in last st, turn. (26 sts)

    Row 13: Ch 1, hdc in 1st st, bpdc in next st, *fpdc in next st, bpdc in next st; rep from * across until 8 sts remain, hdc in next st, turn (remaining 7 sts left unworked). (19 sts)

    Row 14 - 19: Rep Rows 2 and 3.

    Row 20: Ch 1, hdc in 1st st, fpdc2tog over next 2 fpdc sts skipping the bpdc in between, bpdc in next st, [fpdc in next st, bpdc in next st] 5 times, fpdc2tog over next 2 fpdc sts skipping the bpdc in between, hdc in last st; turn. (15 sts)

    Row 21: Rep Row 3.

    Row 22: Ch 1, hdc in 1st st, fpdc in next st, bpdc in next st, fpdc2tog over next 2 fpdc sts skipping the bpdc in between, bpdc in next st, fpdc in next st, bpdc in next st, fpdc2tog over next 2 fpdc sts skipping the bpdc in between, place marker in stitch just made, bpdc in next st, fpdc in next st, hdc in last st; break yarn and finish off. (11 sts)

    Closeup of the cactus branch of the Tall Cactus Potholder

    Cactus Branch - worked into the 7 sts left unworked at the end of Row 13:

    Row 23: From RS, join with hdc in 1st st of Row 12, fpdc in next st, [bpdc in next st, fpdc in next st] twice, hdc in next st, turn. (7 sts)

    Row 24: Rep Row 3.

    Row 25: Ch 1, hdc in 1st st, fpdc3tog over next 3 fpdc sts skipping the bpdc sts in between, hdc in last st; do NOT turn. (3 sts)

    Edging Rnd 1: Ch 1, sc evenly around cactus, working fpsc in each fp st and a ch 1 at each bottom corner; join and break Color A. (Move stitch marker up to the corresponding stitch.)

    Flower and Edging Rnd 2:

    Flower Rnd 1: With Color B, make a magic circle, work 5 sc into the ring; join. (5 sts)

    Flower Rnd 2: *Ch 1, (dc, 2tr, dc, ch 1, sl st) in next st; rep from * around; do NOT join or break yarn. (5 petals made)

    Edging Rnd 2: Sc in marked st and each st around cactus, working a ch 1 at each bottom corner, until 3 sts remain; bpslst around 2nd tr of 3rd petal of flower, then sc in last 3 sts of cactus, join and break.

    Crochet Ball Cactus Potholder on a table

    Ball Cactus Instructions

    Row 1 (WS): With Color A, FDC 15; turn. (15 sts)

    Row 2 (RS): Ch 2 (does not count as a st), dc in 1st st, (fptr, dc) in next 2 sts, *fpdc in next st, bpdc in next st; rep from * until 4 sts remain, fpdc in next st, (dc, fptr) in next 2 sts, dc in last st, turn. (19 sts)

    Row 3: Ch 2 (does not count as a st), dc in 1st st, (bptr, dc) in next 2 sts, *bpdc in next st, fpdc in next st; rep from * until 4 sts remain, bpdc in next st, (dc, bptr) in next 2 sts, dc in last st, turn. (23 sts)

    Row 4: Ch 1, hdc in 1st st, *fpdc in next st, bpdc in next st; rep from * across until 2 sts remain, fpdc in next st, hdc in last st, turn. (23 sts)

    Row 5: Ch 1, hdc in 1st st, *bpdc in next st, fpdc in next st; rep from * across until 2 sts remain, bpdc in next st, hdc in last st, turn. (23 sts)

    Rows 6- 9: Rep Rows 4 and 5.

    Row 10: Ch 1, hdc in 1st st, fpdc2tog over next 2 fpdc sts skipping the bpdc in between, skip next bpdc, fpdc in next st, *bpdc in next st, fpdc in next st; rep from * across until 5 sts remain, skip next bpdc, fpdc2tog over next 2 fpdc sts skipping the bpdc in between, hdc in last st, turn. (17 sts)

    Row 11: Ch 1, hdc in 1st st, bpdc in next st, bp/fpdc2tog, bpdc2tog in next 2 bpdc sts skipping the fpdc in between, fpdc in next st, bpdc in next st, fpdc in next st, bpdc2tog in next 2 bpdc sts skipping the fpdc in between, fp/bpdc2tog, bpdc in next st, hdc in last st, turn. (11 sts)

    Row 12: Ch 1, hdc in 1st st, fpdc in next st, bpdc in next st, fpdc in next st, bp/fp/bpdc3tog, fpdc in next st, bpdc in next st, fpdc in next st, hdc in last st, turn. (9 sts)

    Row 13: Ch 2, dc in 1st st, bpdc2tog in next 2 bpdc sts skipping the fpdc in between, place marker in stitch just made, bpdc in next st, bpdc2tog in next 2 bpdc sts skipping the fpdc in between, dc in last st, turn. (5 sts)

    Edging Rnd 1: Ch 1, sc evenly around cactus, working a ch 1 at each bottom corner; join and break Color A. (Move stitch marker up to the corresponding stitch.)

    Cactus Pot:

    Row 1: With Color B, from RS, join with sl st, ch 1, and sc in bottom ch-1 corner sp of cactus, fpsc in next 15 sts, sc in last ch-1 corner sp; turn. (17 sts)

    Row 2: Ch 1, sc2tog, sc in each st until 2 sts remain, sc2tog; turn. (15 sts)

    Row 3: Rep Row 2; break and finish off. (13 sts)

    Flower and Edging Rnd 2:

    Flower Rnd 1: With Color B, make a magic circle, work 5 sc into the ring; join. (5 sts)

    Flower Rnd 2: *Ch 1, (dc, 2tr, dc, ch 1, sl st) in next st; rep from * around; do NOT join or break yarn. (5 petals made)

    Edging Rnd 2: Sc in marked st and each st around cactus, working a ch 1 at each bottom corner, and working evenly along the sides of the Cactus Pot, until 3 sts remain; bpslst around 2nd tr of 3rd petal of flower, then sc in last 3 sts of cactus, join and break.


    And that's the free Crochet Cactus Potholders pattern set! I hope you enjoy crocheting your own cacti kitchen set - is there a piece missing from the set? Let me know what you think in the comments!

    Crochet Tall Cactus Potholder back of the flower

    If you make the Crochet Cactus Potholders I’d love to see a photo. So if you share it on social media, be sure to tag me @mooglyblog or #mooglyblog – and happy crocheting!

    The Fine Print

    Written pattern copyright Tamara Kelly 2018, all rights reserved. Please do not reprint or repost this pattern, but please do link to this page to share this pattern with others.  If you wish to make items for sale from this pattern or translate it to another language, please visit the About page for details. Thank you to Red Heart Yarn, Furls Crochet, and Clover USA for providing the materials for this pattern.

    Pineapple Basket Tutorial

    May 16, 2018 by Tamara Kelly Leave a Comment

    The Pineapple Basket is so much fun to make - I love when a few clever stitches create something new! So I'm excited to share the crochet Pineapple Basket video tutorial today, so you can see how it comes together in action!

    How to Crochet the Pineapple Basket - get the free crochet pattern and the right and left-handed video tutorials on Moogly!Disclaimer: This post includes affiliate links; materials provided by Red Heart Yarn, Brittany Needles, and Clover USA.

    [Read more...]

    Hookin On Hump Day #167: A Yarny Link Party!

    May 15, 2018 by Tamara Kelly 3 Comments

    Welcome back to Hookin On Hump Day! Or if this is your first visit to Hookin On Hump Day, then you're in for a treat - the hottest new crochet and knit projects from your favorite designers!  Thank you again to all the designers for submitting your latest designs - and thank you all for helping us pick the top 5! I love seeing what pulls in your clicks every round!

    Hookin On Hump Day #167 - get the hottest new crochet and knit patterns on Moogly and Petals to Picots - from all of your favorite designers! [Read more...]

    Dishcloths to Crochet by Pat Olski Giveaway

    May 14, 2018 by Tamara Kelly 56 Comments

    Dishcloths to Crochet: Fun Designs to Brighten Your Kitchen! is a fun book of - you guessed it - crocheted dishcloths! Ranging from the whimsical to the elegant, I get to show off what you'll find inside this book, and give away a copy to two lucky Moogly readers, courtesy of Dover Publications - and hey, there's a discount code too!

    Dishcloths to Crochet Giveaway on Moogly! Open to US and Canada, ends 5/29/18 at 12:15 am Central US time.  Sponsored by Dover Publications Disclaimer: This giveaway was sponsored by Dover Publications, but all opinions are my own.

    [Read more...]

    Pineapple Basket

    May 11, 2018 by Tamara Kelly 32 Comments

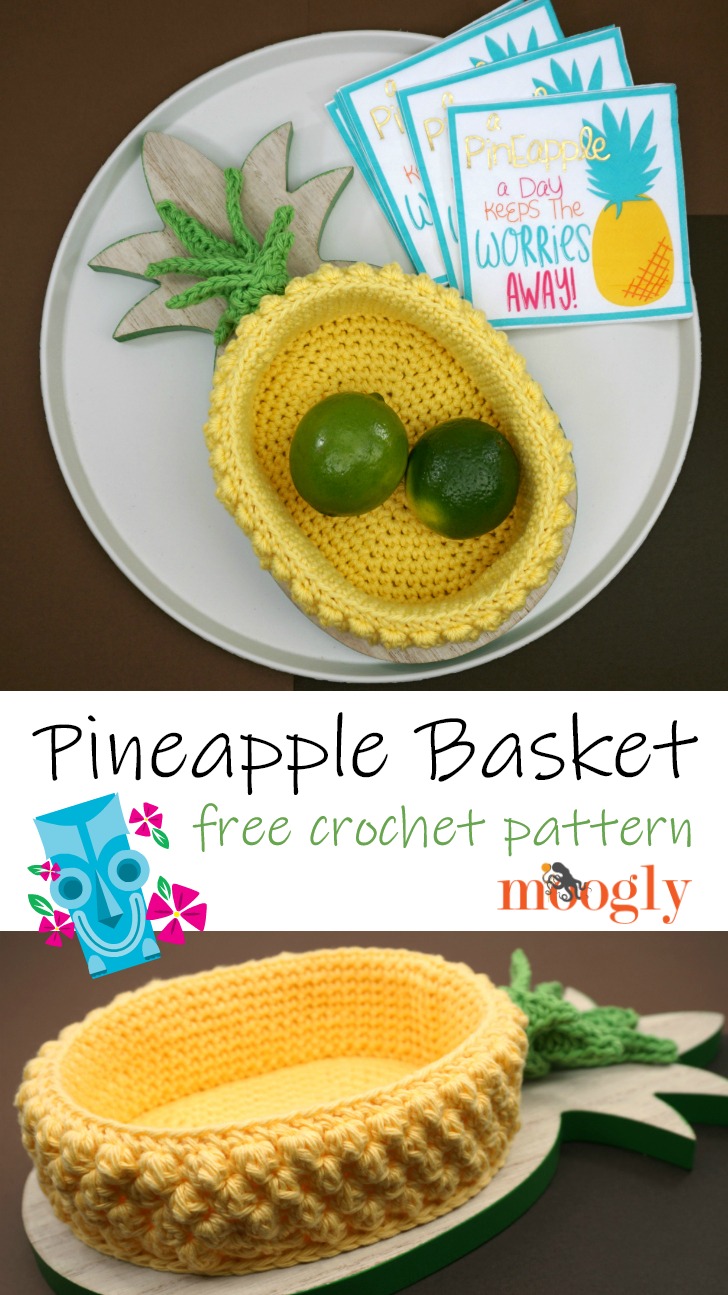
    Pineapple Basket - free crochet pattern on Moogly! Make it with Red Heart Scrubby Smoothie!

    Pineapples have been a home decor staple for generations, and they are having yet another moment in the sun. To celebrate this lucky fruit - and the return of summer - I've designed the Pineapple Basket. And I'm sharing the free crochet pattern right here on Moogly!

    Disclaimer: This post includes affiliate links; materials provided by Red Heart Yarn and Brittany Needles.

    Prefer an ad-free PDF? You've got options!

    This button leads to the pattern on Etsy

    Prefer the free blog version? Keep scrolling!

    Big Pineapple or Little Pineapple?

    The free crochet Pineapple Basket pattern features Red Heart Scrubby Smoothie and a few clever stitches and tricks to create a pineapple shaped bowl you'll love to use and show off.

    Pineapple Basket - free crochet pattern on Moogly! Make it with Red Heart Scrubby Smoothie!

    The Pineapple Basket pattern begins with a simple crochet oval. While I've taken it out to 10 rounds, you can stop increasing at any time if you'd like a smaller crocheted pineapple bowl. Or you can add more rounds in pattern to make it even bigger! As long as you have an even number of stitches, the rest of the pattern works just fine.

    After you make the oval, you make the inside sides of the bowl, and then finally the small bobbles that create the outside sides - one quick fold, add the crown, et voila - a crocheted pineapple basket, ready to use!


    Pineapple Basket

    Add this pattern to your Ravelry Queue and Favorites

    US - H, 5.0mm hook - Brittany Needles

    150 yds Red Heart Scrubby Smoothie (100% Cotton; "4"/Medium/Worsted/UK: 10-12 ply; 3.5oz/100g; 153 yd/140 m)
    Color A: Lime (1 ball)
    Color B: Lemony (1 ball)

    This yarn is discontinued. Recommended substitutions include Lily Sugar'n Cream, Bernat Handicrafter, and WeCrochet Dishie.

    Darice Clear Plastic Canvas - cut 2 pcs, each 1 ⅞" wide and 10.5" long

    Clover Stitch Markers

    Spray Starch

    Gauge: 14 sts x 16 rows = 4"/10 cm in sc

    Size: Basket portion is 7 ⅛" long x 5 ¾" wide, excluding crown.

    Helpful Links & Tutorials:

    Pineapple Basket Tutorial

    Front Loop Only (FLO) and Back Loop Only (BLO)

    Special Stitch:

    Small Bobble (SMB) - dc3tog in the same st, pushing the "bobble" to the front when making the next st

    NOTES:

    To make a smaller basket, simply stop increasing between Rnds 1 and 10 when you have the size desired, and skip to Rnd 11.

    To make a larger basket, continue to increase in pattern after Rnd 10, before continuing with Rnd 11.

    The first rnd is worked into both sides of the foundation chain.

    INSTRUCTIONS:

    Crown Portion: Use Color A

    The leaves of the crown are made in one long strip that is then set aside until assembly. Do not break the yarn between the leaves - just keep crocheting. Crochet into the back/underside of each chain for best results.

    Leaf 1: Ch 5, skip the ch closest to the hook, sl st in next ch, sc in next ch, hdc in next st, dc in last ch.

    Leaves 2 and 3: Rep Leaf 1.

    Leaf 4: Ch 7, skip the ch closest to the hook, sl st in next ch, sc in next ch, hdc in next 2 chs, dc in last 2 chs.

    Leaves 5 and 6: Rep Leaf 4.

    Leaf 7: Ch 10, skip the ch closest to the hook, sl st in next ch, sc in next ch, hdc in next 3 chs, dc in next 3 chs, tr in last ch.

    Leaf 8: Ch 12, skip the ch closest to the hook, sl st in next ch, sc in next 2 chs, hdc in next 3 chs, dc in next 3 chs, tr in last 2 chs.

    Leaf 9: Rep Leaf 8.

    Finish Crocheting the Leaf Strip: Turn leaves to work across the last st of each leaf, ch 1, hdc 4 along each of the last (tr) sts of Leaves 9, 8, and 7, hdc 3 along each of the last (dc) sts of each rem leaf; break yarn leaving an 18" tail.

    Prep the Leaf Strip: Lay Leaf Strip on a clean, non-textured surface. Spray each side lightly with spray starch, and allow to air dry flat and straight.

    Basket Portion: Use Color B

    Rnd 1: Ch 7, sc in the 2nd ch from the hook, sc in the next 4 chs, 3 sc in the last ch wrapping around to the underside of chs, sc in base of next 4 sts, 2 sc in base of first st; join. (14 sts)

    Rnd 2: Ch 1, 2 sc in the first st, sc in the next 4 sts, 2 sc in each of the next 3 sts, sc in the next 4 sts, 2 sc in each of the last 2 sts; join. (20 sts)

    Rnd 3: Ch 1, sc in the first st, 2 sc in the next st, sc in the next 4 sts, [sc in the next st, 2 sc in the next st] 3 times, sc in the next 4 sts, [sc in the next st, 2 sc in the next st] twice; join. (26 sts)

    Rnd 4: Ch 1, sc in the first st, 2 sc in the next st, sc in the next 6 sts, [2 sc in the next st, sc in the next 2 sts] 3 times, sc in the next 4 sts, 2 sc in the next st, sc in the next 2 sts, 2 sc in the next st, sc in the last st; join. (32 sts)

    Rnd 5: Ch 1, sc in the first 2 sts, 2 sc in the next st, sc in the next 7 sts, [2 sc in the next st, sc in the next 3 sts] 3 times, sc in the next 4 sts, 2 sc in the next st, sc in the next 3 sts, 2 sc in the next st, sc in the last st; join. (38 sts)

    Rnd 6: Ch 1, sc in the first 2 sts, 2 sc in the next st, sc in the next 8 sts. [2 sc in the next st, sc in the next 4 sts] 3 times, sc in the next 4 sts, 2 sc in the next st, sc in the next 4 sts, 2 sc in the next st, sc in the last 2 sts; join. (44 sts)

    Rnd 7: Ch 1, sc in the first 3 sts, 2 sc in the next st, sc in the next 9 sts, [2 sc in the next st, sc in the next 5 sts] 3 times, sc in the next 4 sts, 2 sc in the next st, sc in the next 5 sts, 2 sc in the next st, sc in the last 2 sts; join. (50 sts)

    Rnd 8: Ch 1, sc in the first 4 sts, 2 sc in the next st, sc in the next 10 sts, [2 sc in the next st, sc in the next 6 sts] 3 times, sc in the next 4 sts, 2 sc in the next st, sc in the next 6 sts, 2 sc in the next st, sc in the last 2 sts; join. (56 sts)

    Rnd 9: Ch 1, sc in the first 5 sts, 2 sc in the next st, sc in the next 11 sts, [2 sc in the next st, sc in the next 7 sts] 3 times, sc in the next 4 sts, 2 sc in the next st, sc in the next 7 sts, 2 sc in the next st, sc in the last 2 sts; join. (62 sts)

    Rnd 10: Ch 1, sc in the first 6 sts, 2 sc in the next st, sc in the next 12 sts, [2 sc in the next st, sc in the next 8 sts] 3 times, sc in the next 4 sts, 2 sc in the next st, sc in the next 8 sts, 2 sc in the next st, sc in the last 2 sts; join. (68 sts)

    Rnd 11: Ch 1, sc in FLO of each st around; join. (68 sts)

    Rnd 12 - 19: Ch 1, sc in each st around; join. (68 sts)

    Rnd 20: Ch 1, sc in BLO of each st around; join. (68 sts)

    Rnd 21: Ch 1, sc in the first st, SMB in next st, *sc in next st, SMB in next st; rep from * around; join. (68 sts)

    Rnd 22: Ch 1, SMB in the first st, sc in the next st, *SMB in next st, sc in next st; rep from * around; join. (68 sts)

    Rnd 23 and 24: Rep Rnd 21 and 22.

    Rnd 25 and Assembly:

    1. Insert plastic canvas pieces between the bobble section and the sc sides, with the ends overlapping at the sides of the basket.Pineapple Basket - free crochet pattern on Moogly!
    2. (Rnd 25 beginning): Ch 1, sc through each st AND the unused Back Loop from Rnd 11, directly below, sandwiching the canvas between the layers of crochet until you are about 3-5" from finishing the rnd. Secure loop with a stitch marker.Pineapple Basket - free crochet pattern on Moogly!
    3. Roll the Crown up, RS out, starting with Leaf 9 and ending with Leaf 1 on the outside. Using the long tail left behind, secure the base of the Crown and then sew the Crown to the top of the pineapple, going through the bobble portion and putting a few stitches through the plastic canvas if desired. Finish off. Pineapple Basket - free crochet pattern on Moogly!
    4. (Rnd 25 finishing): Reinsert hook in loop left behind and continue to sc through each remaining stitch and Rnd 11 back loop to end; join and finish off. (68 sts)

    I hope you've enjoyed making your own Pineapple Basket! What will you put in yours? There are so many possibilities!

    Pineapple Basket - free crochet pattern on Moogly!

    If you make the Pineapple Basket I’d love to see a photo. So if you share it on social media, be sure to tag me @mooglyblog or #mooglyblog – and happy crocheting!

    The Fine Print

    Written pattern copyright Tamara Kelly 2018, all rights reserved. Please do not reprint or repost this pattern, but please do link to this page to share this pattern with others. If you wish to make items for sale from this pattern or translate it to another language, please visit the About page for details. Thank you to Red Heart Yarn, Brittany Needles, and Clover USA for providing the materials for this pattern.

    Moogly CAL 2018 - Afghan Block #9

    May 10, 2018 by Tamara Kelly 4 Comments

    Block #9 for the 2018 Moogly Crochet Along is here - and it will have your hook feeling like it's on Cloud 9! Designed by Elena Hunt of Beatrice Ryan Designs, this square features a bit of texture, a lot of color, and an easy to follow pattern!

    MooglyCAL2018 Block #9, courtesy of Beatrice Ryan Designs!Disclaimer: This post includes affiliate links; yarn provided by Red Heart. [Read more...]

    Mermaid Towel Tutorial

    May 9, 2018 by Tamara Kelly Leave a Comment

    The Mermaid Towel and Washcloth Set are a lot of fun - but the "mermaid scale" stitch pattern I used to design them is a little bit tricky. So here's a Mermaid Towel Video Tutorial to help!

    Crochet your own Mermaid Towel with this free pattern and Moogly video tutorial!Disclaimer: This post includes affiliate links; material support provided
    by Red Heart Yarns and Brittany Needles.

    [Read more...]

    « Previous Page
    Next Page »
    Tamara Kelly of Moogly

    Moogly is world-famous for fresh. modern, and approachable crochet designs - as well as a little knitting and crafting here and there. On Moogly, you'll find several new free patterns every month, top quality video tutorials, giveaways, and more!

    More about Moogly →

    Popular

    • MooglyCAL2026 Block 21
      MooglyCAL2026 Block 21
    • Crochet and Catch Up with Moogly - October 14, 2026
      Crochet and Catch Up with Moogly - October 14, 2026
    • Seamless Crochet Sweaters Review and Giveaway
      Seamless Crochet Sweaters - Review and Giveaway
    • Ghost Treat Basket Tutorial
      Ghost Treat Basket Tutorial
    gosadi
    I'm a Craftsy Instructor. Click to see my classes.
    I Like Crochet


    Footer

    ↑ back to top

    About

    • About
    • Privacy Policy

    Newsletter

    Contact

    Email Moogly

    As an Amazon Associate I earn from qualifying purchases.
    Copyright © 2026 Mooglyblog.com