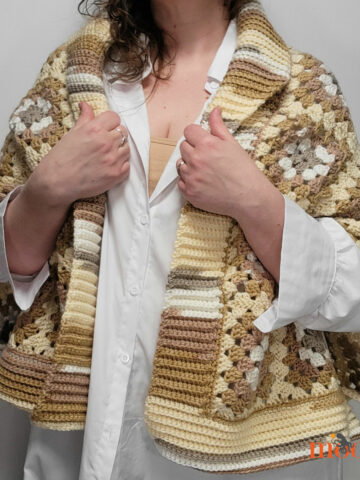
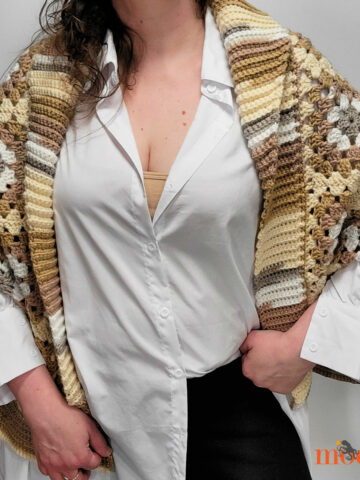
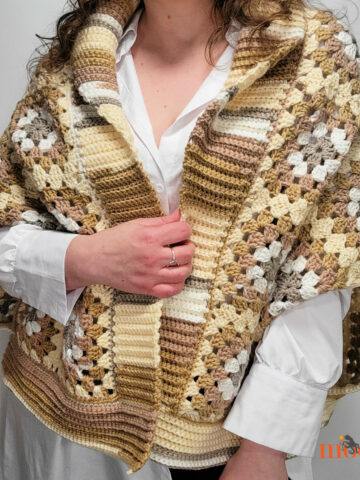
The Seaglass Summer Cardi is a simple beach or swimsuit cover-up - that is just as beautiful back on solid land! And it's a free crochet pattern on Moogly!
 Disclaimer: This post includes affiliate links; materials
provided by Red Heart Yarns and Clover USA.
When I began designing the Seaglass Summer Cardi, I was thinking exclusively in terms of a swimsuit coverup. But by the time it was done, I knew I wanted to wear it everywhere! It's still great for the pool though - even after I soaked it, it dried super fast!

And truth be told... I wasn't really looking forward to putting swimsuit photos of myself on the internet. Nobody needs that! But what you *do* need is a beautiful super lightweight layering piece to throw on this summer - and I think that this is the one for me.
The Seaglass Summer Cardi is truly one size fits all. It fits up to a 68" bust - and stretches too! Made with just 2 cakes of Red Heart It's a Wrap Rainbow, it's simple enough to be your first garment if you haven't made one before!

Seaglass Summer Cardi
Add this pattern to your Ravelry Queue and Favorites
US - K, 6.5mm hook - Clover Amour
1200 yds Red Heart It's a Wrap Rainbow (55% Acrylic/45% Cotton; "2" - Fine/Sport/UK: 5 ply; 623 yds (570 m); 5.29 oz. /150g)
Colorway Shown: Seaglass (2 cakes)
Gauge: 13 sts x 6 rows = 4"/10 cm in Rows 2-3 stitch pattern
Size: One Size Fits All (up to 68" bust)

Helpful Links, Special Stitches & Tutorials:
Seaglass Summer Cardi Tutorial
Foundation Double Crochet - FDC
Chainless Starting Double Crochet - CSDC
Standing Double Crochet - STDC
SCHEMATIC:
The 4" seams on each side are approximately 13" from the shoulder fold. Exact rows are given in the pattern. Block to 34" wide x 36" long.

NOTES:
The yarn is cut several times when making the 2 front sections, in order to maintain the gradient of the yarn and match that of the back. If you are using a solid colored yarn, then you can finish one front side before beginning the other (simply work the same number of rows as the back).
Try on the garment before weaving in the ends of the seams, to make sure you like where they lay - they are easily adjustable and customizable.
If you would like the garment to be shorter or longer, simply stop after any odd-numbered row desired - just be sure to adjust the front to match. Longer rows can always be added before the edging, so that is another good time to try it on.
If a larger/wider garment is desired, I recommend soaking the garment well before blocking and stretching the fabric slightly before pinning, as this fabric has a lot of stretch to it.
Use one cake of Red Heart It's a Wrap Rainbow to make the back, and then use a new cake to make the front pieces. There will be a bit of yarn left over at the end of each cake, which should be set aside for seaming.
If avoiding Foundation Stitches is preferred, substitute a chain of 111 and skip the first 3 chains, and dc in each remaining chain across (109 dc).
If avoiding Chainless Starting Double Crochets or Standing Double Crochets is preferred, substitute a chain 3 (counts as the first dc of the row).
INSTRUCTIONS:
BACK OF CARDI (First Cake)
Row 1: FDC 109; turn. (109 dc) TIP: Put a stitch marker in the base (foundation chain) of the last stitch made.
Row 2: CSDC, ch 1, skip next st, dc in next st, *ch 1, skip next st, dc in next st; rep from * across, turn. (55 dc)
Row 3: CSDC, dc in each st and ch-1 sp across; turn. (109 dc)
Row 4 - 57: Repeat Rows 2 and 3; after Row 57, break yarn.
FRONT OF CARDI (Second Cake)
Right Front Row 1: STDC in base (foundation chain) of the last stitch of Row 1 of the Back of Cardi, dc in the next 54 sts; turn (remaining stitches left unworked). (55 dc)
Right Front Row 2: CSDC, ch 1, skip next st, dc in next st, *ch 1, skip next st, dc in next st; rep from * across, turn. (28 dc)
Right Front Row 3: CSDC, dc in each st and ch-1 sp across; turn. (55 dc)
Right Front Row 4 - 6: Repeat Rows 2 and 3, ending on a Row 2 repeat; break yarn.
Left Front Row 1: STDC in same st as the last st of Right Front Row 1, dc in each remaining st across; turn. (55 dc)
Left Front Row 2 - 12: Repeat Right Front Rows 2 and 3, ending on a Row 2 repeat; break yarn.
Right Front Row 7: STDC in the last stitch made in Right Front Row 6, dc in each st and ch-1 sp across; turn. (55 dc)
Right Front Row 8 - 18: Repeat Right Front Rows 2 and 3, ending on a Row 2 repeat; break yarn.
Left Front Row 13: STDC in the last stitch made in Left Front Row 12, dc in each st and ch-1 sp across; turn. (55 dc)
Left Front Row 14 - 24: Repeat Right Front Rows 2 and 3, ending on a Row 2 repeat; break yarn.
Right Front Row 19: STDC in the last stitch made in Right Front Row 18, dc in each st and ch-1 sp across; turn. (55 dc)
Right Front Row 20 - 30: Repeat Right Front Rows 2 and 3, ending on a Row 2 repeat; break yarn.
Left Front Row 25: STDC in the last stitch made in Left Front Row 24, dc in each st and ch-1 sp across; turn. (55 dc)
Left Front Row 26 - 36: Repeat Right Front Rows 2 and 3, ending on a Row 2 repeat; break yarn.
Right Front Row 31: STDC in the last stitch made in Right Front Row 30, dc in each st and ch-1 sp across; turn. (55 dc)
Right Front Row 32 - 42: Repeat Right Front Rows 2 and 3, ending on a Row 2 repeat; break yarn.
Left Front Row 37: STDC in the last stitch made in Left Front Row 36, dc in each st and ch-1 sp across; turn. (55 dc)
Left Front Row 38 - 48: Repeat Right Front Rows 2 and 3, ending on a Row 2 repeat; break yarn.
Right Front Row 43: STDC in the last stitch made in Right Front Row 42, dc in each st and ch-1 sp across; turn. (55 dc)
Right Front Row 44 - 54: Repeat Right Front Rows 2 and 3, ending on a Row 2 repeat; break yarn.
Left Front Row 49: STDC in the last stitch made in Left Front Row 48, dc in each st and ch-1 sp across; turn. (55 dc)
Left Front Row 50 - 57: Repeat Right Front Rows 2 and 3; break yarn.
Right Front Row 55: STDC in the last stitch made in Right Front Row 54, dc in each st and ch-1 sp across; turn. (55 dc)
Right Front Row 56 and 57: Repeat Right Front Rows 2 and 3; do not turn and do not break yarn.
FINISHING
Edging: Ch 1, sc evenly around the entire piece, working a ch-2 at each corner; join and break yarn.
Seaming: Lay garment flat with Row 57 of back and fronts matched. Using a whip stitch and leftover yarn, sew the sides of the front and back pieces together at Rows 20-26. This seam should be approximately 13" from the shoulder, and 4" long.
And that's another crochet garment on the books - and in my closet! I hope you enjoy making and wearing your own Seaglass Summer Cardi. It's a stunning piece that really shows off the yarn, and I can't wait to see it in the colorways you choose!
If you make the Seaglass Summer Cardi I’d love to see it! So if you share it on social media, be sure to tag me @mooglyblog or #mooglyblog – and happy crocheting!
The Fine Print
Written pattern copyright Tamara Kelly 2018, all rights reserved. Please do not reprint or repost this pattern, but please do link to this page to share this pattern with others. To print or download, use the Print Friendly button below, or go to PrintFriendly.com, or right-click to copy and paste it into a word processing document if those options do not work for you (please note that Print Friendly is a free outside website that the button links to, and you can click here for a tutorial on how to use it, but I cannot provide additional technical support for this service). If you wish to make items for sale from this pattern or translate it to another language, please visit the About page for details. Thank you to Red Heart Yarn and Clover USA for providing the materials for this pattern.


Judy
So pretty! I've never crocheted a garment (can't sew to save my life so it would remain in pieces forever), but I might give this one a try just because it is to pretty. Thank you so much for the pattern and explanations.
Tamara Kelly
Thank you so much Judy! 😀 There are only 8" inches of seams total - and really, they are optional! 🙂 It's all crocheted in one piece, so you could leave it as a ruana if desired.
Kris
Very well done! Not easy to work with a gradient when making separate pieces. It looks really great. I just ordered some of this yarn. Can't wait for it to arrive!!!
Tamara Kelly
Thank you so much! ♥ I hope you enjoy making it!
Eva Carvajal
Thank you so much for the free Sea glass Summer Cardi or ruana. When I first saw it, I immediately knew I wanted to make a ruana. Also, thanks for the excellent tutorial on the Red Heart Yarn. I appreciate the thoroughness of your tutorial because other women have posted that something was wrong with their yarn because it had "knots" all over it. I don't believe it was this yarn. Now I know why there are knots and so much more. Thanks again, Tamara Kelly!
Tamara Kelly
Thank you so much Eva, I'm so glad you like it! 😀 ♥
Susan Heywood
I can see why you want to wears for more than just a swim cover up. It turned out fantastic!. BTW are you in Devils Glen Park in those pictures? They make me miss Iowa.
Tamara Kelly
Hi Susan! Thank you so much! These were taken in my backyard - which does have Duck Creek running through it! 😀
Jessie Rayot
I love the yarn and the stitch pattern and everything about this!!
Tamara Kelly
😀 Thank you so much!
Diana
Simply lovely!
Tamara Kelly
Thank you so much!
Marianne
What a nice pattern. I hope i can understand everything so I can meke it. I’m feom Holland but it’s so nice that i give it a try.
Tamara Kelly
Thank you! I'm happy to try to help if you have any questions!
Jana
I don't understand where to stitch it completely. The one picture of it flat doesn't work for me. Are there side seams? One seam on the shoulders?
What am I missing, Sorry for being so dense.
Tamara Kelly
Hi Jana! The seams are at the side of the waist. There is no seam at the shoulders. 🙂
Katie S
Hey there, beautiful pattern!
I’m working on the back right now, but confused how you got the front colors to match?
Tamara Kelly
Thank you so much! The first paragraph above under Notes covers how I did that. 🙂
Kim Miles
Hi Tamara
Question for you: i did the swatch and my rows/height matches 4” but i get 10 stitches (not the stated 13) for 4” in width.
What do i do to adjust? If i do the full 109 FDC, i think my cardi will be bigger? I am using a 6.5mm Furls Streamline….
Tamara Kelly
Hi Kim! Great question. The best way to get fewer stitches per inch is to go down in hook size! You can also just shorten the rows by a few stitches if you'd like - it's a very forgiving garment. 🙂
Shoalbear
I am late, but this is why it's good to never delete posts because you never know when someone will run into it!
I have a question about the edging:
Edging: Ch 1, sc evenly around the entire piece, working a ch-2 and each corner; join and break yarn.
What does this mean about the corners?
Thank you in advance.
Tamara Kelly
Hi Shoalbear! There's a typo there I hadn't caught - it should be "Edging: Ch 1, sc evenly around the entire piece, working a ch-2 at each corner; join and break yarn." So you'll crochet down the side til you get to the corner, ch 2, then crochet along the next side, etc. Does that make sense? (I'll fix my typo now!)
Janet
I have had this pattern saved, wanting to make for some time. However, I have difficulty using a #2 Fine Sport weight yarn. I found the perfect color in Red Heart Unforgettable, (#4 wt) although it's more like a #3. I have yet to find instructions anywhere on converting yarns of different weights. Any suggestions? This pattern is indeed forgiving and I could just "wing it." You are so helpful with tips and it would be a great help if you could direct me to a conversion chart or video, as there are many projects, even blankets where I use #4 wt. instead of #3 or bulky, etc.
Tamara Kelly
Hi Janet! Alas, I wish I knew of a simple conversion! My best advice is to use the long chain method, and just work until you get the 34" width - then just split that number in half for the front pieces!
TK
Hi Janet. I just finished this piece and used a DK weight yarn with a J hook - it turned out great. I basically just estimated the rows and stitches based off the finished measurements she gave, no special techniques. It's not quite as drapey as say sport weight yarn, but it's absolutely gorgeous anyway, as the length and weight of the final project added extra elegance.
Janet
Thank you so much!