moogly

menu icon
go to homepage
  • Patterns
  • Tutorials
  • MooglyCAL
  • Giveaways
  • Lives
    • Facebook
    • Instagram
    • Pinterest
    • TikTok
    • Twitter
    • YouTube
  • search icon
    Homepage link
    • Patterns
    • Tutorials
    • MooglyCAL
    • Giveaways
    • Lives
    • Facebook
    • Instagram
    • Pinterest
    • TikTok
    • Twitter
    • YouTube
  • ×
    Home

    How to Space Stitches Evenly Along the Side - Moogly Live June 8, 2021

    June 8, 2021 by Tamara Kelly Leave a Comment

    Crocheting a set number of stitches into the side of your work isn't always easy. But I'll show you how to space stitches evenly along the side using stitch markers! Today, get the latest Moogly news on Facebook and see where you can sign up for my next live class. Then, join me on YouTube to see one of my best tricks for working into the edge of your crochet.

    How to Space Stitches Evenly Along the Side- Moogly Live June 8, 2021Disclaimer: This post is sponsored by Yarnspirations, and contains affiliate links. Live videos are unscripted, unedited, occasionally weird, and all opinions are my own.

    [Read more...]

    GoImagine: Review and Giveaway

    June 7, 2021 by Tamara Kelly 1 Comment

    GoImagine is a new site where makers can sell their creations - but unlike other similar sites, 100% percent of their profits go to charity! Get a peek inside and enter to win a $50 gift certificate in this Moogly giveaway!

    GoImagine Review and Giveaway - MooglyDisclaimer: This post was sponsored by GoImagine; all opinions are my own.

    [Read more...]

    The Craft and Tea Box: Review and Giveaway

    June 4, 2021 by Tamara Kelly 1 Comment

    The Craft and Tea Box is a brand new subscription box that features a craft kit sourced from a small business owner and a different tea each month! Get a peek inside and enter to win your own box in this Moogly giveaway!

    The Craft and Tea Box - Review and Giveaway on Moogly Disclaimer: This post was sponsored by The Craft and Tea Box; all opinions are my own.

    [Read more...]

    How to Make the Fringe Hoop Decoration

    June 3, 2021 by Tamara Kelly Leave a Comment

    The Lily Sugar'n Cream Reflected Fringe Hoop is a lovely mirrored decor wreath! No needles required - just simple techniques to knot cotton yarn into a lush fringe around a hoop. In this How to Make the Fringe Hoop Decoration Class, I'll take you through every step - in mini form!

    How to Make the Fringe Hoop Decoration - MooglyDisclaimer: Materials provided by Yarnspirations and Michaels; this post includes affiliate links. 

    [Read more...]

    The Loop Scoop #15: A Yarny Link Party!

    June 1, 2021 by Tamara Kelly 1 Comment

    What a fun and fabulous collection we have for Loop Scoop #15! Make yourself a new sweater or shawl, whip up that baby shower gift, or clean up beautifully with these 5 free patterns. Be sure to check out the new additions and links at the bottom as well, to help us decide what gets featured next round!

    The Loop Scoop 15 - on Moogly and Petals to Picots [Read more...]

    Cuddle Up Dinosaur Blanket

    May 28, 2021 by Tamara Kelly 34 Comments

    Cuddle Up Dinosaur Blanket - free crochet pattern on Moogly

    The Cuddle Up Dinosaur Blanket features the corner to corner stitch and a roaring good time! Crochet one for your own little wild one with this crochet pattern on Moogly!

    Disclaimer: Materials for this pattern were provided by Yarnspirations; this post includes affiliate links.

    Prefer an ad-free PDF? You've got options!

    Prefer the free blog version? Keep scrolling!

    Cuddle Up as a Dinosaur... or Dragon?

    With this pattern, it's all too easy to see the possibilities! Change up the colors, and you'll go from dino to Cuddle Up Dragon Blanket! Change up the spike colors, use color-changing yarn, your imagination is the limit. And it's a great accompaniment to the Cuddle Up Unicorn Blanket!

    Cuddle Up Dinosaur Blanket - free crochet pattern on Moogly

    Featuring Caron One Pound

    Caron One Pound is a great choice to use for the Cuddle Up Dinosaur Blanket because it's strong and kid-friendly. Plus, it comes in lots of great colors for your custom creation. And those big skeins mean less to buy, and a lot fewer ends to weave in!

    Cuddle Up Dinosaur Blanket - free crochet pattern on Moogly - work in progress

    Corner to Corner - or Just Double Crochet!

    I used the Corner to Corner or C2C stitch, aka the box stitch to create most of the pieces for this design. But if you're not a fan, don't fret! You can simply make the Body and Head with simple rows of double crochet, or your own chosen stitch. Just work to the dimensions for each piece given!

    Cuddle Up Dinosaur Blanket - free crochet pattern on Moogly


    Cuddle Up Dinosaur Blanket

    Add this pattern to your Ravelry Queue and Favorites

    US - K, 6.5 mm hook - Susan Bates

    1060 - 1900 yds Caron One Pound (worsted/“4”/UK: 10 ply; 454g/16 oz, 742 m/ 812 yds)
    Color A: Kelly Green - 925-1700 yds (2 balls for size ¾ and ⅚; 3 balls for size ⅞)
    Color B: Grass Green - 135-200 yds (1 ball all sizes)

    Stitch markers

    Gauge: 5 blocks (ch-3 and dc 3 is one block) = 4" in pattern

    Sizes (by age, based on average height): ¾ (shown); ⅚; ⅞

    Helpful Links:

    How to Corner to Corner Crochet
    Crochet Abbreviations
    Magic Circle
    Tr - treble
    Dtr - double treble
    Whip Stitch Seaming
    Join with sc

    NOTES:

    The directions for the "Blanket Pieces" and "Hands" are not written as standard crochet instructions. Rather, they use the Corner to Corner technique. See the video tutorial linked above if needed for more info on how to work this stitch.

    Cuddle Up Dinosaur Blanket - flat

    CUDDLE UP DINOSAUR BLANKET INSTRUCTIONS:

    Body Blanket Piece - Color A

    Size ¾: (measures approximately 28" x 36")

    Rows 1 - 35: Work Corner to Corner stitch increases - start with one block, increasing on both ends on each row, to 35 blocks across.

    Row 36 - 45: Work Corner to Corner stitch evenly - decrease on one side, and increase on the other, maintaining 35 blocks across for each row.

    Row 46 - 79: Work Corner to Corner stitch decreases - decrease on each side of each row, until only 1 block remains. Break yarn and set aside.

    Size ⅚: (measures approximately 33" x 42")

    Rows 1 - 41: Work Corner to Corner stitch increases - start with one block, increasing on both ends on each row, to 41 blocks across.

    Row 42 - 53: Work Corner to Corner stitch evenly - decrease on one side, and increase on the other, maintaining 41 blocks across for each row.

    Row 54 - 93: Work Corner to Corner stitch decreases - decrease on each side of each row, until only 1 block remains. Break yarn and set aside.

    Size ⅞: (measures approximately 38" x 48")

    Rows 1 - 47: Work Corner to Corner stitch increases - start with one block, increasing on both ends on each row, to 47 blocks across.

    Row 48 - 61: Work Corner to Corner stitch evenly - decrease on one side, and increase on the other, maintaining 47 blocks across for each row.

    Row 62 - 107: Work Corner to Corner stitch decreases - decrease on each side of each row, until only 1 block remains. Break yarn and set aside.

    Hood Blanket Piece - Color A

    Size ¾: (measures approximately 8" x 12")

    Rows 1 - 10: Work Corner to Corner stitch increases - start with one block, increasing on both ends on each row, to 10 blocks across.

    Row 11 - 15: Work Corner to Corner stitch evenly - decrease on one side, and increase on the other, maintaining 10 blocks across for each row.

    Row 16 - 24: Work Corner to Corner stitch decreases - decrease on each side of each row, until only 1 block remains. Break yarn leaving a long tail and set aside.

    Size ⅚: (measures approximately 9" x 14")

    Rows 1 - 11: Work Corner to Corner stitch increases - start with one block, increasing on both ends on each row, to 11 blocks across.

    Row 12 - 17: Work Corner to Corner stitch evenly - decrease on one side, and increase on the other, maintaining 11 blocks across for each row.

    Row 18 - 27: Work Corner to Corner stitch decreases - decrease on each side of each row, until only 1 block remains. Break yarn leaving a long tail and set aside.

    Size ⅞: (measures approximately 10" x 18")

    Rows 1 - 13: Work Corner to Corner stitch increases - start with one block, increasing on both ends on each row, to 13 blocks across.

    Row 14 - 23: Work Corner to Corner stitch evenly - decrease on one side, and increase on the other, maintaining 13 blocks across for each row.

    Row 24 - 35: Work Corner to Corner stitch decreases - decrease on each side of each row, until only 1 block remains. Break yarn leaving a long tail and set aside.

    Hands (make 2) - Color B

    Size ¾:

    Rows 1 - 6: Work Corner to Corner stitch increases - start with one block, increasing on both ends on each row, to 6 blocks across.

    Row 7: Ch 2, dc in first st, hdc in next st, sc in next st, *(sc, hdc, dc) in next ch-3 sp,** skip next 3 sts; rep from * across ending last rep at **, turn.

    Row 8: Ch 1, sc in each st across; break yarn and set aside.

    Size ⅚:

    Rows 1 - 7: Work Corner to Corner stitch increases - start with one block, increasing on both ends on each row, to 7 blocks across.

    Row 8: Ch 2, dc in first st, hdc in next st, sc in next st, *(sc, hdc, dc) in next ch-3 sp,** skip next 3 sts; rep from * across ending last rep at **, turn.

    Row 9: Ch 1, sc in each st across; break yarn and set aside.

    Size ⅞:

    Rows 1 - 8: Work Corner to Corner stitch increases - start with one block, increasing on both ends on each row, to 8 blocks across.

    Row 9: Ch 2, dc in first st, hdc in next st, sc in next st, *(sc, hdc, dc) in next ch-3 sp,** skip next 3 sts; rep from * across ending last rep at **, turn.

    Row 10: Ch 1, sc in each st across; break yarn and set aside.

    Spikes - Color B

    1 Row: *Ch 7, skip ch closest to hook, sl st in next ch, sc in next ch, hdc in next ch, dc in next ch, tr in next ch, dtr in next ch; rep from * until 44 (48, 54) spikes made.

    Join Spikes: Fold row in half, so that first and last spikes made meet, making sure that the row is not twisted. Working through both layers, ch 1, sc across the spikes, working an extra sc in the skipped ch at the top of each spike.

    Cuddle Up Dinosaur Blanket - Spikes

    Assembly (all sizes)

    Step 1: Whipstitch Hood Blanket Piece to Body Blanket Piece so that longer sides are together, centered on the Body Blanket Piece.

    Cuddle Up Dinosaur Blanket - hood and hands

    2: Use stitch markers to pin hands to top two corners, matching up the blocks of the pattern.

    3: Fold the top of the Hook in half and whipstitch it together to form the hood (see photo below).

    Cuddle Up Dinosaur Blanket - fold and seam hood

    4: Sew base of Spikes (dtr sts) to blanket, starting at seam at top of hood and going straight down the middle of the back.

    Cuddle Up Dinosaur Blanket - sew on spikes

    Finishing (all sizes) - Color B

    Join with sc between any 2 blocks along bottom edge of Body Blanket Piece, ch 2, *sc between next pair of blocks, ch 2; rep from * around working 3 sc in each corner, and going through both the Body Blanket Piece and the Hands when at the corners, to secure the Hands to the blanket. Join and finish off. Weave in ends.

    Cuddle Up Dinosaur Blanket - edging


    LOOKING FOR MORE?

    Are you looking for more free crochet for kids' patterns? I have so many - browse all my patterns on Moogly or Ravelry!

    Cuddle Up Dinosaur Blanket - flat 2

    Has the Cuddle Up Dinosaur Blanket pattern inspired you to make your own project? Be sure to tag me @mooglyblog or #mooglyblog so I can check it out too!

    THE FINE PRINT

    Follow Moogly on Facebook, Twitter, Pinterest, and Instagram! Thank you to Yarnspirations for providing the materials shown in this post. Written pattern copyright Tamara Kelly 2021, all rights reserved. Please do not reprint or repost this pattern. Please do link to this page to share this pattern with others.

    Wish to make items for sale from this pattern or translate it to another language? Please visit the About page for details. 

    MooglyCAL2021 - Block #11

    May 27, 2021 by Tamara Kelly Leave a Comment

    MooglyCAL2021 Block 11 is a beautiful and textured square by ACCROchet! The Secret Handshake Block features a reversible stitch pattern with two unique looks. Read on for all the details, and for the link to Block #11 in this free year-long crochet along!

    MooglyCAL2021 Block 11 Disclaimer: This post includes affiliate links; materials provided by Yarnspirations and Furls. [Read more...]

    How to Crochet the Lily Sugar'n Cream Market Bag

    May 26, 2021 by Tamara Kelly Leave a Comment

    The Lily Sugar'n Cream Market Bag is the quintessential mesh bag - a true classic! This bag is great to have on hand no matter where your day takes you. In this How to Crochet the Lily Sugar'n Cream Market Bag Class, I'll take you through every step - in mini form!

    How to Crochet the Lily Sugar'n Cream Market Bag - Tutorial on Moogly!
    Disclaimer: Materials provided by Yarnspirations and Michaels; this post includes affiliate links. 

    [Read more...]

    How to Close Holes Behind Crochet Cables - Moogly Live May 25, 2021

    May 25, 2021 by Tamara Kelly Leave a Comment

    Crochet cables add pattern, texture, and interest to all sorts of projects! Unfortunately, they can also leave a "hole" in your work. Today, get the latest Moogly news on Facebook and see where you can sign up for my next live class. Then, join me on YouTube to learn how to close holes behind crochet cables!

    How to Close Holes Behind Crochet Cables - MooglyDisclaimer: This post is sponsored by Yarnspirations, and contains affiliate links. Live videos are unscripted, unedited, occasionally weird, and all opinions are my own.

    [Read more...]

    Red Heart With Love Metallic Giveaway

    May 24, 2021 by Tamara Kelly 107 Comments

    Red Heart With Love Metallic is the same wonderful Red Heart With Love you know and well... love... but with a thread of sparkle running throughout! Take a look at this happy yarn and enter to win 7 lucky skeins of Red Heart With Love Metallic on Moogly!

    Red Heart With Love Metallic Giveaway on MooglyDisclaimer: This post was sponsored by Yarnspirations and includes affiliate links; all opinions are my own.

    [Read more...]

    Jellyfish Squish Tutorial

    May 21, 2021 by Tamara Kelly Leave a Comment

    The Jellyfish Squish Tutorial will demo the details of this simple squishy crochet friend - in both right and left-handed videos! Follow along with the free pattern here on Moogly!

    Jellyfish Squish - free crochet pattern on MooglyDisclaimer: This post includes affiliate links; materials provided by Yarnspirations.

    [Read more...]

    Jellyfish Squish

    May 20, 2021 by Tamara Kelly 2 Comments

    Jellyfish Squish - free crochet pattern on Moogly

    The Jellyfish Squish is another cute, cuddly, squishy, free crochet pattern on Moogly! So much more huggable than the real thing, you can make your own with Bernat Baby Blanket and the pattern below!

    Disclaimer: This post includes affiliate links; materials provided by Yarnspirations.

    Prefer an ad-free PDF? You've got options!

    Prefer the free blog version? Keep scrolling!

    What Makes the Jellyfish Squish?

    The Jellyfish Squish is filled with a 16" round pillow form, so it's supremely cuddlable. If you'd prefer, you can use fiberfill, but I do like how premade pillow forms hold their shape. I have used Microbead pillows for these types of projects in the past but didn't find one just the right size for the jellyfish. But if you'd like, you can open up a seam on your pillow form and fill it with microbeads yourself!

    Jellyfish Squish - free crochet pattern on Moogly

    Made with Bernat Baby Blanket

    Bernat Baby Blanket is just like the regular Bernat Blanket yarn - but with more color choices! And of course, all Bernat Baby yarns are OEKO-TEX® certified, and are tested for over 300 harmful substances. So you can feel free to mix and match your favorite colors of Blanket and Baby Blanket when making the Jellyfish Squish, or any project that calls for either yarn!

    Jellyfish Squish - work in progress

    Finishing Touches

    I used safety eyes to create the "face" of my jellyfish, but you can customize yours however you like! Add a mouth as well, use buttons instead of safety eyes, or go with no face at all (aka, the more accurate to real-life route).

    I've also included instructions for a total of 8 tentacles, but jellyfish have all different numbers and forms - so you can customize the look of your Jellyfish Squish in all sorts of ways!

    Jellyfish Squish - pinterest collage


    Jellyfish Squish

    Add this pattern to your Ravelry Queue and Favorites

    US-K, 6.5mm hook - Susan Bates

    440 yds  Bernat Baby Blanket (6 – Super Bulky/UK: 14-16 ply; 100% polyester; 300g/10.5 oz; 201 m/220 yds)
    Color A: Vanilla (1 ball)
    Color B: Baby Teal (1 ball)

    16" Round Pillow Form

    22mm Safety Eyes

    Stitch Markers

    Large Yarn Needle

    Gauge:  4" across after Rnd 3dc

    Size: Approx 14" wide x 18" max length (variable)

    Helpful Links & Tutorials

    Jellyfish Squish Tutorial

    Crochet Abbreviations

    Magic Circle

    Working in a Spiral

    Hdc – half double crochet

    Hdc2tog – hdc decrease

    Seamless Finishing

    Join with dc (Standing dc)

    NOTES:

    Rnds in the top and bottom are worked in a spiral. Do not ch 1 or sl st unless directed in pattern.

    Move a stitch marker along the first st of each rnd as you work to keep track of your progress.

    Jellyfish Squish Instructions

    Top of Jellyfish 

    Rnd 1: With Color A, make a magic circle, ch 1, sc in the ring, 9 hdc in the ring. (10 sts)

    Rnd 2: 2 hdc in each st around. (20 hdc)

    Rnd 3: *Hdc in the next st, 2 hdc in the next st; rep from * around. (30 hdc)

    Rnd 4: *2 hdc in the next st, hdc in the next 2 sts; rep from * around. (40 hdc)

    Rnd 5: *Hdc in the next 3 sts, 2 hdc in the next st; rep from * around. (50 hdc)

    Rnd 6: *Hdc in the next st, 2 hdc in the next st, hdc in the next 3 sts; rep from * around. (60 hdc)

    Rnd 7: *Hdc in the next 5 sts, 2 hdc in the next st; rep from * around. (70 hdc)

    Rnd 8: *2 hdc in the next st, hdc in the next 6 sts; rep from * around. (80 hdc)

    Rnd 9: *Hdc in the next 15 sts, 2 hdc in the next st; rep from * around. (85 hdc)

    Rnd 10: Hdc in each st around.

    Rnd 11: Hdc in the first 8 sts, *2 hdc in the next st, hdc in the next 16 sts; rep until 9 sts rem, 2 hdc in the next st, hdc in the last 8 sts. (90 sts)

    Rnd 12 - 15: Hdc in each st around.

    Rnd 16: *Hdc in the next 16 sts, hdc2tog; rep from * around. (85 hdc)

    Rnd 17: Hdc in each st around.

    Rnd 18: Hdc in the next 7 sts, *hdc2tog, hdc in the next 15 sts; rep from * until 10 sts rem, hdc2tog, hdc in last 8 sts. (80 hdc)

    Rnd 19: Sc in next st, sl st in next st, break yarn and seamless join. Set piece aside until assembly.

    Bottom of Jellyfish

    Rnd 1 - 8: With Color B, rep Rnds 1 - 8 of the Top of Jellyfish

    Rnd 9: Rep Rnd 19 of the Top of Jellyfish.

    Tentacles #1 - Make 2 with Color B

    Row 1: Ch 35, skip the 2 chs closest to the hook, 3 dc in each rem ch across; break yarn leaving a long tail for sewing. (99 dc)  Set pieces aside until assembly.

    Tentacles #2 - Make 2 with Color B

    Row 1: Ch 22, skip the 2 chs closest to the hook, 3 dc in each rem ch across; break yarn leaving a long tail for sewing. (60 dc) Set pieces aside until assembly.

    Tentacles #3 - Make 2 with Color A

    Row 1: Ch 35, skip the 2 chs closest to the hook, 2 hdc in each rem ch across; break yarn leaving a long tail for sewing. (66 hdc) Set pieces aside until assembly.

    Tentacles #4 - Make 2 with Color A

    Row 1: Ch 27, skip the 2 chs closest to the hook, 2 dc in each rem ch across; break yarn leaving a long tail for sewing. (50 dc) Set pieces aside until assembly.

    Jellyfish Squish Assembly

    1st Step: Sew the Tentacles to the Bottom of Jellyfish

    Sew Tentacles #1 opposite each other along Rnd 2 of the Bottom of Jellyfish.

    Sew Tentacles #3 opposite each other along Rnd 2 of the Bottom of Jellyfish.

    Jellyfish Squish - first rnd of Tentacles

    Then, sew Tentacles #2 opposite each other along Rnd 4 of the Bottom of Jellyfish.

    Sew Tentacles #4 opposite each other along Rnd 4 of the Bottom of Jellyfish.

    2nd Step: Add Eyes to the Top of Jellyfish (optional) 

    Attach safety eyes (or sew buttons) between Rnds 13 and 14 of Top of Jellyfish. (You can also add a smile with a small amount of black worsted weight yarn if desired.)

    Jellyfish Squish - eyes closeup

    3rd Step: Stuff and Set-Up for Final Rnd

    Insert Pillow Form in Top of Jellyfish, making sure the eyes are facing out. Use stitch markers to attach Top and Bottom of Jellyfish together with Tentacles also facing out.

    4th Step: Attach the Top and Bottom 

    With Color B, and working through matched sts of both pieces with Tentacles facing away from you, join with dc in any st,  dc in the next 2 sts, 2 dc in the next st, *dc in the next 3 sts, 2 dc in the next st; rep from * around, join with sl st in top of first st, break yarn and finish off.

    Jellyfish Squish - dc through both layers


    LOOKING FOR MORE?

    Are you looking for more free crochet Squish patterns? Check out the Bunny Squish, Octopus Squish, Narwhal Squish, and Squid Squish! And you can browse all my patterns on Moogly or Ravelry!Squish Collage - patterns available on Moogly!

    If the Jellyfish Squish pattern inspires you to make your own project, and you post a photo on social media, be sure to tag me @mooglyblog or #mooglyblog so I can check it out too!

    THE FINE PRINT

    Follow Moogly on Facebook, Twitter, Pinterest, and Instagram! Thank you to Yarnspirations for providing the materials shown in this post. Written pattern copyright Tamara Kelly 2021, all rights reserved. Please do not reprint or repost this pattern, but please do link to this page to share this pattern with others.

    If you wish to make items for sale from this pattern or translate it to another language, please visit the About page for details. 

    The Loop Scoop #14: A Yarny Link Party!

    May 18, 2021 by Tamara Kelly Leave a Comment

    Get ready to refresh your home and wardrobe with this fabulous collection in The Loop Scoop #14! All these patterns are available for you to make yourself - and all but one are free! Be sure to check out the new additions and links at the bottom as well, to help us decide what gets featured next round!

    Loop Scoop 14 - get all the links to these patterns on Moogly!
    [Read more...]

    The New Crochet Stitch Dictionary: Review and Giveaway

    May 17, 2021 by Tamara Kelly 3 Comments

    The New Crochet Stitch Dictionary by Nele Brass and Eveline Hetty-Burkart features 440 patterns - and more! Get a peek inside and enter to win your own copy in this Moogly giveaway!

    The New Crochet Stitch Dictionary GiveawayDisclaimer: This post includes affiliate links and was sponsored by Stackpole Books; all opinions are my own.

    [Read more...]

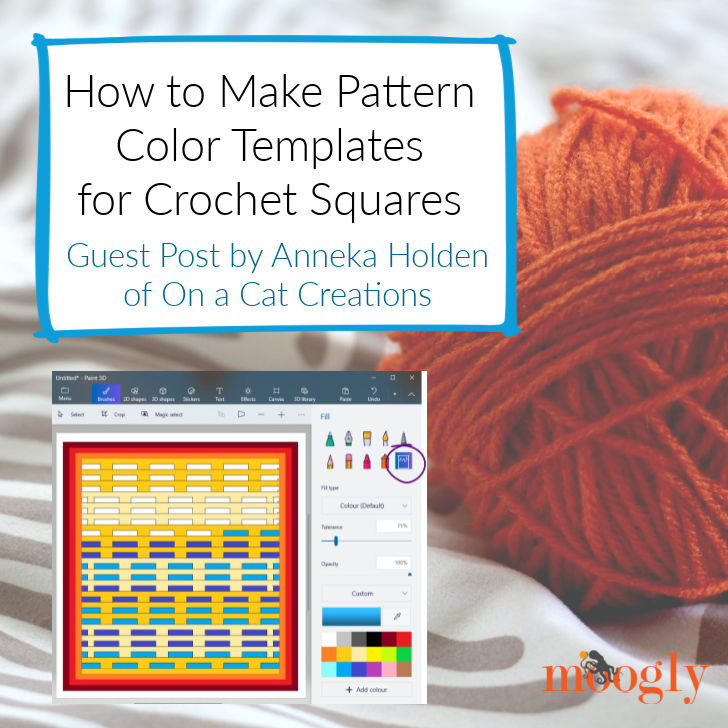
    How to Make Pattern Color Templates: Guest Post by Anneka Holden

    May 14, 2021 by Tamara Kelly Leave a Comment

    When you're planning a crochet or knit project, there are a few different factors to consider - and color layout is a big one!  Anneka Holden is a member of the Moogly Afghan Crochet Along Group on Facebook, and she is sharing how to make pattern color templates for these projects - like a coloring page you can play with to plan your design! I'm so excited to get to share her method with you here on Moogly!

    How to Make Pattern Color Templates: Guest Post by Anneka HoldenDisclaimer: This guest post is written by Anneka Holden, posted here with permission. 

    [Read more...]

    MooglyCAL2021 - Block #10

    May 13, 2021 by Tamara Kelly Leave a Comment

    MooglyCAL2021 Block 10 is a unique and fun JAYGO square by Fiber Flux! The Planet Earth Square features post stitches in a creative way, and there's a video tutorial too. Read on for all the details, and for the link to Block #10 in this free year-long crochet along!

    MooglyCAL2021 Block 10 Courtesy of Fiber Flux Disclaimer: This post includes affiliate links; materials provided by Yarnspirations and Furls. [Read more...]

    How to Choose Colors for Your Yarn Projects

    May 12, 2021 by Tamara Kelly Leave a Comment

    Sometimes picking out the colors is the hardest part of getting started with your next project! In this How to Choose Colors for Your Yarn Projects Class, I’ll share my best tips and tricks – and yours too!

    How to Choose Colors for Your Yarn Projects

    Disclaimer: Materials provided by Yarnspirations and Michaels; this post includes affiliate links.

    [Read more...]

    Chainless Starting Y Stitch - Moogly Live May 11, 2021

    May 11, 2021 by Tamara Kelly 2 Comments

    The Y Stitch is a great crochet stitch for all sorts of lacy projects - and the Chainless Starting Y Stitch opens up even more possibilities! Today, get the latest Moogly news on Facebook and see where you can sign up for my next live class. Then, join me on YouTube to learn how to crochet the Chainless Starting Y Stitch (with a little review of the Y stitch of course)!

    How to Crochet the Chainless Starting Y St - MooglyDisclaimer: This post is sponsored by Yarnspirations, and contains affiliate links. Live videos are unscripted, unedited, occasionally weird, and all opinions are my own.

    [Read more...]

    Bucilla Weaving Loom All-In-One Loom Kit Giveaway

    May 10, 2021 by Tamara Kelly 1 Comment

    If you love playing with yarn, then you might want to give weaving a try! It can be a lot of fun, and very creative. So let's check out this Bucilla Weaving Loom, All-In-One Loom Kit. And then enter to win your own on Moogly!

    Bucilla Weaving Loom All-In-One Loom Kit Giveaway on MooglyDisclaimer: Materials provided by PLAID; this post includes affiliate links.

    [Read more...]

    Plush Hourglass Floor Pillow Tutorial

    May 7, 2021 by Tamara Kelly Leave a Comment

    The Plush Hourglass Floor Pillow Tutorial will demo how to crochet this lovely oversized cushion - in both right and left-handed videos! Follow along with the free pattern here on Moogly!

    Plush Hourglass Floor Pillow - on floorDisclaimer: This post includes affiliate links; materials provided by Yarnspirations.

    [Read more...]

    Plush Hourglass Floor Pillow

    May 6, 2021 by Tamara Kelly Leave a Comment

    The Plush Hourglass Floor Pillow is an oversized throw pillow - perfect for lounging at any level! Jumbo yarn makes gorgeous thick cables in this free crochet pattern on Moogly!

    Plush Hourglass Floor Pillow - on bed

    Disclaimer: This post includes affiliate links; materials provided by Yarnspirations.

    Prefer an ad-free PDF?

    Prefer the free blog version? Keep scrolling!

    It's So Fluffy

    The Plush Hourglass Floor Pillow is about 24 inches square when finished - and so thick and soft! Our family loves gathering around the coffee table to play games together, and the extra seat is welcome. This cushion looks great up on the couch or down on the floor. And it's ideal against the headboard when sitting up in bed!

    Plush Hourglass Floor Pillow - on floor

    I've used this stitch pattern a few times before - in the Striped Hourglass Area Rug, the Striped Hourglass Square, Striped Hourglass Basket, and now a floor cushion! I have, once again, changed up some of the details for yet another take on this pattern. I eliminated the stripes, made the stitches bigger, and took out some rows for a quicker repeat!

    Plush Hourglass Floor Pillow on a white background

    Made with Bernat Blanket Extra

    Bernat Blanket Extra is the even thicker, fuzzier, cozier, Jumbo version of Bernat Blanket. To crochet the Plush Hourglass Floor Pillow I used 3 balls of Blanket Extra and a US-Q, 16mm crochet hook. So it worked up super fast and got even fluffier than the pillow inside!

    Plush Hourglass Floor Pillow back piece in progress with hook and dish with stitch markers and scissors

    Finishing Touches

    When you make crochet cables with a big thick yarn like this, you end up with "holes" in the fabric. And then the pillow shows through - bleh. There's an easy solution though!

    After I finished crocheting the Plush Hourglass Floor Pillow, I put some of the leftover yarn and a yarn needle. Then, from the inside of the pillow, I simply stitched the gaps closed! After weaving in the ends, I had a gorgeous solid fabric with no tell-tale gaps. It's these finishing touches that take it to the next level!

    Plush Hourglass Floor Pillow Pinterest Collage


    Plush Hourglass Floor Pillow

    Add this pattern to your Ravelry Queue and Favorites

    US-Q, 16mm hook - Susan Bates

    285 yds Bernat Blanket Extra (7 - Jumbo; 100% polyester; 300 g/10.5 oz, 87 m/97 yds)
    Colorway shown: Velveteal (3 balls)

    3 buttons - 40mm or 1.5"

    24" square pillow form

    Stitch Markers

    Large Yarn Needle

    Gauge:  4.25 sts x 3.3 rows = 4"/10cm in hdc

    Size: approx 24" x 24"

    Helpful Links & Tutorials

    Plush Hourglass Floor Pillow Tutorial

    Crochet Abbreviations

    Post stitches

    Join with sc

    NOTE:

    This pattern is made in three pieces and then seamed with a round of single crochet.

    When you make a post stitch, skip the hdc stitch behind it – this maintains the st count for the row.

    If desired, use leftover yarn to sew closed the gaps around the crochet cables.

    This pillow cover is removable for easy care. Follow the wash instructions for the yarn used - but be sure to choose buttons with the same care instructions.

    Plush Hourglass Floor Pillow Instructions

    Front Panel

    Row 1: Ch 25, skip ch closest to the hook, hdc in each rem ch across; turn. (24 sts in every row of pattern)

    Row 2 and every even-numbered row to end: Ch 1, hdc in each st across; turn.

    Row 3: Ch 1, hdc in first 5 sts, fptr around next 2 sts 2 rows below, *hdc in next 4 sts, fptr around next 2 sts 2 rows below; rep from * until 5 sts rem, hdc in last 5 sts; turn.

    Rows 5 and 7: Ch 1, hdc in first 3 sts, fptr around first post st 2 rows below, hdc in next 4 sts, *fptr around next 2 post sts 2 rows below, hdc in next 4 sts; rep from * across until 4 sts rem, fptr around last post st 2 rows below, hdc in last 3 sts; turn.

    Rows 9 and 11: Ch 1, hdc in first 5 sts, fptr around first 2 post sts 2 rows below, *hdc in next 4 sts, fptr around next 2 post sts 2 rows below; rep from * until 5 sts rem, hdc in last 5 sts; turn.

    Rows 13 - 19: Rep Rows 5 - 11. Do not turn after Row 19.

    Edging Rnd: Ch 1, sc 24 along the side of the panel, ch 2, sc in each st of the foundation chain, ch 2, sc 24 along the other side of the panel, ch 2, sc in each st of Row 19, ch 2; join to first sc and break yarn.

    Large Back Panel

    Row 1: Ch 25, skip ch closest to the hook, hdc in each rem ch across; turn. 

    Row 2 - 17: Ch 1, hdc in each st across; turn. Do not turn after Row 17.

    Edging Rnd: Ch 1, sc 20 along the side of the panel, ch 2, sc in each st of the foundation chain, ch 2, sc 20 along the other side of the panel, ch 2, sc in each st of Row 17, ch 2; join to first sc and break yarn.

    Small Back Panel

    Row 1: Ch 25, skip ch closest to the hook, hdc in each rem ch across; turn. 

    Row 2 - 5: Ch 1, hdc in each st across; turn. Do not turn after Row 5.

    Edging Rnd: Ch 1, sc 6 along the side of the panel, ch 2, sc in each st of the foundation chain, ch 2, sc 6 along the other side of the panel, ch 2, sc in each st of Row 5, ch 2; join to first sc and break yarn.

    Assembly

    1st Step: Using stitch markers, attach the pieces to each other so that the cables are facing out on the Front Panel.  The Small Back Panel should overlap the Large Back Panel.

    2nd Step: With Front Panel facing you, join with a sc through any corner ch-2 sp, going through both layers. Work 2 more sc in the same corner ch-2 sp. Working through all layers as needed, sc around the pillow cover, working 3 sc in each rem corner.

    Plush Hourglass Floor Pillow - side view

    3rd Step: Sew buttons to Large Back Panel where the Small Panel overlaps, as shown.

    lush Hourglass Floor Pillow - back

    4th Step: Fold back the Small Back Panel and insert pillow form. Fold Small Panel back over the top of the pillow, and button closed.


    LOOKING FOR MORE?

    Are you looking for more free crochet pillow patterns? Check out the Diagonal Stripes and Texture Pillow, Hygge Diamond Pillow, Sunshine Lattice Pillow, Rainbow in the Clouds Pillow, or Bacon and Eggs Pillow! Or you can browse all my patterns on Moogly or Ravelry!

    Moogly Pillows

    If the Plush Hourglass Floor Pillow pattern inspires you to make your own project, and you post a photo on social media, be sure to tag me @mooglyblog or #mooglyblog so I can check it out too!

    THE FINE PRINT

    Follow Moogly on Facebook, Twitter, Pinterest, and Instagram! Thank you to Yarnspirations for providing the materials shown in this post. Written pattern copyright Tamara Kelly 2021, all rights reserved. Please do not reprint or repost this pattern, but please do link to this page to share this pattern with others.

    To print or download, use the Print Friendly button below, or go to PrintFriendly.com, or right-click to copy and paste it into a word processing document if those options do not work for you (please note that Print Friendly is a free outside website that the button links to, and you can click here for a tutorial on how to use it, but I cannot provide additional technical support for this service).

    If you wish to make items for sale from this pattern or translate it to another language, please visit the About page for details. 

    The Loop Scoop #13: A Yarny Link Party!

    May 4, 2021 by Tamara Kelly Leave a Comment

    It's lucky #13 because this round of the Loop Scoop features 5 fabulous new free crochet patterns - from home decor to art to a beautiful cardigan! Be sure to check out the new additions and links at the bottom as well, to help us decide what gets featured next round!

    The Loop Scoop 13 on Moogly and Petals to Picots [Read more...]

    Hooked on You by Kathleen Fuller Giveaway

    May 3, 2021 by Tamara Kelly 10 Comments

    Hooked on You is a new book by Kathleen Fuller - a "sweet and delightful small-town rom-com" that centers on a local yarn shop! And in addition to a lovely story, the book includes a pair of knit and crochet hat patterns - and the crochet version was designed by me! Get a peek inside and enter to win one of three copies in this Moogly giveaway!

      Hooked on You Giveaway on MooglyDisclaimer: This post was sponsored by Kathleen Fuller; all opinions are my own.

    [Read more...]

    Patons Striped Hourglass Basket

    April 30, 2021 by Tamara Kelly 1 Comment

    The Patons Striped Hourglass Basket is a smart and functional crochet container that is useful in every room of the home. Perk up your houseplants, organize your ornaments, and manage your mess with this free crochet pattern - video tutorials included!

    Patons Striped Hourglass Basket by MooglyDisclaimer: This post is sponsored by Yarnspirations, all opinions are my own. 

    [Read more...]

    MooglyCAL2021 - Block #9

    April 29, 2021 by Tamara Kelly 2 Comments

    MooglyCAL2021 Block 9 is a fun and pretty crochet square by The Lavender Chair! The Galaxy Flower Square features springy stitching and is a joy to watch come together. Read on for all the details, and for the link to Block #9 in this free year-long crochet along!

    MooglyCAL2021 Block 9 by The Lavender Chair
    Disclaimer: This post includes affiliate links; materials provided by Yarnspirations and Furls.
    [Read more...]

    How to Latch Hook with WonderArt Kits Class

    April 28, 2021 by Tamara Kelly 2 Comments

    Latch Hook is back - and WonderArt kits make it easy to pick up this craft for the first time, or the first time in a long time! Learn how to get set up and get latch hooking, here on Moogly!

    Learn how to Latch Hook with MooglyDisclaimer: Materials provided by Yarnspirations and Michaels; this post includes affiliate links. 

    [Read more...]

    How to Use the Red Heart Pom and Tassel Maker - Moogly Live April 27, 2021

    April 27, 2021 by Tamara Kelly 2 Comments

    Poms and tassels add so much life and texture to our craft projects - and the Red Heart Pom and Tassel Maker makes it easy! Today, get the latest Moogly news on Facebook and see where you can sign up for my next few lives and classes. Then, join me on YouTube to learn how to use the Red Heart Pom and Tassel Maker!

    How to Use the Red Heart Pom and Tassel Maker - MooglyDisclaimer: This post is sponsored by Yarnspirations, and contains affiliate links. Live videos are unscripted, unedited, occasionally weird, and all opinions are my own.

    [Read more...]

    Patons Kroy Socks Giveaway

    April 26, 2021 by Tamara Kelly 106 Comments

    Patons Kroy Socks is a lightweight wool blend yarn that’s perfect for fine garments and accessories - lots more than just socks! Take a look at this versatile yarn and enter to win 5 skeins of Patons Kroy Socks on Moogly!

    Patons Kroy Socks Giveaway on MooglyDisclaimer: This post was sponsored by Yarnspirations and includes affiliate links; all opinions are my own.

    [Read more...]

    Ring Rose Bag Tutorial

    April 23, 2021 by Tamara Kelly Leave a Comment

    The Ring Rose Bag Tutorial will demo how to crochet this lovely textured stitch pattern, and how to assemble the bag - in both right and left-handed videos! Follow along with the free pattern here on Moogly!

    Ring Rose Bag Tutorial on MooglyDisclaimer: This post includes affiliate links; materials provided by Yarnspirations.

    [Read more...]

    Ring Rose Bag

    April 22, 2021 by Tamara Kelly 8 Comments

    The Ring Rose Bag is a small drawstring wristlet with a unique closure - perfectly sized to hold just the essentials. It's pretty, practical, and a free crochet pattern on Moogly!

    Ring Rose Bag - Free Crochet Pattern on Moogly Disclaimer: This post includes affiliate links; materials provided by Yarnspirations.

    [Read more...]

    The Loop Scoop #12: A Yarny Link Party!

    April 20, 2021 by Tamara Kelly Leave a Comment

    This round of the Loop Scoop features 5 fantastic new (mostly) free crochet patterns to add color to every bit of your life! Be sure to check out the new additions and links at the bottom as well, to help us decide what gets featured next round!

    The Loop Scoop 12 - get all these free crochet patterns on Moogly! [Read more...]

    WonderArt Latch Hook Kit Giveaway

    April 19, 2021 by Tamara Kelly 92 Comments

    Crafts move in cycles - and it's time for Latch Hook to make a comeback! Take another look at this classic yarn art craft with WonderArt Latch Hook Kits - from the simple to sublime! Then, enter to win your favorite kit on Moogly!

    WonderArt Latch Hook Kit Giveaway on MooglyDisclaimer: This post was sponsored by Yarnspirations and includes affiliate links; all opinions are my own.

    [Read more...]

    Sugar Plum Pocket Wrap

    April 16, 2021 by Tamara Kelly 4 Comments

    Courtesy of Furls: Sugar Plum Pocket Wrap

    The Sugar Plum Pocket Wrap is a cozy wearable blanket that's perfect for chilly spaces and fickle weather! Originally designed for the December 2020 Furls Crochet Along, I can now share this pattern on Moogly as well!

    Disclaimer: This post includes affiliate links; materials provided by Yarnspirations. This pattern was sponsored by Furls, and outdoor photos are courtesy of Furls.

    Prefer an ad-free PDF? You've got options!

    This button leads to the pattern on Etsy

    Prefer the free blog version? Keep scrolling!

    Made for the Furls December 2020 CAL

    The Sugar Plum Pocket Wrap was the Furls December Crochet Along in 2020 - and it was shared in three parts! Be sure to check out the latest CAL and all their amazing hooks, needles, and crochet swag on Furls!

    Sugar Plum Wrap by Moogly for Furls - laid flat

    Tons of Texture

    The Sugar Plum Pocket Wrap features a four-row repeat that I came up with just for this pattern. It creates tons of texture on both sides of the fabric - so it looks great no matter how you wear it! The variety of angles used create interest and flattering lines.

    With all that texture, I decided to make a quick video tutorial to show off this stitch pattern. It's linked and embedded below along with lots of other helpful tutorials!

    Always Unique with Caron Cakes

    I used Caron Cakes Lovely Layers to design the Sugar Plum Pocket Wrap - a self-striping yarn available exclusively at Michaels. With a self-striping yarn, every project is a little different! This is a seasonal yarn though, so you can use any of the Caron Cakes to make this pattern - or any Worsted Weight yarn you like!

    Sugar Plum Pocket Wrap on Moogly


    Sugar Plum Pocket Wrap

    Add this pattern to your Ravelry Queue and Favorites

    US - J, 6.0mm hook - Furls

    1700 yds Caron Lovely Layers Cakes (4 – Worsted; 80% acrylic, 20% wool; 8.5 oz/ 240 g; 445 yds/ 407)
    Colorway shown: Sugar Plums (4 cakes used)

    Gauge: 14 sts x 9 rows =4” in pattern

    Finished Size: 79” x 21”

    Helpful Links and Tutorials:

    Sugar Plum Pocket Wrap Stitch Tutorial

    Crochet Abbreviations

    FDC - Foundation Double Crochet

    CSDC - Chainless Starting Double Crochet

    Post Stitches

    Notes:

    If you prefer to skip the Fdc, you can instead work Row 1 as follows: Ch 231, dc in the 4th ch from the hook, dc in each rem ch to end; turn. (229 sts)

    If you prefer to skip the Csdc, you can instead ch 3 and count that as the first dc of the row.

    For the Horizontal Rows, Rnd 1 works around 3 sides of the piece, and, the pattern returns to Rows.

    Instructions

    Vertical Rows:

    Row 1 [WS]: Fdc 229; turn. (229 dc)

    Row 2 [RS]: Csdc in first st, *ch 1, skip next st, dc in next st; rep from * across, turn. (115 dc)

    Row 3: Csdc in first st, dc in next ch, *fpdc around next dc, dc in next ch; rep from * across until 1 st rem, dc in last dc, turn. (229 sts)

    Row 4: Csdc in first st, *skip next st, dc in next 2 sts, fpdc around skipped st working in front of the previous sts, dc in next dc; rep from * across, turn.

    Part 1 - Row 4 rep

    Row 5: Csdc in first st, fpdc around each rem st until 1 st rem, dc in last st; turn.

    Rows 6 – 45: Rep Rows 2 -5.

    Row 46: Rep Row 2.

    Row 47: Csdc in first st, dc in each rem st to end; turn.

    Row 48: Ch 1, sc in each st across; do NOT turn.

    Horizontal Rows: 

    Turn work 90 degrees to work along the ends of the previous rows.

    Rnd 1 [RS]: Ch 1, sc evenly across ends of rows, ch 1, sc in each foundation ch across, ch 1, sc 73 evenly across other ends of rows stopping at Row 47; turn.

    Row 2: Csdc in first st, fpdc around each rem st until 1 st rem, dc in last st; turn. (73 sts)

    Row 3: Csdc in first st, *ch 1, skip next st, dc in next st; rep from * across, turn. (37 dc)

    Row 4: Csdc in first st, dc in next ch, *fpdc around next dc, dc in next ch; rep from * across until 1 st rem, dc in last dc, turn. (73 sts)

    Row 5: Csdc in first st, *skip next st, dc in next 2 sts, fpdc around skipped st working in front of the previous sts, dc in next dc; rep from * across, turn.

    Row 6: Csdc in first st, fpdc around each rem st until 1 st rem, dc in last st; turn.

    Rows 7 – 26: Rep Rows 3 – 6.

    Edging Section 1: Ch 1, sc evenly across sides of Rows of Horizontal Rows; join with a sl st to first st of Row 48, fasten off.

    Edging Section 2: Rejoin yarn on the other side of Horizontal Rows from RS, ch 1, sc evenly across sides of rows, ch 2; join with a sl st to first st of Horizontal Row 26.

    Part 2 - Edging Section 2

    Pockets: Make 2

    Row 1: Ch 2 (does not count as a st), 3 dc in first ch made; turn. (3 dc)

    Row 2: (Csdc, dc) in first st, ch 1, dc in next st, ch 1, 2 dc in last st; turn. (5 dc)

    Row 3: (Csdc, dc) in first st, [fpdc around next st, dc in next ch] twice, fpdc around next st, 2 dc in last st; turn. (9 sts)

    Row 4: (Csdc, dc) in first st, *skip next st, dc in next 2 sts, fpdc around skipped st, dc in next st; rep from * across, dc again in last st, turn. (11 sts)

    Row 5: (Csdc, dc) in first st, fpdc around each rem st until one st rem, 2 dc in last st; turn. (13 sts)

    Row 6: (Csdc, dc) in first st, *ch 1, skip next st, dc in next st; rep from * across, dc again in last st, turn. (9 dc)

    Row 7: (Csdc, dc) in first st, *fpdc around next dc, dc in next ch; rep from * until 2 sts rem, fpdc around next st, 2 dc in last st, turn. (17 sts)

    Rows 8 – 15: Rep Rows 4 – 7.

    Row 16: Rep Row 4.

    Row 17: Ch 2, dc2tog in first 2 sts, fpdc around each rem st until 2 sts rem, dc2tog in last 2 sts; turn. (33 sts)

    Row 18: Ch 2, dc2tog in first 2 sts, *ch 1, skip next st, dc in next st; rep from * until 3 sts rem, ch 1, skip next st, dc2tog in last 2 sts; turn. (16 sts)

    Row 19: Ch 2, dc2tog in first st and ch, *fpdc around next st, dc in next ch; rep from * until 2 dc rem, fpdc around next st, dc2tog in last ch and st; turn. (29 sts)

    Row 20: Ch 2, dc2tog in first 2 sts, *skip next st, dc in next 2 sts, fpdc around skipped st, dc in next st; rep from * until 3 sts rem, skip the next st, dc2tog in last 2 sts; turn. (26 sts)

    Row 21: Ch 2, dc2tog in first 2 sts, fpdc around each rem st until 2 sts rem, dc2tog in last 2 sts; turn. (24 sts)

    Pocket Edging: Ch 1, sc evenly around pocket, working ch 2 at each corner; join and fasten off.

    Part 2 - Edging the Pocket

    Assembly Instructions:

    Block shawl to 79” x 21”.

    Sew pockets to shawl with remaining yarn and yarn needle, at each end, as shown – approximately 4.5” from each end, centered width-wise – or where desired.


    Looking for more free crochet wraps and shawl patterns? Check out the Moogly Free Patterns Page or Ravelry! All shapes and sizes are here - and if there's one I've missed, let me know so I can add it!

    If the Sugar Plum Pocket Wrap pattern inspires you to make your own project, and you post a photo on social media, be sure to tag me @mooglyblog or #mooglyblog so I can check it out too!

    THE FINE PRINT

    Follow Moogly on Facebook, Twitter, Pinterest, and Instagram! Thank you to Yarnspirations for providing the materials shown in this post. Written pattern copyright Tamara Kelly 2020, all rights reserved. Please do not reprint or repost this pattern, but please do link to this page to share this pattern with others. If you wish to make items for sale from this pattern or translate it to another language, please visit the About page for details.

    MooglyCAL2021 - Block #8

    April 15, 2021 by Tamara Kelly 1 Comment

    MooglyCAL2021 Block 8 is a cabled and striped square... by me! The Striped Hourglass Square features one of my favorite stitch patterns, worked in a new way. Read on for all the details, and for the link to Block #8 in this free year-long crochet along!

    MooglyCAL2021 Block 8 Disclaimer: This post includes affiliate links; materials provided by Yarnspirations and Furls. [Read more...]

    Striped Hourglass Square

    April 15, 2021 by Tamara Kelly Leave a Comment

    The Striped Hourglass Square is a great addition to the Moogly Crochet Along - or any squares-based project! Play with color and texture in this free crochet pattern on Moogly!

    Striped Hourglass SquareDisclaimer: This post includes affiliate links; materials provided by Yarnspirations.

    [Read more...]

    Mock-rame Crochet Fringed Shawl Pattern and Tutorial

    April 14, 2021 by Tamara Kelly 1 Comment

    The Caron Mock-rame Crochet Fringed Shawl is "a classic-looking, macramé-inspired shawl that's featured in a fresh spring shade. Worked top-down in clusters of post stitches, double crochet, and triple crochet, we finished this gorgeous wrap with a delicious fringe that accentuates its lovely drape." Get the free crochet pattern link, supplies, and the tutorial for this pattern, here on Moogly!

    Mock-rame Crochet Fringed Shawl PatternDisclaimer: Materials provided by Yarnspirations and Michaels; this post includes affiliate links. 

    [Read more...]

    The Latest Moogly News - Live April 13, 2021

    April 13, 2021 by Tamara Kelly Leave a Comment

    It's a quick check-in today! Get the latest Moogly news on Facebook, and see where you can sign up for my next few lives and classes!

    Where in the World is Moogly?
    Disclaimer: This post is sponsored by Yarnspirations, and contains affiliate links. Live videos are unscripted, unedited, occasionally weird, and all opinions are my own.

    [Read more...]

    Simply by Amy Designs Yarn Swag Giveaway

    April 12, 2021 by Tamara Kelly Leave a Comment

    Simply By Amy Designs makes keychains, pins, stickers, and more for the Craft Lover, Small Business Owner, Art Lover, and Coffee Lover! She's got some adorable products for yarn lovers, and today you can win your own set of yarn swag on Moogly!

    Simply By Amy Designs Giveaway on MooglyDisclaimer: This post was sponsored by Simply by Amy Designs; all opinions are my own.

    [Read more...]

    Marly Bird's BiCrafty Boot Camp: Beginner Knitting Lessons for Crocheters

    April 9, 2021 by Tamara Kelly Leave a Comment

    Have you seen the latest from Marly Bird? She's running a BiCrafty Boot Camp! If you're a crocheter, you already know how fun it is to play with yarn - add another new yarny trick to your toolbox and learn how to knit from Marly!

    Marly Bird's BiCrafty Boot Camp: Beginner Knitting Lessons for CrochetersDisclaimer: This is a guest post from Marly Bird and Kathryn Vercillo. 

    [Read more...]

    Carrot Door Basket Tutorial

    April 8, 2021 by Tamara Kelly Leave a Comment

    Carrot Door Basket Tutorial - Right and Left-Handed Videos on Moogly

    The Carrot Door Basket Tutorial will demo how to crochet this fun door decor - in both right and left-handed videos! Follow along with the crochet pattern here on Moogly!

    Disclaimer: This post includes affiliate links; materials provided by Yarnspirations.

    Carrot Door Basket Tutorial:

    How to Crochet the Carrot Door Basket - Right Handed

    How to Crochet the Carrot Door Basket - Left Handed

    As Seen in This Video (click each for more info!):

    Carrot Door Basket Crochet Pattern

    US - M, 9.0 mm - Susan Bates

    Bernat Blanket Colorway used: Orange Leaf (1 ball)

    5.7" foam ball for artificial flowers

    Artificial greenery

    Fiber Fill

    Stitch Markers

    Large Yarn Needle

    Magic Circle

    CSDC - Chainless Starting Double Crochet

    Ldc - Linked Double Crochet

    And here's a Pin for your Crochet Pinterest Board! Make sure you are following Moogly on Pinterest for all the best knit, crochet, and craft pins!

    Carrot Door Basket Tutorial on Moogly

    I hope you enjoyed this tutorial for the Carrot Door Basket! If this video doesn't answer all your questions, please ask in the comments below - I'm always happy to help!

    If you make this or any Moogly pattern, be sure to tag me in your photos so I can see them too, @mooglyblog or #mooglyblog! I can't wait to see your wonderful projects! Thanks so much for reading and watching!

    The Fine Print

    Get Moogly on your favorite social media sites: Facebook, Twitter, Pinterest, and Instagram! And sign up for the free newsletter at the bottom of the page so you don’t miss a thing! Thank you to Yarnspirations for providing the materials for this video.

    « Previous Page
    Next Page »
    Tamara Kelly of Moogly

    Moogly is world-famous for fresh. modern, and approachable crochet designs - as well as a little knitting and crafting here and there. On Moogly, you'll find several new free patterns every month, top quality video tutorials, giveaways, and more!

    More about Moogly →

    Popular

    • MooglyCAL2026 Block 21
      MooglyCAL2026 Block 21
    • Crochet and Catch Up with Moogly - October 14, 2026
      Crochet and Catch Up with Moogly - October 14, 2026
    • Seamless Crochet Sweaters Review and Giveaway
      Seamless Crochet Sweaters - Review and Giveaway
    • Ghost Treat Basket Tutorial
      Ghost Treat Basket Tutorial
    gosadi
    I'm a Craftsy Instructor. Click to see my classes.
    I Like Crochet


    Footer

    ↑ back to top

    About

    • About
    • Privacy Policy

    Newsletter

    Contact

    Email Moogly

    As an Amazon Associate I earn from qualifying purchases.
    Copyright © 2026 Mooglyblog.com