
Mom, don't read this one! Everyone else, stay tuned... because I've got a great Mother's Day giveaway for you, from Zazzle!

The 2015 Moogly Afghan CAL: Block #9!
Sailing in on cloud 9... It's the last square for April! If this is the first you've heard of the 2015 Moogly Afghan CAL, please CLICK HERE to read how it works! In summary, every 2 weeks I'll share a new free 12" crochet block pattern, and we'll all make them together. All the patterns will be free all year long, and we'll get to visit a variety of fantastic crochet blogs along the way!

Mini Magic Mandala Square Tutorial
The Mini Magic Mandala Square is a great little 6" square when worked in Worsted/Aran weight yarn. It's also the basis of the Magic Rainbow Baby Blanket! Here's how it's made.

Andee Graves of Mamas2hands: Designer Showcase!
It’s time for April’s Designer Showcase! Once a month I have one of my favorite designers share a bit about themselves, and then I follow it up by sharing my 5 favorite free patterns that they’ve designed! This month I’m excited to share some things from the remarkable Andee Graves - the blogger and designer behind Mamas2hands!

Spring 2015 Moogly Mini Crochet-Along Part 2: Rainbow Runner Tote
And at last - the 2nd half of the Moogly Spring 2015 Mini CAL! Let's finish up the Rainbow Runner Tote, made with 100% cotton - Red Heart Creme de la Creme!

Magical Toadstool Finger Puppets Set

Finger puppets are the perfect take-along toys - small, quiet, easy to stash, creative, and did I mention quiet? All things you want from a toy at a restaurant, waiting room, airplane, or backseat. The Magical Toadstool Finger Puppet Set fits the bill - and all in a handy carrying case that's part of the fun!
Disclaimer: This post includes affiliate links. Red Heart Yarn provided materials for this pattern.
Prefer an ad-free PDF? You've got options!


Prefer the free blog version? Keep scrolling!
A Toy with Built In Storage
The Toadstool here is actually a handy pouch, as well as a magical forest setting. Fitting neatly inside are the Flower Fairy, Butterfly Fairy, and cute little Gnome - all ready to come out and play! And in 100% cotton yarn, they are soft and kid-friendly in every way!

PLEASE NOTE: These finger puppets include small parts, and are not safe for kids 3 and under! Please use adult supervision with small children!
Magical Toadstool Finger Puppets Set
Add this pattern to your Ravelry Queue and Favorites
Susan Bates US - F, 3.75mm hook
125 total yards Red Heart Creme de la Creme (100% cotton; Worsted/10 ply; 125 yards/114 meters; 2.47 ounces)
Small amounts of each of the following colors were used:
Color A - Linen
Color B - Fudge
Color C - Rally Red
Color D - White
Color E - Forest
Color F - Brite Orange
Color G - Brite Pink
Color H - Wood Violet
Color J - Royal Blue
The original yarn is discontinued. Recommended substitute: Lily Sugar'n Cream or equivalent.
Gauge is unimportant - use a hook that gives you a tight, stiff fabric. Weave in ends as you go!
For video tutorials and stitch abbreviations, please see the Crochet Abbreviations page.
 TOADSTOOL PATTERN: (Colors A, B, C, and D used)
Special Stitch: Shallow Fpdc - shallow front post double crochet, worked right under the front and back loops instead of around the post of the stitch below. Click HERE for a video tutorial.
Round 1: With Color A, make a magic circle, sc 6 into the ring; join to first sc with a sl st. (6 sts)
Round 2: Ch 1, 2 sc in each st around; join with a sl st. (12 sts)
Round 3: Ch 1, *sc in the next st, 2 sc in the next st; rep from * around, join with a sl st. (18 sts)
Round 4: Ch 1, *2 sc in the next st, sc in the next 2 sts; rep from * around, join with a sl st. (24 sts)
Round 5: Ch 1, *sc in the next 3 sts, 2 sc in the next st; rep from * around, join with a sl st. (30 sts)
Round 6: Ch 2 (does not count as a st), bpdc in each st around; join with a sl st. (30 sts)
Round 7 - 9: Ch 2, dc in each st around; join with a sl st. Break yarn and finish off. (30 sts)
Round 10: With Color B, join to any st, ch 2, *shallow fpdc in the next 4 sts, 2 shallow fpdc in the next st; rep from * around, join with a sl st. (36 sts)
Round 11: Ch 2, *fpdc in next 5 sts, 2 fpdc in next st; rep from * around, join with a sl st. Break yarn and finish off. (42 sts)
Round 12: With Color C, join to any st, ch 1, *sc in the next 6 sts, 2 sc in the next st; rep from * around, join with a sl st. (48 sts)
Round 13: Ch 2, bpdc in each st around; join with a sl st. (48 sts)
Round 14 - 18: Ch 2, dc in each st around; join with a sl st. (48 sts)
Round 19: Ch 2, *dc in the next 6 sts, dc2tog; rep from * around, join with a sl st. (42 sts)
Round 20: Ch 2, *dc in the next 5 sts, dc2tog; rep from * around, join with a sl st. (36 sts)
Round 21: Ch 1, *sc in the next st, ch 1, skip 1 st; rep from * around, join with a sl st. Break yarn and finish off. (18 sc and 18 chs)
SMALL SPOTS (make 2): With Color D, make a magic circle, hdc 9 into the ring; join to first hdc with a sl st. Break yarn and finish off, leaving long tails for sewing.
LARGE SPOT (make 1): With Color D, make a magic circle, dc 12 into the ring; join to first dc with a sl st. Break yarn and finish off, leaving long tails for sewing.
TIE: Ch tightly for 14", break yarn and finish off.
ASSEMBLY: Sew spots to toadstool as shown. Weave tie through ch-1 sps of Round 21 and pull top closed. I recommend tying a bow without tying a knot first. The ends of the tie can be knotted together for a handle if desired.
FLOWER FAIRY PATTERN: (Colors A, E, and F used)
 Round 1: With Color E, make a magic circle, sc 6 into the ring; join to first sc with a sl st. (6 sts)
Round 2: Ch 1, 2 sc in each st around; join with a sl st. (12 sts)
Round 3: Ch 1, sc in each st around; join with a sl st. Break yarn and finish off. (12 sts)
Round 4: With Color F, working in FLO, join to any st, *sc in the next st, 2 sc in the next st; rep from * around, join with a sl st. (18 sts)
Round 5: Ch 1, *sl st in next st, (hdc, dc) in next st, (dc, hdc) in next st; rep from * around, join with a sl st. Break yarn and finish off. (30 sts)
Round 6: With Color A, working in BLO of Round 3, join to any st, sc in each st around; join with a sl st. (12 sts)
Round 7: Ch 1, sc in each st around; join with a sl st. (12 sts)
Round 8: Ch 1, *sc in the next st, sc2tog; rep from * around, join with a sl st. Break yarn and finish off. (8 sts)
Round 9: With Color F, join to any st, sl st in each st around. (8 sts)
Round 10: Ch 1, 2 sc in each st around; join with a sl st. (16 sts)
Round 11: Ch 4, working in FLO, (2 tr, ch 4, sl st) in 1st st, skip the next st, *(sl st, ch 4, 2 tr, ch 4, sl st) in next st, skip the next st; rep from * around. (8 petals)
Round 12: Ch 1, working in BLO, sc in each st of Round 10; join with a sl st. (16 sts)
Round 13 - 15: Ch 1, sc in each st around; join with a sl st. (16 sts)
Round 16: (NOTE: In this round, you will tack down every other petal, leaving 4 free as shown. Adjust where the first sc through the petal is to line them up if needed.) Ch 1, *sc in next st working through tip of petal directly above, sc in next 3 sts; rep from * around; join with a sl st. (16 sts)
Round 17: Ch 1, *sc in next 2 sts, sc2tog; rep from * around, join with a sl st. Break yarn and finish off. (12 sts)
BUTTERFLY FAIRY PATTERN: (Colors B, E, G and H used)
Round 1: With Color B, make a magic circle, sc 6 into the ring; join to first sc with a sl st. (6 sts)
Round 2: Ch 1, 2 sc in each st around; join with a sl st. (12 sts)
Round 3: Ch 1, sc in each st around; join with a sl st. (Do NOT break yarn) (12 sts)
ANTENNAE: With Color E, cut two 12" lengths of yarn. Thread both ends onto yarn needle, insert into Round 2 as shown, pull the ends through the loop, tie a knot, and trim excess.
Round 4 - 5: (continuing with Color B) Ch 1, sc in each st around; join with a sl st. (12 sts)
Round 6: Ch 1, *sc in the next st, sc2tog; rep from * around, join with a sl st. Break yarn and finish off. (8 sts)
 Round 7: With Color G, join to any st, sl st in each st around. (8 sts)
Round 8: Ch 1, *sc in the next st, 2 sc in the next st; rep from * around, join with a sl st. (12 sts)
Round 9 - 14: Ch 1, sc in each st around; join with a sl st. At end of Round 14, break yarn and finish off. (12 sts)
WINGS:
Round 1: With Color H, make a magic circle, sc 6 into the ring; join to first sc with a sl st. (6 sts)
Round 2: Ch 3, (dc, 2 tr, dc, ch 3, sl st) in first st, sl st in next st, *ch 1, (hdc, 2 dc, hdc, ch 1, sl st) in same st as last st**, sl st in next 2 sts, rep from * to **, sl st in next st, ch 3, (dc, 2 tr, dc, ch 3, sl st) in same st as last st, sl st in last st; join with a sl st. Break yarn and finish off leaving long tails for sewing.
ASSEMBLY: Sew the Wings to the back of the body as shown.
GNOME PATTERN: (Colors A, C, D, and I used)
Round 1: With Color C, make a magic circle, sc 4 into the ring; join to first sc with a sl st. (4 sts)
Round 2: Ch 1, *sc in the next st, 2 sc in the next st; rep from * around, join with a sl st. (6 sts)
 Round 3: Ch 1, *sc in the next 2 sts, 2 sc in the next st; rep from * around, join with a sl st. (8 sts)
Round 4: Ch 1, *2 sc in the next st, sc in the next 3 sts; rep from * around, join with a sl st. (10 sts)
Round 5: Ch 1, *sc in the next 2 sts, 2 sc in the next st, sc in the next 2 sts; rep from * around, join with a sl st. Break yarn and finish off. (12 sts)
Round 6: With Color A, working in BLO, join to any st, ch 1, sc in each st around; join with a sl st. (12 sts)
Round 7: Ch 1, sc in each st around; join with a sl st. Break yarn and finish off. (12 sts)
Round 8: With Color D, working in FLO, join to any st, ch 1, sc in the next 3 sts, (hdc, dc) in next st, dc in next 4 sts, dc, hdc) in next st, sc in last 3 sts; join with a sl st. Break yarn and finish off. (14 sts)
Round 9: With Color I, working in BLO of Round 7, join to any st, ch 1, sc in each st around; join with a sl st. (12 sts)
Round 10 - 15: Ch 2, sc in each st around; join with a sl st. At end of Round 15, break yarn and finish off. (12 sts)
And that's it! A sweet little toadstool pouch home and 3 cuties to occupy it! I hope you enjoy these free crochet toy patterns, and that you enjoy it with some kids (or kids at heart!) too. This pattern is a fantastic stashbuster - one skein of each color will make many sets! And if you're looking for even more finger puppet patterns, be sure to check out the Jungle Finger Puppets Set here on Moogly!
The Fine Print
Written pattern copyright Tamara Kelly 2015. Please do not reprint or repost this pattern, but please do link to this page to share this pattern with others. If you wish to make items for sale from this pattern, please visit the About page for details. Thank you to Red Heart Yarn for providing the yarn for this pattern – America’s Most Recommended Yarn Brand!
An Out of This World OttLite Giveaway on Moogly!
I love OttLite - they are just the very best lamps for crafters, sewers, beaders, readers... anyone who wants to be able to see what they are doing! I love my OttLite floor lamp, and now I have an OttLite desk lamp I love too - and I'm giving one away to one of you!

Hookin On Hump Day #93: Link Party for the Yarny Arts!
Welcome back to HOHD! Time to share all the newest yarn crafting projects from your blogs, with my fantabulous co-host, Kara from Petals to Picots! If this is the first time you've been here and you'd like to link up, be sure to check out the rules section below. For everyone else - let's enjoy some fresh new projects! Here are the projects that your clicks (with some help from yours truly) put together for us this round!

Go Crochet Go! Tractors and Diggers, 'Copters and Subs, Blimps and Buses!
I've collected Crochet Cars, Crochet Rocket Ships, and Crochet Trains, Planes, and Boats. But what about all the other crochet vehicles, stuff there is only one or two patterns for? Here's a collection for just about everything that got left out - tractors, diggers, buses, helicopters, blimps, and more!

Spring 2015 Moogly Mini Crochet-Along Part 1: Rainbow Runner Tote
Time for the 1st half of the Moogly Spring 2015 Mini CAL! This time around we're making a super colorful tote with 100% cotton - Red Heart Creme de la Creme!

The 2015 Moogly Afghan CAL: Block #8!
Don't forget what 8 is for! It's the square for this week! If this is the first you've heard of the 2015 Moogly Afghan CAL, please CLICK HERE to read how it works! In summary, every 2 weeks I'll share a new free 12" crochet block pattern, and we'll all make them together. All the patterns will be free all year long, and we'll get to visit a variety of fantastic crochet blogs along the way!
April Showers Bring... a Fantastic Red Heart Yarns Giveaway!
So who's ready to win some wonderful Red Heart Yarns? Oh, you are? Well then let's do a giveaway!

Have You Enrolled Yet?
Today I'm getting on a plane... and going somewhere to do something with crochet... and I can't tell you about it just yet! Secrets, secrets, tsk tsk. But what I *can* do is offer you a special deal to make up for it!
If you haven't signed up for my Craftsy Class, Quick & Easy Crochet Cowls with Lion Brand, then NOW is the time! Seize the day - and the savings!
CLICK HERE TO GET QUICK & EASY CROCHET COWLS WITH TAMARA KELLY FOR 50% OFF!!
This is the biggest discount I can offer, and the last time I'll be doing it for a while. So get it now while the getting is good - and then watch it whenever you like! (And get a jump on those holiday gifts while you do!) It'll be going back to the regular price in one week!

And here's a little something for the knitters too! Click the photo below for a free Craftsy Knitting eGuide!
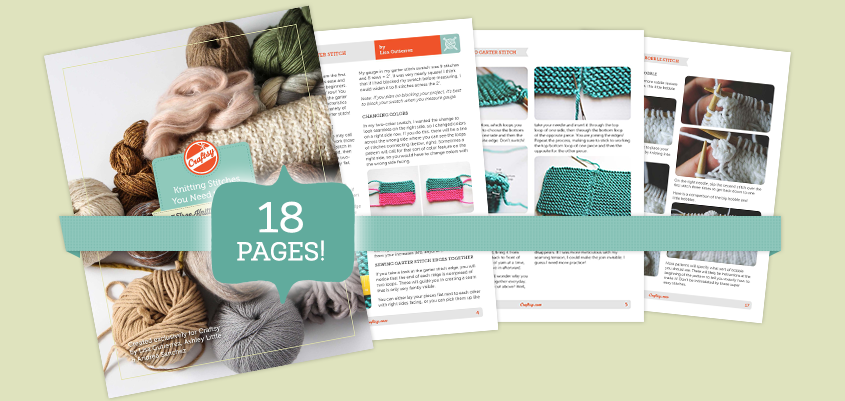
Any wishes for safe travel are much appreciated! Don't worry - there will still be a new post every day this week! Get Moogly on your favorite social media sites: Facebook, Twitter, G+, Pinterest and Tumblr, and sign up for the FREE Newsletter so you don’t miss a thing!
Announcing the 2015 Mini Crochet-Along #2: Rainbow Runner!
It's time for the second Moogly Mini CAL for 2015 - and this time it's something perfect for the warming weather - a new tote bag, in bright happy colors!
Neptune's Stripes Blanket
Exploring all the possibilities of a stitch pattern is one of my favorite things to do, and this free crochet blanket pattern is the latest in my exploration of the Neptune's Arrow Stitch Pattern! Introducing the Neptune's Stripes Blanket, featuring Red Heart Yarn!

The Marvelous Ficstitches Giveaway on Moogly!
I was so excited when I found out about this new crochet kit club, called Ficstitches Yarns! It combines super yummy yarn, handcrafted crochet hooks, an original pattern, AND a story.... intrigued yet?

Moroccan Midnight Boot Cuffs
Whether it's fashion boots or rain boots, boot cuffs are as popular an accessory as ever! And the Moroccan Midnight Hat, Cowl, and Fingerless Mitts were calling out for a matching boot cuffs pattern - or rather, the crocheters who love them were! So at last here is the free crochet pattern for the Moroccan Midnight Boot Cuffs, featuring two types of Red Heart Yarns!

Hookin On Hump Day #92: Link Party for the Yarny Arts!
Welcome back to HOHD! Time to share all the newest yarn crafting projects from your blogs, with my wonderful co-host, Kara from Petals to Picots! If this is the first time you've been here and you'd like to link up, be sure to check out the rules section below. For everyone else - let's enjoy some fresh new projects! Here are the projects that your clicks and Kara put together for us this round!

Bonita and Furls and Oh My! What a Big Giveaway!
This is a giveaway I wish I could enter myself - because it's amazing! With Bonita Patterns Yarn Shop and Furls Fiberarts, SIX prize packages *and* being open worldwide, it's one you don't want to miss!

Crochet... In.... Space!
Anyone else shouting that to the beat of "Pigs in Space"? Just me? Ok then.. on to the space crochet patterns! I've got rockets, planets, and more, and they're all free!

10+ Free Space Crochet Patterns
Click on the names of the pattern you like to go to their pattern pages!
- Rocket Ship by CraftyAnna, on Crochet N Play: Be sure to check out the rocket booster fire detail - love it!

- Zaon the Alien & UFO Space Ship by Adorable Amigurumi, on Ravelry: This set for older kids is too fun!

- Rocket Ship Crochet Patterns by Kara Gunza, on Petals to Picots: Two styles for twice the fun!

- Starship Enterprise Amigurumi by Catherine McMillan, on Ravelry: To seek out new crochet!

- Rocket to the moon by Rikka, on Rikkas Bastel-Blog: The blog is in German, but click where it says "rocket.pdf" to get the pattern in English!

- My Own Planet Amigurumi by Stacey Trock, on Ravelry: This seems like the perfect pattern to slip a stress ball inside - and think about going to your own private planet... or sending someone else to it!

- Rockin' Rocket Ship Amigurumi by Claire Houck, on Ravelry: Don't miss the fab description on the pattern page - so funny!

- Fly me to the moon by Lucy Robson, on Ravelry: The most spaceworthy doorstop ever!

- Toy Rocket Ship by Hannah Daley, on Free Patterns by H: This one is just adorable! Perfect for baby's first spacecraft!

- Pocket Rocket Badge by Emma Varnam, on Emma Varnam: This is the perfect applique to add to... well, anything!

- Bernat Crochet Rocket Rug on Yarnspirations

- Red Heart Rocket Ship Scrubby on Yarnspirations

- Bernat I Want To Believe Stuffie on Yarnspirations

I hope this roundup has you over the moon! Space ships, rocket ships, and even your very own planet - you can crochet it all!
Get Moogly on your favorite social media sites: Facebook, Twitter, Pinterest, and sign up for the FREE Newsletter so you don’t miss a thing!
Ombre Arrows Afghan

Introducing the Ombre Arrows Afghan! I'm completely in love with this stitch pattern, and have had so much fun playing with it for the past month! I wanted to try a different look in a squishy Aran weight yarn - and the Ombre Arrows Afghan is the result!
Disclaimer: This post includes affiliate links. Materials provided by Red Heart Yarns.
Prefer an ad-free PDF? You've got options!


Prefer the free blog version? Keep scrolling!

About the Ombre Arrows Afghan
This stitch pattern is super stretchy, as well as delightfully light weight! I've never made an Aran weight afghan that is so solid *and* perfect for the changing seasons. And with Red Heart With Love, it's so soft too! And the great thing is there are so many colors available, you can create your own custom color gradient! I've also included stitch and row counts and yardage estimates for a variety of sizes - I made the Throw size!

Ombre Arrows Afghan
Add this pattern to your Ravelry Queue and Favorites
Susan Bates US – K, 6.5 mm hook
Red Heart With Love (4/Medium/Aran, 100% acrylic, 315 yds/288 m)
Colors and Amounts Used for the Throw Version Shown:
A: White (4 skeins)
B: Boysenberry (1 skein)
C: Grape Jam (1 skein)
D: Aubergine (1 skein)
E: Violet (1 skein)
F: Lilac (1 skein)
G - Iris (1 skein)
Gauge: 14 sts x 9 rows = 4" in pattern
Helpful Links and Tutorials
Video Tutorial for this Stitch Pattern
Matching Patterns: Neptune's Arrow Scarf; Neptune's Stripes Baby Blanket
SIZES, STITCH/ROW COUNTS and ESTIMATED TOTAL YARDAGES:
- Baby (36" x 36") - Ch 128, 81 rows, 850 yds
- Throw (50" x 70") - Ch 176, 157 rows, 2300 yds- SHOWN
- Twin (65" x 90") - Ch 230, 201 rows, 3850 yds
- Queen (90" x 100") - Ch 320, 223 rows, 6000 yds
- King (110" x 100") - Ch 392, 223 rows, 7300 yds
SPECIAL STITCHES
- Cluster – dc2tog in the same stitch – (yo, insert hook in indicated stitch, pull up a loop, yo and pull through 2 loops) twice, yo and pull through all 3 loops.
- V st – (dc, ch 1, dc) in the same stitch
- Small V st – 2 dc in the same stitch

NOTES:
This pattern is worked in two colors, but instead of cutting the yarn between rows, or carrying it along the sides, you have two active loops going, one of which is worked at a time. Use a stitch marker to secure the loop you are not working with to keep it from pulling out on you!
You also will only turn after every other row, which is noted in the pattern itself. The instructions below are tailored for the Throw size, as shown in the photos. If you are making the other sizes, you'll want to adjust the locations of the color changes accordingly.
Ombre Arrows Afghan Instructions
Row 1: With Color B, ch 176 (or for size as indicated in above list), sc in 2nd ch from hook, *ch 3, cluster in same st as previous st, ch 3, skip 5 chs, sc in next st; repeat to end, remove hook from working loop (place marker in loop), TURN.
Row 2: With Color A, join to last st of Row 1, ch 3, dc in 1st st, *ch 1, skip ch-3 loop, sc in cluster, ch 1, skip ch-3 loop, V st in sc st; repeat from * to end, finishing last repeat with Small V st, remove hook from working loop (place marker in loop), DO NOT TURN.
Row 3: Insert hook in the active loop of Color B (remove stitch marker), ch 4, sc in top of ch-3 of previous row, *ch 3, cluster in same st as previous st, ch 3, sc in ch-1 sp of next V st; repeat from * to end, finishing last repeat with sc in the last dc st of previous row, remove hook from working loop (place marker in loop), TURN.
Row 4: Insert hook in the active loop of Color A (remove stitch marker), ch 4, dc in 1st st (the sc at the end of the previous row), *ch 1, skip ch-3 loop, sc in cluster, ch 1, skip ch-3 loop, V st in sc st; repeat from * to end, finishing last repeat with Small V st, remove hook from working loop (place marker in loop), DO NOT TURN.
Rows 5 – 26 (or to length desired): Repeat Rows 3 – 4, ending with a Color A row, do NOT turn. Break Color B, but do NOT break Color A.
Row 27: Join with Color C to top of ch-3 of previous row, ch 1, sc in same st, *ch 3, cluster in same st as previous st, ch 3, sc in ch-1 sp of next V st; repeat from * to end, finishing last repeat with sc in the last dc st of previous row, remove hook from working loop (place marker in loop), TURN.
Rows 28- 52 (or to length desired): Repeat Rows 3 - 4 in pattern, ending with a Color A row, do NOT turn. Break Color C, but do NOT break Color A.
Rows 53 - 78 (or to length desired): Repeat Rows 27 - 52 using Color D and Color A.
Rows 79 - 104 (or to length desired): Repeat Rows 27 - 52 using Color E and Color A.
Rows 105 - 130 (or to length desired): Repeat Rows 27 - 52 using Color F and Color A.
Rows 131 - 157 (or to length desired): Repeat Rows 27 - 52 using Color G and Color A, ending on a Color G row, TURN. Do not break either yarn.
Row 158: Continuing with Color G, ch 1, sc in 1st st, *ch 2, sc in top of next cluster, ch 2, sc in next sc; repeat from * to end of row, break Color G and finish off.
Edging: Insert hook in the active loop of Color A, ch 1, sc evenly all around the blanket; join and break Color A and finish off. Add additional borders as desired.

Thank you for making the Ombre Arrows Afghan! If you have any questions, please let me know!
The Fine Print
Written pattern copyright Tamara Kelly 2015. Please do not reprint or repost this pattern, but please do link to this page to share this pattern with others. If you wish to make items for sale from this pattern, please visit the About page for details. Thank you to Red Heart Yarn for providing the yarn for this pattern.
The 2015 Moogly Afghan Crochet-Along: Block #7!
Time for lucky #7! If this is the first you've heard of the 2015 Moogly Afghan CAL, please CLICK HERE to read how it works! In summary, every 2 weeks I'll share a new free 12" crochet block pattern, and we'll all make them together. All the patterns will be free all year long, and we'll get to visit a variety of fantastic crochet blogs along the way!
Neptune's Arrow Stitch Tutorial
Recently I shared the Neptune's Arrow Scarf pattern here on Moogly - and I've got more patterns in the works with this fun stitch, so I'll be adding this tutorial to those as well. But first, here's how to crochet the Neptune's Arrow stitch pattern!

FiberArtsy Yarn Giveaway on Moogly!
Annette at FiberArtsy recently contacted me with a special offer for Moogly readers that I couldn't pass up - because it's a YARN GIVEAWAY!

Danyel Pink of Danyel Pink Designs: Designer Showcase!
It’s time for the March Designer Showcase! Once a month I have one of my favorite designers share a bit about themselves, and then I follow it up by sharing my 5 favorite free patterns that they’ve designed! This month I’m excited to share some things from the delightful Danyel Pink - the blogger and designer behind Danyel Pink Designs!

Red White and Baby Blanket
The Red White and Baby Blanket features bold stripes and pretty filet details that can be made in any color you chose - with the free crochet pattern on Moogly!
 Disclaimer: Materials provided by Yarnpirations; this post includes affiliate links.
Padded Single Crochet

I recently got an email from a reader asking me to do a video tutorial for Padded Single Crochet. Well that was a new one to me! I did some digging and learned as much as I could about the Padded Single Crochet - and now I'll teach you!
Disclaimer: This post includes affiliate links.
How to Crochet the Padded Single Crochet Right Handed
How to Crochet the Padded Single Crochet Left Handed
As Seen In This Video
US - I, 5.5mm Furls Fiberarts Hook
Lion Brand Vanna's Choice Baby in Aqua
Essentially, the padded single crochet is a very specific form of spike stitch. You crochet "over" the previous row, enclosing it in single crochet stitches. This creates a puffy, padded, but very stable stitch, that looks almost identical on both sides!
It's a very interesting stitch, and I can see how it could come in handy while designing! I found two different designers using it, but now that I know about it I might have to use it too. I hope it inspires you as well!
Get Moogly on your favorite social media sites: Facebook, Pinterest, and YouTube, and sign up for the FREE Newsletter so you don’t miss a thing!
Knits for Boys Giveaway
Knits for Boys by Kate Oates features fantastic patterns for little boys - and I can certainly see little girls loving them too! And I'm excited to be giving away a copy on Moogly!

Roar! 10 Free Crochet Dinosaur Patterns!
Crochet can do just about anything - including bringing prehistoric creatures back to life! Well, okay, not quite... but these 10 free dinosaur crochet patterns sure are cute! And a lot nicer to live with than their inspiration!

Stash It!
Bulky yarns are hot right now - and the bigger the better! So I combined one skein of Bernat Mega Bulky and some gorgeous fabric from Zazzle to create Stash It - the basket that hangs on the wall, on a doorknob, on a hook... wherever you need to stash it fast!

The 2015 Moogly Afghan Crochet-Along: Block #6!
Moving on to Block #6! I'm so happy to announce that from here on out, the block patterns are being professionally tech edited, so hopefully it will just get better and better. If this is the first you've heard of the 2015 Moogly Afghan CAL, please CLICK HERE to read how it works! In summary, every 2 weeks I'll share a new free 12" crochet block pattern, and we'll all make them together. All the patterns will be free all year long, and we'll get to visit a variety of fantastic crochet blogs along the way!
Chevron Lace Infinity Scarf Tutorial
The Chevron Lace Infinity Scarf features a two row repeat - easy enough, but getting a chevron pattern established can be tricky! So here's a video tutorial!

Hookin On Hump Day #91: Link Party for the Yarny Arts!
Welcome back to HOHD! Time to share all the newest yarn crafting projects from your blogs, with my wonderful co-host, Kara from Petals to Picots! If this is the first time you've been here and you'd like to link up, be sure to check out the rules section below. For everyone else - let's enjoy some fresh new projects! Here are the projects that your clicks and I put together for us this round!

The Crochet Awards Apparel 2015 WINNERS!

Loopy Love Toddler Booties
The Loopy Love Newborn Booties and Big(ger) Baby Booties have been on Moogly for a little while, and now I'm happy to say the Toddler sizes are available as well! Introducing the Loopy Love Toddler Booties - a free crochet pattern on Moogly!

How to Find Patterns on Ravelry
I don't know about you, but I spend a lot of time looking at crochet patterns... whether it's to put together a collection for this site, find a pattern for someone who isn't having any luck, or for my own crochet down time. Ravelry makes it easy to find the pattern you're looking for - and everyday I talk to people who don't know how to use it. So here's how to use Ravelry to find a crochet or knit pattern - you'll love it!

Curvy Crochet with Marly Bird, on Craftsy!
Over the weekend I got a chance to sit down and watch a Craftsy class I've had on my agenda for ages - Curvy Crochet, taught by the super talented Marly Bird. I profiled Marly in a past Designer Showcase here on Moogly, and being a "curvy" girl myself, I couldn't wait any longer to watch. And I'm so glad I did enroll in Curvy Crochet!

Cute and Cuddly Crochet Car Patterns!
Cars have been a popular plaything since the day they were invented - and you can crochet them too! I've put together a collection of free crochet car patterns - includes some accessories to make them even more fun!

Lucky Day Cowl

We could all use a little extra luck once in a while - and the fun little clovers or shamrocks in the Lucky Day Cowl might just be the token you need! At the very least, it'll decrease the odds of pinching! Fortunately, it's a free crochet pattern here on Moogly!
Disclaimer: This post includes affiliate links.
Prefer an ad-free PDF? You've got options!
Prefer the free blog version? Keep scrolling!
Crazy for Cashmere
And I have to point out that this is just about the softest, coziest, most pet-able thing I've ever crocheted! It's SO soft! Cashmere is amazing, and if you get to crochet with it, then you are indeed very lucky.

It also stretches out quite a bit on blocking, displaying the stitch pattern beautifully. So if you use a different yarn, you'll want to pay attention to the finished size vs the Row count. (Note - the original yarn is discontinued.)

Lucky Day Cowl
Add this pattern to your Ravelry Queue and Favorites
US - H, 5.0mm hook - Furls Crochet
325 yds total Lion Brand LB Collection Cashmere (100% Cashmere; DK/8 ply; 82 yds/75 m)
Color A - Sprout (3 skeins)
Color B - Natural (1 skein)
This yarn has been discontinued. Recommended Substitution: Rowan Pure Cashmere or the DK of your choice.
5 buttons (⅝")
Finished Size (after blocking): 11" wide x 39.5" long
Main Stitch Pattern: Multiple of 6 plus 1
Special Stitches:
wide dc2tog - (dc2tog skipping 3 sts in the center) - yo, insert hook in next st, pull up a loop, yo, pull through 2 loops (2 loops remain on hook), skip the next 3 sts, yo, insert hook in next st, pull up a loop, yo, pull through 2 loops (3 loops on hook), yo and pull through all 3 loops.
clover - (worked at the top of the wide dc2tog) - [ch 4, sc in the wide dc2tog space (between the posts)] twice, ch 4, sl st in the top of the wide dc2tog, wrapping around the previous sts. (see photo tutorial below)
tr - (triple or treble crochet) - yo twice, insert hook into indicated st, pull up a loop, (yo and pull through 2 loops) 3 times.
Clover Stitch Photo Tutorial:

Lucky Day Cowl Pattern Instructions:
Row 1: With Color A, ch 45, skip 2 ch, dc in the remaining 43 ch; turn. (43 sts)
Row 2: Ch 5 (counts as dc and ch 2), *wide dc2tog, clover, ch 2, dc in next ch, ch 2; repeat from * to end, finishing last repeat with a dc in last st; turn. (7 clovers)
Row 3: Ch 6 (counts as tr and ch 2), *sc in the middle ch-4 loop of the next clover, ch 2, tr in the next dc st, ch 2; repeat from * to end, finishing last repeat with a tr in the 3rd ch of the beginning ch-5; turn.
Row 4: Ch 3 (counts as dc), 2 dc in each ch-2 sp and dc in each st across, finishing with a dc in the 3rd ch of the beginning ch-6; turn. (43 sts)
Row 5 - 55: Repeat Rows 2 - 4. Continue with Color A for 1st round of edging.

Edging:
Round 1: Ch 1, sc evenly around entire cowl (increase 1 st in corners), join and finish off.
Rnd 2: With Color B, join to 1st st of previous round, ch 1, sc in each st around (increase 1 st in corners), join with sl st.
Rnd 3: Ch 3 (counts as dc), dc in the next 7 sts, (ch 1, dc in the next 7 sts) 5 times, ch 3, sc in same st as previous st, sc in each st along side of cowl, ch 3, dc in each st end of cowl, ch 3, sc in same st as previous st, sc in each st along remaining side of cowl, ch 3, sl st in top of ch 3 to join. (NOTE: The 5 ch-1 sps are the button holes.)
Rnd 4: Skip the first 2 sts, then working into the 48 dc sts and ch sps at the end of the cowl, (7 dc in the next st, skip 1 st, sl st in the next st, skip 1 st) 12 times, sl st in the ch-3; sc evenly along remaining 3 sides of cowl (increase 1 st in both corners), join and finish off. (12 shells made at first end)
Finishing: Block cowl and then sew on buttons opposite the ch-1 button holes. Have a lucky day!

I hope you've enjoyed this crochet pattern! It was a lot of fun coming up with a shamrock or clover stitch that was clear but not too in your face - making the Lucky Day Cowl wearable any day!
The Fine Print
Written pattern copyright Tamara Kelly 2015. Please do not reprint or repost this pattern, but please do link to this page to share this pattern with others. If you wish to make items for sale from this pattern, please visit the About page for details. Thank you to Lion Brand Yarn for providing the yarn for this pattern.
The 2015 Moogly Afghan Crochet-Along: Block #5!
Block #5 - enough to count on one hand! We've had some challenging blocks, and now we've got one that's a little more relaxing - and very pretty! If this is the first you've heard of the 2015 Moogly Afghan CAL, please CLICK HERE to read how it works! In summary, every 2 weeks I'll share a new free 12" crochet block pattern, and we'll all make them together. All the patterns will be free all year long, and we'll get to visit a variety of fantastic crochet blogs along the way!