moogly

menu icon
go to homepage
  • Patterns
  • Tutorials
  • MooglyCAL
  • Giveaways
  • Lives
    • Facebook
    • Instagram
    • Pinterest
    • TikTok
    • Twitter
    • YouTube
  • search icon
    Homepage link
    • Patterns
    • Tutorials
    • MooglyCAL
    • Giveaways
    • Lives
    • Facebook
    • Instagram
    • Pinterest
    • TikTok
    • Twitter
    • YouTube
  • ×
    Home

    Broomstick Lace

    May 9, 2012 by Tamara Kelly 11 Comments

    Broomstick Lace, aka Jiffy Lace, is one of those things that I avoided for far too long. Sure, it's pretty, I thought, but it's got to be hard. Well I was absolutely delighted to sit down one day and discover it's super easy! And now it's one of my favorite things to crochet. Here's how I do it:

    You can use this technique for clothes, blankets, whatever you like, though I don't recommend it for a potholder. The Baby In Bloom Sweater and Bonnet both use broomstick lace, and I can't wait to design more crochet patterns with this stitch. I hope this video tutorial encourages you to give it a try yourself if you haven't already. What sort of projects do you want to make with broomstick lace?

    How to crochet broomstick lace video tutorialBe sure to check out and like the moogly Facebook page to get all the latest updates, fun links, sneak peeks, and more! And check out my Zazzle page for fun moogly merchandise and crochet themed items.

    My Review: Urban Edge

    May 7, 2012 by Tamara Kelly 1 Comment

    Last week I was lucky enough to receive a copy of Urban Edge, by designer Shannon Mullett-Bowlsby, published by Leisure Arts. And I'm super excited to be able to give you an inside peek! I snapped a few pics this overcast May morning (hence the blurriness, my apologies), so let's dive in.

    Urban Edge by Leisure Arts

    [Read more...]

    Devotee Clutch

    May 4, 2012 by Tamara Kelly 6 Comments

    I just love it when things come together. Inspiration, occasion, and the perfect yarn. And this is the result!

    Devotee Clutch Free Crochet Pattern

    [Read more...]

    Spike Cluster Stitch

    May 2, 2012 by Tamara Kelly 2 Comments

    The Spike Cluster Stitch, or SPC, is featured in the Blue Agave Phone Pouch pattern. It's a purely decorative stitch, fun to make but hard to describe in text. So what to do? Make a video!

    I hope this makes things clearer! It's one of those stitches that you kind of have to dive into - intimidating at first, but once you've made a half dozen you'll see just how simple they are. Here's a static pic with the stitches labeled in the order the loops are made:

    Spike Cluster Stitch Crochet CloseupThe key is to keep pulling each loop up to the height of the current row. Otherwise the whole thing will pull down into the fabric. You can use this stitch in blankets, cozies, garments - anything you want. Work from the top down, as in the Blue Agave Phone Pouch pattern, and you get an upright plant-like look. Work from the bottom up and you'll get something a little different. Have fun and enjoy! More videos to come soon!

    Spike Cluster Stitch Crochet Video TutorialBe sure to check out and like the moogly facebook page to get all the latest updates, fun links, sneak peeks, and more! TamaraKelly@mooglyblog.com

    Acrylic Killer! (a quick photo tutorial)

    April 30, 2012 by Tamara Kelly 55 Comments

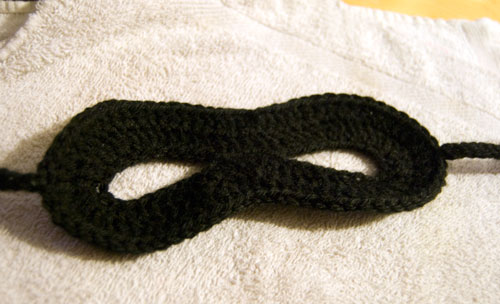
    Whew, it's been a crazy weekend here. A surgery, a wedding, a child's birthday party... I'm in total recovery mode today. But I wanted to take a few minutes here to share with you one of the little tricks I picked up several years ago and used just this past week - "killing" acrylic yarn!

    Superhero Mask - How to Kill Acrylic Tutorial

    [Read more...]

    Toot Sweet Newborn Bonnet

    April 27, 2012 by Tamara Kelly 41 Comments

    The Toot Sweet Newborn Bonnet is as close as you can come to immediate gratification! Not to mention simple, stunning, and pillowy soft!

    free baby bonnet crochet pattern Toot Sweet Newborn Bonnet Crochet Free Pattern baby newborn hat

    [Read more...]

    Simple Rosettes and Leaves

    April 27, 2012 by Tamara Kelly 18 Comments

    These Simple Rosettes and Leaves are perfect for any project that needs a quick touch of floral femininity. Add one for a pop of color or add a bunch for a beautiful bouquet! Each Rosette takes about 5 minutes to make, and the Leaves take even less.

    Simple Rosettes and Leaves on Toot Sweet Bonnet free patterns mooglblog.com [Read more...]

    Weaving in Ends

    April 25, 2012 by Tamara Kelly 22 Comments

    One request that I've gotten a few times, here at the blog and on my facebook page, is for a video tutorial detailing how I weave in ends. Well, I finally got my hands on the camera and we filmed this last night!

    The technique is the same, no matter what kind of stitches you are weaving into - sc, dc, trc, etc. The key thing is to work back into the tail, splitting it with your needle in several places. That will make your ends much more secure. Never just knot the yarn and cut it next to the knot  - that knot will almost always wiggle it's way out eventually!

    Hope this video helps you with your own crochet projects! Stay tuned for more videos!

    how to weave in ends crochet video tutorialBe sure to check out and like the moogly facebook page to get all the latest updates, fun links, sneak peeks, and more! TamaraKelly@mooglyblog.com

    Earth Day - 10 Patterns to Save the World!

    April 23, 2012 by Tamara Kelly 13 Comments

    Earth Day is just one day, but doing right by our home planet is an everyday activity. We have to take care of the Earth - it's where we keep the yarn! So in addition to reusing, recycling, and re-purposing, here are 10 patterns that will help you be eco-friendly and eco-crafty (and you might even save money while you're at it)!

    10 free patterns for earth day [Read more...]

    Blue Agave Phone Pouch

    April 20, 2012 by Tamara Kelly 34 Comments

    blue agave phone pouch necklace music hands free pattern

    Earlier this month I got a request on the moogly facebook page for  "a pattern for a bag with a strap to hold my new phone, so I can be hands free and listen to music while doing chores." Well, how can I say no to a fan?

    Disclaimer: This post may include affiliate links.

    Purchase the downloadable PDF of this pattern on Ravelry

    The Blue Agave Phone Pouch is really several patterns in one - you can make it with the spiky "agave" plant design or without; with a long strap to wear it as a necklace, or with a short strap to wear it as a wristlet; or leave off the strap altogether and call it a phone cozy!

    blue agave phone wristlet stripes free patternIt's sized to fit both my Android and my friend's iPhone (and probably most smartphones, but you'll have to check yours as you go). I didn't add a closure to mine, but a simple chain loop opposite a button would do the trick if you like extra security.


    Blue Agave Phone Pouch

    Add this pattern to your Ravelry Queue

    • Hook: US G, 4.0mm
    • Small amounts of worsted weight yarn in two colors; recommended yarn: Lily Sugar'n Cream
    • Clicca QUI per la traduzione italiana da Thalyta Campana

    Special Abbreviations:

    RS - right side
    WS - wrong side
    FSC - foundation single crochet
    SPC (Spike Cluster) - To work an SPC, pick up 5 loops and bring them to the height of the current row by inserting the hook as follows: 1) 2 sts to the right of the current stitch and 1 row down; 2) 1 st to the right and 2 rows down; 3) directly below and 3 rows down; 4) 1 st to the left and 2 rows down; 5) 2 sts to the left and 1 row down (yo and pull up a loop in each location, 6 loops on hook). Next, insert hook into the top of the current stitch itself, yo and pull through (7 loops on hook), yo again and carefully pull through all 7 loops.

    Spike Cluster Stitch Crochet CloseupNow with video tutorial!

    NOTES:

    Turning after each row is important to keep the seam running straight up the side and to line up the spike clusters. If you don't mind a slanted seam and aren't using the cluster stitches, then you can skip the turns and just work sc across for each row.

    All odd numbered rows are RS, even numbered rows are WS.

    Instructions:

    Round 1: With Color A, FSC 21, join with sl st. (Alternately, ch22 and sc in 2nd ch and ea st to end, join with sl st.)

    Round 2-4: Ch1 and turn. Sc in ea st to end, join with sl st. (21sc)

    Round 5: With Color B, ch1 and turn. Work 3sc, SPC, 4sc, SPC, 12sc. Join with sl st. (2 SPC, 19sc)

    Round 6-8: Ch1 and turn. Sc in ea st to end, join with sl st. (21sc)

    Round 9: With Color A, ch1 and turn. Work 3sc, SPC, 4sc, SPC, 12sc. Join with sl st. (2 SPC, 19sc)

    Round 10-12: Ch1 and turn. Sc in ea st to end, join with sl st. (21sc)

    Round 13: With Color B, ch1 and turn. Work 3sc, SPC, 4sc, SPC, 12sc. Join with sl st. (2 SPC, 19sc)

    Round 14-16: Ch1 and turn. Sc in ea st to end, join with sl st. (21sc)

    Round 17: With Color A, ch1 and turn. Work 3sc, SPC, 4sc, SPC, 12sc.  Join with sl st. (2 SPC, 19sc)

    Round 18-20: Ch1 and turn. Sc in ea st to end, join with sl st. (21sc)

    Round 21: With Color B, ch1 and turn. Work 3sc, SPC, 4sc, SPC, 12sc. Join with sl st. (2 SPC, 19sc)

    Round 22-24: Ch1 and turn. Sc in ea st to end, join with sl st. (21sc)

    For iPhone (and other longer phone model users):
    Round 25-26: Ch1 and turn. Sc in ea st to end, join with sl st. (21sc)

    Break yarn, leaving a 12" tail. Turn case to WS and use tail to whip stitch the end closed. Weave in ends. Turn case back to RS. If you just want a phone cozy, you're done, otherwise, continue with handle instructions below.

    Make cord/handle:
    Holding Color A and Color B together, leave a 12 inch tail and make a slip knot. Ch to desired length. For a wristlet, I recommend about 9 or 10 inches, for a necklace length I'd recommend at least 30 inches, but either way, try it on as you go. Leaving another 12 inch tail on the end, break yarn and finish off. For the wristlet, sew both ends of the chain to one side of the pouch. For the necklace version, sew one end to each side. Add button and loop if desired.


    Do you listen to music or podcasts on your phone? I think I'll listen to a lot more now that I have this pouch. And a big thank you to Lisa from Richmond for the idea and inspiration!

    Blue-Agave-Phone-Pouch free pattern mooglyblog.comWritten pattern copyright mooglyblog 2012, please do not reprint this pattern, but feel free to link to this page to share this pattern with others!


    Zebra Finger Puppet

    April 18, 2012 by Tamara Kelly 14 Comments

    There's just one more finger puppet pattern I want to share with you (for now) - the final companion to the Lion, Monkey, and Wild Man.... the Zebra Finger Puppet!

    Zebra Finger Puppet Pattern on www.mooglyblog.com [Read more...]

    SuperCrochet and MightyKnits!

    April 16, 2012 by Tamara Kelly 17 Comments

    I'm surrounded by superhero fans! And if you've seen what movies are out there lately... there's no denying it, superheroes are here to stay.  So let's start a mighty week then with a roundup of some of the best free superhero knit and crochet patterns I can find!

    Super Crochet and Mighty Knits! 10 free patterns to make for your littlest heros, from mooglyblog.com [Read more...]

    Baby In Bloom Bonnet

    April 13, 2012 by Tamara Kelly 15 Comments

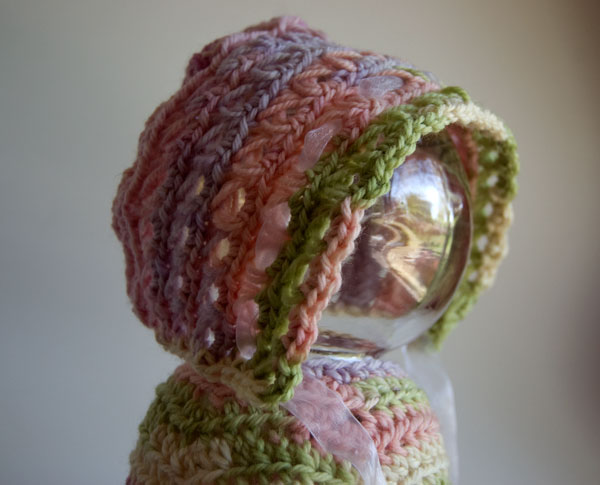
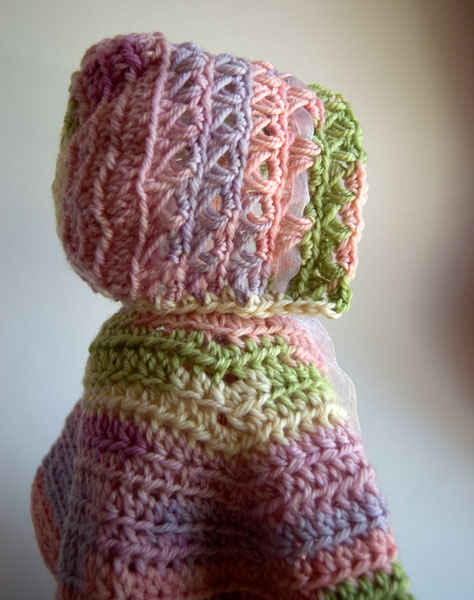
    Baby In Bloom Bonnet - free crochet pattern

    Did you like the Baby In Bloom Sweater pattern? It's a sweet little cardigan, perfect for gift giving (and for your own babies!) but I thought something was missing... And so here is the Baby In Bloom Bonnet!

    Disclaimer: This post includes affiliate links.

    Prefer an ad-free PDF? You've got options!

    This button leads to the pattern on Etsy

    Prefer the free blog version? Keep scrolling!

    Alone or Together!

    This precious bonnet makes a great set when paired with the sweater, but it stands alone just as well. The lacy fabric keeps heads from overheating, and the touch of ribbon makes for endless customizations!

    Baby In Bloom Bonnet free crochet pattern at moogly


    Baby In Bloom Bonnet

    Add this pattern to your Ravelry Queue and Favorites

    Hook: US J, 6mm

    Needle: US 19, 15mm, or equivalent sized dowel

    Yarn: 75 yards of worsted weight yarn (original yarn has been discontinued)

    Ribbon: 1 yard of ribbon of your choice

    Helpful Links and Tutorials:

    • crochet abbreviations
    • foundation single crochet
    • front loop only/back loop only
    • broomstick lace tutorial

    Broomstick Lace Terms:

    Loop Pass – In broomstick lace, all stitches are worked from the right side of the fabric. The first half of the technique is the loop pass, worked from left to right. Without twisting, transfer the loop on your hook onto the knitting needle. Skip the first stitch, and going into the blo, pull up a loop from each stitch and place it on the needle. You should have as many loops on your needle at the end as you had stitches in the previous row. Do NOT turn.

    Return Pass – This is the second half of a broomstick lace row. Working from right to left, Insert the hook into the first 3 sts and pull them off the needle. Holding the loops somewhat taut so they don’t loose height, bring the working yarn loosely up behind the loops, yo and pull through. Ch1 (this is the only ch of the row) and work 3 sc, going through the center of all three loops each time. Using the hook, slide three more loops off the hook and work 3 more sc in this set. Continue to end, working 3sc into each group of 3 loops. At the end you should have as many sc as you had loops. Do not turn, but use the loop on your hook at the end of the last sc to start the next row of Loops.

    Instructions:

    Leaving about 12" of yarn for later seaming, make 22 fsc. (If you prefer, ch 23 and sc in the second ch from hook and in ea st to end.)

    Row 1 (WS): Ch1 and turn. Working in flo, *1 hdc into st, then 2 hdc into next st. Repeat from * to end of row. (33 hdc)

    Row 2 (RS): Ch1 and turn. Working in flo, *1 hdc in 2 sts, then 2 hdc into next st. Repeat from * to end of row. (44 hdc)

    Row 3 (WS): Ch1 and turn. Working in flo, *1 hdc in 2 sts, then 2 hdc into next st, then 1 hdc in the next st. Repeat from * until 4 sts are left. Work 1 hdc in ea of last 4 sts. (54 hdc)

    Row 4 (RS): Ch1 and turn. Working in flo, hdc in ea st across to end. (54 hdc) Do not turn.

    Row 5 (RS): Working in blo, work Loop Pass of broomstick lace. (54 loops)

    Row 6 (RS): Work Return Pass of broomstick lace, in groups of 3. (54 sc, 18 groups)

    Row 7 - 14 (all RS): Repeat Rows 5 and 6, for 5 complete broomstick lace rows total. Do not break yarn.

    Finishing:

    Folding the bonnet in half, use a tapestry or yarn needle and the 12" tail you left at the beginning to sew the back of the bonnet together. Weave in this end, then go back to live stitch at the end of Row 14 and sc evenly around the bottom edge of the bonnet (shown in yellow above). Break yarn and weave in ends. Weave a ribbon in and out of second row of broomstick lace as shown, and trim to desired length. Alternately, crochet chains and attach at the bottom.


    The Fine Print

    Be sure to check out the moogly facebook page for the latest updates and fun extras! Written pattern and photos copyright Tamara Kelly 2012, please use a link to this page when sharing this pattern with others.


    Moogly is now on Zazzle!

    April 12, 2012 by Tamara Kelly Leave a Comment

    Show off your love of crochet, knitting, (and the free patterns here at moogly!) with these top quality products from Zazzle! I take all the photos and do all the designs myself, and Zazzle takes care of the production and mailing. I hope you like them! If you see a picture or design you like but want it on a different product, let me know and I'll get it set up for you.

    Hooks in Bloom - available on Zazzle


    And don't forget - I'm still taking commissions for custom crochet and knit products! Contact me at mooglystore@gmail.com or send me a message through the moogly facebook page today!


    Wild Man Finger Puppet

    April 11, 2012 by Tamara Kelly Leave a Comment

    *insert Tarzan yell here*

    This little guy is ready to swing from the vines and chill with his animal pals!

    Wild Jungle Man Finger Puppet Free Crochet Pattern Tarzan [Read more...]

    How to Make Your Own Yarn - 6 Great Tutorials

    April 9, 2012 by Tamara Kelly 15 Comments

    Going to the yarn store is always fun and exciting - so much potential in all those beautiful skeins. But you aren't limited to what's in the store. You can make your own - no spinning required! I've scoured the web this morning to bring you 6 great tutorials for making your own yarn!

    How to Make Your Own Yarn - 6 Ways! See them all on Moogly!

    [Read more...]

    Baby In Bloom Sweater

    April 6, 2012 by Tamara Kelly 42 Comments

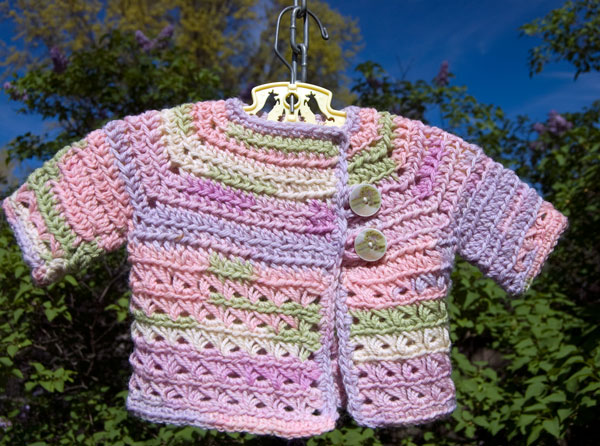
    Baby-In-Bloom-Newborn-Cardigan-Sweater

    The Baby In Bloom Sweater is the perfect baby cardigan for seasonal changes - super lightweight and airy, just warm enough to ward off a chill. The big stitches and hook make it fast and drapey, while the asymmetrical front and broomstick lace make it new and different.

    Prefer an ad-free PDF? You've got options!

    This button leads to the pattern on Etsy


    Baby In Bloom Sweater

    Add this pattern to your Ravelry Queue and Favorites

    Hook: US J, 6mm

    Needle: US 19, 15mm, or equivalent-sized dowel

    Yarn: 270 - 500 yds Lion Brand Baby Wool (100% wool, 4/Worsted)
    English Garden colorway shown

    Stitch markers

    Buttons - 2 (La Mode Vintage Style 1716, 1" buttons shown)

    Sizes: Directions are listed as 0-3mths (6-9 mths, 12mths)

    NOTES:

    This sweater features broomstick lace for the bottom half. If you are not familiar with broomstick lace, I've filmed a video tutorial! There is also a quick written set of instructions below in the Special Terms section.

    Click here for a tutorial on how this sweater starts, and how to armholes are formed

    Klik hier voor een PDF van dit patroon in het Nederlands!

    Special Terms:

    hdc - half double crochet
    pm - place marker
    flo - front loop only
    blo - back loop only
    RS - right side
    WS - wrong side

    Loop Pass - In broomstick lace, all stitches are worked from the right side of the fabric. The first half of the technique is the loop pass, worked from left to right. Without twisting, transfer the loop on your hook onto the knitting needle. Skip the first stitch, and going into the blo, pull up a loop from each stitch and place it on the needle. You should have as many loops on your needle at the end as you had stitches in the previous row. Do NOT turn.

    Return Pass - This is the second half of a broomstick lace row. Working from right to left, Insert the hook into the first 3 sts and pull them off the needle. Holding the loops somewhat taut so they don't loose height, bring the working yarn loosely up behind the loops, yo and pull through. Ch1 (this is the only ch of the row) and work 3 sc, going through the center of all three loops each time. Using the hook, slide three more loops off the hook and work 3 more sc in this set. Continue to end, working 3sc into each group of 3 loops. At the end you should have as many sc as you had loops. Do not turn, but use the loop on your hook at the end of the last sc to start the next row of Loops.

    Baby in Bloom Sweater Instructions:

    BODY:

    For all sizes, ch 35.

    Row 1 (RS): Hdc in 2nd ch from hook and in next 3 ch. Work 3hdc into next ch, and pm in center of these. Hdc in the next 3 ch, then work 3hdc in next ch (pm in center). Hdc in next 9 ch, then work 3hdc in next ch (pm in center). Hdc in the next 3 ch, then work 3hdc in next ch (pm in center). Hdc in last 11 ch. (42 hdc)

    Row 2 (WS): Ch1 and turn. Working in flo, hdc in the first st and each st, working 3hdc in each st with a marker (pm in each new center st). (50 hdc)

    Row 3 - 7 (9, 11) : Repeat Row 2, moving markers up to the new centers each time. 90 (106, 122) hdc

    Row 8 (10, 12) (WS): Ch1 and turn. Working in flo, hdc to first marker. Remove marker and hdc in this st. Ch3, remove second marker, and hdc in that st. Hdc across to next marker. Remove marker and hdc in this st. Ch3, remove last marker, and hdc in that st. Hdc to end. Armholes made. 56 (64, 72) hdc and two ch 3 sps

    Row 9 (11, 13) (RS): This is the setup row to get the st counts right for the broomstick lace. It's a little different for each, so make sure you are following the right set of instructions below:

    Row 9 / 0-3 mths: Ch1 and turn. Working in flo, hdc in first st. Work 2 hdc in next st. *Hdc in next 4 sts, then 2 hdc in next st. Repeat from * 12 times. (75 hdc)

    Row 11 / 6-9 mths: Ch1 and turn. *Working flo, hdc in 4 sts, then 2 hdc in the next st. Repeat from * to end. (84 hdc)

    Row 13 / 12 mths: Ch1 and turn. *Working in flo, hdc in 5 sts, then 2 hdc in the next st. Repeat from * until 6 sts remain. Hdc in remaining 6 sts. (90 hdc)

    Note:

    If you are a small skein yarn, now is a good time to change skeins so that you don't have to change in the middle of the broomstick lace section. You can use the bit left over from the first skein for edging the sleeves. If you are making one of the larger sizes, you've probably already had to start a second skein!

    Row 10 (12, 14) (RS): Loop Pass. Working in blo, make first half of broomstick lace row. 75 (84, 90) loops

    Row 11 (13, 15) (RS): Return Pass. Working in groups of 3 loops and 3sc, make second half of broomstick lace row. 75 sc, 25 groups (84 sc, 28 groups; 90 sc, 30 groups)

    Row 12-19 (14-23, 16-27) (all RS): Repeat last two rows for 5 (6, 7) total broomstick lace rows. Add more length in pattern as desired. Do not break yarn.

    Edging: Staying on the RS, work sc evenly up the inside front edge of the sweater, across neckline, and down other front edge. When back at the bottom, work sc in blo across, break yarn, use seamless join and weave in ends.

    SLEEVES:

    Prefer a short sleeve or vest style sweater? Just work a row of sc around the armhole openings and you're done! For longer sleeves, continue as written below. To minimize seaming but keep the broomstick lace motif going, the yarn is attached to the body of the sweater at the shoulder and then the sleeves are worked flat from there, so the only seaming is the actual sleeve itself. If you prefer not to seam the sleeves, you can join each round and work plain hdc all the way down to the wrist.

    Row 1 (RS): Using sl st, join yarn to center of armpit and ch1. Working in blo, hdc in each ch and st around. Do NOT join. 20 (24, 28) hdc

    Row 2 (WS): Ch1 and turn. Working in flo:

    0-3 mths: Hdc in the first 2 sts, then 2hdc in the next st. *Hdc in 4 sts, then 2hdc in next st. Repeat from * twice, then hdc in the last 2 sts. (24 hdc)

    6-9 mths: *Hdc in 7 sts, 2hdc in next st. Repeat from * twice. (27 hdc)

    12 mths: *Hdc in 13 sts, 2hdc in next st. Repeat from * once. (30 hdc)

    Row 3 - 5 (7, 9): Ch1 and turn. Working in flo, hdc in each st across. 24 (27, 30) hdc

    Row 6 (8, 10) (stay on RS): Loop Pass. Working in blo, make first half of broomstick lace row.  24 (27, 30) loops

    Row 7 (9, 11) (RS): Return Pass. Working in groups of 3 loops and 3sc, make second half of broomstick lace row. 24 sc, 8 groups (27 sc, 9 groups; 30 sc, 10 groups)

    Break yarn leaving 12" tail for seaming. Seam up the sleeve from wrist to armpit.

    Edging: Join yarn with sl st to RS of wrist opening near seam. Ch1 and working in blo, sc around wrist. Break yarn, use seamless join, and weave in ends.

    Repeat for second sleeve.

    BUTTONS:

    Baby-In-Bloom-Cardigan Button-Closeup Sew the button(s) to the inside, shorter flap of the sweater. Make chain loops long enough to go around the buttons and sew them in behind the edging of the longer front flap. For 1" buttons, I chained 10, but you'll need to play around a little to see what works for the buttons you choose.


    What do you think? Do you have any little ones in mind for this sweater? What's your favorite spring or summer baby gift?

    The Fine Print

    Written pattern copyright Tamara Kelly, 2012. Please use a link to this page when sharing this pattern with others. 

    Foundation Single Crochet Stitch (FSC) - Video Tutorial

    April 4, 2012 by Tamara Kelly 68 Comments

    One of the most aggravating steps in crochet is crocheting into that thin little chain at the start - getting a beginner past that can be the hardest part of teaching! But it's a necessary evil... except when it isn't! The Foundation Single Crochet is a great way to avoid working into a long row of chains, and it's also a great way to start a project when you don't know exactly how many stitches you need - no pulling out an entire row just to get rid of one extra chain! Here's how I make the FSC!

    Learn how to #crochet the Foundation Single Crochet (FSC) - so much easier than crocheting into the chain! Video tutorial from Mooglyblog.com

    [Read more...]

    Easter Lily (November Lily)

    April 3, 2012 by Tamara Kelly 36 Comments

    This pattern is also featured on Stitch & Unwind, a fantastic new craft blog! I'm so honored to have been able to participate in their launch. Check them out for great free patterns, giveaways, and more!

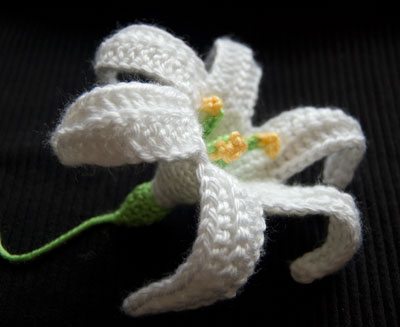
    The Easter Lily, aka the November Lily, is a traditional spring time plant - as iconic as colored eggs and chocolate bunnies. But real Lilies can aggravate the allergies, and they only last a little while. What to do? Break out the hooks and create a handmade crochet Easter Lily!

    Crochet Easter Lily (November Lily) free pattern flower [Read more...]

    Monkey Finger Puppet

    April 2, 2012 by Tamara Kelly 8 Comments

    MONKEY! Who doesn't love monkeys? Now you can have your very own tiny monkey - mess not included! This little guy is a fine companion for the Lion Finger Puppet, Wild Man, Zebra, and Jungle Finger Puppets Carrying Case, but he also stands on his own. Or how about a whole handful jumping on the bed?

    Monkey Finger Puppet

    [Read more...]

    Lion Finger Puppet

    March 30, 2012 by Tamara Kelly 8 Comments

    Recently I had some fun creating a custom set of finger puppets, with a jungle/wild animal theme. I love this job! I came up with a set of four puppets and a carrying case, and I couldn't resist sharing them. Let's start with the King of the Jungle!

    Lion Finger Puppet crochet free jungle animal play toy [Read more...]

    The Magic Circle

    March 28, 2012 by Tamara Kelly 67 Comments

    Ever wondered how round or circular projects have those centers that are all closed up and tight? It's the Magic Circle! Also known as Magic Ring or Magic Loop, there are several ways to create it. Here's mine!

    Learn how to crochet the Chainless Starting Double Crochet in the Magic Ring, and have the perfect start to all of your circular projects! Great video tutorial on Moogly! #crochet

    [Read more...]

    Tutorial: 5 Basic Crochet Shapes

    March 26, 2012 by Tamara Kelly 48 Comments

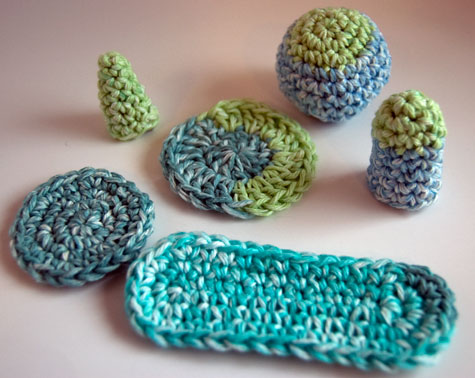
    The sculptural qualities of crochet are amazing! With crochet, any shape is possible - you can take off in any direction, add or subtract any stitches you like, go wild! That said, there are several basic shapes most crocheters will eventually use, beyond the straight line. These shapes are the building blocks of hats, bags, toys, amigurumi, finger puppets, and so much more. So let's round five of them up today and pin them all down in one place!

    Five-Basic-Crochet-Shapes

    [Read more...]

    Chinese Waves Pouch

    March 23, 2012 by Tamara Kelly 81 Comments

    This week brings a quick knit pattern, with simple crochet edging! The Chinese Waves Pouch is super simple, and a great "purse project" - small enough to keep in your bag for those quiet waiting room moments... and great for keeping your purse or bag organized when it's all done! The thick fabric keeps even delicate items safe and secure.

    Chinese Waves Pouch - free knitting pattern on mooglyblog.com

    [Read more...]

    Decreases: Sc2tog and Dc2tog

    March 21, 2012 by Tamara Kelly 2 Comments

    Crochet decreases are used to make the fabric get smaller/narrower, and also to help create interesting stitch patterns. Two of the most common decreases you'll see are sc2tog (single crochet two together) and dc2tog (double crochet two together).

    This technique is the same as the stitches get taller (e.g. trc2tog), and as more stitches are added to the decrease (e.g. dc3tog) - start each stitch, stopping before you pull through the last 2 loops, and then yarn over and pull through all the remaining loops on the hook. You can do it!

    And check it out - moogly is now on About.com!

    Mooglyblog Featured on About.com Crochet

    How to crochet decreases sc2tog dc2togBe sure to like moogly on facebook for fun links, sneak peeks, and to get all the latest moogly updates! TamaraKelly@mooglyblog.com

    The 10 Cutest Easter Crochet Patterns

    March 19, 2012 by Tamara Kelly 2 Comments

    These are the ten cutest Easter crochet patterns EVER! Well, maybe not forever ever. But it's the ten cutest Easter / Ostara / Spring Celebration patterns I've seen so far this year! I haven't made any of them (yet) myself, but I can't wait to start. And they are ALL free online!

    The 10 Cutest Free Easter Crochet Patterns!

    1. Huevitos Amigurumi Easter Egg pattern from Owlishly- How ridiculously cute are these? Good thing they'll last forever, because I don't think I could ever bring myself to eat that sweet smile. Owlishly Amigurumi Easter Egg - Easter #crochet [Read more...]

    Chevron Cuff

    March 16, 2012 by Tamara Kelly 7 Comments

    Ripples... sorbets and white...big bold bracelets...  this fabulous new Chevron Cuff pattern combines several of the hottest fashion trends for Spring 2012! Best of all, it gives you a new piece to wear in one evening, and for just pennies. Instructions are included for two versions - a loose bangle style bracelet, and a tighter cuff with fasteners.

    Ivory and aqua crochet chevron cuff displayed on a bottle free crochet pattern

    [Read more...]

    Post Stitches (Raised/Relief)

    March 14, 2012 by Tamara Kelly 28 Comments

    Post stitches, often called Relief Stitches, or Raised Stitches, are crochet stitches that are worked around the stems, or posts, of the stitches in previous rows. They are always worked around the post from right to left, and the difference between front post and back post is which side of the stitch you come from. Great for crochet ribbing and fun details, post stitches are also the key to crochet cabling - it's all about exactly which stitch you're crocheting around! Here are the basics:

    As I mentioned, post stitches can be made with dc; there are also fptrc as in the Diamond Crochet Cowl pattern; and sometimes you'll have post stitches with even larger/longer stitches, such as quad tr fp - as in the Squares Squared pattern. I hope this helps you understand how post stitches are made. Thanks for watching!

    Sample swatch of crochet post stitchesBe sure to like moogly on facebook for fun links, sneak peeks, and to get all the latest moogly updates!

    10 Fabulous and Free Crochet Bracelets

    March 12, 2012 by Tamara Kelly 12 Comments

    It's a new season, with new fashions, new looks, and new trends. And what better way to update your look, than with unique, one of a kind jewelry pieces? Here are some of the most popular free bracelet patterns available online, and most take hardly any yarn or time -  make one for every outfit!

    Ten crochet baeacelets displayed on knitting needles

    1. [Read more...]

    Squares Squared: 12" Block & Custom Blanket

    March 9, 2012 by Tamara Kelly 6 Comments

    A lot of crochet can seem rather feminine - flowers, lace, etc - but sometimes I want something a little more unisex. And I love designs that look great, are modern, interesting and customizable. I think this pattern fits the bill!

    Yellow, grey and white Squares Squared Block crochet [Read more...]

    Front Loop Only (FLO) & Back Loop Only (BLO)

    March 7, 2012 by Tamara Kelly 12 Comments

    Another video tutorial for beginner crocheters! This one shows you what to do when a pattern says to crochet in the front loop only or the back loop only - commonly abbreviated as flo and blo.

    How to Crochet in the Front Loop Only and Back Loop Only: Right Handed Version

    How to Crochet in the Front Loop Only and Back Loop Only: Left Handed Version

    The front loop and the back loop are always relative to you as the crocheter. Whichever one is closest to you is the front loop, and the one furthest away is the back loop. If you flip your work over to work back the other way, the front loop becomes the back loop, and vice versa! Easy Peasy!

    Craftsy

    Did you find this video helpful? What other stitch videos would you like to see? Let me know in the comments!

    Thumbnail image of FLOBLO crochet stitchBe sure to like moogly on facebook for fun links, sneak peeks, and to get all the latest moogly updates!

    10 Beautiful (and Free) Crochet Flower Patterns

    March 5, 2012 by Tamara Kelly 23 Comments

    This month finally marks the return of Spring, and with it, the return of warm breezes and delicate plants peeking through the snow and mud. Let's celebrate March with some lovely crochet flower patterns!

    Nine colorful crochet flowers [Read more...]

    Rainbow in the Clouds Pillow

    March 2, 2012 by Tamara Kelly 11 Comments

    How about another free pillow pattern? This one was inspired some IT'S SO FLUFFY yarn, Bernat Baby Blanket. Have you used this stuff? A super bulky acrylic chenille that works up incredibly fast, I had some left over from some Santa Hats I made at the end of last year. It feels like it's made of clouds, and I couldn't wait any longer to find another use for it. Everyone who touches it wants to lay their heads on it. So of course...

     White and rainboe colored Rainbow in the Clouds crochet pillow [Read more...]

    Reverse Single Crochet (Crab Stitch)

    February 29, 2012 by Tamara Kelly 27 Comments

    Video Tutorial: Reverse Single Crochet, aka the Crab Stitch! Learn to crochet backwards and make great edgings! #crochetReverse Single Crochet (RSC), also known as the Crab Stitch, is a great, modern edging for your work. Perfect for everything from blankets to bags, it gives a firm edge with real visual interest. It takes a bit of practice, but it's worth it. And now there's a moogly video tutorial! [Read more...]

    7 Lucky Baby Sweater and Hat Patterns

    February 27, 2012 by Tamara Kelly 8 Comments

    A dear friend of mine is expecting again, so I've got baby crafting on the brain. (Not THAT kind of baby crafting, sheesh!) I haven't started crafting for her yet, but I'm definitely pondering my options. The Blackberry Salad Stitch Baby Blanket is a possibility of course, but I like to make little hats and sweaters too.

    So I thought that today I'd share a few of my favorite knit and crochet baby clothing patterns. Seven of them, as it turns out. Does that make them lucky? Probably not, but then again, they worked out pretty well for me! And I'd like to think that any baby is lucky to get a hat or sweater handmade with love.

    1. Mini Moogly Sweater - This recipe is one I come to again and again! I've made a couple different sizes and for a little girl it's my favorite quick crochet.
    2. Baby Hoodie - I've made this one with and without the hood, for two very different looks! [Read more...]

    Bacon and Eggs Pillow

    February 24, 2012 by Tamara Kelly 29 Comments

    free crochet pattern bacon eggs pillow food kawaii

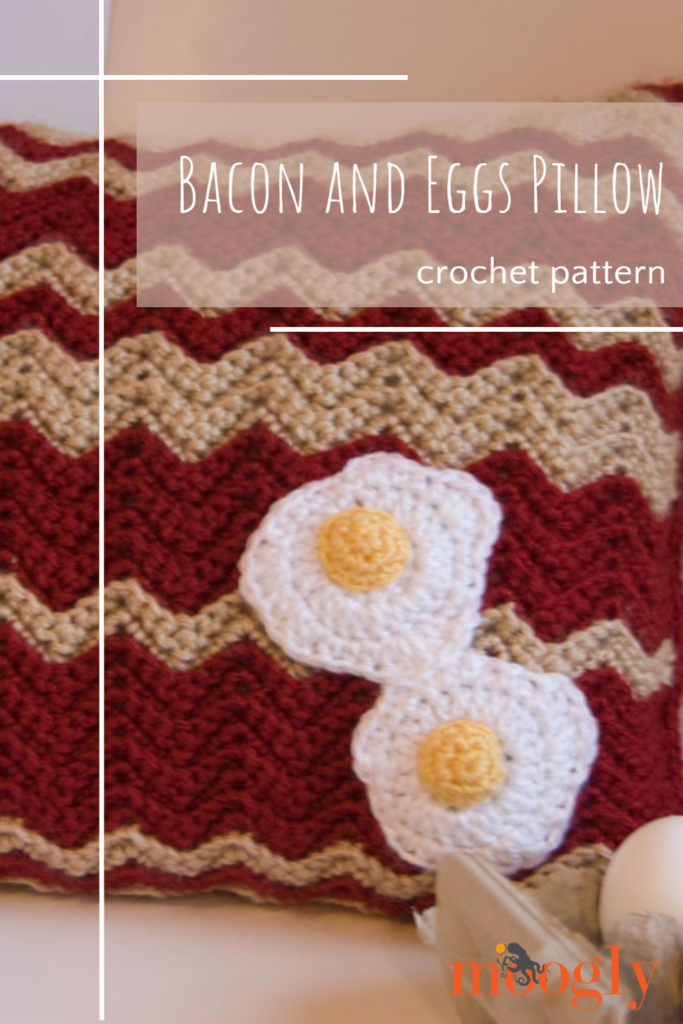
    Is there anything more magical, more all purpose, more... downright awesome... than BACON? The internet certainly doesn't think so, and who am I to argue with the internet? But a happy tummy full of bacon is just begging for a nap. I can't imagine what you'll dream about when you doze off with this pillow...

    Disclaimer: This post may contain affiliate links. 

    Prefer an ad-free PDF? You've got options!

    This button leads to the pattern on Etsy

    Prefer the free blog version? Keep scrolling!

    Bacon and Eggs Pillow Crochet Pattern by Moogly


    Bacon and Eggs Pillow

    Add this pattern to your Ravelry Queue and Favorites

    This pattern is designed to fit a 12" to 16" pillow form. To fit a 16" x 16" square pillow form, just keep going until it's long enough to wrap around the pillow. This is more of a stitch pattern with a recipe - be sure to read the notes carefully to make your own ooak pillow!

    • Yarn:
      • Caron Simply Soft Autumn Red, one skein
      • Caron Simply Soft Bone, one skein
      • Caron Simply Soft White, small amount
      • Caron Simply Soft Sunshine, small amount
    • Hook: US-H, 5.0mm
    • Also needed: Pillow form, 12" x 16"

    THE BACON:

    The Ripple Pattern for the bacon is the same as found in this video tutorial, with two important changes: all stitches are sc, and there are only two sc worked between the increases and decreases. Basically, it's a multiple of 8 plus 1, plus 1 more for the starting chain. See below for a written pattern. Here is an abbreviated chart:

    Free crochet bacon pattern chart eggs food kawaii

    Starting in Row 2, all stitches are worked into the Back Loop Only (BLO), except for the 2 sc in the first and last stitches of ea row. Customize your bacon by switching between rows of "fat" and "meat" as desired. Start and end with red - this will hide the joining row best. The only rule is that you should always work an even number of rows of a color before switching - this will allow you to carry the colors up the side so there will be only a few ends to weave in. Plus it looks nicer, giving you a definite RS and WS.

    Right Side (RS)
    Wrong Side (WS)

    Chain 82.

    Row 1: Skip the first ch, and sc twice in the next st. *Sc in the next two ch. Work a sc2tog decrease over the next 3 ch, skipping the 2nd ch. Sc in the next 2 ch.^ Work 3sc in the next ch. Repeat from * until there 8 ch left. Work from * to ^ once more, leaving just the last ch unworked. Work 2 sc into the last ch.

    Rows 2 - 84: Ch1 and turn. Sc twice into the first st. Working into the BLO, *Sc in the next two sts. Work a sc2tog decrease over the next 3 sts, skipping the center st. Sc in the next 2 sts.^ Work 3sc in the next st. Repeat from * until there 8 sts left. Work from * to ^ once more.  Sc twice into the last st of the row.

    Joining the starting chain to the last row.

    Fold the RS of the fabric together. Ch1 and hold the ends so that the working loop is on your right, with the last row farthest from you and the starting chain end of the fabric closest to you. Pull your hook around to the side closest to you, and sc the ends together, going through both loops on the side facing you and the BLO of the row furthest from you. Weave in any ends, and turn the bacon right side out. Set aside and make the eggs.

    THE EGGS: (make 2)

    The Whites:

    Starting with a magic circle, ch3 and dc 11, join with sl st to work in rnd.

    Row 1: Ch3 and dc in same st. Work 2dc in ea st around. Join to top of ch3 with sl st. (24 dc)

    Row 2: Ch1 and sc in first 3 sts. Hdc into next 2 sts. Work 3 dc into next st, then hdc in next st. Dc twice in next st, then dc in next st. Hdc in next 3 sts. 3dc into next st. 2dc into next st. Hdc into next 2 sts, then sc in next 3 sts. 4dc into next st, hdc into next st, and then sc in next 2 sts. 3hdc into last st of round, and then break yarn and use seamless join to finish off. Leave a long tail to sew onto the pillow.

    The Yolks:

    Starting with a magic circle, ch1 and sc 6, do NOT join with sl st - work amigurumi style, in a spiral, starting each row right in the top of the first st of the previous row without joining or chaining.

    Row 1: Sc twice in ea st around.  (12 sc)

    Row 2: Sc evenly around. (12 sc) Finish off with seamless join, leaving a long tail to sew onto the whites.
    Stuff with a bit of yellow yarn and sew to the whites, wherever desired.

    Free crochet bacon pattern chart eggs food kawaii
    Sew the eggs to the pillow, and then sc one end closed.

    Assembly:
    Placing the eggs as desired, sew them to the RS of the pillow using the long white tails. Close one end of the pillow by sc evenly with red yarn. Stuff pillow into case and sc closed other end. Now dream of your next meal!


    The Fine Print

    Follow Moogly on Facebook, Twitter, Pinterest, TikTok, and Instagram! Written pattern copyright Tamara Kelly 2012, all rights reserved. Please do not reprint or repost this pattern, but please do link to this page to share this pattern with others.

    If you wish to make items for sale from this pattern or translate it to another language, please visit the About page for details. 

    The Ripple Stitch (Chevrons)

    February 22, 2012 by Tamara Kelly 8 Comments

    Ripples have been popular in crochet for at least 60 years, and there are dozens of ways to make them. But basically it's just a series of alternating increases and decreases, creating a zigzagging fabric. Here's a video for one kind of Ripple Stitch!

    This pattern would be written as such:
    Ch3 and dc in the same stitch. Dc in the next 8 sts. Work dc2tog over the next three sts, by skipping over the center st. *Dc in the next 8 sts. 3dc in the next st. Dc in the next 8 sts. Work dc2tog over the next three sts, by skipping over the center st.* Repeat from * to * until there is one stitch remaining. 2dc in the last st.

    I hope this gives you a good idea of how ripples come together in crochet!

    Be sure to like moogly on facebook for fun links, sneak peeks, and to get all the latest moogly updates! TamaraKelly@mooglyblog.com

    10 Perfect Crochet Squares for Fast Afghans

    February 20, 2012 by Tamara Kelly 29 Comments

    Online Crochet Class
    If you are thinking of making an afghan, the sheer size can be daunting, but crochet offers several different options for breaking it down into pieces. One of my favorites are the 12 inch blocks. They are like granny squares  in that they usually start from a center point and work outward, but the finished designs are very different. Small and interesting, they are great traveling projects, and a great way to make an heirloom, one block at a time!

    Way back in 2008, I made my first block afghan, seen above. There are 25 gorgeous squares in there, and it's still in use and looking good. I made this entire blanket in white, but of course you can make yours as colorful as you can imagine! This style is also perfect for group afghans, where each person contributes one or two squares. If you are thinking about making one of these blankets, there are over 200 free block patterns on Ravelry. And here are 10 of my personal favorites!

    1. Butterfly Garden
    2. Supernova
    3. Flower Burst
    4. Victorian Dream
    5. New Year's Eve
    6. Star Overlay
    7. Wheel Lattice
    8. Birthday Flower
    9. Mandala
    10. Lovely in Green

    The pictures aren't the greatest - I took each one as I finished the square, but they give you an idea. There are so many possibilities! You can use all different squares as I did, or you can repeat the same square in different colors... get creative! Make a square while you watch a movie, work on a block while waiting for an appointment, and soon you'll have a pile of squares waiting to be joined.

    There are plenty of methods for joining too - whip stitching, single crocheting, etc. My personal favorite method is the flat braided join. It's pretty, it looks complicated (but isn't!) and best of all it's flexible - it's rare that every square will be *exactly* the same size or have the same number of stitches on the final row, and this method lets you fudge things so they all work together. There are a series of great video tutorials for flat braid join on youtube - I can't recommend them enough! Now pick a square, pick up your hook, and get started on a custom handmade blanket of your own!

    Looking for more? Check out 10 More Perfect Crochet Squares for Afghans!

    Be sure to like moogly on facebook for fun links, sneak peeks, and to get all the latest moogly updates! You can contact me via the Facebook page or at TamaraKelly@mooglyblog.com.

    Rainbow Flower Scrubby Dishcloth

    February 17, 2012 by Tamara Kelly 40 Comments

    Rainbow Flower Scrubby Dishcloth - free crochet pattern on Moogly!

    Is winter over yet? How about now? If you are as eager as I am for warm breezes, open windows, green growth and all things Spring, then you know how appealing bright colors are right now! While it's still far too early for many of us to plant the real thing, we can have a bright, sunshiney, happy Rainbow Flower Scrubby Dishcloth!

    Disclaimer: This post includes affiliate links.

    Prefer an ad-free PDF? You've got options!

    Prefer the free blog version? Keep scrolling!

    Make Dish Doing a Little Bit Happier

    Brighten up your kitchen and put a smile on your face even when you're washing yet another set of dishes. It's a great stashbuster - or an excuse to increase your stash - shop at the yarn links listed in the pattern!

    Rainbow Flower Scrubby Dishcloth - free crochet pattern on Moogly!

    This dishcloth features a scratchy scrubby bobbled center for tough messes and soft cotton for more delicate surfaces. Watch for the turns - there are only a couple, but they're important!


    Rainbow Flower Scrubby Dishcloth

    Add this pattern to your Ravelry Queue and Favorites

    US-H, 5.0mm hook - Furls Crochet

    Recommended Yarn:

    Red Heart Super Saver (worsted/"4", 100% acrylic)
    (center of flower - a few yards of red color)

    Lily Sugar'n Cream (worsted/"4", 100% cotton)
    (petals of flower - a few dozen yards of each color)

    Helpful Links and Tutorials:

    Crochet Abbreviations

    Magic Circle

    Dc5tog - Bobble

    Front Loop Only

    INSTRUCTIONS:

    CENTER (using acrylic yarn):
    Starting with a magic circle, work 8sc in the circle, join with a sl st to work in the round.
    Row 1: Ch1 and sc twice in same st, 2sc in each st around, join with sl st. (16 sc) Turn.
    Row 2: Ch1 and work 2sc in 1st st. In next st, dc5tog. *2 sc in next st. Dc5tog in next st.* (8 bobbles and 16 sc). Join with sl st to 1st sc. Turn.
    Row 3: Ch1 and sc once in each sc and twice in the top of each bobble around. (32 sc) Break yarn and use seamless join to finish off. Weave in ends.

    PETALS (using cotton yarn):
    Petal set #1:
    Row1: Join to any st with sl st, ch1 and sc in first 3 sts. 2sc in next st. *Sc in next 3 sts, 2sc in next st.* Repeat from * to * around, join with sl st to 1st sc. (40 sc)
    Row2: Ch1. Working in front loop only this round: sc in same st. Skip next st, 5dc in next st, skip next st. *Sc in next st, skip next st, 5dc in next st, skip next st.* Repeat to end.  Break yarn and use seamless join to finish off by joining to first sc. (10 petals) Weave in ends.

    Petal set #2:
    Row 1: Without turning, join yarn with a sl st to the remaining back loop in the center of one of the petals from last round. Continuing to work in these back loops, ch1 and sc in first 4 st. *2sc in next st, then sc in next 4 st.* Repeat from * to * around, ending with 2sc in last st. Join with a sl st to first sc. (48sc)

    Row 2: Ch1. Working in front loop only this round: sc in same st. *Skip next st, 5dc in next st, sk next st, sc in next st.* Repeat to end, then break yarn and use seamless join to finish off in first sc. (12 petals) Weave in ends.

    BACKING (using cotton yarn):
    Using magic circle, sc 8 and join with sl st.
    Row 1: Ch1, 2sc in each st around, join with sl st. (16 sc)
    Row 2: Ch1, sc in same st, then 2sc in next st. *Sc in next st, 2sc in next st.* Repeat from * to * around. Join with sl st. (24 sc)
    Row 3: Ch1, sc in same st and next st, then 2sc in next st. *Sc in next 2 sts, 2sc in next st.* Repeat around. (32 sc)
    Row 4: Ch1, sc in same st and next 2 sts, then 2sc in next st. *Sc in next 3 sts, 2sc in next st* Repeat around. (40 sc)
    Row 5: Ch1, sc in same st and next 3 sts, then 2sc in next st. *Sc in next 4 sts, 2sc in next st.* Repeat around. (48 sc) Do NOT break yarn.

    ASSEMBLY:
    Turn flower over, so the bobbles are facing down (WS). Place the backing against the back of the flower, wrong sides together. Ch1 and join pieces by sc through each st of the backing and the remaining “back” loops on the back of the flower. Increase around by*sc in 5 sts, followed by 2sc in the next st* to end. (56 sc) Break yarn, use seamless join, and weave in ends.

    free crochet pattern rainbow flower scrubby dishcloth washcloth cleaning kitchenHANGING LOOP:
    Turn flower back over (RS). Join to any st of backing with sl st. Ch1 and sc evenly around. At halfway point, create a loop of 20ch (adjust the length to your own hook/faucet width), then sc in same st and continue to sc around. Break yarn. Join using seamless join and weave in ends.

    free crochet pattern rainbow flower scrubby cloth dishcloth washcloth


    Hang it from your faucet, hook, or dishsoap, and bring some spring to your sink! I hope you enjoy this fun free crochet dishcloth pattern!

    The Fine Print

    Be sure to check out and like the moogly facebook page to get all the latest updates, fun links, sneak peeks, and more! Written pattern and images copyright Tamara Kelly 2012. Please include links to this blog post if sharing this pattern with others. For seller information, see the About page. You can contact me via Facebook messages or at TamaraKelly@mooglyblog.com. For printing and download info, please click here.

    10 Great (and free!) Dishcloths and Scrubbies

    February 15, 2012 by Tamara Kelly 12 Comments

    Some projects are fun, some are fast, some are cheap, and some are practical. The best combine all these features! For me, dishcloths, washcloths, and tawashis (the Japanese version) fit the bill.


    [Read more...]

    « Previous Page
    Next Page »
    Tamara Kelly of Moogly

    Moogly is world-famous for fresh. modern, and approachable crochet designs - as well as a little knitting and crafting here and there. On Moogly, you'll find several new free patterns every month, top quality video tutorials, giveaways, and more!

    More about Moogly →

    Popular

    • Frankenstein’s Monster Treat Basket
      Frankenstein’s Monster Treat Basket
    • Furls Seagrass Jumbo Resin Crochet Hooks
      Furls Seagrass Jumbo Resin Crochet Hooks Giveaway
    • MooglyCAL2026 Block 21
      MooglyCAL2026 Block 21
    • Crochet and Catch Up with Moogly - October 14, 2026
      Crochet and Catch Up with Moogly - October 14, 2026
    gosadi
    I'm a Craftsy Instructor. Click to see my classes.
    I Like Crochet


    Footer

    ↑ back to top

    About

    • About
    • Privacy Policy

    Newsletter

    Contact

    Email Moogly

    As an Amazon Associate I earn from qualifying purchases.
    Copyright © 2026 Mooglyblog.com