Whew, it's been a crazy weekend here. A surgery, a wedding, a child's birthday party... I'm in total recovery mode today. But I wanted to take a few minutes here to share with you one of the little tricks I picked up several years ago and used just this past week - "killing" acrylic yarn!
Now, a lot of people will tell you acrylic yarn can't be blocked - not true! What is true is that acrylic can't be blocked in the same way as wool. For wool, you just get it wet and then shape it, and however it dries is how it will stay (at least until you wash it again). Try this method with acrylic yarn and you'll be disappointed.
But! Try using steam, and it's a different story. There are some excellent tutorials out there, but what it comes down to is that you block or pin the item the way you want it to be, and then steam it slowly and gently, being sure to NEVER touch the yarn with the hot iron or steamer - otherwise you've got a melted mess and a ruined iron. The hot steam will melt the plastic just a little bit, causing it to lay in the shape you've created without crushing and flattening your stitches. Check out the tutorials at Bead Knitter Gallery and Never Too Hot to Stitch for pictures and more detailed instructions.
Killing acrylic is taking blocking to the extreme and fatal end. It's something I'd never ever do to a sweater or shawl or slippers or anything I wanted to have stretch. But for a select few items, killing them is exactly what I mean to do!
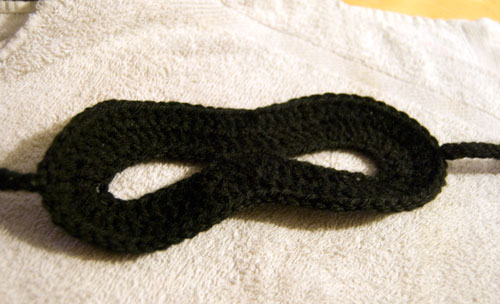
As a party favor for my youngest's birthday party yesterday, I made superhero masks using the Masquerade Mask pattern I linked to a couple weeks ago. I changed a couple things on the pattern, skipping round 3 and adding the straps on the opposite ends one at a time. They worked up super fast using Vanna's Choice yarn (I got 6 out of one skein, with several yards left over), but when done, they looked like this:
 huh
huh
Not exactly what I had in mind. Time to break out the iron! Killing the acrylic was the answer, and to do so without ruining my iron, I used the wet washcloth method.
- Lay a dry washcloth or towel on your ironing board.
- Lay the item to be ironed out on the washcloth and carefully shape it - this is permanent, so make so you get it just right!
A little rough and ruffly, but all where it needs to be. - Cover the item with a wet washcloth (or a part of it, if your project is a big one). This washcloth should be really wet, though not dripping. Smooth it all out, making sure your project is still in position and the desired shape.

Hey look kids - it's a wet washcloth photo! - With a hot iron (doesn't have to be the hottest setting, but it should be medium hot at least), carefully press down on the top of the wet washcloth, being careful not to move the iron around. Hold the iron down for about 5 seconds, and then move to the next bit to be ironed. The wet washcloth should steam like crazy.

Photographing steam is harder than you'd think. - Take a peek at your project. If it's shiny and flat, it's done! If you feel like it could use more ironing, go for it. Just make sure to keep a WET section of washcloth between the iron and the acrylic.

Tada!
This was a late night project, so the pictures aren't the best, but I think you can see what happened here. The crazy crinkly stiff mask is now shiny, smooth, and look at that drape!

The acrylic fibers have melted together - there's no possibility of frogging here. They have created a unified but thin fabric that is silky and solid - no more holes.

I didn't kill the straps - I wanted those to remain springy and stretchy for tying the masks on - but the front masks themselves turned out just right. The kids (and a few adults) seemed quite pleased, and I was too. Have you ever intentionally killed an acrylic project? What projects do you think could be improved with this technique?

Be sure to check out and like the moogly facebook page to get all the latest updates, fun links, sneak peeks, and to order your own ooak moogly items – I’m taking commissions! And check out my Zazzle page for fun moogly merchandise and crochet themed items.


Anna says
Very fascinating. I thought it was going to come out hard and stiff.
moogly says
Anna, it amazes me every time!
Erin says
This is amazing! I'm playing catch-up on Moogly. Reading all the things now...
moogly says
😀 Thanks!
Michelle says
Great! I am going to try this with a table runner I am making! Thank you for the info.
sannajane says
I've learned so much from you! I'm pretty much self taught - and your hints & tutorials have really given me a lot of great info & ideas. Thank you so much!
Tamara Kelly says
Thank you so much sannajane! I'm self taught too and it's a joy to be able to share it all!
Vicki says
I tried this on a scarf made from Lion Hometown and it came out amazing! Much more drapier and not quite as bulky looking. Thanks for the great tip!
Tamara Kelly says
😀 So glad it worked for you!
Carocolo Crochet says
Would you suggest doing this on an acrylic baby blanket? Will it make it scratchy? Because it's so thick, it's holding it's shape really well, but it's kind of stiff. Wondering if this method will make a little more blankety.
Tamara Kelly says
I wouldn't suggest doing this to a blanket, I think it would make it too thin and not warm. In this case I'd recommend either fabric softener or vinegar in a wash.
Shannon says
Hello! I'm new to crocheting (only a few months) and I've learned a lot from you , so thank you! I just finished making a baby pinafore with acrylic yarn, would you suggest this technique for that? The pattern has a lot of shells in it, so its a lot of open work and I don't know if it makes sense to even try this? Thanks!
Tamara Kelly says
Hi Shannon! Thank you! For wearables where you want some stretch, I would not kill the fabric. A light steaming or wet blocking would serve you better I think!
AJ says
Hello and thanks for the tutorial!
I just have a quick question. I want to kill an acrylic blanket square that I made to give it more drape as it turned out a bit stiff It has colorwork on it, though, and I'm not sure if the killing process will melt the colors together and ruin the picture or if its safe to do this to it.
Thanks so much!
AJ says
Just noticed the comment above relating to blankets- I am not worried about my blanket being too thin as it is currently very thick. I am also probably going to attach some sort of fleecy backing to it due to the ugliness of the wrong side of the fabric created by the color changes. I am more concerned about it not being too stiff.
Thanks!
Tamara Kelly says
I would try steaming it first - and doing a swatch before the real thing! 🙂
Rose says
This may save my bacon. I'm making a scull scarf for my daughter and I'm very much a beginner. As in, every five or ten years I make something for her. She doesn't care they are a bit off. But I'm worried about all those end bits of yarn, so this will be perfect. After I block the sculls, I'm putting them together with ruffle yarn to look like spiderwebs, so having the sculls flat will help immensely. Kind of like being able to felt wool. Thanks!
Tamara Kelly says
Great analogy Rose! 😀 Glad it helped!
Janis says
I tried this out for a headband and it worked so well! Does anyone have any ideas on how to go about doing something similar for a hat?? For the life of me I cannot find something that'll help. Thanks in advance!
Tamara Kelly says
Hm, perhaps using the end of an ironing board, so you can turn it and do a bit at time?
Mary says
I made a couple of angels Christmas tree ornaments for a friend who ordered them. This is a sentimental project, in memory of a child she lost, so I want it to be exactly right. Rather than hanging nicely, the angels droop and twist as your masks did. But since I've never killed acrylic, I need a little extra confidence boost here. If I use this method, will the texture and crocheted look of the angels still be present?
This angel patter by Camelia is the one my friend requested.
http://handmadebycamelia.blogspot.com/2013/12/pattern-christmas-ornament.html
Tamara Kelly says
Killing the acrylic does make it drape, but it also does make it lose the texture and some of the crocheted look. My best advice is to test it on a swatch first.
Theresa says
Hello Tamara,
I just wanted to say thank you for sharing how to do acrylic killer. This is my first time working with a pattern that called for blocking and with your step by step it made it easy to do and my shawl came out wonderful.
Tamara Kelly says
I'm so glad to hear it! Thank you! 😀
Zoe says
Hey so I'm trying to get wrinkles out of my acrylic sweater, and was wondering if I could use a steamer very gently to try and get those out. Or if I should just wash it again and lay flat to dry. What do you think??
Tamara Kelly says
To be safe, I would wash it and lay it flat to dry. 🙂
Stella says
Hi, what blocking for curled sides of a knitted scarf using fleur de lys stitch pattern. I used acrylic yarn, I do not have a steam iron, so is the wet cloth over the scarf method ok? And should I block on the right or wrong side?
Tamara Kelly says
If you do the wet cloth, you'll end up killing the acrylic - this might be a good thing, or a bad thing... you'd have to do a swatch of the pattern first to find out! Getting it wet and blocking it with pins might be the gentler, better solution in this case.
Stella says
Hi, thanks for the advice. How do you wet block a scarf?
Lynne says
Thank you so much for referring to my tutorial on blocking acrylic -- just as important when knitting lace in acrylic as it is wool! I love the way your masks turned out -- thanks for your tutorial on "killing" acrylic!
Tamara Kelly says
😀 Thank you so much Lynne!
Ashley says
So is there a way to do this with 100% yarn? I made similar masks and they look like yours did before you killed the acrylic. How can I smooth and straighten the mask out when it's 100% cotton?
Tamara Kelly says
Cotton doesn't melt, so it won't react the same way to heat. But you can get it wet and then apply the hot iron - it won't melt it, but it will flatten it quite a bit.
Christina says
Here I go! There's a picture post wet-blocking that clearly did nothing for my acrylic, stockinette/slip stitched scarf in my Rav project page: http://www.ravelry.com/projects/Sexymayo/tire-tread-scarf. I hope killing the acrylic will flatten it out a bit. I'll report back...
Tamara Kelly says
Fingers crossed! 🙂
emma hayes says
I know you wouldn't normally do it for clothing items but I'm making a loose, open stitch lacy beach cover up/cardigan for my holidays and its a bit fluffy...do you think if I killed it it would be cooler and more like lace?
Tamara Kelly says
I think this would be a good use for the technique, yes! 😀 I do always recommend trying it on a swatch first though!
Meredith says
Hi,
Could I use this to apply an iron on patch to an acrylic scarf? Made my cousin a Gryffindor scarf and wanted to put a house patch on it. I plan on sewing to edges as well but I'm worried that sewing alone may not lay flat since it's crocheted. I've had patches that "bubble" up in places from sewing leaving gaps in places. Thanks!
Tamara Kelly says
Hi Meredith! I'm afraid the yarn will probably melt too. I don't think it will go well, but there's only one way to know for sure. I would definitely go very low heat.
Tess says
so very glad to use this on the Ninja Mask I just made that's all curly!!! 🙂
Thanks so much for sharing!!
Tamara Kelly says
😀 Thank you Tess!
Betsy says
Thank you for your tutorials. I find them simple to follow and appreciate your teaching techniques. I stumbled upon this one and am wondering if killing the acrylic would stiffen a yarn tote bag to make it sturdier and less likely to stretch. What do you think? Any suggestions for a newbie?
Tamara Kelly says
It wouldn't stiffen it, but it would definitely eliminate some of the stretch!
Bridget says
Good morning! Thanks for this info about "killing" acrylic yarn. I just finished this elephant rug and because of the lacy stitches it's a bit bunchy in places and blocking didn't do much. I used Caron One Pound yarn that is 100% acrylic. Would you suggest trying the "killing" if it's only needed in a few particular sections or would you think that it's better to do the whole thing vs. just one section?
here's the link to the rug: http://www.ravelry.com/patterns/library/josefina-and-jeffery-elephant-rug
please note, I did not do the bobble stitches on the main part of the ears, just the lace edging.
Tamara Kelly says
I would try steaming it first - once it's killed, there's no coming back from it. If steaming doesn't work, I'd try killing a swatch of the fabric before the finished piece, to see if it's the effect you really want.
Coral says
I am make gn a lariat scarf with leaves and yarn tendrils on the ends . Would your wet cloth technique work for keeping the strands in a spray rather than just hanging in a clump
Tamara Kelly says
Unfortunately, I'd guess no, as it would likely make the tendrils that much softer and more flexible.
Veronica says
Love this. Thanks so much for sharing. I'm a huge fan of acrylic (mostly because I don't have the time & patience to properly clean and care for natural wool sweaters and hats) and I'd love to knit a lace sweater with a sweet baby-rose acrylic. Now I know I can make it look as perfect as it feels. 🙂
Tamara Kelly says
🙂 I'm glad you liked it! Thank you!
Johanna says
Hello Tamara !
Thank you very much for another super interesting article !
I’d love to make those masks to put in my little boys Xmas stockings (I know, I know it’s only July 😉) but when I clicked on the link it says “page not found”. Is there anyway I could get hold of the pattern or a similar one please ?
Tamara Kelly says
Hi Johanna - and thank you! 😀 I've fixed the link - thank you for the heads up!
JoHanna says
No worries ! Thanks for replying and trouble shouting so quickly xxx
daisy says
I'm making a blanket and I was wondering if I would block the blanket first then kill it or would killing it just work?
Tamara Kelly says
If you want to kill it, you can do it without blocking first. I always recommend trying it on a small swatch first though!
Misty says
A friend’s little boy asked me to make him an amigurumi Batman. I’ve worked out the man himself, but was wondering what to do for his cape to keep it from curling and being way too thick. I think this is the answer!!