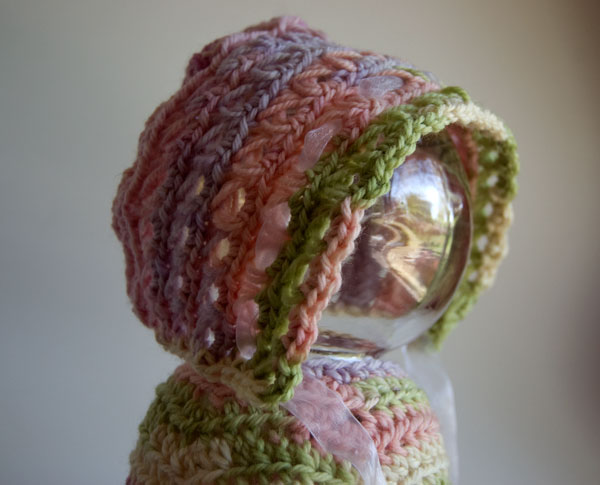
Did you like the Baby In Bloom Sweater pattern? It's a sweet little cardigan, perfect for gift giving (and for your own babies!) but I thought something was missing... And so here is the Baby In Bloom Bonnet!
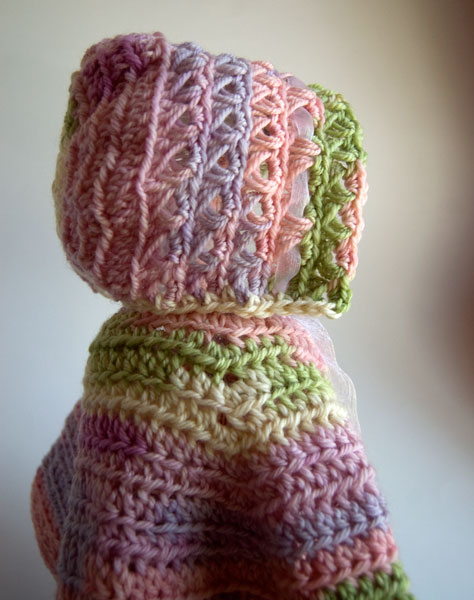
This precious bonnet makes a great set when paired with the sweater, but it stands alone just as well. The lacy fabric keeps heads from overheating, and the touch of ribbon makes for endless customizations!
Baby In Bloom Bonnet
Add this pattern to your Ravelry Queue
- Hook: US J, 6mm
- Needle: US 19, 15mm, or equivalent sized dowel
- Yarn: 75 yards of worsted weight yarn (original yarn has been discontinued)
- Ribbon: 1 yard of ribbon of your choice (I just used one I had in my stash)
Helpful Links and Tutorials:
- crochet abbreviations
- foundation single crochet
- front loop only/back loop only
- broomstick lace tutorial
Broomstick Lace Terms:
Loop Pass – In broomstick lace, all stitches are worked from the right side of the fabric. The first half of the technique is the loop pass, worked from left to right. Without twisting, transfer the loop on your hook onto the knitting needle. Skip the first stitch, and going into the blo, pull up a loop from each stitch and place it on the needle. You should have as many loops on your needle at the end as you had stitches in the previous row. Do NOT turn.
Return Pass – This is the second half of a broomstick lace row. Working from right to left, Insert the hook into the first 3 sts and pull them off the needle. Holding the loops somewhat taut so they don’t loose height, bring the working yarn loosely up behind the loops, yo and pull through. Ch1 (this is the only ch of the row) and work 3 sc, going through the center of all three loops each time. Using the hook, slide three more loops off the hook and work 3 more sc in this set. Continue to end, working 3sc into each group of 3 loops. At the end you should have as many sc as you had loops. Do not turn, but use the loop on your hook at the end of the last sc to start the next row of Loops.
Instructions:
Leaving about 12" of yarn for later seaming, make 22 fsc. (If you prefer, ch 23 and sc in the second ch from hook and in ea st to end.)
Row 1 (WS): Ch1 and turn. Working in flo, *1 hdc into st, then 2 hdc into next st. Repeat from * to end of row. (33 hdc)
Row 2 (RS): Ch1 and turn. Working in flo, *1 hdc in 2 sts, then 2 hdc into next st. Repeat from * to end of row. (44 hdc)
Row 3 (WS): Ch1 and turn. Working in flo, *1 hdc in 2 sts, then 2 hdc into next st, then 1 hdc in the next st. Repeat from * until 4 sts are left. Work 1 hdc in ea of last 4 sts. (54 hdc)
Row 4 (RS): Ch1 and turn. Working in flo, hdc in ea st across to end. (54 hdc) Do not turn.
Row 5 (RS): Working in blo, work Loop Pass of broomstick lace. (54 loops)
Row 6 (RS): Work Return Pass of broomstick lace, in groups of 3. (54 sc, 18 groups)
Row 7 - 14 (all RS): Repeat Rows 5 and 6, for 5 complete broomstick lace rows total. Do not break yarn.
 Finishing:
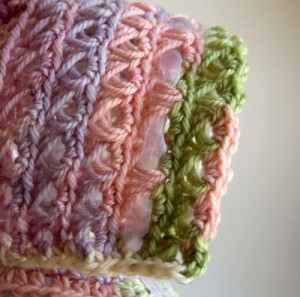
Folding the bonnet in half, use a tapestry or yarn needle and the 12" tail you left at the beginning to sew the back of the bonnet together. Weave in this end, then go back to live stitch at the end of Row 14 and sc evenly around the bottom edge of the bonnet (shown in yellow above). Break yarn and weave in ends. Weave a ribbon in and out of second row of broomstick lace as shown, and trim to desired length. Alternately, crochet chains and attach at the bottom.
 Be sure to check out the moogly facebook page for the latest updates and fun extras! Written pattern and photos copyright Tamara Kelly 2012, please use a link to this page when sharing this pattern with others.



Chelle
I am wondering what size baby hat you consider this... I'm hoping to try it in 3-6 months size.
moogly
Chelle this is probably more of a newborn size - for a 14" head or so. For an older child I'd probably bump it up a little - add 2 more stitches to the first row and maybe another row or two worked even before the last row.
Kay
In the picture, the back of the bonnet seems to be something other than broomstick. What is that stitch, and could you post a photo of the rear view?
moogly
I'm afraid I've already given the bonnet as a gift so I can't take any more photos, but the pattern starts with a row of fsc and then there are a few rows of hdc. As you'll see in the pattern, it isn't until Row 5 that it switches to broomstick lace. These stitches are defined in the Special Terms section of the above pattern, and there's a link to fsc if you aren't familiar with it. 🙂 Hope this helps!
Kay
Ah, now I understand. Thanks so much. I'm thrilled to find this pattern. I've never made a baby hat before, but I do know how to make broomstick lace. This will rescue my "due" date for finishing a gift.
Cynthia B
Your directions are clear, the photos are close enough to see the stitches for when I get stuck - thank you.
moogly
Thanks for saying so, Cynthia!
Terri
Moogly, your pattern is very clear to understand. This is the first time I've tried the broomstick lace stitch. It was very easy to follow. I'll have to search for another one using this stitch. Thank you for sharing. Terri
moogly
Thanks for saying so Terri! 😀
Ginny
Where can I find a copy of the sweeter that goes with this baby in bloom bonnet?
moogly
Here you go Ginny: https://www.mooglyblog.com/baby-in-bloom-broomstick-sweater-free-crochet-pattern/ 🙂
Michelle Schill
I just made both the bonnet and sweater. Simply beautiful!! I have always been afraid to do broomstick lace. Thanks for the tutorial!!
Tamara Kelly
😀 Thanks so much Michelle!
grama Pei
Love them both! thank you much for sharing these!
Tamara Kelly
Thank you so much!