
The Pig Squish is a cuddly, squishy free crochet pattern on Moogly that's sure to make you squeal in delight! Featuring Bernat Blanket, grab this pattern by the tail and make your own porcine pal today!
Disclaimer: This post includes affiliate links; materials provided by Yarnspirations.
Prefer an ad-free PDF? You've got options!


Prefer the free blog version? Keep scrolling!
Adding to the Bernat Barnyard of squish!
I've always loved making amigurumi, but the tiny fiddly piece wasn't my fave. So I'm loving coming up with all these squishes using jumbo Bernat Blanket and Bernat Blanket O'Go! Big enough to cuddle and squeeze, the entire series works up quickly. The Pig was a reader request - what animal would you like to see next?

Cute and Cuddly for Kids and Adults
This crochet pig pillow is fun to make - and squeeze! I used safety eyes, but this pattern has not been tested for safety for children under 3 years of age. If you are crocheting it for a baby or toddler, you may wish to embroider on the face and make sure that the pieces are sewn on quite securely. If using it as a photo prop, be sure not to leave the toy with a baby unattended.

Pig Squish
Add this pattern to your Ravelry Queue and Favorites
8.0 mm hook, Susan Bates
210 yds Bernat Baby Blanket (6 - Super Bulky; 100% polyester; 300g/10.5 oz; 201 m/220 yds)
Color A: Baby Pink - 1 ball
40 yds Bernat Blanket O'Go (6 - Super Bulky; 100% polyester; 300g/10.5 oz; 201 m/220 yds)
Color B: Foxglove, Lightest Pink
This yarn is discontinued, but there are lots of other shades of Bernat Blanket that will substitute!
Fairfield Poly-fil or 10" Microbead Pillow Ball
Gauge: 5"/10cm across after Rnd 3.
Size: approx 10" across/tall excluding ears, feet, and tail
HELPFUL LINKS AND TUTORIALS
CSDC - Chainless Starting Double Crochet (use ch 3 if preferred)
NOTES:
Rnds are worked in a spiral.
Do not ch 1 at the beginning of a rnd or join any rnds with a sl st unless specifically directed in the pattern.
Move a stitch marker along the first st of each rnd as you work to keep track of your progress.
When changing colors, finish the last stitch of the previous color with the new color.
Please note that some pieces switch between Rows and Rounds.

PIG SQUISH INSTRUCTIONS:
Body - Color A
Rnd 1: Make a magic circle, ch 1, sc in the ring, 9 hdc in the ring. (10 sts)
Rnd 2: 2 hdc in each st around. (20 hdc)
Rnd 3: *Hdc in the next st, 2 hdc in the next st; rep from * around. (30 hdc)
Rnd 4: *2 hdc in the next st, hdc in the next 2 sts; rep from * around. (40 hdc)
Rnd 5: *Hdc in the next 3 sts, 2 hdc in the next st; rep from * around. (50 hdc)
Rnd 6: *Hdc in the next st, 2 hdc in the next st, hdc in the next 3 sts; rep from * around. (60 hdc)
Rnd 7: Hdc in the next 5 sts, 2 hdc in the next st, *hdc in the next 9 sts, 2 hdc in the next st; rep from * until 4 sts rem, hdc in last 4 sts. (66 hdc)
Rnd 8: *2 hdc in the next st, hdc in the next 10 sts; rep from * around. (72 hdc)
Rnd 9: Hdc in the next 8 sts, 2 hdc in the next st, *hdc in the next 17 sts, 2 hdc in the next st; rep from * until 9 sts rem, hdc in last 9 sts. (76 hdc)
Rnd 10 - 15: Hdc in each st around.
Rnd 16: *Hdc in next 17 sts, hdc2tog; rep from * around. (72 hdc)
Rnd 17: *Hdc in next 10 sts, hdc2tog; rep from * around. (66 sts)
Rnd 18: Hdc in next 5 sts, hdc2tog, *hdc in next 9 sts, hdc2tog; rep from * around until 4 sts rem, hdc in last 4 sts. (60 sts)
Rnd 19: Sc in next st, sl st in next st, break yarn and seamless join.

Tail - Color A
Row 1: Leaving a long tail, ch 6, skip the ch closest to the hook, 3 sc in each rem ch to end; break yarn leaving long tail. (15 sc)

Snout - Color B
Row 1: Ch 6, skip ch closest to the hook, hdc in last 5 chs; turn. (5 sts)
Rnd 2: Ch 1, hdc in the next 5 sts, 4 hdc in skipped ch, hdc in base of next 5 sts, 4 hdc in side of last st of Row 1; break yarn leaving a long tail for sewing, and seamless join.
Ears (make 2 of each piece) - Colors A and B
PIECE #1 - Color A
Row 1: Ch 8, skip ch closest to hook, sc in next ch, hdc in the next ch, dc in next 5 chs; turn. (7 sts)
Rnd 2: CSDC, dc in the next 3 sts, hdc in the next st, sc in the next st, sl st in the last st; turn.
Rnd 3: Sl st in first st, sc in next st, hdc in next st, dc in last 4 sts; break yarn leaving long tail for sewing.
PIECE #2 - Color B
Row 1: Ch 6, skip ch closest to hook, sc in next st, hdc in next 3 sts, dc in last st; turn. (5 sts)
Row 2: CSDC, hdc in the next 2 sts, sc in the next st, sl st in the next st; break yarn leaving long tail for sewing
Assemble the Ears: Insert Ear Piece #2 into Piece #1, and use the long tail of Piece #2 to sew it on. Be sure to stitch so that Piece #2 does not show on the other side of the ear.

Ear, Snout, and Tail to Body Assembly
1 - Sew on Ears: Use the long tails of Piece #1 to sew the Ears to opposite sides, around Rnds 5 -7.
2 - Add Nostrils: Add smaller safety eyes to snout, as shown in the photo below.

3 - Sew on Snout: Use the long tail to sew the Snout to the front, around Rnds 14 - 16.
4 - Add Safety Eyes: Add larger safety eyes to body, around Rnds 12 and 13.
5 - Sew on Tail: Using its long tail, sew the Tail opposite the face, around Rnd 17.

Feet (make 4) - Color B
Rnd 1: Make a magic circle, ch 1, sc in the ring, 6 hdc in the ring. (7 sts)
Rnd 2: 2 hdc in each st around. (14 sts)
Rnd 3: Hdc in next st, sc in next 5 sts, hdc in next 2 sts, sc in the next 5 sts, hdc in next st. (14 sts) Tip: Weave in your first end now.
Row 4: Fold piece flat, ch 1, sc through next st and last st, sc through next 6 sets of sts; break yarn and finish off
Belly - Color A
Rnd 1 - 5: With Color A, rep Rnd 1 - 5 of Body. (50 hdc) Use stitch markers to space Feet around RS of Rnd 5 - at sts #5-11, 17-23, 30-36, and 42-48.

Rnd 6: Working through both layers for those sts, *hdc in the next st, 2 hdc in the next st, hdc in the next 3 sts; rep from * around. (60 hdc)
Rnd 7: Sc in next st, sl st in next st, break yarn and seamless join leaving a long tail for sewing.
Final Pig Squish Assembly
1 - Insert stuffing into body. If using a 12" pillow ball, be sure to insert the ball so that the zipper is at the bottom of the body. Remove stuffing as needed. Zip up ball and fold over excess fabric. (Save the excess stuffing for another project!)
2 - Use stitch markers to attach Belly to Body, so that legs are spaced appropriately for the face.
3 - Using long tails of Belly, sew Belly to Body with the whip stitch.

More Patterns? It's a Ham-bush!
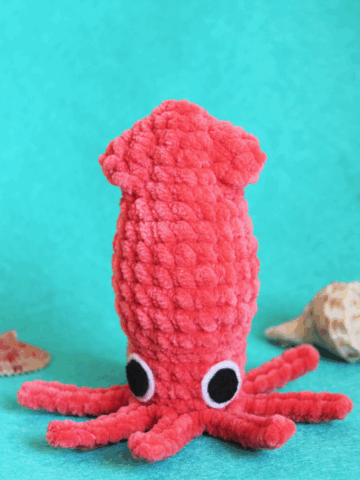
Check out the Octopus Squish, Narwhal Squish, Squid Squish, Jellyfish Squish, Bunny Squish, Lamb Squish, Cow Squish - and their cousin the Mushroom Stuffie! Looking for something else? Check out the Moogly Free Patterns Page or Ravelry!

If the Pig Squish pattern inspires you to make your own project, and you post a photo on social media, be sure to tag #CALCentralCrochet and me @mooglyblog or #mooglyblog so I can check it out too!
THE FINE PRINT
Follow Moogly on Facebook, Twitter, Pinterest, and Instagram! Thank you to Yarnspirations for providing the materials shown in this post. Written pattern copyright Tamara Kelly 2022, all rights reserved. Please do not reprint or repost this pattern, but please do link to this page to share this pattern with others.
To print or download, use the Print Friendly button below, or go to PrintFriendly.com, or right-click to copy and paste it into a word processing document if those options do not work for you (please note that Print Friendly is a free outside website that the button links to, and you can click here for a tutorial on how to use it, but I cannot provide additional technical support for this service).
If you wish to make items for sale from this pattern or translate it to another language, please visit the About page for details.


Angie says
Love this pig! It worked up really quick!
Any chance there is an elephant on the horizon?
Tamara Kelly says
I'll add it to the list! 🙂
Carka says
Hi. I see that you must have figured out how to use the 12” ball it just says to unstuff it. How did you end up doing that? Did you cut the seams? Is there a video tutorial for the pig yet??? Thanks
Tamara Kelly says
Hi Carka! The pillow ball has a zipper that opens it right up - just put the zipper at the "bottom" of the body and you can subtract/re-add stuffing as needed. Then zip it up, fold over any excess cloth, and sew on the belly!
The video tutorial was delayed as we all got Covid, alas. But it should be out tomorrow!
AW says
I am a beginner and was wondering if the ladybug video would work to follow how to make the squish pig? I am still at the point where videos help plus the written instructions. I am wanting to make the pig for a birthday gift.
Thank you!
Tamara Kelly says
The bodies are all the same, so anything that is different will be in the pig one! 🙂
Janice says
No, i made my own ball because I could not find one in the store. Oh lord find any kind of ball instead.
Alexandra says
Love that nose - too cute!
Rebecca Rice says
I love all of your Squish items. So far I have done the Cow and Narwhale Squishes and am getting the yarn for the Pig. I hope in the future you will do a Puppy Squish.
Tamara Kelly says
Thank you so much! ♥ It's definitely on the list!
Kristina says
I happened to see this on FB on my sister's birthday. She loves pigs, so I'll have to work it up for next year.
Vicki Breaux says
Love your patterns.
Kathy says
I have started and ripped it out 3 times as I keep running out of yarn….what am I doing wrong? It says 1 ball but I only have enuf for body. I’m a tight crocheter so what am I doing wrong?..
Tamara Kelly says
Hi Kathy! It's possible that you got a different-sized ball, I think this yarn comes in a couple of different putups! Otherwise, I'm not sure. 🙁
Kathy Meier says
WOW! Im such a tool, I just realized the ball was only 72yds.....sorry about that
Tamara Kelly says
No worries, I'm just so glad we were able to figure it out!
Diana L Mayo says
Thank you so much, I just found this, SOOO adorable, I can see many squishes in my future, I too love amigurumi but not the fiddly tiny pieces, (the tiny reindeer antlers about did me in)! Getting ready to start my piggy!
Tamara Kelly says
♥ Thank you, I hope you enjoy it!
Pamela says
I love this pattern! How many stitches are between the eyes and the nostrils? I can’t quite tell from the pictures.
Tamara Kelly says
Thank you! I believe it's 10 sts between the eyes, and 3 sts between the nostrils. 🙂
Rose says
I saw your YouTube video on the parts and you mentioned not to use size 7 yarn - what happens if used? I didn’t realize and I already have sweet snuggles in size 7 for the project
Tamara Kelly says
Hi Rose! It will just be bigger, and you'll need a bigger hook and more stuffing! 🙂 I just didn't want people to get confused between the varieties of Bernat Blanket out there. 🙂
Rose says
Oh! Got it! Thank you 🙂 I’m currently working on it and it is really big! Lol
Salli says
Why do you not show how to attach the body to the belly? Do you have a YouTube video on this? I’m not understanding how to do this. Thank you
Tamara Kelly says
Hi Salli! There is a video tutorial at https://www.mooglyblog.com/pig-squish-tutorial/ - it is simply sewn on, whip stitch is fine. 🙂
Kristi says
How do I attach the pigs feet to the belly? Can I use a velvet yarn- what will happen? Also- I have clicked on the ball for the stuffing but on Amazon shows unavailable. I can’t find it anywhere. Any ideas? Thanks!!
Tamara Kelly says
Hi Kristi!
For attaching the feet, please see Rnd 1 - 5 of the Belly Instructions above.
You can use velvet yarn, but will probably want to go down a couple of hook sizes and will need less stuffing, as the finished animal will be smaller.
For stuffing, I prefer to use these when available: https://amzn.to/48mvojL however, if you use the velvet yarn, you may need to switch to loose polyfil.
Jenn Blandford says
Hello, I’m having a few issues with this pattern. I did the round: 1 magic circle and in those 10 sts. I could not get 20HDC. Only 18 so I added an extra making it 11 total and was able to get the holes I needed. In that note my circle is folding in many places. Have I done this correctly or do I need to start again for the 5th time. Please Help!!! Thank you
Tamara Kelly says
Hi Jenn! I'm not sure what you mean by folding, perhaps curling up around the edges? If you are using the suggested yarn, make sure that you are pulling the loops all the way up to the top of the fabric as you are making your stitches. It should start to curl up into a bowl when you stop increasing as much.
Amanda Box says
Hi, I absolutely love this pig!! I’m rarely new and a friend is telling me that most amigurumi in the US work in Single crochet. Is this British terminology or did I do the pattern correctly? I just don’t want to do it wrong
Tamara Kelly says
All my patterns are in US terms unless it's a special version, clearly marked! 🙂
Piper says
Hi how do I make the body I can’t find a video for it
Tamara Kelly says
Hi Piper! The body is most shown in the Ladybug Squish video. 🙂