
The Lamb Squish is a sheepy, wooly, and very squishy, free crochet pattern on Moogly! Perfect for spring, Easter, or any lamb, sheep, or farm lover - you'll love just how fast it is to make with Bernat yarns!
Disclaimer: This post includes affiliate links; materials provided by Yarnspirations.
Prefer an ad-free PDF? You've got options!


Prefer the free blog version? Keep scrolling!
Don't Try to Resist the Squish!
Just like all the Squishes on Moogly, you can fill the Lamb Squish with a microbead pillow ball, or you can use Fiberfill.

And the yarn has a lot to do with the squishiness for this one too! I've used Bernat Sheepy for the gorgeous look and feel of the body, and then the details are made with a skein of Bernat Blanket O'Go - just one has all the extra colors needed! I did use all of the Bernat Sheepy though, so you may need two skeins of that one - let me know how much you used below!

In addition to the yarn and stuffing, you can use safety eyes and sew on the nose as shown, or you can use buttons - or a safety nose, or whatever you like! Make your lamb your own!

Cute and Cuddly for Kids and Adults
This lamb pillow is fun to make - and pet and squeeze! I used safety eyes, but this pattern has not been tested for safety for children under 3 years of age. If you are crocheting it for a baby or toddler, you may wish to embroider on the face and make sure that the ears are sewn on quite securely. If using it as a photo prop, be sure not to leave the toy with a baby unattended.

Lamb Squish
Add this pattern to your Ravelry Queue and Favorites
8.0 mm hook, Susan Bates
200 yds Bernat Sheepy (6 - Super Bulky; 100% nylon; 250 g/8.8 oz; 136 m/149 yds)
A: Cotton Tail (2 balls)
75 yds Bernat Blanket O'Go (6 - Super Bulky; 100% polyester; 300g/10.5 oz; 201 m/220 yds)
Colorway: Hibernate
B - lightest color/white
C - medium color/light gray
D - darkest color/dark gray
This yarn is discontinued, please use equivalent colors of Bernat Blanket.
Alternate Filling #1: 10" Microbead Pillow Ball
Alternate Filling #2: Fiberfill
Gauge: 5"/10cm across after Rnd 3.
Size: approx 10" across/tall excluding ears and feet
HELPFUL LINKS AND TUTORIALS
NOTES:
Rnds are worked in a spiral.
Do not ch 1 at the beginning of a rnd or join any rnds with a sl st unless specifically directed in the pattern.
Move a stitch marker along the first st of each rnd as you work to keep track of your progress.
Please note that some pieces switch between Rows and Rounds.

LAMB SQUISH INSTRUCTIONS:
Body - Color A (Bernat Sheepy)
Rnd 1: Make a magic circle, ch 1, sc in the ring, 9 hdc in the ring. (10 sts)
Rnd 2: 2 hdc in each st around. (20 hdc)
Rnd 3: *Hdc in the next st, 2 hdc in the next st; rep from * around. (30 hdc)
Rnd 4: *2 hdc in the next st, hdc in the next 2 sts; rep from * around. (40 hdc)
Rnd 5: *Hdc in the next 3 sts, 2 hdc in the next st; rep from * around. (50 hdc)
Rnd 6: *Hdc in the next st, 2 hdc in the next st, hdc in the next 3 sts; rep from * around. (60 hdc)
Rnd 7: Hdc in the next 5 sts, 2 hdc in the next st, *hdc in the next 9 sts, 2 hdc in the next st; rep from * until 4 sts rem, hdc in last 4 sts. (66 hdc)
Rnd 8: *2 hdc in the next st, hdc in the next 10 sts; rep from * around. (72 hdc)
Rnd 9 - 14: Hdc in each st around.
Rnd 15: *Hdc in next 10 sts, hdc2tog; rep from * around. (66 sts)
Rnd 16: Hdc in next 5 sts, hdc2tog, *hdc in next 9 sts, hdc2tog; rep from * around until 4 sts rem, hdc in last 4 sts. (60 sts)
Rnd 17: Sc in next st, sl st in next st, break yarn and finish off.
Tail - Color A (Bernat Sheepy)
Rnd 1: Make a magic circle, ch 1, hdc, sc, 2 hdc, sc, hdc. (6 sts)
Rnd 2: 2 hdc in next st, sc in next st, 2 hdc in each of next 2 sts, sc in next st, 2 hdc in next st. (10 sts) Break yarn leaving a long tail for sewing. Stuff inside of the Tail with the beginning tail end of the yarn.
Face - Color C (Bernat Blanket O'Go, light gray)
Rnd 1: Make a magic circle, ch 1, sc in the ring, 9 hdc in the ring. (10 sts)
Rnd 2: 2 hdc in each st around. (20 hdc)
Rnd 3: *Hdc in the next st, 2 hdc in the next st; rep from * around. (30 hdc)
Rnd 4: *2 hdc in the next st, hdc in the next 2 sts; rep from * around. (40 hdc)
Rnd 5: *Hdc in the next 3 sts, 2 hdc in the next st; rep from * around. (50 hdc)
Rnd 6: Sc in next st, sl st in next st, break yarn and seamless join, leaving a long tail for sewing.
Ears (make 2)
PIECE #1 - Color B (Bernat Blanket O'Go, white)
Row 1: Ch 8, skip ch closest to hook, sc in next ch, dc in next 5 chs, sc in last ch; do NOT turn. (7 sts)
Rnd 2: Hdc in foundation chain of last st, hdc in next 6 foundation chains, 3 hdc in turning chain, hdc in next 7 sts. (17 sts)
Rnd 3: Sc in next 8 sts, 3 sc in next st, sc in next 8 sts, sl st in first sc; break yarn leaving long tail for sewing.
PIECE #2 - Color C (Bernat Blanket O'Go, light gray)
Row 1: Ch 8, skip ch closest to hook, sc in next st, dc in next 5 sts, hdc in last st; break yarn leaving long tail for sewing. (7 sts)
Ear, Face, and Tail to Body Assembly
Step 1 - Face Details: Add safety eyes to face, and sew on nose/mouth using Color D, Bernat Blanket O'Go dark gray. As shown, the eyes are between Rnds 2 and 3.

Step 2 - Sew on Face: Using its long tail, sew the Face to the Body. Center the face opposite the last st of the body, just a bit above Rnd 17.
Step 3 - Assemble the Ears: Insert Ear Piece #2 into Piece #1, and use the long tail of Piece #2 to sew it on. Be sure to stitch so that Color C does not show on the other side of the ear.

Step 4 - Sew on Ears: Use the long tails of Piece #1 to sew Ears to top of Body, around Rnd 7 or where desired.
Step 5 - Sew on Tail: Using its long tail, sew the Tail opposite face, about an inch up from Rnd 17.

Feet (make 4) - Color D (Bernat Blanket O'Go, dark gray)
Rnd 1: Make a magic circle, ch 1, hdc, sc, 2 hdc, sc, hdc. (6 sts)
Rnd 2: 2 hdc in next st, sc in next st, 2 hdc in each of next 2 sts, sc in next st, 2 hdc in next st. (10 sts)
Rnd 3: 2 hdc in next st, hdc in next st, sc in next st, hdc in next st, 2 hdc in each of next 2 sts, hdc in next st, sc in next st, hdc in next st, 2 hdc in next st. (14 sts) Tip: Weave in your first end now.
Row 4: Fold piece flat, ch 1, sc through next st and last st, sc through next 6 sets of sts; break yarn and set aside.

Belly - Color A (Bernat Sheepy)
Rnd 1 - 5: With Color A, rep Rnd 1 - 5 of Body. (50 hdc) Use stitch markers to space Feet evenly around RS of Rnd 5.

Rnd 6: Working through both layers for those sts, *hdc in the next st, 2 hdc in the next st, hdc in the next 3 sts; rep from * around. (60 hdc)
Rnd 7: Sc in next st, sl st in next st, break yarn leaving a long tail for sewing.
Final Lamb Squish Assembly
Step 1: Insert ball or stuffing into body.

Step 2: Use stitch markers to attach Belly to Body, with long tail at the back. Spin a bit to adjust for foot placement as needed.
Step 3: Using long tail of Belly, sew Belly to Body with whip stitch.
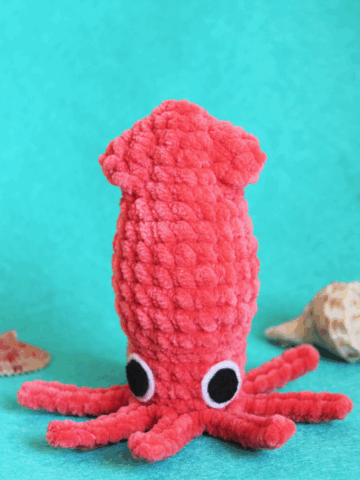
Looking for more Squishy patterns? Check out the Octopus Squish, Narwhal Squish, Squid Squish, Jellyfish Squish, and Bunny Squish - and their cousin the Mushroom Stuffie! Looking for something else? Check out the Moogly Free Patterns Page or Ravelry!

If the Lamb Squish pattern inspires you to make your own project, and you post a photo on social media, be sure to tag me @mooglyblog or #mooglyblog so I can check it out too!
THE FINE PRINT
Follow Moogly on Facebook, Twitter, Pinterest, and Instagram! Thank you to Yarnspirations for providing the materials shown in this post. Written pattern copyright Tamara Kelly 2022, all rights reserved. Please do not reprint or repost this pattern, but please do link to this page to share this pattern with others.
If you wish to make items for sale from this pattern or translate it to another language, please visit the About page for details.


Alexandra says
So cute!
Mary Kay says
Adorable! What a great pattern! Do you also have a pattern for the pillow the lamb is sitting on?
Tamara Kelly says
Thank you so much - and yes! https://www.mooglyblog.com/hygge-diamond-pillow/
Carla says
Hi, this is adorable. I want to attempt to make this for a baby shower gift. I am trying to find all of the supplies on line (it doesn't seem that anyone locally has the correct colors in the yarns). Is this a pretty easy project?? I still consider myself a beginner. I also wanted to know if the 10" ball is the same as the 12"?? I keep finding a 12" but is says that it is 10" in diameter (I guess when it is flat)?? I even checked the fairfield website and I only see a 12" on their site. Thanks for the patterns. I am hoping that I am able to do it.
Tamara Kelly says
Hi Carla! This pattern uses only basic stitches, and there are video tutorials for all the stitches used as well, so that part is pretty beginner friendly. The harder part would be working with the highly textured Sheepy yarn - a little bit of crochet experience helps there.
Unfortunately, the 10" balls of all kinds seem to be sold out everywhere now. 🙁 So the best bet would be to use straight fiberfill. However, I have just purchased a 12" pillow ball myself and will be experimenting to see if they'll work with a bit of the filling removed. I hope to be able to offer this as an option soon!
Carla says
Great. Thank you so much. I did purchase the 12" ball since that was all that I could find. That is a good idea- to remove some of the filling. I didn't realize that there was filling inside the pillow. I figured that it was a pillow form inside. Wish me luck. I hope that I am able to do it and it looks nice. I have not done that magic circle. I hear that it is a love or hate relationship with everyone.
Thank You!!!
Carla says
I received the 12 “ ball. Did you get yours yet? If so I was wondering how you removed the stuffing? I am not sure of the best way. Also, I wanted to ask if the hook that you use is a size L? You show the Susan bated bamboo hook and it says 8.0 so I wanted to make sure I have that correct.
Thanks again.
Tamara Kelly says
Hi Carla! I did, yes! I just opened the zipper and took out the excess, and set it aside for another project later on! I do recommend you put the ball in the body, then take out the extra stuffing until you can get the belly on. I use a 8mm hook - different companies use different letters, so always go by the mm.
Julie says
Hi Tamara! I love the lamb, and have looked at all the other squishes. There is one glaring absence -- a dog! You have a cat in the bunch, but no dogs. Do you have a dog squish or know of one somewhere?? Thanks!!
Tamara Kelly says
The dog is in the works for 2025! 🙂
Julie says
Woo hooo!! Can't wait!! Thank you!