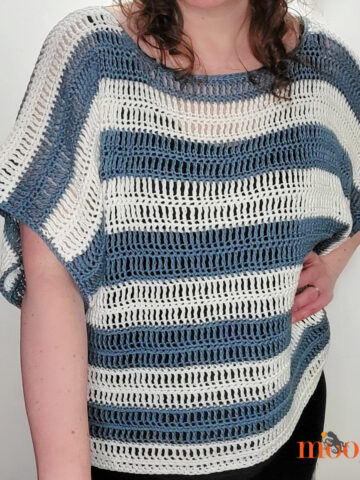
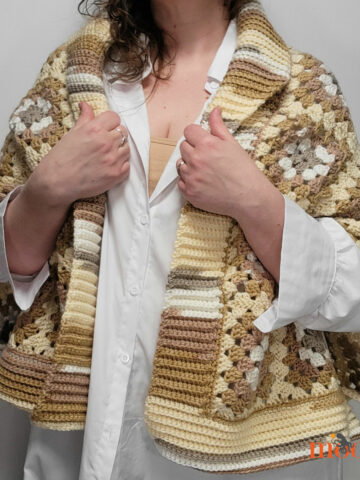
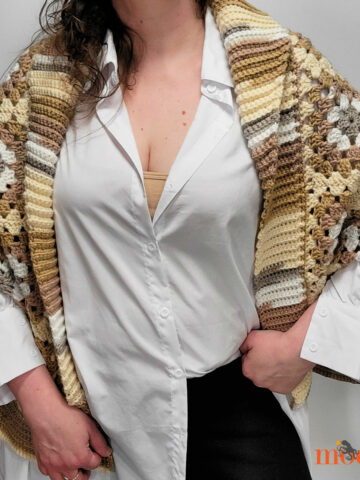
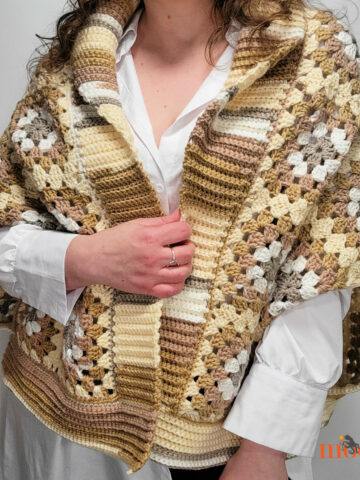
The Playoff Poncho is a warm and cozy topper with sporty stripes and an easy to wear length - that's totally customizable! And it's a free crochet poncho pattern on Moogly!
 Disclaimer: This post includes affiliate links; materials provided by Yarnspirations and Furls.
A Great Beginner Pattern
The Playoff Poncho is a simple crochet garment, suitable for beginner crocheters. Two simple rectangles are seamed, and then a mock turtleneck is added for extra style and coziness.

Make it your own
And the Playoff Poncho is perfect for personalization! Want it a little wider or narrower? No worries, there's no stitch multiple needed. Want it a little longer or shorter? Stop whenever you have an even number of rows in the length desired!

A Special Yarn
Made with Red Heart Heat Wave, the Playoff Poncho is also ideal outerwear for the chillier months! This unique yarn heats up 12 degrees in UV light, meaning it will keep you even warmer than expected. If you prefer not to use Heat Wave, Red Heart With Love would make a great substitute.

Playoff Poncho
Add this pattern to your Ravelry Queue and Favorites
US - K, 6.5mm - Furls
925-1700 yds Red Heart Heat Wave ("4"- Medium/UK: 10-12 ply; 100% acrylic; 198 yds/100g)
Color A - Passport: 4(5, 5, 5, 6, 6, 7, 7, 7) balls
Color B - Sandy Shores: 1(1, 1, 1, 2, 2, 2, 2, 2) balls
Gauge: 12 sts and 8 rows = 4"/10 cm in main st pattern
Sizes: XS(S, M, L, XL, 2X, 3X, 4X, 5X)
Pattern features 23" ease and ends 4.5" below waist, based on Craft Yarn Council Standards
Size shown: L
Multiple: There is no stitch multiple for this pattern; Row multiple is 2.
Helpful Links and Tutorials:
FDC - Foundation Double Crochet
CSDC - Chainless Starting Double Crochet
Switching Colors for Striped Patterns
STDC - Standing Double Crochet
Playoff Poncho Schematic

Notes:
Sizes are written in the pattern as XS(S, M, L, XL, 2X, 3X, 4X, 5X). Please be sure to follow the numbers for your size unless making a custom size.
If you prefer to avoid the FDC stitch in Row 1, ch 2 sts more than the number of FDC called for, skip the first 3 chs and dc in each rem ch across.
Or if you prefer to avoid the CSDC stitch at the beginning of each dc row and round, use a ch 3 or ch 2 and dc in the first st, or your preferred dc substitute.
And if you prefer to avoid the STDC at the beginning of the neck, join to the blo of any st and ch 3 or use your preferred dc substitute.
Body Instructions - Make 2
Row 1 [RS]: With Color A, FDC 80(86, 92, 98, 104, 110, 116, 122, 128); turn. (80(86, 92, 98, 104, 110, 116, 122, 128) sts)
Row 2 [WS]: Ch 1, hdc in each st across; turn.
Row 3: CSDC in the first st, blo dc in each st until 1 st rem, dc in last st; turn.
Row 4: Ch 1, hdc in each st across finishing last st with Color B; turn.
Rows 5 - 8: With Color B, rep Rows 3 and 4 twice; finish last st of Row 8 with Color A, turn.
Rows 9 and 10: With Color A, rep Rows 3 and 4; finish last st of Row 10 with Color B, turn.
Rows 11 - 14: With Color B, rep Rows 3 and 4 twice; finish last st of Row 14 with Color A, turn. Break Color B.
Rows 15 - 42(42, 44, 44, 44, 46, 46, 46, 46): With Color A, rep Rows 3 and 4 to indicated number of rows for size; break yarn.
Seaming the Shoulders Instructions
With WS and last row of both pieces together, use the mattress stitch to seam together 26(29, 32, 35, 38, 40, 43, 46, 49) sts from each edge towards the middle (the green arrows shown in the schematic), leaving 28(28, 28, 28, 28, 30, 30, 30, 30) sts unsewn in the center for the neck.
Neck Instructions
NOTE: If you find that your first rnd here gaps at the sts that are sewn together for the shoulders, work a dc2tog into the st before the seam and the first seamed st, and dc2tog into the next seamed st and the st after the seam. Do this on both sides of the neck opening.
Rnd 1: With Color A, join to any st of the neck opening with blo STDC, blo dc in each rem st around neck opening; join. (56(56, 56, 56, 56, 60, 60, 60, 60) sts)
Rnds 2 - 3: BLO CSDC in the first st, blo dc in each st around; join.
Rnd 4: Rep Rnd 2; join in blo.
Rnd 5: Skipping the first st, blo sl st in each rem st around; join and break yarn.
Edging Instructions
Rnd 1: Join to any st along the body opening, sc evenly around entire body opening, working (sc, ch 2, sc) in each corner; join in blo.
Rnd 2: Skipping the first st, blo sl st in each rem st around, working (sc, ch 2, sc) in each ch-2 sp; join and break yarn.
I hope you enjoy making your own Playoff Poncho! In addition to customizing the size, feel free to add more stripes - or go solid! It's a great versatile pattern, perfect for cheering on your team - no matter what the game is!

If this free crochet poncho pattern does inspire you to make your own, and you post a photo on social media, be sure to tag me @mooglyblog or #mooglyblog so I can check it out too! I love seeing what you make!
THE FINE PRINT
Follow Moogly on Facebook, Twitter, Pinterest, Instagram, and Tumblr! Thank you to Yarnspirations and Furls for providing the materials shown in this post. Written pattern copyright Tamara Kelly 2019, all rights reserved. Please do not reprint or repost this pattern, but please do link to this page to share this pattern with others.
To print or download, use the Print Friendly button below, or go to PrintFriendly.com, or right-click to copy and paste it into a word processing document if those options do not work for you (please note that Print Friendly is a free outside website that the button links to, and you can click here for a tutorial on how to use it, but I cannot provide additional technical support for this service). If you wish to make items for sale from this pattern or translate it to another language, please visit the About page for details.


Debbie
Super cute pattern! I could totally see doing this in favorite team colors.
Tamara Kelly
Thank you so much, Debbie! ♥
Jessika Asman
At the risk of sounding trite—This is the poncho I’ve be searching for
Simple, classic dress it up , keep it cool and casual
This poncho was created to make a one of a kind personalized accessory
Thank you , you’ve solved a lot of gifting problems for me
Jessika
Tamara Kelly
Thank you so very much, Jessika! ♥ I really appreciate it - and I'm so glad!
Debbie
Just the poncho I've been looking for! How difficult would it be to add a few buttons up the sides?
Tamara Kelly
Not difficult at all - especially if you use ones that fit between the stitches! 🙂