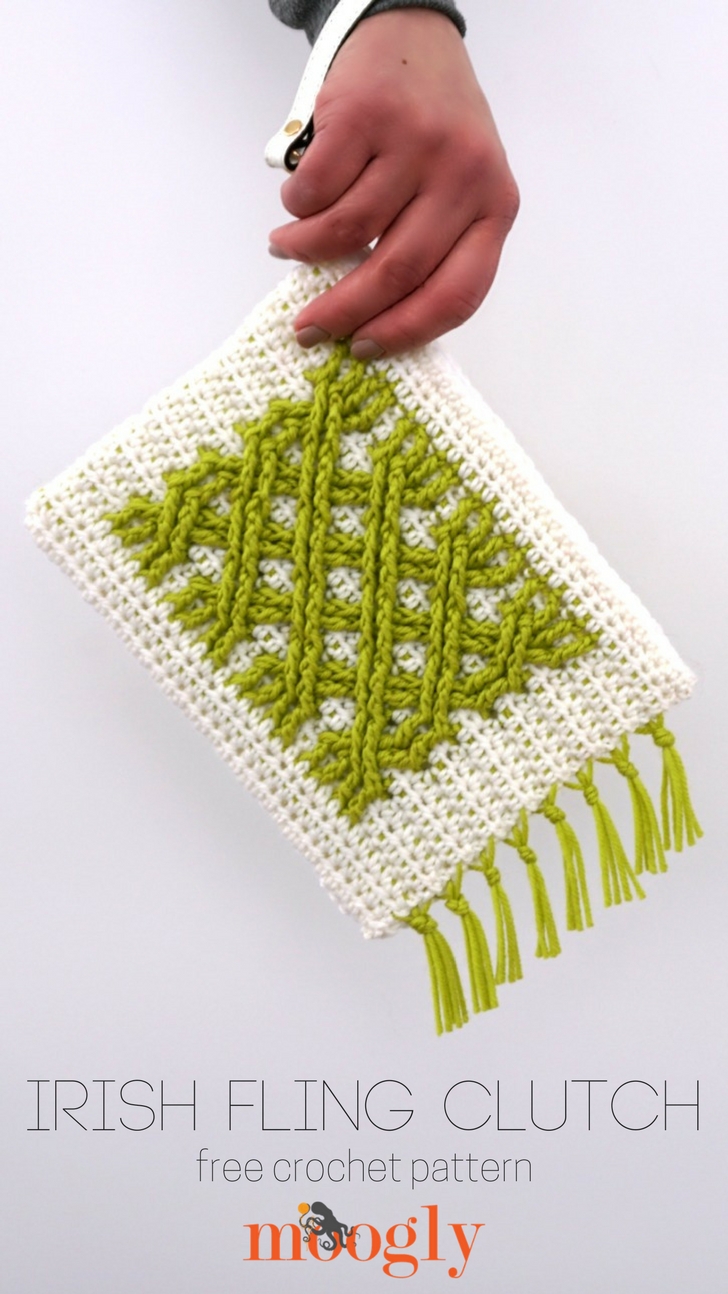
The Irish Fling Clutch is the perfect little project to start thinking Spring with - snowy white bursts forth with bright green vines and frivolous fringe! Add a wristlet strap and you'll be ready for that first sunny day adventure!
 Disclaimer: This post includes affiliate links; materials provided by Red Heart Yarns and Brittany.

The Irish Fling Clutch was designed with Red Heart Chic Sheep by Marly Bird yarn - look for my review of this new yarn later this month! In the meantime, I can tell you I *love* it! The colors, the texture, it's just fantastic.
To crochet the Irish Fling Clutch, you'll need to make post stitches, and crochet over unused yarn like you do in tapestry crochet - and there are lots of helpful tutorials linked below to help you with these techniques and more. This pattern isn't terribly complicated, but there is a lot going on. Be sure to read the Notes carefully before you begin!
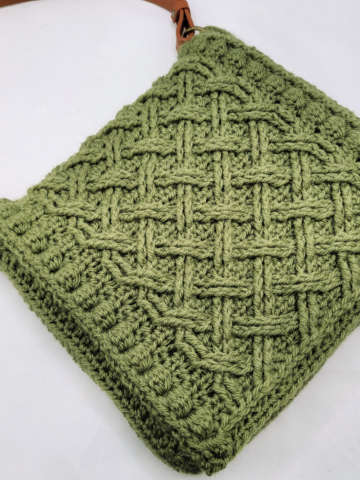
Irish Fling Clutch
Add this pattern to your Ravelry Queue and Favorites
US - I, 5.5mm hook - Brittany Crochet Hooks
200 yds Red Heart Chic Sheep by Marly Bird (100% Mercerized Merino Wool; 4-Medium/UK: 10-12 ply; 186 yds/170m; 3.5oz./100g)
Color A: Lace (1 ball)
Color B: Green Tea (1 ball)
This yarn has been discontinued. Recommended substitutions: Caron Simply Soft, Bernat Premium, Red Heart Comfort, Bernat Satin
Wristlet Leather Strap (optional)
Gauge: 15 sts x 11 rows = 4"/10cm in hdc
Size: 9" wide x 7" tall
Helpful Links and Tutorials:
Foundation Half Double Crochet (FHDC)
Changing Colors in the Middle of a Row
NOTES:
Beginning in Rnd 2, leave a 6-inch tail of Color B, and crochet over Color B with every stitch of Color A, enclosing Color B within/under the stitch, as in Tapestry Crochet.
At the end of each round, cut Color B leaving another 6-inch tail. Do not cut Color A. Keep both Color B ends on the outside of the pouch when joining Color A.
Hate the tassels/fringe? Then ignore the cutting Color B instructions, and just continue working over Color B with Color A, "turning" both at the end of each round.
This pattern is worked in joined rows or turned rounds - with Color A, at the end of every round, join and then turn to work from the other side of the pouch (you will alternate between working from the outside/RS of the pouch (odd numbered rounds) and from the inside/WS of the pouch (even numbered rounds)).
Remember that when making post stitches, the stitch "behind" the post stitch is considered worked - do not work into the top of that stitch or you will make increases.
INSTRUCTIONS:
Rnd 1: With Color A, FHDC 33, then hdc in the bottom of each st across; join with sl st to first fhdc made to work in the round, turn. (66 sts in every rnd of pattern)
Rnd 2 and every even numbered round through Rnd 18: Ch 1, hdc in each st around; join and turn.
Rnd 3: Repeat Rnd 2.
Rnd 5: Ch 1, hdc in 1st 5 sts, *[with Color B, fptr in next 2 sts 2 rows below, with Color A, hdc in next st] 8 times,** hdc in next 9 sts; rep from * to **, hdc in last 4 sts, join and turn.
Rnd 7: Ch 1, hdc in 1st 5 sts, *[with Color B, skip 3 sts, fpdtr in each of next 2 fp sts 2 rows below, with Color A, hdc in 3rd skipped st, with Color B, working in front of last 2 fp sts just made, fpdtr in each of skipped fp sts 2 rows below, with Color A, hdc in next st] 4 times,** hdc in next 9 sts; rep from * to **, hdc in last 4 sts, join and turn.
Rnd 9: Ch 1, hdc in 1st 5 sts, *with Color B, fptr in next 2 fp sts 2 rows below, with Color A, hdc in next st, [with Color B, skip 3 sts, fpdtr in each of next 2 fp sts 2 rows below, with Color A, hdc in 3rd skipped st, with Color B, working in front of last 2 fp sts just made, fpdtr in each of skipped fp sts 2 rows below, with Color A, hdc in next st] 3 times, with Color B, fptr in last 2 fp sts 2 rows below,** with Color A, hdc in next 10 sts; rep from * to **, with Color A, hdc in last 5 sts, join and turn.
Rnds 11 and 13: Repeat Row 7 and 9.
Rnd 15: Repeat Row 7.
Rnd 17: Repeat Row 5.
Rnd 19: Drop or cut Color B, continue with Color A only. Ch 1, sc in each st around; join but do NOT turn.
Rnd 20: Ch 1, sc in each st around; join and break yarn.

Assembly:
Sew zipper to opening with matching thread.
Tie fringe into "tassel" groups and trim to desired length.
Add strap for wristlet if desired.

The Irish Fling Clutch is happy, chipper, and a great way to show off your crochet skills - and get a hot new bag to carry too! I hope you enjoy making it, and using it!
If you do make your own Irish Fling, I'd love to see a photo! So if you share it on social media, be sure to tag me @mooglyblog or #mooglyblog - and happy crocheting!
Looking for more 1-2 skein Chic Sheep by Marly Bird patterns? CLICK HERE!
The Fine Print
Written pattern copyright Tamara Kelly 2018, all rights reserved. Please do not reprint or repost this pattern, but please do link to this page to share this pattern with others. If you wish to make items for sale from this pattern or translate it to another language, please visit the About page for details.

Tracy king
This is so cute! I hope I find the time to try it. Thanks as always for sharing 🙂
kelly
Love it! Thank you!
Ainara
I find the pattern quite difficult but I am going to try making the clutch, a video support will be grest at least for this part " with Color B, fptr in next 2 fp sts 2 rows below, with Color A, hdc in next st, [with Color B, skip 3 sts, fpdtr in each of next 2 fp sts 2 rows below, with Color A, hdc in 3rd skipped st, with Color B, working in front of last 2 fp sts just made, fpdtr in each of skipped fp sts 2 rows below, with Color A, hdc in next st] 3 times, with Color B, fptr in last 2 fp sts 2 rows below"
I'll let you know if I am able to finish it😉. Thanks a lot for sharing so beautiful work🌠
Tamara Kelly
There is a video tutorial at https://www.mooglyblog.com/irish-fling-clutch-tutorial/ 😀
Ainara
Oh I am terrrible sorry I haven' t seen it.... what a clumsy am I!!! Thank you very much for your answer, now Ishould be abkple to do it without any doubt. I' ll show you my finished work