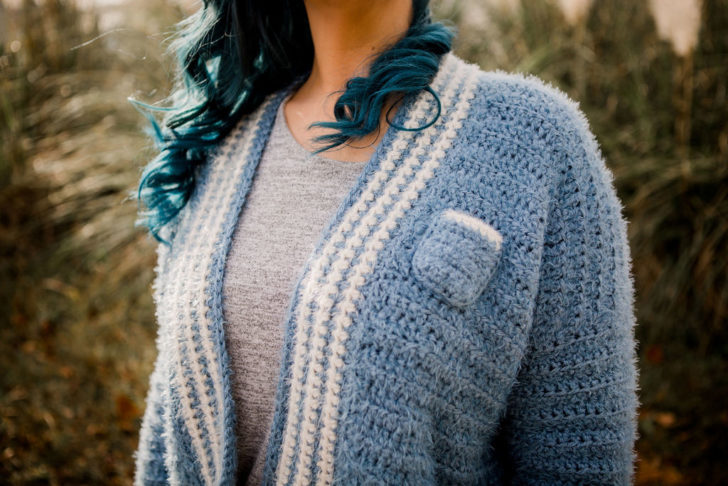
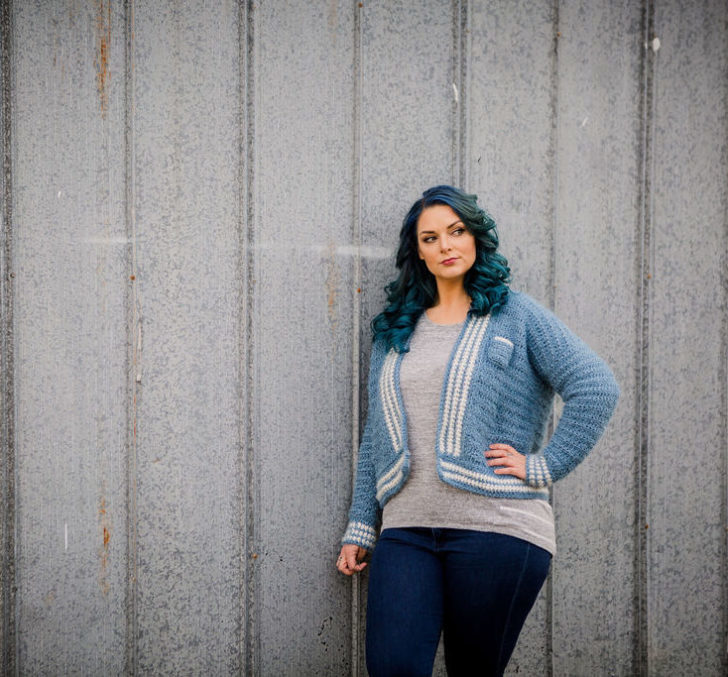
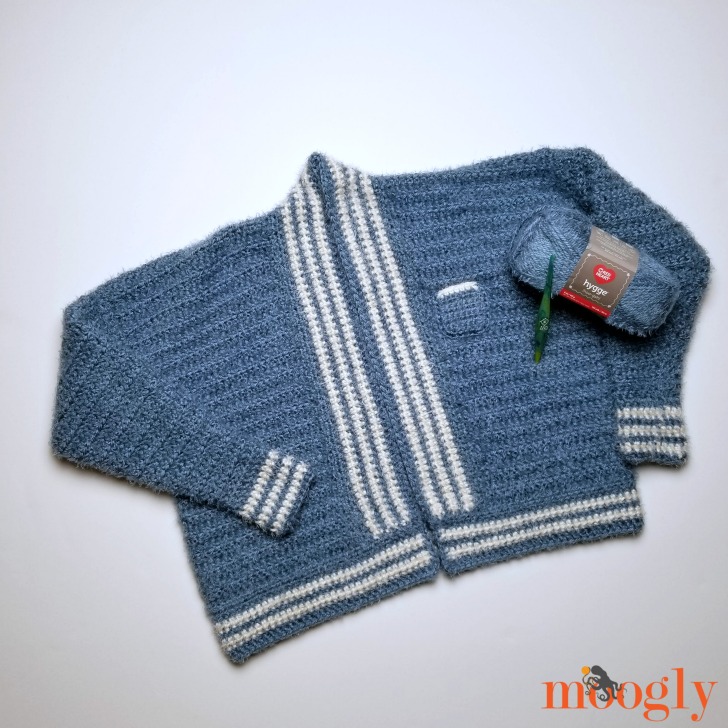
The Retro Cropped Cardi is a vintage-inspired little jacket, designed to keep you feeling warm and looking great! Originally designed for the December 2019 Furls Crochet Along, I can now share this pattern here on Moogly as well!
 Disclaimer: This post includes affiliate links; materials provided by Yarnspirations. This pattern was sponsored by Furls.

Extra Cozy with Red Heart Hygge
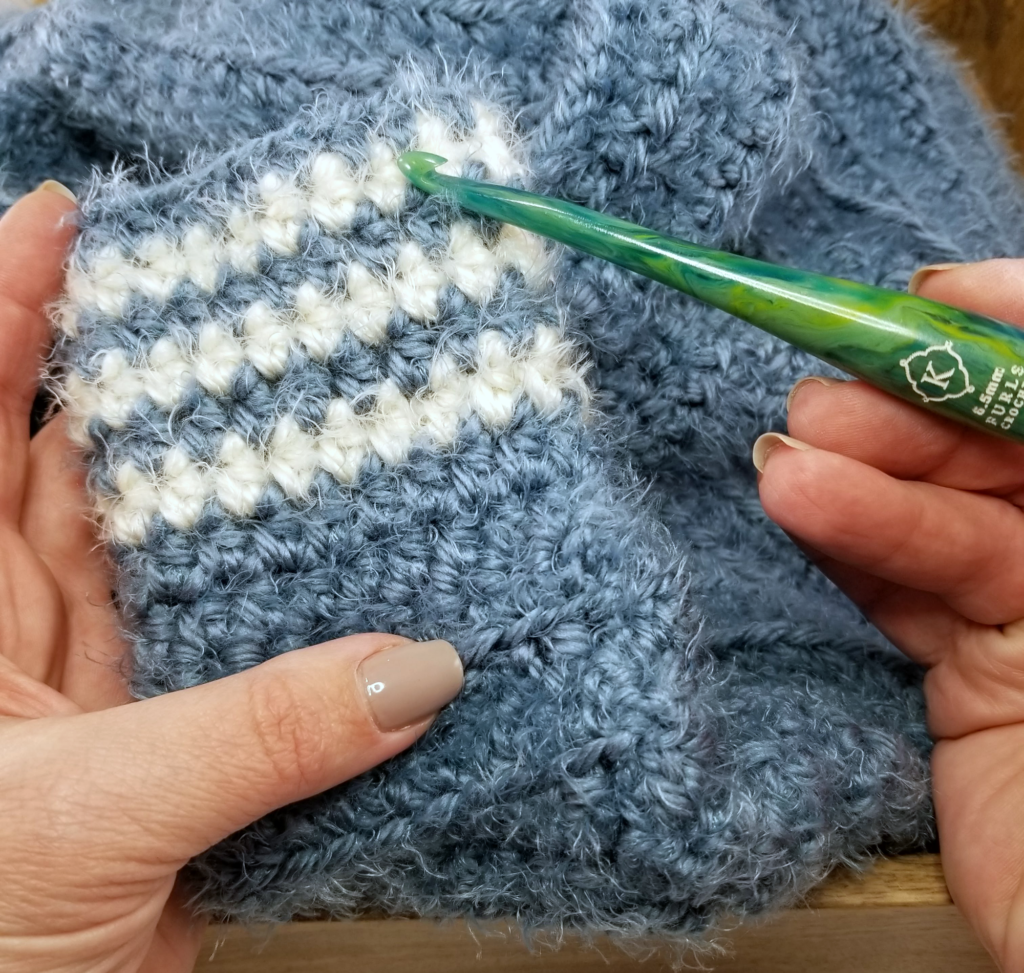
The Retro Cropped Cardi is made with Red Heart Hygge - so it’s fuzzy, cozy, and fast to crochet! This yarn does require good lighting - but the hook size makes it easier to work with here. If you do have trouble, try adding a light background behind your crochet - that usually does the trick!
Easy to Stitch - and Customize!
If you've never made a sweater before, do not fear. Easy stitches and shaping make this a great pattern for beginner garment makers. The main stitch is the extended single crochet – and there is a video tutorial for the stitch included below!
Prefer a longer, “non-cropped” sweater? Just add more rows to each piece – just remember to add the same number of rows to the back and both fronts! The Retro Cropped Cardigan is just that easy. Do also remember to add that extra length into your side seams, and purchase additional yarn if needed.
And if you prefer a different sleeve style, instructions for that are included too!
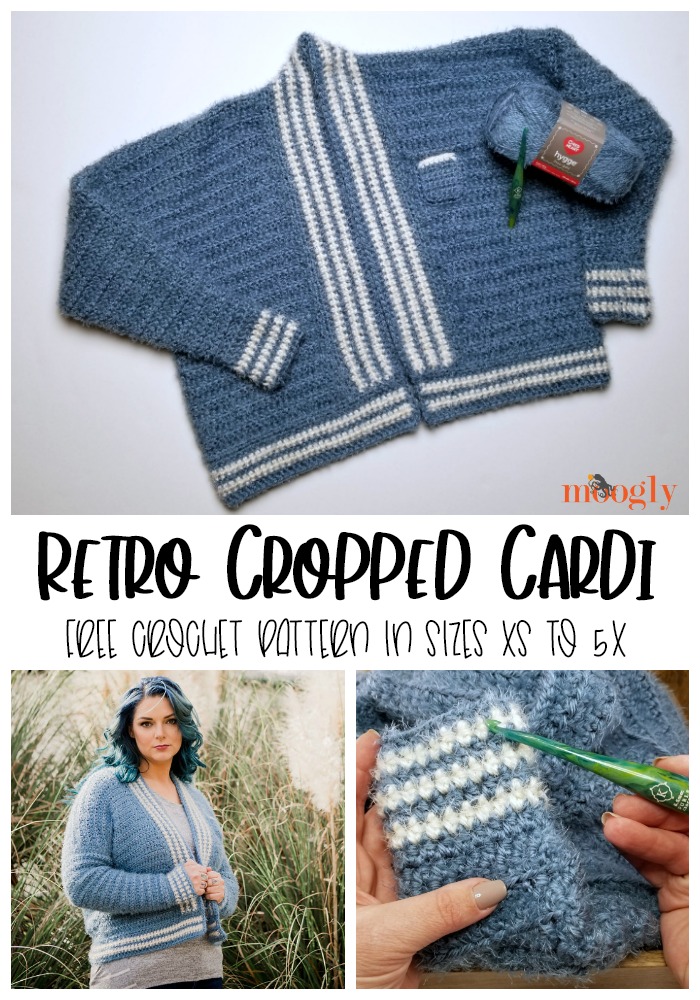
Retro Cropped Cardi
Add this pattern to your Ravelry Queue and Favorites
Get this pattern as the original Furls CAL
US - K, 6.5mm - Furls
Red Heart Hygge (5/Bulky; 141 g/5 oz, 121 meters/132 yards)
Color A: Slate Blue - 5 (5, 6, 6, 7, 8, 8, 9, 10) balls
Color B: Pearl -1 ball all sizes
Stitch Markers – Clover
Gauge: 10 stitches and 8 rows = 4 inches in esc
Sizes: XS (S, M, L, XL, 2X, 3X, 4X, 5X)
Finished Bust (including edging): 42 (46, 50, 54, 58, 62, 66, 70, 74)”
Finished Length (including edging): 21.5 (22, 22.5, 23, 23.5, 24, 24.5, 25, 25.5)”
Helpful Links and Tutorials:
esc – extended single crochet
insert hook in indicated stitch, yo and pull up a loop, yo and pull through the first loop on the hook (2 loops rem on hook), yo and pull through both loops on hook.
FSC – foundation single crochet
INSTRUCTIONS:
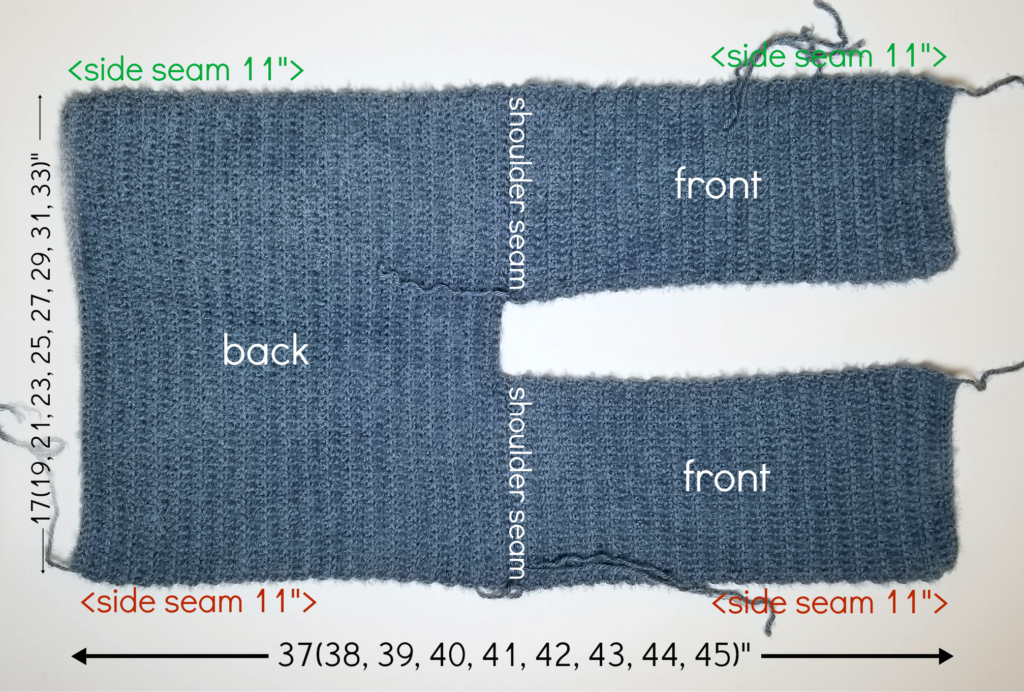
Back (with Color A)
Row 1 [RS]: FSC 42 (48, 52, 58, 62, 68, 72, 78, 82); turn. (42 (48, 52, 58, 62, 68, 72, 78, 82) sts)
Row 2 [WS] – 37 (38, 39, 40, 41, 42, 43, 44, 45): Ch 1, flo esc in each st across; turn. Break yarn after last row.
Fronts (make 2, with Color A)
Row 1 [RS]: FSC 17 (20, 22, 25, 27, 30, 32, 35, 37); turn. (17 (20, 22, 25, 27, 30, 32, 35, 37) sts)
Row 2 [WS] – 37 (38, 39, 40, 41, 42, 43, 44, 45): Ch 1, flo esc in each st across; turn. Break yarn after last row.
Assembly
With wrong sides together, seam fronts to back at last rows of each piece, matching the outer edges.
Then seam from the bottom of the sides, 11.5” along each side, leaving remainder open for the armholes.
OPTION 1: Fitted Sleeves (repeat for each armhole, begin with Color A) - shown
Rnd 1: Join to bottom of armhole at side seam, ch 1, esc evenly around opening, working 35 (37, 40, 42, 45, 47, 50, 52, 55) sts; join and turn. (35 (37, 40, 42, 45, 47, 50, 52, 55) sts)
Rnd 2: Ch 1, flo esc2tog, flo esc in each rem st around; join and turn. (decrease by 1 st)
Rnd 3: Ch 1, flo esc in each st around; join and turn.
Rnd 4 – 28 (24, 20, 16, 20, 16, 12, 8, 4): Rep Rows 2 and 3, ending on a Rnd 2 rep. (21 (25, 30, 34, 35, 39, 44, 48, 53) sts)
Next row – 30 (30, 30, 30, 34, 34, 34, 34) total rows: Rep Rnd 2. (19 (19, 20, 20, 21, 21, 22, 22, 23) sts)
Go to Cuff Instructions Below
OPTION 2: Loose Sleeves (repeat for each armhole, begin with Color A)
Rnd 1: Join to bottom of armhole at side seam, ch 1, esc evenly around opening, working 35 (37, 40, 42, 45, 47, 50, 52, 55) sts; join and turn. (35 (37, 40, 42, 45, 47, 50, 52, 55) sts)
Rnd 2 – 30 (30, 30, 30, 34, 34, 34, 34, 34): Ch 1, flo esc in each st around; join and turn.
Go to Cuff Instructions Below
Cuff Instructions (all sizes, continue with Color A switching to Color B as indicated)
Rnd 1 and 2: Ch 1, hdc in each st around; join. Finish last st of Rnd 2 with Color B.
Rnd 3: With Color B, rep Rnd 1. Finish last st with Color A.
Rnd 4: With Color A, rep Rnd 1. Finish last st with Color B.
Rnd 5 – 7: Rep Rnds 3 and 4. Break Color B after Rnd 7.
Rnd 8: With Color A, rep Rnd 2; join, break yarn and weave in ends.
Front/Neck Edging (with Colors A and B)
Row 1: With Color A, join to bottom edge from WS of pattern, ch 1, hdc evenly across front opening; turn.
Row 2: Ch 1, hdc in each st across; break yarn and turn.
Row 3: With Color B, join to first st, ch 1, hdc in each st across; break yarn and turn.
Row 4: With Color A, rep Row 3.
Row 5 – 8: Rep Rows 3 and 4.
Waist Edging (with Colors A and B)
Row 1: With Color A, join to bottom edge of Neck Edging from WS of pattern, ch 1, hdc evenly across bottom/waist opening; turn.
Row 2: Ch 1, hdc in each st across; break yarn and turn.
Row 3: With Color B, join to first st, ch 1, hdc in each st across; break yarn and turn.
Row 4: With Color A, rep Row 3.
Row 5 and 6: Rep Rows 3 and 4. After Rnd 6, do not turn or break Color A.
Final Edging (Color A)
Rnd 1: Ch 1, sc evenly around front opening and across last row of waist edging, working 3 sc at each of the bottom corners.
Pocket (optional – with Color A and B)
Row 1: With Color A, ch 6, skip ch closest to the hook, 2 sc in the next st, sc 3, 2 sc in the last st; turn. (7 sts)
Row 2 – 7: Ch 1, sc in each st across; turn. Break yarn after Rnd 7.
Row 8: With Color B, join to first st, ch 1, sc in each st across; break yarn, do not turn.
Pocket Edging: With Color A, join to side of last row, ch 1, sc down the side, across the bottom, and along the other side of the pocket (do not work across the top of the pocket); break yarn leaving long end. Sew to cardi as shown.
LOOKING FOR MORE?
Are you looking for more free crochet women's cardigan patterns? You can browse them all here on Moogly or search my patterns on Ravelry! Be sure to check out the Handkerchief Cocoon, Cuff to Cuff Colorblock Cardigan, Paloma Cardigan, Cosmos Cardigan, and Hygge Cocoon Cardigan!

If the Retro Cropped Cardi pattern inspires you to make your own project, and you post a photo on social media, be sure to tag me @mooglyblog or #mooglyblog so I can check it out too!
THE FINE PRINT
Follow Moogly on Facebook, Twitter, Pinterest, Instagram, and Tumblr! Thank you to Yarnspirations for providing the materials shown in this post. Written pattern copyright Tamara Kelly 2019, all rights reserved. Please do not reprint or repost this pattern. Please do link to this page to share this pattern with others.
If you wish to make items for sale from this pattern or translate it to another language, please visit the About page for details.


Eleanor says
Another great, wearable design! Thanks Tamara! What makes it "retro" or "vintage"?
Tamara Kelly says
Thank you! The styling was inspired by vintage letterman jackets. 🙂
Weichelt Rosemarie says
Hallo und vielen Dank für die Bilder und Häkelnanleitung für diese wunderschöne Strickjacke,das ist genau das was ich immer gesucht habe,einfach, schick und elegant
Die Farbkombination ist auch gut gelungen.Eeizer so und bitte nicht die Lust am Häkeln und Posten verlieren.liebe Grüße Rosemarie
Tamara Kelly says
Thank you so much! ♥