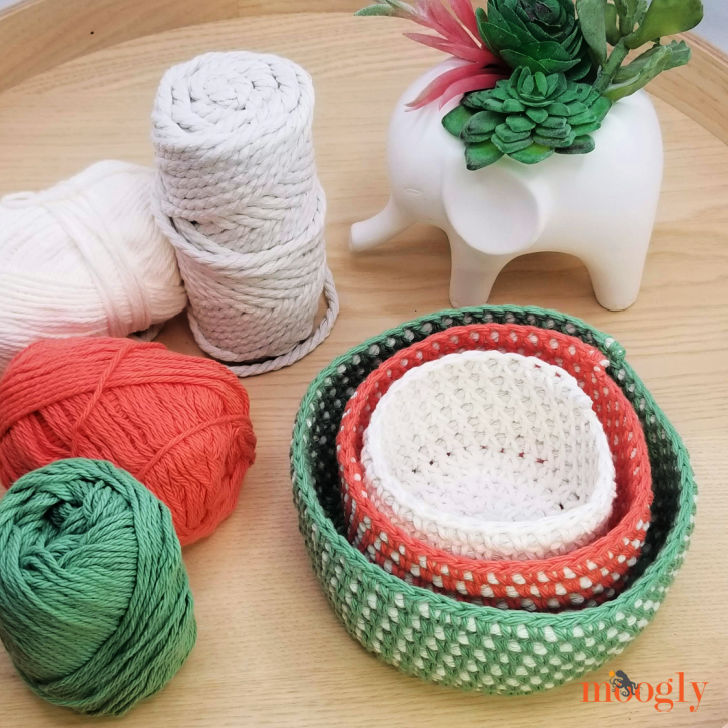
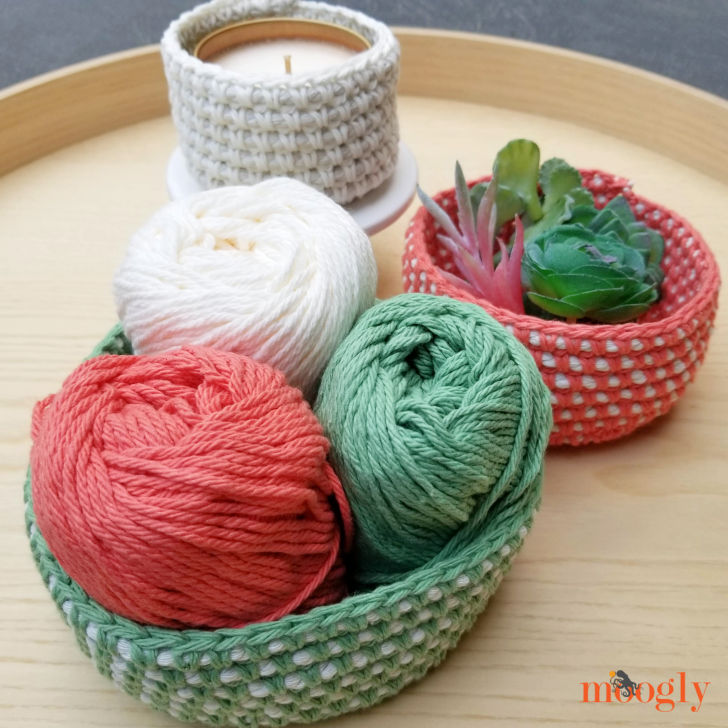
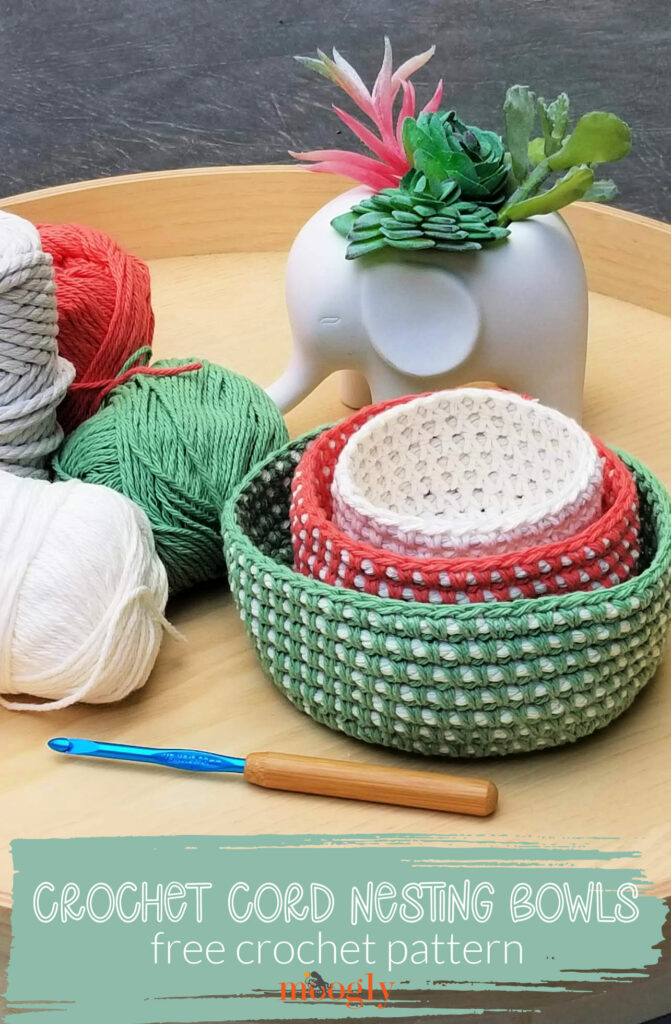
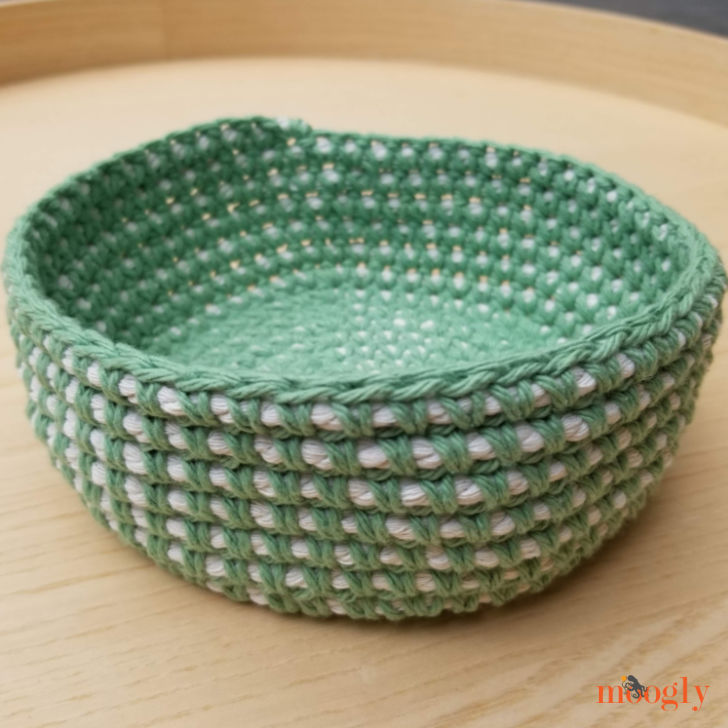
Crochet Cord Nesting Bowls are great for organizing your home and office - and they make a fantastic housewarming gift or craft fair item! With your favorite colors of cotton yarn and a coordinating roll of Bernat Macramé, you can make your own nesting bowls with this free crochet pattern on Moogly!
Disclaimer: Materials for this pattern were provided by Yarnspirations; this post includes affiliate links.
Prefer an ad-free PDF? You've got options!


Prefer the free blog version? Keep scrolling!
Featuring Bernat Macramé and Lily Sugar'n Cream or Bernat Handicrafter
I've been wanting to try making a crochet cord bowl or basket for a long time - and have gotten a lot of requests for tutorials! So when Yarnspirations came out with Bernat Macramé, I knew just what I wanted to use it for first!
To pull the whole thing together, I chose Lily Sugar'n Cream because it's what I had on hand. It's strong, easy to use, and the cotton compliments the Bernat Macramé well. Bernat Handicrafter would be a great substitute too - either work!
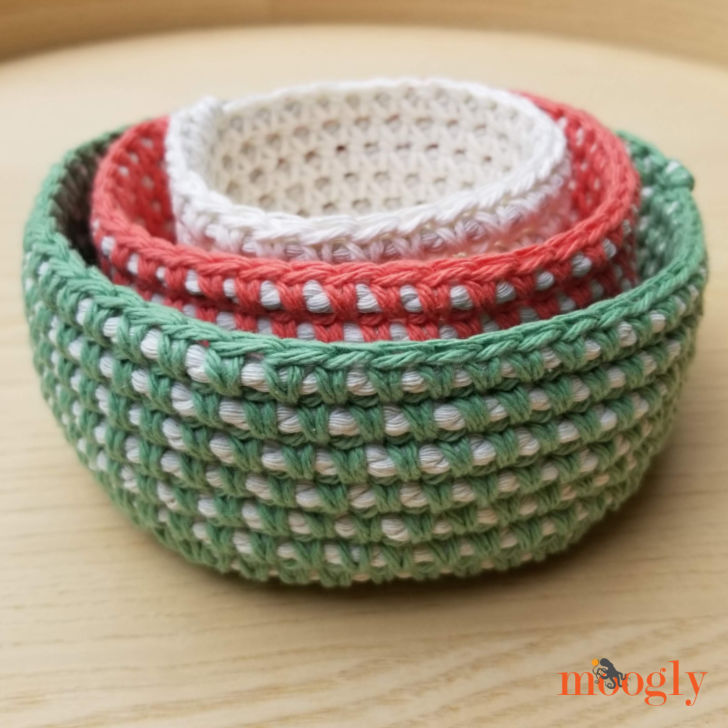
I couldn't decide which color combo to use - both Macramé and Sugar'n Cream come in so many, and there are hundreds of possible pairings. So I picked three - one matching, two contrasting. I can't wait to see what color combos you choose!
Make Crochet Cord Nesting Bowls in Any Size!
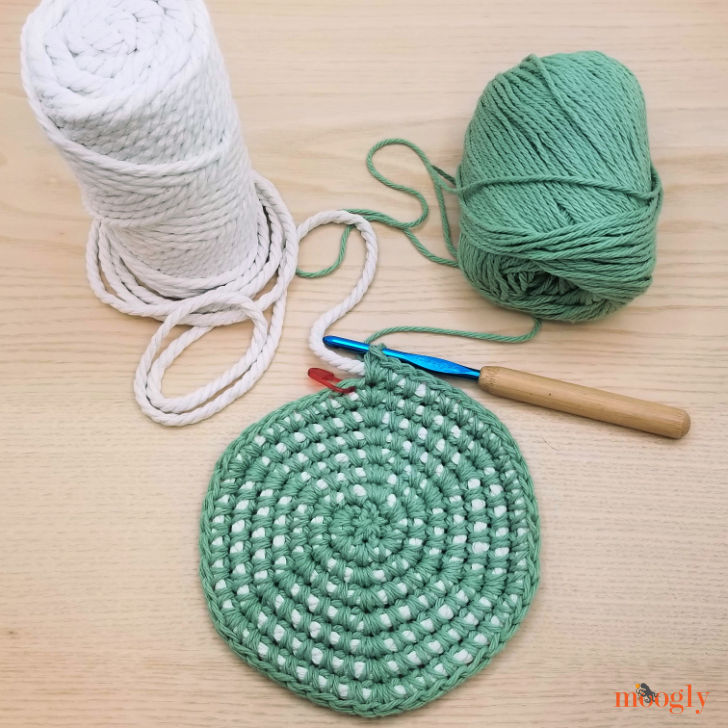
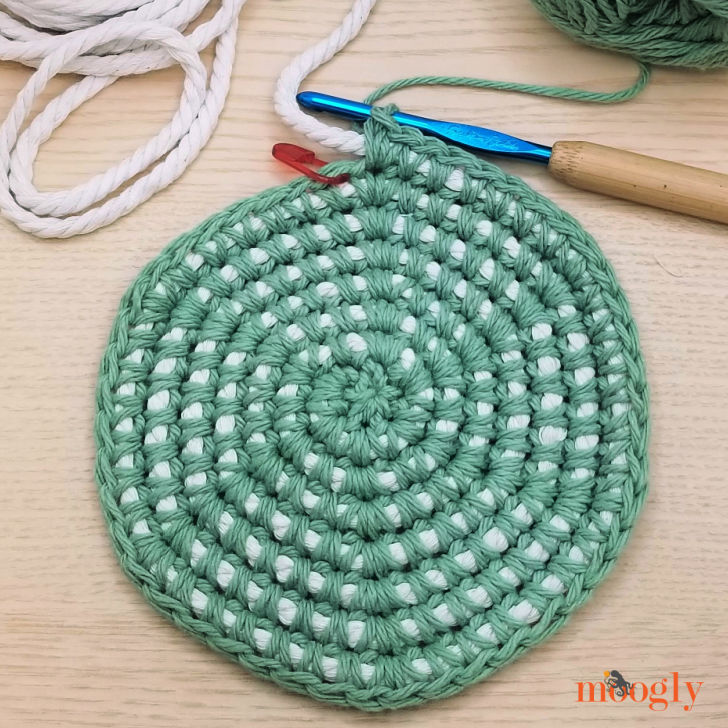
Learning how to crochet over cord is a new skill, so I kept this pattern as simple as can be. The increases all line up creating a nice patterning on the bottom, and there are no color changes or yarn changes needed. But don't let this limit you!
If you're new to crochet, take a close look at the lines of instruction for the increasing rows. See the number that goes up by one each round? You can keep on increasing just like that to make a bigger bowl base. Then, keep crocheting straight up the sides to make it as tall as you like! Change colors, use a self-striping yarn, make it your own!
Crochet Cord Nesting Bowls
Add this pattern to your Ravelry Queue and Favorites
US-H, 5.0mm hook - Susan Bates
115 yds Lily Sugar'n Cream or Bernat Handicrafter
(4 - Worsted; 100% cotton; 71g/2.5 oz, 109 m/120 yds)
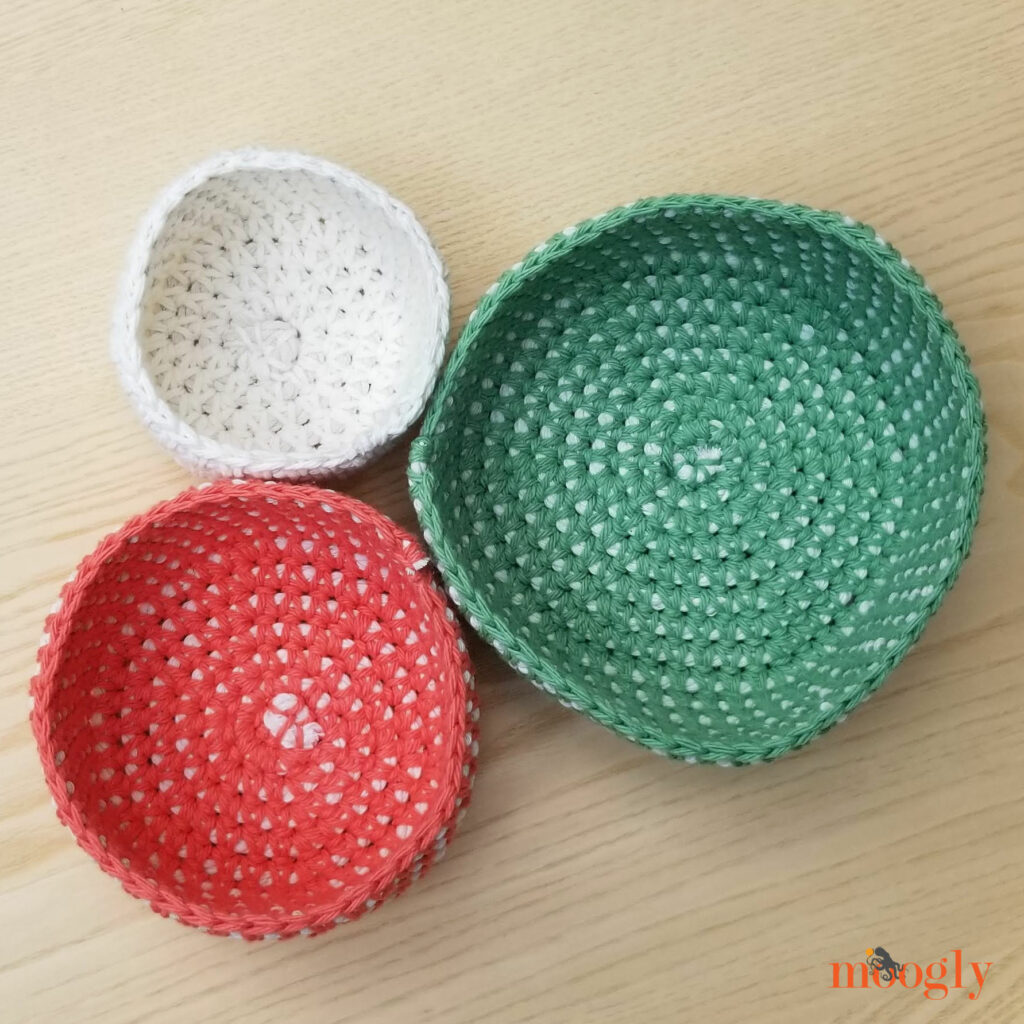
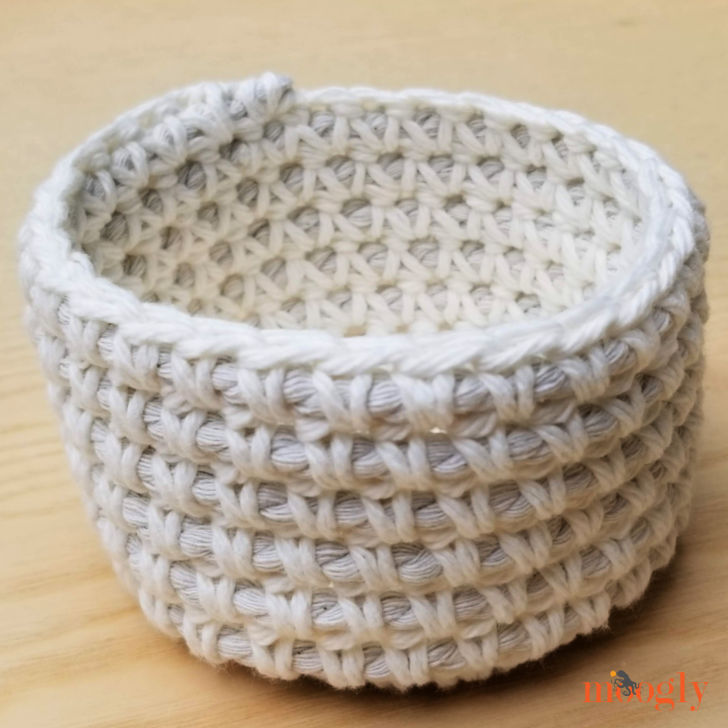
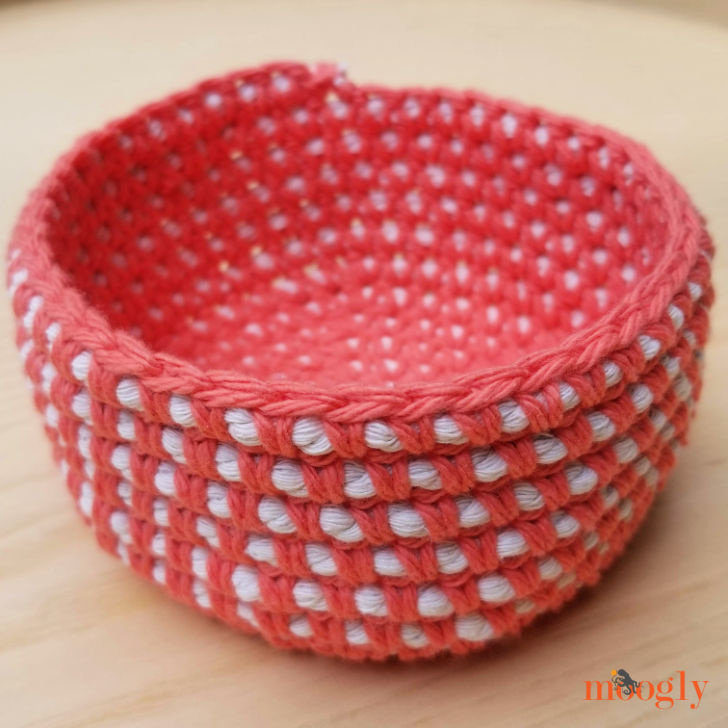
A: Colorways shown: Soft Ecru (Small - 25 yds), Tangerine (Medium - 35 yds), Meadow (Large - 55 yds)
15 yds Bernat Macramé
(6 - Super Bulky; 57% cotton, 39% viscose polyester, 4% other fibers; 250 g/8.8 oz; 40 m/44 yds)
B: Colorway shown: Natural - less than 1 skein makes all 3 bowls
Gauge: 1" across after Rnd 2
Sizes: Small - 3.25" diameter; Medium - 4.5" diameter; Large - 6" diameter; all bowls approx 2.5 " tall
Helpful Links:
Crochet Cord Nesting Bowls Tutorial
Enclosing Chains and Stitches (in this pattern it's the macramé cord)
Notes:
Wrap the end of the macramé cord in a piece of tape to stop it from fraying as you crochet the bowls.
To make larger bows, continue to increase in pattern and then work as many even rows as desired.
This pattern is worked in a spiral - do not join at the end of the rnd, but do use a stitch marker to mark the first st of each rnd.
Crochet Cord Nesting Bowls
Small - 3.25" diameter
Rnd 1: With A and leaving a 12" tail, make a magic circle, ch 1, work 6 sc in the circle. (6 sc)
Rnd 2: Laying B over A so as to crochet over it, work 2 sc with A in each st around, enclosing B. (12 sc)
Rnd 3: Continuing to enclose B in each st, *1 sc in the next st, 2 sc in the next st; rep from * around. (18 sc)
Rnd 4: Continuing to enclose B in each st, *1 sc each of the next 2 sts, 2 sc in the next st; rep from * around. (24 sc)
Rnd 5: Continuing to enclose B in each st, *1 sc each of the next 3 sts, 2 sc in the next st; rep from * around. (30 sc)
Rnd 6 - 11: Continuing to enclose B in each st, work 1 sc in each st around. (30 sc)
Finishing: Cut A and B. Use a bit of glue to secure the cut end of B. Use the end of A to sew down B in next st. Use glue and beginning tail of A to secure beginning of B at bottom of bowl.
Medium - 4.5" diameter
Rnd 1 - 5: Rep Rnds 1 - 5 of Small.
Rnd 6: Continuing to enclose B in each st, *1 sc each of the next 4 sts, 2 sc in the next st; rep from * around. (36 sc)
Rnd 7: Continuing to enclose B in each st, *1 sc each of the next 5 sts, 2 sc in the next st; rep from * around. (42 sc)
Rnd 8 - 13: Continuing to enclose B in each st, work 1 sc in each st around. (42 sc)
Finishing: Cut A and B. Use a bit of glue to secure the cut end of B. Use the end of A to sew down B in next st. Use glue and beginning tail of A to secure beginning of B at bottom of bowl.
Large - 6" diameter
Rnd 1 - 7: Rep Rnds 1 - 7 of Medium.
Rnd 8: Continuing to enclose B in each st, *1 sc each of the next 6 sts, 2 sc in the next st; rep from * around. (48 sc)
Rnd 9: Continuing to enclose B in each st, *1 sc each of the next 7 sts, 2 sc in the next st; rep from * around. (54 sc)
Rnd 10 - 15: Continuing to enclose B in each st, work 1 sc in each st around. (54 sc)
Finishing: Cut A and B. Use a bit of glue to secure the cut end of B. Use the end of A to sew down B in next st. Use glue and beginning tail of A to secure beginning of B at bottom of bowl.
LOOKING FOR MORE?
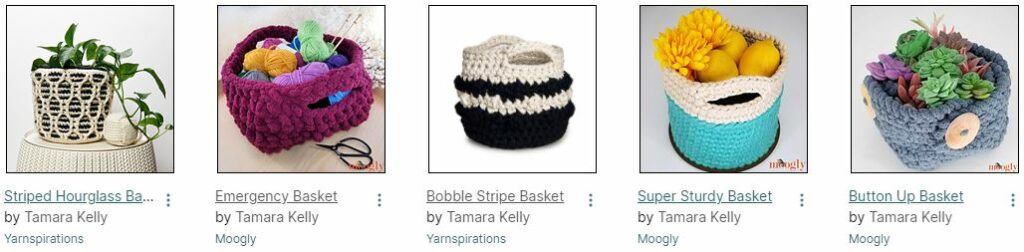
Are you looking for more crochet container patterns? I have so many! You can browse all my patterns on Moogly or Ravelry - and check out some of my most recent designs: Striped Hourglass Basket, Emergency Basket, Bobble Stripe Basket, Super Sturdy Basket, and Button Up Basket.
If the Crochet Cord Nesting Bowls pattern inspires you and you post a photo on social media, be sure to tag me @mooglyblog or #mooglyblog so I can check it out too! And send in your finished photos to tamarakelly@mooglyblog.com to have them featured in the Moogly email newsletter!
THE FINE PRINT
Follow Moogly on Facebook, Twitter, Pinterest, and Instagram! Thank you to Yarnspirations for providing the materials shown in this post. Written pattern copyright Tamara Kelly 2021, all rights reserved. Please do not reprint or repost this pattern, but please do link to this page to share this pattern with others. If you wish to make items for sale from this pattern or translate it to another language, please visit the About page for details.


Roberta says
I've been looking for cord bowls since I lost my pattern for them back in the 90's. Back then I made them with clothes line cord. I so happy to have found this, thank you.
Tamara Kelly says
♥ Thank you so much, I'm so glad you like them!
Martha says
I had ordered the wrong size cord to fix my lawn chair but decided to keep it anyway in case I could think of a way to use it. Now I have one. I can't wait to get started. I had reordered the correct size for my chair so I got that to do yet.
Tamara Kelly says
Oh yay, I hope you enjoy it!
Cendy Sikes says
Could you make these to fit your bowls that you eat out of for soups? (I believe I can)
Could you use them in the microwave to heat the soup?
I love that you have right and left handed instructions one of my sisters also crochet and she is left handed and I will be telling her about your web site. I believe it will help her a lot.
Thank you
Tamara Kelly says
You could make them any size - and I *think* it would be okay to microwave them but I haven't tested it!
Thank you! ♥
Kelcie Michels says
So excited to make these! One question - do you have to use cotton yarn? I do have some Lily & Sugar but was curious if other yarn would yield the same result. Thanks!
Tamara Kelly says
You don't have to, just be sure to clean it if necessary using the instructions for the most delicate of the two yarns/materials you do use.
Rachel D. says
Learning how to make crochet bowls and this has been the best instruction sand video so far!! I’m a newbie and am trying to make my bowls flared out rather than straight up the sides. Does anyone know how I would do that? Thanks so much!
Tamara Kelly says
Hi Rachel, and thank you! To keep going flat, you'll want to keep increasing in the same pattern. Note how the number of stitches between the increases grows by one in Rounds 3, 4, and 5. Keep that pattern going, and you'll keep making a flat circle! 🙂
Rachel D says
Thank you!
Monica says
A flat circle would make a nice placemat. This is a great pattern. I will try as a bowl first.