Spring has surely sprung, and it's time to switch to lighter crochet wearables - so with a warm breeze and your requests, I bring you Fortune's Hat!
 Disclaimer: This post includes affiliate links.

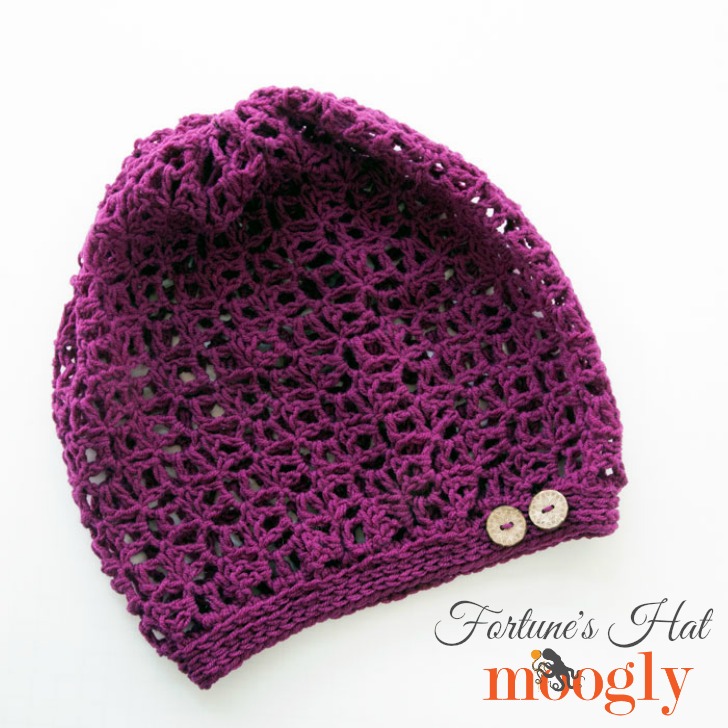
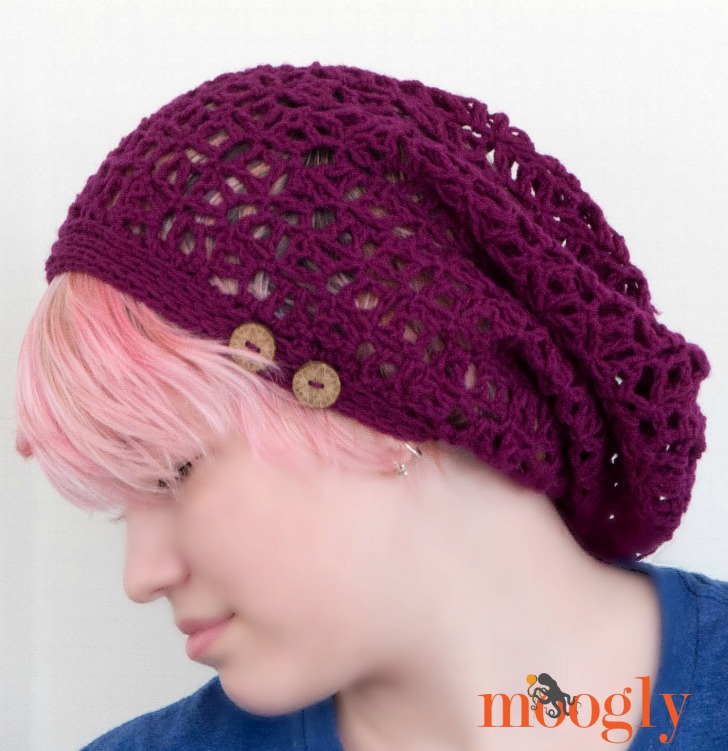
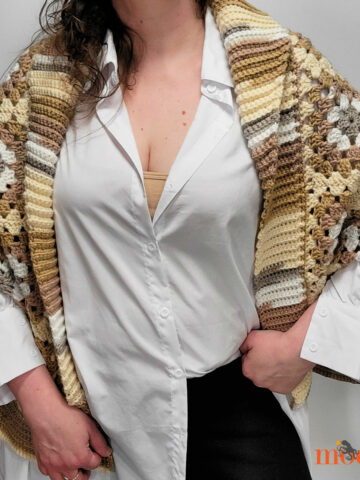
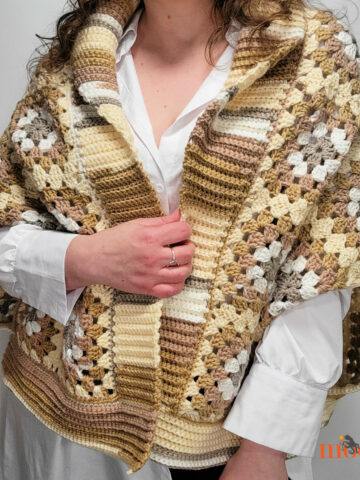
Fortune's Hat features the same open lacy fabric as the matching Shawlette and Wrap, with a simple brim and optional decorative buttons! Shown in a super slouchy style, it's easy to make into a beanie if you prefer - just eliminate rows 9-12, and then follow the rest of the instructions as written!
Made with Lion Brand Superwash Merino, this is a fun and quick one skein pattern - in fact, you can get 2 hats out of just one skein!
Fortune's Hat
Add this pattern to your Ravelry Queue and Favorites
- US – L, 8.0 mm hook (Clover Amour Recommended)
- US - J, 6.00 mm hook (Furls Odyssey Recommended)
- 150 yds Lion Brand Superwash Merino (100% merino; DK / 8 ply; 306 yds /280 m; 3.53 oz) in Wild Berry
- Gauge: 5 blocks = 4" along straight edge with larger hook
- Finished Size: One Size Fits Most Teens/Adults (22-24")
- Finished Measurements: 9" at brim and 11" tall laid flat
- Matching Patterns: Fortune's Shawlette; Fortune's Wrap
- Helpful Video Tutorials: Beginning the main stitch pattern; Decreasing in the main stitch pattern; Sl St Seaming; Hdc in the 3rd Loop
Fortune's Hat Instructions
Row 1: With larger hook, ch 6, dc in 4th ch from hook, ch 1, skip next ch, dc in last ch; turn. (1 block)
Row 2: Ch 6, dc in 4th ch from hook, ch 1, skip next ch, dc in last ch, (slip st, ch 3, dc, ch 1, dc) in ch-3 sp of previous row; turn. (2 blocks)
Row 3: Ch 6, dc in 4th ch from hook, ch 1, skip next ch, dc in last ch, [(slip st, ch 3, dc, ch 1, dc) in next ch-3 sp of previous row] twice; turn. (3 blocks)
Row 4: Ch 6, dc in 4th ch from hook, ch 1, skip next ch, dc in last ch, [(slip st, ch 3, dc, ch 1, dc) in next ch-3 sp of previous row] 3 times; turn. (4 blocks)
Row 5 – 12: Continue as above, increasing 1 block on each row until there are 12 blocks across. (12 blocks)
Row 13: Ch 6, dc in 4th ch from hook, ch 1, skip next ch, dc in last ch, [(slip st, ch 3, dc, ch 1, dc) in next ch-3 sp of previous row] 11 times, sl st in next ch-3 sp, (last block does not have a new block added to it); turn. (12 blocks)
Row 14: Sl st in next dc, sl st in ch sp, sl st in next dc, [(slip st, ch 3, dc, ch 1, dc) in next ch-3 sp of previous row] 12 times; turn. (12 blocks)
Rows 15 - 28: Repeat Rows 13 and 14. (12 blocks)
Row 29: Sl st in next dc, sl st in ch sp, sl st in next dc, [(slip st, ch 3, dc, ch 1, dc) in next ch-3 sp of previous row] 11 times (last block does not have a new block added to it); sl st in next ch-3 sp, turn. (11 blocks)
Rows 30 - 39: Repeat Row 29, decreasing by one block with every row, until there is only one block made on Row 39. Do not break yarn.
Pause here, and block the fabric just made:
Wet block to 12" x 26" to open up lace. Fabric will shrink up a bit when fabric is dried and pins are removed. Then continue as follows.
Continuing with attached yarn, seam short ends of fabric together with slip stitch (see tutorial linked above). Turn fabric so that seam is on the inside of the hat.
Moving to the long side closest to your hook, gather the crown closed as follows:
Round 1: Ch 1, sc in each block around, join with a sl st. (28 sts)
Round 2: Slst2tog around; join with a sl st. (14 sts)
Break yarn leaving long tail; use tail to gather the 14 sts and pull closed. Weave in ends.
BRIM:
Round 1: With smaller hook, join yarn near the seam, ch 1, hdc 2 in block you joined to, hdc 3 in next block, *hdc 2 in next block, hdc 3 in next block; repeat from * around, join with a sl st. (70 sts)
Round 2 - 3: Ch 1, hdc in 3rd loop of each st around; join. (70 sts)
Round 4: Ch 1, sc in 3rd loop of each st around; join and break yarn. (70 sts)
Sew buttons to brim if desired.
And scene! That's the Fortune's Hat! Adjust the height of the hat to your preference by adding or omitting Rows between 1 and 12, and adjust the brim size as needed by switching hooks for that section. This lightweight crochet hat is perfect for warmer weather, and perfectly customizable as well. I hope you enjoy this free crochet hat pattern!
The Fine Print
Written pattern copyright Tamara Kelly 2016, all rights reserved. Please do not reprint or repost this pattern, but please do link to this page to share this pattern with others. If you wish to make items for sale from this pattern, or translate it to another language, please visit the About page for details. Thank you to Lion Brand Yarn for providing the yarn for this pattern!

WheelyBad
It's a lovely hat, the other fortunes patterns are on my to do list so I'll be adding this to them... Be great for a British summer lol!
Rhonda
Hi...i seem to be stuck right at the first few stitches. Trying the Fortunes Shawlette. And can't get past the 2nd Row where it says (slip st, ch 3,dc,ch1,dc) in chain 3 of previous row. Which previous row and can you tell me where that chain 3 is please. I absolutley LOVE the pattern but definatley need some help. Thank-you in advance!
Rhonda 🙂
Tamara Kelly
Hi Rhonda! Thank you! Did you watch the linked video tutorials? They go over how to work the stitch pattern. 🙂
jane
I love this! I really enjoyed making Fortune's Shawlette once I figured out the stitch. It was very helpful for me to watch the tut, look at the charts and then reread the directions-then it "clicked". I already have the yarn chosen for the hat, too. Thanks so much for the lovely, free pattern.
Tamara Kelly
😀 Thank you Jane!
Sylvia
Hi Tamara,
Thank you all the designs that you share with us. Once you get the hang of it, the patterns are do imple but the outcome is beautiful.
I have gifted three ladies the fortune wraps,( one to my daughter) and they love it.
I am trying the fortune cap but I get stuck at the start. I am going wrong somewhere.
It would be so helpful if we could follow a video just for starters. I want to make one for my daughter.
I know you are busy but I know I am shellfish when I say. Please Help!!
Thank you for your generosity and may you always come up with amazing designs
Sylvia
Tamara Kelly
Thank you so much Sylvia! I'll see what I can do! 🙂
Nancy mcquade
Hey Tamara,
Starting this new pattern but the gauge description is new for me! Could you walk me through it? Thanks,
Nancy
Tamara Kelly
Hi Nancy!
This pattern is made in the "corner to corner" style, with "blocks" of stitches that build on each other in a unique way. There aren't rows in the traditional sense. So to get gauge, I measured 5 of these blocks - because of the way they are made, the measurement is the same along either edge.
nancy mcquade
Hmmm...So do I do 5 x the first "row/block" for my gauge?
nancy mcquade
Dear Tamara,
I actually watched the videos and it was all crystal clear! Who would have thunk??? I couldn't have figured out without the video. Thank you so much for all of your videos. I use them all the time when I need basic help also.
Tamara Kelly
Oh I'm so glad! Thank you Nancy!
Nancy mcquade
Me again, Tamara,
I decided to take the more "complicated" route and make this the shorter slouch which means leaving out Rows 9-13. However, I am having trouble with the pattern as I start in to Row 9 with 8 blocks. Do I slip st in to the first dc as I turn into my Row 8, or the dc after the ch 1? This is a really fun pattern!
Nancy
Nancy mcquade
Never mind that for now. Let me "play"!
Tamara Kelly
Thank you so much Nancy! Skip to Row 13, work it exactly as written, just with only 8 blocks. Starting in Row 13 you're working even - this is creating the circumference/length without adding height. You may want to add a few more rows in fact, so that the rectangle is 8 blocks x 28 blocks, so that it's big enough around.
nancy mcquade
Hey Tamara,
I have done more rows to extend the length. I think what you are describing is to bring the total number of rows to 28, as if I were doing the full 12 blocks and starting Row 13 and going to 28 after that? I am finding it tough to count rows! I was trying to count along the "straight" edge and I am sure there is some semblance of order along that edge but I can't see it! I have kind of lost track of my number of rows!
Nancy
P.S. As I was sitting next to husband on the couch last night where he is used to hearing me cursing and getting frustrated as I crochet, I said to him "This pattern is actually fun!"
Tamara Kelly
Hi Nancy! I hear ya! Counting the blocks can be tricky, though I've had lots of practice - I wish you could teleport over and I'd help you in person! The main thing is to get it long enough to fit around your head - if you've got that, then the rest can be fudged a bit. 😉
nancy mcquade
Dear Tamara,
I have been trying to avoid asking any more questions. You are so generous with your time that I really hate to use it up unnecessarily!
I do have 2 questions though:
1. I cannot figure out how to slip stitch 2 together
2. When I start the brim, I have 12 blocks and I am unsure how I end up with 70 stitches?
As always, thank you for your help.
Nancy
Tamara Kelly
Hi Nancy! I'm happy to help when I can. 🙂
1. Insert the hook in the first stitch, pull up a loop, insert the hook in the next st, pull up a loop (3 loops on hook), pull the first (most recent) loop through the other 2 loops. 🙂
2. I'm wondering if you seamed the wrong edges together? You want the short sides seamed, not the long sides.
nancy mcquade
Yes, I did seam the short sides together and now I do understand the slip stitch 2 together. Thank you.
Regarding the number of blocks, do you think I should have a different number than 12? Potentially, I could be counting incorrectly. I went back and counted the number of "holes" I have and there are 48 but I don't know if the "holes" all count, if that makes sense!
Tamara Kelly
Counting the blocks can be tricky! There should be the ch 3 for one row, then the (dc, ch 1, dc) for the next row. The most important thing though, is that it fits around your head when you add the brim. It sounds like you are doing the gather at the top though, yes? First you do Round 1: Ch 1, sc in each block around, join with a sl st. (28 sts) This is where you turn each "block" into one st. So you can just sc evenly spaced around, and then gather that round closed with the slst2tog round, then use the end to pull it shut. The actual st count doesn't matter so much here as it does in the brim.
Nancy mcquade
I promise this is my last question. I have the top completely together and I THINK my stitching is correct with the slip stitch 2tog around as the second row but when I try to pull it tight it won't budge. I know I am supposed to use the tail to pull it up but my tail wants to pull out all of the stitches which makes me question what I have done. I have completed the brim, which is why I know this is my last question. That went beautifully!
I am late replying to your last post because I was finishing up my biggest project so far - a sleeveless cardigan and I used your "V Pattern" around the arm holes and it is gorgeous. I will post on Facebook.
Tamara Kelly
No worries! 🙂
Ok, so it sounds like you haven't pulled the tail through the last stitch - to finish it off, so the stitches don't come undone? Otherwise I can't think why the stitches would pull out. I do plan on doing a "gathering the crown" video very soon.
nancy mcquade
A tutorial would be awesome! I am not in a rush to finish my hat so I will just set it aside for now. Thank you again, as always,
Nancy
Toni Barrett
Dear Tamara,
I am very very new to crochet. I need help. I am making the fortune hat, I am nearly at row 29. I understand the decrease but can't work out why I need to do it 24 times. I am really just crocheting to pattern. The idea is it will end up a rectangle, after blocked 12" by 24". Would have had no hope of even getting a project like this off the ground without the videos, they are fantastic.
Tamara Kelly
Hi Toni! Basically, you want to end up with a rectangle that is long enough to fit around your head, and wide enough to be tall enough for a hat. I'm so glad the videos help!
toni
Hi Tamara,
Cool, that bit I get now.
I am still confused about the 24 times stated in row 29.
Tamara Kelly
That may be a typo, the point is to be decreasing to finish the rectangle. 🙂
Natty
Hi Tamara,
i just started the hat and im already half way done .
im loving it so far 😀
there is one part im kinda confused about when you say wet the fabric
so am i suppose to wet the rectangular fabric then let it dry to continue the pattern or?
thankyou in advance 😀
Tamara Kelly
Hi Natty! Thank you! Yes, blocking it flat before finishing the rest of the pattern is MUCH easier than trying to block it when it's all done and hat shaped. 😀
Kim
I love your Fortune pattern! Will this pattern work on cotton yarn?
Tamara Kelly
Thank you! I would think so! 🙂
Sanne
Dear Tamara,
Thank you so much for sharing these patterns. I'm currently at home from work because of an illness and crocheting is my main past time right now, taking my mind of other things. I already made the shawlette and I am now waiting for my blocked piece for the hat to dry (first time blocking lace, so I'm a bit excited to see the result).
I love the pattern so much and I would like to make a hat from a similar skin (though different color) for my (almost) two year old. I was wondering if you would be able to offer some advice as to making the hat in a smaller size. I guess I'd have to skip rows 9-12, but how about the rows after that?
I hope you can help me, but even if you can't offer any advice, I'd still like to thank you for these wonderful patterns.
All the best from the Netherlands,
Sanne
Tamara Kelly
Hello Sanne! You are so welcome! I hope your recovery is going well! ♥
For a smaller hat, the easiest adjustment would be to use a smaller hook, but since this one begins with a rectangle, you can use the circumference of her head and crochet until the long side is just that long, then go to the decreases to finish it out to a rectangle, and gather and add the brim. 🙂
Sanne
Thanks, I went with measuring her head circumference and it worked out perfectly.