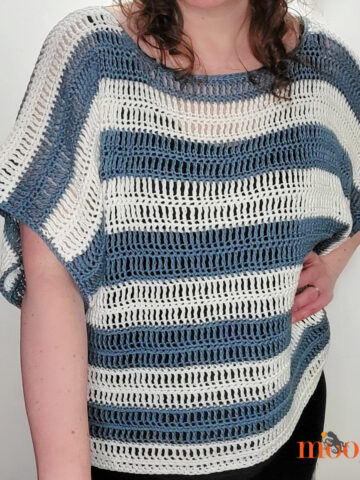
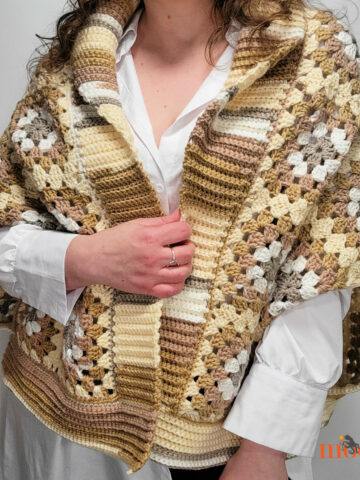
The Chic Moves Poncho features bold stripes, an easy diagonal stitch pattern, pockets and a hood - what more could you want? How about this - it's a free crochet pattern here on Moogly!
 Disclaimer: This post includes affiliate links; materials provided by Red Heart Yarns and Furls.
The Chic Moves Poncho is part of the Red Heart Chic Sheep by Marly Bird Designer Blog Tour - featuring lots of new free crochet patterns made with this gorgeous merino yarn! Here are some of the ones out so far:

When I was faced with the challenge of creating my own Chic Sheep by Marly Bird pattern, the hardest part was narrowing down all my ideas! But I soon settled on a "one size fits all" poncho. And I had fun combining the horizontal stripes with a diagonal mesh pattern - creating lots of movement in the fabric!

The pocket and hood are both optional - but personally, I love them both! All together they create a cozy warm crochet poncho that's just fun to wear!

Chic Moves Poncho
Add this pattern to your Ravelry Queue and Favorites
US - K, 6.5mm hook - Furls Crochet
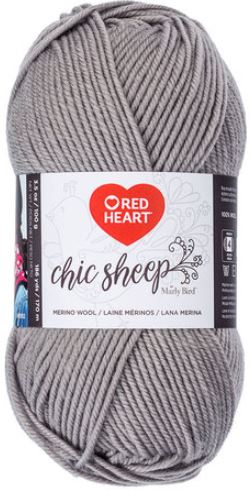
1377 yds Red Heart Chic Sheep by Marly Bird (100% Mercerized Merino Wool; Medium/UK: 10-12 ply; 186 yds/170m; 3.5oz./100g)
Color A: Linen (4 balls - 633 yds)
Color B: VIP (4 balls - 744 yds)
Gauge: 22 sts x 13 rows = 7" in dc (unblocked)
Size: One size fits all, model is a size L
Stitch Multiple: mult of 9, +3
Helpful Links and Tutorials:
SCHEMATIC:

NOTES:
If you prefer a stretchier neckline, work a row of 109 foundation single crochets to replace the chain that begins the Back Piece.
For the purposes of this pattern, chains are counted as stitches. When there is a ch-2 sp, dc into it twice, working into the ch sp and not the individual chains.
If desired, substitute a Chainless Starting Double Crochet for the "Ch 3 (counts as dc)" at the beginning of most rows.
Carry the yarn along the side to avoid having to cut after every stripe and weave in ends - see this tutorial for more on how to carry yarn along the side.
The Front is worked into the unused loops of the foundation chain that begins Row 1 of the Back Piece.
Extra rows can be added in pattern to make it larger.

INSTRUCTIONS:
BACK PIECE:
Row 1 (WS): With Color A, ch 111, dc in the 4th ch from the hook (skipped 3 chs count as first st), dc in the next ch, *ch 2, skip 2 ch, dc in the next 7 ch; rep from * until 7 chs rem, ch 2, skip 2 ch, dc in the last 5 chs, turn. (109 sts including chs)
Row 2 (RS): Ch 3 (counts as first dc here and throughout), dc in the next 6 sts, *ch 2, skip 2 sts, dc in the next 7 sts; rep from * until 3 sts rem, ch 2, skip 2 sts, dc in the last st finishing stitch with Color B, turn.
Row 3: Ch 3, dc in the next 7 sts, *ch 2, skip 2 sts, dc in the next 7 sts; rep from * until 2 sts rem, ch 1, skip 1 st, dc in the last st, turn.
Row 4: Ch 3, dc in the next st, *ch 2, skip 2 sts, dc in the next 7 sts; rep from * until 8 sts rem, ch 2, skip 2 sts, dc in the last 6 sts finishing last st with Color A, turn.
Row 5: Ch 3, dc in the next 3 sts, *ch 2, skip 2 sts, dc in the next 7 sts; rep from * until 6 sts rem, ch 2, skip 2 sts, dc in the last 4 sts, turn.
Row 6: Ch 3, dc in the next 5 sts, *ch 2, skip 2 sts, dc in the next 7 sts; rep from * until 4 sts rem, ch 2, skip 2 sts, dc in the last 2 sts, finishing last st with Color B, turn.
Row 7: Ch 4 (counts as dc and ch 1), skip the next st, dc in the next 7 sts, *ch 2, skip 2 sts, dc in the next 7 sts; rep from * until 1 st rem, dc in the last st, turn.
Row 8: Ch 5 (counts as dc and ch 2), skip the next 2 sts, dc in the next 7 sts, *ch 2, skip 2 sts, dc in the next 7 sts; rep from * to end finishing last st with Color A, turn.
Row 9: Ch 3, dc in the next 4 sts, *ch 2, skip 2 sts, dc in the next 7 sts; rep from * until 5 sts rem, ch 2, skip 2 sts, dc in the last 3 sts, turn.
Row 10: Repeat Row 9, finishing last st with Color B.
Row 11: Repeat Row 8, but do not change colors.
Row 12: Repeat Row 7, finishing last st with Color A.
Row 13: Repeat Row 6, but do not change colors.
Row 14: Repeat Row 5, finishing last st with Color B.
Row 15: Repeat Row 4, but do not change colors.
Row 16: Repeat Row 3, finishing last st with Color A.
Row 17: Repeat Row 2, but do not change colors.
Row 18: Ch 3, dc in the next 2 sts, *ch 2, skip 2 sts, dc in the next 7 sts; rep from * until 7 sts rem, ch 2, skip 2 sts, dc in the last 5 sts finishing last st with Color B, turn.
Row 19: Repeat Row 18, but do not change colors.
Rows 20 - 44: Repeat Rows 2 - 19, ending on a Row 8 repeat, and changing colors every 2 rows to maintain the stripe pattern; break both Color A and Color B.
FRONT PIECE - FIRST SHOULDER:
Row 1: From WS of fabric, with Color A, join to first foundation ch, ch 3, dc in the next 2 chs, *ch 2, skip 2 chs, dc in the next 7 chs; rep from * 3 more times, ch 2, skip 2, dc in the next st, break yarn, do not turn. (42 sts including chs)
FRONT PIECE - SECOND SHOULDER AND JOINING:
Row 1: Skip 25 foundation chains after the last stitch of the Front Piece - First Shoulder, with Color A, join to the next ch, ch 3, dc in the next 7 chs, *ch 2, skip 2 chs, dc in the next 7 chs; rep from * until 7 chs rem, ch 2, skip 2 chs, dc in the last 5 chs, turn. (42 sts including chs)
Row 2: Ch 3, dc in the next 6 sts, *ch 2, skip 2 sts, dc in the next 7 sts; rep from * until 8 sts rem on Second Shoulder, ch 2, skip 2 sts, dc in the last 6 sts, ch 25, pm in 13th ch, dc in first 3 sts of First Shoulder, ^ch 2, skip 2 sts, dc in the next 7 sts; rep from ^ until 3 sts rem, ch 2, skip 2 sts, dc in the last st finishing stitch with Color B, turn. (109 sts including chs)
Rows 3 - 44: Repeat Rows 3 - 44 of Back Piece, break Color A but do not break Color B.

BORDER:
Continuing with Color B, turn to work along the side of the poncho, sc evenly around entire piece working a ch-2 at each corner; join and break yarn.
If no hood is desired, repeat sc border around the neck opening. Otherwise, continue to hood instructions below.
HOOD (optional):
Row 1: From WS of poncho, with Color A, join to marked st in the center of the front neck opening, ch 2 and dc in the next st (counts as dc2tog), dc evenly around neck opening until 1 st rem, dc2tog in last st and marked st; turn. (60 sts)
Row 2: Ch 2 and dc in the next st, dc in each st until 2 sts rem, dc2tog finishing with Color B; turn. (58 sts)
Row 3: Repeat Row 2, but do not change colors. (56 sts)
Row 4: Repeat Row 2, finishing last st with Color A. (54 sts)
Row 5 - 28: Ch 3, dc in each st across and turn, changing colors every 2 rows to maintain the stripe pattern; after Row 28, break both Colors leaving an 18" on Color B.

Hood Assembly: Fold hood in half so that the first and last stitch meet at the front of the poncho. Use the long tail of Color B and the mattress stitch to sew the two halves of this row together and create the top of the hood.

Hood Edging: With Color B, join to any st of hood opening and sc evenly around; join and break yarn.
POCKET (optional):
Row 1: With Color B, ch 46, dc in the 4th ch from the hook (skipped 3 chs count as first st), dc in each rem ch across; turn. (44 dc)
Rows 2 and 3: Ch 3, dc in each st across; turn.
Row 4: Ch 2 and dc in the next st (counts as dc2tog), dc in each st until 2 sts rem, dc2tog; turn. (42 sts)
Rows 5 - 12: Repeat Row 4. (26 dc in Row 12)
Pocket Edging: Ch 1, sc evenly around entire pocket working an extra sc where Row 3 and 4 join (both sides) and a ch 2 at each corner; join and break yarn.

Pocket Assembly: Sew pocket to front RS of poncho at desired height using the backstitch - shown as sewn to Row 26 at the top and Row 38 at the bottom - centered under the neck opening. Be sure not to sew the angled hand openings closed (unsewn portions shown in red on the Schematic above).
That's how to make the Chic Moves Poncho! The color and stitch pattern combine to give it a sense of movement, and the hood an pocket add extra coziness. I hope you'll give this pretty pattern a try!
And don't forget to check out the other gorgeous pattern in the Chic Sheep by Marly Bird Designer Blog Tour! There are a whole bunch of free patterns already out or on their way for this yummy merino yarn.

If this pattern inspires you to make your own project, and you post a photo on social media, be sure to tag me @mooglyblog or #mooglyblog so I can check it out too! I love seeing what you make!
The Fine Print
Follow Moogly on Facebook, Twitter, Pinterest, Instagram, and @mooglyblog on TikTok! Thank you to Red Heart Yarns and Furls Crochet for providing the materials shown in this post. Written pattern copyright Tamara Kelly 2018, all rights reserved. Please do not reprint or repost this pattern, but please do link to this page to share this pattern with others. If you wish to make items for sale from this pattern or translate it to another language, please visit the About page for details.



Sarah Powell
Love it
Tamara Kelly
Thank you!
Aida
So cute and in y favorite yarn! This ones definitely a keeper!
Tamara Kelly
Thank you so much Aida!
Mary
Any guidance on sizing this down for a 10year old?
Tamara Kelly
Hi Mary! You can use the stitch multiple listed above and the Craft Yarn Council sizing guidelines to determine a new width and length! 🙂
Cyndi
Frontside 1st row 1st section should say "4 times" or "3 more times". The pattern as is creates a lopsided neckline. Thank you.
Tamara Kelly
Thanks for the feedback Cyndi, I've added a "more" to that row to clarify further. 🙂
ELIZABETH RIVERA
I love this poncho, I am going to try making it. Thank you so much.
Tamara Kelly
Thank you Elizabeth! I hope you enjoy it!
Nancy Spoolman
Thank you so much for the link! I am going to do it in a solid, though as stripes across make me look wider. LOL
Tamara Kelly
That will make it even easier too! 😀 You're very welcome, I hope you enjoy making it!
GreTchen
Any advice for making a toddler size? I’d like to start with something small. Thanks
Tamara Kelly
Hi Gretchen! I would use the long chain method to make a chain the approximate width desired (plus a few extra) and then crochet in pattern until you have the height/length desired for the back piece, and then make the front accordingly. If you have a toddler size top around, you can use that neck width as a template when beginning the front. 🙂
Katie
I'm looking at this patern with the idea of expanding the width and making a kitty cat pocket shawl. Are their any pitfalls I need to be aware of before i start running with it?
Sharron Roberts
Is it possible to add sleeves to this please?
Tamara Kelly
Sure, you can just crochet around the arm hole to the length desired! 🙂
Chirstine
Can you use a different yarn that is not wool and get the same results?
Tamara Kelly
Yes, any worsted you like. 🙂
Peggy
Can you tell me are the sides sewn together at all? After looking at the pictures I haven't been able to determine if you did this or not.
Tamara Kelly
I did not, but you could if you wanted to!
Marissa
Thank you so much for this pattern! I added buttons to mine😊
Tamara Kelly
Hi Marissa! Thank you! I'd love to see it if you'd like to share a photo! tamarakelly@mooglyblog.com