
The Bauble Ornament Wiggle Trivet is a fun and festive way to add practical color to your holiday table! In your favorite colors of the season, this cotton trivet will protect your table from all your favorite treats. Part of the 24 Days of Quickies with Marly Bird, it's a free crochet pattern - here on Moogly!
Disclaimer: This post includes affiliate links; materials provided by Yarnspirations.
Prefer an ad-free PDF? You've got options!


Prefer the free blog version? Keep scrolling!
Part of 24 Days of Quickies with Marly Bird and Friends
Marly Bird is back again with her 24 days of Quickies - new crochet and knit patterns every day, that work up fast for the holidays! My contribution is the Bauble Wiggle Trivet - CLICK HERE to see all 24 days so far!

The Importance of Being Cotton
When it comes to kitchen items, I'm a big fan of using Lily Sugar'n Cream. It's readily available in tons of great colors, but more importantly, it's 100% cotton. This is super important when you intend to use your crochet item with hot things.
And a trivet is certainly something that needs to be able to stand up to prolonged contact with high heat! Acrylic and plastic-based yarns may melt, and wool may felt if it gets washed. Since trivets are used with food, they need to be easy care... so this yarn is perfect!

Fun Reusable Seasonal Decor - and a Hosting Gift!
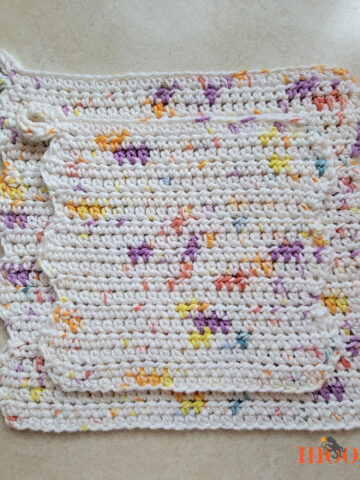
The Bauble Wiggle Trivet is made in three sections, that work up super quickly! First, you make the base mesh, and then you add the "wiggles" - post stitches that add thickness and texture. Finally, the topper/hanger is added - making it really look like an ornament, and including a handy loop to hang it up as decor when not in use!

Bauble Ornament Wiggle Trivet
Add this pattern to your Ravelry Queue and Favorites
US H, 5.0 mm Susan Bates crochet hook
125 yds Lily Sugar'n Cream (100% cotton, 4-medium; 2.5 oz; 120 yds)
A: Dazzle Blue - 100 yds
B: White - 20 yds
C: Yellow - 5 yds
Gauge: 14 dc = 4"/10cm
Size: Approx 8.5" across excluding topper/hanger
Helpful Links & Tutorials
Bauble Ornament Wiggle Trivet Tutorial
NOTES:
This pattern is made in three sections. First, we make a mesh circle. Then, we crochet the "wiggles" into that mesh. We add the white star/snowflake and then fill in with the blue wiggles. Finally, we add the yellow hanger - go with gray if you prefer a silver look!
Ch 4 in the mesh counts as a dc and ch 1.
When making the Wiggles, work ONLY around the mesh dc sts, as for post stitches. Do not work into the ch-1 sps or into the edging.
Always add wiggle sts from the RS of the football mesh.
When you work 3 dc sts "up" the post of one st (from base to top), then you will work the next "down" the st (from top to base) - these alternate creating a wave across the row.
Prefer a different star/snowflake design? Feel free to get creative with how you fill in the circle!
Bauble Ornament Trivet Instructions
MESH BAUBLE ORNAMENT INSTRUCTIONS - COLOR A
Rnd 1: Make a magic circle, and sc 6 times in the ring; join to the first sc with a sl st. (6 sc)
Rnd 2: Ch 4 (counts as dc and ch 1), dc in the same st, *ch 1, (dc, ch 1, dc) in the next st; rep from * to end, ch 1 and join with a sl st into the 3rd ch. (12 dc, 12 ch)
Rnd 3: Ch 4, dc in the same dc, ch 1, dc in the next dc, *ch 1, (dc, ch 1, dc) in the next dc, ch 1, dc in the next dc; rep from * to end, ch 1 and join. (18 dc, 18 ch)
Rnd 4: Ch 4, dc in the same dc, [ch 1, dc in the next dc] twice, *ch 1, (dc, ch 1, dc) in the next dc, [ch 1, dc in the next dc] twice; rep from * to end, ch 1 and join. (24 dc, 24 ch)
Rnd 5: Ch 4, dc in the same dc, [ch 1, dc in the next dc] 3 times, *ch 1, (dc, ch 1, dc) in the next dc, [ch 1, dc in the next dc] 3 times; rep from * to end, ch 1 and join. (30 dc, 30 ch)
Rnd 6: Ch 4, dc in the same dc, [ch 1, dc in the next dc] 4 times, *ch 1, (dc, ch 1, dc) in the next dc, [ch 1, dc in the next dc] 4 times; rep from * to end, ch 1 and join. (36 dc, 36 ch)
Rnd 7: Ch 4, dc in the same dc, [ch 1, dc in the next dc] 5 times, *ch 1, (dc, ch 1, dc) in the next dc, [ch 1, dc in the next dc] 5 times; rep from * to end, ch 1 and join. (42 dc, 42 ch)
Rnd 8/Edging: Ch 1, 2 sc in each ch-1 sp around (skipping the dc sts); break yarn and seamless join. (84 sc)

WHITE STAR/SNOWFLAKE INSTRUCTIONS - COLOR B
Add Stitch Markers: Place stitch markers in Rnd 7, in the 4th dc after each increase. (As seen in photo above.)
First Line: Join with dc at top of Rnd 6 dc post below any marked st, 2 dc around same post, [3 dc around post of st in the row below] 4 times, dc around sc in rows below, skip the magic circle, working toward stitch marker on the opposite side of mesh, dc around sc st, [3 dc around post of st in the row above] 5 times; break yarn and finish off.

Second Line: Join with dc at top of Rnd 6 dc post below next marked st, 2 dc around same post, [3 dc around post of st in the row below] 4 times, dc around sc in rows below, ch 1, skip the magic circle and other line(s), working toward stitch marker on the opposite side of mesh, dc around sc st, [3 dc around post of st in the row above] 5 times; break yarn and finish off.
Third Line: Rep as for Second Line.

FILL IN WIGGLES INSTRUCTIONS - COLOR A
Note: Do not break yarn in this section unless instructed - simply move to the next row. We will go back and forth across the mesh to the end. When you work up one post of a row, work down the next, and vice versa. When going to to a new row, start the first post from the bottom.

Repeat for Each Section: Join with dc at bottom of any unused Rnd 2 st, 2 dc around same post, 3 dc around 2nd unused st of Rnd 3, 3 dc around rem Rnd 3 st, ch 1, 3 dc around first unused post of Rnd 4, [3 dc around post of next Rnd 4 st] twice, 3 dc around last unused post of Rnd 5, [3 dc around post of next Rnd 5 st] three times, ch 1, 3 dc around first unused post of Rnd 6, [3 dc around post of next Rnd 6 st] four times, 3 dc around next marked Rnd 7 dc, [3 dc around post of next Rnd 7 st] 6 times; break yarn and finish off.

When Weaving In Ends: The last end of each section should be sewn to the stitches of the next section, as shown below. All other ends can simply be woven in down into the mesh.


ADD THE TOPPER/HANGER INSTRUCTIONS - COLOR C
Row 1: Working entire row in BLO, join with dc in any Rnd 8 st, dc in next st, hdc in next 2 sts, sc in next 2 sts, hdc in next 2 sts, dc in next 2 sts; turn. (Rem sts left unworked.) (10 sts)
Row 2: Ch 1, sc in each st across; turn.
Row 3: Ch 1, sc in the first 5 sts, ch 14 (or to length desired for hanging loop), sl st in last sc made, sc in each rem st across; break yarn and finish off.

LOOKING FOR MORE?
Are you looking for more wiggle crochet patterns? Check out the Football Wiggle Trivet, Easter Egg Wiggle Trivet, Leaf Wiggle Trivet, Love Wiggles Trivet, and the original round Wiggle It Trivet! You can also browse all my patterns on Moogly or Ravelry - and be sure to hit the contact me button with any wiggly requests!

If the Bauble Ornament Wiggle Trivet pattern inspires you and you post a photo on social media, be sure to tag me @mooglyblog or #mooglyblog so I can check it out too! And send in your finished photos to tamarakelly@mooglyblog.com to have them featured in the Moogly email newsletter!
THE FINE PRINT
Follow Moogly on Facebook, Twitter, Pinterest, TikTok, and Instagram! Thank you to Yarnspirations for providing the materials shown in this post. Written pattern copyright Tamara Kelly 2022, all rights reserved. Please do not reprint or repost this pattern. Please do link to this page to share this pattern with others. If you wish to make items for sale from this pattern or translate it to another language, please visit the About page for details.


Mindy says
Thank you for demystifying the trivet! I always thought they were a giant chain handsewn together and passed on the project. Now, my mind is blown and I see this as something I will be doing this holiday season for coworkers!
Tamara Kelly says
Woohoo! I'm so glad you saw this one! 😀 They are so fun to make!
Chell says
Hi,
The free pdf link doesn't seem to be working; it takes me to the Ravelry page but the pattern is not free. Did I miss a coupon code somewhere? Thanks.
Tamara Kelly says
Hi Chell! There was a note you may have missed, the discount was taken at the cart.
Melody Miller says
Came here on 12/2 from the bloghop, but the button link still shows the PDF at $4.97. Didn't find a coupon code, so not sure what Im doing wrong? Thanks you for the free pattern (even though I can't access it, I assume others can, and it's the thought that counts!)
Tamara Kelly says
Hi Melody! I'm afraid there was no code, the discount was taken at the cart.
Alexandra says
I love seeing all the fun things you make with the wiggle look! I think this one might be my favorite.
Melody says
Oh well - I missed it then! Thank you.
Rachel says
I’m so excited! These look amazing, and I can’t wait to use them when I make hats for birthdays!!