Paliki means "small" in Hungarian (or so I'm told). And this pocket tote is small, but sturdy - perfect for when you need a bag that won't stretch out, keeping your farmer's market purchases safe and protected! A great addition to your usual assortment of bags, the Paliki Pocket Tote is the one that's "just right" for all those small special items!
 Disclaimer: This post includes affiliate links.

Wondering what a "pocket tote" is? It's a tote that folds up into itself, perfect for stashing in your purse or car so you always have it when you need it. This one also features a pretty ribbon woven through the handle. That's not just for looks - the ribbon keeps the handle from stretching out due to the weight of your goodies. And the double layer on the bottom adds even more stability to this handy crochet bag!
Paliki Pocket Tote
Add this pattern to your Ravelry Queue and Favorites
- US - I, 5.5mm hook (Furls hook recommended)
- 300 yds Lion Brand Kitchen Cotton (100% cotton; Aran/yarn symbol “4”; 99 yds/91 m; 2.01 oz)
Color A (CA): Tropic Breeze - 85 yds
Color B (CB): Snap Pea - 80 yds
Color C (CC): Citrus - 75 yds
Color D (CD): Cayenne - 60 yds - Optional: Button (any size); ⅜" ribbon (4' in length)
- Gauge: 4 rnds of dc circle = 4" diameter
- Finished Size: 10" wide x 10" tall before handles (laid flat)
Special Stitches:
- wide dc2tog - worked as a standard dc2tog, working the 1st half of the dc2tog into the same st as the 2nd half of the previous st, skip the next st, then working the 2nd half of the dc2tog into the next st.
- other special stitches - click linked stitches below for tutorials if needed
INSTRUCTIONS:
Make 2 circles: one in CA, and the other in CB
Round 1: Make a magic circle, ch 2, work 12 dc into the circle; join to the first dc with a sl st. (12 sts)
Round 2: Ch 2, 2 dc in each st around; join to the first dc with a sl st. (24 sts)
Round 3: Ch 2, dc in the first st, 2 dc in the next st, *dc in the next st, 2 dc in the next st; repeat from * to end, join to the first dc with a sl st. (36 sts)
Round 4: Ch 2, dc in the first 2 sts, 2 dc in the next st, *dc in the next 2 sts, 2 dc in the next st; repeat from * to end, join to the first dc with a sl st. (48 sts)
Round 5: Ch 2, dc in the first 3 sts, 2 dc in the next st, *dc in the next 3 sts, 2 dc in the next st; repeat from * to end, join to the first dc with a sl st. (60 sts)
Round 6: Ch 2, dc in the first 4 sts, 2 dc in the next st, *dc in the next 4 sts, 2 dc in the next st; repeat from * to end, then:
- join to the first dc with a sl st for the CA circle, leaving yarn attached. (72 sts)
- break the yarn and finish using the seamless join for the CB circle. (72 sts)
Assemble Bottom of Bag:
Place circles right sides together, with CB circle on top. Continuing with CA, sc through both circles for 56 sts, then sc through CA (bottom) layer only for remaining 16 sts; join with sl st in 1st sc, do not break yarn.
Sides/Handles of Bag:
Round 1: (continuing with CA) Ch 2, skip the next 2 sts, dc in next st (first dc2tog made), *ch 1, wide dc2tog; repeat from * to end, finishing the last wide dc2tog in the first st of the previous round (first skipped st), ch 1, join with a sl st in 1st dc. (36 dc2tog sts)
Round 2: Sl st in next ch-1 sp, ch 2, dc in next ch-1 sp (first dc2tog made), *ch 1, dc2tog working 1st half into previous ch-1 sp and 2nd half into next ch-1 sp; repeat from * to end, finishing the last dc2tog in the first ch-1 sp of the previous round, ch 1, join with a sl st in 1st dc. (36 dc2tog sts)
Round 3 - 5: Repeat Round 2, break CA.
 Round 6: With CB, join to any ch-1 sp of previous round, ch 2, dc in next ch-1 sp (first dc2tog made), *ch 1, dc2tog working 1st half into previous ch-1 sp and 2nd half into next ch-1 sp; repeat from * to end, finishing the last dc2tog in the first ch-1 sp of the previous round, ch 1, join with a sl st in 1st dc. (36 dc2tog sts)
Round 7 - 10: Repeat Round 2, break CB.
Round 11 - 15: With CC, repeat Rounds 6 - 10.
Round 16 - 18: With CD, repeat Rounds 6 - 8, do not break yarn.
Round 19: Sl st to next ch-1 sp, ch 1, 2 sc in each ch-1 sp around; join with a sl st in 1st sc. (72 sts)
Round 20: (begin handles) Ch 1, sc in next 12 sts, ch 50 (or to desired handle length), skip 12 sts, sc in next 24 sts, ch 50 (or same amount as 1st ch), skip 12 sts, sc in last 12 sts; join with sl st in 1st sc. (48 sc plus chains)
Round 21: Ch 1, sc in each ch and st around; join with a sl st in 1st sc. (148 sc or custom amount)
Round 22: CSDC (or ch 3 if preferred, counts as first dc), ch 1, skip next st, *dc in next st, ch 1, skip next st; repeat from * around, join with a sl st in CSDC or top of ch 3. (74 dc or custom amount)
Round 23: Ch 1, sc in each st and ch-1 sp around; break yarn and seamless join to 1st dc. (148 sc or custom amount)
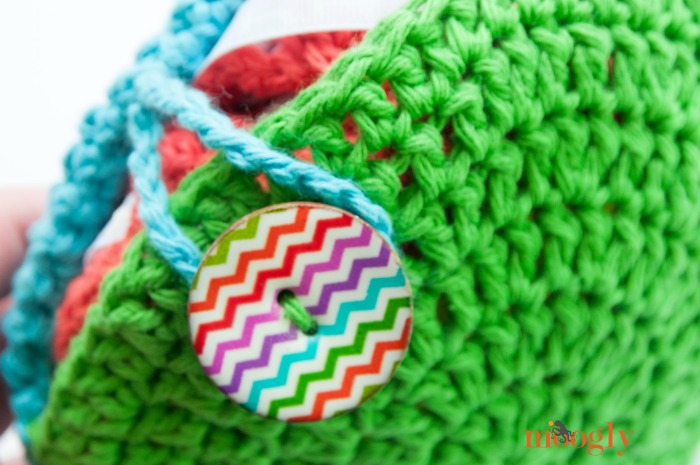
Add Button, Loop, and Ribbon:
Flip circles at bottom of bag inside out, enclosing sides and handles of bag in between. Sew button to one side of the opening, and crochet a simple chain loop to fit your button, sewing it to the other side of the opening. Click here to see the Rainbow Pocket Market Bag for tutorial if needed.
Weave Ribbon through dc sts of handles, and tie a pretty knot bow on the side.
And that's all there is to the Paliki Pocket Tote! I hope you enjoy this fun free market tote pattern - I can't wait to see what you all make with it!

Written pattern copyright Tamara Kelly 2016, all rights reserved. Please do not reprint or repost this pattern, but please do link to this page to share this pattern with others. To print or download this pattern for personal use, please use the green Print Friendly button at the bottom of the pattern, or go to Print Friendly.com and paste in the URL of this post. If you wish to make items for sale from this pattern, or translate it to another language, please visit the About page for details. Thank you to Lion Brand Yarn for providing the yarn for this pattern!


Lisa says
What a cool looking bag! I can't wait to try it- yet another reason to try the new kitchen cotton yarn! Thanks for another great pattern Tamara!
Tamara Kelly says
Thank you so much Lisa!
anita says
That bag looks both pretty and practical 🙂
By the way: I'm Hungarian and never heard the word "paliki" in my life. According to google it's either the name of a peninsula in Greece or means "pegs" in Polish 🙂
Tamara Kelly says
Thank you!
I didn't think it sounded Hungarian - but that's what the baby dictionary said, and I'm no expert lol!
Linda says
Beautiful! This is definitely going on my to do list. About the ribbon... It says "4 in length", but maybe should be 4 feet?
Tamara Kelly says
Thank you so much! 😀
It says 4′ in length - ' meaning feet. Maybe it isn't showing up at your end for some reason? Tech is weird sometimes lol.
Linda says
You're right! The apostrophe doesn't show on the regular view of the page, but it does show in the reader view. Thanks!
Tamara Kelly says
Super weird - thank you for letting me know! Not that I know how to fix it lol! 😛
Nikki says
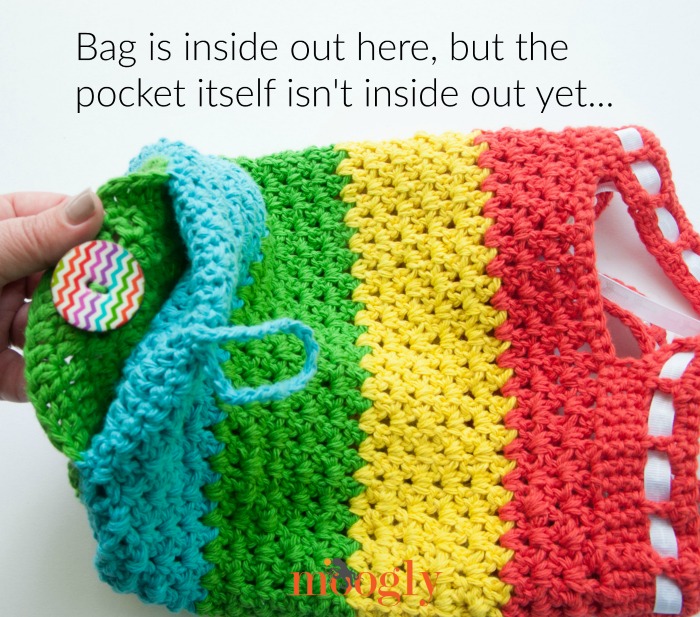
I'm confused by the pocket to bottom part, if I have right sides together then start working the first row of wide dc2tog, when the green is on the inside the bag will be inside out right? So will the pocket have to be visible for the bag to right side out. Maybe I'm just reading it all wrong, I'm a very visual person lol
Tamara Kelly says
Hi Nikki! The green is on top, so as you work the sides, it will gradually be hidden as you work your way up. Then to fold up the bag, you first turn the bag inside out before you flip the pocket inside out - which pulls in the rest of the bag. Does that make sense?
Paula says
I really like your site and am anxious to try this bag as a gift for a friend. Do you have a video tutorial for the wide dc2tog? I'm not sure I'm doing it right.
Tamara Kelly says
Hi Paula! I'm afraid I do not. If you know how to make a dc2tog, this is the same, but the first "leg" is made in the same stitch that you finished the previous stitch in, then you skip the next st, and make the second leg of the dc2tog in the stitch after that. Does that help?