
The Duckie Squish is a happy new friend, a reader request, and perfect for more Easter, spring, and barnyard fun! Bernat Blanket is my favorite for making these oversized amigurumi - soft and fast! Get the pattern below, right here on Moogly!
Disclaimer: This post includes affiliate links; materials provided by Yarnspirations.
Prefer an ad-free PDF? You've got options!


Prefer the free blog version? Keep scrolling!
Cheep Cheep!
Last time I asked, "Where will the Squishes end?" And the answer is no time soon, because I keep getting so many fabulous requests! The Duckie Squish is another sweetie - a much-requested one! The feet took a bit of work - these are the final version, and I think I got them just right.

As usual, this squish is filled with a microbead pillow ball. And like the chicken, it may be a tight fit, depending on your gauge. If you like it a little looser, you can use fiberfill or the filling of your choice. Or add another round to each piece of the body before the round with the wings!

Big Amigurumi with Bernat Blanket
As mentioned above, I've used Bernat Blanket for theDuckie Squish! Super bulky yarn makes these round amigurumi animals quick to crochet, and ultra squishy and satisfying! You can switch yarn weights to change the size of the finished piece - just be sure to pick a hook size that gives you a nice sold fabric!

I've included lots of photos to help you every step of the way - if you have questions, be sure to drop them in the comments!
This crochet duck pillow is fun to make – and pet and squeeze! I used safety eyes, but this pattern has not been tested for safety for children under 3 years of age. If you are crocheting it for a baby or toddler, you may wish to embroider on the face and make sure that the pieces are sewn on quite securely. If using it as a photo prop, be sure not to leave the toy with a baby unattended.

Duckie Squish
Add this pattern to your Ravelry Queue and Favorites
US - L, 8.0mm crochet hook - Susan Bates
250 yds Bernat Blanket (6 - Super Bulky; 100% polyester; 300g/10.5 oz; 201 m/220 yds)
Color Shown:
A - Yellow (most of 1 ball)
B - Gold (approx 30 yds)
24mm Safety Eyes
10" Round Microbead Pillow - Amazon or fiber fill
Gauge: 4"/10cm across after Rnd 3.
Size: approx 10" around excluding feathers, feet, and wings
Helpful Tutorials and Links:
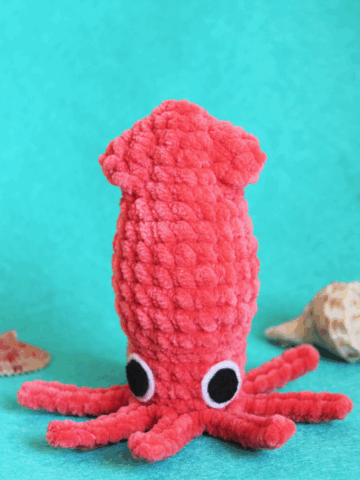
To Begin the Body: Octopus Squish Tutorial
CSDC - Chainless Starting Double Crochet
Fpdc and Bpdc - Front post/back post double crochet
NOTES:
All Body Rnds are worked in a spiral.
Do not ch 1 unless directed, and do not join any rnds with a sl st.
Move a stitch marker along the first st of each rnd as you work to keep track of your progress.
DUCKIE SQUISH INSTRUCTIONS
BOTTOM HALF OF BODY - COLOR A (Lighter Yellow):
Rnd 1: With Color A, make a magic circle, ch 1, sc in the ring, 9 hdc in the ring. (10 sts)
Rnd 2: 2 hdc in each st around. (20 hdc)
Rnd 3: *Hdc in the next st, 2 hdc in the next st; rep from * around. (30 hdc)
Rnd 4: *2 hdc in the next st, hdc in the next 2 sts; rep from * around. (40 hdc)
Rnd 5: *Hdc in the next 3 sts, 2 hdc in the next st; rep from * around. (50 hdc)
Rnd 6: *Hdc in the next st, 2 hdc in the next st, hdc in the next 3 sts; rep from * around. (60 hdc)
Rnd 7: Hdc in the next 5 sts, 2 hdc in the next st, *hdc in the next 9 sts, 2 hdc in the next st; rep from * until 4 sts rem, hdc in last 4 sts. (66 hdc)
Rnd 8: *2 hdc in the next st, hdc in the next 10 sts; rep from * around. (72 hdc)
Rnd 9: Hdc in the next 8 sts, 2 hdc in the next st, *hdc in the next 17 sts, 2 hdc in the next st; rep from * until 9 sts rem, hdc in last 9 sts. (76 hdc)
Rnd 10 - 11: Hdc in each st around.
Rnd 12: Hdc in the next 17 sts, [2 dc in the next st, 3 tr in the next st, 2 dc in the next st], hdc in the next 35 sts, rep from [ to ], hdc in the last 18 sts. (84 sts)
Rnd 13: Sc in the next st, sl st in the next st, break yarn and seamless join to next st. Weave in ends and set piece aside.
TOP HALF OF BODY - COLOR A (Lighter Yellow):
Rnds 1 - 11: Repeat Rnds 1 - 11 of Bottom Half of Body.
Rnds 12 and 13: Hdc in each st around.
Rnd 14: Hdc in the next 17 sts, [2 dc in the next st, 3 tr in the next st, 2 dc in the next st], hdc in the next 35 sts, rep from [ to ], hdc in the last 18 sts. (84 sts)
Rnd 15: Sc in the next st, sl st in the next st, break yarn leaving a long tail for sewing, and seamless join to next st. Set piece aside. Weave in first end (at magic circle). Set piece aside.
TAIL - COLOR A (Lighter Yellow):
Row 1: Make a magic circle, ch1, sc in the ring, hdc in the ring, 3 dc in the ring; turn. (5 sts)
Row 2: Ch 1, 2 sc in each of the first 3 sts, sc in the last 2 sts; break yarn leaving a long tail for sewing. (8 sts) Set piece aside.

FEATHERS - COLOR A (Lighter Yellow):
Row 1: Ch 8, sl st in first ch made, ch 6, sl st in same ch as previous sl st; break yarn leaving a long tail.

BEAK - COLOR B (Darker Yellow/Orange):
Rnd 1: Make a magic circle, ch 1, sc in the ring, 6 hdc in the ring. (7 sts)
Rnd 2: 2 hdc in each st around. (14 sts)
Rnd 3: Hdc in next st, sc in next 5 sts, hdc in next 2 sts, sc in the next 5 sts, hdc in next st. (14 sts) Tip: Weave in your first end now.
Row 4: Fold piece flat, ch 1, sc through next st and last st, sc through next 6 sets of sts; break yarn and finish off. Weave in ends.

FEET - MAKE 2 COLOR B (Darker Yellow/Orange):
Row 1 [RS]: Leaving a long tail for sewing, make a magic circle, ch 1, sc 3 in the circle; close the circle, but do not join, turn. (3 sc)
Row 2 [WS]: CSDC in first st, 3 dc in the next st, dc in the last st; turn. (5 dc)
Row 3: Ch 1, fpdc in first st, [2 sc in next st, fpdc in next st] twice; turn. (7 sts)
Row 4: Ch 1, bpdc in first st, [sc in next 2 sts, bpdc in next st] twice; turn.
Row 5: Ch 1, fpdc in first st, [sc in next st, 2 sc in next st, fpdc in next st] twice; turn. (9 sts)
Row 6: Ch 1, bpdc in first st, [loosely sl st in next 3 sts, bpdc in next st] twice; turn.
Row 7: Ch 1, fpdc in first st, [sl st in next 3 sts, fpdc in next st] twice; break yarn and finish off.

DUCKIE SQUISH ASSEMBLY:
- Sew the Feathers to the top center of the Top Half of the Body.

- Add the Safety Eyes to the Top Half of the Body as shown, on the opposite side of the long tail.

- Sew the first two rows of the Feet, RS up, to the Bottom Half of the Body, leaving the toes loose. Be sure to position them facing away from Rnd 13.


- Sew the Tail to the Bottom Half of the Body, at the end of Row 2 of the tail. Be sure to position it behind the feet, centered between the wings. Sew around Rnd 11/12 of the body.

- Use the stitch markers to secure the Beak to the Top Half of the Body, at the last round, centered between the eyes.

- Insert the pillow ball, and secure the Top Half of the Body to the Bottom Half of the Body using stitch markers, so that the wings match up. Be sure that the eyes and feet face the same direction.

- Use the long tail on the Top Half of Body to whip stitch the Top and Bottom together. At the Beak, use the back stitch to sew through all three layers.

LOOKING FOR MORE?
Are you looking for more fun Squish patterns? I have a bunch you can try (with still more on the way)! Browse my patterns here on Moogly or search my patterns on Ravelry!

If the Duckie Squish pattern inspires you to make your own project, and you post a photo on social media, be sure to tag me @mooglyblog or #mooglyblog so I can check it out too!
THE FINE PRINT
Follow Moogly on Facebook, Twitter, Pinterest, Instagram, and @mooglyblog on TikTok! Thank you to Yarnspirations for providing the materials shown in this post. Written pattern copyright Tamara Kelly 2023, all rights reserved. Please do not reprint or repost this pattern, but please do link to this page to share this pattern with others. If you wish to make items for sale from this pattern or translate it to another language, please visit the About page for details.


Carys Davis says
I'm so excited to make this for my daughter!! Thank you so much for the pattern. It's adorable.
Tamara Kelly says
Thank you so much! ♥
Schuhow Debi says
Thank you! I just love you - and your generosity! When anyone asks for videos for those learning crochet, especially left handed, I send them to you. Moogly is just so easy to remember! ❤️❤️
Tamara Kelly says
♥ Thank you so much!!
Alexandra says
Such a cutie to join the Squish family!
Addison says
Can you make a video to follow because I don't really know what to do and I don't know most the stitches
Tamara Kelly says
Hi Addison! If you look at the Helpful Links and Tutorials section above, you'll find tutorials for each of the stitches used under Crochet Abbreviations!
Terri says
Another great squish, keep them coming. I plan on crocheting at least one of each. Thanks
Coreen says
This is the first squishy I've made and I made 2 of them. One for my granddaughter who loves ducks, and another for her friend who loved the one I made for my gd. They turned out great! I'm planning on making some little baby ones next. Thanks so much for a fun pattern!!!!!
Tamara Kelly says
Oh I'm so glad to hear it, thank you Coreen! ♥
Amy says
This was fun to make! The feet were a little tricky but the video tutorial got me through them!
Mary Mabb says
Just wanted to warn everyone. Don't "cheap out" like i did and use "Loops & threads" blanket yarn. It frays like crazy especially when stitching your work shut. The fur comes right off down to the thread. What a mess!
Tamara Kelly says
Oh no! Thank you so much for sharing that, I'm so sorry you went through it though!
Tiffany says
I am on round 12 of the top half of the body and I am curious what the dc and tr are for? Also, can I follow this round as all hdc, attach the wings, and then continue the body instead of making it in 2 pieces? Thanks!
Tamara Kelly says
Hi Tiffany! It sounds like you are referring to Rnd 14 of the top of the body? Those are what makes the wings! So you don't have to attach them later, they are built right in. The body is made in two pieces to allow for the easier insertion of the pillow ball and to attach the feet , tail, and feathers, but if you'd like to make it all in one piece you could probably manage with a few breaks for adding the other bits!
Puddin says
Is there any way to convert this is to one color instead of two on the whole body? I want to just do one continuous color instead of having the lover be a different color
Tamara Kelly says
You can use whatever color(s) of yarn you like, you can make it all purple if you want to!
Chris says
Made this for Easter last year and it was a huge hit! I love these Squishes.
Tamara Kelly says
♥ Thank you so much, Chris!
Kelly says
I am half way through the pattern and it seems soooo big! What size is the finished product supposed to be?
Tamara Kelly says
It's a big one! About 10" across!
Donna Rusch says
I just made the duck he is adorable,did I miss some decreases I seem to have some ruffling and he seems very fat not like the picture. I do have the correct amount of stitches. Any ideas?
Tamara Kelly says
Hi Donna! Hm, I'm not sure what happened there! Did you get gauge?
Heidi Lehman says
I love your squishes!!!!
I cannot thank you enough for the video tutorials!!!
I could have never made the feet without them. It took me many, many, maaaany.....tries even with the step by step tutorials, and I still didn't get them exactly right.
Luckily the patterns are very forgiving. Despite my more than I can count do overs, and mess ups, they still turned out really cute.
Tamara Kelly says
I'm so glad it helped! Thank you so much, Heidi! ♥
Suzanne Cunningham says
Where are you guys finding the pillow inserts?
Tamara Kelly says
Hi Suzanne! The pillow inserts are linked above, and here is the link as well: https://amzn.to/3TechoS 🙂