The Crossed Loops Cowl is a very special pattern - you make it with your fingers! So you don't have to know how to crochet or knit to make this quick and cozy free neckwarmer pattern!
 Disclaimer: Materials provided by Red Heart Yarns.

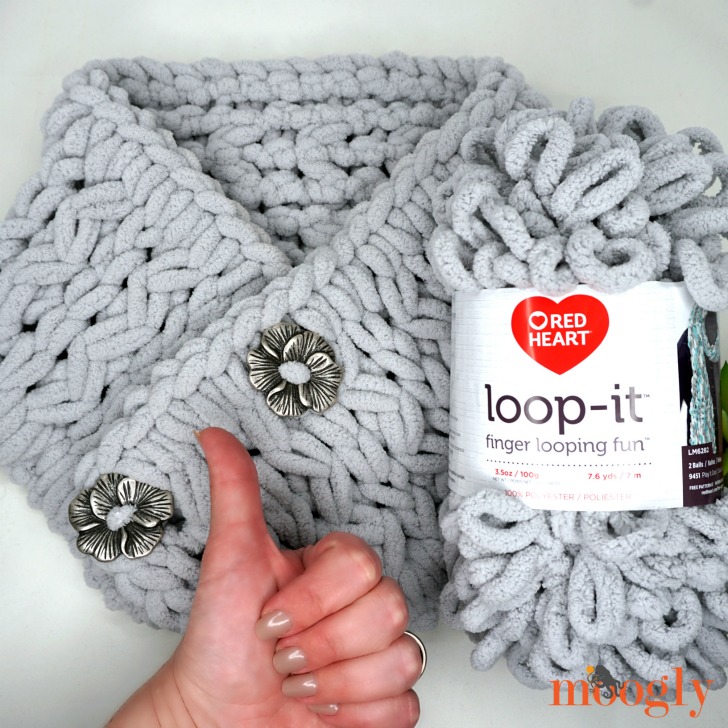
The secret to the Crossed Loops Cowl is the yarn! It's made of lots of loops, and it's super squishy and soft and fun. While this particular type has been discontinued, there is a great substitute - Bernat Alize Blanket EZ!
This project is so fun to make! It takes just one ball of yarn and works up in less than an hour once you get the hang of it. The Crossed Loops Cowl will make a fabulous addition to your fall and winter wardrobe - and I think it will be a popular gift this holiday season too!
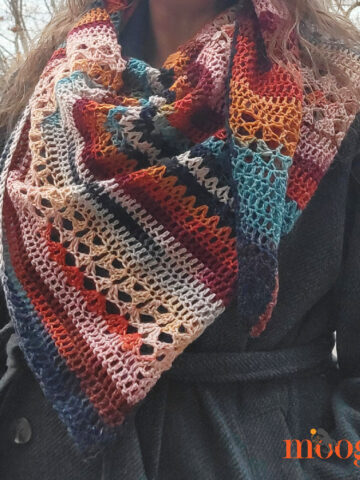
I've loved wearing my Crossed Loops Cowl, though I can't quite decide which way I like to wear it best! What I love is that I can keep switching it up - it's two looks in one piece!

Since this is a yarn pattern - not a crochet or knit pattern - writing it up was a little tricky! I'd say the way the yarn physically works is more like knitted stitches, and I've drawn on my pattern writing experience with both to craft these instructions.
And since it is so unique, I'm including the video tutorial today as well! So I urge you watch the video tutorial before you begin. It's a little fiddly at first, but by the time you finish your own Crossed Loops Cowl, you'll have the hang of this fun yarn!

Crossed Loops Cowl
Add this pattern to your Ravelry Queue and Favorites
1 ball Bernat Alize Blanket EZ (7 - Jumbo; 100% Polyester)
(original yarn is discontinued)
2 Large Buttons: 1.5" to 2" recommended (buttons shown purchased at JoAnn)
Scissors
Yarn Needle or Dental Floss
Finished Size: 7" wide x 31" long
Gauge is determined by the yarn
How to Make the Crossed Loops Cowl
INSTRUCTIONS
Prep yarn: Use scissors to cut open 3-4 loops so that yarn is straight for several inches.
Row 1: With yarn tail on the left, lay out 49 loops of yarn, straightening them into an organized line.
Row 2: Working from right to left, pull the next (50th) loop on the yarn straight through the first loop of Row 1, from back to front. Continue pulling new yarn loops straight through the Row 1 loops, from right to left.
Row 3: Working from left to right, pull the next yarn loop straight through the first Row 2 loop, *cross the next Row 2 loop to the right over the following Row 2 loop, pull the next yarn loop through the rear Row 2 loop in the cross, pull the next yarn loop through the front Row 2 loop in the cross, pull the next yarn loop straight through the next Row 2 loop; repeat from * to end.
Row 4: Working from right to left, pull the next yarn loop straight through the first Row 2 loop, *cross the next Row 2 loop to the left over the following Row 2 loop, pull the next yarn loop through the rear Row 2 loop in the cross, pull the next yarn loop through the front Row 2 loop in the cross, pull the next yarn loop straight through the next Row 2 loop; repeat from * to end.
Rows 5 - 7: Repeat Rows 3 and 4, and then repeat Row 3 once more.
Row 8: Working from right to left, pull the next yarn loop straight through each Row 2 loop across (as in Row 2).

Bind off and Finishing:
Working from right to left, pull the 2nd loop through the 1st loop, and then the next loop through that loop, on across all 49 stitches.
Then, reach through the left loop of the stitch at end of next row, and pull the next yarn loop through the stitch and the previous loop; repeat this down the enter left edge of the cowl.
At the bottom, pull the beginning yarn tail through the last "active" loop on the cowl, and cut the yarn several loops away. Open these loops with scissors, then weave in both ends on the wrong side of the cowl by pushing it through several stitches.
Add Buttons: Sew buttons to the right end of the cowl, as shown. Use a yarn needle or dental floss and extra (straightened) yarn to thread the buttons, then tie them to the cowl in place.

I can't wait to see the Crossed Loops Cowls you all make! They are kind of addictive - I've already made a few! If this pattern inspires you to make your own project, and you post a photo on social media, be sure to tag me @mooglyblog or #mooglyblog so I can check it out too!
Follow Moogly on Facebook, Twitter, Pinterest and, Instagram! Thank you to Red Heart Yarns for providing the materials shown in this post. Written pattern copyright Tamara Kelly 2018, all rights reserved. Please do not reprint or repost this pattern, but please do link to this page to share this pattern with others. To print or download, use the Print Friendly button below, or go to PrintFriendly.com, or right-click to copy and paste it into a word processing document if those options do not work for you (please note that Print Friendly is a free outside website that the button links to, and you can click here for a tutorial on how to use it, but I cannot provide additional technical support for this service). If you wish to make items for sale from this pattern or translate it to another language, please visit the About page for details.


Bruce Howell says
As a dentist, I must keep my fingers limber and this is a great excerise and therapy for my hands. Thanks for the blog.
Maria Sanyshyn says
I did this in a Sunday while watching the football game with my husband. It was fun and worked up fast and looks great. My only comment is that I was disappointed with the yarn which had A LOT of loops that were stitched together - at least 10 or more. Some weren’t so easy to snip apart. And most I had to open the loop and work it in. Too bad.
Tamara Kelly says
I'm so sorry to hear you had that experience Maria, I haven't run into that! Please contact Red Heart and let them know - they may well replace it for you! You can email orders@redheart.com or call (866) 270-9427
I'm glad you liked the pattern though! 🙂
Patrice says
Hi Tamara, I love your video on the crossed loops cowl. I saw the yarn advertised but wasn't really interested until I saw your cowl. Now I'm thinking this will make a couple of nice Christmas presents.
As always, I find wonderful patterns and ideas on your blog.
Fondly,
Patrice
Jolene Nater says
I love the look of this. Is this something that can be made into a blanket pattern? I am looking to make a blanket for my mother in law for Christmas and looking to try something new.
Tamara Kelly says
Absolutely! Just lay out however many loops as you want the blanket to be wide, and then start looping up the rows! 😀
CONNIE DEXHEIMER says
Thank you for this pattern. I would like to know the measurements of this cowl. How can I make it narrower and shorter.I just want an idea. i will look at your tutorial again when I start making it
Thank you.
Connie
Tamara Kelly says
Finished Size: 7″ wide x 31″ long
To decrease the length, start with fewer loops - any odd number will work.
To decrease the width, just work fewer rows. 🙂
Natasha says
Absolutely fabulous tutorial I have made 3 versions of this now ... the original , a cable type and a plain one ... now for the buttons and then i have a fabulous gift for my sister's ... thanks
Tamara Kelly says
Thank you so much, I'm so glad you like it! ♥
Shirlee Keeps says
Just watched your tutorial on the crossed loops cowl
Going out today to get the yarn. Am very excited to try.
Thanks for the detailed video
Tamara Kelly says
Thank you, I hope you enjoy it! ♥
Fatima algria says
I love your content very much. I would like to try this work very much, but there are no threads and tools in my country. I wish you success. Continue.
Tamara Kelly says
Thank you so much! Alas, this type of yarn is indeed pretty specific. Maybe with time, fingers crossed! ♥
Lilian says
What a great idea for kids to start their craft. I love it
Tamara Kelly says
Thank you so much, Lilian! ♥
Joya Pawlikowski says
I didn’t have enough yarn to finish row 7 Now have to get more to finish it
Tamara Kelly says
Oh dear, thank you for letting me know!
Piperelly says
I love this cowl and am making 4 for daughter in laws and cousin for Christmas! I also ran into not enough yarn to finish the project so made mine smaller using 46 loops to start with instead of 49. My daughter in loves are smaller girls so this will be fine!
Tamara Kelly says
Thank you for letting me know, definitely time to update this pattern. 🙂