I am so excited to be able to share Crochet Planned Pooling Basics with Marly Bird! She has written an amazing guest post for Moogly - I've learned a lot, and I think you will too! Planned Pooling is such an amazing crochet technique, and Marly is an expert!
 Disclaimer: Words and images copyright Marly Bird, 2019, used with permission.
A Popular New Technique!
One of the top trends right now in the crochet world continues to be Crochet Planned Pooling. When this technique of using the yarn to generate a plaid/argyle type design in a pattern became popular a few years ago, I knew I had to be involved in making some great designs and helping you all to learn the technique.
Yarnspirations has so many great variegated yarns that lend well to this technique and each color variation will make a different pattern. Today I want to share with you some basics about planned pooling and encourage you to take this technique farther than what you originally imagined. Let me show you how to make the magic happen.

What is Planned Pooling for Crochet?
Planned Pooling is a technique used to intentionally work the colors of a variegated skein of yarn in pattern to make a specific design. The most common of these designs is a criss-cross or plaid/argyle type pattern. There are many stitch patterns that can be used along with planned color pooling technique, but it is important to remember that, with planned pooling, the yarn is really the star of the show and the crochet stitch pattern is the supporting actor.
What do I mean by color placement?
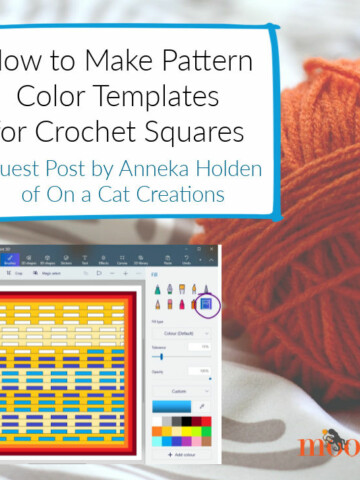
First of all, let’s assume you want to use the moss stitch pattern with the planned pooling technique to get a criss-cross design in your fabric. If you think of a chart showing you exactly where a color has to go to get a plaid/argyle type look you can begin to see what I mean by color placement. If you chart out the design with each square representing the Single Crochet stitch of the moss stitch (as that is the only stitch that is showing) then you can see EXACTLY where each color has to go.

Now imagine you were using that chart to do cross-stitch. You would use whatever color indicated in the chart for the color in that space. If you were using stranding, you would float colors behind stitches until it was time to use one in the specific stitch indicated in the chart. And if you were doing traditional intarsia to get argyle, you would have bobbins of color dangling from the work and use the correct color for that stitch as indicated in the chart. All of which are reasonable and possible.
This is so much easier!
BUT, we don't want to do cross-stitch, or strand our yarn, or do intarsia, we want to do PLANNED POOLING ARGYLE where the yarn does the work for us! So, we work along in moss stitch and manipulate the yarn to make sure that when the color is supposed to change from one to another it happens. Sometimes we do that by changing hook size and other times by changing a single crochet to a half double crochet or skip a chain or ch 1 instead of ch 2 on the turn.
Because the yarn is not dyed to automatically work into argyle and is sometimes inconsistent in the lengths of color, it is our job to first find out how many stitches we actually get in each color of a color sequence before we begin.
You can always create your own chart once you know the color sequence and the number of stitches in each color to help you with your pooling. There is a fantastic site that does this or if you are a more hands-on type I show you how to do that in this video.
Where should I start?
Well, lucky for you I have some great video tutorials for planned pooling on the Marly Bird YouTube Channel. You can follow along with me as you watch the video or work through these steps below.
There are a few extra steps you need to take with doing the planned pooling technique that you don’t have to do for other crochet projects.
FIRST:
Choosing a yarn that will work. Not all variegated yarns will work with planned pooling but there are many that will work. The fantastic facebook group, Planned Pooling with Crochet is a GREAT resource to have. They have compiled a full list of yarns they KNOW work well for Planned Pooling. Some of these are more difficult to pool than others but at least you have a starting point. (Note that you must be a member of the group to see the list.)
 Note: Caron Cake yarns and LONG color sequence yarns do not work for this technique.
SECOND:
Find the color sequence of the yarn. Do this by laying out the colors to find the repeat. Take a minute and write down how many colors are in a repeat and what the sequence is for the yarn you are using.

In this example, although there are only 3 actual colors, the color repeat has 16 sections. I need to know what they are:
- Green
- Blue
- Purple
- Green
- Blue
- Purple
- Green
- Blue
- Purple
- Blue
- Green
- Purple
- Blue
- Green
- Purple
- Blue
Full disclosure: I would not use this yarn to do planned pooling as the colors in each sequence are super short and might only yield one stitch which makes it more difficult to pool than other yarns on the market. I would choose a yarn with longer lengths of color. I prefer at least 12” lengths per color.

THIRD:
Choose a hook size that you think works best with your yarn choice.
FOURTH:
Place a slip knot on your hook. Typically it doesn’t really matter where you place the slip knot as you are going to chain through a full sequence. But to make it easier for a written tutorial, let’s all place the slip knot just before the first color of the color sequence you wrote down. Then, ch through at least 1 full color sequence (all 16 colors for this example), with the last loop on hook being the first loop of a new color just after a color change in the yarn.
Now, we are going to work in the moss stitch pattern and learn just how many stitches we get in each color. This is a vital step as we are establishing a set sequence of stitches per color in a color sequence.
I work the first of these stitches into the chain and the remaining stitches around the foundation chain. Watch this video if you don’t know how to do that.
Work the Pattern
Row 1 (right side): Sk 3 ch (counts as a st), sc in the 4th ch from hook, * ch 1, sc around the foundation ch (instead of going into a ch st); repeat from * until 1 full color sequence has been completed. Count the number of sc made in each individual color in the colorway and note it down. Leave remaining ch sts unworked. Undo one st repeat (sc, ch 1), turn.
For this example of yarn, it would look something like this:
- Green--2
- Blue--1
- Purple--2
- Green--4
- Blue--1
- Purple--2
- Green--1
- Blue--2
- Purple--4
- Blue--1
- Green--2
- Purple--2
- Blue--1
- Green--2
- Purple--1
- Blue--2
Now the goal is to always get the same number of sc in each of those colors. Think of this as your magic number.
Row 2 (wrong side): Ch 2 (counts as a st now and throughout), sc in next ch-1 space, * ch 1, sc in next ch-1 space; repeat from * to end finishing with a sc in last ch-3 space, turn.
Note: As you work this row and all remaining rows, you MUST get the correct number of sc in each color in order to maintain the planned color pooling. Change hook sizes, or actual st used, to get the correct color in place. If you use the same number of sts per color that you counted on Row 1, it will work out.
Row 3 (right side): Ch 2 (counts as a st now and throughout), sc in next ch-1 space, * ch 1, sc in the next ch-1 space; repeat from * to end, finishing with a sc in last ch-2 space, turn.
Note: The color of the sts on this row will shift to the left or right by 1 st from the previous right side row depending on the colorway and if you are right or left-handed. It doesn’t matter which direction the stitch shifts as long as it is off-set by 1.
Row 4 (wrong side): Ch 2 (counts as a st now and throughout), sc in next ch-1 space, * ch 1, sc in the next ch-1 space; repeat from * to end, finishing with a sc in last ch-2 space, turn.
Note: The color of the sts on this row will shift to the left or right by 1 st from the previous wrong side row depending on the colorway and if you are right or left-handed. It doesn’t matter which direction the stitch shifts as long as it is off-set by 1.
And that is it! You continue in the established pattern until the piece measures the length you want.
Finishing
To finish the foundation chain, squish or stretch the sts on the foundation chain to match the width of the rest of the piece. You can slide the sts around along the foundation chain, as with an adjustable ring. Unravel unused foundation ch sts and weave in yarn tail to secure foundation.

Can I make something larger than one sequence?
Absolutely! I have several patterns using multiple full-color sequences. Here is one of my most popular. https://marlybird.com/planned-pooling-crochet-throw-free-pattern/

Basically, you follow along with the same pattern as above. But instead of working through a full sequence on the foundation chain to begin, I suggest chaining enough stitches for the width of the piece you want plus an extra 5”. Then begin row 1 of the instructions until you have filled the length of the foundation chain in the pattern stitch (not the extra 5”) and still working in full color sequence.
So, for a simple throw you would chain approx 40” plus an extra 5”.
Row 1 (right side): Sk 3 ch (counts as a st), sc in the 4th ch from hook, * ch 1, sc around the foundation ch (instead of going into a ch st); repeat from * until 1 full color sequence has been completed. Count the number of sc made in each individual color in the colorway and note it down. Continue from * for another 3 full color sequences maintaining the same number of stitches per color as you did on the first full color sequence. Leave remaining ch sts unworked. Undo one st repeat (sc, ch 1), turn.
Row 2 (wrong side): Ch 2 (counts as a st now and throughout), sc in next ch-1 space, * ch 1, sc in next ch-1 space; repeat from * to end finishing with a sc in last ch-3 space, turn.
Note: As you work this row and all remaining rows, you MUST get the correct number of sc in each color in order to maintain the planned color pooling. Change hook sizes, or actual st used, to get the correct color in place.
Row 3 (right side): Ch 2 (counts as a st now and throughout), sc in next ch-1 space, * ch 1, sc in the next ch-1 space; repeat from * to end, finishing with a sc in last ch-2 space, turn.
Note: The color of the sts on this row will shift to the left or right by 1 st from the previous right side row depending on the colorway and if you are right or left handed. It doesn’t matter which direction the st shifts as long as it is off-set by 1.
Row 4 (wrong side): Ch 2 (counts as a st now and throughout), sc in next ch-1 space, * ch 1, sc in the next ch-1 space; repeat from * to end, finishing with a sc in last ch-2 space, turn.
Note: The color of the sts on this row will shift to the left or right by 1 st from the previous wrong side row depending on the colorway and if you are right or left handed. It doesn’t matter which direction the st shifts as long as it is off-set by 1.
The Repeat
Repeat Rows 3 and 4 until the throws measures the length desired. Be sure to end after a full color repeat and on a row 4 (wrong side row).
Fasten off.
FINISHING
Squish or stretch the sts on foundation chain to match the width of the body of the throw. You can slide the sts around along the foundation chain, as with an adjustable ring. Unravel unused foundation ch sts and weave in yarn tail to secure foundation.
At this point you can add an edging should you choose. I prefer a moss stitch edging.
Are there other stitches to use for planned pooling?
As many crocheters became more proficient with planned pooling they started to experiment with stitches other than moss stitch. Remember, when it comes to planned pooling the yarn is the star and the stitch is the supporting actor. So we should (in theory) be able to use any stitch pattern we wish as long as we keep the colors in the correct place.
Think of the chart above we assumed that each square was a sc form the moss stitch. Instead, what if we assumed each square was just a single crochet with no chain stitch between? Or if it was a 3-dc granny stitch, or what if we assumed it to be a star stitch? As long as we had each color land in the specific square it does not matter what stitch we use to get there.
Having said that, I do have full tutorials for how to do the granny stitch planned pooling technique on my website. (An amazing planned pooler, Rockin’ Lola, wrote the article)
If you are looking for a full pattern using granny stitch planned pooling, check out the Pixie Dust throw pattern.

SNEAK PEEK
There is a brand new C2C planned pooling photo-tutorial coming soon to my website! You do not want to miss it. Be the first to know when it is live by signing up for my newsletter. However, because I love Moogly, here is a a sneak peek. Shhhhh!

Want to learn more?
If you want to learn more about Crochet Planned Pooling you can view my other posts on the topic at MarlyBird.com. There are many full photo-tutorials on basic planned pooling as well as more advanced planned pooling.
If you prefer learning through video, please check out the Marly Bird YouTube Channel where you will find an entire Planned Pooling Playlist. Be sure to subscribe so you don’t miss a new video.
The Planned Pooling Playlist
- The Best Crochet Planned Pooling Argyle Tutorial
- 10 Secrets to Perfect Planned Pooling in Crochet
- Planned Pooling-Finished Starting Chains
- How to create Crochet Planned Pooling Argyle Charts
- Planned Pooling Crochet: Choosing the Best Hook Size
- Multiple Sequence Planned Pooling Crochet
- Granny Stitch Planned Pooling Crochet
- Planned Pooling Crochet: Color Placement
- Planned Pooling Crochet: Deciding Where to Create Your Offset Shift

Get the book “Yarn Pooling Made Easy by Marly Bird”
I did do a book with Leisure Arts about yarn pooling and it includes 10 fun planned pooling patterns that use the moss stitch pattern to create. Once you have figured out how to get the yarn to pool in pattern, you can accomplish anything.

Thank you so much to Marly Bird for this amazing in depth tutorial for planned pooling crochet! Be sure to check out all her links above! Marly is an amazing crochet expert, and we are so lucky to have this post on Moogly!
You can follow Moogly on Facebook, Twitter, Pinterest, Instagram, and Tumblr, and don’t forget to sign up for the free newsletter at the top of the page!


Leave a Reply