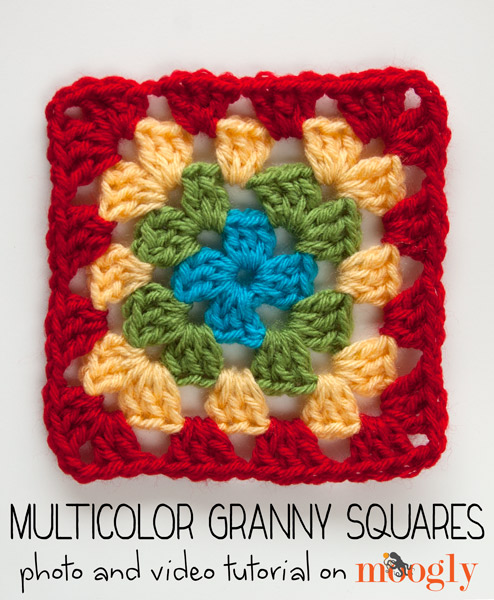
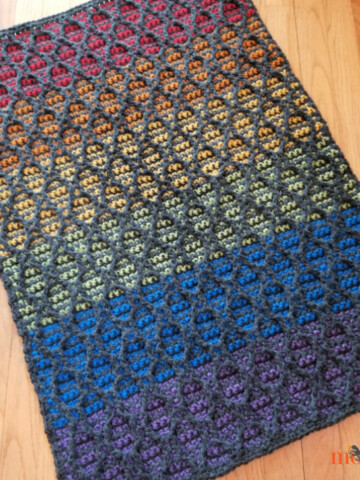
Recently I got a request from a Moogly reader who wanted to see a video for a multicolor granny square, the kind where each row is a new color! There are a few different ways to achieve this, but I want to take it to the next level, pull out all the stops, and share the way that I think gives the most seamless, perfect looking result. Here's how I crochet a traditional (improved!), multicolor granny square.
Before we start the new video tutorial, you should make sure to familiarize yourself with the following techniques (click each to go to the tutorial). We'll be combining these 4 techniques to get the best possible multicolor granny squares! Since there are step by step video and photo tutorials for these techniques already, I won't spend too much time on the "how to" of the individual pieces.
Traditional Granny Squares
Chainless Starting Double Crochet (CSDC)
Seamless finishing
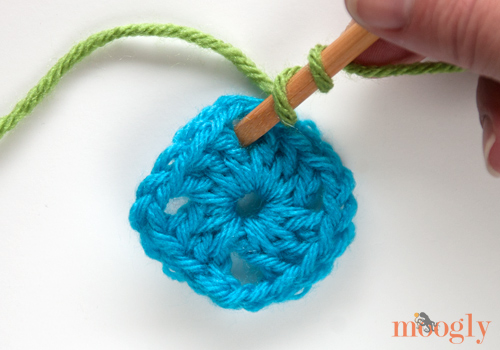
Standing Double Crochet (STDC)
Now to combine them into one project!
Traditional Multicolor Granny Squares Video Tutorial:
Traditional Multicolor Granny Squares Photo Tutorial & Written Instructions:
You can weave in your ends as you go, or leave them until the end, it's up to you! I've given instructions for the first few rows - enough to show you the general pattern. You can stop after a few rows and join many squares together, or you can just keep going and going and going to make one giant multicolor granny blanket!
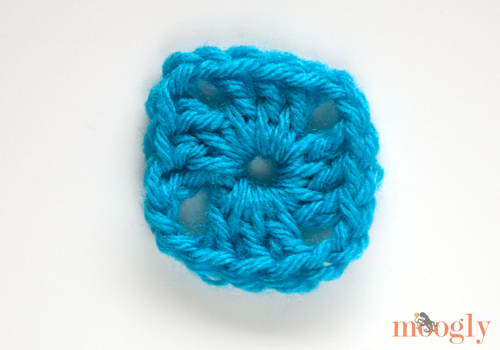
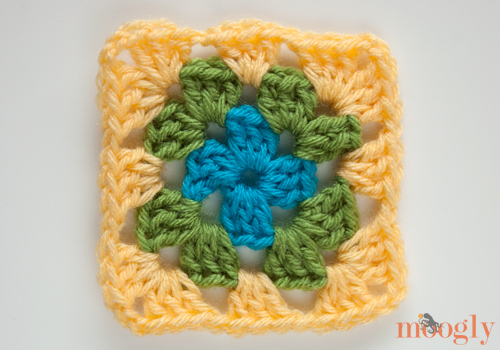
Round 1: With the first color, ch 4, join with a sl st to form a ring. CSDC, ch 2. [Dc 3 into ring, ch 2] 3 times. Dc 2 into ring. Break yarn and seamless join to top of CSDC.

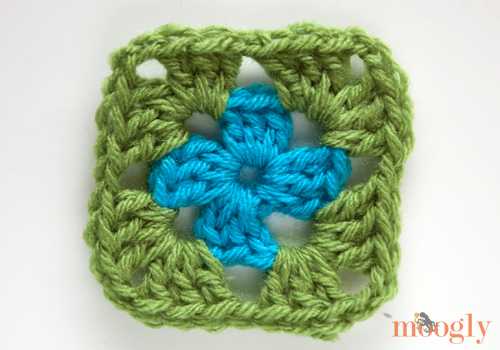
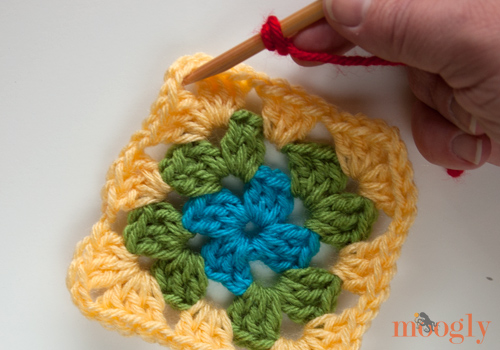
Round 2: With the next color, join with a STDC in one of the ch 2 sps of Round 1. [Dc 2, ch 2, dc 3] in the same ch sp. *Ch 1, sk 3 sts, [dc 3, ch 2, dc 3] into the next ch sp. Repeat from * twice, then ch 1. Break yarn and seamless join to top of STDC.
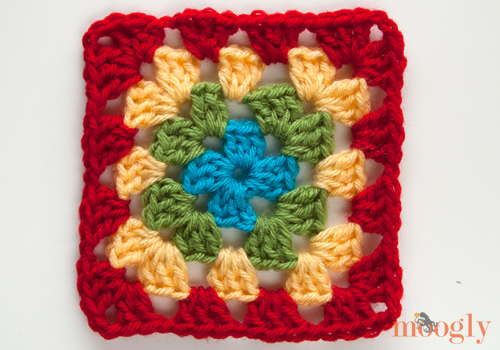
Round 3: With the next color, join with a STDC in one of the ch 2 sps of Round 2. [Dc 2, ch 2, dc 3] in the same ch sp. *Ch 1, sk 3 sts, work 3 dc into next ch sp, ch 1, sk 3 sts,^ [dc 3, ch 2, dc 3] into the next ch sp. Repeat from * twice, then from * to ^ again. Then ch 1. Break yarn and seamless join to top of STDC.

 Round 4: With the next color, join with a STDC in one of the ch 2 sps of Round 3. [Dc 2, ch 2, dc 3] in the same ch sp *[Ch 1, sk 3 sts, work 3 dc into next ch sp] twice. Ch 1, sk 3 sts,^ [dc 3, ch 2, dc 3] into the next ch sp. Repeat from * twice, then from * to ^ again. Then ch 1. Break yarn and seamless join to top of STDC.
And that's how I do it! It's a departure from the truly "traditional" way in that I use a few different tricks to spruce things up and make it as seamless as possible. You won't be able to tell where each round begins and ends - perfect! If you don't want to use the special stitches, chain 3 instead, and use a slip stitch to join each round. I hope you've enjoyed this multicolor granny square tutorial! If you've got a tutorial request of your own, let me know in the comments or send me an email at the address below!
Thanks for watching! Get Moogly on your favorite social media sites: Facebook, Twitter, G+, Pinterest and Tumblr, and sign up for the Newsletter so you don’t miss a thing! Written pattern instructions, video, and photos copyright Tamara Kelly 2013. Please link to share! TamaraKelly@mooglyblog.com

judy Mercado
This tutorial is so clear....I cannot wait to make a granny square
Tamara Kelly
😀 Glad you like it Judy!
LizzieK8
If you start in the corners and do only one grouping of 3 dc, work around and do the last group of dcs in the first corner, and then the invisible join, the join will be covered by the next corner grouping. As it is now, the seamless join does leave a bit of a tattle tail dent in the group of 3 dcs.
Tamara Kelly
That works too! 😀
Julie Corbisiero
Hi Tamara, I love everything about granny squares and they are so much fun to make and use in so many different projects! TFS!!
Julie
Lynda
I just found Moogly on Facebook and I am enjoying the patterns and tutorials. I just watched the 5 tutorials on granny squares and learned a few very valuable things that will make my projects better. You mention a tutorial that demonstrates how to weave in the cut ends. I would really like to watch this to get some tips. I wasn't able to find the tutorial - would you send me a link to it? Thank you!
Tamara Kelly
Hi Linda, so glad you found us! And I'm so glad you commented - for some reason that video wasn't showing up on the Video Tutorials page! Doh! It's in it's place at last. 😀 Here's a direct link to it: https://www.mooglyblog.com/weaving-in-ends-crochet-video-tutorial/
suju
I love the standing dc.i always used to ch and proceed..will try this right away! Thnks a lot.
Tamara Kelly
😀 Thank you suju! Glad you like it!
Melissa
Isnt there a mistakenin the first square and some of the following. One of the green corners only has five insteadmof six.
Tamara Kelly
If you look at the second picture for Round 2 you can see there are 6 dc in each corner. I think in the finished picture one just got tucked a bit behind when I made the next row. I hadn't blocked the square for the photos (taking them as I made the square) so it's just a little tucked in.
Marrie
wow .. Tamara .. usted es realmente creativo en temas de ganchillo! .. me encanta! ..........
Cathy
OH MY GOODNESS! Thank you for these tutorials. I have made so many grannies and shawls and these tips will help make the next ones look even better. This combined with the steam blocking for acrylic yarn I just tried will make prettier shawls for me to give away.
Lulu
Great tutorial, Thanks from Spain!
Angel
Tamara, I have been trying to do a chainless dc after beginning with a magic circle. Do one of your tutorials or videos show that?
Thanks again for all the work you do. Angel
wanda
I hope you can tell me what I am doing wrong. I start my granny square just like the tutorial but after the third row it starts to look like I either put to many stitches or change needle size. I would appreciate any advice you can offer
I chain 4 connect to first chain then start next row etc after that it makes what looks like a cup and I haven't figured out what I might be doing wrong
Tamara Kelly
It's hard to say for sure without being there with you, but my best guess for the cupping is that your chains are worked more tightly than your stitches - you might need to relax your chain stitches a bit.
Cathy - ScrappinCat!
This is a beautiful tutorial. Thank you so much for the inspiration and education. I'm excited to start a granny square project now.
Zahra
Thank you so much for this wonderful video tutorial, I have always wanted to learn to crochet but everything I got online was never clear, your tutorial is excellent keep up the gr8 job and keep on uploading more its really helpful.
God Bless
Tamara Kelly
Thank you so much Zahra! I really appreciate you saying so!
Vicki
how do you connect multicolored squares that are different colors on the outside together to make it look good.
Love this tutorial.
Thanks,
Vicki
Tamara Kelly
Hi Vicki! Thank you! The best tip for this, I think, is to make the last round of each square the same color, and then use that color to do the joining! There are dozens of joining methods, from seaming with a needle to fancy crochet lace joins - which you pick is a matter of personal preference and the look you are going for!