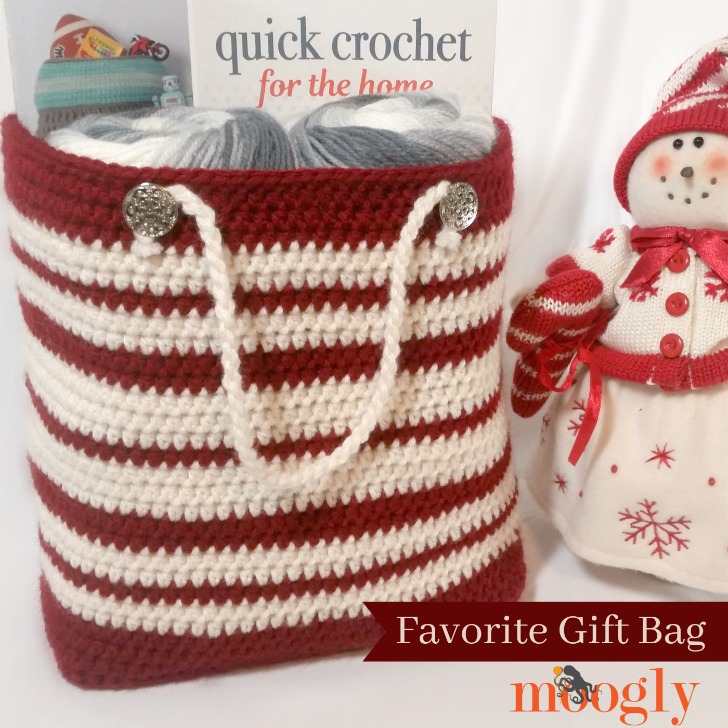
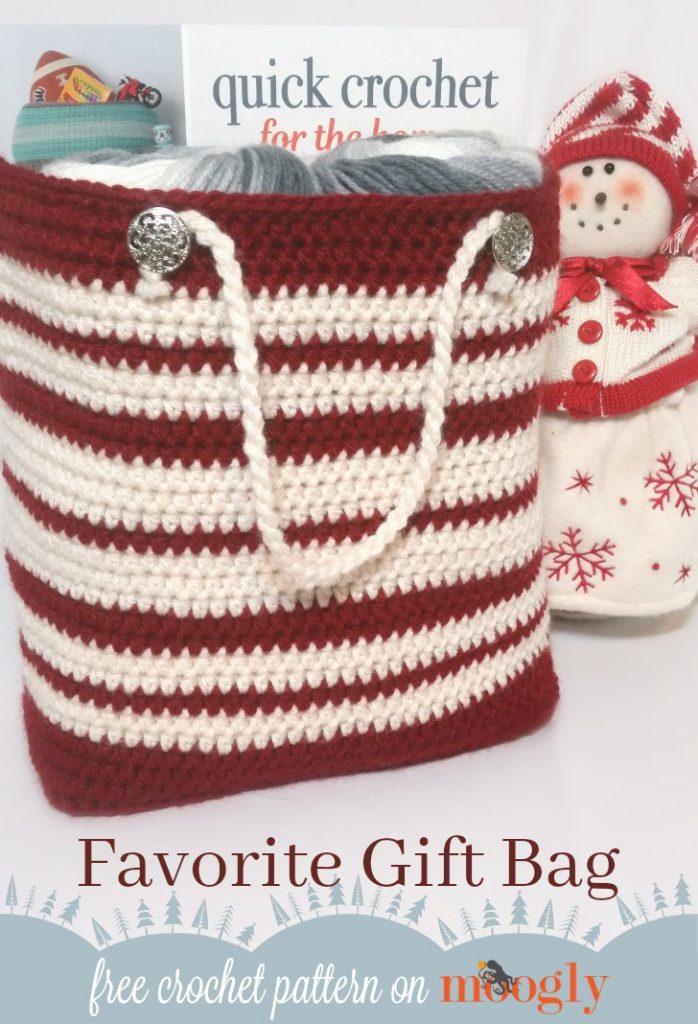
'Tis the season for gift giving! And all too often, that means waste - paper, gift bags, all the stuff we use to bring color to the festivities! Well, going green doesn't have to mean boring - or not being able to present presents in a beautiful way. Introducing a crochet bag that becomes part of the gift - one that can be used for years and years to come - the free Favorite Gift Bag crochet pattern!
Disclaimer: This post includes affiliate links.
Prefer an ad-free PDF? You've got options!


Prefer the free blog version? Keep scrolling!
Customize and Pass It Down
I made the Favorite Gift Bag in just 2 colors, for a classic, unisex look that's ready to give anyone from the office Secret Santa to your new nephew. The one part most likely to wear out - the handles - are just slipped over the buttons, making them easy to replace as needed, so you can keep passing this crochet gift bag around the family for a long long time. It's a great stashbuster too - how colorful will your gift bag be?
Favorite Gift Bag
Add this pattern to your Ravelry Queue and Favorites
US - H, 5.0mm hook - Furls
235 yds Lion Brand Vanna's Choice (Aran/yarn symbol “4”/UK: 10 ply; 145 yds; 3oz)
Color A: Cranberry - 140 yds (1 ball)
Color B: Fisherman - 95 yds (1 ball)
4 Buttons - ¾"/19mm shown (LaMode Style 24534)
Optional: Clover Handy Thread Twister
Optional: Plastic Canvas (cut to 3-¾" x 7-⅞")
Gauge: 16 sts x 12 rows = 4" in hdc
Finished Size: 9" tall (excluding handles), 8.5" wide, 4" deep
Helpful Links and Video Tutorials:
changing colors for striped patterns
SPECIAL STITCH: Shallow bphdc - worked as for a normal back post hdc, but only inserting the hook under the top 2 loops of each st, rather than going around the post of the stitch itself. Please see the helpful video tutorial linked above.
NOTES: This pattern begins with Rows, and switches to Rounds, but Row/Round count is maintained. Unused yarn is carried along the inside of the bag to reduce ends left to weave in, but you can cut after each color change if desired.
FAVORITE GIFT BAG INSTRUCTIONS:
Row 1: With Color A, ch 31, skip the ch closest to the hook, hdc in remaining chs; turn. (30 sts)
Row 2 - 10: Ch 1, hdc across; turn. (30 sts)
Rnd 11: Ch 1, hdc across to last st, 3 hdc in last st, turn work 90 degrees, hdc 10 across side of work, turn work 90 degrees, 3 hdc in 1st st of foundation ch, hdc across to last st of foundation ch, 3 hdc in last st of foundation chain, turn work 90 degrees, hdc 10 across last side of work, 2 hdc in same st as 1st hdc of the round; join. (88 sts)
Rnd 12: Ch 1, shallow bphdc around; join. (88 sts)
Rnds 13 - 15: Ch 1, hdc in each st around; join. (88 sts)
Rnds 16 and 17: Repeat Round 13 with Color B.
Rnd 18: Repeat Round 13 with Color A.
Rnds 19 and 20: Repeat Round 13 with Color B.
Rnds 21 and 22: Repeat Round 13 with Color A.
Rnds 23 - 25: Repeat Round 13 with Color B.
Rnd 26: Repeat Round 13 with Color A.
Rnds 27 - 29: Repeat Round 13 with Color B.
Rnds 30 and 31: Repeat Round 13 with Color A.
Rnds 32 and 33: Repeat Round 13 with Color B.
Rnd 34: Repeat Round 13 with Color A.
Rnds 35 and 36: Repeat Round 13 with Color B, break Color B.
Rnds 37 - 39: Repeat Round 13 with Color A.
Rnd 40: Continuing with Color A, ch 1, sc in each st around; join and break Color A. (88 sts)
Finishing:
- Cut plastic canvas if desired and insert into bottom of bag.
- Sew buttons to bag as shown in photo above, 2 on each side.
- Use Clover Handy Thread Twister and Color B to create handles of desired length (instructions in package). Alternatively, chain handles to desired length with Color B. Knot and cut each end to create tiny tassels.
- Slip ends of handles over buttons.
And that's the Favorite Gift Bag! It's in Christmas colors here, but you can mix it up and make gift bags for birthdays, other holidays - whatever you like! I hope you enjoy this free crochet pattern!
Oh and if you're interested in the fantastic crochet book shown in the bag, click here! 😉
The Fine Print
Written pattern copyright Tamara Kelly 2016, all rights reserved. Please do not reprint or repost this pattern, but please do link to this page to share this pattern with others. If you wish to make items for sale from this pattern, or translate it to another language, please visit the About page for details. Thank you to Lion Brand Yarn for providing the yarn for this pattern!


Jennifer says
This is super-cute, I love packaging that is part of the gift! Thank you for sharing this pattern!
Tamara Kelly says
😀 Thank you!
Becki says
Cute bag! I can't wait to make one. Thank you for another sweet pattern!
Tamara Kelly says
Thank you! 😀
Debi says
Beautiful!!!!! I've been looking for a bag like this that would show off bold colors and be quick and easy to make. Can hardly wait to make this. Thank you for sharing.
Tamara Kelly says
😀 Thank you, I'm so glad you like it!
Karen says
Had to make it when I saw it.
Tamara Kelly says
😀 I'm glad you like it!
Shirley Bartels says
If I wanted to make the handles part of the bag (crocheted at the top similar to your other bags/totes) could you help me with the spacing? Thanks!
Shirley says
If I wanted to make the handles part of the bag (crocheted at the top similar to your other bags/totes) could you help me with the spacing? Thanks!s
Tamara Kelly says
Hi Shirley! I would recommend laying it out with stitch markers, like this: click here
Rachel says
Should the seam where the next row is started each time go straight up the bag? Mine is not, it's kind of wrapping around the bag. My stitch count each row is correct though. Just not sure if I'm doing something wrong...
Tamara Kelly says
Seams often have a slant, it's okay. 🙂
Alice FalKneR says
Thanks for the crocheted bag , know l will love to make it
Tamara Kelly says
Thank you! 😀
Sara says
If I want to make this bag bigger, what multiples do I use?
Tamara Kelly says
There is no stitch multiple with this bag to worry about. 🙂 Just crochet the first row to be as wide as you want the bag to be, and crochet as many rows as you want it to be deep, then go to the instructions for Round 11, working the same number of stitches as you had rows along the sides.
SAndid says
Love this pattern but am having trouble with th stitch count on row 11. Hope you will help me out. I come up with. 29+3+10+3+29+3+10+2=89? I'm sure once I get past row 11 I will love this bag. Thank you
Tamara Kelly says
Hi SAndid! Here's my breakdown:
hdc across to last st = 29 sts
+ 3 hdc in last st = 32 sts
+ hdc 10 across side of work = 42 sts
+ 3 hdc in 1st st of foundation ch = 45 sts
+ hdc across to last st of foundation ch (28 sts - note that the last st of foundation ch is not worked into in this step) = 73 sts
+ 3 hdc in last st of foundation chain = 76 sts
+ hdc 10 across last side of work = 86
+ 2 hdc in same st as 1st hdc of the round = 88 sts
Myra says
Love this pattern but one question in round 13-15 it says ch 1, 1 hdc in each s around (88) does this mean you do 3 rows? Thanks love the bag. Myra
Tamara Kelly says
Hi Myra! Yes, Rows 13, 14, and 15 are all the same. 🙂
Jackolyn E Hopkey says
Hi Tamara! It's almost six years since the last comments were published, so I'm hoping this is still being monitored. I'm making this bag for my granddaughter to carry around her dolls, (Barbies, etc.). Somehow, I ended up with more than the 88 stitches called for in the pattern, but I'm okay with that as it will just make the bag wider. What I'm wondering, after the row with the bphdc stitches, at row 15, it occurred to me that I'm crocheting from the inside of the bag to the outside. Is that right, or should I now try to reverse my stitches so that I am crocheting the stitches on the outside?
Tamara Kelly says
Hi Jackolyn! You are working from the Right Side throughout this pattern - the back post sts are to create a "fold" for the bottom of the basket, much like working in the blo. 🙂
Jackolyn Hopkey says
Thank you! I don’t know how I got turned around but I was able to reverse my work and since my wrong way was in a multi-color it isn’t noticeable. I am sure my granddaughter will love this bag!