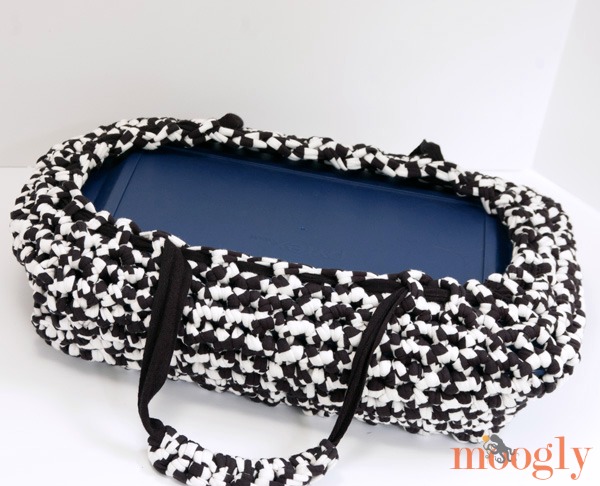
So you've been invited to a potluck dinner, pitch in, or barbecue and you need to decide what to bring - your grandma's best casserole recipe, or maybe that amazing new cake recipe you saw on Pinterest. Or maybe a gorgeous lasagna! Whatever it is, make sure it gets there safe and in style - with the Chic Crochet Casserole and Cake Carrier!

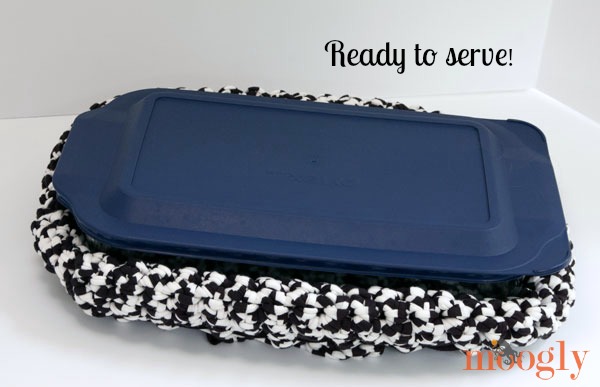
The Chic Crochet Casserole and Cake Carrier is the perfect accessory for your dish to pass - no matter what's inside! It fits rectangular pans (both metal and glass) in several sizes, adjusting to fit with drawstring handles. It keeps your legs comfy as it rides to your destination in your lap, and the handles don't just keep the lid on tight - they're also a great way to carry your dish safely inside! Fold the edges over when it's time to serve and it makes a great trivet too, protecting the host's table.
I made up the Chic Crochet Casserole and Cake Carrier using Lion Brand Fettuccini, which may contain fibers other than cotton. So when you make your own, make sure to let the dish cool a little before you put it in, or line the carrier with a dish towel for extra protection. Or make your own tshirt or fabric sheet yarn that's 100% cotton!
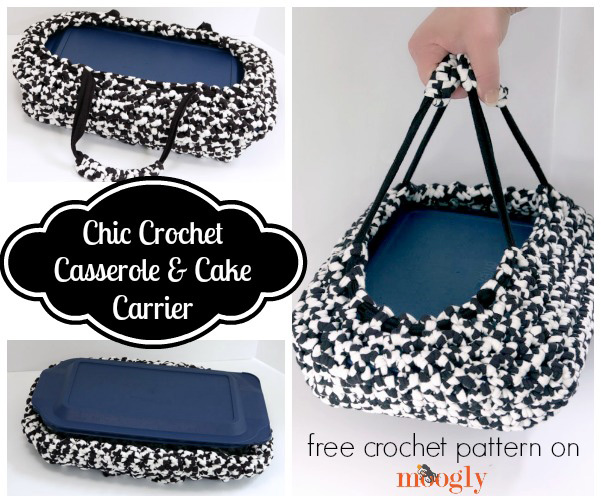
Chic Crochet Casserole and Cake Carrier
Click here to add this pattern to your Ravelry Queue and Favorites
- US - Q/19, 15.00 mm hook
- 2 skeins Lion Brand Fettuccini (approximately 110 yds/100 meters)
This yarn is discontinued. The recommended substitution: T-Shirt Jersey by Big Twist at JOANN - 9 feet of 1" wide twill tape or ribbon
- thread and sewing needle
- Recommended: Susan Bates Finishing Needles (size large, Amazon affiliate link)
- Gauge: 5 sts x 6 rows = 4 inches/10 cm in sc
INSTRUCTIONS:
Row 1: Ch 12, sc in the 2nd st from the hook and each ch to end; turn. (11 sts)
Row 2 - 17: Ch 1, sc in each st across; turn. (11 sts)
Round 18: (NOTE: You'll crochet around Rows 1-17 here, as if it were a tiny blanket.) Ch 1, sc across Row 17, sc 17 sts along side, sc 11 sts across foundation chain, sc 17 sts along last side; join with sl st to first sc of round, do not turn. (56 sts)
Round 19 - 24: Ch 1, sc in each st around; join with sl st to first sc of round, do not turn. (56 sts) At end of Round 24, break yarn and finish off; weave in ends.
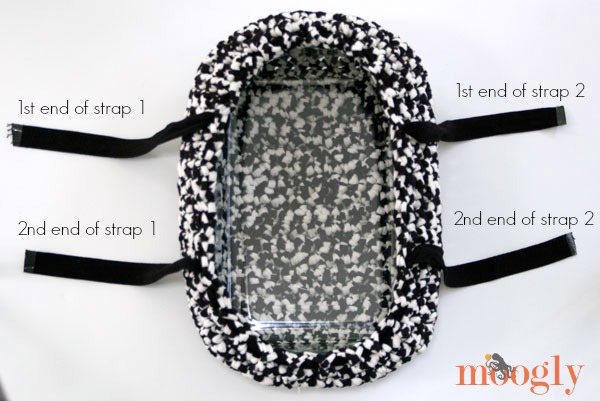
Cut the ribbon or twill tape into two equal lengths. (TIP: Tape the ends of the twill tape to prevent them unraveling during weaving.) Weave them between the sts of Round 24, so that the ends come out on the same side, several sts apart, as shown in the photo below.
Sew the ends of each piece of ribbon together using matching thread. I sewed them in 3 places for extra security. Then, spin the ribbons through the top row so that the sewn portions are well hidden by the crochet stitches.
Handles: Sc 10 sts around each ribbon where you want the handle to be. (see photos)

And that's all there is to making the Chic Casserole and Cake Carrier! Whether it's a carry in, covered dish, hot dish, dish to pass, bring a plate, or whatever you call it... you'll be all set with this free crochet pattern! Thanks so much for reading Moogly!
Written pattern and photos copyright Tamara Kelly 2014. You are welcome to sell items made from this pattern, please see the About page for details. Be sure to follow Moogly on your favorite social media sites to stay up to date with all the exciting things happening in the world of crochet! Thank you to Lion Brand Yarn for sponsoring the yarn for this pattern.


Colleen D. says
I can't wait to try this but I think I'd thread the handles as one long piece going around the short ends and skipping stitches on the long sides.
Tamara Kelly says
I can't quite picture what you mean, but if it works then I'd say go for it! 😀
Karren says
I agree with Colleen. I'd weave the handles around the top!
Tamara Kelly says
They are woven around the top! 🙂 Through the last row of stitches.
Corie says
I love this pattern & I think I've found what some people will be getting for Christmas gifts!
But I think what Colleen means about the handles is instead of cutting the ribbon/tape into 2 pieces (and having to sew 2 sets of ends back together), leave the ribbon in one long piece and thread thru the same holes as shown (resulting in having to only sew one set of ends together).
I would even be tempted to knot the ends together and stitch the handle over. If the handle is thick enough, you would never know it's there.
Tamara Kelly says
Thank you! 🙂
Rena says
Like sweat pants an it shrinks around the top an holds the lid down
Tamara Kelly says
😀 Yes!
Ashley Frank says
Thats what I was thinking colleen!
Renee Kleinhans says
thank you so much for pattern. very practical and helpful.
Tamara Kelly says
🙂 Thank you Renee!
Glenda says
I think Colleen may mean she would swap the way the handle is threaded -- so the handle goes across the width of the pan, not the length with the in and out weaving of the ribbon on the long sides of the carrier. That might make it balance a little better when carrying it, do you think?
Tamara Kelly says
Ah, gotcha! It might, physics wasn't a good class for me lol. I think this balances well, but if someone tries it the other way I'd love to hear what they think!
Laurie says
Wonderful! I love how you ran the handle tape through twice to counteract any slippage when using. As soon as I find coordinating t-shirts, this will be on my hook. Thank you for sharing it.
Tamara Kelly says
😀 Thank you Laurie!
karen says
Thank you for the pattern! But I'm not understanding the handles, can you give more specific details about where you start with the ribbon and the steps thereafter so that they end up on the same side without going all the way around please. Thanks so much!
Tamara Kelly says
Hi Karen! Thank you! So if you look at the photo, the first end of strap 1 goes in at that point, then goes up and around the other side, coming out where shown. The 2nd strap goes in where shown, and goes up and to the left and around and across the bottom, coming out where shown. So they do overlap! Does that help?
JULIE says
I am not familiar with the yarn that you used What weight is it? Did you use one strand or two together?
JULIE says
Also I'm the last picture, is the blue that we see the lid to the cass er role dish you are using?
Tamara Kelly says
Yes, that's the lid. 🙂
Tamara Kelly says
It's t-shirt yarn, so it's super bulky. It is single stranded. 🙂
Misty says
Should rows 1-17 fit the bottom of a 9x13?
Tamara Kelly says
Yes! 🙂
Michelle B says
I noticed that a lot of people used acrylic yarn - is that ok in a project that might need to withstand a bit of heat? Assuming that there are times that, running late, I pull something from the oven just before I have to leave. If the acrylic melts, would it melt right through or make it weaker?
Going to be making this as soon as I choose a yarn! Great idea!
Tamara Kelly says
I would definitely recommend sticking to cotton or 100% wool - and avoiding acrylic!
Zoe Zefo says
At Lionbrand dot com, it says Fettucini yarn has been discontinued.
Tamara Kelly says
Yes, I would recommend Fast-Track as a substitute! 🙂