Okay, so the Tasty Turkey Basket probably tastes a little... yarny. But you can fill it with tasty things for your Thanksgiving table! Or pretty things. Or whatever you like - maybe the things you're thankful for this time of year.
 Disclaimer: This post includes affiliate links.

Tasty Turkey Basket
Add this pattern to your Ravelry Queue and Favorites
- US - I, 5.5mm hook (Furls Fiberarts recommended)
- US – K, 6.5mm hook (Clover Amour Jumbo Hook recommended)
- 625 yds Bulky yarn (original yarn is discontinued)
Color A: Coffee - 450 yds
Color B: Pumpkin - 65 yds
Color C: Black - 10 yds
Color D: Honey - 65 yds
Color E: Cranberry - 5 yds
Color F: Avocado - 30 yds - Gauge: 10 sts x 8 rows = 4" in hdc with yarn held doubled and larger hook
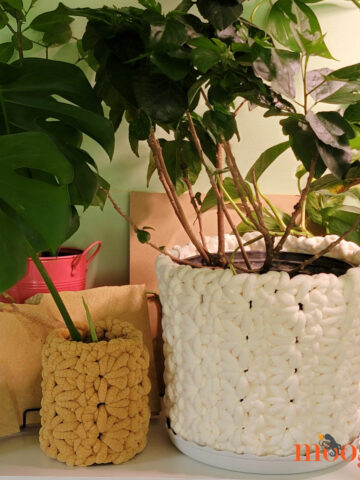
- Finished Size: Basket portion = 10" long x 6" wide x 5" high
- Helpful video tutorials: Bag Bottoms (rows to rounds); Hdc Decreases; Magic Circle
NOTE: Some parts are made with the yarn held doubled and the larger hook, others are made with the yarn held singly and the smaller hook - this is listed at the beginning of that part of the pattern.
BASKET INSTRUCTIONS: Make 1, with Color A, yarn held doubled, larger hook
Row 1: Ch 24, skip the ch closest to the hook, hdc in each of the remaining chs; turn. (23 sts)
Row 2 – 12: Ch 1, hdc 23; turn. (23 sts)
Round 13: Ch 1, hdc 23, turn work 90°, hdc 14 along sides of previous rows, turn work 90°, hdc 23 along foundation chain, turn work 90°, hdc 14 along sides of previous rows; join to first hdc of round with a sl st. (74 sts)
Round 14 – 22: Ch 1, hdc in each st around; join with a sl st. (74 sts) After Round 22, break yarn and finish off.
HEAD INSTRUCTIONS: Make 1, with Color A, yarn held doubled, larger hook
Row 1: Ch 10, skip the ch closest to the hook, hdc in each of the remaining chs; turn. (9 sts)
Row 2 - 4: Ch 1, hdc 9; turn. (9 sts)
Row 5: Ch 1, hdc2tog, hdc 5, hdc2tog; turn. (7 sts)
Row 6 - 7: Ch 2, hdc 7; turn. (7 sts)
Row 8: Ch 1, hdc2tog, hdc 3, hdc2tog; turn. (5 sts)
Row 9 - 10: Ch 1, hdc 5; turn. (5 sts)
Row 11: Ch 1, 2 hdc in the 1st st, hdc 3, 2 hdc in the last st; turn. (7 sts)
Row 12 - 13: Ch 1, hdc 7; turn. (7 sts)
Row 14: Ch 1, hdc2tog, hdc 3, hdc2tog; turn. (5 sts)
Row 15: Ch 1, hdc2tog, hdc, hdc2tog; turn. (3 sts)
Edge: Ch 1, sc evenly all around head; break yarn leaving a long tail for sewing.
BEAK INSTRUCTIONS: Make 1, with Color B, yarn held singly, smaller hook
Row 1: Ch 6, skip the ch closest to the hook, sc in each remaining ch; turn. (5 sts)
Row 2: Ch 1, sc2tog, sc in the next st, sc2tog; turn. (3 sts)
Row 3: Ch 1, sc3tog; break yarn leaving long tail for sewing. (1 st)
Sew beak to head as shown.
EYES INSTRUCTIONS: Make 2, with Color C, yarn held singly, smaller hook
Round 1: Starting with a magic circle, hdc 10 in the ring; join with a sl st and break yarn, leaving long tail for sewing. (10 sts)
Add "twinkle" with yarn needle and a small amount of Color D.
Sew eyes to head as shown.
WATTLE INSTRUCTIONS: Make 1, with Color E, yarn held single, smaller hook
Row 1: Ch 9, skip the 2 chs closest to the hook, dc in next 3 chs, hdc in next 2 chs, sc in next ch, sl st in last ch; break yarn and finish off, leaving a long tail for sewing.
Sew wattle to head as shown.

TAIL FEATHER INSTRUCTIONS: All made with yarn held doubled, larger hook
- Make 1 with Color F
- Make 2 with Color B
- Make 2 with Color D
Row 1: Ch 2, skip the ch closest to the hook, 3 dc in last ch; turn. (3 sts)
Row 2: Ch 2, 2 dc in the 1st st, dc in the next st, 2 dc in the last st; turn. (5 sts)
Row 3 - 7: Ch 2, dc in each st across; turn. (5 sts)
Row 8: Ch 2, dc2tog, dc in next st, dc2tog; turn. (3 sts)
Row 9: Ch 2, dc3tog; turn. (1 st)
Edge: Ch 1, sc evenly all around feather; break yarn leaving a long tail to sew it to the basket with.
ASSEMBLY: After sewing the beak, eyes, and wattle to the head, sew the head and tail feathers to the basket.
Happy Thanksgiving everyone! I hope you all have a wonderful holiday with people you love.
Written pattern copyright Tamara Kelly 2015, all rights reserved. Please do not reprint or repost this pattern, but please do link to this page to share this pattern with others. To print this pattern for personal use, please use the green Print Friendly button at the bottom of the pattern. If you wish to make items for sale from this pattern, or translate it to another language, please visit the About page for details. Thank you to Lion Brand Yarn for providing the yarn for this pattern!


Patricia Koziel
I love to crochet and always am looking for new ideas that are not really hard. I am a beginner.
I have also just learned to knit and pearl. That is a lot harder than crocheting.
I really want to make the above turkey for this Thanksgiving. Thank you.
Tamara Kelly
🙂 Thank you Patricia, I hope you enjoy it!
Dee2
Thanks so much for this pattern. I will forever be a novice crocheter. My first attempts at making a bowl was with your bird's nest bowl patterns. I really enjoyed making the basket part of the turkey basket as it was different and uses hdc stitches. It shaped beautifully! My basket is a bit smaller, and I even used the inside 3rd loop method! I like how both the interior and exterior of the basket look. I made a feather, but may opt to use several real turkey feathers I have instead. 🙂 thanks for being so giving
Tamara Kelly
😀 Thank you Dee! Real feathers would be fantastic!
Rene Haley
I have a question regarding the beak. Does it lay flat on the head or stick out from the head?
Tamara Kelly
This beak lays flat. 🙂
REne Haley
Thanks so much for the quick response! Can't wait to start on the basket.