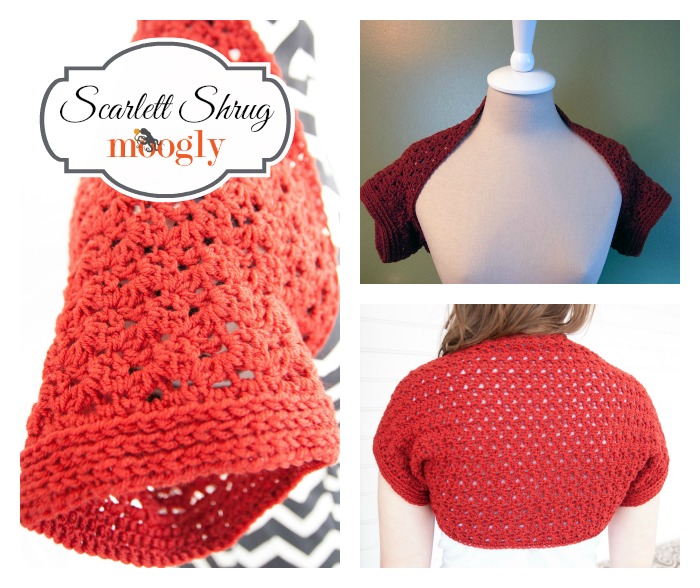
I've always wanted to design a shrug - they're simple in concept and easy to make, but the little details can really make them stand out! This pattern has been months in the design - but takes only a few evenings to make! Introducing the Scarlett Shrug!
 Disclaimer: This post includes affiliate links.

The Scarlett Shrug features a simple stitch pattern that I came up with while playing with stitch dictionary - mine is more simplified and much easier to make, and still gives great texture! And because I know too well the pain of sizing issues, it goes all the way from XS to 5X. I would say when in doubt, go with the larger size. You can always seem up more of the front for longer sleeves and a snugger fit if needed!
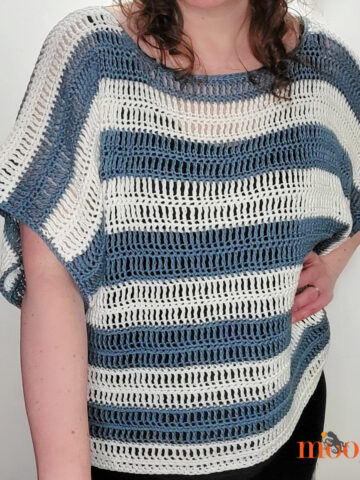
The Scarlett Shrug is easy to make - even for beginners! It's a simple rectangle, seamed at the sides and then edged at the sleeves. And in LB Collection Superwash Merino in Cayenne it's so delicious - and spicy! Definitely a "scarlet" shrug any lady can flaunt!
![]()
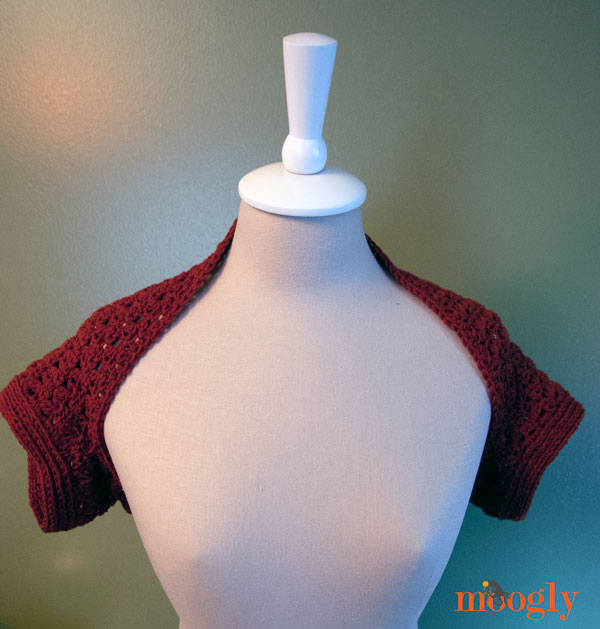
Alas, the seasonal ick got ahold of my model, so all I was able to get of the shrug being worn by an actual human was the photo above. I hope to add better photos when we're in better health! But I didn't want to make you wait either... and so... Also, just to note, the color of this gorgeous yarn is closer to the deep red shown in the indoor photo. Again, better photos when our health returns...
Scarlett Shrug
Click here to add this pattern to your Ravelry Queue and Favorites
- US - I, 5.5mm hook (Furls Fiberarts Cocobolo used)
- 330 - 820 yds DK weight yarn: Lion Brand LB Collection Superwash Merino in Cayenne shown (100 % Merino; 306 yds/280 m); 100 g/ 3.53 oz)
- yarn needle (Susan Bates Finishing needles used)
- Click on the linked stitches within the pattern to go to their video tutorials, or go to the Crochet Abbreviations page for other stitch info
- Sizes include (bust measurement): XS (28-30"); S (32-24"); M (36-38"); L (40-42"); XL (44-46"); 2X (48-50); 3X (52-54); 4X (56-58"); 5X (60-62")
- Gauge: 18 sts (6 repeats) x 8 rows = 4" in pattern
Because there are so many sizes available, you can use the green Print Friendly button at the bottom of this pattern to print out the pattern, and then circle the numbers that apply to your chosen size. The stitch counts are written in the pattern as XS (S, M, L, XL, 2X, 3X, 4X, 5X).
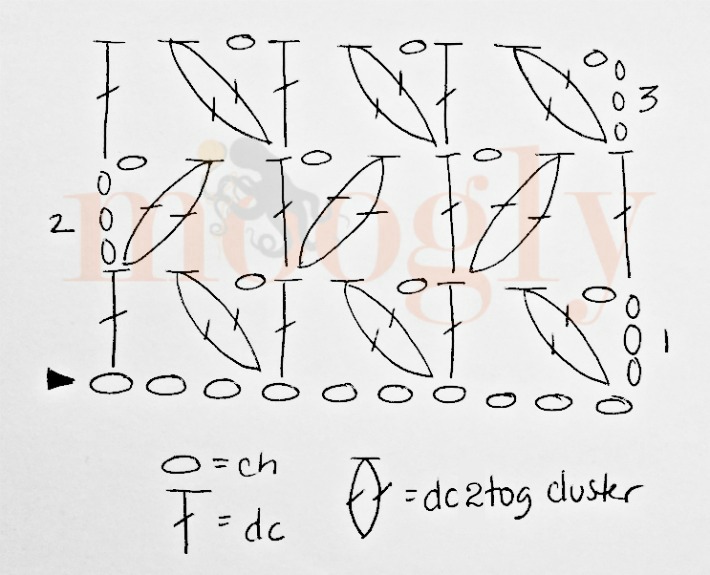
Special Stitch: dc cluster - yo, insert hook in indicated stitch, yo and pull up a loop, yo and pull through 2 loops (2 loops remain on hook), yo, insert hook in same stitch, yo and pull up a loop, yo and pull through 2 loops (3 loops remain on hook), yo and pull through all 3 loops.
Row 1: Ch 83 (89, 98, 104, 107, 113, 116, 122, 125), dc cluster in 5th ch from hook (the 4 skipped chs count as a dc and ch 1), skip 2 chs, *(dc, ch 1, dc cluster) in next ch, skip 2 chs; repeat from * until 1 ch remains, dc in last chain, turn.
Row 2: Ch 4 (count as a dc and ch 1), dc cluster in 1st st, skip next st and ch sp, *(dc, ch 1, dc cluster) in next st, skip next st and ch sp; repeat from * until end of row, finishing with a dc in the top of the 3rd ch skipped at the beginning of Row 1.
Row 3: Ch 4 (count as a dc and ch 1), dc cluster in 1st st, skip next st and ch sp, *(dc, ch 1, dc cluster) in next st, skip next st and ch sp; repeat from * until end of row, finishing with a dc in the top of the 3rd ch.
Repeat Row 3 until you have 28 (30, 32, 34, 36, 38, 40, 42, 44) rows, or until desired back depth measurement is reached. Break yarn and finish off, leaving a 12" tail.
Assembly:
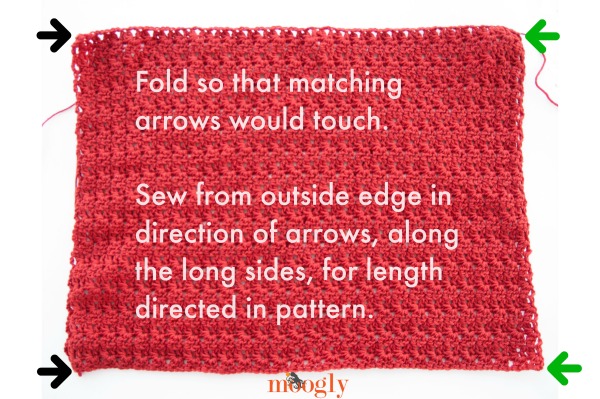
Fold the edges of the rectangle as shown above, to create the armholes. Sew a seam on each side (use the tail on one side, and join new yarn on the other side) - each seam should be 1 (1.5, 2, 2.5, 3, 3, 3.5, 3.5, 4) inches long. Try the shrug on, and see if you need to adjust the seams for a custom fit! I used the mattress stitch, but you could whip stitch them if preferred.
Sleeve Edging:
(Note - I found it worked best for Round 1 to work 2 hdc around each dc or ch 3, so that the stitch count would be the number of rows times 2 - so 56 (60, 64, etc) sts. However, exact stitch count here isn't important, so you can work it however you like for best results.)
Round 1: Join to sleeve opening in any stitch, from right side of shrug. Ch 1, hdc evenly around opening, join with a sl st in 1st st.
Round 2 - 3: Ch 1, hdc in the 3rd loop of each st around, join with a sl st in 1st st.
Round 4: Ch 2, sc in 3rd loop of each st around, join and finish off. Repeat for other sleeve opening.
![]()
Body/Neck Edging (1 round):
Join to opening in any stitch, from right side of shrug. Ch 1, hdc evenly around opening, join with a sl st in 1st st. (Again, final stitch count here doesn't matter.)
And that's that! The Scarlett Shrug is a very simple garment to make, but I just love that stitch pattern! It's perfect all dressed up with a sleeveless frock, or with a tshirt and jeans! I'm already thinking of more items I want to make with this stitch pattern too, so I'm sure you can look forward to that. I hope you enjoy making this pattern, and wearing it as well!

Written pattern copyright Tamara Kelly 2014. Please do not reprint or repost this pattern, but please do link to this page to share this pattern with others. If you wish to make items for sale from this pattern, please visit the About page for details. To print this pattern for personal use, please use the Print Friendly button below –tutorial HERE. Thank you to Lion Brand Yarn for providing the yarn for this pattern!

Jennissa
Hey i found your Chubby Teddy Bear Rattle on pintrest and i bought a rattle insert to make it. I cant find it on your page.
Tamara Kelly
Hi Jennissa! That's not my pattern, I'm afraid. I think you'll find it here: http://isitatoy.blogspot.fr/2012/10/teddy-rattle-free-pattern.html 🙂
Shannon
Thank you so much for creating this free pattern! I was on the search for a cute shrug the same day you posted this! I am almost done with my first one and am loving it!
Tamara Kelly
😀 Thank you so much Shannon! I'm so glad to hear it!
Tamra
What would be the best way to figure out how long to make the beginning chain if one wanted to make this a 3/4 length or full length sleeve shrug?
Looking forward to making this!
Thanks!
Tamara Kelly
Hi Tamra! You could go two different ways. The simplest would be to add sleeves like you add the sleeve trim - just crochet in the stitch pattern instead of the trim pattern, and stop when you have the sleeve length you want. The other option would be to make the triangle as wide as the measurement all the way from the end of one arm (where you want the sleeve to end) to the end of the other arm. then seam as before, but that much longer.
elaine
Thank you for this great pattern I had been looking for something that would cover my sleeveless dresses . I really appreciate your having the large sizes. I'm large and I've always been afraid to try clothes. I want to make the sleeves longer I saw your other comments and will use them
I would really like to thank you for all your free patterns. I love crocheting and make many different things. Your patterns are such a great help. Thank you
Tamara Kelly
♥ Thank you so much Elaine!
Oona linnett
Hi Tamara, I love the pattern! I have a question about the amount of yarn needed. On the Ravelry page it says you need 300-675 yards. But when you click through to the pattern it says you need 330-820. Anyway, I have a total of 316 yards of yarn (dk) and I want to know if it's enough for the small size? Thanks 🙂
Tamara Kelly
Ah, I refigured and forgot to update the Ravelry page. Thanks for the reminder! It might be enough, a lot depends on the yarn itself, and how it works up. I got 300 yds with one yarn, 330 with another - and figure it's better to have too much than too little. If you're running short, you can always just leave off one row of edging on the sleeves. 🙂
Oona linnett
Thanks Tamara 🙂
Dara
So I was wondering if I needed to use a slightly bigger hook since I have worsted weight yarn (red heart soft). Still a bit of a beginner and wondered if I would need to adjust for that.
Tamara Kelly
Hi Dara! With thicker yarn, you'll probably want a bigger hook, but that said, a lot depends on personal tension! You might find you like the fabric you get with the same hook, or even smaller. There's only one way to find out - play with it and see what it looks like! 🙂
Dara
Thanks! I tend to crochet a bit tight so I'll play with it and see how it works. Thanks!
Michelle
Do you know what the finished dimensions for the XL are before the sleeves are sewn? I’m over gauge, but it still seems kind of small. I’ve never made a shrug before.
Brittany
The instructions say to make the Dc Cluster like you would a Double crochet 2 together but the diagram says DC*3*Tog. Which is correct, the Dc2 or the Dc3?
Tamara Kelly
That was a misprint, sorry about that! It should be dc2tog
julia
Hi Tamara, the instructions of the dc cluster are not exactly the same that dc2tog, right? Looks to me there's an extra yo and pull through 1 loop - could you please comment? Thanks a lot!
Tamara Kelly
A dc cluster is just like a dc2tog, but all in one stitch rather than over 2 sts. The rest is exactly the same. 🙂
julia
Great! thanks 😀
sradha
Hi
I made a similar bolero sometime back from a pattern from lion brand yarn website but the end product looked slouchy in the back at the armpits. It is right where you join the top portion of the rectangle to the bottom to create armholes. I was wondering if you have any solution to avoid that and give a smoother look.
Thank you,
Sradha
Tamara Kelly
Hello Sradha! The best solution would be set in sleeves with sleeve cap shaping. In other words, all the pieces would need to sized and shaped, and the sleeves would be set in with seams.
Carr
Are shrugs still in style?
Joanne Hudes
Love this shrug. Than you for the pattern.
Tamara Kelly
Thank you so much! 🙂