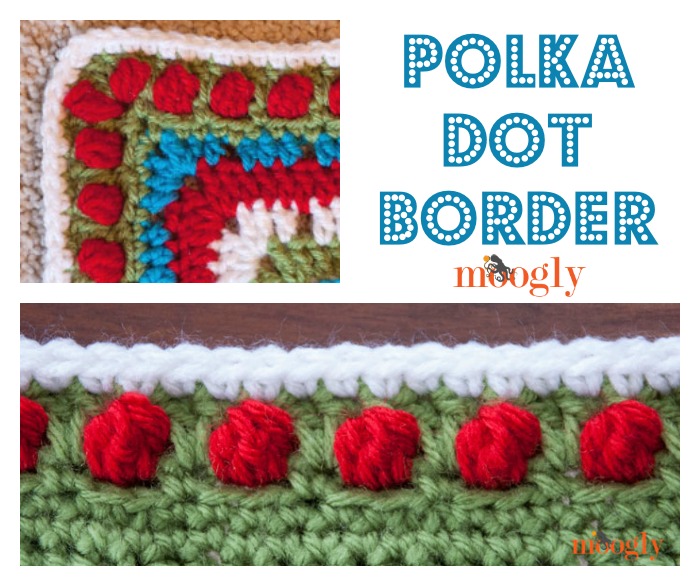
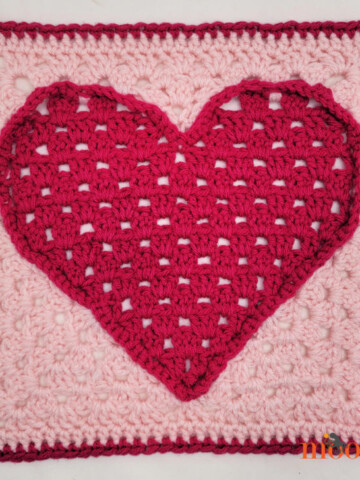
The Polka Dot Border is a nice, solid edging pattern that I came up with while finishing up my afghan for the Moogly 2014 Afghan Crochet-a-long! It works really well as a final round after joining squares with the Tight Braid Join, which is how I used it. However, with one extra round, it should work as an attractive crochet edging pattern on any blanket!
 Disclaimer: This post includes affiliate links.

Polka Dot Border
Add this pattern to your Ravelry Queue and Favorites
Use the yarn and hook needed to match your blanket. The amount of yarn needed with vary depending on weight, gauge, and size of the blanket to be edged. For the example shown here I used:
- US - I, 5.5 mm hook (Furls Fiberarts in Cocobolo)
- Worsted/Aran weight yarn (Lion Brand Vanna's Choice - Fern "background"; Scarlet "dot"; White "edge")
- Click here for the video tutorial!
Special Stitches:
Dc3tog Cluster - Yo and insert hook into indicated ch sp, yo and pull up a loop, yo and pull through 2 loops (2 loops remain on hook), yo and insert hook in same ch sp, yo and pull up a loop, yo and pull through 2 loops (3 loops remain on hook), yo and insert hook in same ch sp, yo and pull up a loop, yo and pull through 2 loops (4 loops remain on hook), yo and pull through all 4 loops.
Fpsc - front post single crochet: insert hook from from the front of the stitch, going right to left around the back of the indicated stitch, yo and pull up a loop, yo and pull through both loops.

INSTRUCTIONS
Set Up Round: (If you are working this border around squares that have been edged using the Tight Braid Join, then you can skip this round and go straight to Round 1.) Work around the blanket with your "background" color as follows: *sc, ch 2, skip 2 sts; repeat from * around, working (sc, ch 2, sc) in each corner stitch or space. The total number of ch-2 loops does not matter. Join to first sc and finish off.
Round 1: With "dot" color, dc3tog cluster in any ch-2 sp, ch 2, skip next st, *dc3tog cluster in next ch 2 sp, ch 2, skip next st; repeat from * around, working (dc3tog cluster, ch 2, dctog cluster, ch 2) in each corner ch sp. Join to first cluster and finish off.
Round 2: With "background" color, work 2 dc in any skipped sc st of set up round, enclosing the ch-2 from Round 1, fpsc around dc3tog cluster, *2 dc in next skipped sc of set up round, fpsc around next dc3tog cluster; repeat from * around, working 3 dc between clusters in the corner ch-2 sps.
Round 3: With "edge" color, sc evenly around entire blanket, working 3 sc in each corner st.

And scene! What do you think? It's pretty simple, and the fpsc sts really make the dots pop! I hope you enjoy adding it to your next blanket - or any project that could use a fun polka dot edging!
The Fine Print
Written pattern and graphics copyright Tamara Kelly 2014. Please do not reprint or repost this pattern, but please do link to this page to share this pattern with others. If you wish to make items for sale from this pattern, please visit the About page for details.

Susie T
Beautiful pattern! Thanks for sharing it with us! I've added your blog to my blogroll at http://susiethomemaker.wordpress.com/
Tamara Kelly
😀 Thank you so much Susie!
Carol Derbis
Thanks for sharing this with us....i LOVE this! quite different and very pretty- and it seems quite easy as well1
Thank you so much!
Tamara Kelly
😀 Thank you Carol! I'm glad you like it!
Amy
When working along the side and where 2 squares meet....there is a corner stitch in each square and the tight braid in between....do you work the corner stitch in each corner or do you consider those corner stitches as a chain 2 space and thus only have 4 corner stitches total? Do you do anything in the tight braid edge?
Tamara Kelly
I worked them as a single ch-2 space. 🙂
Sarah
I'm going to try to do this on some fleece lapgans for sporting events. Do you have any idea how much yarn you ended up using on just the boarder, or what would you recommend to start?
Tamara Kelly
The amount of yarn used will vary widely based on the size of the blanket. My best estimate would be about 8 yds/foot of border.
Eleanor
I was looking for the perfect border for a special blanket I am crocheting for my new granddaughter. I chose this one and I'm so excited with how it's turning out It's the perfect pick!
Thanks so much!
Tamara Kelly
😀 I'm so glad you like it Eleanor!
Peggy
I am completely lost at round 2. Where do I attach my yarn and start a DC? Could you post a photo of this step? Thanks…
Tamara Kelly
Hi Peggy, I'm sorry you're having trouble! You can attach your yarn with a sl st in any stitch that you skipped over in the previous round, and ch 2, OR you can go into that same skipped stitch with a Standing Double Crochet, which has a neater look - HERE's a tutorial. 🙂 I will try to make a full video tutorial later this year.
Peggy
Thank you...that helps a lot! This border is gorgeous! I am adding it to a baby boy blanket in cream, brown and blue.