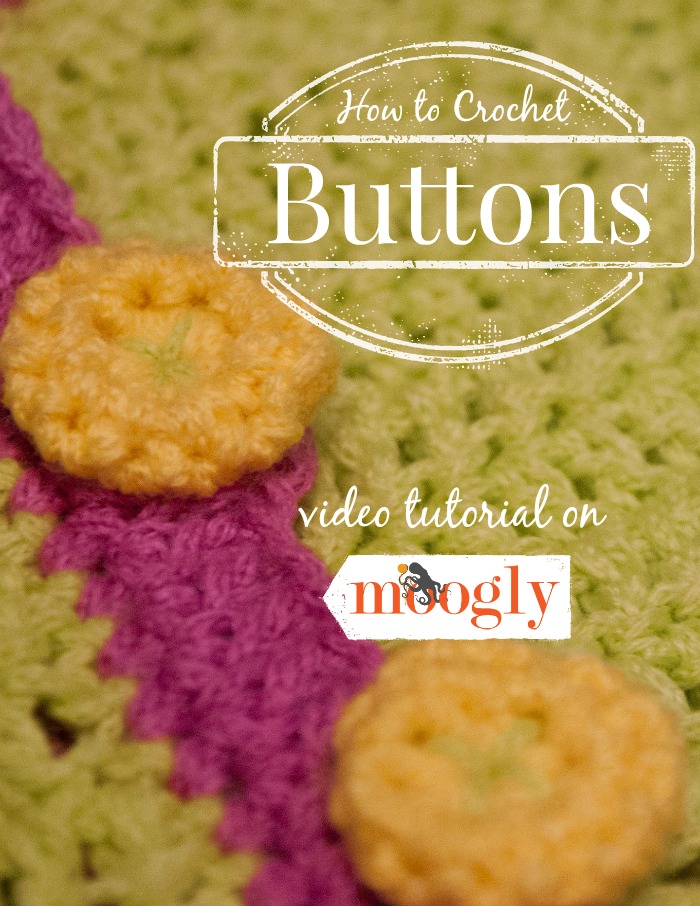
Sometimes you just can't find the button you want. Sometimes it's just too yucky out to go button shopping. And sometimes you just want to crochet... a button! So here's how to crochet a button!
Disclaimer: This post includes affiliate links.
There are lots of crochet buttons patterns out there, and way back when I put together a list of links to them. The amazing Lily Chin also talks about crocheting buttons in her book, Crochet Tips and Tricks, which is a book I do highly recommend!
But 99% of the crochet buttons out there follow the same basic formula - crochet in the round til you get the size you want, then decrease and finish off. That's about all there is to it! I have a pattern that I'll be sharing soon where I use crocheted buttons, so I decided to share how I made them.
How to Crochet a Button Video Tutorial - Right Handed
How to Crochet a Button Video Tutorial - Left Handed
As Seen in This Video:
US - I, 5.5mm Furls Fiberarts Hook
Lion Brand Modern Baby in Yellow and Chartreuse
Now, as I say in the video, this is all about the idea, not the pattern itself. You should feel free to play and experiment and make buttons you love! But for those who like to see a written pattern for reference, here's how these were made:
Round 1: Starting with a magic circle, sc 6 times in the ring, join with a sl st. (6 sts)
Round 2: Ch 1, 2 sc in each st around, join with a sl st. (12 sts)
Round 3: Ch 1, sc in each st around, join with a sl st. (12 sts)
Round 4: Slst2tog around, break yarn leaving long tail. (6 sts) Cinch bottom closed by weaving through sts, pull tight. Use tails to sew button onto garment.
You can get great new looks by changing the hook size, type of yarn, number of stitches, and of course, embellishing them with contrasting yarn! I hope you enjoyed this tutorial, and I can't wait to see what you come up with!

Get Moogly on your favorite social media sites: Facebook, Twitter, G+, Pinterest, Instagram and Tumblr!

Ruth Weyman
Tamara, I have just recently begun to crochet again after a few years & am totally hooked again. Since finding your site you have been an unbelievable help to me. I love your tutorials. You do them at a speed easily followed & with full explanations. I made many home crocheted gifts for my grandchildren for Christmas. They were so well received that others requested some too so I have continued to make several things already in January. I joined the 2015 CAL afghan & so far have found that first square a challenge. So many great patterns on your site. Just wanted to say a big THANK YOU!!
Tamara Kelly
Oh my, thank you so much Ruth!! Your note was just what I needed to read this afternoon. ♥ Thank you.
Kajsa Hübinette
I really liked this, I haven't done patterns needing buttons but now I can make my own, I will try some of these patterns too. Thank you!
Tamara Kelly
Thank you Kajsa! I'm so glad you like it!
Clotilde/Craftybegonia
Very useful knowledge for when you simply cannot match the color of your yarn with existing commercial buttons or do not have any on hand that you love. Shared.
Tamara Kelly
Thank you Clotilde!
Margaret
Thnaks for the pattern and the clear explanation. Now I don't worry anymore finding the wright buttons for my crochetwork.
Dear greetings, Margaret
Tamara Kelly
Thank you Margaret!
Crystal Wall
Tamara, how did you know I needed a certain button? I love this. Its clear, and very well taught. Thanks so much. This one is saved. One can NEVER have too many buttons, crocheted or not! I follow and share! Thanks!
~Crystal
Crochet A Day In The Life
http://krystlewv.blogspot.com
susan mcdowell
these are safer for kids too, and also for stuffed animals
Paula archer
I love it! That is the exactly thing I do for some noses on my amigurumi animals!! I never thought of using them for buttons! Duh! I so love your posts!
Tamara Kelly
How funny! 😀 Thank you so much Paula!
Cazzy
I thought I had the right buttons but I can't get the yarn through the shank, so I might have to make some as it is difficult to get the right buttons.
I wonder how well they would work with a chunky jacket?
Tamara Kelly
Chunky yarns certainly present an issue with buttons! You can always use a smaller, coordinating yarn as well! 🙂
Theresa
Great tutorial. If you're worried about the magic loop opening, a neat trick is to wrap the starting yarn around your finger twice. When you go to close it, pull the tail a bit to see which of the loops moves, then pull that loop to close the first ring. Next pull the tail of the yarn to close the second circle. It takes a bit of practice at first, but I use that for all my magic ring starts, especially on amis.
Tamara Kelly
Yes, I have a tutorial video for it! 🙂