Time for another pattern tutorial! Thank you all so much for loving the Berry Harvest Bandana Cowl pattern - I'm so glad you do! And at your request, I've put together a video tutorial and chart to make it even easier to crochet - here's the Berry Harvest Bandana Cowl tutorial!
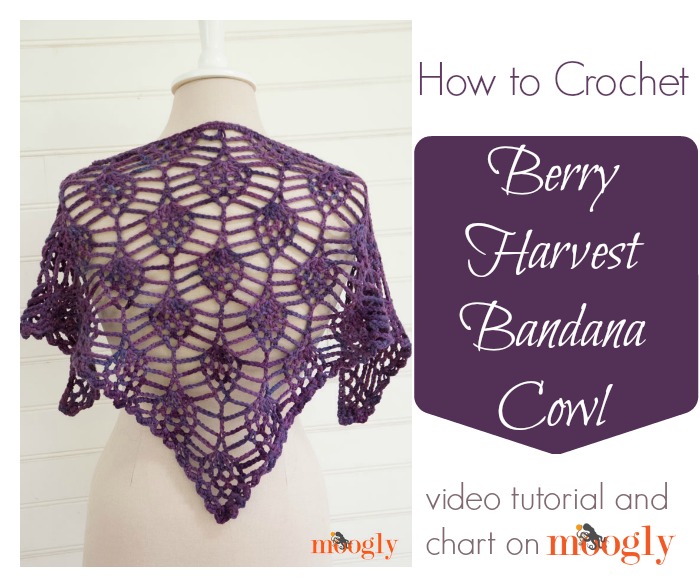

Berry Harvest Bandana Cowl Tutorial
As seen in the video (click to purchase your own!)
- US – H, 5.0mm hook (Furls Fiberarts Tulipwood used)
- Celestial Strings Yarn (DK weight; 100% superwash merino; 246 yds; Moogly Berry colorway)
- Berry Harvest Bandana Cowl crochet pattern
The stitch pattern used in the Berry Harvest Bandana Cowl is made in a multiple of 16, plus 10. So while I kept the original on the small side, to make it a one skein pattern, you can make a bigger shawl by adding any multiple of 16 sts to the starting chain. Each set of 16 represents one of the "berries" or "pineapples" - and for every four rows, you'll reduce by one berry.
So for instance, the original starts with 8 berries in the first four rows, then it goes to 7 in the next four rows, then 6, 5, etc. This means that for each multiple of 16 that you add to the starting chain, you'll need to add an additional 4 rows to the pattern, to keep working your way down to 1 berry at the end. It's all very easy once you get going!
And I'd like to take this opportunity to urge you to read through the entire pattern before starting! There is some unevenness on the sides as you work, but that's taken into account and there's a quick fix for it later on, before you work the final edging. That final edging itself is based on the Triangle Edging Pattern here on Moogly, for which you can see a video tutorial HERE.
Now, finally, on to the chart! Please note that this is an abbreviated chart - it only shows 5 berries for the first 4 rows. Any more and it would be too tiny to see!

I hope that between the video and the chart, and of course the written instructions, the Berry Harvest Bandana Cowl is crochet-able for most! It's not a beginner pattern, but it's not terribly tricky or hard either - just takes some concentration to get the stitch pattern established! Thanks so much for watching, reading, and commenting - it all means a lot to me!

Written pattern and graphics copyright Tamara Kelly 2014. If you wish to make items for sale from this pattern, please visit the About page for details. To print the chart please use the Print Friendly button (tutorial here). Thank you to Celestial Strings for sponsoring the yarn for this pattern.


Marrie
Thanks! This tutorial has helped me a lot... Thanks for working on it further 🙂
Tamara Kelly
😀 Glad to hear it Marrie!
Katherine A Powell
Could you show the edging I am a little confused!
Tamara Kelly
Hi Katherine! This pattern is from 2014, so I won't be able to make a new video for it, but did you watch the border tutorial linked above?
Michele
I am on my 4th one! As soon as I saw this pattern I loved it. The first 3 I made with a bulky yarn from Knit Picks that I had in my stash, The one I am currently working on I am using a yarn that says its a 4, but it doesn't crochet up like a 4. It is Red Heart Unforgettable. I am using Tidal but I also bought Parrot.
This pattern is so quick to make.
Tamara Kelly
Wow, thanks so much Michele!
Silvia
Love it so much that did one for me:
https://www.facebook.com/silviacrochet.pt/photos/a.172265426267355.1073741828.172186872941877/362603130566916/?type=1&theater
Tamara Kelly
Lovely! 😀
Sarah evans
Just found this pattern on Celestrial Strings Facebook page. It is the perfect pattern for the one skein of super soft dk yarn I was gifted! Looked for two days for the perfect pattern.
I had to use the video for the starting of the second row, but by the end of the video I had grasped the concept of it, so thank you for the video! 🙂 Your blog is one of my go to's for patterns and inspiration! 🙂
Tamara Kelly
😀 Thank you so much Sarah! I'm so glad you found it!
margaret
I enjoyed the instruction and the pattern. I would suggest that the information about one side being uneven be inserted earlier in the video. It would have saved me a lot of re-winding and re-watching to figure out what I did wrong! LOL. I finally gave up and decided I'd just "fill it in with fringe later." When I saw the explanation at the end of the video I was really laughing at myself. I can already tell I'll be making several of these.
Tamara Kelly
Oof, sorry about that Margaret! I'm glad you like the pattern though!
christine Sveistys
Love this pattern. Great work. Thank you for the video and the drawn pattern. I'm a newbie, but I think I can do it.
Christine
Tamara Kelly
🙂 Thank you Christine!
Helen Faul
do I add 10Stitches for each16 I add
Tamara Kelly
No, just a multiple of 16, then 10 added at the end. 🙂
Sheila
I am looking for Celestial Strings Yarn ...........DK weight; in the varigated purple/lavender but can't find it.
Do you have any sites or places you can direct me to? Does Joann Fabric carry it? thanks
Tamara Kelly
Hi Sheila! Celestial Strings is an independent dyer. The link to her shop is in the pattern. 🙂
Mary Furlan
I believe if on row 6 at the end of it instead of doing 1 chain and 1 dc in the last loop, just do 3 ch sc in the last loop then do 2 ch 1 dc on top of last dc then turn slip st in every stich till the middle of the first loop then do 1ch sc in the first loop . That way you make the two sides mirror image and you don't have to do that extra row to fill in the gap.
Tamara Kelly
I'm glad you found something that works for you! 🙂
Lynne Gerwitz
The final edging is not working out, I'm confused especially where it comes to the chain 5 area. please help! Thankyou!
Tamara Kelly
Hi Lynne! I haven't looked at this pattern in a while, but it looks like the ch-5 loops are treated the same as the ch-3 loops. Does that help?
Barb Miller
I just completed my bandana. I used the suggested replacement yarn. Sugar Bush. Do you have blocking instructions for this pattern? Did you block you example?
Tamara Kelly
A light blocking would be nice! 🙂 It was blocked, yes.